
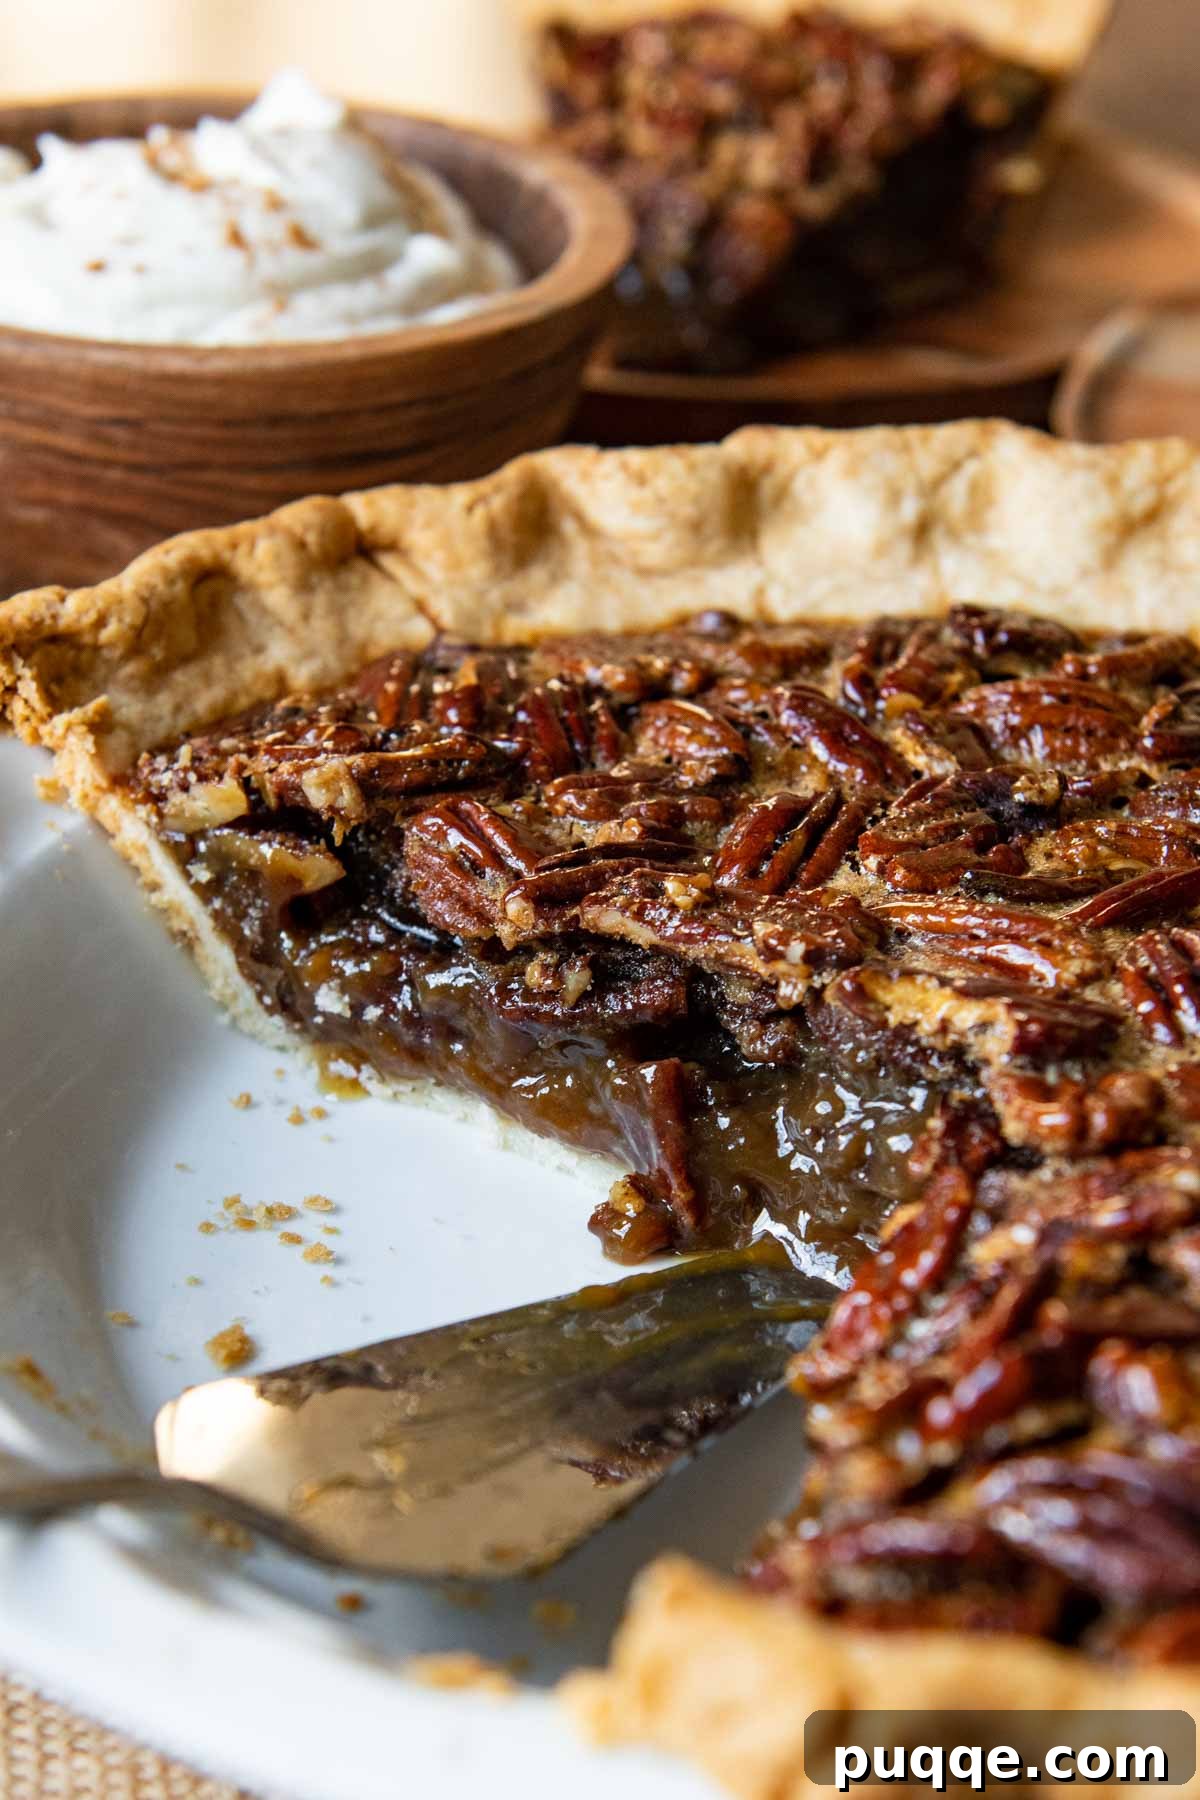
Welcome to the ultimate guide for creating the **best gluten-free pecan pie** you’ll ever taste! Forget everything you thought you knew about gluten-free baking; this isn’t just a passable alternative – it’s a showstopper designed to impress every guest, whether they follow a gluten-free diet or not. This homemade masterpiece boasts a perfectly buttery, incredibly flaky crust that cradles a rich, deeply flavored pecan filling. Our secret-ingredient approach ensures the filling sets beautifully every single time, with a subtle hint of molasses to expertly balance the sweetness and a touch of cornstarch for guaranteed firmness.
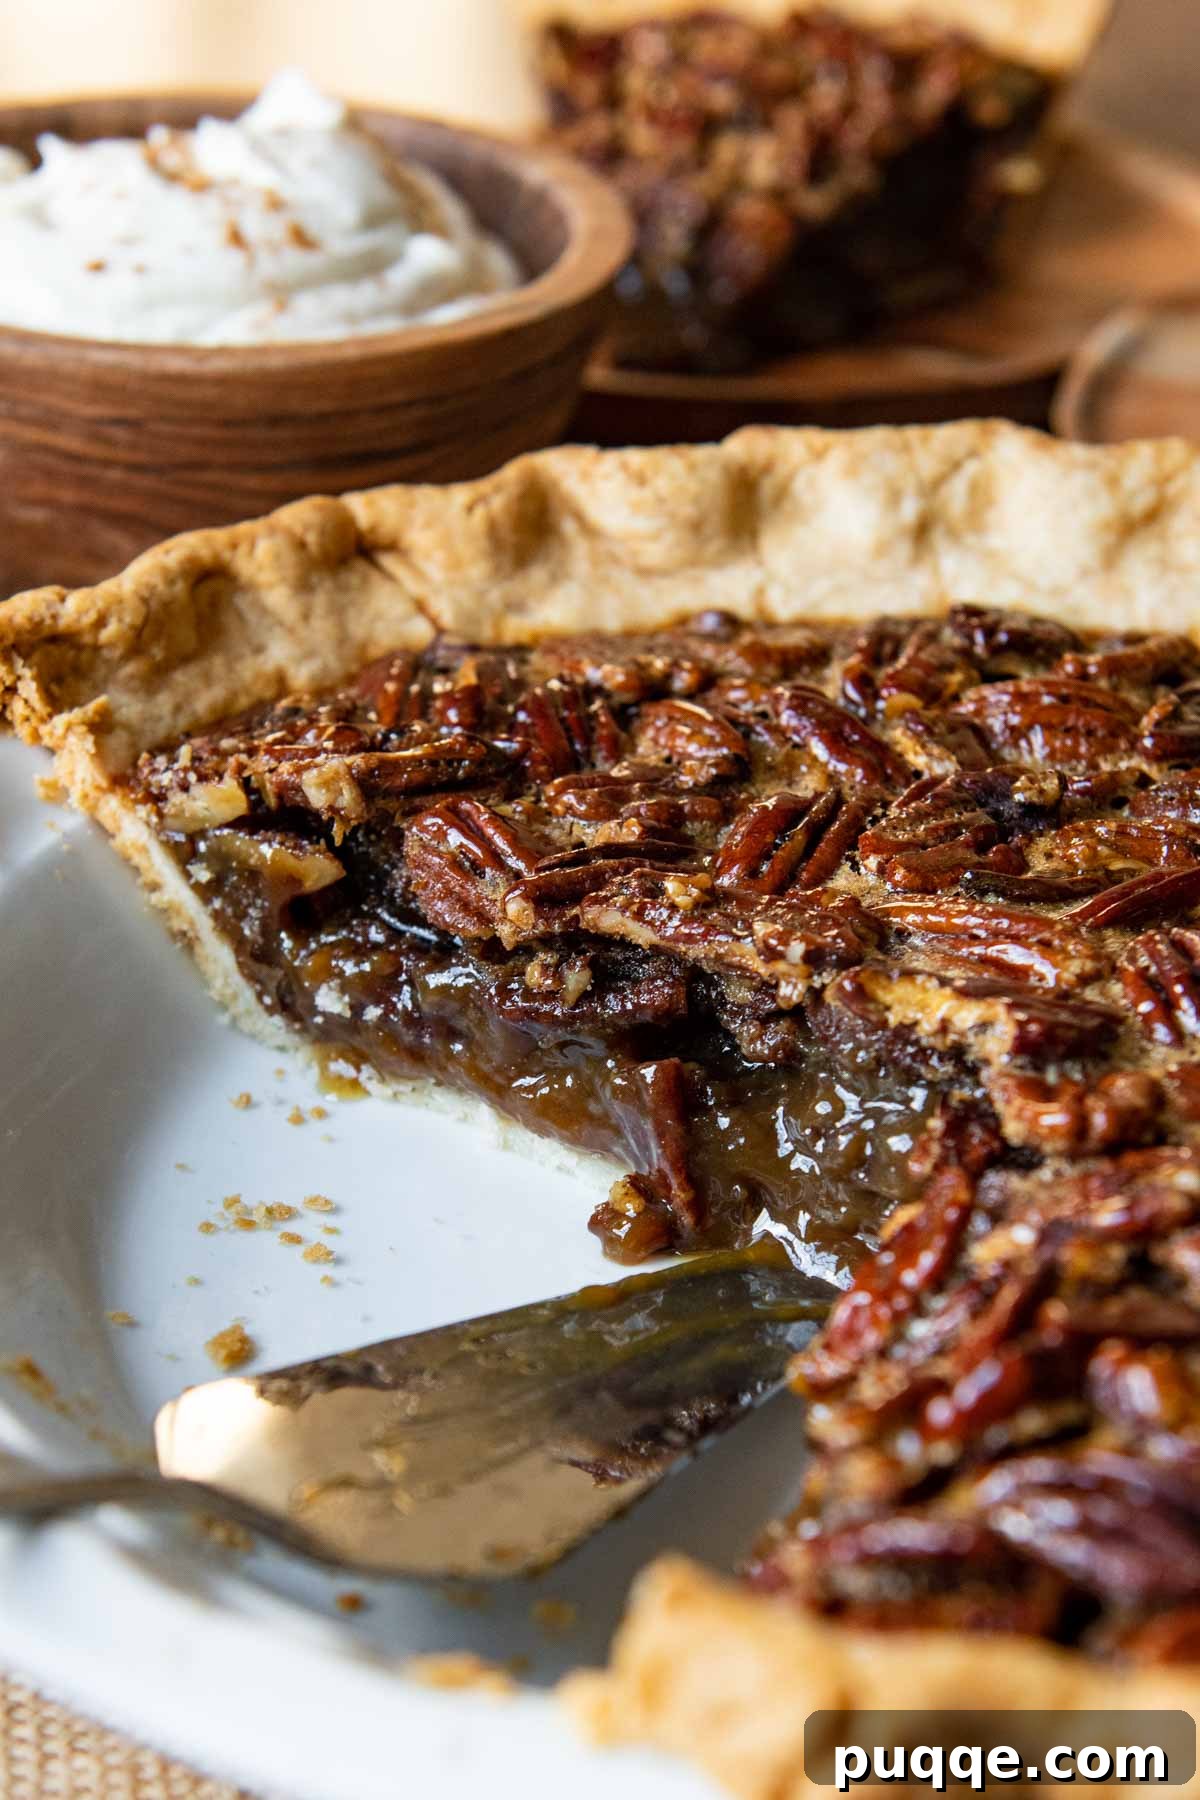
Mastering the Art of Gluten-Free Pecan Pie – A Recipe for Holiday Perfection
There’s something inherently comforting and festive about a classic pecan pie, especially during the holidays. Its rich, sticky, and nutty profile makes it an undeniable favorite. However, when dietary restrictions come into play, finding a gluten-free version that truly rivals the traditional can be a challenge. That’s precisely where this recipe shines! We guarantee that even the most discerning palate won’t detect a difference between this gluten-free pecan pie and the classic rendition they grew up enjoying. This isn’t just a substitute; it’s an elevated experience.
The foundation of any exceptional pie lies in its crust, and a gluten-free pie is no exception. The key to making the absolute best GF pecan pie is a buttery, flaky pie crust – one that holds its shape, offers incredible texture, and tastes so good it will fool even the toughest skeptics. For this reason, I rely on my proven fail-proof gluten-free pie dough recipe. It’s remarkably easy to roll out, yielding a tender, flavorful base that perfectly complements the sweet pecan filling. This versatile dough is my go-to for a myriad of creations, from delightful homemade gluten-free dessert pies to savory family favorites like this comforting gluten-free chicken pot pie.
One of the most common frustrations encountered when baking a pecan pie from scratch is a filling that refuses to set. A runny, thin filling can quickly turn a beautiful pie into a disappointing mess, making it impossible to slice and serve elegantly. Traditional recipes often address this by incorporating a small amount of all-purpose flour into the filling mixture. When transitioning to a gluten-free pecan filling, the challenge is to find a reliable alternative. While some might consider using a gluten-free flour blend, I’ve found that cornstarch is a far superior choice. Gluten-free flour blends can vary significantly in their starch composition, leading to inconsistent results in thickening. Some blends are better suited for general baking, while others perform more effectively as thickeners. Cornstarch, on the other hand, provides a consistent, smooth, and perfectly set filling every single time, eliminating the guesswork and ensuring a professional-looking slice.
Beyond the setting issue, another hurdle I aimed to overcome during the development of this recipe was the common complaint of an overly sweet, syrupy taste that can make pecan pie almost too rich to consume. My goal was to create a pie that was decadent but perfectly balanced, allowing the rich pecan flavor to shine without being overshadowed by excessive sugar. To achieve this harmonious flavor profile, this recipe incorporates a few simple yet effective tricks:
- **Reduced Sugar:** A straightforward but impactful change involves simply using less brown sugar than many traditional recipes call for. This immediately cuts down on the overwhelming sweetness.
- **A Dash of Molasses:** Adding a tablespoon of molasses is a game-changer. Molasses not only further counteracts the sweet notes but also introduces a wonderful depth and complex caramel-like flavor that elevates the overall taste of the pie. It’s a subtle addition that makes a huge difference.
- **Salty Pecans:** Finally, incorporating a generous quantity (an entire 10-ounce bag) of salty pecans provides a crucial textural contrast and a delightful savory note that expertly balances the sweetness of the filling. The saltiness enhances the nutty flavor and prevents the pie from tasting one-dimensional.
In the following sections, I’ll share more of my gluten-free baking expertise, ensuring your pecan pie journey is a complete success. You’ll discover invaluable tips for achieving a perfectly golden GF crust, precise indicators for knowing when your pie is perfectly baked, and detailed step-by-step photos to guide you. Prepare to bake a gluten-free Thanksgiving dessert (or any occasion dessert!) that is truly unforgettable.
Ingredient Spotlight: Key Components for Your Gluten-Free Pecan Pie
Understanding the role of each ingredient is vital for achieving baking success. Here’s a closer look at the key components for your gluten-free pecan pie:
- Pecans: You have flexibility here! Feel free to use whole pecans, chopped pecans, or a combination of both, depending on your preferred texture. If you’re planning a decorative design on top of your pie with the nuts, remember to set some aside before pouring in the filling. Arrange the reserved pecans on top in your desired pattern before baking for an elegant finish. The slight saltiness in many store-bought pecans further enhances the flavor balance.
- Eggs: Eggs are crucial for the structure and richness of pecan pie filling, acting as a binder and helping the filling set. I do not recommend using egg substitutes for this particular recipe to create an egg-free pecan pie. The unique properties of eggs are integral to the pie’s texture. If an egg-free option is essential, I advise seeking out a dedicated vegan pecan pie recipe, which is formulated with different binders to achieve a similar result.
- Dark Corn Syrup: This ingredient plays a significant role in achieving the classic sticky, glossy texture of pecan pie and aids in the filling’s setting. While you can substitute light corn syrup interchangeably, I personally prefer dark corn syrup. Its richer, caramel-like flavor, with hints of molasses, truly enhances the overall depth and warmth of the pie. If you wish to replace corn syrup entirely, an equal amount of pure maple syrup can be used. However, keep in mind that maple syrup is thinner, so you will need to add 1 tablespoon of gluten-free flour to the filling mixture to help it solidify properly.
- Molasses: Pecan pies are notorious for their sweetness, which can sometimes be overwhelming. Adding a modest splash of molasses is my secret weapon to counterbalance this sugariness. It introduces a complex, slightly bitter, and earthy note that rounds out the flavor profile, preventing the pie from being cloyingly sweet. While highly recommended for flavor balance, this ingredient is optional if you prefer a sweeter pie or don’t have it on hand.
- Butter: Butter contributes significantly to the richness and mouthfeel of the pie filling. For those seeking a gluten-free and dairy-free option, a simple substitution can be made: replace the melted butter with an equal amount of melted coconut oil or your favorite vegan butter alternative. Ensure these alternatives are also melted and cooled as specified.
- Cornstarch: As mentioned, cornstarch is key to a perfectly set filling. Its inclusion creates a more solid, sliceable filling, taking the guesswork out of determining when your pie is truly done. While it may be omitted if you prefer a slightly runnier consistency, its presence guarantees a reliable set. If you choose to omit it, it’s highly recommended to use a reliable method to check for doneness, such as an instant-read thermometer. The center of the pie filling should register between 185-200ºF for a proper set.
Let’s Bake This *Together*!
(The following provides detailed step-by-step photos and modified instructions. For the complete recipe, including precise ingredient amounts and nutritional information, please scroll down to the full recipe card.)
Crafting a Legendary Gluten-Free Pie Crust
This is my absolute favorite, go-to pie crust recipe, adaptable for everything from sweet dessert pies to savory quiches. The full recipe card below guides you through creating it step-by-step, whether you prefer using a food processor for speed or crafting it by hand for a more traditional approach. If you’re new to rolling out pie crusts, or simply looking for expert guidance, I’ve packed my dedicated homemade GF pie crust recipe with countless helpful tips and illustrative pictures to ensure your crust is nothing short of perfect.
Preparing the Irresistible Pecan Pie Filling
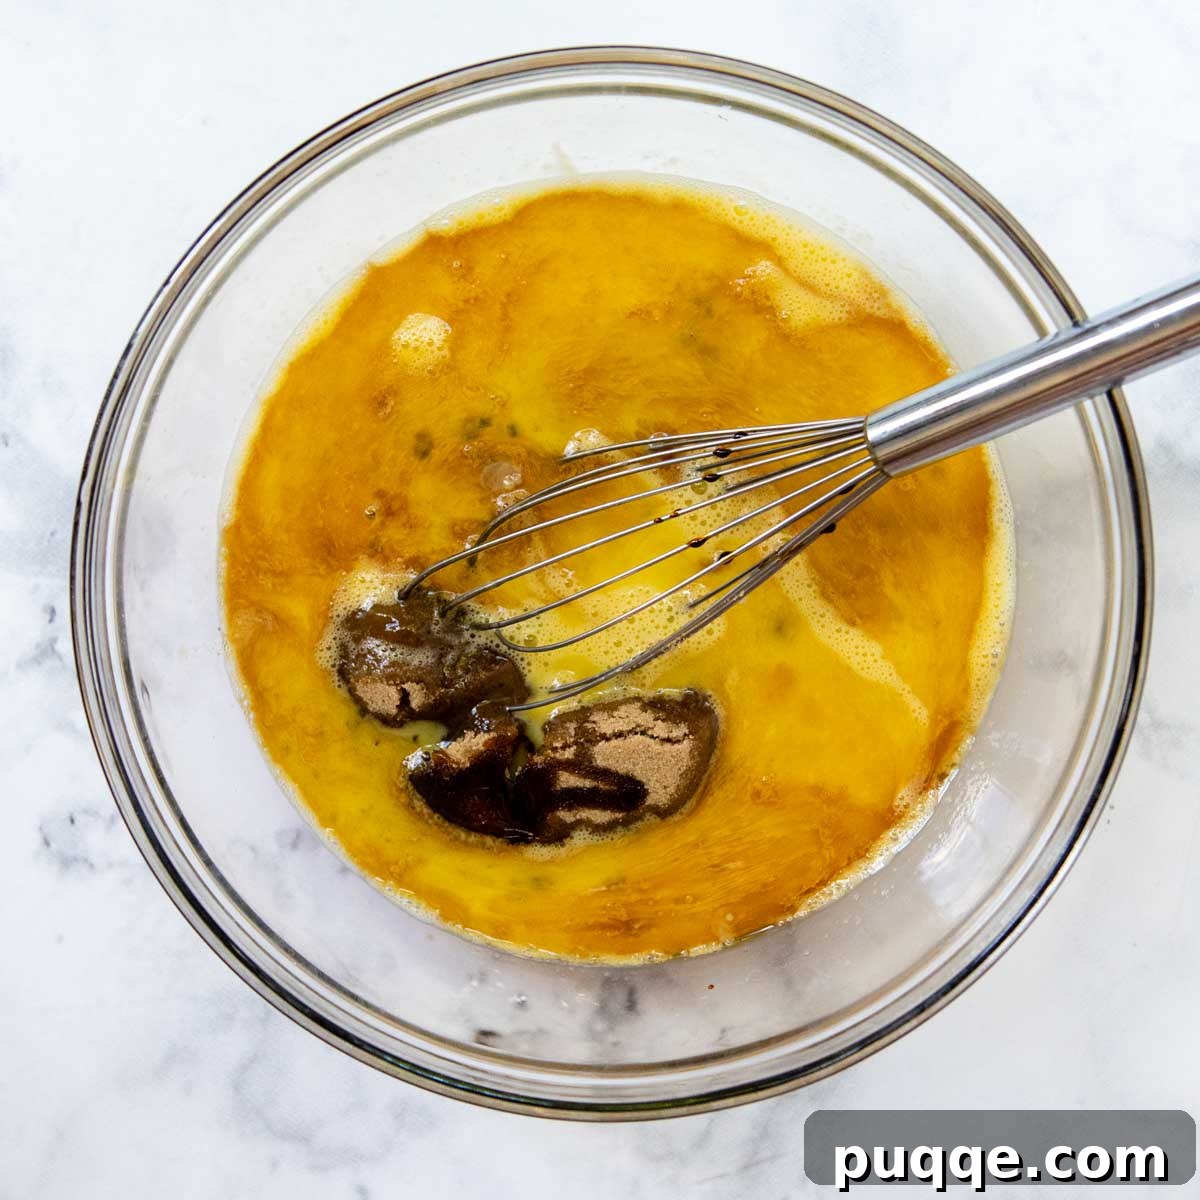
Once your pie dough is beautifully shaped and settled into your pie pan, a quick 15-minute chill in the freezer is all it needs while you prepare the filling. This is truly the easiest part of the entire process! In a large mixing bowl, simply whisk together all the filling ingredients – eggs, corn syrup, brown sugar, melted butter, molasses, cornstarch, and salt – until they are thoroughly combined and smooth. Remember to hold back the pecans for now; they get added later.
Fill, Bake, and Patience is Key
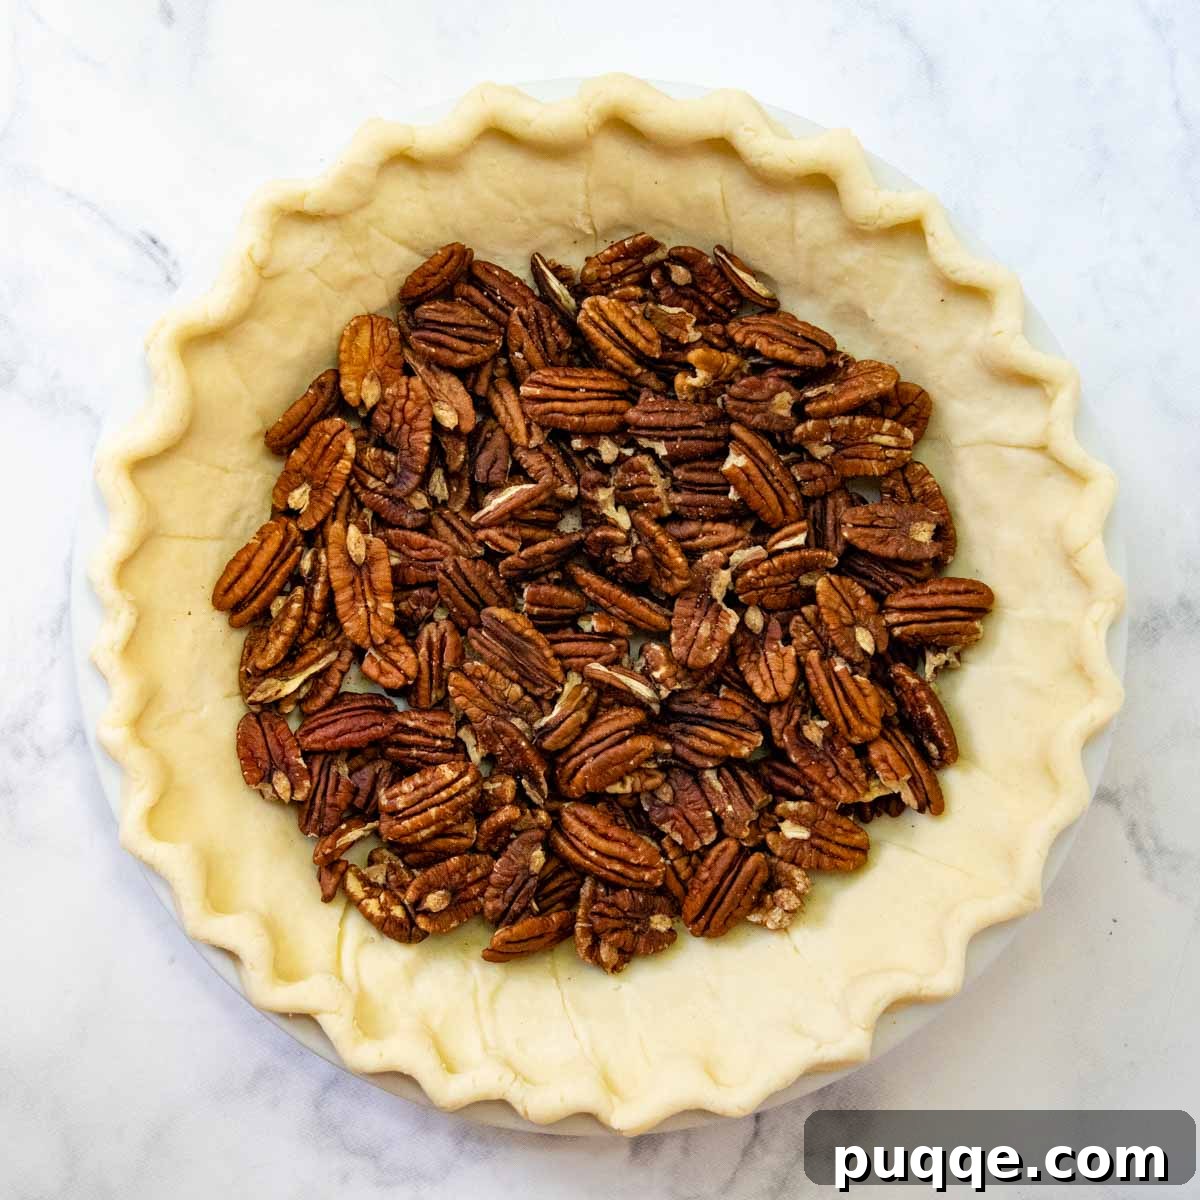
Now for the exciting part! Evenly spread your pecans across the bottom of the chilled pie crust. This creates a delightful layer of nutty flavor and texture. Then, carefully pour the prepared filling over the pecans, ensuring it’s distributed evenly. For baking, begin by placing the pie in a 425ºF oven for the initial 10 minutes. This high heat helps to set the crust quickly. After this initial bake, reduce the oven temperature to 325ºF and continue baking for another 50-60 minutes. To prevent your beautiful crust from becoming overly browned or burnt, I highly recommend using a pie shield after the first 20 minutes of baking.
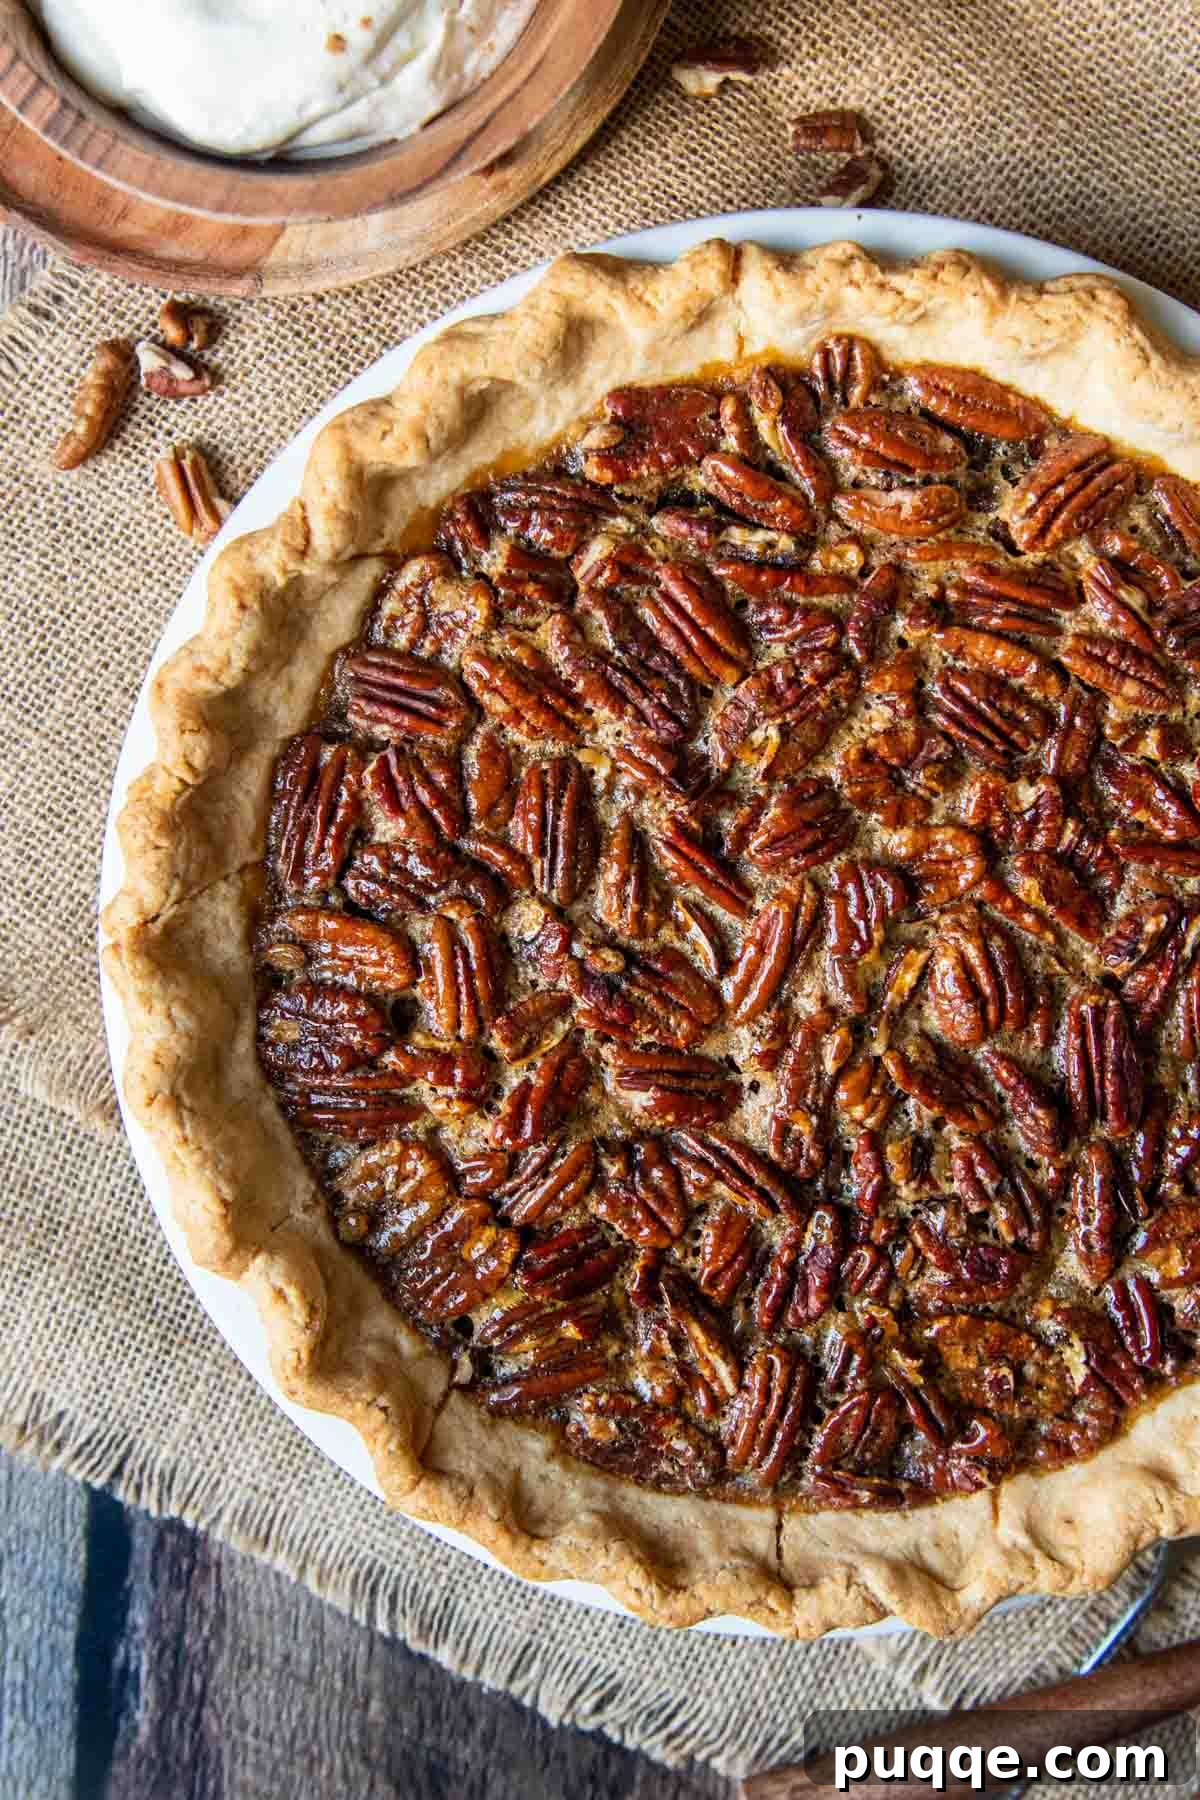
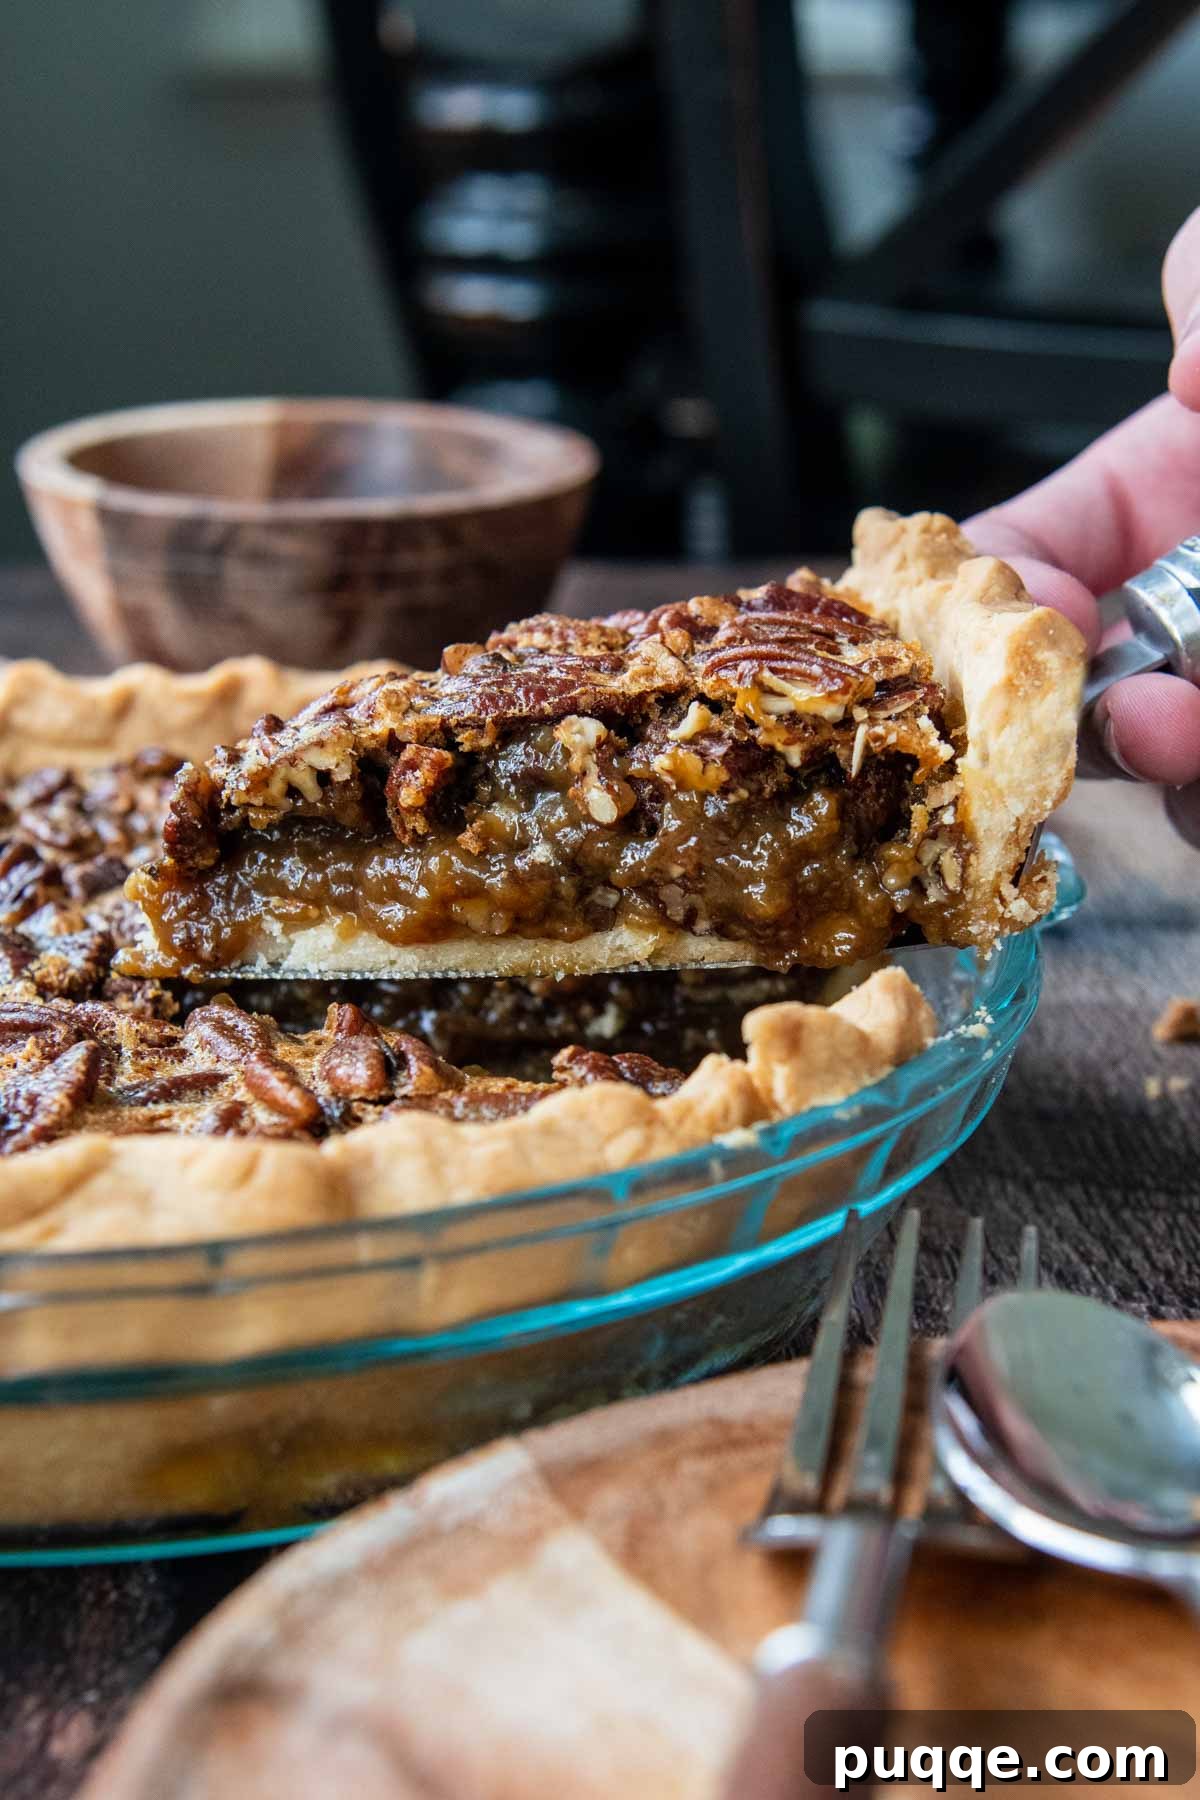
Once baked, the hardest part begins: waiting! It is absolutely crucial to allow the pie to cool completely, which typically takes a minimum of 4-6 hours, before attempting to slice and serve. This extended cooling period allows the filling to fully set and achieve its perfect, sliceable consistency. Rushing this step will result in a runny pie. Once cooled, it’s go time. Enjoy every decadent, perfectly set slice!
Expert Tips for Success
- Dairy-Free Option: To easily adapt this to a dairy-free and gluten-free recipe, simply substitute the melted butter in the filling with an equal amount of melted coconut oil or your preferred brand of vegan butter.
- Preventing a Soggy Bottom: A soggy pie crust is a common baking woe. To ensure a crisp, flaky bottom crust, always freeze your unbaked pie shell for a minimum of 15 minutes before filling and baking. Additionally, baking the pie on the lowest rack in your oven helps conduct heat directly to the bottom crust, preventing sogginess. For more in-depth advice on this, check out my homemade recipe for gluten-free apple pie, which includes a wealth of tips for preventing a soggy bottom.
- Flavor Twist: For an extra layer of warmth and spice, consider adding ½ teaspoon of ground cinnamon to the pecan pie filling mixture. It complements the nutty and sweet flavors beautifully.
- Cornstarch Flexibility: While cornstarch is recommended for a thicker, more solid, and easily sliceable filling, you can certainly omit it if you prefer a slightly runnier, more traditional consistency. If omitting, be extra diligent about checking the pie’s doneness.
- Crust Protection: To safeguard your pie crust from over-browning, especially during the longer bake at a lower temperature, use a pie shield after the first 20 minutes of baking. This small tool makes a big difference in achieving a perfectly golden crust without burnt edges.
- Checking for Doneness: The pie is typically done when its edges are firmly set, and the center still has a slight, gentle jiggle when lightly shaken – but it should not wave back and forth like liquid. For the most accurate assessment, I highly recommend using an instant-read thermometer. Insert it into the center of the filling; it should register between 185-200ºF for a perfectly set pie.
- Make-Ahead & Storage: This gluten-free pecan pie is an excellent make-ahead dessert! It actually tastes even better when allowed to sit for 1 to 2 days, allowing the flavors to meld and deepen. Once completely cooled, store the pie at room temperature, loosely covered with foil or plastic wrap, for up to 3 days. For longer storage, it can be refrigerated for up to a week.
Runny Filling Troubleshooting
A runny pecan pie filling is usually a result of two main issues: either the pie was under-baked, or it didn’t have sufficient time to cool completely before being sliced. Patience truly is a virtue with pecan pie! If you’ve cooled your pie and, upon slicing, discover that the filling is still too liquid, don’t despair. You can often rectify this by chilling the pie in the refrigerator. The cooler temperature will help the filling further solidify, making it more sliceable, though reheating it might cause it to soften again.
Save this Recipe to Your Pinterest Board!
Let’s be friends on Pinterest! I’m always sharing great recipes and gluten-free baking inspiration!
Did you make this incredible gluten-free pecan pie? I truly love hearing from you! Please consider leaving a star rating and comment below the recipe card. Your feedback is invaluable, helping other home bakers discover and enjoy this recipe, and I always make sure to respond! -Melissa
Vintage Gluten-Free Pecan Pie (Slices Perfect!)

Melissa Erdelac
8
20 mins
55 mins
2 hrs 15 mins
Pin
Rate
Remove Ads
Ingredients
Gluten-Free Pie Crust
- 8 tablespoon unsalted butter, cut into small cubes and frozen for 10 minutes
- 2 ½ tablespoons ice water
- 1 ½ tablespoons sour cream
- 1 ½ teaspoon apple cider vinegar
- ¾ PLUS ⅔ cup (6 ½ ounces weight total) gluten free flour, I highly recommend Cup4Cup gluten-free flour
- 1 ½ teaspoon sugar
- ½ teaspoon salt
Pecan Pie Filling
- 3 large eggs
- 1 cup dark corn syrup
- ½ cup light brown sugar
- 3 tablespoons butter, melted and cooled
- 1 tablespoon molasses
- 1 tablespoon cornstarch
- ½ teaspoon salt
- 2 ½ cups (10 ounce bag) whole or chopped pecans
Equipment
- Pie Shield
- Food Processor (optional, for crust)
Instructions
Gluten-Free Pie Crust
- Place the cubed butter in the freezer for 10 minutes. Mix together the cold water, sour cream, and vinegar in a small bowl. Place the liquids bowl in the refrigerator until you are ready to use.
- FOOD PROCESSOR: Pulse flour, sugar, and salt together until mixed.
BY HAND: Whisk dry ingredients in medium-sized bowl. - FOOD PROCESSOR: Process the butter into the flour mixture until well incorporated, evenly dispersed, and without large chunks.
BY HAND: Use a pastry blender, fork, or fingers to cut and knead butter into the dough until it is well incorporated throughout. - FOOD PROCESSOR: Add the liquids to the food processor and pulse until the flour becomes moistened and small dough clumps appear. If dough doesn’t start to come together, add a touch more cold water.
BY HAND: Add half the liquids and knead with fingers or a fork. Pour in the remaining liquids. Knead until the dough starts to come together and the liquids are well mixed with flour.
TIP: To check if you have enough liquid, clump and flatten a small bit of dough. If it doesn’t stick together, is crumbly, or breaks apart easily, add a small dash of ice water. Pulse a few times and recheck. If the dough is too wet or sticky, add a dash of flour. Pulse a few times and recheck. - Turn dough onto sheet of plastic wrap and flatten into a thick 1″ disk. Wrap tightly and refrigerate for at least 1 hour or freeze for 30 minutes. Before rolling out, let sit on counter 5 minutes so it is easier to work with.
- Preheat the oven to 425ºF. Lay a large piece of parchment paper on your workspace. Place unwrapped dough disc in middle and place same sized sheet on top. Use a rolling pin to press and spread out down from the middle out. Roll out into a circle slightly larger than your pie dish.
- Remove top paper, and invert onto pie dish. Remove second paper. Tip: If the dough warmed while rolling, it may be trickier to take the paper off. If this happens, leave the paper on, and stick the whole thing in the fridge for 5-10 minutes. Once the crust is chilled again it’s much easier to pull off the paper. If the dough is too cold and the crust breaks, let it sit on the counter for a minute first.
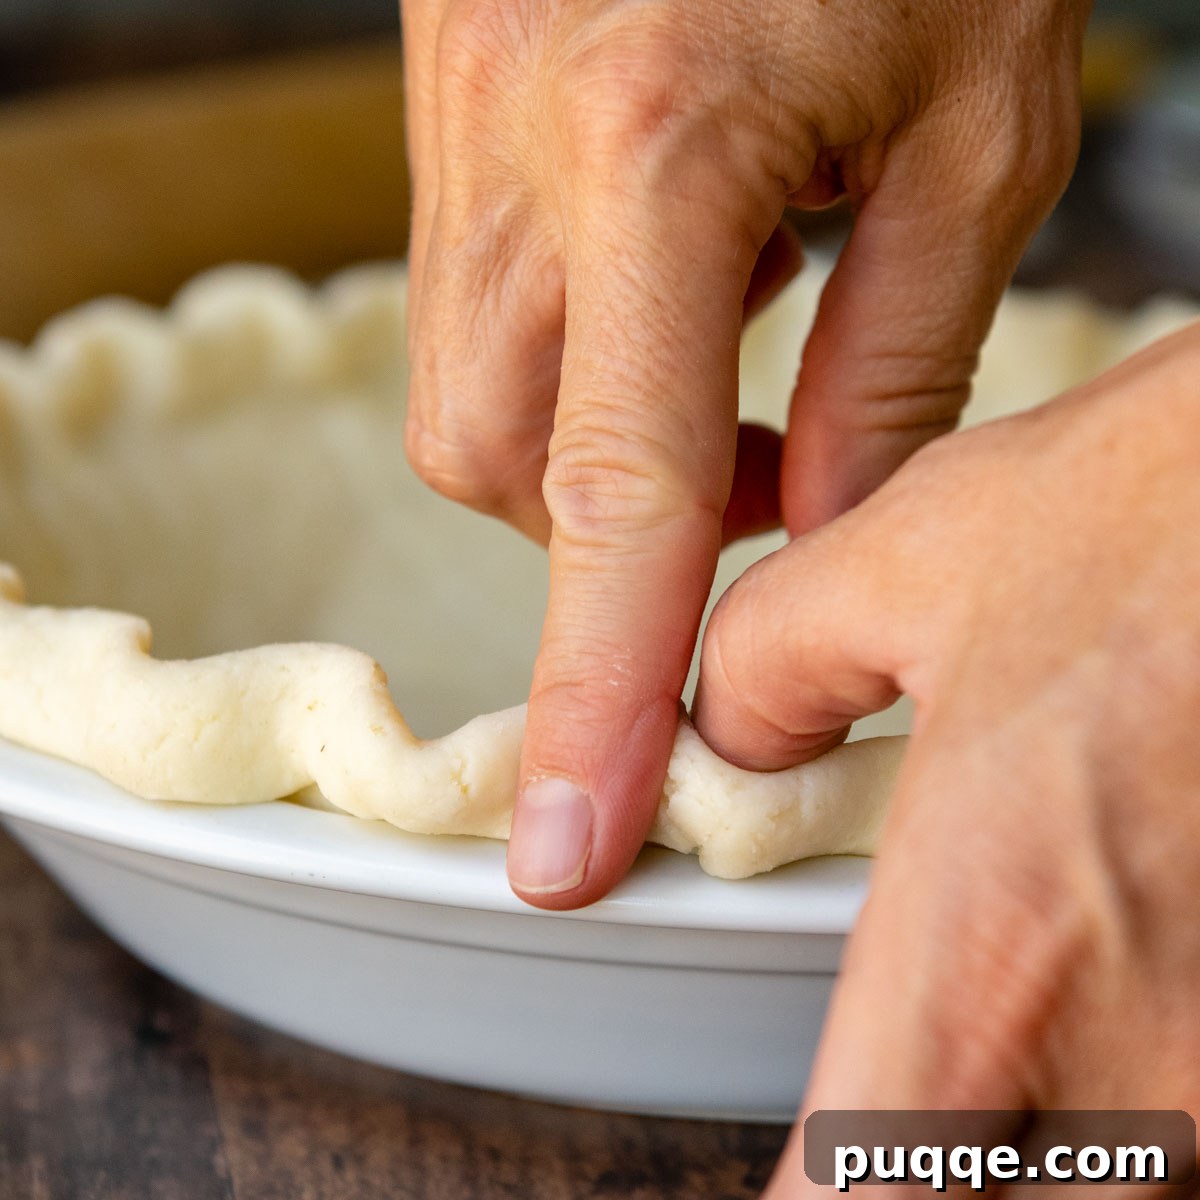
- If necessary, trim the edges so there is an even ½ inch overhang all around the edges. Tuck the edge under, all the way around, and then use your finger and thumb to make a decorative edge. Freeze the crust for 15 minutes while you prepare the pecan filling.
Pecan Pie Filling
- In a medium bowl whisk together the eggs, corn syrup, brown sugar, melted butter, molasses, cornstarch, and salt. Place the pecans on bottom of the chilled pie shell and pour the filling on top.
- Bake at 425ºF for 10 minutes ON THE LOWEST OVEN RACK, and then reduce the oven to 325ºF to bake for 50-60 minutes longer. For best results, use a pie shield after 20 minutes to protect the crust from becoming overly browned. The pie is done when the edges are set and the middle jiggles just slightly, but does not wave back and forth. For best results, use an instant read thermometer and it should read 185-200ºF in the center.
- Let the pie cool completely, at least 4-6 hours before slicing and serving. The filling will set as it cools. Store leftover, loosely covered with foil, at room temperature up to 3 days.
Notes
Best Tips and Tricks
- For a dairy-free gluten-free recipe, replace the melted butter with coconut oil.
- To prevent a soggy pie crust bottom, freeze the shell for 15 minutes first and bake on the lowest rack.
- For an added twist of flavor, add ½ teaspoon cinnamon.
- Adding cornstarch makes a thicker, more solid filling, but you may omit it if you prefer it runnier.
- Use a pie shield after 20 minutes of baking to protect the crust from becoming overly browned.
- The pie is done when the edges are set and the middle just slightly jiggles, but does not wave back and forth. For best results, use an instant read thermometer and it should read 185-200ºF in the center.
Nutrition Information
Calories: 638kcal
Carbohydrates: 70g
Protein: 7g
Fat: 40g
Saturated Fat: 12g
Polyunsaturated Fat: 8g
Monounsaturated Fat: 17g
Trans Fat: 1g
Cholesterol: 104mg
Sodium: 524mg
Potassium: 233mg
Fiber: 5g
Sugar: 51g
Vitamin A: 595IU
Vitamin C: 1mg
Calcium: 78mg
Iron: 2mg
Did you make this recipe?
Please leave a star rating and review below. It helps others when searching for recipes and I LOVE feedback!