
Effortless Gluten-Free Grilled Pizza: Smoky Flavor, Golden Crust, Pure Perfection
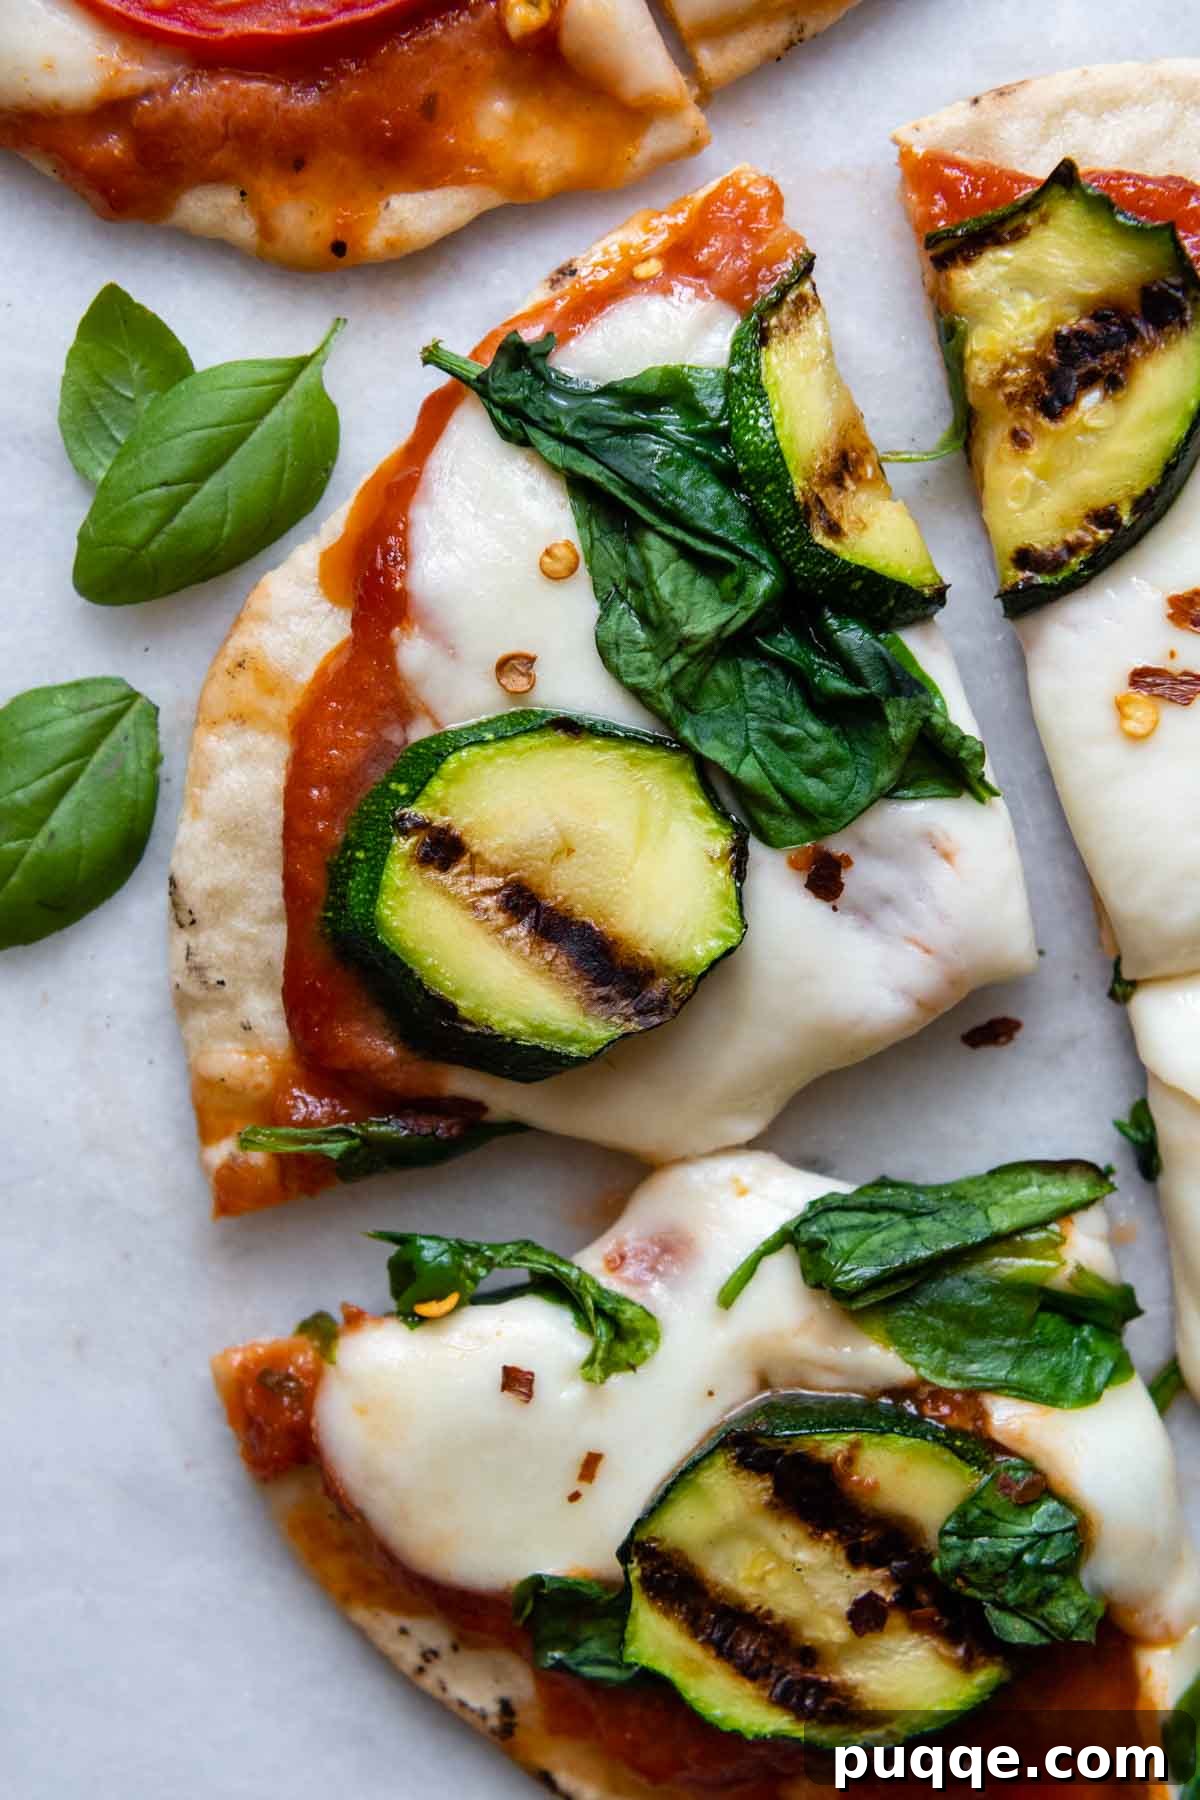
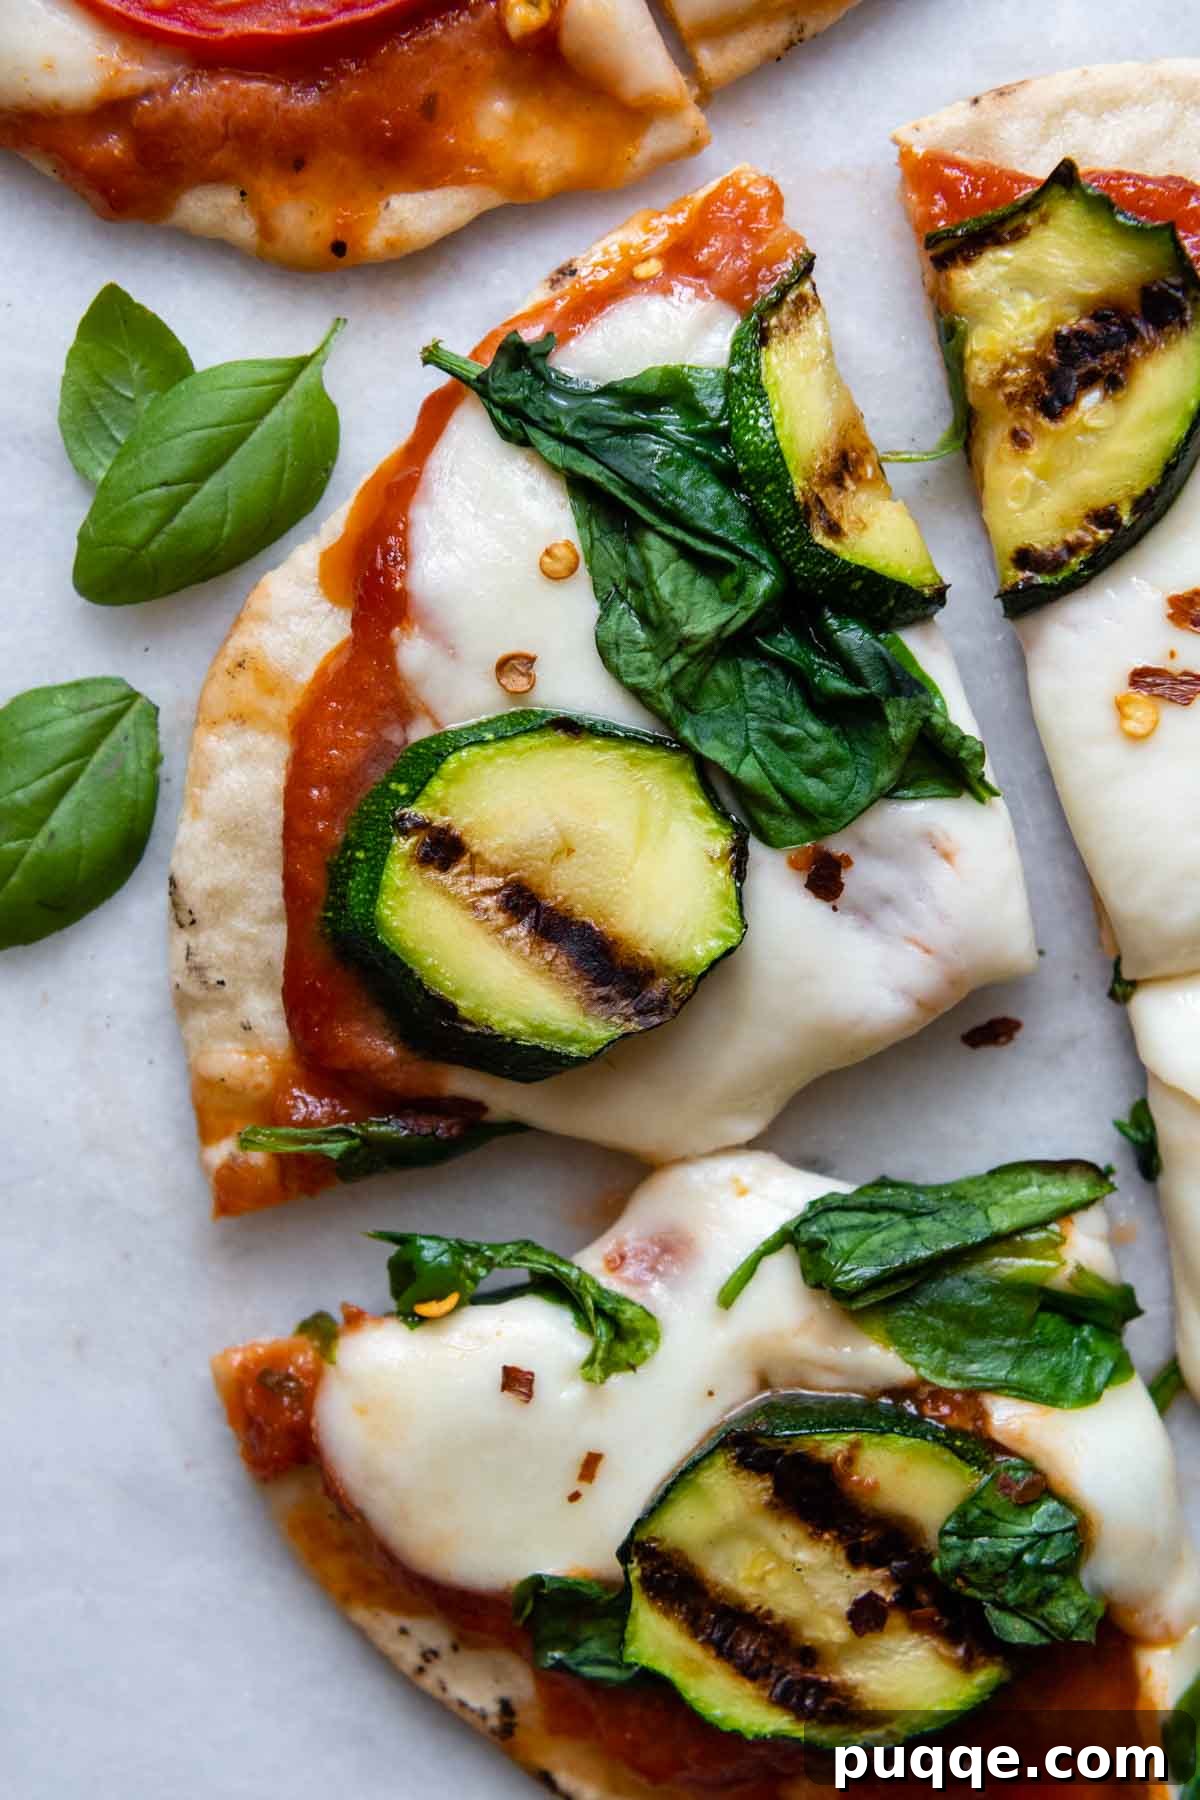
Craving the irresistible delight of grilled pizza? Imagine a golden, slightly charred crust, generously topped with gooey, melted cheese and bursting with smoky flavor. For those navigating a gluten-free diet, this culinary dream often feels out of reach, but not anymore! Discover the secret to an effortless gluten-free grilled pizza that delivers perfectly delicious results every time.
As an experienced gluten-free cook and baker, I’ve spent years perfecting the art of crafting exceptional GF dishes. This recipe draws upon that expertise, providing easy-to-follow tips for achieving a wonderfully soft and fluffy gluten-free crust on the grill. You’ll learn which toppings work best for grilling and how to ensure flawless results that will make you forget it’s gluten-free!
Mastering Gluten-Free Grilled Pizza: A Culinary Revelation
Embarking on a gluten-free journey often means saying goodbye to beloved comfort foods, replaced by dry, crumbly alternatives like sandwich bread and notoriously uninspiring cardboard-like pizza crusts. The disappointment of subpar stand-ins can make even the most enthusiastic home cook feel forlorn.
However, through dedicated experimentation and a passion for flavorful food, I’ve successfully perfected recipes for incredibly soft, tender gluten-free bread and delightfully crisp, yet fluffy gluten-free pizza dough. These foundational recipes, incorporating my favorite easy GF tips, have allowed many cherished foods to make a triumphant return to the table, and this gluten-free grilled pizza recipe is a shining example.
Developing a truly delicious grilled gluten-free pizza became a priority in my quest for more easy, impressive dinner ideas. After creating a fantastic one-bowl gluten-free flatbread that cooks in mere minutes, I became obsessed with its versatility. It was the perfect canvas, and thus, the grilled gluten-free pizza recipe was born! This method ensures a perfectly cooked crust with a wonderful smoky aroma that oven-baked pizzas simply can’t achieve.
This recipe is ideal for various occasions. Serve it as a quick and convenient weeknight dinner, especially when you want to avoid heating up the kitchen by turning on the oven. Alternatively, make it the star of an entertaining pizza night, allowing guests to choose their own toppings for a fun, interactive meal. I often prepare the flatbreads in advance and keep them in my freezer. A quick thaw is all it takes, and they’re ready to be transformed into grilled masterpieces in less than 10 minutes!
Here, you will learn comprehensive techniques for making grilled pizzas with consistently perfect results. We’ll delve into optimal heating and cook times, explore the best gluten-free pizza toppings, and discuss various crust options and cooking methods. Every detail needed for a successful grilling experience is covered, ensuring your grilled gluten-free pizza is nothing short of exceptional.
Key Ingredients for Your Perfect Gluten-Free Grilled Pizza Crust
The flatbread dough utilized in this recipe is naturally dairy-free, making it easily adaptable for those on dairy-free or vegan diets. Simply substitute with non-dairy cheese and an array of delicious veggie toppings to create a pizza that suits your dietary needs without compromising on flavor or texture.
Crafting Your Gluten-Free Pizza Crust: Essential Components
- Gluten-Free Flour Blend: The choice of gluten-free flour is paramount to the texture of your crust. I highly recommend Cup4Cup gluten-free flour blend for its ability to produce the softest, most pliable dough. However, it’s important to note that this blend contains milk powder. For individuals requiring a dairy-free or vegan recipe, King Arthur Measure-for-Measure is an excellent alternative. Be aware that using King Arthur’s blend will require slight adaptations to the recipe, which will be detailed in the specific recipe notes at the end of this guide.
- Potato Starch (not flour): To achieve an unparalleled softness in the dough, potato starch is incorporated. Rather than relying solely on additional flour, which can sometimes result in a denser texture, this gluten-free starch significantly contributes to the dough’s tender crumb. It’s particularly effective in shaped GF baked goods. While potato starch yields the best results, tapioca starch can be used as a substitute if needed, though the texture may vary slightly.
- Psyllium Husk Powder: This ingredient is an absolute game-changer for gluten-free doughs that require shaping and elasticity. Psyllium husk powder acts as a crucial binding agent, helping to mimic the elastic properties and crumb structure typically found in wheat-based baked goods. This results in a dough that is easier to handle, roll, and offers a more satisfying chew. I specifically recommend using the linked brand as it helps maintain a white dough color, preventing the purplish tint sometimes associated with other psyllium husk powders.
- Active Dry Yeast: Yeast is essential for the rise and airiness of the crust. To activate active dry yeast, you’ll combine it with warm water and a touch of sugar, allowing it to bloom until frothy. If you opt for instant yeast, this activation step can generally be skipped, and the yeast can be added directly with the dry ingredients.
- Baking Powder: Working in conjunction with the yeast, baking powder provides an additional lift and loftiness to the dough as it cooks, particularly during the initial pan-cooking phase. This combination of leavening agents is my preferred method for achieving a wonderfully airy texture in gluten-free breads and flatbreads.
- Salt: A fundamental ingredient, salt not only enhances the overall flavor of the crust but also plays a role in regulating yeast activity.
- Olive Oil: Extra virgin olive oil adds richness and moisture to the dough, contributing to its tenderness and making it easier to work with during shaping and rolling.
Selecting Your Grilled Pizza Toppings: Sauce and Cheese
- Cheese: For that classic, gooey, and irresistibly stringy pizza slice, mozzarella is your top choice for melting. However, don’t limit yourself! A variety of other cheeses can elevate your grilled pizza. Consider fresh mozzarella for pockets of creamy delight, dollops of ricotta for a rich contrast, sharp cheddar, mild havarti, salty parmesan, or even smoky gouda for unique flavor profiles. While some cheeses melt better than others, each offers a distinct contribution to your pizza experience.
- Sauce: A good quality marinara or your preferred gluten-free pizza sauce forms the base of many delicious pizzas. For a lighter, yet incredibly flavorful option, simply brush the crust generously with olive oil and sprinkle it with sea salt, freshly cracked black pepper, and finely minced garlic. This creates a wonderful aromatic foundation for your toppings. Other excellent sauce alternatives include pesto, a creamy white sauce (alfredo style), or even a tangy BBQ sauce for a unique twist.
- Toppings: The world of pizza toppings is vast, and you can certainly choose your favorites, as long as they are gluten-free! However, there are crucial tips to ensure success specifically for grilled pizza. Due to the rapid cooking time on the grill, special consideration must be given to preparation. For essential guidance on selecting and preparing toppings, please refer to the dedicated section, “Things To Know About Toppings,” further down the page.
Step-by-Step Guide: Crafting Your Gluten-Free Grilled Pizza
The following provides detailed, step-by-step photos and modified instructions to guide you through the process. For the complete recipe, including precise ingredient amounts, please scroll down to the full recipe section.
Easy GF Flatbread Pizza Dough
The beauty of this recipe starts with the incredibly versatile gluten-free flatbread dough. You have the flexibility to prepare the flatbreads immediately before assembling and grilling your pizzas, or you can make a batch in advance. Once fully cooled, simply wrap them securely and store them for later use, either at room temperature for a day or frozen for up to two months.
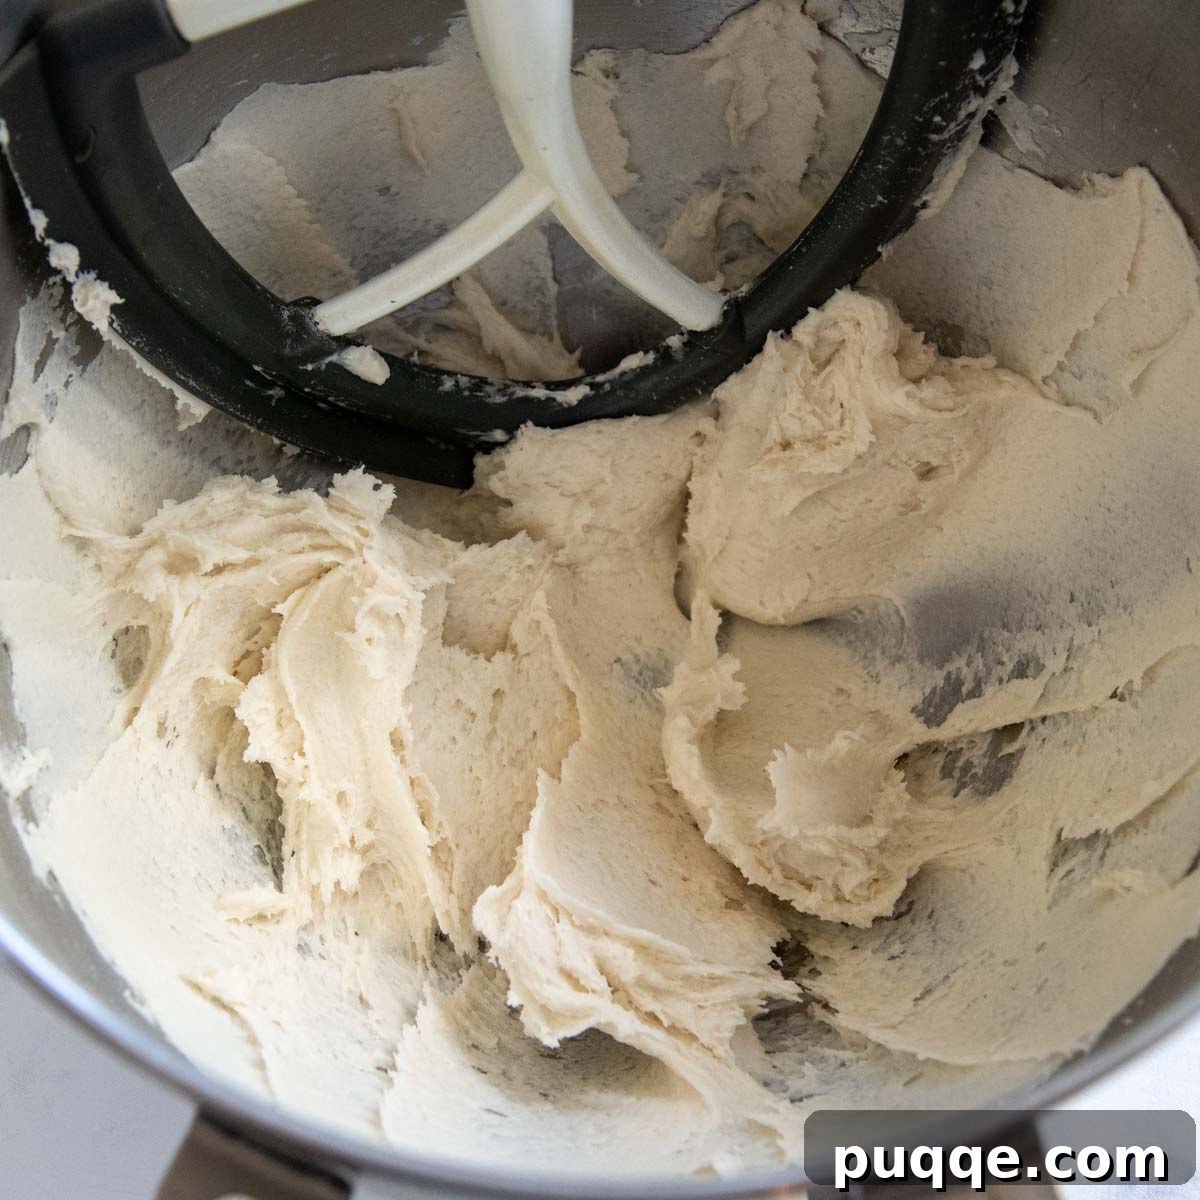
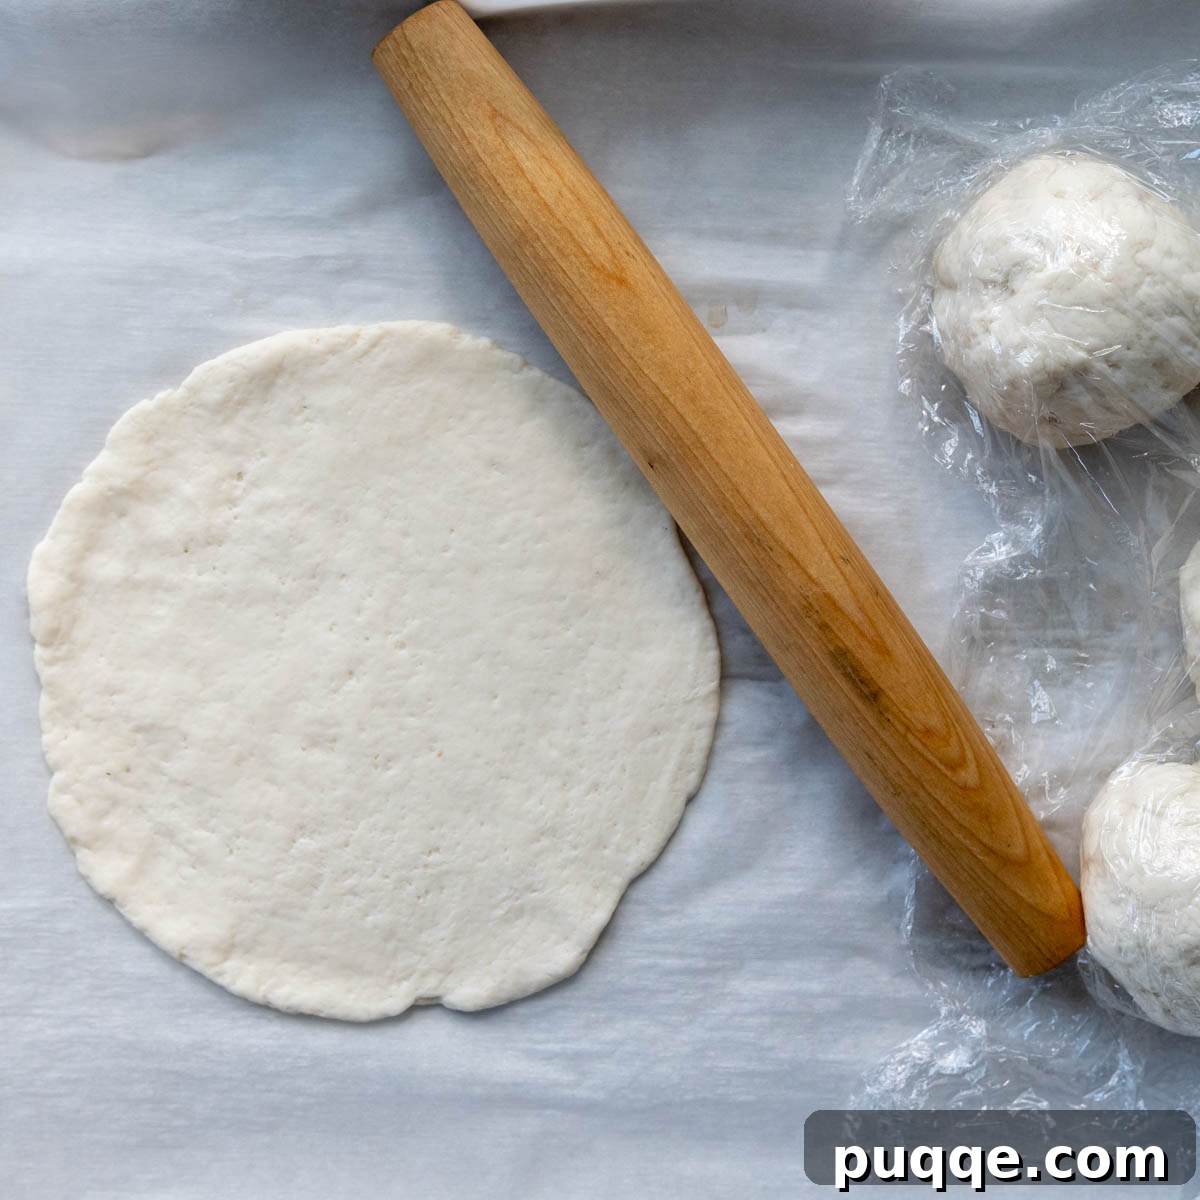
The dough preparation itself is remarkably straightforward. Begin by combining all the specified ingredients in a bowl and mixing until a thick, cohesive dough forms. Cover the bowl with plastic wrap and allow the dough to rise for approximately 45 minutes in a warm environment. After rising, divide the dough into five equal balls, each ready to be rolled into a 6-inch circle. These flatbreads are initially cooked on the stove top before moving to the grill. Heat a dry nonstick skillet to a medium-high temperature, then cook each flatbread for about 4 minutes in total, flipping halfway through. This preliminary cooking develops a lovely texture and structure. Once cooked, transfer them to a cooling rack, and continue with the remaining flatbreads. Only after all flatbreads are prepared should you begin assembling your pizzas and preheating the grill.
Assembling and Grilling
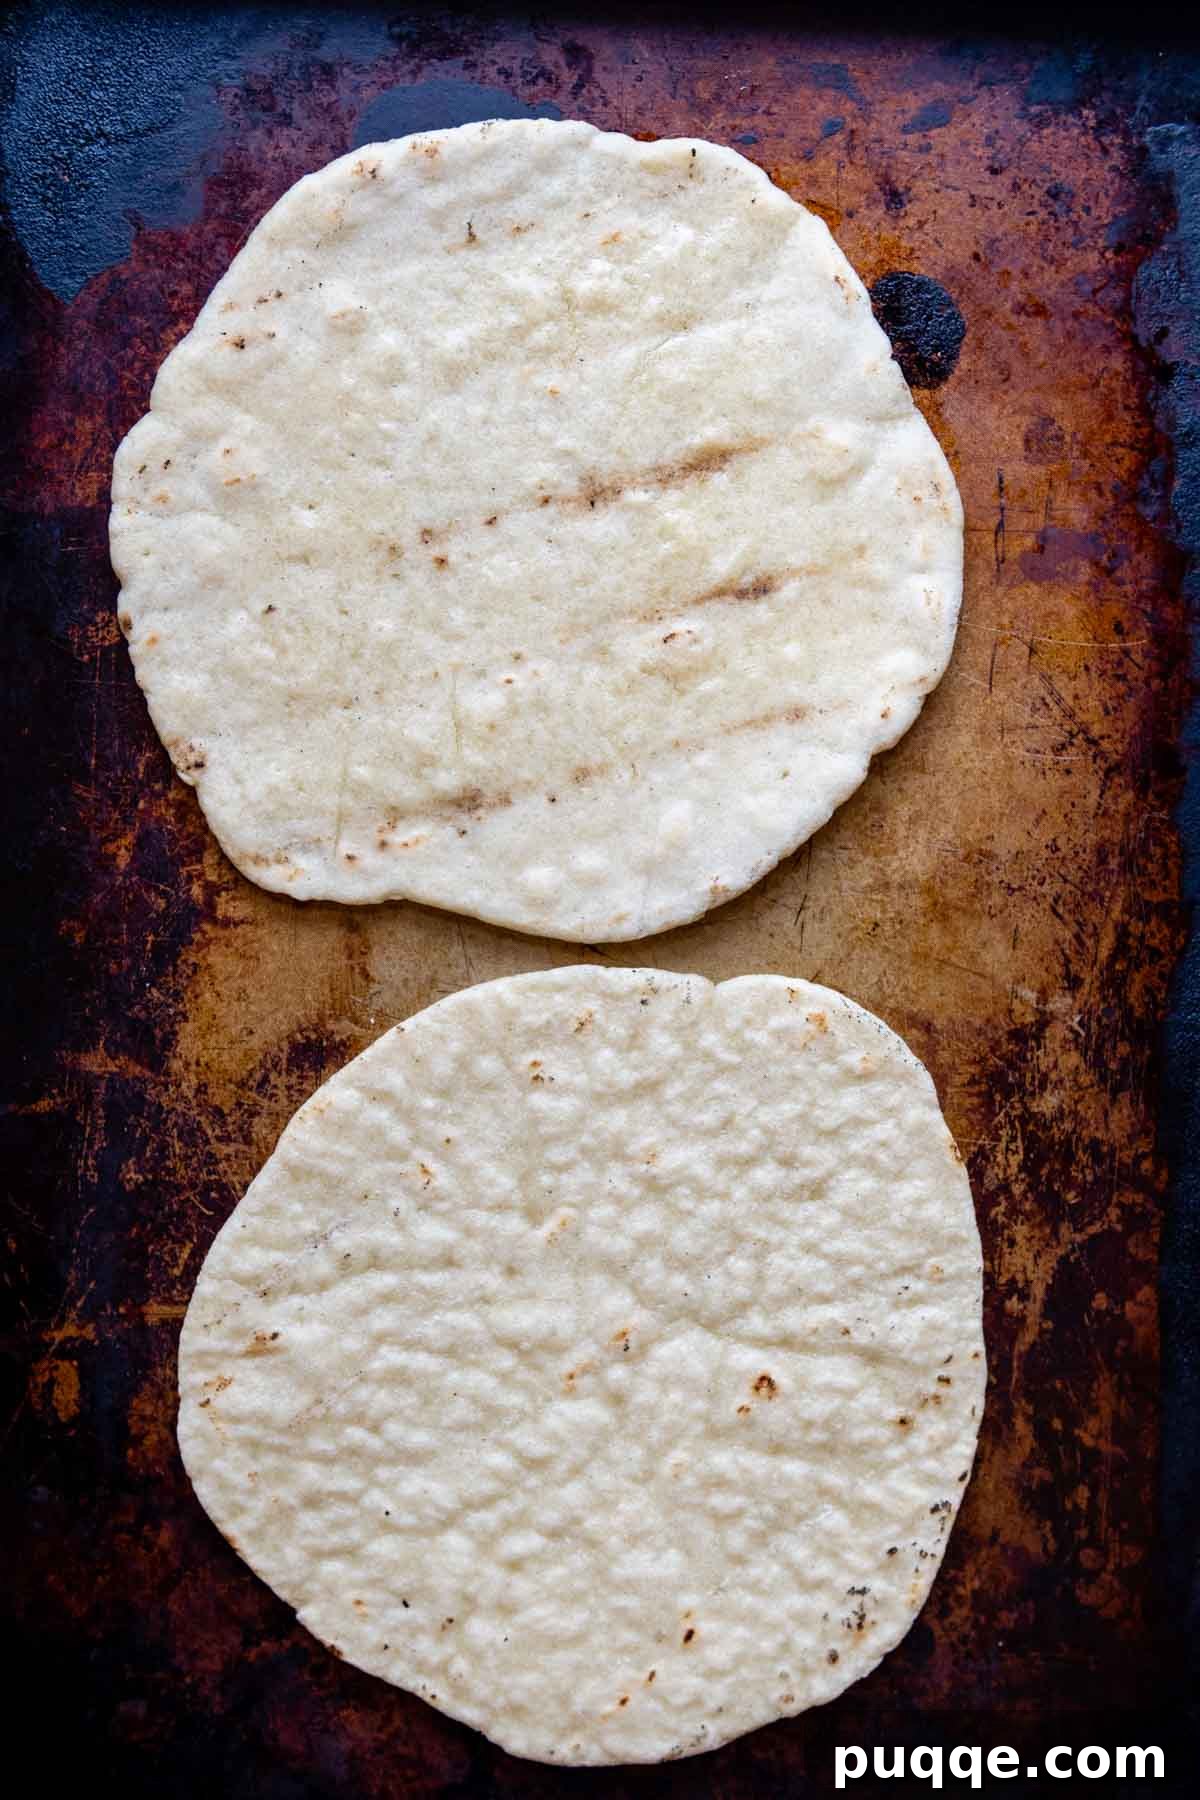
With your flatbread crusts ready, you’re now set for the exciting grilling phase. Begin by preheating your gas or charcoal grill to a consistent medium-low heat. This moderate temperature is crucial for achieving a beautifully charred crust without burning it prematurely. Once the grill has reached the desired temperature, carefully place the cooked flatbread crusts directly onto the clean grill grates. Cook only one side for precisely 90 seconds. This brief exposure to direct heat will impart a distinctive smoky flavor and a desirable slight char to the crust, forming the base of your grilled pizza.
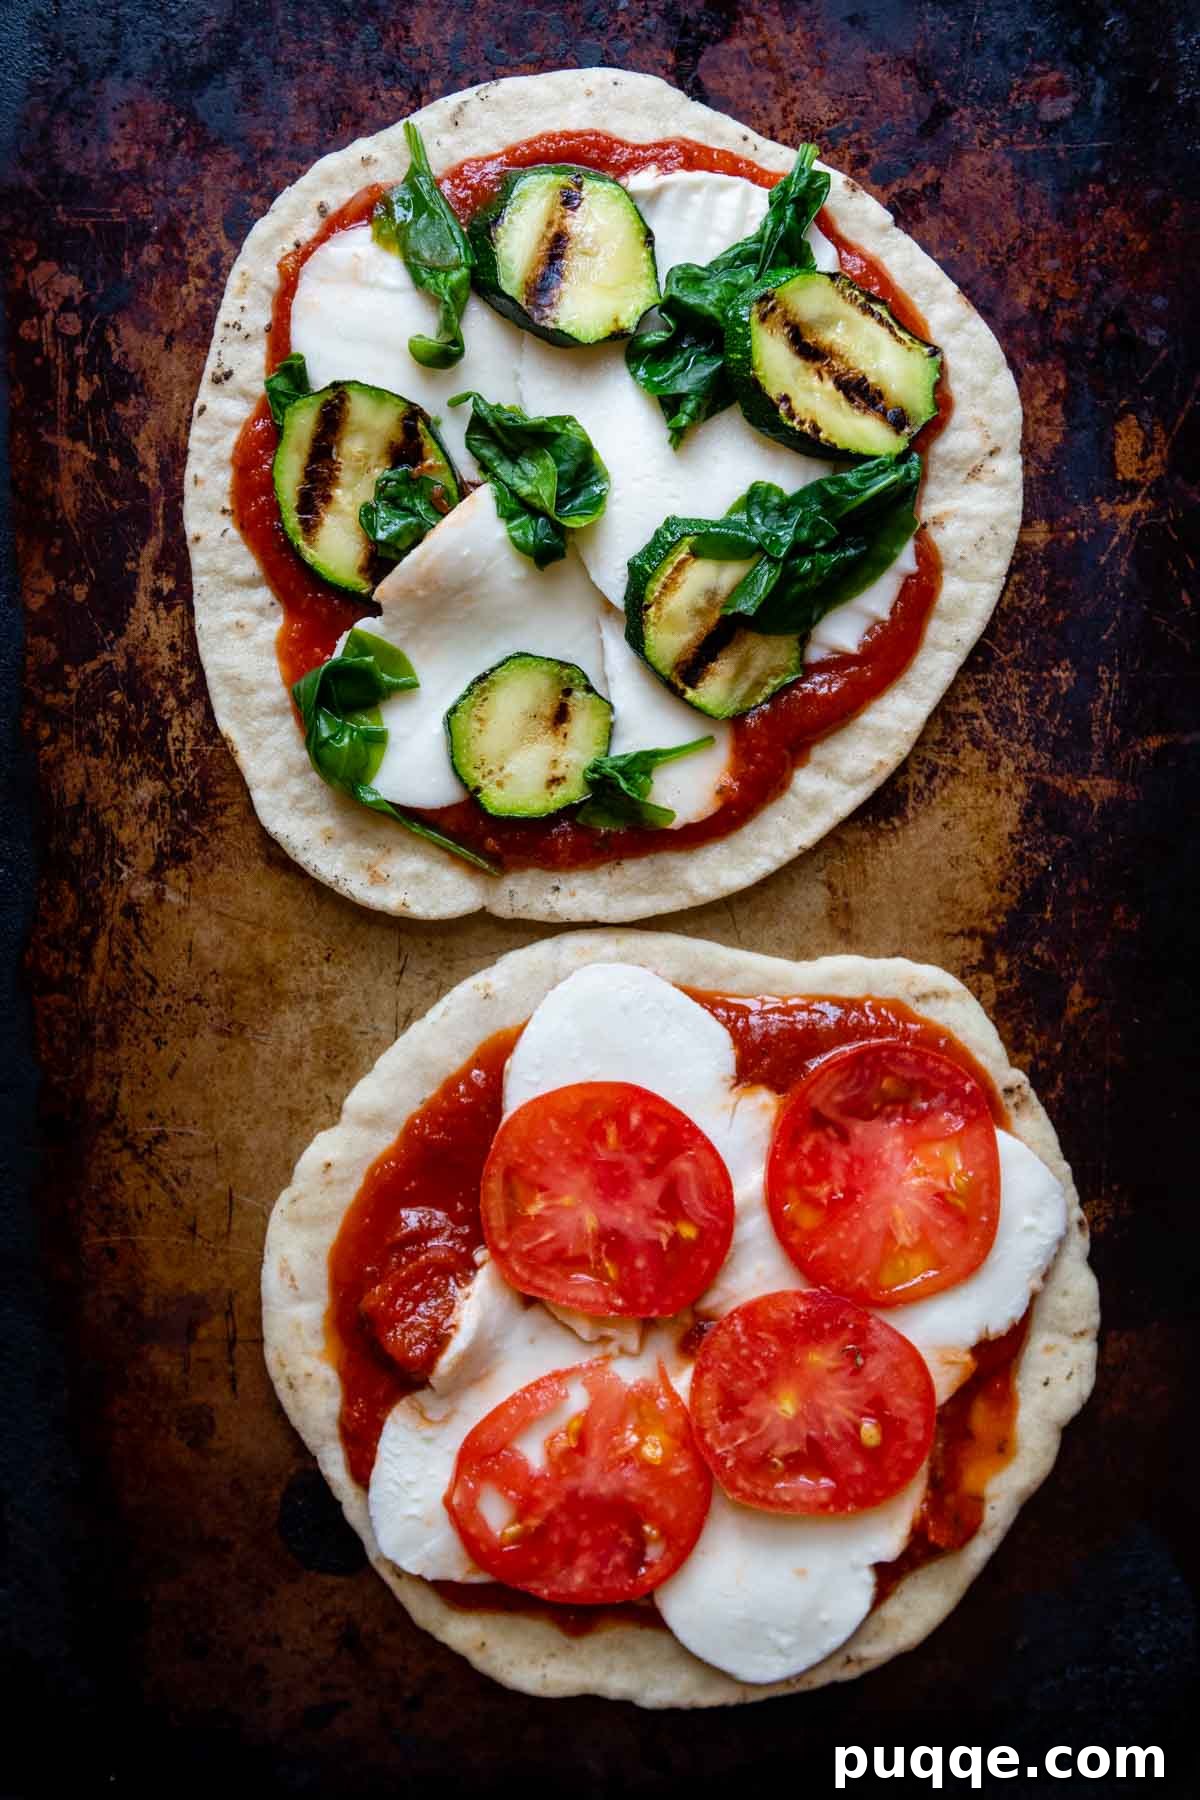
After the initial charring, gently remove the crusts from the grill and transfer them to a baking sheet or a pizza peel. Now it’s time to assemble your pizzas with your chosen toppings. Ensure that the side of the crust with the grill marks is facing upwards, as this is where you will add your sauce, cheese, and other delicious ingredients. This method allows the toppings to melt and cook effectively while the other side of the crust finishes cooking on the grill.
Finishing Off
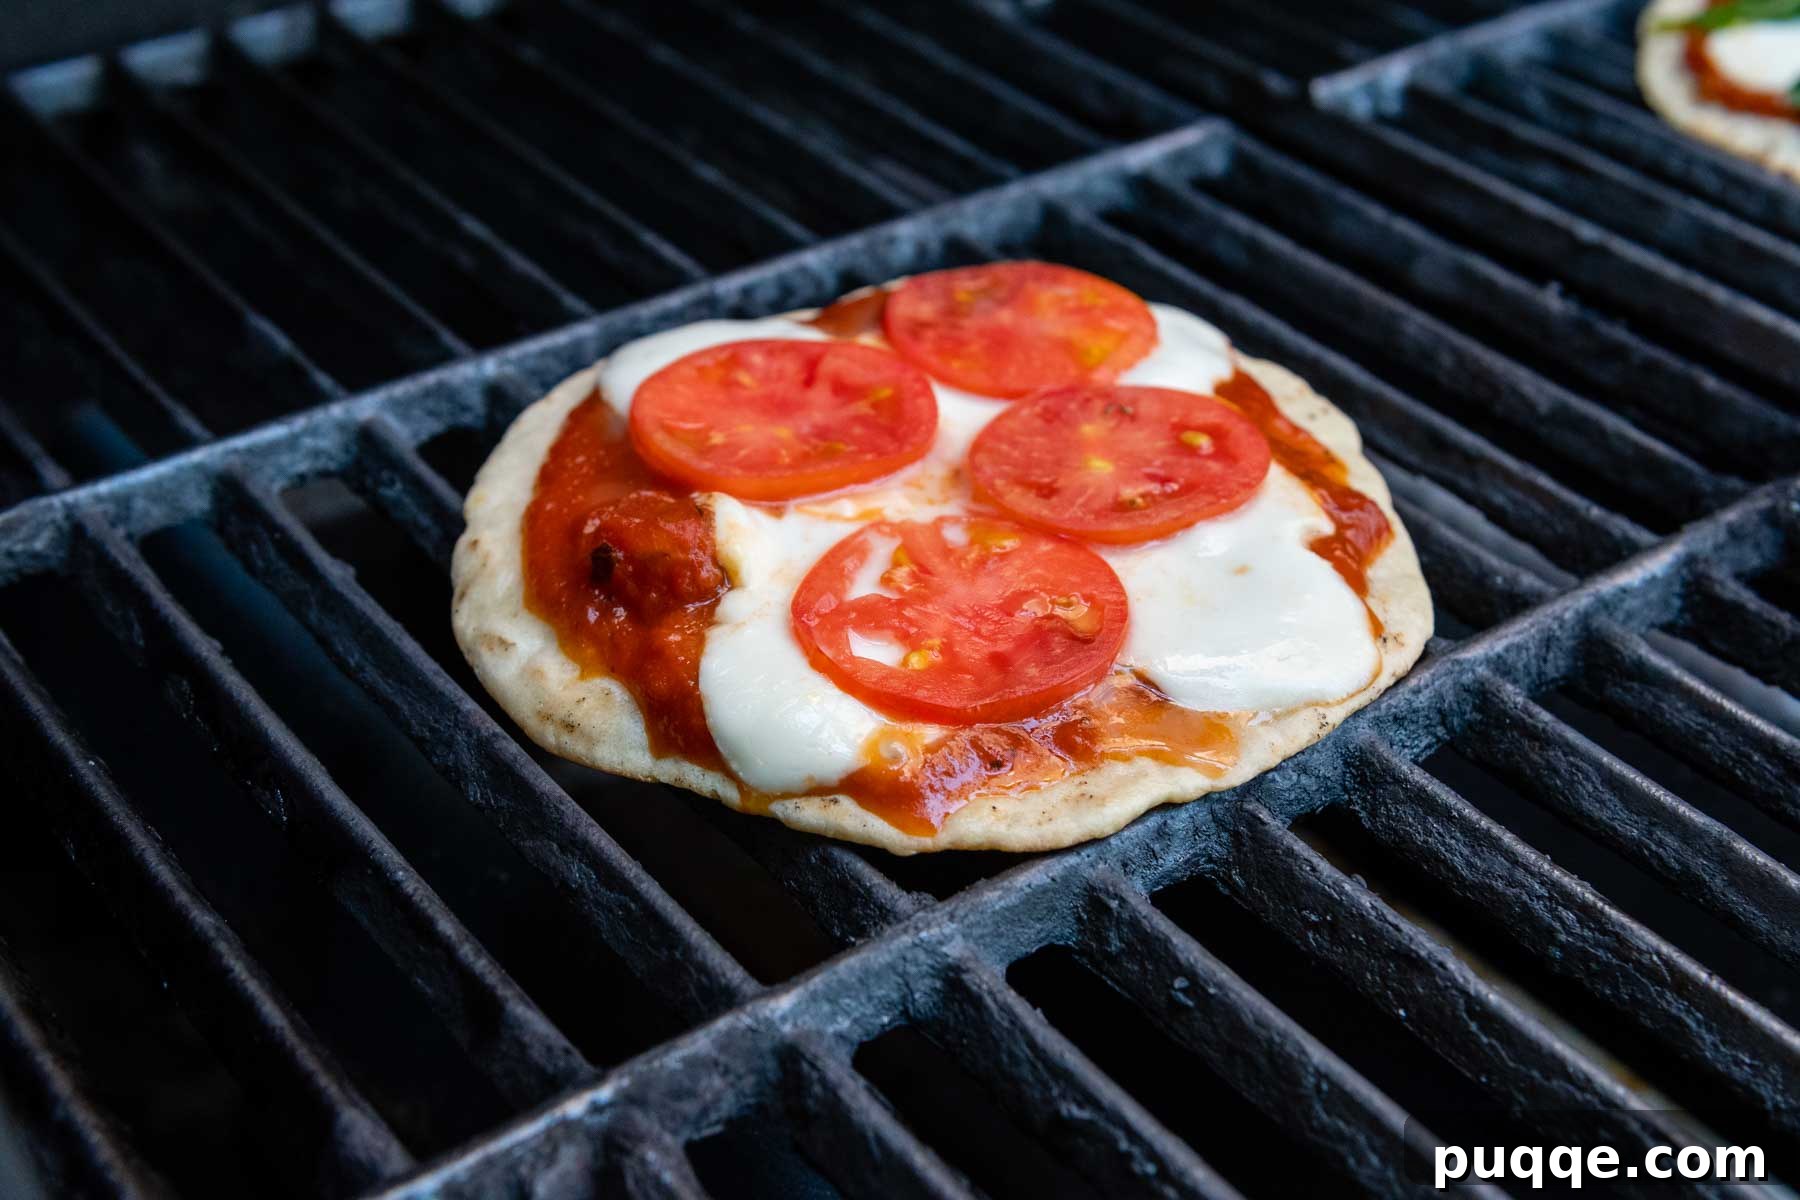
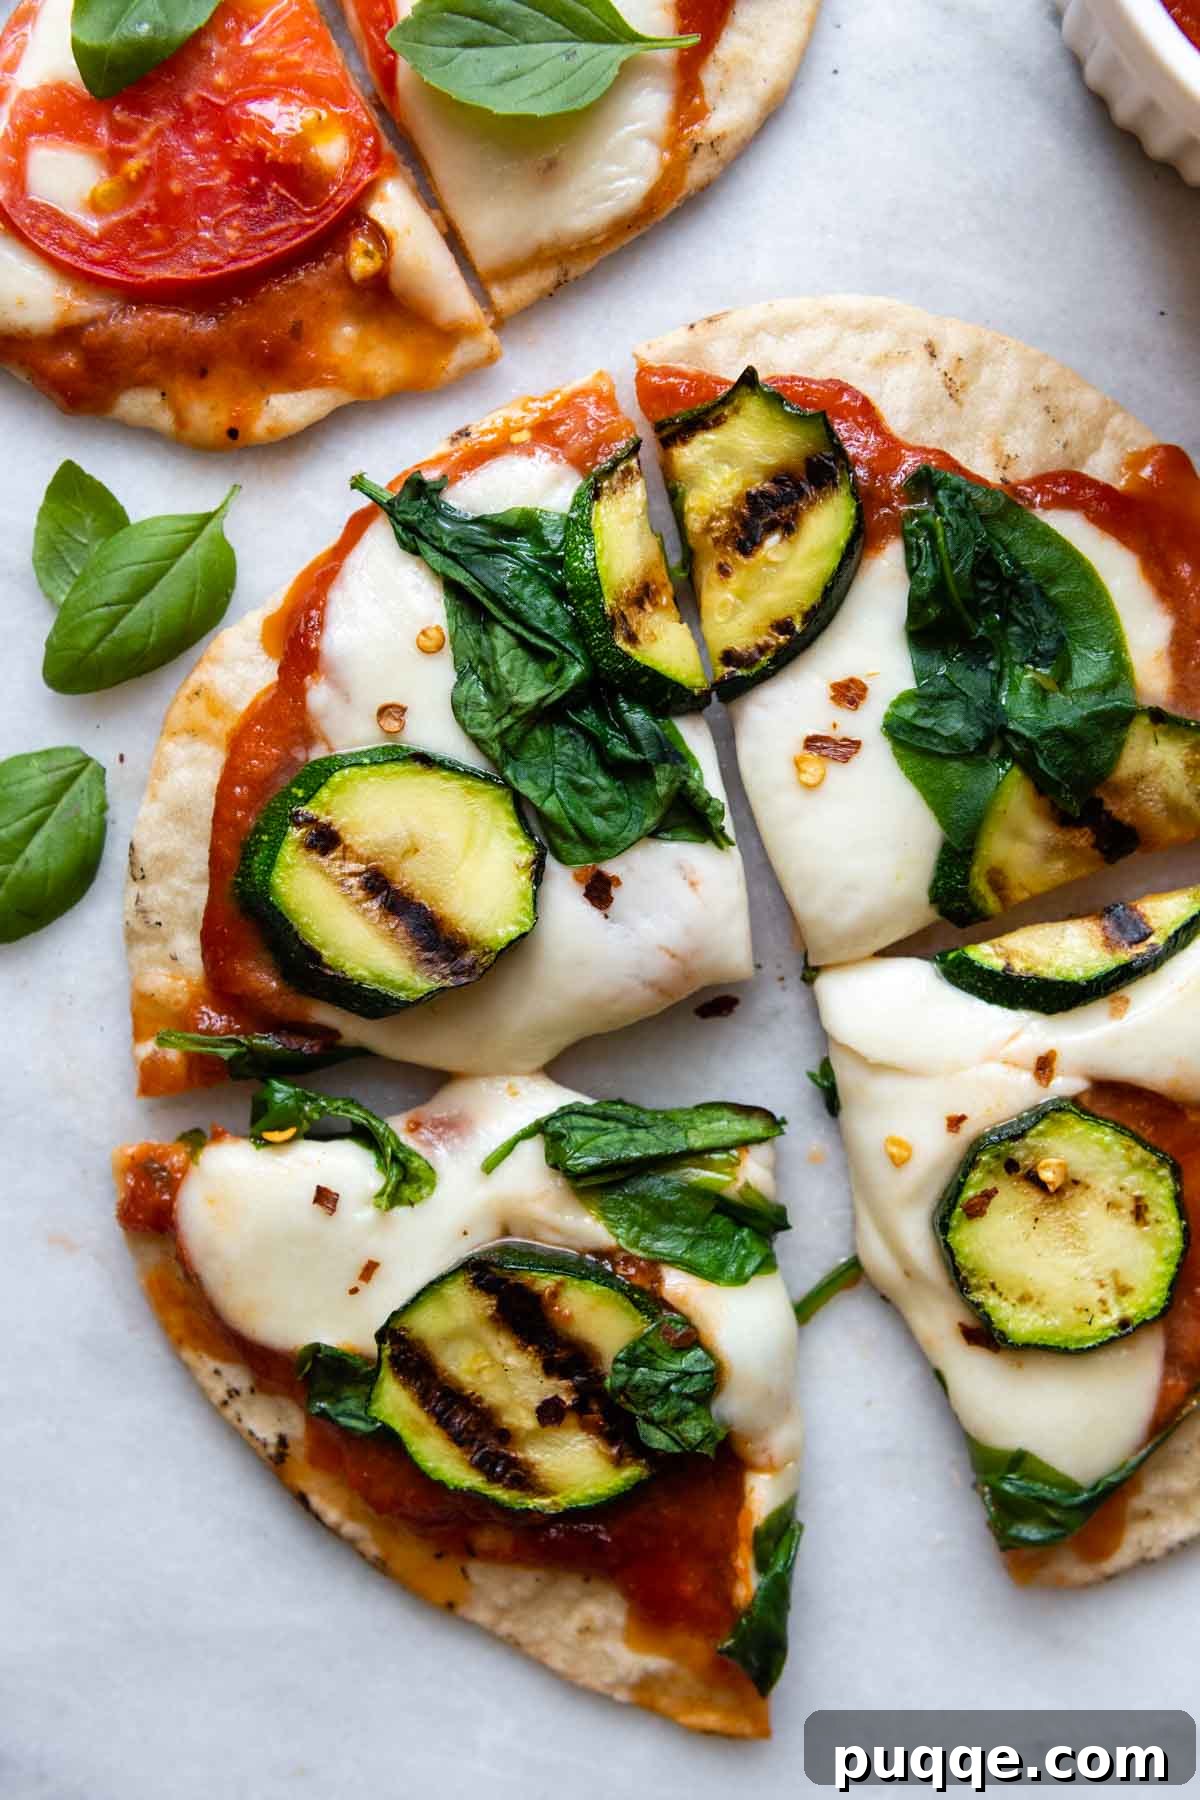
Once your pizzas are beautifully assembled with all their delicious toppings, it’s time to return them to the grill for the grand finale. Carefully place each pizza directly onto the grill grate. Close the grill lid to allow the heat to circulate evenly, cooking the toppings and melting the cheese to perfection. Cook for an additional 2-3 minutes. Keep a close eye on them; the goal is to achieve perfectly melted cheese and a slightly crisp underside without over-scorching the crust. If, after 2 minutes, the cheese hasn’t fully melted but the crust is browning nicely, simply turn off the grill and allow the residual heat to finish melting the cheese. This gentle approach ensures a perfectly cooked pizza every time. Once ready, use a long spatula or pizza peel to carefully remove the pizzas from the grill. Serve immediately and savor every bite of your homemade, smoky, gluten-free grilled pizza!
More Cooking Options for Your Gluten-Free Pizza
While the stove-top pre-cook method followed by grilling offers excellent results, there are other fantastic ways to achieve a delicious gluten-free grilled pizza. Experiment with these alternative cooking options to find what best suits your preference and equipment.
Cooking The Dough On The Grill from Scratch: During my testing phase, I did experiment with cooking the raw dough entirely on the grill. While it is certainly achievable, I found the stove-top method (as detailed in the main recipe) offered more consistent temperature control and made for an easier, more foolproof process. However, if you prefer the satisfaction of cooking your flatbread dough entirely on the grill, here’s how to do it:
- Roll out your raw crusts to the desired size and carefully transfer them to a parchment-lined baking sheet.
- Spray a sheet of heavy-duty aluminum foil generously with nonstick cooking spray. Place this foil directly onto your grill grates.
- Carefully transfer the rolled flatbreads onto the prepared foil. Cook them, undisturbed, for about 90 seconds.
- Flip the flatbreads and cook for an additional 90 seconds on the other side. This initial cooking on foil helps to set the dough and prevent it from falling through the grates.
- Remove the foil and place the partially cooked flatbreads directly onto the grill grates. Grill one side for approximately 90 seconds to achieve a nice char and smoky flavor.
- Transfer the crusts back to a baking sheet, add your desired toppings, and then return them to the grill to finish cooking as directed in the main recipe.
Using a Pizza Stone for Grilled Pizza: If you’re concerned about scorching your pizza crust directly on the grill grates, or simply prefer a crispier, more evenly cooked bottom, utilizing a pizza stone is an excellent option! The stone acts as a thermal barrier, distributing heat more uniformly and preventing direct exposure to intense flames.
- Crucially, place your pizza stone on a *cold* grill. This is vital to prevent dangerous thermal shock and potential breakage of the stone.
- Once the stone is in place, preheat your grill to medium-high heat. Allow the grill and the stone to heat up together for at least 15-20 minutes to ensure the stone is thoroughly hot.
- Once heated, carefully slide your assembled pizza (using a cooked crust with toppings, no need for pre-grilling one side first with this method) onto the preheated pizza stone. A pizza peel dusted with a little cornmeal or flour will make this transfer much easier.
- Close the grill lid and cook for approximately 5 minutes, or until the cheese is bubbling and perfectly melted, and the crust has achieved a beautiful golden brown and crispy underside.
Things To Know About Toppings for Gluten-Free Grilled Pizza
The key to successful grilled pizza lies in understanding the extremely short cook time on the grill. Unlike oven-baked pizzas, there isn’t much time for raw ingredients to cook through. Therefore, careful consideration and preparation of your toppings are essential to avoid a raw, unevenly cooked, or soggy pizza.
Pre-cooking Meats and Harder Vegetables
Since the pizza cooks rapidly, all meats must be fully precooked before being added to your grilled pizza. This includes favorites like crumbled sausage, pepperoni, cooked chicken (shredded or diced), bacon bits, and thinly sliced ham. Adding raw meat will result in it being undercooked or even raw by the time your cheese has melted.
Similarly, vegetables that typically require a longer cooking time to become tender should be roasted, sautéed, or grilled ahead of time. Excellent examples include:
- Mushrooms: Sauté them until softened and slightly browned to release their moisture and intensify their flavor.
- Onions: Thinly slice and caramelize them for a sweet, savory addition, or lightly grill them for a smoky touch.
- Bell Peppers: Slice them thinly and quickly sauté or grill them until tender-crisp.
- Broccoli & Asparagus: Blanch or lightly steam, then grill briefly for a tender bite.
- Eggplant & Zucchini: Slice thinly, brush with olive oil, and grill until tender before adding to the pizza.
- Thin-sliced Potatoes: Par-boil or roast until nearly tender before adding to ensure they cook through.
Handling Tomatoes and Fresh Herbs
Fresh tomatoes, while delicious, can release a lot of moisture, leading to a soggy crust. To avoid this:
- Cherry Tomatoes: Halve or quarter cherry tomatoes and char or roast them briefly before adding them to the pizza. This concentrates their flavor and reduces moisture.
- Larger Tomatoes: If using larger tomatoes, slice them thinly and blot them thoroughly with paper towels to absorb excess moisture. This critical step prevents water from seeping into your crust during grilling. Alternatively, consider using sun-dried tomatoes for an intensely flavorful, low-moisture option.
Fresh Herbs: Delicate fresh herbs like basil, oregano, parsley, or cilantro are best added *after* the pizza has been removed from the grill. The intense heat of the grill can cause these tender herbs to burn and become bitter. Sprinkling them on post-grilling preserves their vibrant color and fresh aroma, providing a beautiful finish and a burst of fresh flavor.
Don’t Overload!
A common mistake with any pizza, but especially grilled pizza, is overloading with toppings. Too many toppings create excess moisture and weight, hindering proper cooking and potentially making your crust soggy or difficult to handle. Aim for a balanced distribution that allows each ingredient to shine and the crust to cook evenly.
Save This Delicious Recipe to Your Pinterest Board!
Let’s be friends on Pinterest! I’m always sharing great recipes and cooking tips!
Did you make this recipe? I love hearing from you! Leave a star rating and comment below the recipe card. Your feedback helps others discover and enjoy these recipes, and I truly appreciate hearing from our community. You will always hear back from me! – Melissa
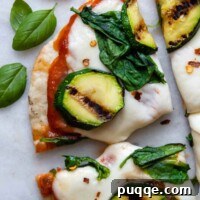
Gluten-Free Grilled Pizza (Easy Tips, Best Results)
 Melissa Erdelac
Pin
Rate
Remove Ads
Ingredients
Gluten-Free Pizza Dough
- ¾ cup warm water, heated to 110℉
- 1 teaspoon active dry yeast
- 1 teaspoon granulated sugar
- 1 ⅓ cup gluten free all purpose flour, (I recommend Cup4Cup GF flour, see recipe notes for other flours)
- 3 tablespoons potato starch
- 2 teaspoons psyllium husk powder
- ¾ teaspoon baking powder
- ½ teaspoon salt
- 1 tablespoon olive oil, and more for shaping and rolling
Toppings
- pizza sauce or olive oil
- 2-3 cups freshly grated mozzarella cheese, or sliced buffalo mozzarella
- toppings, see recipe notes for best results
Equipment
-
Stand Mixer
-
Cup 4 Cup Gluten Free Flour
-
Pizza Peel
Instructions
Gluten-Free Pizza Dough
-
Begin by preparing the flatbread crust. You can choose to make this immediately before assembling and grilling your pizzas, or you can prepare a batch in advance. To store, cool completely, securely wrap, and keep at room temperature for one day or freeze for up to 2 months.
-
Preheat your oven to 150ºF. Once it reaches this temperature, turn it off. This creates a perfectly warm environment for your dough to rise.
-
In a small bowl, combine the warm water, yeast, and sugar. Whisk these ingredients gently and set the bowl aside for 5 minutes to allow the yeast to activate. You’ll know it’s ready when a frothy layer appears on top.
-
In the large bowl of a stand mixer fitted with a paddle attachment, combine the gluten-free flour, potato starch, psyllium husk powder, salt, and baking powder. Mix on low speed until all the dry ingredients are thoroughly combined.
-
Pour in the activated yeast mixture and the olive oil. Mix on medium speed for 3 minutes until a cohesive dough forms. If you do not have a stand mixer, mix vigorously with a sturdy wooden spoon until all ingredients are well combined and the dough comes together.
-
Scrape the dough into the center of the bowl. Cover the bowl tightly with plastic wrap and place it into your warm oven (which you previously turned off). Leave the oven door slightly ajar for 5-10 minutes, then close it. Allow the dough to rise for 45 minutes.
-
When you are ready to shape the dough, pour a small amount of extra olive oil into a separate bowl to dip your fingers in, as gluten-free dough can be sticky. Lay a large sheet of parchment paper on your workspace. Using slightly greased fingers, divide the risen dough into 5 equal-sized balls. Cover these balls with plastic wrap and let them rest for 10 minutes. Meanwhile, heat a dry nonstick skillet over medium heat.
-
Keep the remaining dough balls covered. On the parchment paper, spread a very thin, light sheen of olive oil. Place one dough ball in the middle and gently flatten it into a thick disc. Use a rolling pin to shape it into a 6½-inch circle, rotating the dough a quarter turn after each roll to maintain a round shape.
-
Carefully use a spatula to lift the shaped flatbread onto the hot skillet. Cook, undisturbed, for 1½ – 2 minutes. Flip it, and cook for an additional 1½ – 2 minutes on the second side. It’s crucial to cook for the full duration on both sides, even if it looks “done,” to ensure a fluffy texture and prevent it from becoming dense. As one flatbread cooks, start rolling out the next one.
-
Transfer each cooked flatbread to a cooling rack. Continue cooking the remaining flatbreads. Once all flatbreads are cooked and cooling, you can begin assembling your pizzas and warming up the grill.
Assembling and Grilling Pizzas
-
When you are ready to grill, preheat your gas or charcoal grill to a medium-low heat. Once the grill is heated to temperature, carefully place the pre-cooked flatbread crusts directly onto the clean grill grate. Cook only one side for 90 seconds. This step is designed to lightly char the crust, imparting a delicious smoky flavor and creating a sturdy base for your toppings.
-
After the initial charring, move the crusts from the grill to a baking sheet or a pizza peel. Now, position the crusts with the grill marks facing up; this is the side where your toppings will be added. This ensures the grilled side gets additional heat during the final cook, contributing to crispiness.
-
Spread a thin, even layer of your chosen pizza sauce or olive oil over the charred side of the crust. Then, sprinkle with your desired toppings (remember to consult the recipe notes for best results on topping preparation) and finish with a generous layer of cheese. Carefully return the assembled pizzas to the grill, placing them directly on the grates. Close the grill lid and cook for 2-3 minutes. Begin checking after 2 minutes to ensure the bottom of the crust isn’t burning. If the crust appears sufficiently browned or scorched before the cheese has completely melted, turn off the grill and allow the residual heat inside the grill to finish melting the cheese gently. Use a long spatula or pizza peel to remove the pizzas and serve immediately for the best flavor and texture.
Notes
Gluten-Free Flour Variations
I consistently use and highly recommend Cup4Cup gluten-free flour blend for achieving the absolute softest texture in this pizza crust. Please be aware that other brands of gluten-free flour may significantly affect the final texture of your dough. If you choose to use King Arthur Measure-for-Measure flour, which is a popular alternative, please make the following specific adjustments to ensure the best possible results:
- Measure 1 ⅓ cup of King Arthur Measure-for-Measure flour, then remove 2 tablespoons of this flour. Replace these 2 tablespoons with 2 tablespoons of cornstarch. This adjustment helps to achieve a more tender crumb similar to Cup4Cup.
- When you are shaping and rolling out the dough, use a little more olive oil on your hands and work surface. This will add a touch more fat and moisture, which is beneficial for the King Arthur blend.
- Adjust your cooking time. I found that the King Arthur flour blend yields optimal results when cooked for approximately 1 minute per side on the stove top, rather than the 1½-2 minutes specified for Cup4Cup.
Important Note About Toppings
Given the rapid cooking time of pizza on the grill, it is crucial to prepare your toppings appropriately. All meats should be precooked before being added to the pizza. Similarly, any vegetables that typically require a longer cooking duration to become tender—such as mushrooms, onions, thin-sliced potatoes, eggplant, bell peppers, and broccoli—should be roasted, sautéed, or grilled ahead of time. This ensures all ingredients are cooked through and flavorful when your pizza is ready.
Using a Pizza Stone on the Grill
For those who prefer to use a pizza stone for an even crispier bottom crust or to avoid direct grate cooking, follow these steps:
Place your pizza stone on a cold grill. Then, preheat the grill to a medium-high heat. It is essential that the stone heats gradually with the grill to prevent thermal shock, which could cause it to crack or break.
Once the grill and stone are fully preheated, carefully slide your assembled pizza (made with a cooked crust and all toppings already applied—no need to grill one side first with this method) onto the hot stone. Close the grill lid and cook for approximately 5 minutes, or until the cheese is beautifully melted and bubbly, and the crust has started to brown and crisp underneath.