
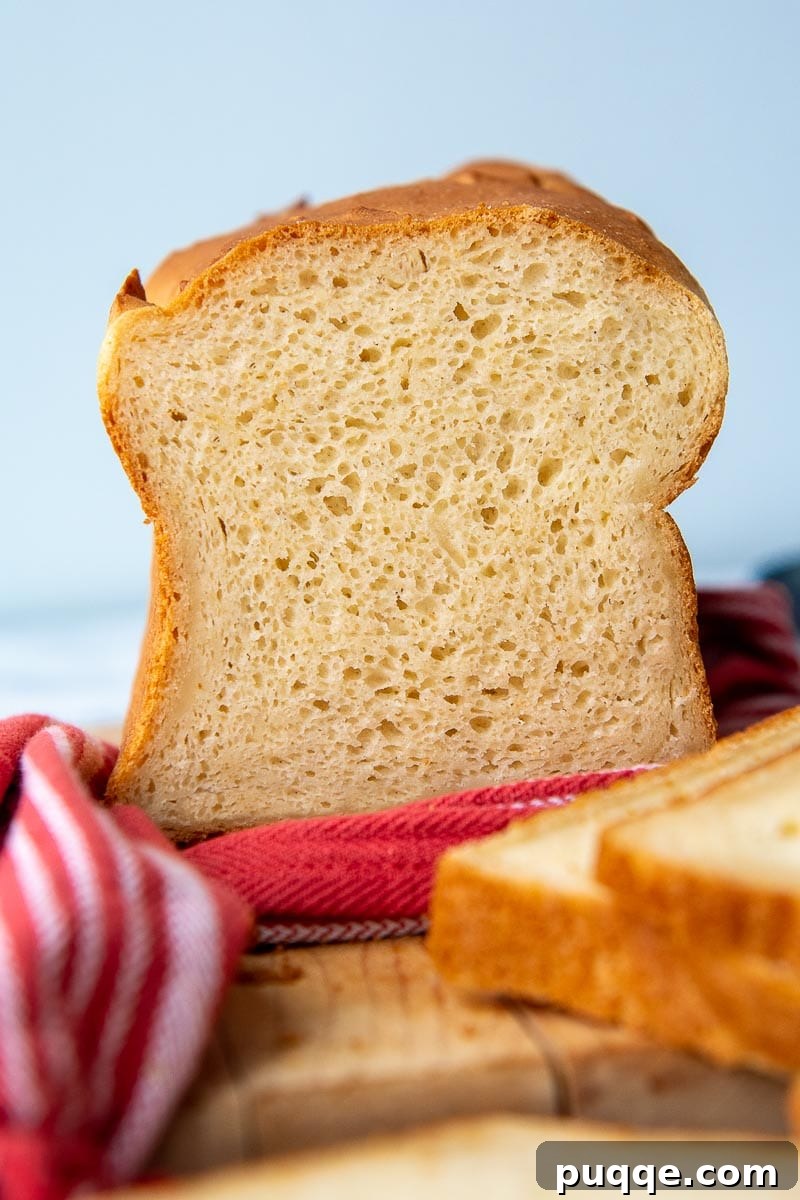
Are you tired of gluten-free bread that crumbles, tastes like cardboard, or requires an advanced degree in baking to make? We’ve all been there! But what if you could bake a truly squishy-soft, delicious gluten-free bread right in your own kitchen with minimal effort? Imagine a homemade sandwich bread so good, it makes you forget it’s gluten-free.
This isn’t just another gluten-free bread recipe; it’s the culmination of years of testing and refining, designed to be the ultimate solution for your GF bread cravings. Made with genuinely simple ingredients, this recipe demands nothing more than a quick mix, a single rise, and a straightforward bake. The result? A perfectly soft, fluffy, and flavorful loaf that stands head and shoulders above anything you’ll find in stores. Don’t just take my word for it—the hundreds of glowing 5-star reviews below speak volumes. Or, better yet, embark on this baking journey today and discover your new favorite bread!
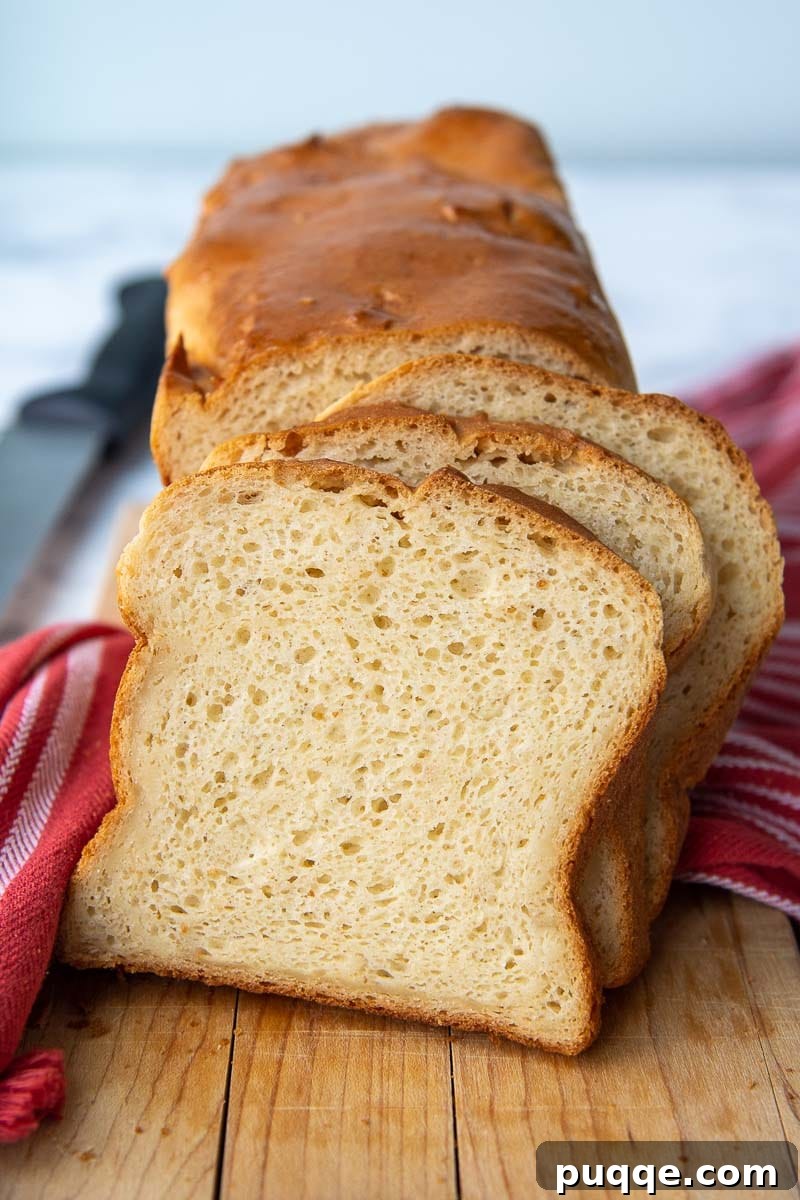
Unlocking the Secret to Truly Delicious Gluten-Free Bread
For far too long, “gluten-free bread” has been synonymous with dense, dry, and often flavorless loaves. My journey to find a truly exceptional gluten-free bread recipe spanned years, filled with frustrating experiments and disappointing results. Traditional homemade gluten-free recipes often proved overly complex and time-consuming, leaving me disheartened. This struggle often led me back to expensive, subpar store-bought options, simply to save time, despite their lack of satisfying texture or taste.
The persistent requests from our wonderful community for a genuinely great-tasting gluten-free bread fueled my dedication. Much like the extensive testing required to perfect squishy-soft gluten-free dinner rolls or tender, fluffy gluten-free biscuits, this bread recipe underwent countless trials. But finally, I landed on a formulation that not only meets but dramatically exceeds all my essential criteria for exceptional gluten-free baking.
What makes this recipe truly revolutionary? It’s the perfect harmony of simplicity, accessibility, and unparalleled taste:
- Effortless Preparation: This recipe simplifies gluten-free baking by requiring just one bowl for mixing, a single, short rise, and a straightforward bake. Say goodbye to complicated steps and endless waiting!
- Pantry-Friendly Ingredients: We’ve designed this recipe around common, affordable ingredients that you likely already have on hand, ensuring that a fresh loaf is always within reach without a special grocery run.
- Time-Saving Convenience: Nobody wants to spend their entire day in the kitchen making bread. This recipe is quick and efficient, allowing you to enjoy fresh, homemade gluten-free bread without a huge time commitment.
- Superior Taste and Texture: This is the game-changer. Our bread boasts a taste and texture that rivals, and often surpasses, traditional wheat bread, and certainly leaves all other gluten-free alternatives in the dust. It’s soft, moist, and utterly satisfying. Seriously, the enthusiastic comments from our community below are proof!
I wouldn’t endorse this recipe if I wasn’t 100% confident that it delivers on every one of these crucial elements. I understand the frustration of wasted time and expensive ingredients on failed gluten-free experiments. This recipe is designed to be your steadfast companion in the gluten-free kitchen, banishing those past disappointments for good.
It is my sincere hope that this recipe will fulfill all your gluten-free bread dreams, just as it has mine! Witness how this “magical” bread has transformed the baking experiences of our community members, and prepare to be convinced to explore the rest of our highly-reviewed gluten-free bread collection!
Delicious, easy bread! I have been gluten-free for over 15 years and have tried countless bread recipes. This by far is the easiest AND best tasting 👍🏼
—FancyMom
I never comment on things like this, but oh my god….I’ve tried so many gluten-free recipes and none fitted me properly. But this one? AMAZING!
—Ana
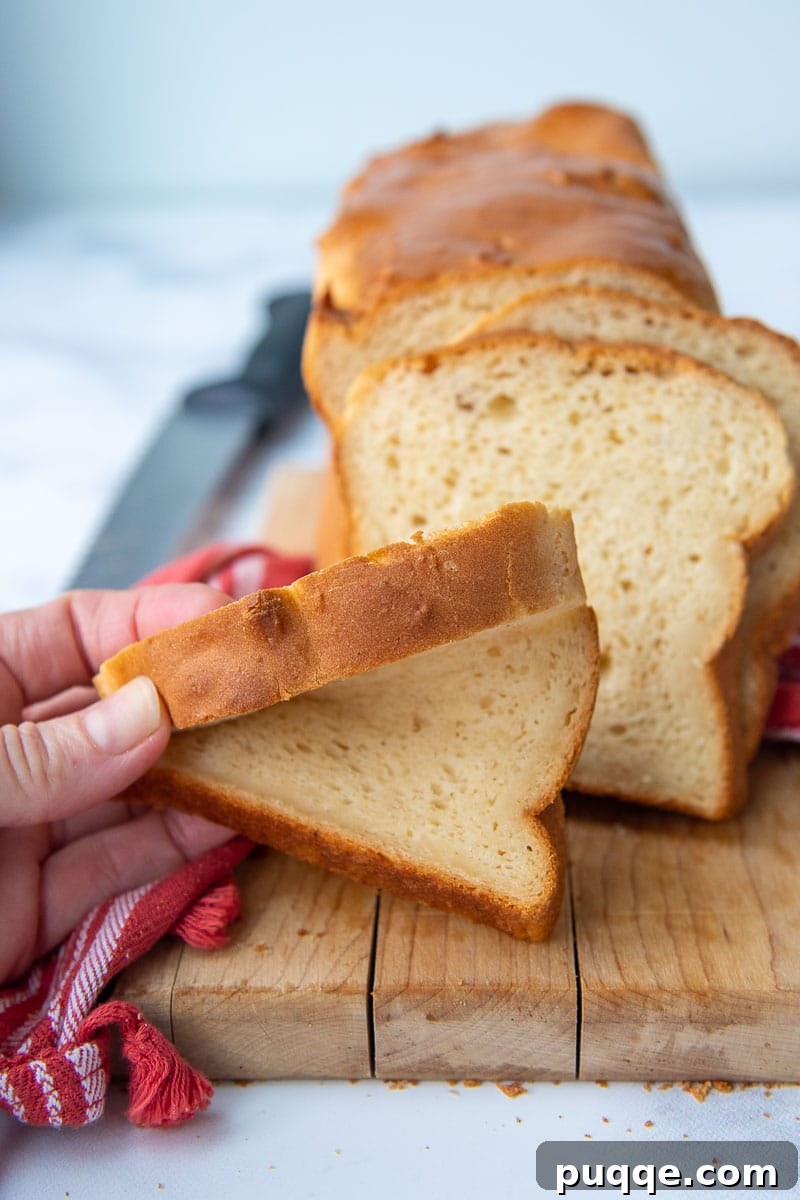
Essential Ingredients for Perfect Gluten-Free Bread
Since sandwich bread is a cherished everyday staple, the ingredients chosen for this recipe are intentionally simple, readily available, and affordable. This ensures that you can whip up a fresh loaf whenever the craving strikes, without hassle. Beyond enjoying it fresh, this versatile bread is also perfect for creating a classic, moist gluten-free stuffing, or for transforming leftover slices into homemade gluten-free bread crumbs (a batch of which you can easily freeze for future recipes!).
Diving Deeper into Key Ingredients:
- Gluten-Free All-Purpose Flour: The choice of gluten-free flour is paramount – it truly makes or breaks the quality and texture of your bread. After extensive testing, I wholeheartedly recommend Cup4Cup GF flour for its consistent, superior results. While I’ve tested this recipe with several popular brands to ensure broad success, some definitely outperformed others. For alternative recommendations and a deeper dive into flour selection, be sure to check our dedicated section below at Gluten-Free Flour Recommendations.
- Psyllium Husk Powder: This ingredient is a fantastic secret weapon in gluten-free baking. I’ve made this bread many times both with and without psyllium husk powder, and while it doesn’t significantly alter the taste, it plays a critical role in moisture retention and preventing the notoriously crumbly texture often associated with gluten-free loaves. It provides much-needed structure and elasticity. Curious to learn more? Explore why psyllium is a game-changer for gluten-free baking.
- Honey: While granulated sugar can be substituted, I prefer honey for the delightful subtle sweetness and, crucially, the added moisture it contributes to the bread. For those who prefer less sweetness, feel free to slightly reduce the amount—the bread will still be delicious.
- Oil: Any neutral-flavored oil you prefer will work beautifully here. I typically use canola oil, but vegetable oil, light olive oil, or even melted coconut oil (if you don’t mind a slight coconut flavor) are excellent choices. If you’re not aiming for a dairy-free loaf, you can also substitute the same amount of melted butter for a richer flavor profile.
- (Optional) Milk Powder: This is a more recent, yet highly beneficial, addition to the recipe. While entirely optional, it significantly enhances the bread’s moisture and softness. Specifically, if you’re using Cup4Cup flour (which recently removed milk powder from its formulation), I recommend replacing 2 tablespoons of GF flour with 2 tablespoons of a gluten-free certified milk powder. This small tweak works wonders for the overall texture and freshness!
Watch the Gluten-Free Bread Recipe in Action
Seeing the process can make all the difference! To help visualize each step and ensure your baking success, here’s a detailed video demonstration of how to make this incredible gluten-free bread:
Let’s Bake This *Together*! Step-by-Step Guide
Embark on your journey to the perfect gluten-free loaf with these detailed step-by-step instructions. Below, you’ll find descriptive photos and expanded guidance. For precise ingredient amounts and the full, printable recipe card, please scroll down to the bottom of this article.
Step 1: The Foundation – Mixing Dry and Wet Ingredients
For the absolute best results and ease, we highly recommend using a stand mixer fitted with a paddle attachment. Begin by combining all your dry ingredients: the gluten-free flour, instant rapid-rise yeast, optional psyllium husk powder (highly recommended for superior texture!), baking powder, and salt. Mix these on low speed until they are thoroughly combined. Once homogenous, introduce the wet ingredients: room temperature eggs, oil, honey, and warm water. The water temperature is crucial here – around 110°F (43°C) is ideal for activating the yeast without killing it. Mix on low speed until everything just comes together, usually about 1 minute.
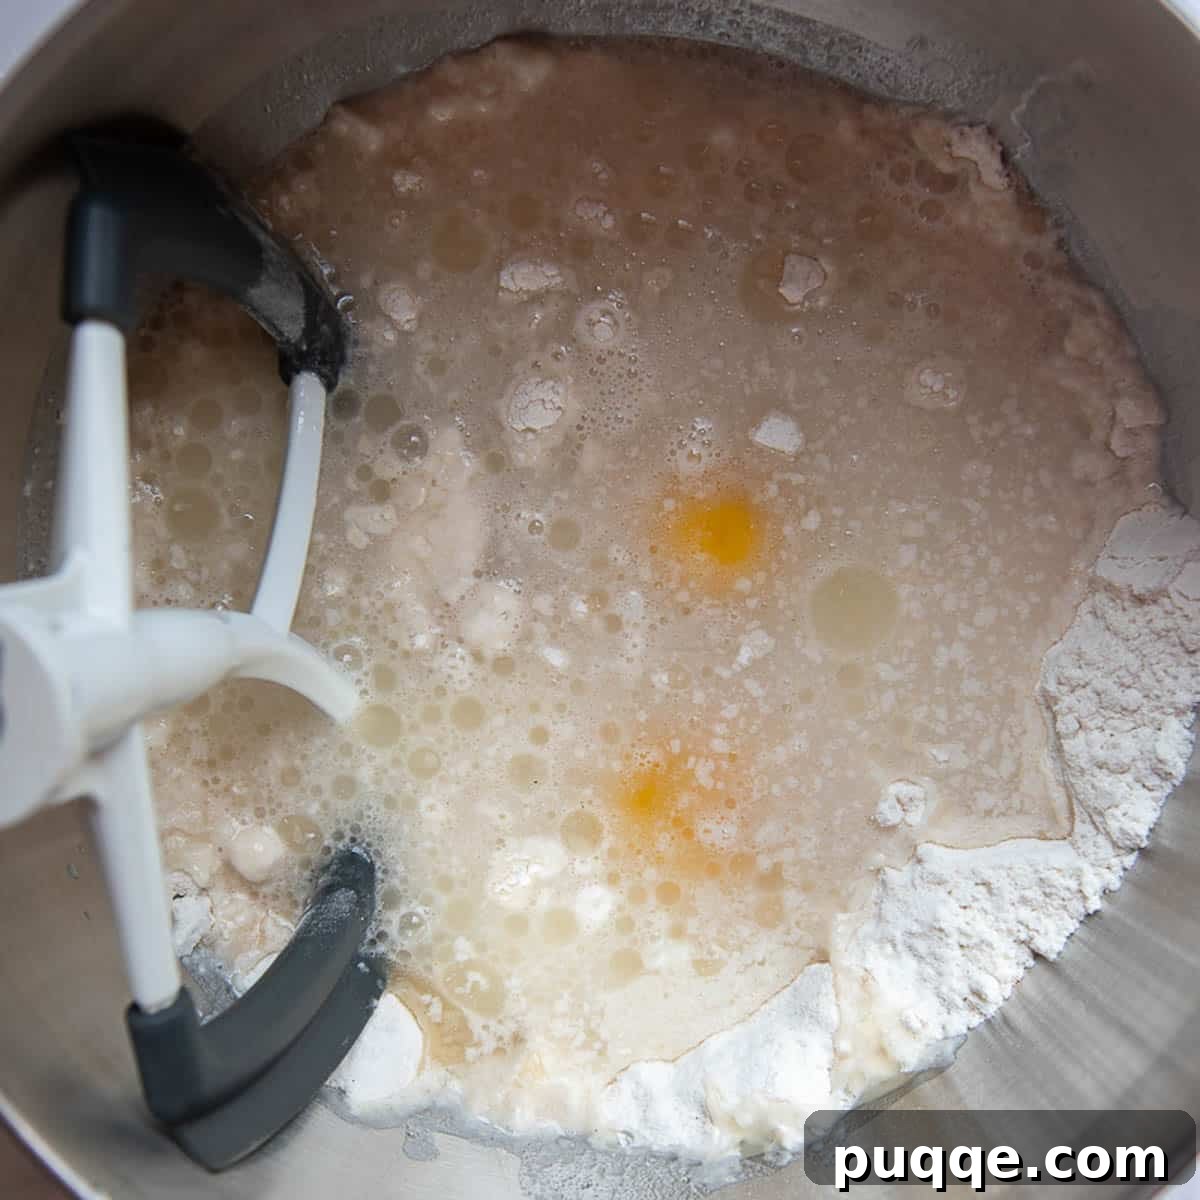
Step 2: Developing the Dough’s Texture
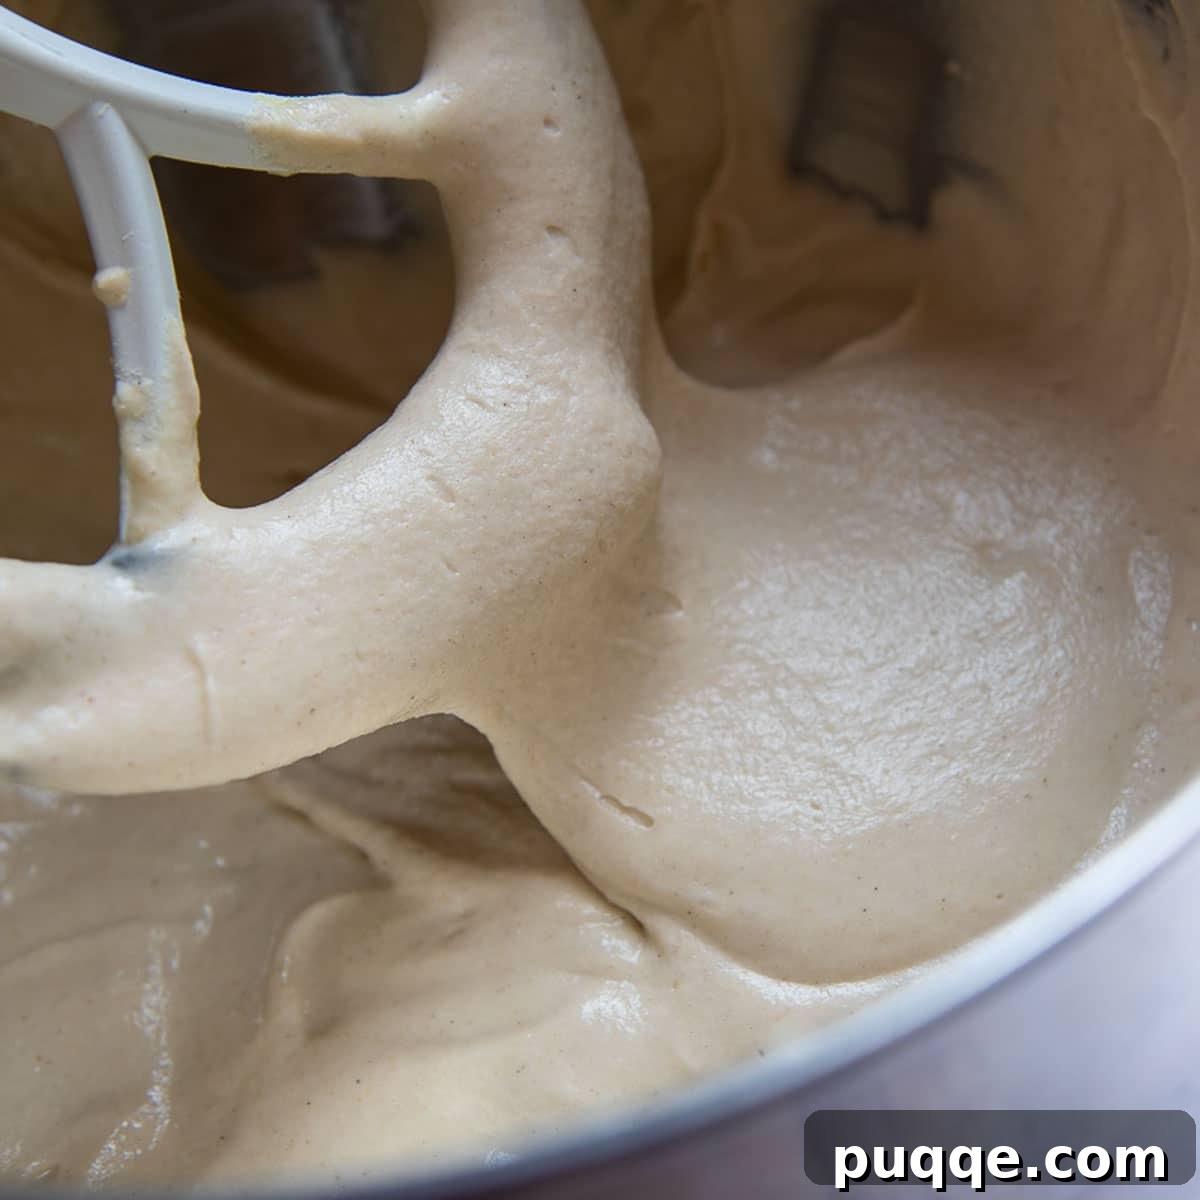
Now, it’s time to truly develop the dough. Increase your mixer’s speed to medium and beat the mixture vigorously for a full 5 minutes. This beating process is vital for gluten-free bread; it provides time for the starches to properly hydrate and relax, resulting in a wonderfully soft texture rather than a gritty or dense one. Don’t be alarmed by the consistency—when finished, your dough will be notably soft, slightly runny, and almost pourable. This unique characteristic is perfectly normal for gluten-free dough, and it means you’re on the right track!
Step 3: The Crucial Rise – Achieving Perfect Loaf Height
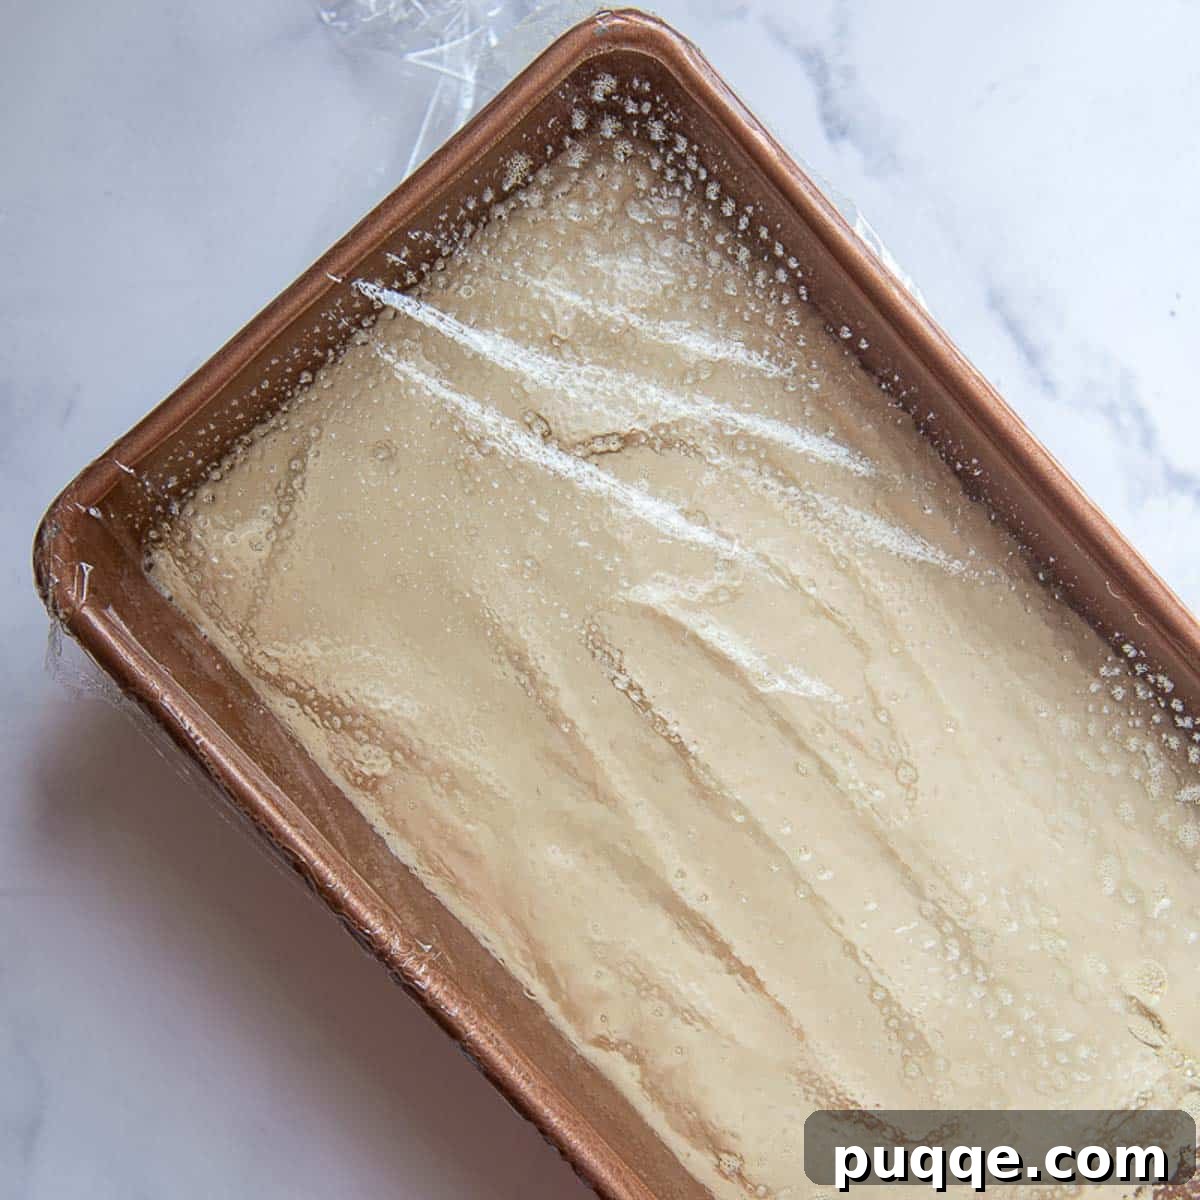
Gently scrape your prepared dough into a well-greased bread pan. For optimal results and a beautifully tall, sandwich-style loaf (no “dinky” slices here!), I highly recommend using a small Pullman loaf pan. This type of pan helps prevent the bread from overflowing as it bakes and encourages a consistent rise. Once the dough is in the pan, smooth the top evenly with a spatula. Take a large piece of plastic wrap, spray one side liberally with nonstick cooking spray, and gently lay it, greased side down, over the top of the pan. Place the pan in a warm, draft-free spot while your oven preheats to 350ºF (175ºC). The dough should rise to about two-thirds of the way to the top of the pan, typically taking about 30-40 minutes. Be careful not to let it over-rise at this stage, as it will continue to expand in the oven.
Step 4: Baking and Cooling – The Final Touches for Perfection
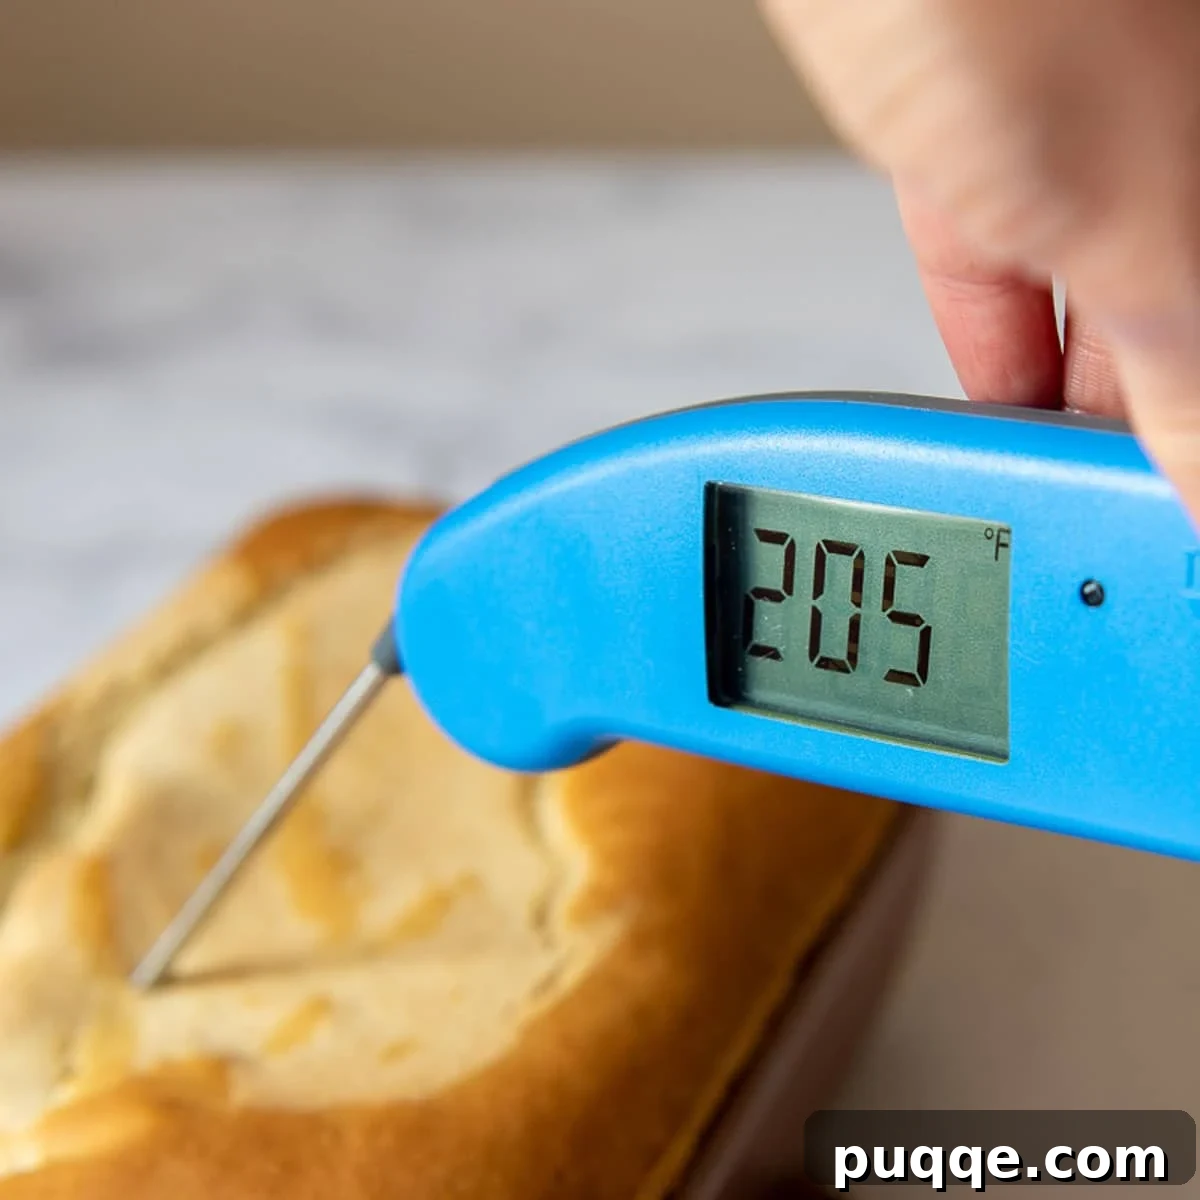
Once the dough has risen adequately and the oven is preheated, carefully remove the plastic wrap. Bake the bread for 40-50 minutes. To prevent over-browning on top while ensuring the inside cooks thoroughly, loosely tent a piece of foil over the bread for the last 20 minutes of baking. The most crucial step to determining doneness for gluten-free bread is checking its internal temperature. I emphatically recommend using an instant-read thermometer (my favorite is linked here!) before removing the bread from the oven. Gluten-free breads often “look done” on the outside long before they are fully cooked through internally. Pulling the bread too soon means insufficient time for moisture to evaporate, which leads to a dense, gummy, and disappointing crumb. Aim for an internal temperature of 205ºF (96ºC).
After baking, allow the loaf to cool in the pan for about 5 minutes before carefully transferring it to a wire rack to cool completely. If you used the recommended Pullman loaf pan, you might find it beneficial to lay the tall loaf on its side on the cooling rack. This simple trick prevents the middle of the bread from potentially sinking as it cools, maintaining its beautiful shape. And just like that, you’ve created the most legitimate, soft, and squishy homemade sandwich bread ever!
The Cornerstone of Success: Quality Gluten-Free Flour Blends
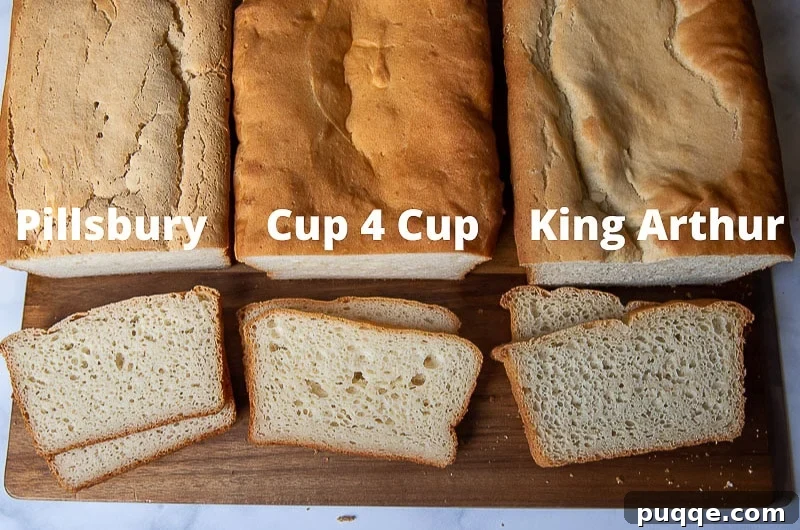
Achieving truly exceptional gluten-free bread hinges significantly on the quality and composition of your gluten-free flour blend. Once this recipe was perfected, it underwent rigorous testing with three distinct gluten-free flours to guarantee consistent, outstanding results across various brands.
Based on insights from extensive gluten-free flour research, we consciously opted to exclude Bob’s Red Mill 1-to-1 GF Flour from our final recommendations for this recipe, as it consistently delivered disappointing results in our trials for soft, squishy bread.
Our primary tests were conducted with Cup4Cup Gluten-Free Flour, which consistently ranks as a top-tier gluten-free blend due to its balanced composition and excellent performance in baked goods. We also evaluated King Arthur Measure-for-Measure and Pillsbury gluten-free flour, as these are popular choices and readers frequently inquire about their suitability.
From a general ease-of-baking standpoint, all three flours mixed relatively well. However, the finished products showed significant differences. The bread made with Pillsbury had the most solid, almost rigid, structure—which, for a soft sandwich bread, was not a desirable outcome. Cup4Cup yielded the softest, most pliable bread, with King Arthur falling somewhere in the middle.
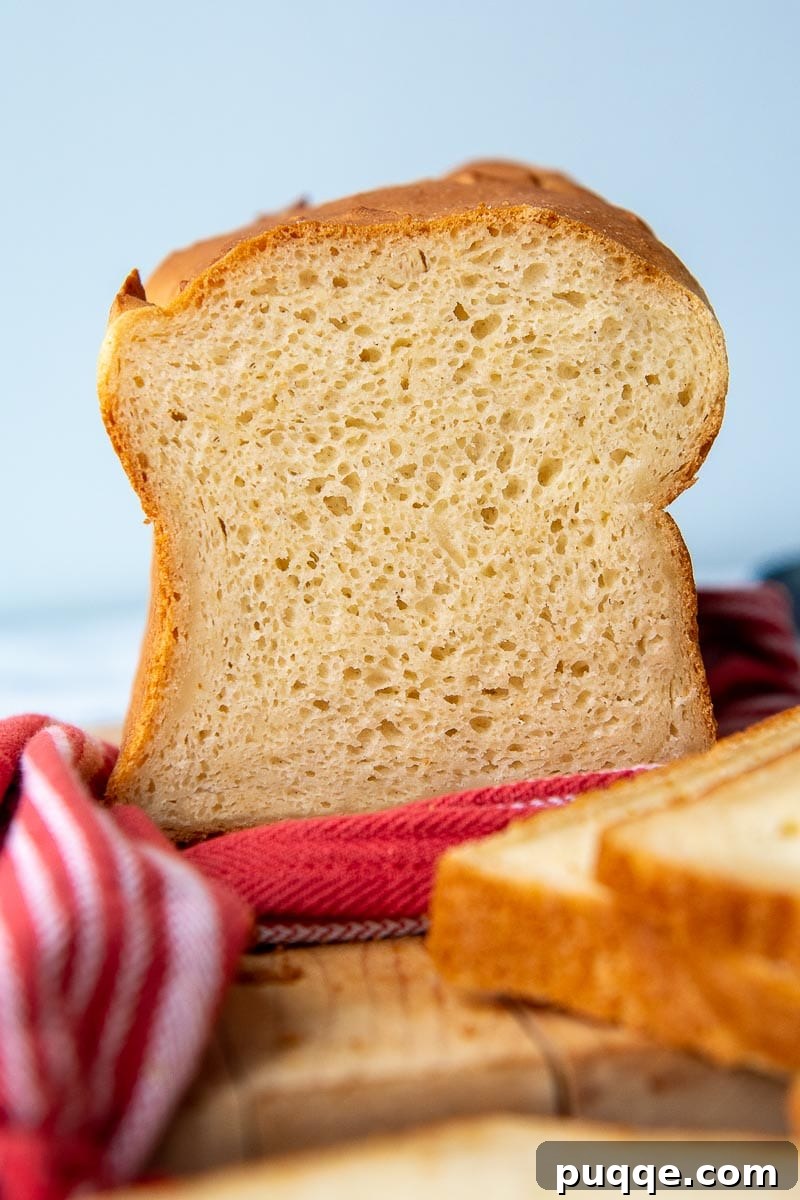
When it came to taste, Cup4Cup was the undisputed champion. There was absolutely nothing “gluten-free” about its flavor profile. It produced a bread that was exquisitely soft, squishy, and delicately sweet, mimicking the best qualities of traditional white bread. This is the blend that will truly make you forget you’re eating gluten-free!
King Arthur Measure-for-Measure still produced a good-tasting loaf with a favorable texture, but it carried a distinct, rustic flavor. It reminded me more of a hearty wheat bread than a classic white sandwich bread, which might be appealing for some but not for those seeking a “classic white” experience. Additionally, the King Arthur blend appeared to absorb moisture at a different rate, sometimes requiring slight adjustments to liquid content, as noted in various reader comments and my own observations.
Regrettably, the bread made with GF Pillsbury flour was simply inedible. It resulted in a dry, cardboard-like texture and taste that went straight into the trash. While Pillsbury GF flour might perform adequately in certain other recipes (like muffins or cookies where a softer crumb isn’t paramount), it unequivocally did not work well for this particular bread recipe.
If you have questions about using a different gluten-free flour blend not mentioned here, I strongly encourage you to review the comments section below. Many readers have generously shared their experiences with various brands, offering valuable insights and tips!
Perfecting Your Bake: How to Know When Gluten-Free Bread is Done
One of the most common pitfalls in gluten-free baking is prematurely removing the bread from the oven. It’s incredibly deceiving: gluten-free loaves often “look” perfectly golden and done on the outside well before they are fully cooked through internally. This is why I highly recommend using an instant-read thermometer to check the internal temperature when baking any gluten-free bread.
If you pull the bread too soon, the residual liquids won’t have had enough time to fully evaporate, resulting in a dense, gummy texture rather than the light, soft, and fluffy crumb we’re aiming for.
For this recipe, the internal temperature of your bread should reach a precise 205ºF (96ºC). A quick and accurate check with an instant-read thermometer will help the bread retain valuable heat while the temperature is being read. My personal favorite kitchen tool for this is a Thermoworks Thermapen, known for its efficiency and accuracy. I also use it to ensure my water is at the optimal 110°F (43°C) for yeast activation, which is another crucial step for a successful rise! Trust the thermometer, not just your eyes, for gluten-free baking success. 🙌
Important Serving and Storage Notes
Unlike many gluten-free breads that truly only taste good when toasted or grilled on a buttered griddle, this recipe is a delightful exception (another reason why it’s truly remarkable!). This bread is exceptionally soft and fluffy even at room temperature, making it perfect for sandwiches, toast, or simply enjoying plain.
However, a crucial note regarding frozen bread: if you’re pulling slices from the freezer to serve at room temperature, it is absolutely essential to thoroughly defrost the bread first. Serving it while still slightly chilled will unfortunately compromise its delicate texture, causing it to become more crumbly and less enjoyable. Allow it to come to full room temperature for the best experience.
Do I Need a Stand Mixer for This Recipe?
The short answer is both yes and no. While this gluten-free sandwich bread recipe can technically be made without a stand mixer, a stand mixer significantly simplifies the process and generally yields better, more consistent results. Gluten-free doughs, unlike traditional wheat-based doughs, don’t develop gluten, but they still benefit immensely from thorough mixing to properly hydrate starches and incorporate air.
Using a handheld mixer is an option, but due to the substantial amount of flour and the consistency of gluten-free dough, it will be much more taxing on both your handheld appliance and your arm strength. You’ll need to work harder to achieve the necessary smooth, somewhat pourable consistency.
If you’re not ready to invest in a stand mixer (though I am completely obsessed with mine for its versatility!), a gluten-free bread machine presents a fantastic and often more affordable alternative. Many modern bread machines have a dedicated gluten-free setting, which handles all the mixing, rising, and baking with incredible ease. This can be an excellent way to achieve perfectly baked gluten-free bread with minimal hands-on effort.
Save This Incredible Recipe to Your Pinterest Board!
Let’s be friends on Pinterest! I’m always sharing delicious recipes and baking tips!
Did you make this recipe? I absolutely love hearing from you and seeing your baking successes! Please leave a star rating and comment below the recipe card. Your feedback is incredibly valuable, helping other bakers find and enjoy these recipes, and I truly appreciate hearing from our community. You can always expect a response from me! -Melissa
Legit Squishy-Soft Gluten-Free Bread Recipe

Melissa Erdelac
14
10 mins
55 mins
Pin
Rate
Remove Ads
Ingredients
- 3 cups (438 g) gluten-free all-purpose flour, (Cup4Cup gluten-free flour highly recommended – see recipe notes for optional milk powder addition)
- 1 packet (2 ¼ tsp, 9 g) instant rapid rise yeast
- 1 tablespoon (11 g) psyllium husk powder (optional), helps with bread moisture & structure (what is psyllium husk?)
- 1 teaspoon baking powder
- 1 teaspoon salt
- 1 ½ cups (338 g) warm water (110°F/43°C)
- 2 large eggs, room temperature
- ¼ cup (85 g) honey
- ¼ cup (55 g) vegetable oil
Equipment
-
Stand Mixer
-
Cup4Cup Gluten-Free Flour
-
9×4 Loaf Pan
Instructions
-
Using a stand mixer with paddle attachment, mix together gluten-free flour, yeast, optional psyllium husk powder, baking powder, and salt on low speed until combined.3 cups (438 g) gluten-free all-purpose flour, 1 packet (2 ¼ tsp, 9 g) instant rapid rise yeast, 1 tablespoon (11 g) psyllium husk powder (optional), 1 teaspoon baking powder, 1 teaspoon salt
-
Add warm water, eggs, honey, and vegetable oil. Mix on low speed to let the dough come together, about 1 minute.1 ½ cups (338 g) warm water (110°F), 2 large eggs, ¼ cup (85 g) honey, ¼ cup (55 g) vegetable oil
-
Increase speed to medium and beat for 5 minutes, scraping down paddle and bowl halfway through. The batter will be stiff, but sticky.
-
Grease a 9X4 baking pan (recommended). Pour into the pan and smooth top evenly with a spatula. Spray a large piece of plastic wrap with nonstick cooking spray. Lay the plastic, greased side down, over the pan.
-
Set in a warm, draft-free place to rise until the bread reaches two-thirds to the top of the pan (do not let it go over this point because it rises more in the oven). This should take about 30 minutes. Meanwhile, preheat oven to 350°F (175°C).
-
Remove plastic and bake bread on middle rack for 40-50 minutes, tenting a piece of foil loosely over the bread halfway through. The internal temperature of the bread should read 205°F (96°C).
-
Allow the loaf to cool for 5 minutes in the pan and then remove to a cooling rack. Allow bread to cool completely, at least 2 hours, before slicing. For best results, serve the bread at room temperature, toasted, or grilled. Chilled, cold bread has an adverse effect on texture.
Notes
Adding Milk Powder
This is a new addition to the recipe, so it’s completely optional, but adds moisture to the bread. Recently Cup4Cup removed milk powder from their formulation, so now I remove 2 tablespoons GF flour and replace it with 2 tablespoons gluten-free certified milk powder. You can do this with any GF flour blend, it doesn’t have to be C4C.
Psyllium Husk Powder
I’ve made the bread multiples with and without the psyllium husk powder. It doesn’t affect the taste, but it does help maintain moisture, prevents the bread from becoming crumbly, and makes it softer.
Psyllium husk powder is very affordable to buy, lasts a long time, and greatly improves GF bread’s texture because it helps absorb moisture.
I recommend the psyllium listed in the ingredients because its lighter color doesn’t affect the bread. Some powders are darker, which will make GF baked goods a grayish, purple color.
How to Make in a Bread Machine
Although I have not personally tried making this recipe in a bread machine, several readers have written in and said they’ve had great results using one!
You will need a bread machine with a gluten-free setting. Add all the wet ingredients to the bottom of the bread baking pan. Then add the dry ingredients over that. Start the bread machine and set it to the “gluten-free” setting.
Freezing / Storing
Gluten-free bread does not have the shelf life of normal bread. Refrigerating will dry it out, and is not recommended. It may be wrapped tightly and left at room temperature, but will lose optimal taste and texture quickly.
For best results, slice and freeze the bread after it has completely cooled (at least 3 hours). Pull slices as needed from the freezer to defrost or toast from frozen.
Generally, GF bread requires toasting or a buttered griddle to taste good, but not with this recipe. Room temperature bread is exceptionally soft and fluffy.
However, please note, if pulling from the freezer and serving at room temp, thoroughly defrost the bread first. If it is chilled slightly it will become more crumbly.
Calories: 147kcal
,
Carbohydrates: 24g
,
Protein: 3g
,
Fat: 5g
,
Saturated Fat: 3g
,
Cholesterol: 23mg
,
Sodium: 177mg
,
Potassium: 41mg
,
Fiber: 3g
,
Sugar: 6g
,
Vitamin A: 34IU
,
Calcium: 34mg
,
Iron: 1mg
Did you make this recipe?
Please leave a star rating and review below. It helps others when searching for recipes and I LOVE feedback!