
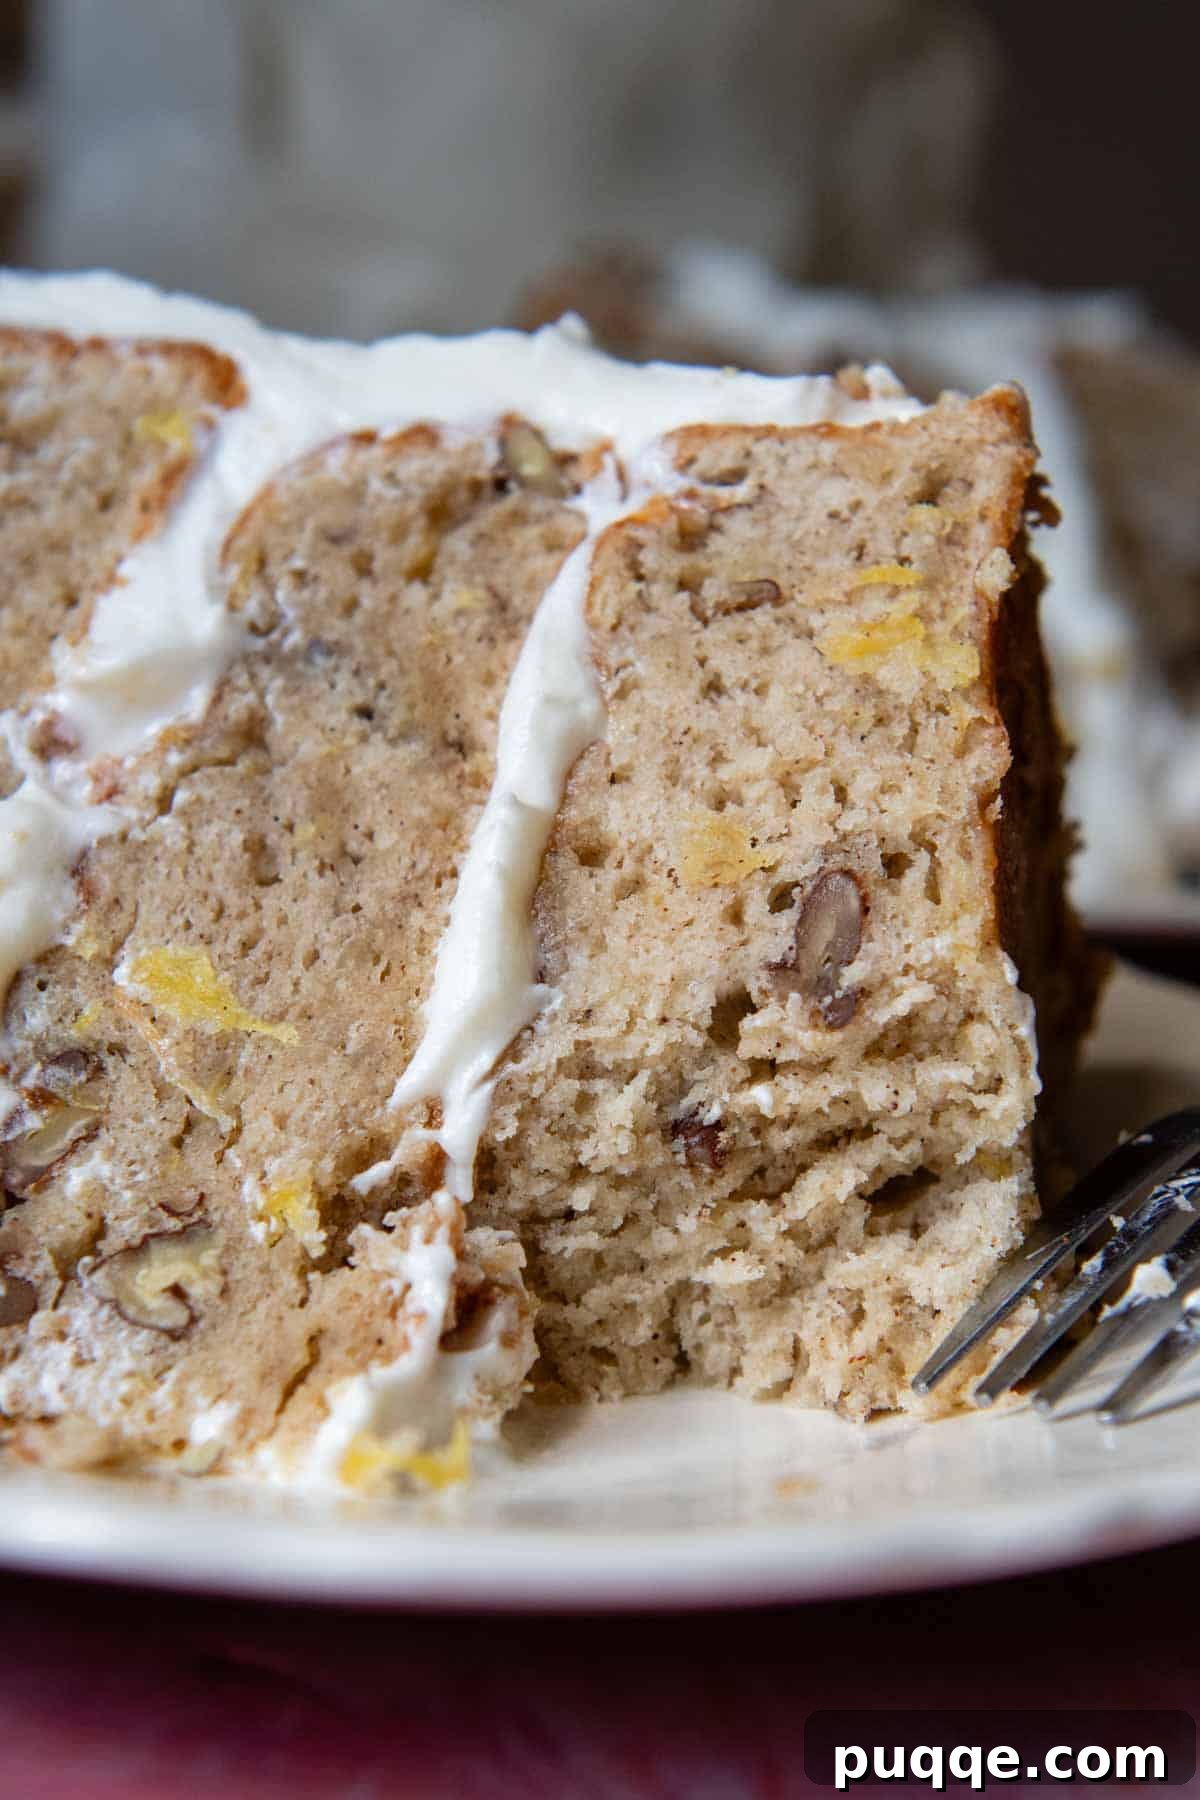
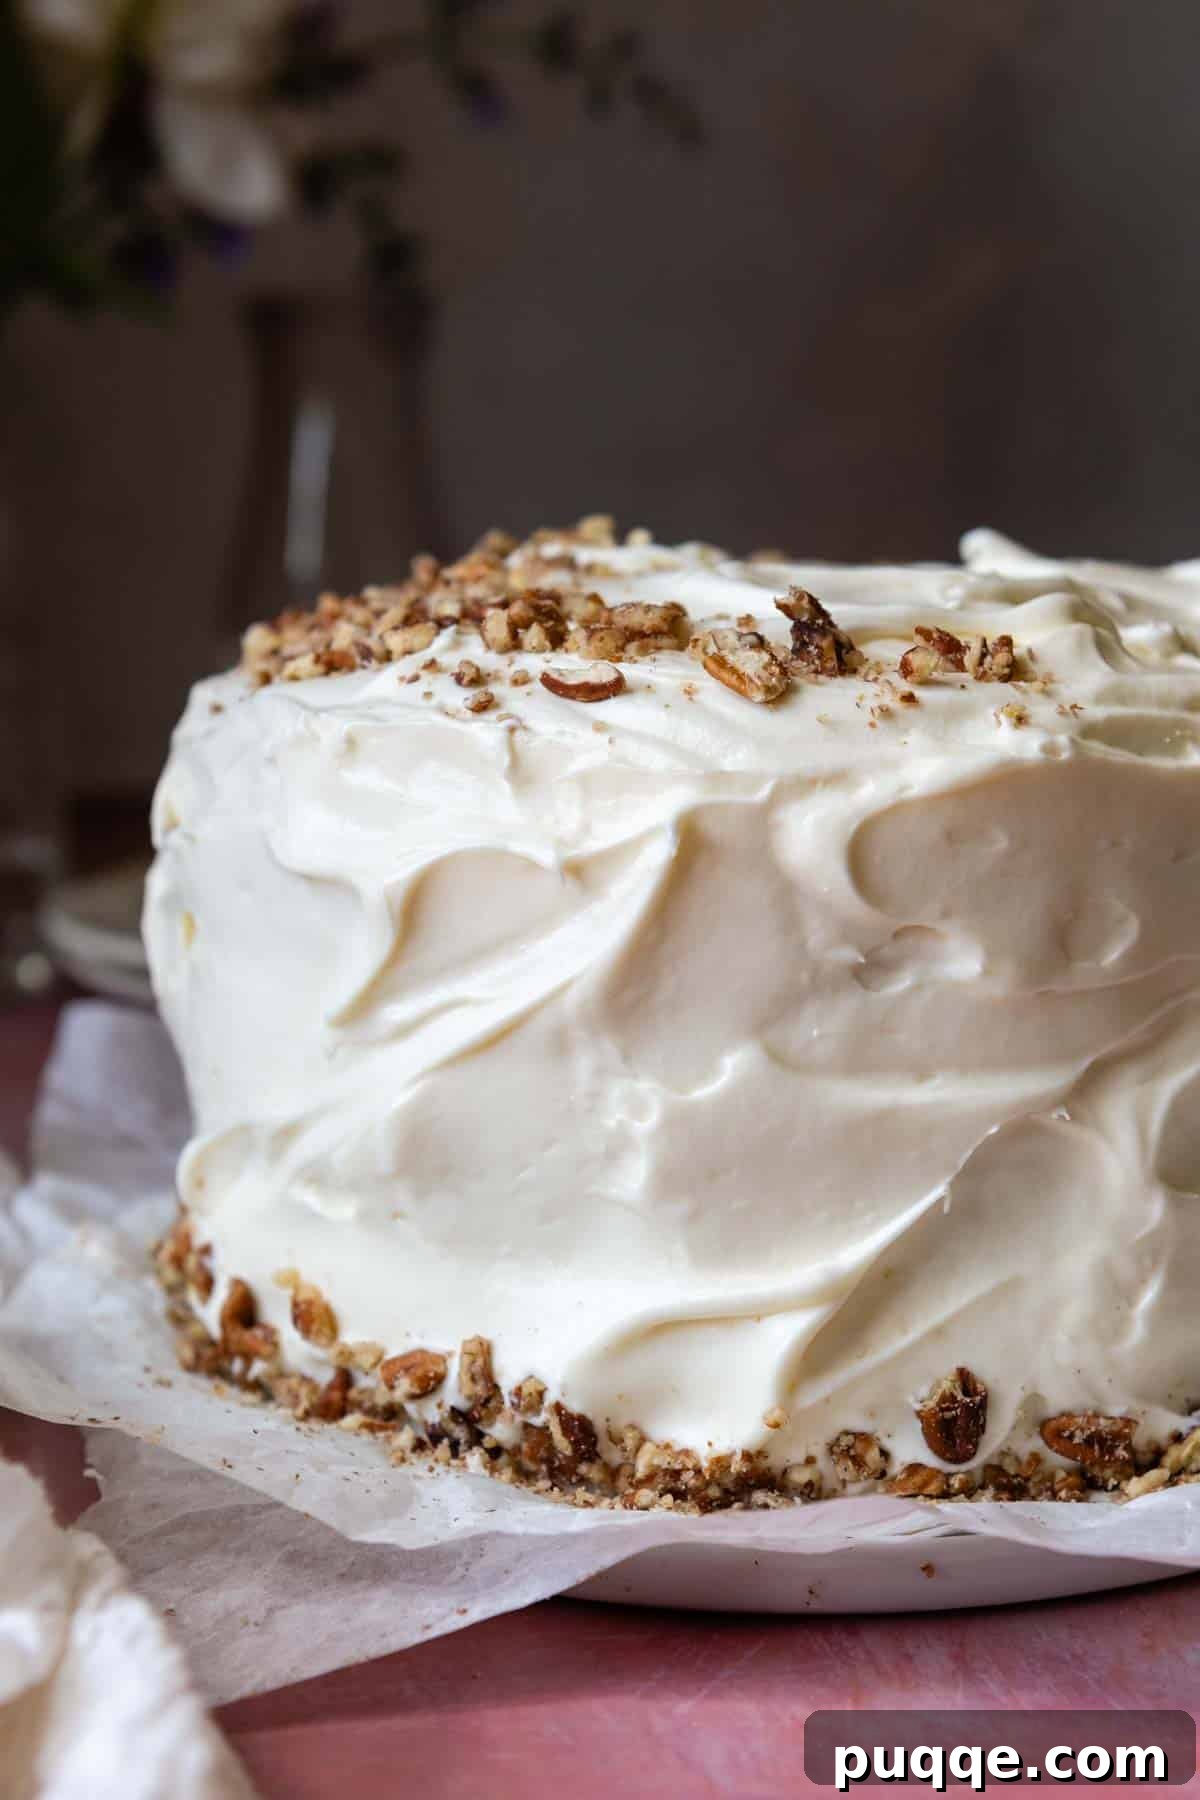
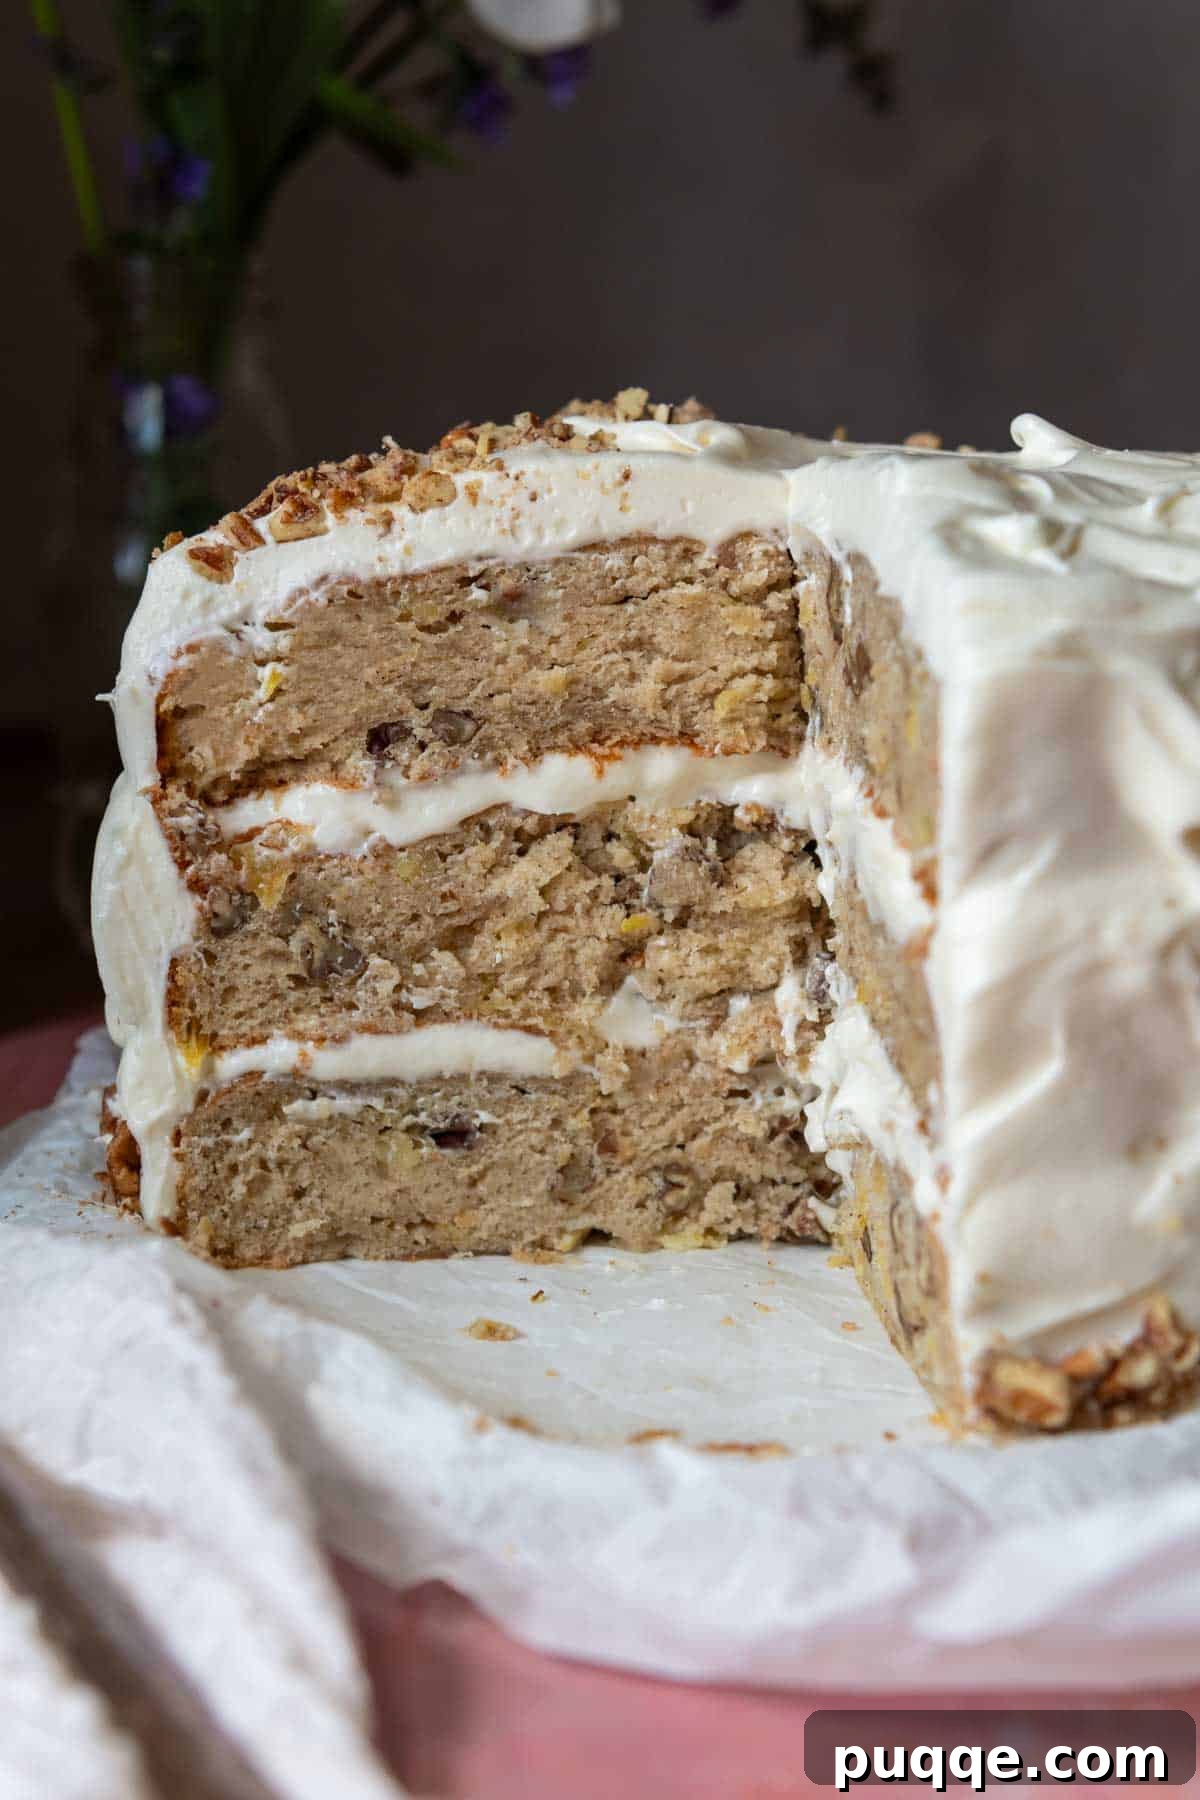
Craving a classic dessert with a delightful twist? Look no further than this incredibly moist and flavorful homemade gluten-free hummingbird cake. This beloved Southern specialty is reimagined to be completely gluten-free, delivering a crumb so tender and rich that no one will guess it’s a dietary modification. Infused with the natural sweetness of ripe bananas and the bright tang of crushed pineapple, along with the richness of oil, this layer cake promises an exceptionally soft texture. Crowned with a luxurious whipped cream cheese frosting, each bite offers a symphony of tropical flavors and comforting spices, making it a truly unforgettable dessert experience for any occasion.
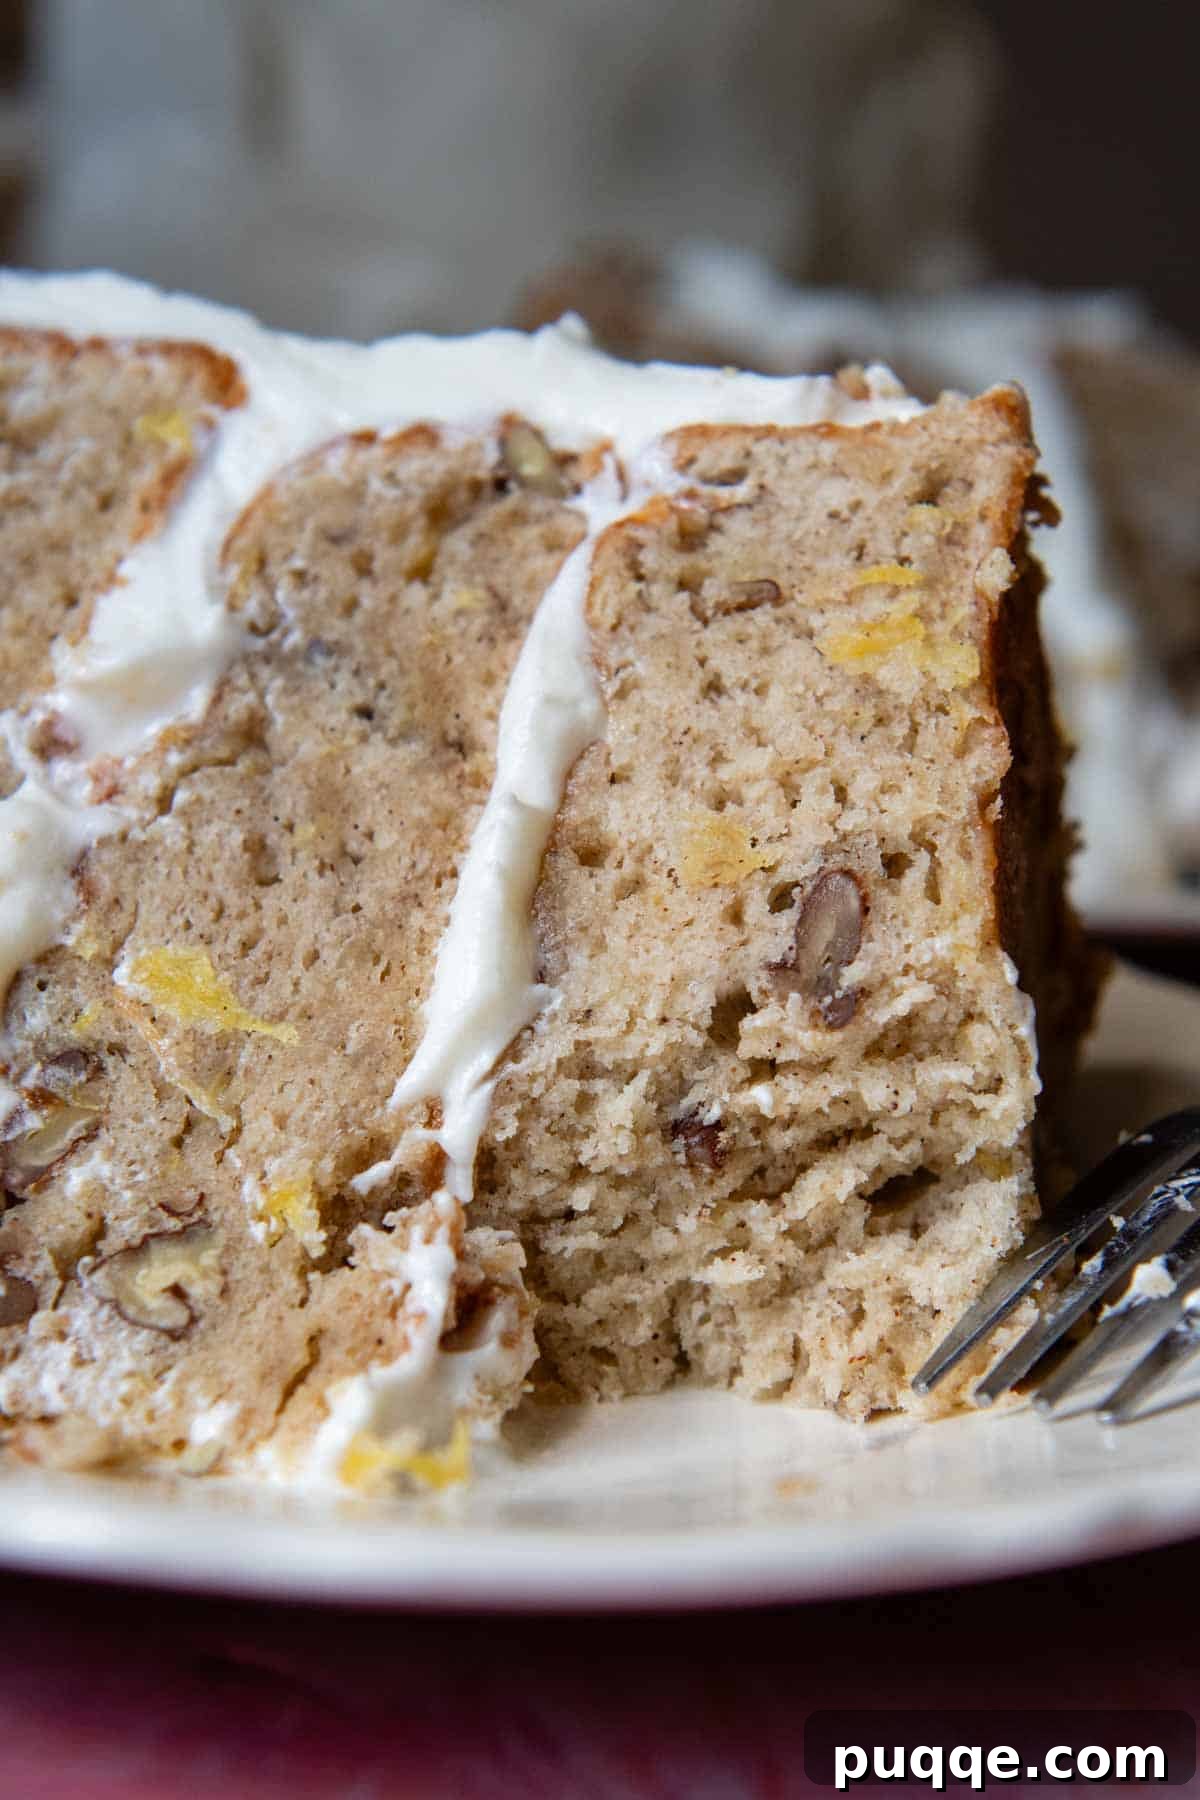
Crafting the Perfect Gluten-Free Hummingbird Cake: A Journey of Delicious Discovery
Embarking on the journey of gluten-free baking can sometimes feel like a culinary expedition filled with trials and triumphs. There have been moments in my own kitchen where experimental batches left me frustrated, contemplating the resilience of cake pans after one too many collapsed layers. But with persistence, the eventual taste of success, that perfectly tender crumb, makes every effort worthwhile.
Developing this particular homemade gluten-free hummingbird cake, complete with its luscious cream cheese frosting, was a less dramatic affair, primarily because I had already navigated the complexities of gluten-free fruit cakes with my tried-and-true fool-proof GF banana cake recipe. That previous endeavor, however, was indeed a saga of its own, wrestling with the unique challenges bananas present when combined with gluten-free flours. Achieving a moist yet fluffy crumb with bananas in a gluten-free context felt like cracking a secret code.
Once that hurdle was overcome, my culinary curiosity naturally led me to explore new possibilities. The vision of a classic Southern hummingbird cake, rich with aromatic spices, juicy crushed pineapple, crunchy pecans, and a cloud-like cream cheese frosting, began to take shape. To ensure the signature ultra-moist texture without succumbing to density or a gummy consistency, I integrated techniques perfected during the creation of my easy gluten-free red velvet layer cake, specifically its generous use of oil. However, a traditional hummingbird cake inherently boasts more moisture from the mashed bananas and pineapple, necessitating a delicate balance in the fat profile.
This is where the magic of baking comes into play: finding that perfect equilibrium. Instead of solely relying on oil, a thoughtful combination of oil and softened butter provides the necessary fat while preventing the cake from becoming too heavy. I also intuited that adding milk or buttermilk might introduce too much liquid for the gluten-free flour to absorb effectively, yet I still desired a subtle tanginess to complement the sweet fruit. My solution came from revisiting another successful creation in my gluten-free archives: an old-fashioned gluten-free pound cake, renowned for its signature moist crumb. Rather than using cream cheese to build out the fat profile in the cake batter itself, I opted for sour cream. Its unique viscosity, somewhere between liquid oil and solid butter, contributes a pleasant tang and further enhances the cake’s tender texture without adding excessive moisture.
Now that we’ve delved into the intricacies of its creation, let’s move on to the truly enjoyable part: actually baking and assembling this delightful, celebratory layer cake, adorned with generous swirls of frosting and a delightful sprinkle of salty pecans. Get ready to impress!
Essential Ingredients for Your Flawless Gluten-Free Hummingbird Cake
The success of this exceptional gluten-free hummingbird cake hinges on a few key ingredients and how they interact. Understanding their roles is vital for achieving the perfect texture and flavor.
- Fats: Oil, Butter, and Sour Cream Synergy
- Oil: For the oil component, choose a neutral-flavored variety such as canola, vegetable, or grapeseed oil. These oils contribute significant moisture without imparting their own strong flavor, allowing the cake’s natural fruit and spice notes to shine. If you opt for melted coconut oil, be mindful that all other ingredients, especially the dairy and eggs, should be at room temperature to prevent the coconut oil from resolidifying and creating lumps in the batter.
- Butter: Unsalted butter adds a layer of rich, classic flavor that oil alone cannot provide. Ensure it is softened to room temperature for proper creaming with the sugars. For those with dairy sensitivities, a high-quality vegan butter substitute, ideally in stick form and softened, can be used effectively.
- Sour Cream: This ingredient is a secret weapon for tender, moist cakes. Its acidity helps activate the baking soda, contributing to a lighter crumb, while its fat content adds richness and tang. Plain full-fat yogurt can be used as a substitute for sour cream, or you can opt for a dairy-free sour cream alternative if needed.
- Sugars: Granulated and Light Brown Sugar for Depth
- A combination of granulated sugar and light brown sugar is used to achieve the ideal balance of sweetness, structure, and moisture. Granulated sugar provides foundational sweetness and structure, while light brown sugar introduces subtle caramel notes and enhances the cake’s moistness due to its molasses content.
- Gluten-Free Flour Blend: The Foundation of a Perfect Crumb
- For gluten-free baking, especially when aiming for delicate cakes, the choice of flour blend is paramount. I highly recommend and consistently use Cup4Cup gluten-free flour mixture. Its unique composition, particularly the inclusion of cornstarch, is crucial for developing a light, fluffy crumb and providing enough structure to thicken the batter appropriately. Trust the process and resist the temptation to add extra liquid, as this blend absorbs moisture differently than traditional wheat flour.
- Bananas: The Key to Moisture and Natural Sweetness
- The ripeness and precise measurement of bananas are critical. Use very ripe bananas (with plenty of brown spots) for optimal sweetness and moisture. It is crucial to measure the mashed banana precisely, either by volume (in cups) or by weight (in grams), as indicated in the recipe. Too much banana can lead to undesirable ribbons of dense, gummy texture, while too little can result in a dry cake.
- Crushed Pineapple: Tropical Tang and Juicy Goodness
- Seek out a small 8-ounce can of crushed pineapple, such as the Dole brand often found in grocery stores. When incorporating it into the batter, be sure to use the fruit *with its juice* (undrained). The natural acidity and moisture from the pineapple are essential for the cake’s signature tropical flavor and moist texture.
- Spices: A Warm and Inviting Aroma
- Given the pronounced flavors of banana and pineapple, I lean heavily on cinnamon to ensure its warm, sweet notes shine through. However, cinnamon alone didn’t quite achieve the full depth I was looking for. The addition of allspice perfectly rounds out the spiced cake flavor, offering a fragrant nod to Jamaica, widely considered the birthplace of the hummingbird cake.
Step-by-Step Guide to Baking Your Gluten-Free Hummingbird Cake
(The following outlines the key steps with helpful tips. For precise ingredient quantities and a detailed recipe, please refer to the complete recipe section below.)
Cream the Fats and Sugars
This initial step is the fundamental building block for any from-scratch cake, including this gluten-free version. In a spacious mixing bowl, combine the oil, softened butter, sour cream, granulated sugar, and light brown sugar. Beat these ingredients together until the mixture becomes exceptionally smooth, light, and creamy, typically taking about two minutes. This aeration process is vital for a tender crumb.
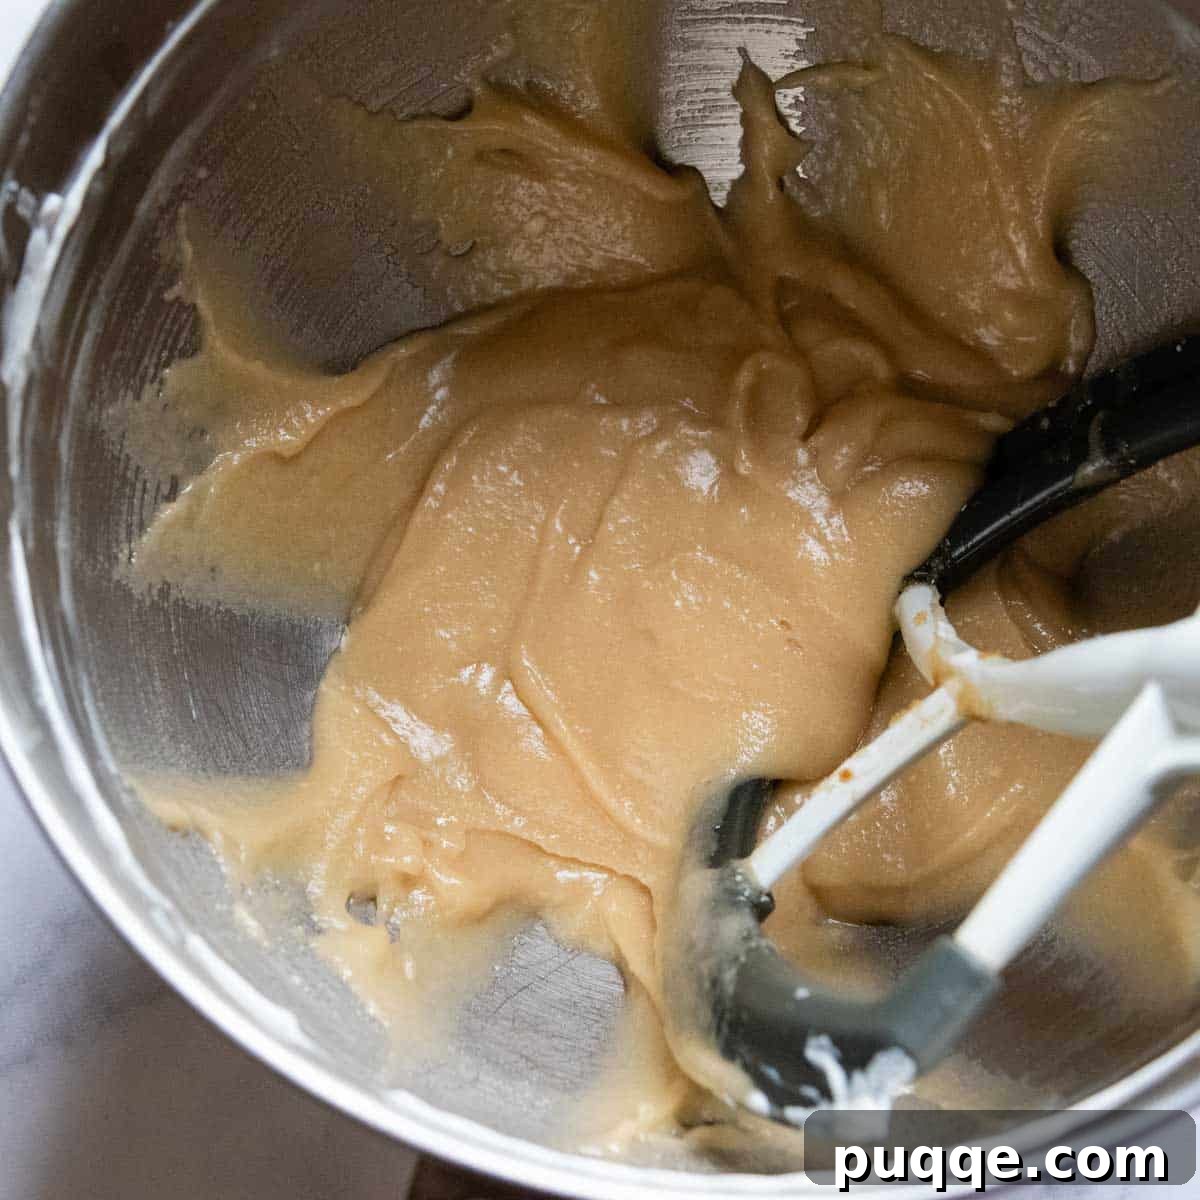
Incorporate Eggs and Fruit
Next, introduce the large eggs into the creamy mixture. Add them one at a time, ensuring you beat thoroughly after each addition until fully incorporated. This gradual addition helps to create a stable emulsion. Finish this stage by mixing in the mashed banana, the undrained crushed pineapple, and the vanilla extract. Mix gently until just combined, ensuring the fruit is evenly distributed throughout the batter.
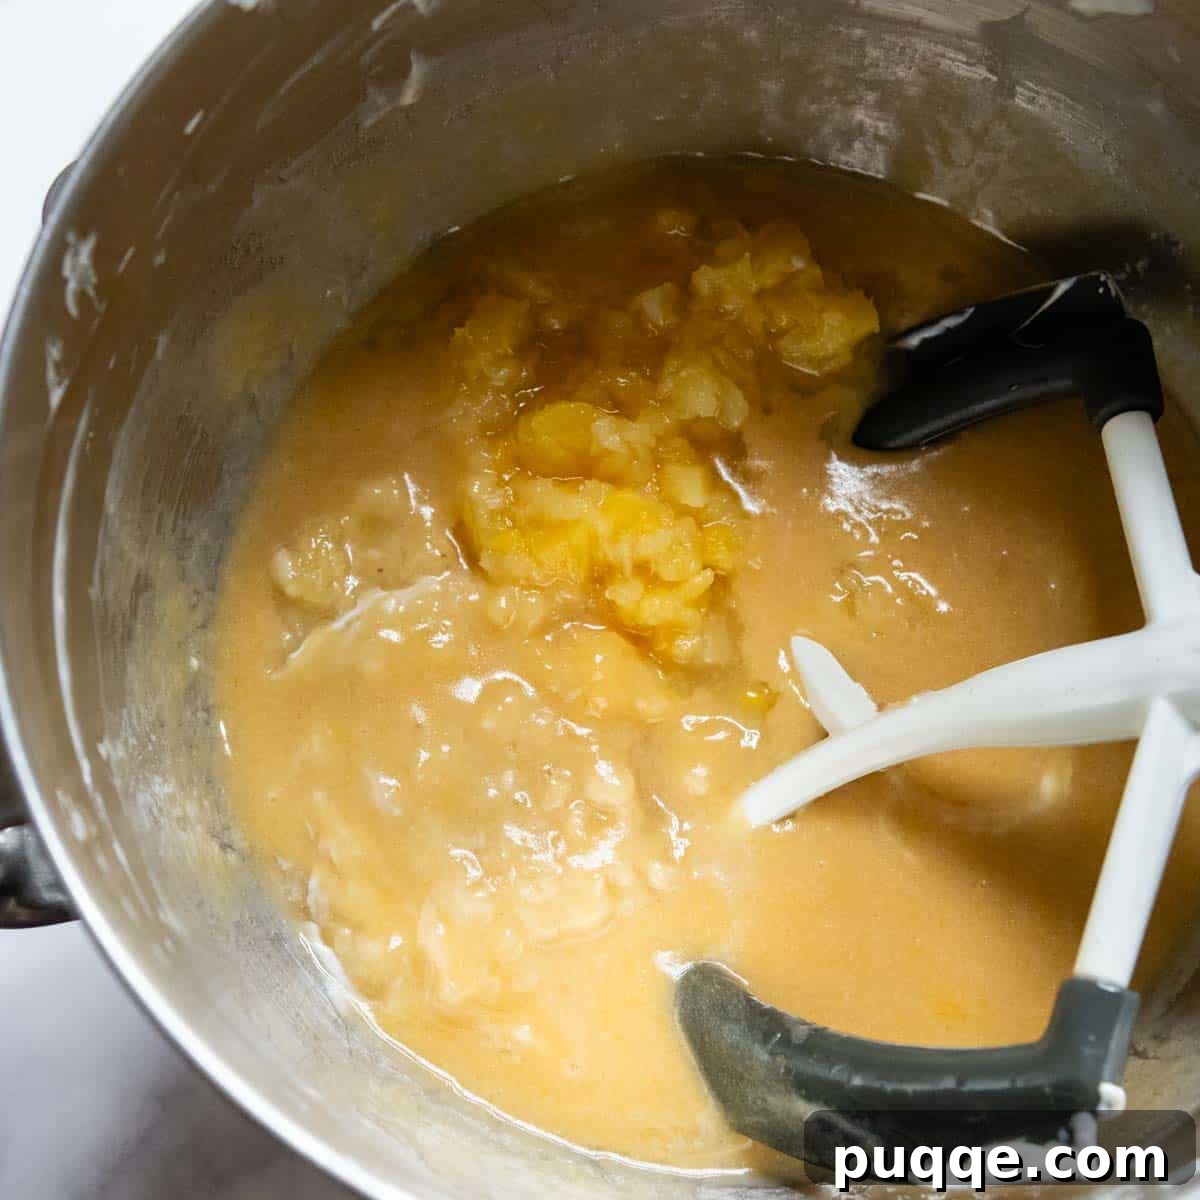
Finish with Dry Ingredients and Nuts
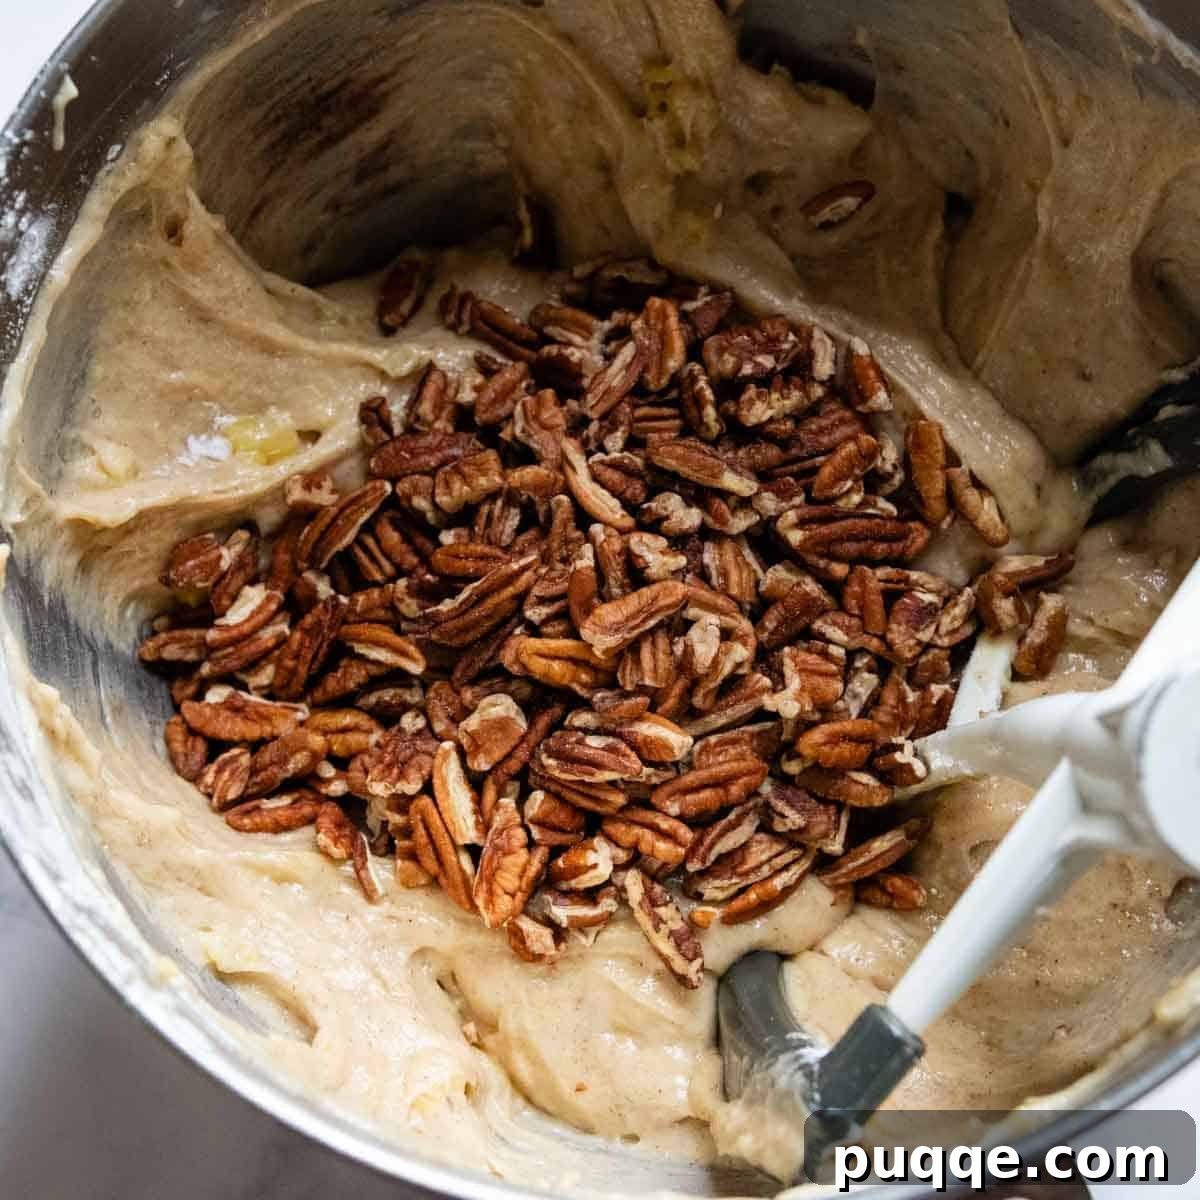
For the final stage of batter preparation, add the pre-measured gluten-free flour blend, baking powder, baking soda, ground cinnamon, allspice, and salt to the wet ingredients. Mix on low speed initially to just combine the dry ingredients, then increase the speed to medium-low and beat for exactly one minute. At this point, the batter will appear quite thick, particularly if you are using a cornstarch-rich GF flour like Cup4Cup. Remember our earlier tip: resist the urge to add more liquid! Finally, gently fold in the chopped pecans. While chopped pecans are traditional for a classic hummingbird cake, feel free to experiment with chopped almonds, walnuts, or a delightful combination of nuts.
Divide, Rest, and Bake for Perfection
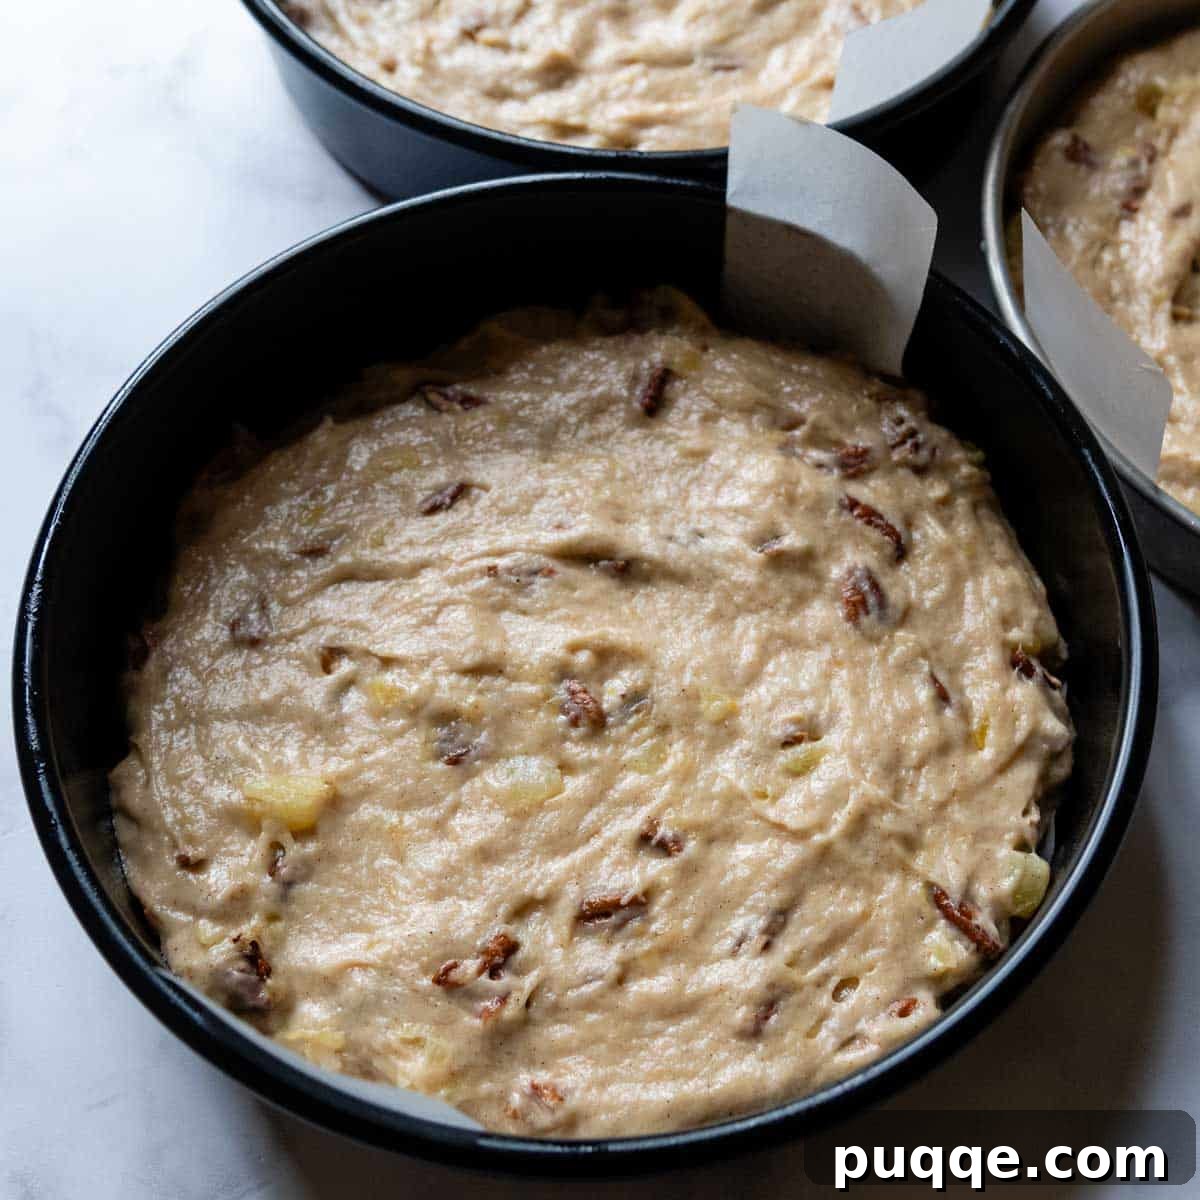
Evenly divide the thick cake batter among three prepared 8-inch cake pans. If three 8-inch pans are not available, this recipe has also been successfully tested using two 9-inch cake pans, with specific notes provided below for optimal results. After dividing the batter, allow it to rest in the pans for 15 minutes before placing them in the oven. This crucial resting period permits the starches in the gluten-free flour to fully absorb the liquids, which in turn contributes to a significantly fluffier and more tender cake crumb.
Decadent Cream Cheese Frosting & Expert Tips
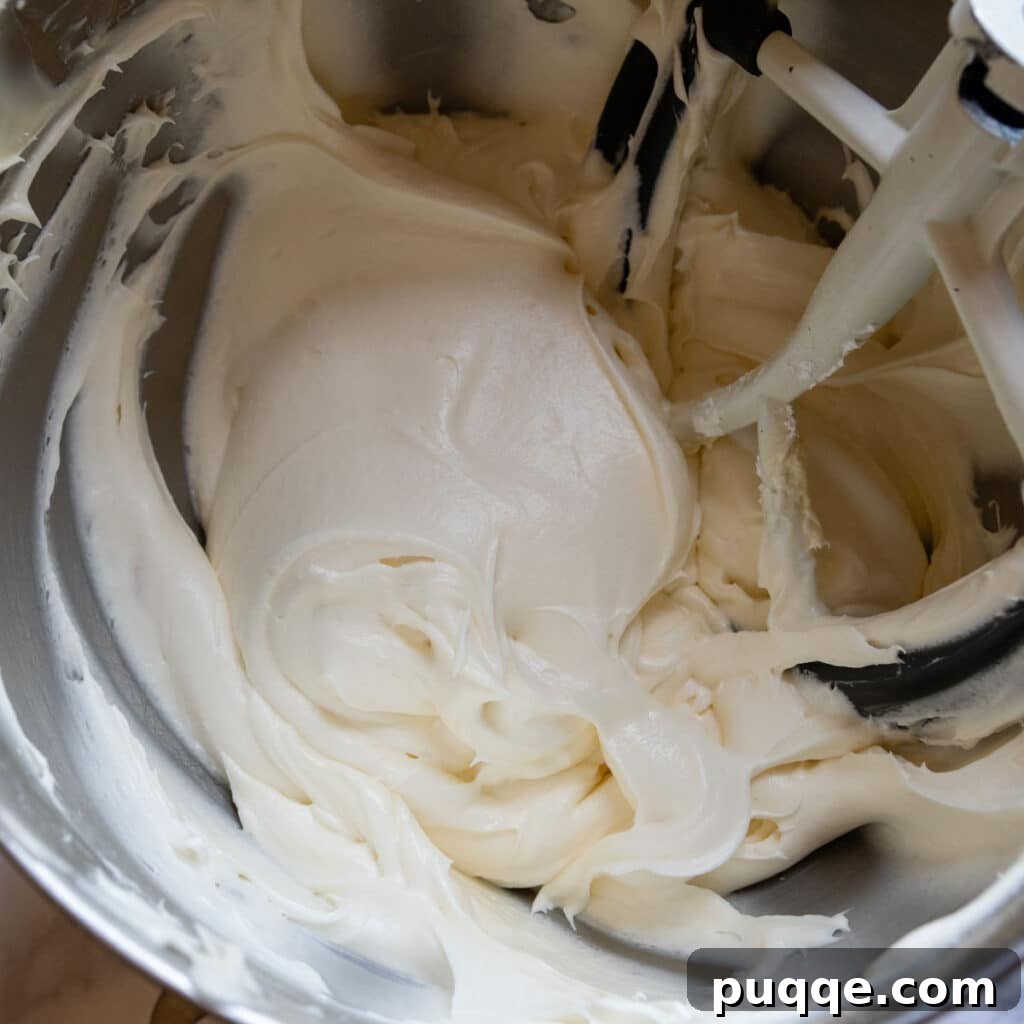
While I adore the rich flavor of traditional cream cheese frosting, I often find its inherent heaviness can overwhelm high-moisture cakes, like this tropical hummingbird layer cake. To achieve a more harmonious balance, I prefer a lighter, whipped version. Instead of relying solely on cream cheese, I incorporate softened butter for structure and flavor, and a touch of heavy cream to significantly lighten the texture, transforming it into a pillowy cloud rather than a dense blanket. Another excellent option for a unique flavor profile would be to adapt the browned butter cream cheese frosting from my oatmeal carrot cake recipe – truly uber yum!
The secret to this lighter frosting lies in the whipping technique. Don’t simply mix the heavy cream in; instead, beat the frosting vigorously, much as you would for homemade whipped cream. Continue beating on high speed for at least three minutes, allowing ample time to incorporate air and develop that incredibly light and fluffy texture. However, a crucial word of caution: be careful not to thin the frosting with too much heavy cream. An overly thin frosting will struggle to support the cake layers, potentially leading to sliding layers – and no one enjoys a collapsed cake!
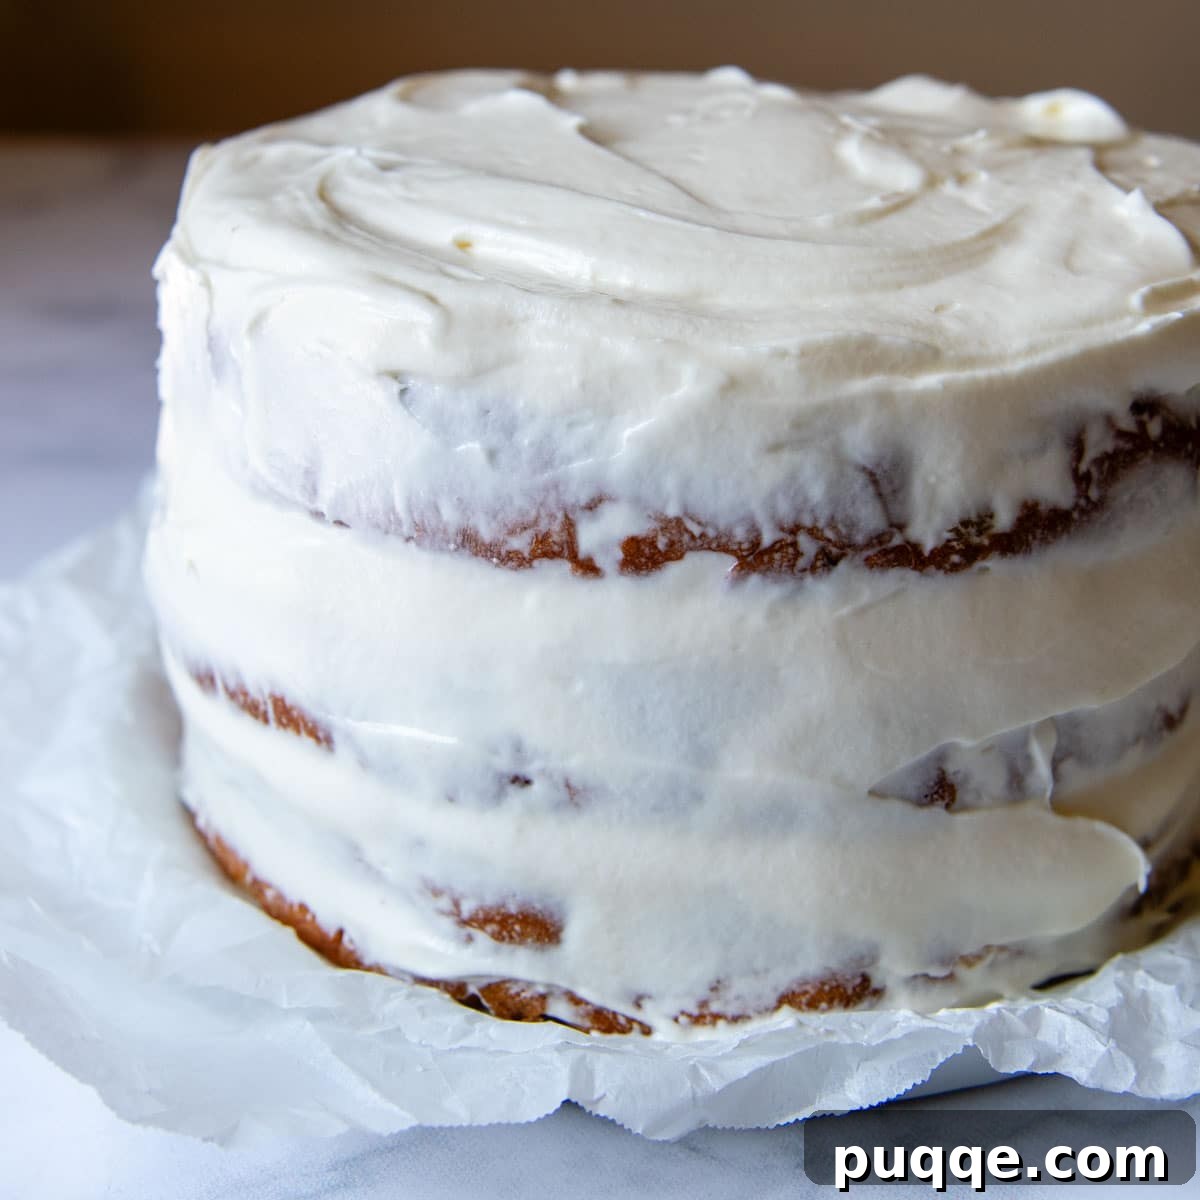
To ensure a flawless and stable presentation, I highly recommend employing the “crumb coat” technique. What is this fancy term, you ask? A crumb coat involves spreading a very thin layer of frosting around the entire outside of the cooled cake (top and sides). This initial layer traps any loose crumbs, preventing them from mixing into your final, pristine frosting. Once applied, refrigerate the cake for 15-20 minutes until this thin layer is firm. After the crumb coat has chilled and solidified, you can confidently apply the remaining frosting, smothering the cake in its decadent glory. You’ll find that applying the final coat becomes much easier and yields a beautifully smooth, professional-looking finish.
Choosing Your Cake Pans: 8-inch vs. 9-inch Options
During the recipe development process, I initially tested this gluten-free hummingbird cake using two 9-inch cake pans, as these are commonly found in most home bakers’ kitchens. If you fall into this camp and do not possess a set of three 8-inch cake pans, rest assured that you can still achieve excellent results with your existing equipment. However, it’s essential to be aware of a few adjustments to ensure your success.
When using two 9-inch round pans, your cake layers will naturally be thicker. Consequently, the baking time will need to be extended by approximately 5 to 7 minutes compared to the three 8-inch pans. It is paramount to check for doneness thoroughly. I highly recommend using a long cake tester (my favorite, especially for gluten-free cakes, is the Noric Ware model) to ensure the center of the thicker layers is fully baked. The middle of the cake should also spring back gently when lightly touched, indicating it’s done.
I found that dividing the batter into three 8-inch pans yielded layers that rose more evenly and consistently. These thinner layers also bake up with a slightly less dramatic rise, which reduces the risk of them sinking or collapsing during the cooling process – a common concern with very moist cakes. Regardless of the pan size you choose, the taste of this gluten-free hummingbird cake remains absolutely exquisite. So, prioritize what is most convenient and accessible for you in your kitchen!
Save This Delicious Recipe to Your Pinterest Board!
Let’s connect on Pinterest! I’m always sharing fantastic recipes you won’t want to miss!
Did you delight in this recipe? Your feedback means the world to me! Please consider leaving a star rating and sharing your comments below. Your reviews help fellow bakers discover and enjoy these recipes, and I truly value hearing from our community. I always look forward to responding! -Melissa
Moist Gluten-Free Hummingbird Cake with Oil

Melissa Erdelac
12 servings
10 mins
28 mins
53 mins
This homemade gluten-free hummingbird cake offers an exceptionally moist crumb, thanks to the addition of oil, crushed pineapple, and ripe banana. Topped with layers of whipped cream cheese frosting, this classic Southern layer cake is so delicious, your guests won’t believe it’s gluten-free!
Pin Recipe
Rate This Recipe
Ingredients
Gluten-Free Hummingbird Cake
- 1 cup (200 g) granulated sugar
- ½ cup (117 g) packed light brown sugar
- ½ cup (109 g) oil, any preferred neutral flavor like canola or vegetable
- ¼ cup (61 g) sour cream, at room temperature (or plain full-fat yogurt)
- ¼ cup (57 g) unsalted butter, softened (or vegan butter sticks)
- 3 large eggs, at room temperature
- ¾ cup (196 g) mashed banana, about 2 medium very ripe bananas
- 8 ounce crushed pineapple, undrained (use the entire can with juice)
- 1 tablespoon vanilla extract
- 3 cup (438 g) gluten-free all-purpose flour blend (recommended: Cup4Cup)
- 1 ½ teaspoon baking powder
- ½ teaspoon baking soda
- 1 ½ teaspoon ground cinnamon
- ½ teaspoon allspice
- ½ teaspoon salt
- 1 ½ cup (188 g) chopped pecans (plus ¼ cup additional for decorating, optional)
Whipped Cream Cheese Frosting
- 12 ounces (336 g) cream cheese, cold
- ¾ cup (170 g) unsalted butter, softened
- 1 ½ teaspoon vanilla extract
- ¼ teaspoon salt
- 4 ½ cups (540 g) powdered sugar, sifted (reserve ½ cup if needed for consistency)
- 2 tablespoons heavy cream
Equipment
- Three 8-inch round cake pans (or two 9-inch pans, see notes below)
- Stand Mixer or Handheld Electric Mixer
- Cup4Cup Gluten-Free Flour Blend (recommended)
- Offset Spatula
- Wire Cooling Rack
- Long Cake Tester (for checking doneness of thicker cakes)
Instructions
For the Gluten-Free Hummingbird Cake Layers
-
Preheat your oven to 350°F (175°C). Lightly grease and flour (with gluten-free flour) three 8-inch round cake pans. If using two 9-inch pans, please see the notes section below for adjustments. Set the prepared pans aside.
In a large mixing bowl, combine the granulated sugar, light brown sugar, oil, sour cream, and softened unsalted butter. Beat with an electric mixer on medium speed for about 2 minutes, until the mixture is light, creamy, and well combined.
-
Add the large eggs to the wet mixture, one at a time, beating well after each addition until fully incorporated. Once all eggs are added, mix in the mashed banana, the undrained crushed pineapple, and the vanilla extract. Beat on low speed until just combined.
-
In a separate bowl, whisk together the gluten-free all-purpose flour blend, baking powder, baking soda, ground cinnamon, allspice, and salt. Gradually add the dry ingredients to the wet ingredients in the mixing bowl. Mix on low speed until just combined. Increase the speed to medium-low and beat for exactly one minute. The batter will be relatively thick, especially if using a blend like Cup4Cup. Resist the urge to add more liquid!
Gently fold in the chopped pecans by hand until evenly distributed.
-
Evenly divide the cake batter among the three prepared cake pans. Use an offset spatula to gently spread the batter to the edges, ensuring a level surface.
Allow the batter to rest in the pans for 15 minutes before baking. This resting period is crucial for the gluten-free starches to fully absorb the liquids, which results in a noticeably fluffier and more tender crumb.
-
Bake for 28-32 minutes, or until the center of the cakes springs back when lightly touched and a wooden skewer or toothpick inserted into the center comes out clean. With gluten-free cakes, it is often best to err on the side of slightly over-baking rather than under-baking to ensure the moisture is fully absorbed and the cake layers do not sink after cooling.
-
Once baked, allow the cakes to cool in their pans for 5 minutes before carefully inverting them onto a wire rack. Let them cool completely to room temperature before attempting to frost them. Frosting warm cakes will cause the frosting to melt and slide off.
For the Whipped Cream Cheese Frosting and Assembly
-
In a large mixing bowl, combine the cold cream cheese, softened unsalted butter, vanilla extract, and salt. Beat on medium speed until smoothly combined and creamy, scraping down the sides of the bowl as needed.
-
Gradually add 4 cups of the sifted powdered sugar (reserving the remaining ½ cup if needed later) and the heavy cream to the cream cheese mixture. Beat on low speed until the powdered sugar is mostly incorporated, then increase the speed to high. Beat for 3 full minutes until the frosting is very light, airy, and fluffy, almost like whipped cream. If desired, you can add a splash more heavy cream to achieve a thinner consistency, or more powdered sugar to make it stiffer.
-
To assemble the cake, place one completely cooled cake layer on your desired serving platter. Spread a generous amount of the whipped cream cheese frosting evenly over the top. Carefully place the second cake layer on top, followed by another generous layer of frosting. Finally, place the third and final cake layer on top.
Spread a thin “crumb coat” layer of the remaining frosting around the sides and top of the cake. This traps any loose crumbs. Refrigerate the cake for 15-20 minutes to allow the crumb coat to set. Once firm, apply the remaining frosting over the top and sides of the cake for a smooth, finished look. If desired, decorate the top and sides with the additional chopped pecans.
-
Since the cake features cream cheese frosting, any leftovers should be stored in the refrigerator. For best results, press a piece of plastic wrap directly against any cut edges to prevent drying. The cake is best enjoyed within 24-48 hours of making, as the crumb will tend to dry out over longer refrigeration periods.
Notes
Using 9-inch Cake Pans
If you do not have three 8-inch cake pans, this recipe can successfully be baked using two 9-inch cake pans. The resulting two layers will be thicker, requiring a slightly longer baking time—approximately 35 minutes or more. Be sure to use a long cake tester to ensure they are baked through, and the center should spring back when lightly touched. Note that these thicker layers may rise more significantly during baking and might be more prone to a slight dip in the center after cooling. Additionally, with only two layers, you may have some cream cheese frosting leftover.
Storing, Freezing, and Make-Ahead Tips
Storage: Due to the cream cheese frosting, any leftover cake must be stored in the refrigerator. To maintain moisture, gently press a piece of plastic wrap directly against any cut surfaces. The cake is best consumed within 2 days; however, the crumb is freshest within 24 hours.
Serving Temperature: While stored chilled, the cake crumb achieves its optimal tenderness and flavor at room temperature. For the best eating experience, remove the cake from the refrigerator and allow it to sit out for up to 3 hours before serving.
Make-Ahead & Freezing: This cake is an excellent candidate for making ahead. You can frost the entire cake and then freeze it until solid. Once frozen, wrap the cake securely in several layers of plastic wrap, followed by a layer of aluminum foil, to protect it from freezer burn. Thaw in the refrigerator overnight before bringing to room temperature to serve.
Alternatively, you can bake the cake layers ahead of time. Once completely cooled, wrap each layer securely in plastic wrap and then foil, and freeze them. When ready to assemble, thaw the layers at room temperature before proceeding with the frosting steps.
Nutrition Information
(Per serving, approximate)
- Calories: 501 kcal
- Carbohydrates: 65 g
- Protein: 8 g
- Fat: 25 g
- Saturated Fat: 11 g
- Polyunsaturated Fat: 3 g
- Monounsaturated Fat: 9 g
- Trans Fat: 0.2 g
- Cholesterol: 93 mg
- Sodium: 369 mg
- Potassium: 254 mg
- Fiber: 3 g
- Sugar: 41 g
- Vitamin A: 681 IU
- Vitamin C: 1 mg
- Calcium: 140 mg
- Iron: 2 mg
Did you make this recipe?
Please leave a star rating and review below. Your feedback helps others find great recipes and I LOVE hearing from you!