
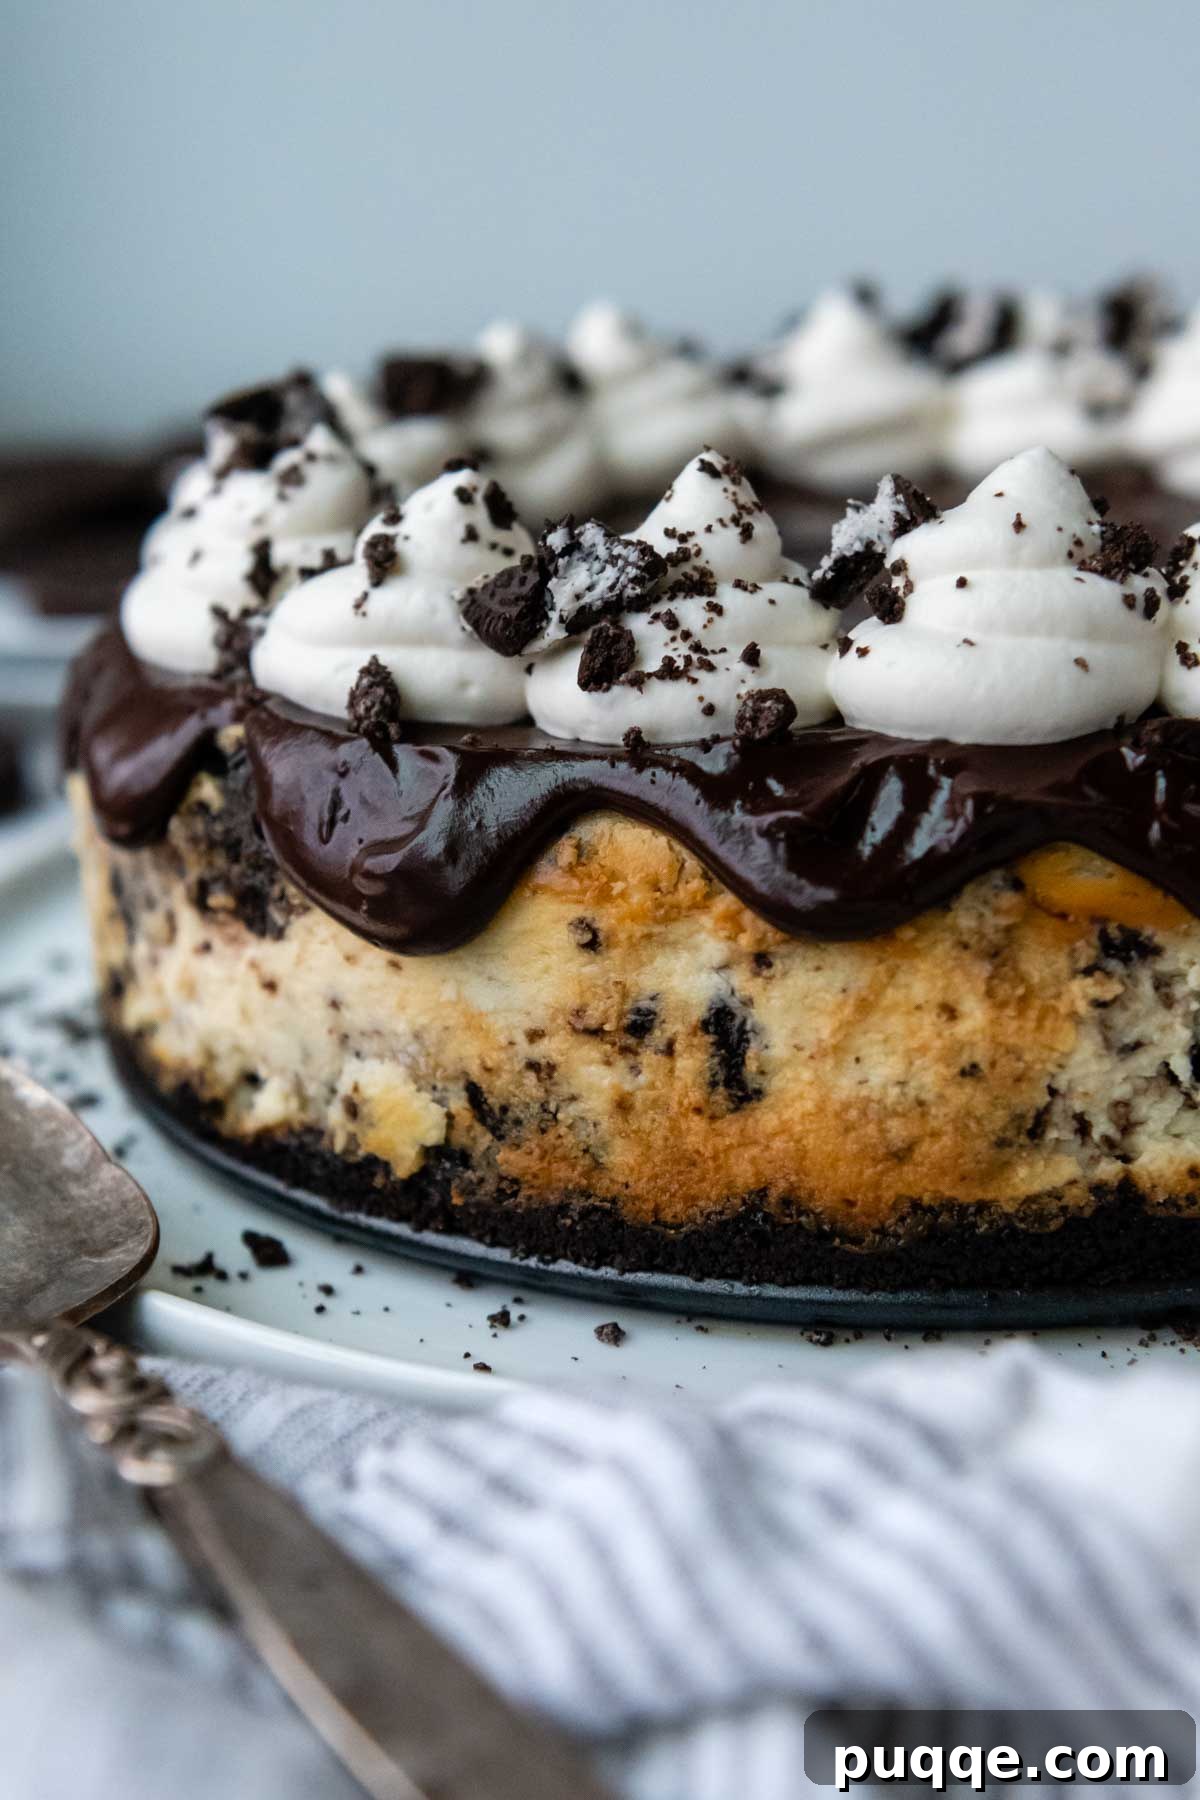
Prepare yourself for an extraordinary dessert experience with the ultimate Gluten-Free Oreo Cheesecake. This recipe delivers an ultra-thick, irresistibly creamy cheesecake featuring a luscious cookies and cream filling, crowned with a rich chocolate ganache, and adorned with delicate clouds of freshly whipped cream. It’s not just a dessert; it’s a celebration for your taste buds, meticulously crafted to be entirely gluten-free without compromising on flavor or texture. Whether you’re a seasoned baker or new to the world of gluten-free treats, this homemade gluten-free Oreo cheesecake is designed to impress, making it the perfect showstopper for any occasion.
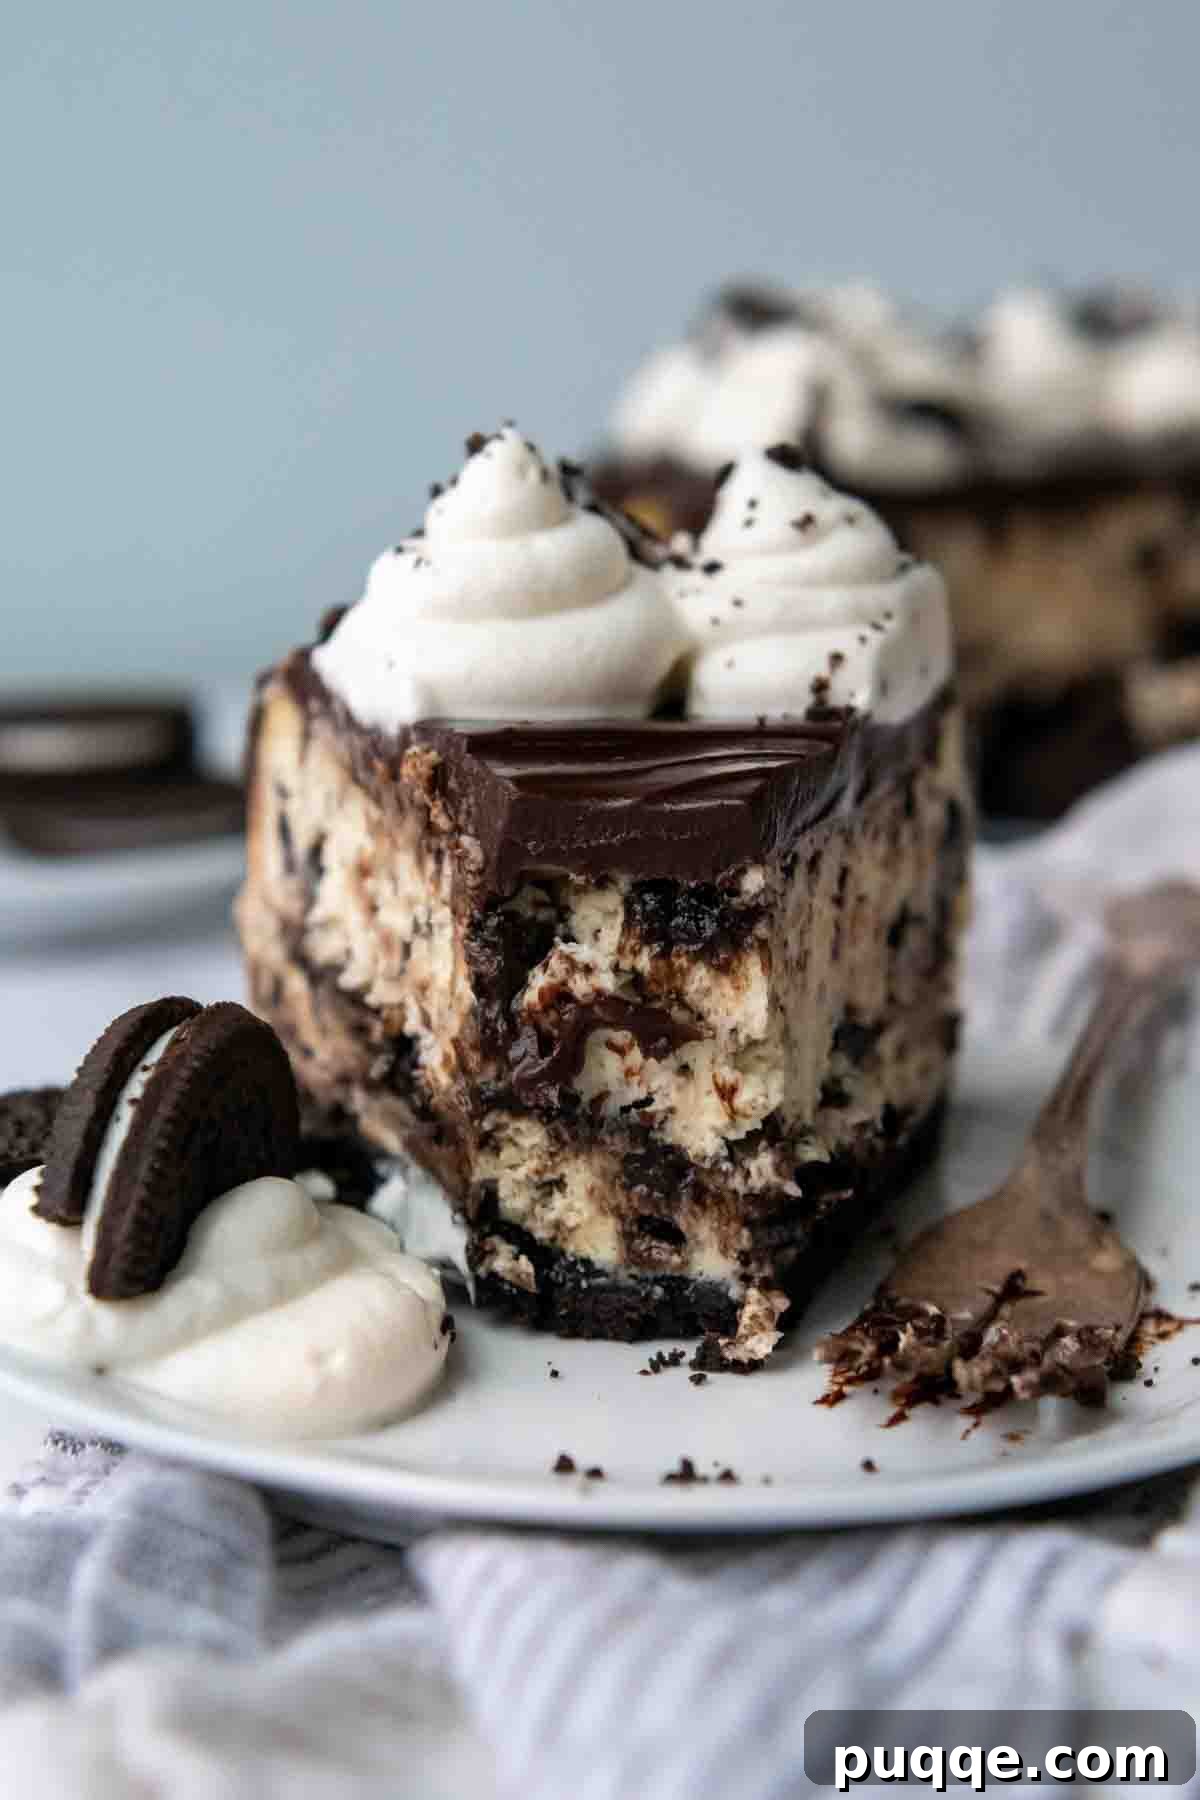
Why This Gluten-Free Oreo Cheesecake is the Ultimate Dessert
The culinary landscape for gluten-free enthusiasts transformed with the introduction of gluten-free Oreo cookies. This momentous arrival inspired the creation of numerous delightful treats, but none quite capture the essence of indulgence like a perfectly crafted gluten-free Oreo cheesecake. It stands as a magnificent centerpiece, offering a rich, decadent experience that rivals its traditional counterparts. This exquisite cheesecake perfectly complements other beloved gluten-free desserts such as gluten-free cookies and cream ice cream cake and delicious gluten-free Oreo truffles, solidifying its place as a must-try recipe.
The journey to this extraordinary dessert begins with its foundational element: an easy-to-make, press-in crust. Utilizing finely crushed gluten-free Oreo cookies blended with melted butter, this crust forms a dark, rich base that is both flavorful and structurally sound. While typically prepared in a 9-inch springform pan for that classic cheesecake presentation, this versatile cookie crumb mixture can also be adapted for a 9×13-inch pan, yielding delightful gluten-free Oreo cheesecake bars, perfect for sharing or potlucks. The simple act of pressing the crumbs firmly into the pan ensures a stable and delicious foundation for the creamy layers to come.
As the aromatic crust cools, attention shifts to preparing the star of the show: the velvety cheesecake filling. Our recipe opts for a baked filling, incorporating eggs to achieve a distinctively thicker, tangier custard. This method creates a sophisticated balance, cutting through the inherent sweetness of the Oreo cookies and elevating the overall flavor profile. The baking process lends a depth and complexity that is unparalleled, resulting in a rich, smooth interior that melts in your mouth.
For those who prefer a quicker assembly, a no-bake gluten-free Oreo cheesecake is also an option. While this recipe specifically details a baked version, you can adapt a classic no-bake gluten-free cheesecake filling by simply folding in generous amounts of chopped gluten-free Oreos. This offers a different, yet equally delicious, texture – lighter and quicker to prepare, ideal for warmer months or when time is of the essence.
The grand finale of this dessert symphony is the silky chocolate ganache topping. After the cheesecake has chilled sufficiently, typically several hours or ideally overnight, you’re ready to create this luxurious layer. A simple combination of heated heavy cream and high-quality chocolate chips, stirred until impeccably smooth, forms a glistening, rich topping that perfectly complements the cookies and cream interior. This ganache not only adds a beautiful sheen but also introduces another layer of deep chocolate flavor.
To truly elevate this ultimate gluten-free dessert, a final flourish of additional cookie crumbs is sprinkled over the ganache, adding textural contrast and a visual cue to the Oreo goodness within. Generous dollops of homemade whipped cream, light as air, complete the masterpiece, adding a fresh, creamy counterpoint to the rich chocolate and cheesecake. Below, we’ll delve deeper into essential gluten-free baking tips, including expert advice on storage, freezing, and professional decorating techniques to help you create a cheesecake that looks as incredible as it tastes.
I have made a LOT of cheesecakes over the years but none better than this one! No one would ever know it is gluten free. It is easy, delicious and disappeared faster than any other dessert on the table. Thanks for an outstanding and delicious recipe that does not need one bit of tweaking – it is perfection as is!
—Ella
Key Ingredients for Your Gluten-Free Oreo Cheesecake
Crafting the perfect gluten-free Oreo cheesecake relies on selecting high-quality ingredients and understanding their roles. Fortunately, gluten-free Oreo cookies have become a pantry staple, readily available in most grocery stores, making this indulgent recipe both accessible and enjoyable. Here’s a detailed look at the core components that make this cheesecake truly exceptional:
- Gluten-Free Oreo Cookies: These are the undisputed stars of our cheesecake. You’ll need a generous amount – typically two full packages – to ensure their iconic chocolatey flavor and delightful crunch are present throughout. They serve multiple purposes: forming the rich, dark crust, being folded into the creamy filling for that classic cookies and cream texture, and finally, providing a beautiful garnish on top. Any leftover cookies are perfect for whipping up a quick batch of gluten-free Oreo truffles, ensuring no delicious crumb goes to waste.
- Full-Fat Cream Cheese: For a truly decadent and robust cheesecake, full-fat cream cheese is non-negotiable. Its higher fat content contributes to a thicker, sturdier, and incredibly rich filling, far superior to lighter versions which can result in a watery or less stable texture. The secret to a lump-free, silky smooth batter is ensuring your cream cheese is at proper room temperature before mixing. If you forget to take it out in advance, a clever trick is to unwrap the bricks and gently microwave them on the defrost setting for short bursts until softened, as suggested in our creamy gluten-free pumpkin cheesecake recipe.
- Sour Cream: This unassuming ingredient plays a crucial role in balancing the sweetness of the cookies and cream cheese, imparting that distinctive, delightful tang characteristic of a superb cheesecake. Both regular and light sour cream can be used, as its primary contribution here is flavor rather than structural integrity. It adds a subtle acidity that brightens the overall profile of the dessert.
- Eggs: Essential for a baked cheesecake, eggs are what give the filling its luxurious, velvety custard-like texture. They act as a binder and help the cheesecake set beautifully, creating a dense yet smooth consistency that simply melts on your tongue. Unlike some baked cheesecake recipes, this easy version remarkably achieves its perfect texture without the need for a fussy water bath, simplifying the baking process significantly.
- Granulated Sugar: Providing the perfect level of sweetness, granulated sugar is crucial for both the crust and the filling, harmonizing with the tangy cream cheese and sour cream.
- Vanilla Extract: A touch of pure vanilla extract enhances all the flavors, adding warmth and depth to both the cheesecake filling and the homemade whipped cream.
- Heavy Cream: This versatile dairy product is utilized in two key areas. First, it forms the base of the silky chocolate ganache topping, melting chocolate chips into a smooth, pourable glaze. Second, it’s whipped with vanilla and powdered sugar to create airy, fluffy mounds of whipped cream, adding a light and elegant finish to your masterpiece.
- Unsalted Butter: The melted butter is combined with crushed Oreo cookies to form the perfect, firm crust. Using unsalted butter allows you to control the overall saltiness of the dessert.
Crafting the Perfect Gluten-Free Oreo Crust
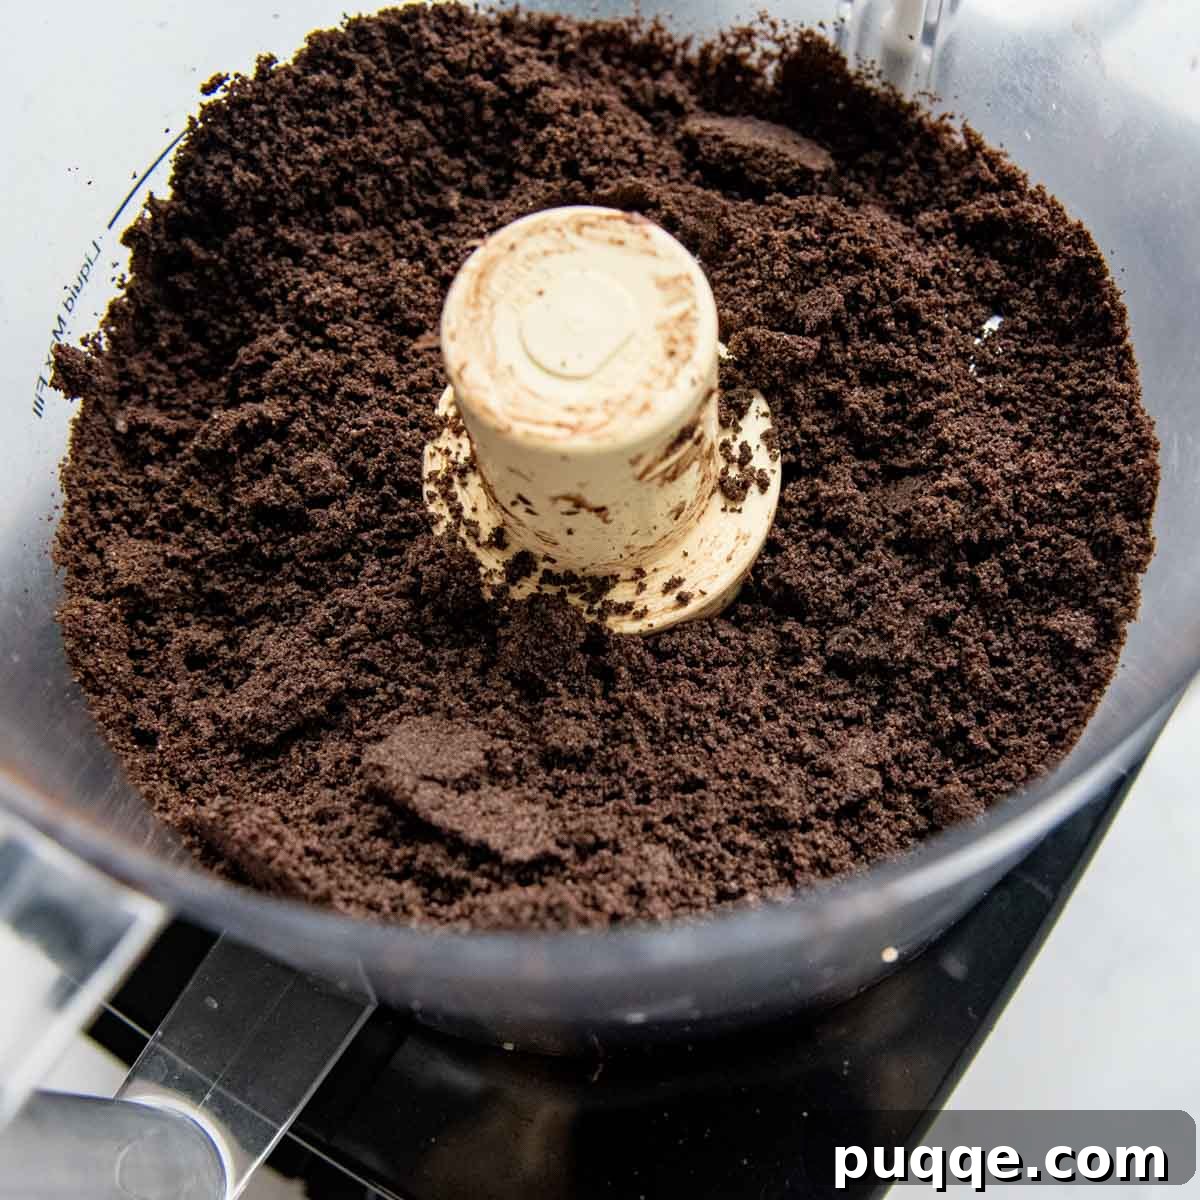
The foundation of this incredible dessert is its rich, chocolatey crust, made effortlessly with gluten-free Oreo cookies. To begin, you’ll need to transform about 20 gluten-free Oreos into extremely fine crumbs. The most efficient method for achieving this consistent, powdery texture is by using a food processor. Simply pulse the cookies until no large chunks remain. If a food processor isn’t available, don’t worry! You can achieve similar results by placing the cookies in a sturdy ziplock bag and crushing them with a rolling pin until thoroughly pulverized. The finer the crumbs, the more cohesive and uniform your crust will be.
Once your gluten-free Oreo crumbs are ready, combine them with melted unsalted butter. This butter acts as a binder, holding the crumbs together to form a solid crust. Transfer this mixture into a 9-inch springform pan. While a 9-inch pan yields a beautifully thick cheesecake, a 10-inch springform pan can also be used, though it will result in slightly thinner layers. Using the bottom of a measuring cup or a flat-bottomed glass, firmly press the crumb mixture evenly along the bottom of the pan. This step is crucial for creating a compact crust that won’t crumble when sliced.
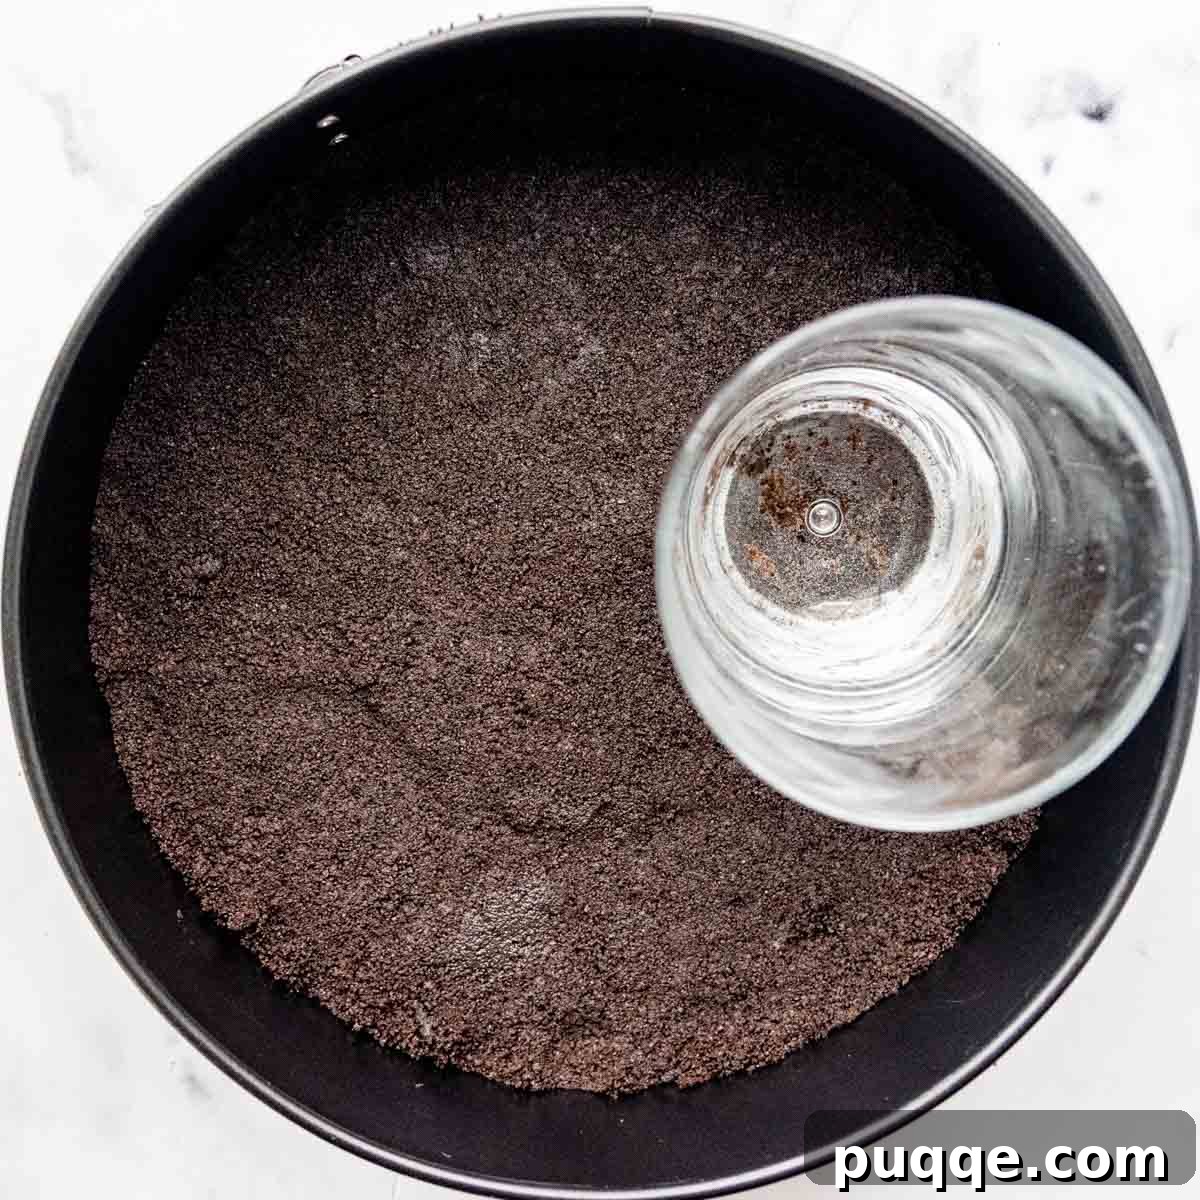
Pre-baking the crust is a vital step that enhances its flavor and prevents it from becoming soggy. Bake the pressed crust in a preheated 350°F (175°C) oven for just 10 minutes. This short baking period sets the butter and crumbs, creating a crisp, aromatic base. After baking, remove the crust from the oven and allow it to cool completely while you prepare the rich and creamy cheesecake filling. A cooled crust is essential to prevent the cheesecake batter from melting and seeping through.
Baking Your Delectable Gluten-Free Oreo Cheesecake
This section provides a visual guide and detailed steps for creating the irresistible gluten-free Oreo cheesecake filling. For exact measurements and a printable version, please refer to the comprehensive recipe card located at the bottom of this article.
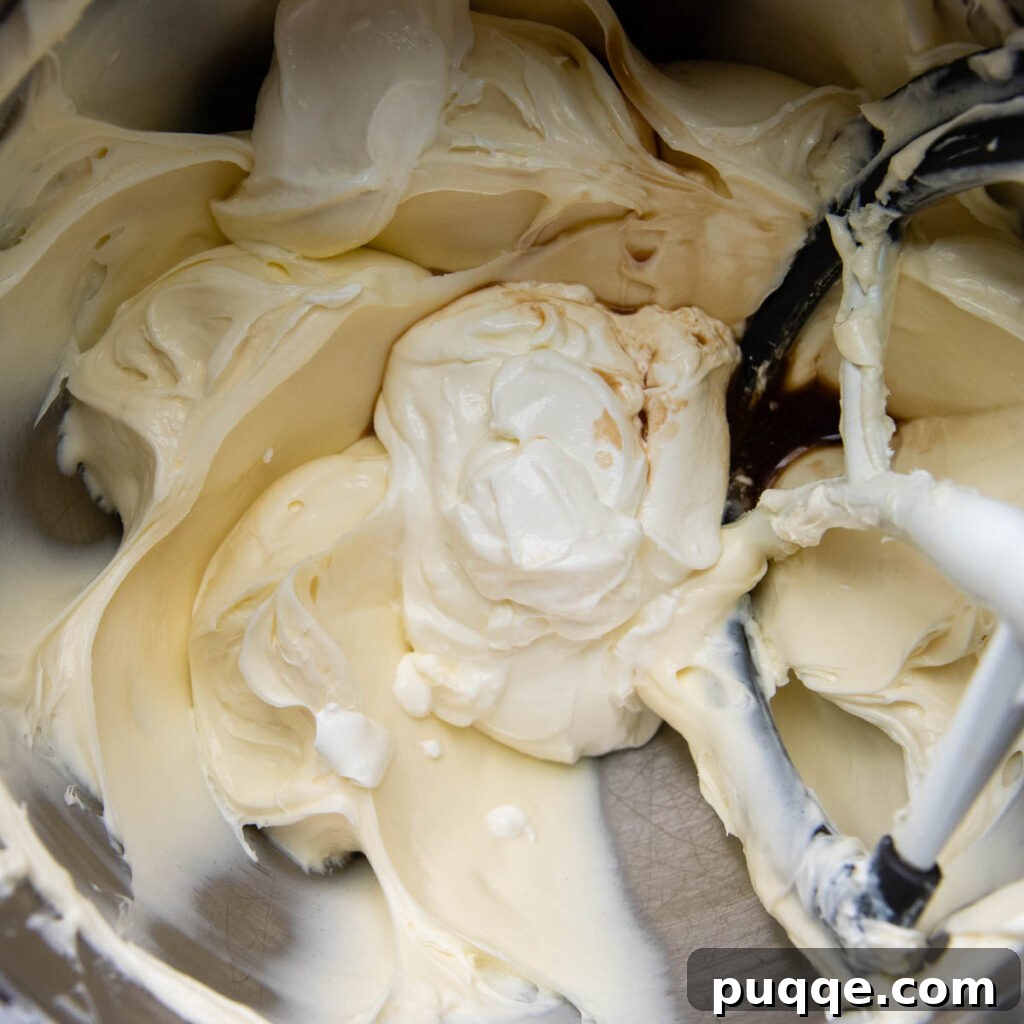
Preparing the Velvety Filling
In a large mixing bowl, or the bowl of a stand mixer fitted with a paddle attachment, combine your softened full-fat cream cheese with granulated sugar. Beat these two ingredients together until the mixture is incredibly smooth and creamy, with absolutely no lumps remaining. This usually takes about 1-2 minutes. The key here, as highlighted previously, is room temperature cream cheese; it ensures a seamless blend. If you’re short on time and your cream cheese isn’t soft enough, a brief defrost cycle in the microwave can expedite the softening process.
Next, incorporate the sour cream, eggs, and vanilla extract into the cream cheese mixture. Continue beating on low speed until all ingredients are thoroughly combined and the batter is uniform and velvety. Avoid over-mixing once the eggs are added, as this can introduce too much air, leading to cracks during baking.
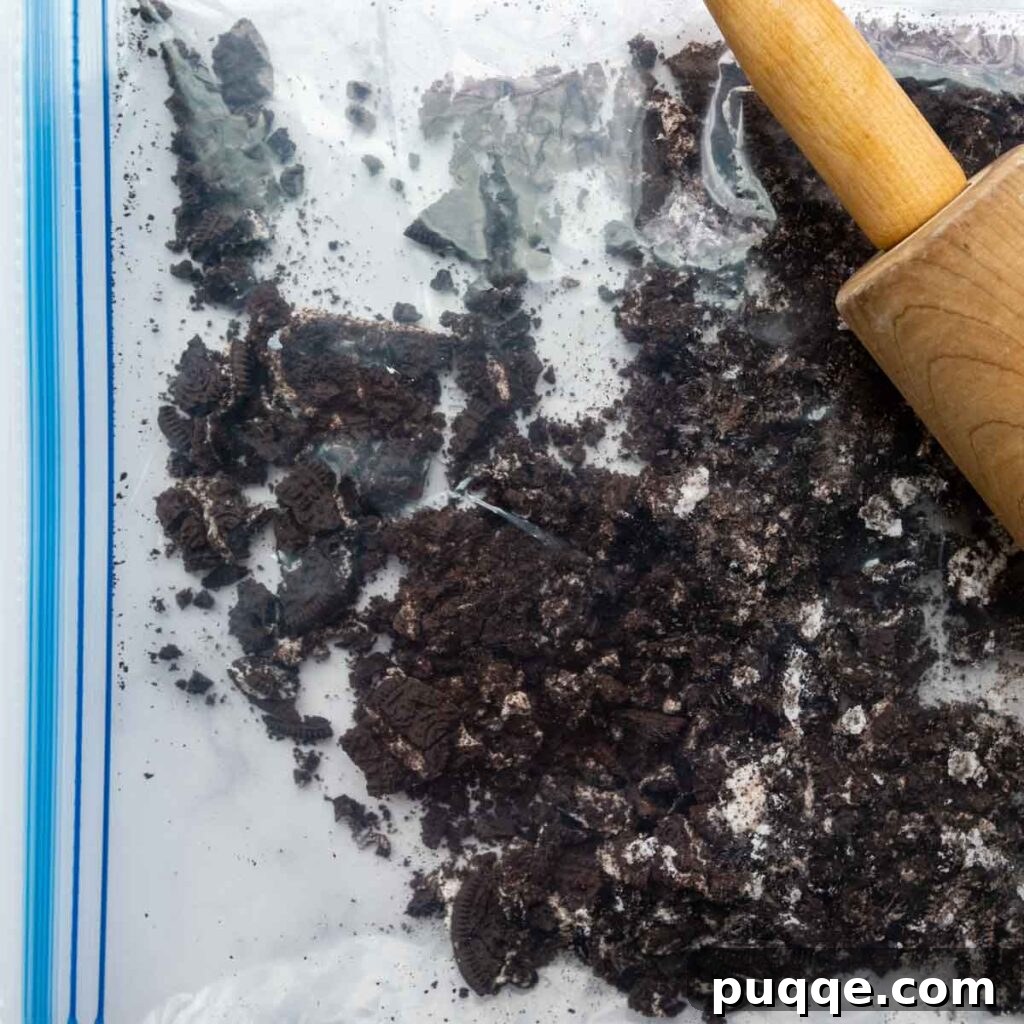
Folding in the Oreo Chunks
For the signature “cookies and cream” aspect, gently crush the remaining gluten-free Oreos. Unlike the crust, for this step, you want larger, discernible chunks, not fine crumbs. Placing them in a ziplock bag and lightly tapping with a rolling pin works perfectly. These substantial cookie pieces will be folded into the creamy cheesecake filling, providing delightful pockets of chocolatey crunch with every bite. Carefully fold the crushed Oreos into the batter using a spatula, ensuring they are evenly distributed without deflating the mixture.
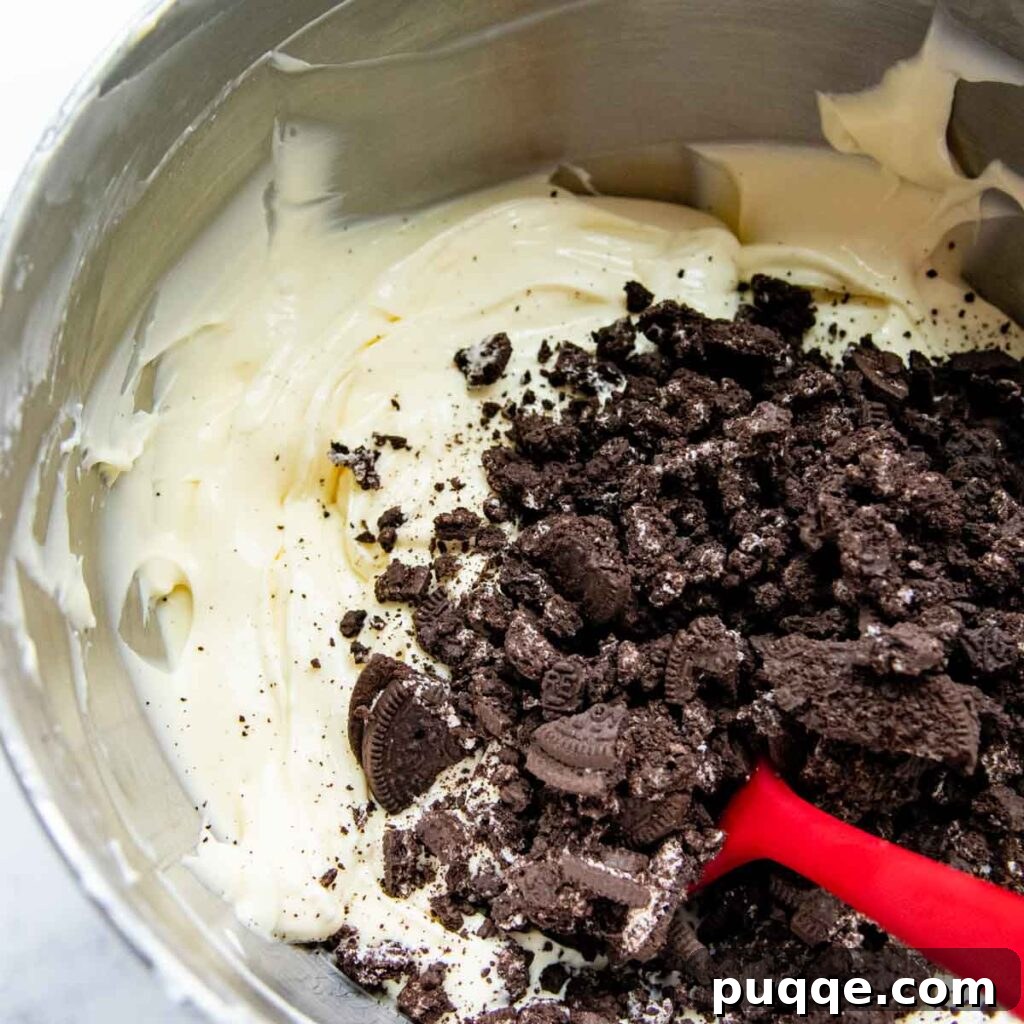
Baking and Cooling to Perfection
Once your filling is ready, pour it into the pre-baked gluten-free Oreo crust. Use an offset spatula to gently smooth the top, ensuring an even layer. Before placing it in the oven, line a baking sheet with aluminum foil and set the springform pan on top. This clever trick catches any butter drips from the crust, keeping your oven clean and hassle-free. Bake the cheesecake in a preheated 325°F (160°C) oven for 50-60 minutes. The cheesecake is done when the edges are firmly set, but the center still has a slight jiggle. A toothpick inserted near the center should not come out liquidy, but a few moist crumbs are acceptable.
To prevent those unsightly cracks that can sometimes mar a beautiful cheesecake, a gradual cooling process is paramount. After the baking time, turn off the oven and leave the cheesecake inside with the door slightly ajar for about 15 minutes. This allows the cheesecake to slowly adjust to the change in temperature, minimizing stress on its delicate structure. After this initial cooling, remove it from the oven and place it on a wire rack to cool completely to almost room temperature. This gradual transition is crucial for maintaining its smooth, unblemished surface.
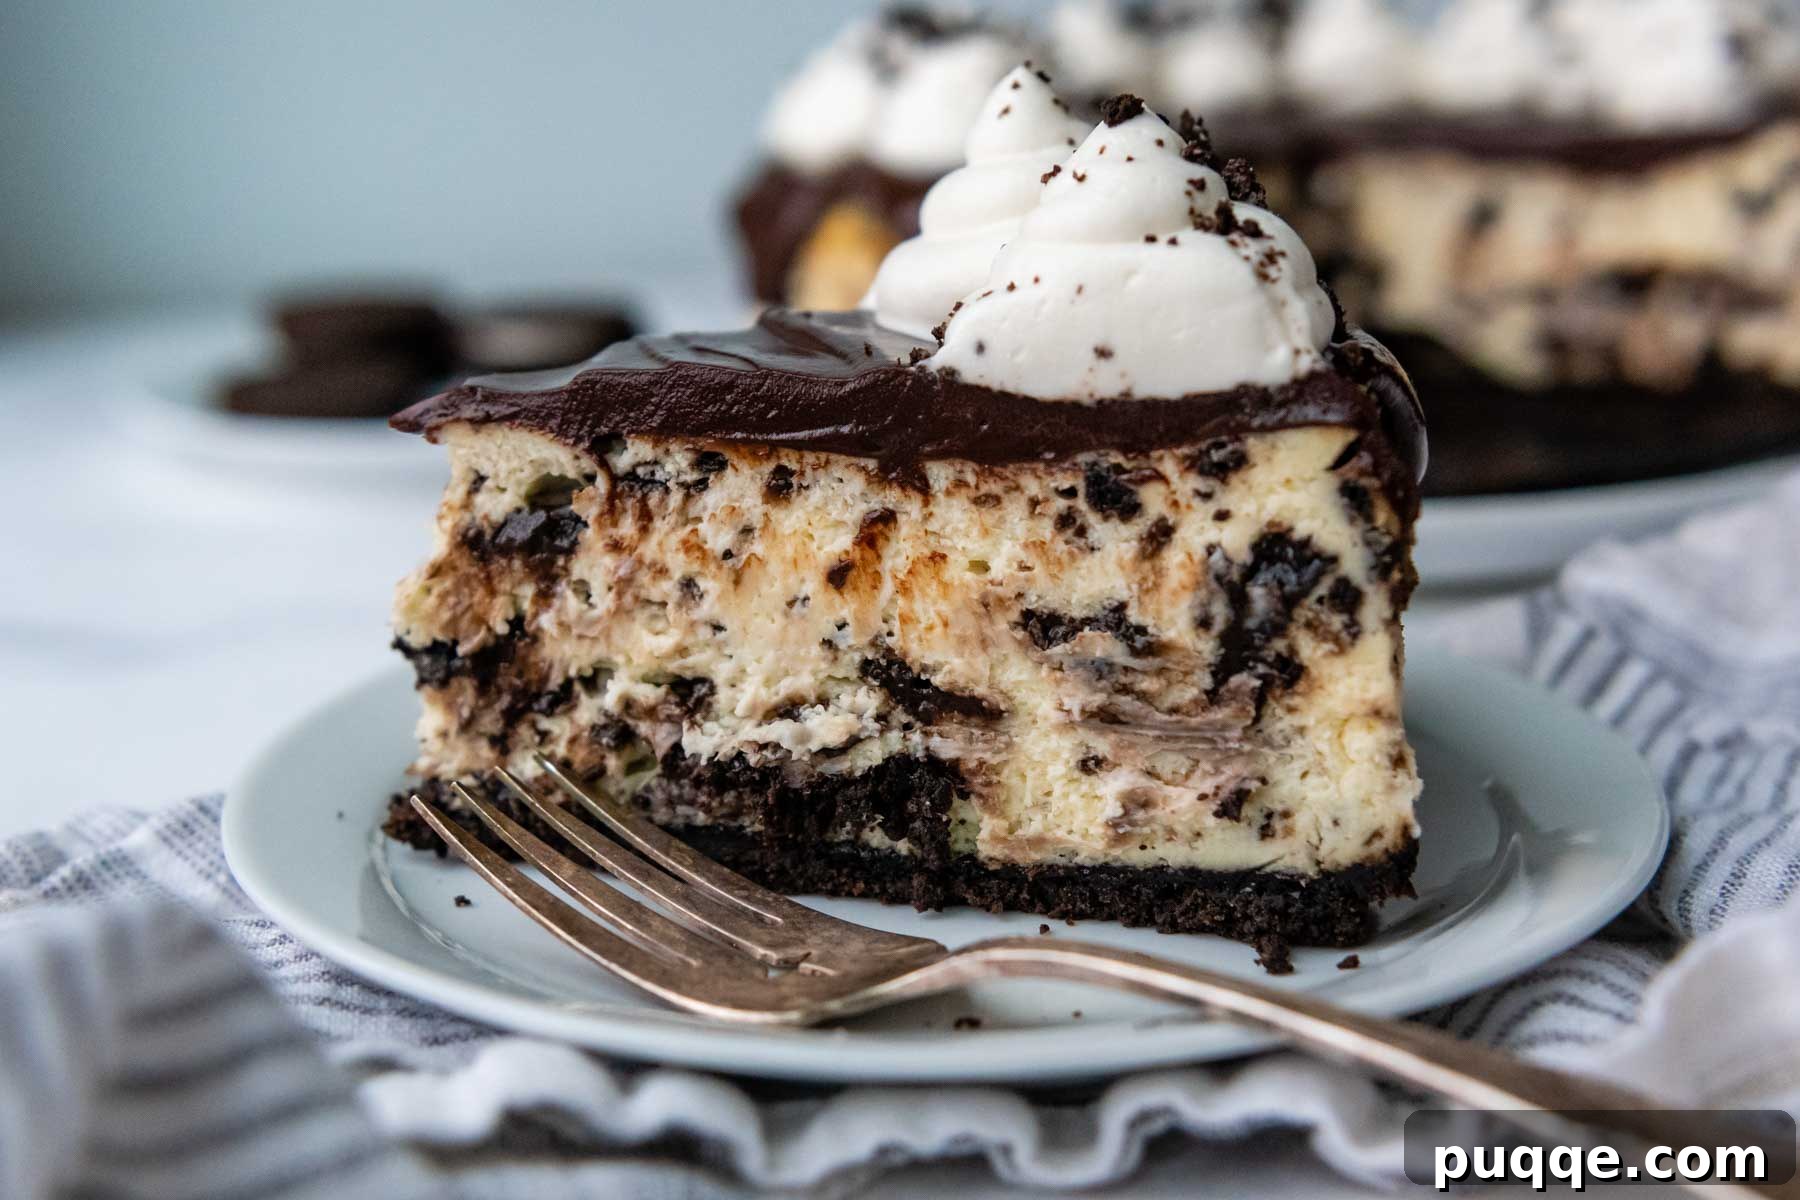
Finally, the most challenging part of cheesecake making: patience! Once cooled, transfer the cheesecake to the refrigerator for at least 4 hours, or ideally, overnight. This chilling period is essential for the cheesecake to fully set and firm up, ensuring perfect slices. Resist the temptation to release the outer ring of the springform pan until the cheesecake is completely chilled. Releasing it too soon can cause the edges to pull apart or crack, a mistake many bakers (myself included!) have learned from. A fully chilled cheesecake will slice cleanly and present beautifully, ready for its decadent toppings.
Decadent Chocolate Ganache Topping & Elegant Whipped Cream Decorating
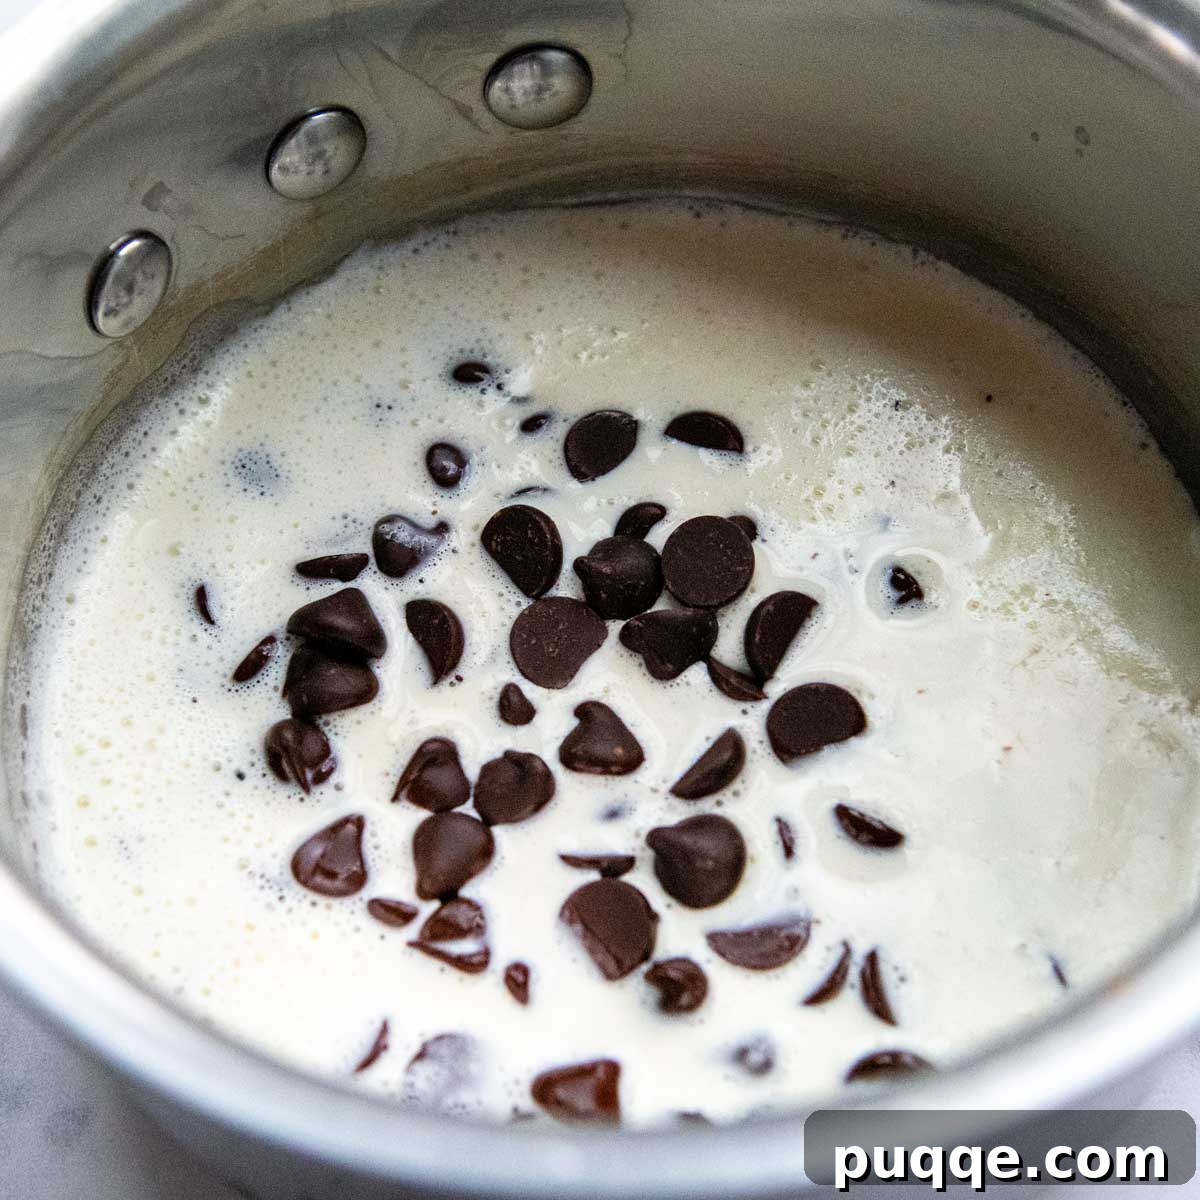
Creating the Silky Chocolate Ganache
While the thought of making chocolate ganache might sound intimidating, it is surprisingly simple and incredibly rewarding. To begin, gently heat half a cup of heavy cream in a small saucepan until it’s hot to the touch, but crucially, not boiling. Remove the cream from the heat and immediately add one cup of high-quality semi-sweet chocolate chips. Allow the chocolate chips to sit undisturbed in the hot cream for about one minute; this gives them time to melt evenly. After a minute, gently stir the mixture until it transforms into a glossy, perfectly smooth, and luxurious ganache. This rich topping adds a beautiful sheen and an intense chocolate flavor that perfectly complements the gluten-free Oreo cheesecake.
Should you be pressed for time or prefer a shortcut, you can certainly opt for a store-bought hot fudge sauce, or even better, whip up a batch of our old-fashioned homemade hot fudge sauce. Alternatively, serving the cheesecake simply with a generous dollop of whipped cream is always a delightful choice.
Decorating with Elegance: Ganache and Whipped Cream
Once your cheesecake is fully chilled and the ganache is prepared, it’s time to add the finishing touches that make this dessert truly shine. Before applying the ganache, gently run a thin knife along the inner edge of the springform pan to ensure the cheesecake releases cleanly when the ring is removed. Then, open the springform ring and carefully lift it away. If desired, you can then transfer the cheesecake (still on its bottom plate) to your chosen serving platter.
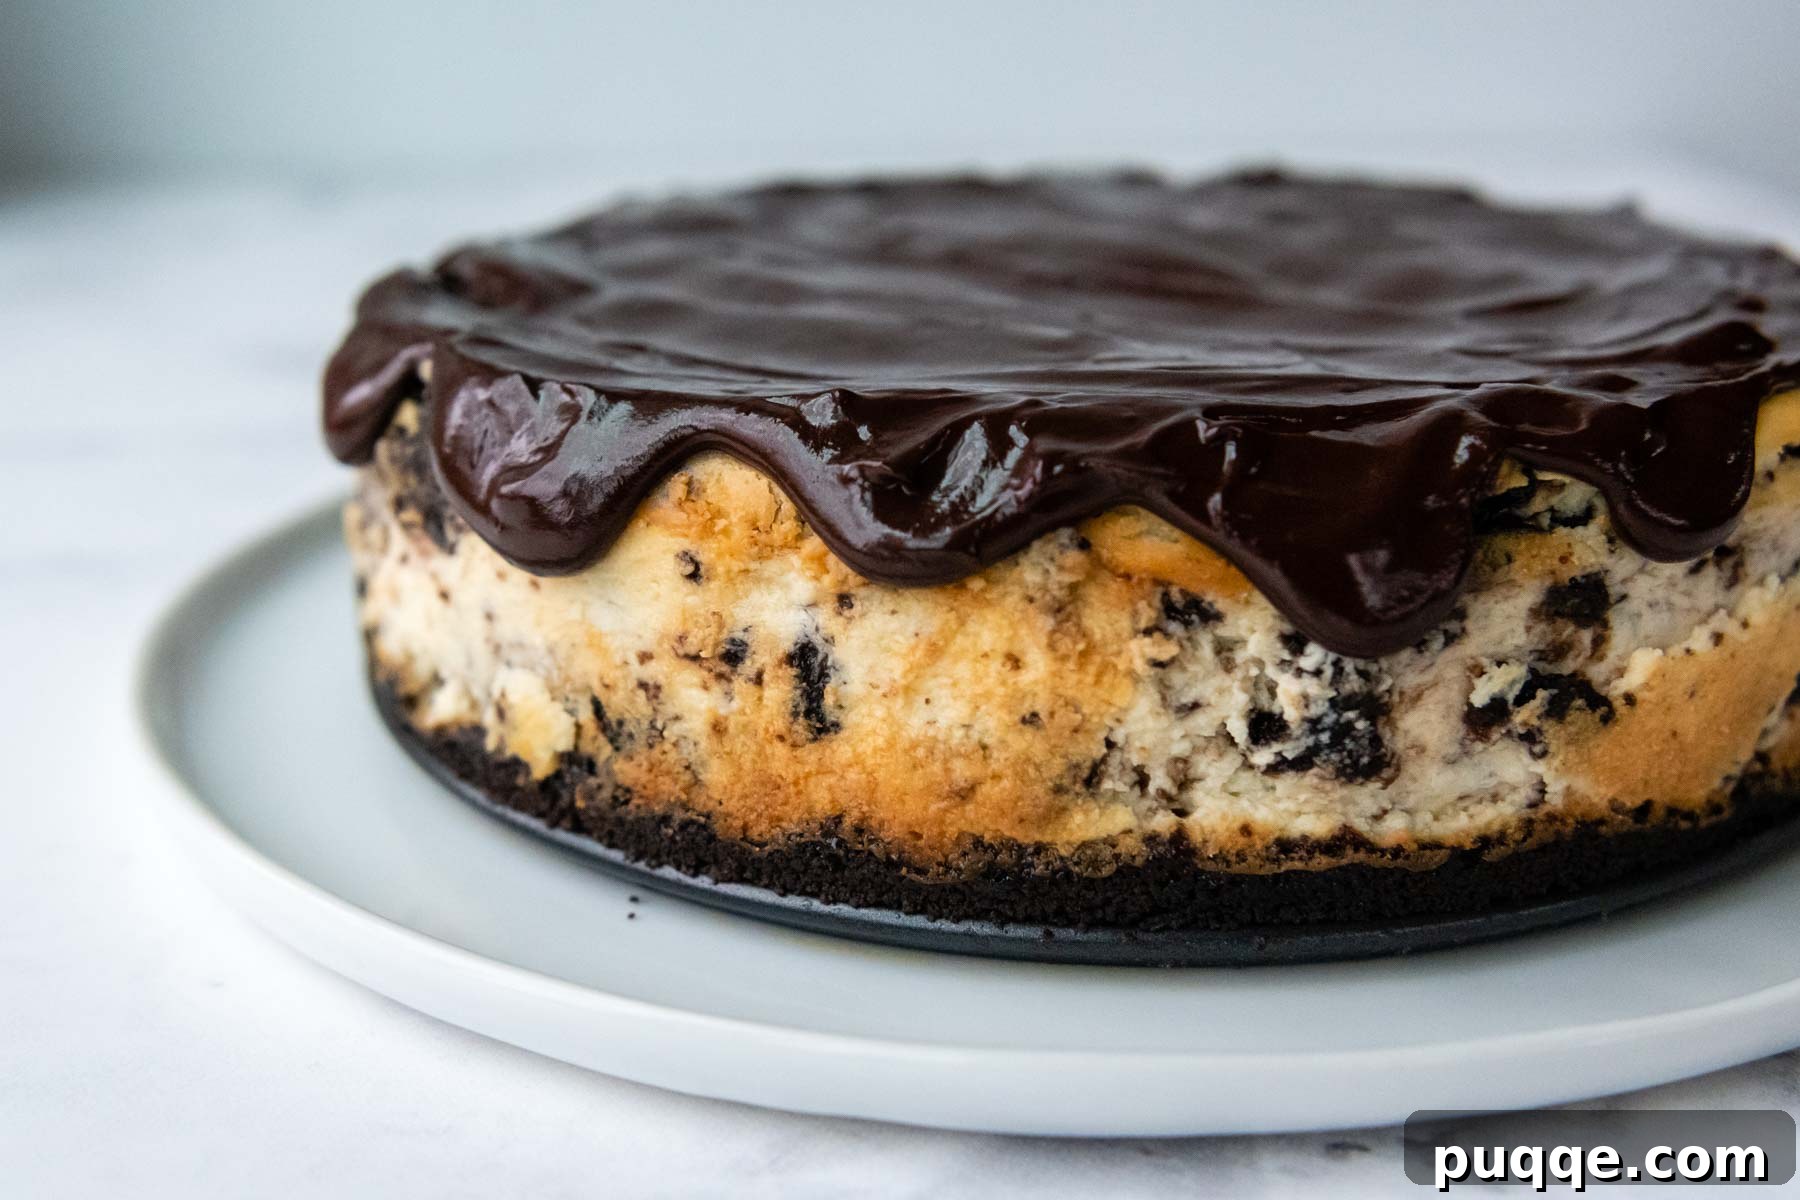
Pour the warm, silky ganache onto the very center of the chilled cheesecake. Using your trusty offset spatula, gently and evenly spread the ganache, guiding it just to the edge of the cheesecake. For a beautiful drip effect, allow a small amount to cascade gracefully over the sides. Once the ganache is spread, place the cheesecake back into the refrigerator for about 20 minutes to allow the chocolate to set slightly.
Whipping Up Perfect Clouds of Cream
While the ganache sets, prepare your homemade whipped cream. In a chilled mixing bowl, using a whisk attachment (or a hand mixer), combine ¾ cup of cold heavy cream, 1 teaspoon of vanilla extract, and 2 tablespoons of powdered sugar. Beat these ingredients on medium-high speed until soft, billowy peaks form and hold their shape. Be vigilant during this step: over-beating will turn your beautiful cream into butter, while under-beating will result in a runny topping that won’t hold its form for piping.
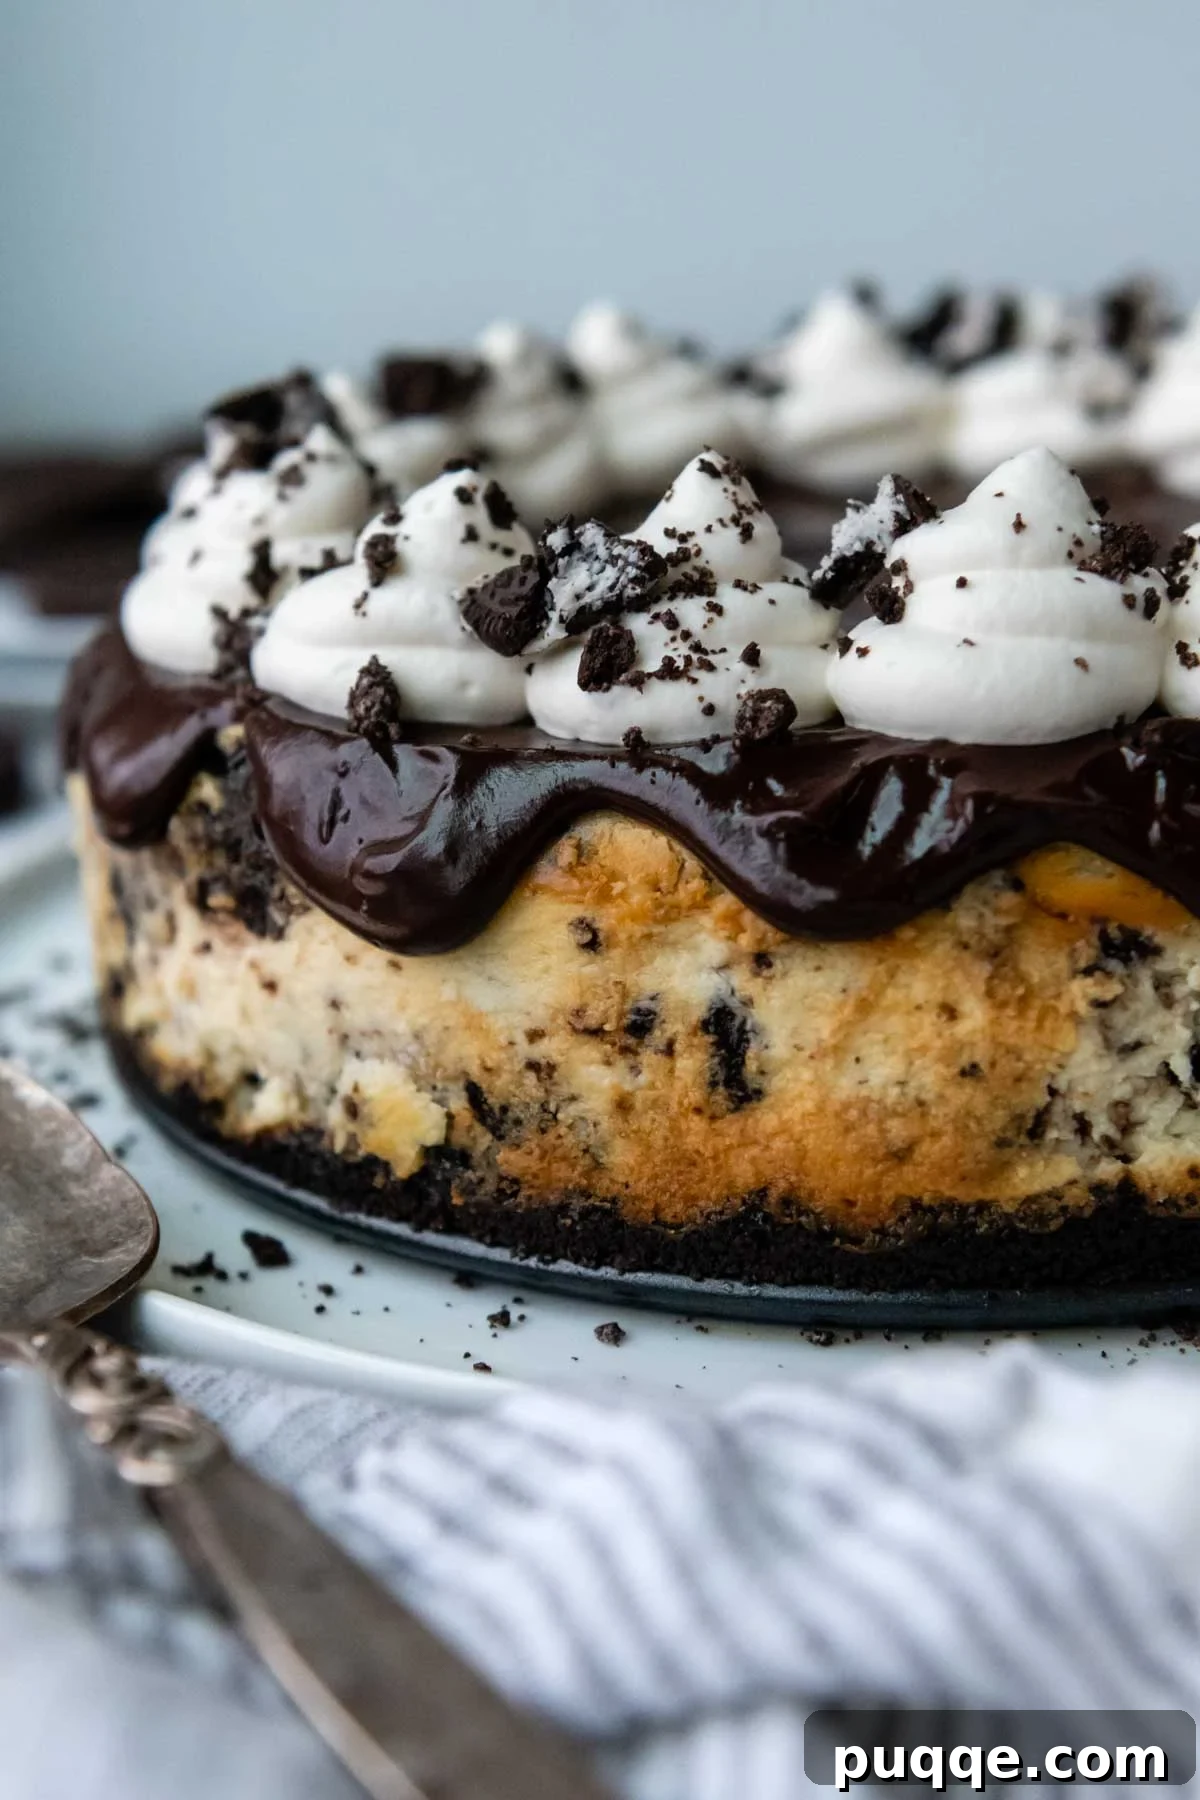
For a professional-looking finish, transfer the whipped cream to a pastry bag fitted with a large open star tip or a large round tip, ideally with a coupler for easy tip changes. Disposable pastry bags (like these) make cleanup a breeze! Pipe elegant mounds of whipped cream around the entire edge of the cheesecake. As a final decorative flourish and a nod to the “Oreo” in the name, generously sprinkle additional crushed gluten-free Oreo cookie crumbs over the whipped cream and across the ganache. This adds both visual appeal and a delightful textural contrast. Your stunning gluten-free Oreo cheesecake is now ready to be served and enjoyed!
Locating Gluten-Free Oreos and Other Alternatives
With the surge in popularity of gluten-free desserts, finding gluten-free Oreo cookies has become remarkably easier. You no longer need to scour specialty stores; these popular cookies are typically found in the regular cookie aisle of most major supermarkets, often positioned right alongside their traditional counterparts. Large retailers such as Walmart, Meijer, and Target consistently stock them, making them readily accessible for all your gluten-free baking adventures.
While Nabisco’s gluten-free Oreos are fantastic, it’s also worth exploring other excellent brands of gluten-free chocolate sandwich cookies. These alternatives can offer slight variations in flavor and texture, allowing you to discover new favorites or to use what’s most conveniently available. Brands like Glutino, Kinnikinnick, Goodie Girl, and Trader Joe’s GF Joe Joe’s all produce delicious gluten-free versions that work wonderfully in this cheesecake recipe, ensuring you can always enjoy this delightful treat regardless of specific brand availability.
Storing and Serving Your Gluten-Free Oreo Cheesecake
One of the many benefits of this gluten-free Oreo cheesecake recipe is its make-ahead potential, making it an ideal dessert for busy holidays, special celebrations, or any entertaining occasion. For optimal texture and the cleanest slices, it is highly recommended to prepare the cheesecake at least one day before you plan to serve it. This extended chilling period allows the flavors to meld beautifully and the cheesecake to set completely, ensuring a truly spectacular dessert experience.
Any leftover slices of this delectable cheesecake can be refrigerated for up to 3 days. To maintain its freshness and prevent it from absorbing other odors, ensure it is well-covered with plastic wrap or stored in an airtight container. For longer storage, this cheesecake freezes exceptionally well. You have the option to either freeze the entire cheesecake or, for ultimate convenience, slice it into individual portions before freezing.
Freezing Your Gluten-Free Oreo Cheesecake for Future Indulgence
The good news is that both baked and no-bake cheesecakes are excellent candidates for freezing, allowing you to prepare this delightful dessert well in advance. Proper wrapping is crucial to prevent freezer burn and the formation of ice crystals, which can compromise the texture and flavor of your cheesecake.
To ensure a flawless wrap without disturbing the delicate ganache and whipped cream topping, follow this expert tip: First, place the fully assembled and chilled cheesecake uncovered in the freezer. Allow it to freeze solid, which typically takes several hours. Once it’s completely firm, remove it from the freezer and carefully wrap it in at least two layers of plastic wrap, ensuring a tight seal. Then, add an additional layer of heavy-duty aluminum foil for maximum protection against freezer odors and burn. This method protects your beautiful topping while providing superior preservation.
Properly frozen, this gluten-free cookies and cream cheesecake can be stored for up to 3 months, making it a fantastic treat to have on hand for impromptu gatherings or future cravings. When you’re ready to enjoy it, transfer the wrapped cheesecake to the refrigerator and allow it to thaw slowly overnight, for approximately 24 hours. Unwrap it just before serving to fully appreciate its fresh taste and creamy texture. With these tips, you can enjoy a slice of this heavenly gluten-free dessert whenever the craving strikes!
Save this recipe to your Pinterest board!
Let’s be friends on Pinterest! I’m always sharing great recipes!

Ultra Creamy Gluten-Free Oreo Cheesecake (Easy)
 Melissa Erdelac
Pin
Rate
Remove Ads
Ingredients
Gluten-Free Oreo Crust
- 20 gluten-free Oreo cookies, (2 packages total for the recipe)
- 4 tablespoons unsalted butter
Gluten-Free Oreo Cheesecake
- 32 ounces (4 packages) full-fat cream cheese, softened
- 1 cup granulated sugar
- 1 cup sour cream, full-fat
- 3 large eggs, room temperature
- 1 teaspoon vanilla extract
- 15 gluten-free Oreo cookies, crushed into larger chunks
Chocolate Ganache
- ½ cup heavy cream
- 1 cup semi-sweet chocolate chips
Whipped Cream
- ¾ cup heavy cream
- 1 teaspoon vanilla extract
- 2 tablespoons powdered sugar
- 2-3 gluten-free Oreo cookies (crushed), for decorating
Equipment
-
Food Processor
-
Offset Spatula
-
9-inch springform pan
Instructions
Cheesecake Crust
-
Preheat the oven to 350°F.
-
Crush the 20 cookies into fine crumbs. To do this quickly, use a food processor. Otherwise place in a ziplock bag and use a rolling pin to crush to extremely fine crumbs.20 gluten-free Oreo cookies, 4 tablespoons unsalted butter
-
Add the melted butter to the food processor or transfer the crumbs to a bowl and mix with butter to combine.
-
Dump the mixture into a 9-inch springform pan. Use a measuring cup or glass to firmly press the crumbs evenly along the bottom of the pan.
-
Bake for 10 minutes. Remove from the oven and cool while you prepare the cheesecake mixture.
Filling
-
Turn down the oven to 325°F. In a large bowl or stand mixer fitted with a paddle attachment, mix together the cream cheese and sugar until very smooth and creamy, about 1-2 minutes.32 ounces (4 packages) full-fat cream cheese, 1 cup granulated sugar
-
Add the sour cream, eggs, and vanilla extract. Beat again until well mixed and smooth.1 cup sour cream, 3 large eggs, 1 teaspoon vanilla extract
-
Slightly crush the remaining gluten-free Oreos in a ziplock bag with a rolling pin. For this, you do not want fine crumbs, but larger chunks to disperse throughout the cheesecake. Fold the Oreos into the cheesecake filling.15 gluten-free Oreo cookies
-
Pour the filling into the pre-baked crust and smooth the top using an offset spatula. Line a baking sheet with foil and place the cheesecake on top. As it bakes, butter will drip from the bottom and this catches the drips, preventing a mess in your oven!
-
Bake in the 325ºF oven for 50-60 minutes. The edges should be firmly set and when a toothpick is inserted in the middle it should not come out wet and liquidy.
-
Turn off the oven, leaving the cheesecake inside with the door slightly ajar. Let it sit in the oven for 15 minutes before pulling out and cooling completely on a wire rack.
-
Once it has cooled to almost room temperature, transfer it to the fridge for at least 4 hours or overnight. Do not release the outer ring until it is fully chilled or the cheesecake will pull apart and crack.
Chocolate Ganache
-
In a small saucepan heat the heavy cream until hot, but not boiling. Add the chocolate chips to the cream and let it sit for 1 minute to melt the chocolate. Stir until smooth and all the chocolate has melted.½ cup heavy cream, 1 cup semi-sweet chocolate chips
-
Run a knife along the outer ring to release the cheesecake before opening the ring and pulling away. If desired, set the cheesecake (with bottom pan attached) on a serving platter.
-
Pour the ganache onto the center of the cheesecake. Use an offset spatula to smooth it out until it goes just over the edge. Place it back in the fridge to set, about 20 minutes.
Whipped Cream
-
In a mixing bowl with a whisk attachment, blend together heavy cream, vanilla, and powdered sugar until soft peaks form and hold firm shape.¾ cup heavy cream, 1 teaspoon vanilla extract, 2 tablespoons powdered sugar
-
To pipe, use a large open star tip or large round tip with a coupler and pastry bag. (I love these disposable ones!) Pipe mounds of whipped cream around the edge of the cheesecake and then sprinkle additional cookie crumbs on top. Serve immediately or refrigerate until ready to serve.2-3 gluten-free Oreo cookies (crushed)
Notes
Storing and Freezing Tips
It’s best to make at least one day ahead of serving so the cheesecake has time to set before slicing.
Leftovers can be refrigerated up to 3 days, well covered. If you need to store longer, I recommend either freezing the entire cheesecake or slicing and freezing serving-size portions.
To freeze, first place the cheesecake in the freezer without wrapping. Once it is solidly frozen, wrap in a couple layers of plastic wrap and then cover with foil.
Cheesecake can be frozen up to 3 months. Thaw overnight in the refrigerator for 24 hours before unwrapping and enjoying.
Carbohydrates: 59g,
Protein: 17g,
Fat: 29g,
Saturated Fat: 15g,
Polyunsaturated Fat: 2g,
Monounsaturated Fat: 9g,
Trans Fat: 0.2g,
Cholesterol: 96mg,
Sodium: 736mg,
Potassium: 459mg,
Fiber: 2g,
Sugar: 43g,
Vitamin A: 652IU,
Vitamin C: 0.3mg,
Calcium: 333mg,
Iron: 6mg