

Get ready to redefine your understanding of gluten-free baking! These homemade cheddar biscuits aren’t just a simple copycat; they are a sensational replica of Red Lobster’s famous Cheddar Bay Biscuits, crafted with a gluten-free twist that promises an identical knockout taste and texture. Imagine sinking your teeth into tender, cheesy, and buttery perfection, each bite infused with a delicate hint of garlic. What makes these savory treats truly stand out is a collection of easy-to-follow, fool-proof tricks. From allowing the dough to rest, which works wonders for gluten-free flour, to using a unique combination of yogurt and milk for an unbelievably tender crumb, this recipe guarantees soft, fluffy biscuits that are never dry or crumbly. Forget any intimidation you might feel about gluten-free baking – this recipe is designed for success, even for the most novice baker. Prepare to experience gluten-free goodness at its absolute best!

The Ultimate Gluten-Free Cheddar Bay Biscuits (Red Lobster Copycat)
If the thought of homemade biscuits, especially gluten-free ones, seems daunting, allow this recipe to be your welcoming gateway into the wonderful world of gluten-free baking. Among my extensive collection of gluten-free bread recipes, this particular one stands out for its simplicity and guaranteed success. But don’t let the straightforward process fool you; these gluten-free cheddar bay biscuits achieve a stone-cold victory in both their authentic taste and impeccable texture. They effortlessly capture the essence of the beloved Red Lobster classic, ensuring a delightful experience for everyone at your table, regardless of dietary needs.
One of the most appealing aspects of these cheesy drop biscuits is their convenience. There’s no need for time-consuming rolling, cutting, or intricate shaping. Simply mix the dough, scoop it onto your baking sheet, drop, and bake. It’s that easy! If you’ve ever worried that making a copycat Red Lobster’s cheddar bay biscuit gluten-free would involve obscure or complicated ingredients, rest assured, that’s simply not the case here. My philosophy is all about making delicious food accessible.
While various store-bought gluten-free biscuit mixes exist, I’m confident that you likely already have most, if not all, of the necessary ingredients in your pantry to whip up these from-scratch cheddar biscuits that are substantially better than any mix. And even if you don’t, many of the ingredients come with easy, readily available swaps, which I’ll detail shortly. Building a little “insurance” into my recipes is important to me, especially with gluten-free baking where the variety of flour blends can lead to inconsistent results. That’s precisely why I rely on a few simple, yet incredibly effective, tricks to consistently avoid that dreaded dry, crumbly texture. These aren’t complicated techniques; they are fundamental principles I apply to many of my gluten-free creations, from fluffy muffins and soft cookie doughs to these highly-praised savory gluten-free cheddar scones.
One of the most critical steps to ensuring a perfect gluten-free biscuit is allowing the dough to rest. After combining the dry and liquid ingredients, simply cover the bowl and chill it for 30 minutes. This resting period is transformative, giving the gluten-free starches ample time to hydrate properly, relax, and ultimately contribute to a softer, more tender texture in the final baked product. Different gluten-free flour blends utilize varying starch ratios, and some can be notoriously gritty without proper hydration. For the absolute best texture, I highly recommend Cup4Cup flour, known for its excellent performance in gluten-free baking. However, if Cup4Cup isn’t available to you, the resting trick is an equal opportunity tweak that benefits virtually all gluten-free blends, making them more pliable and less prone to dryness.
You might also notice that this recipe deviates from traditional buttermilk, opting instead for a mixture of yogurt and milk. The reason is simple: gluten-free flours don’t absorb liquid as efficiently as wheat flour, which can often lead to a dense, gummy heaviness if too much liquid is present or absorbed incorrectly. Yogurt, particularly whole, full-fat yogurt, provides the essential moisture and desirable tangy flavor reminiscent of buttermilk, but it bakes into a uniquely soft and tender crumb that truly elevates these gluten-free biscuits, preventing them from becoming heavy or pasty. This thoughtful substitution is key to achieving that light, fluffy interior that makes these biscuits so irresistible.
Essential Ingredient Swaps for Your Gluten-Free Cheddar Biscuits
Flexibility in baking is key, especially when you’re adapting recipes to dietary needs or working with what you have on hand. Here are some reliable ingredient substitutions that won’t compromise the delicious outcome of your gluten-free cheddar biscuits:
- Yogurt: For the richest texture and flavor, whole, full-fat plain yogurt is always preferred. However, if your fridge is empty, an equal amount of full-fat sour cream makes an excellent substitute, yielding equally great results. The tang and moisture are very similar.
- Lemon Juice: This ingredient is crucial for activating the baking soda and contributing to that classic “buttermilk” tang in our yogurt-milk mixture. If you find yourself without fresh lemons, don’t worry! An equal amount of white vinegar will work perfectly, providing the necessary acidity without altering the flavor profile significantly.
- Cheddar Cheese: To truly achieve that pronounced, bold cheesy taste synonymous with the Red Lobster Cheddar Bay experience, I strongly recommend using extra sharp cheddar cheese. Always opt for freshly grated cheese from the block; pre-shredded varieties often contain anti-caking agents that can affect melting and texture. Of course, if you’re experimenting or simply not aiming for the exact “Cheddar Bay” profile, feel free to swap in other cheeses like Monterey Jack, Gruyere, or even a spicy pepper jack for a kick!
Watch the Magic Happen: Our Gluten-Free Cheddar Biscuits Recipe Video
Let’s Bake These Buttery Biscuits Together!
(Below you’ll find step-by-step photos and detailed instructions to guide you. For the complete ingredient measurements and a printable recipe card, please scroll down to the bottom of the page.)
Step 1: Incorporate Cold Butter into Dry Ingredients
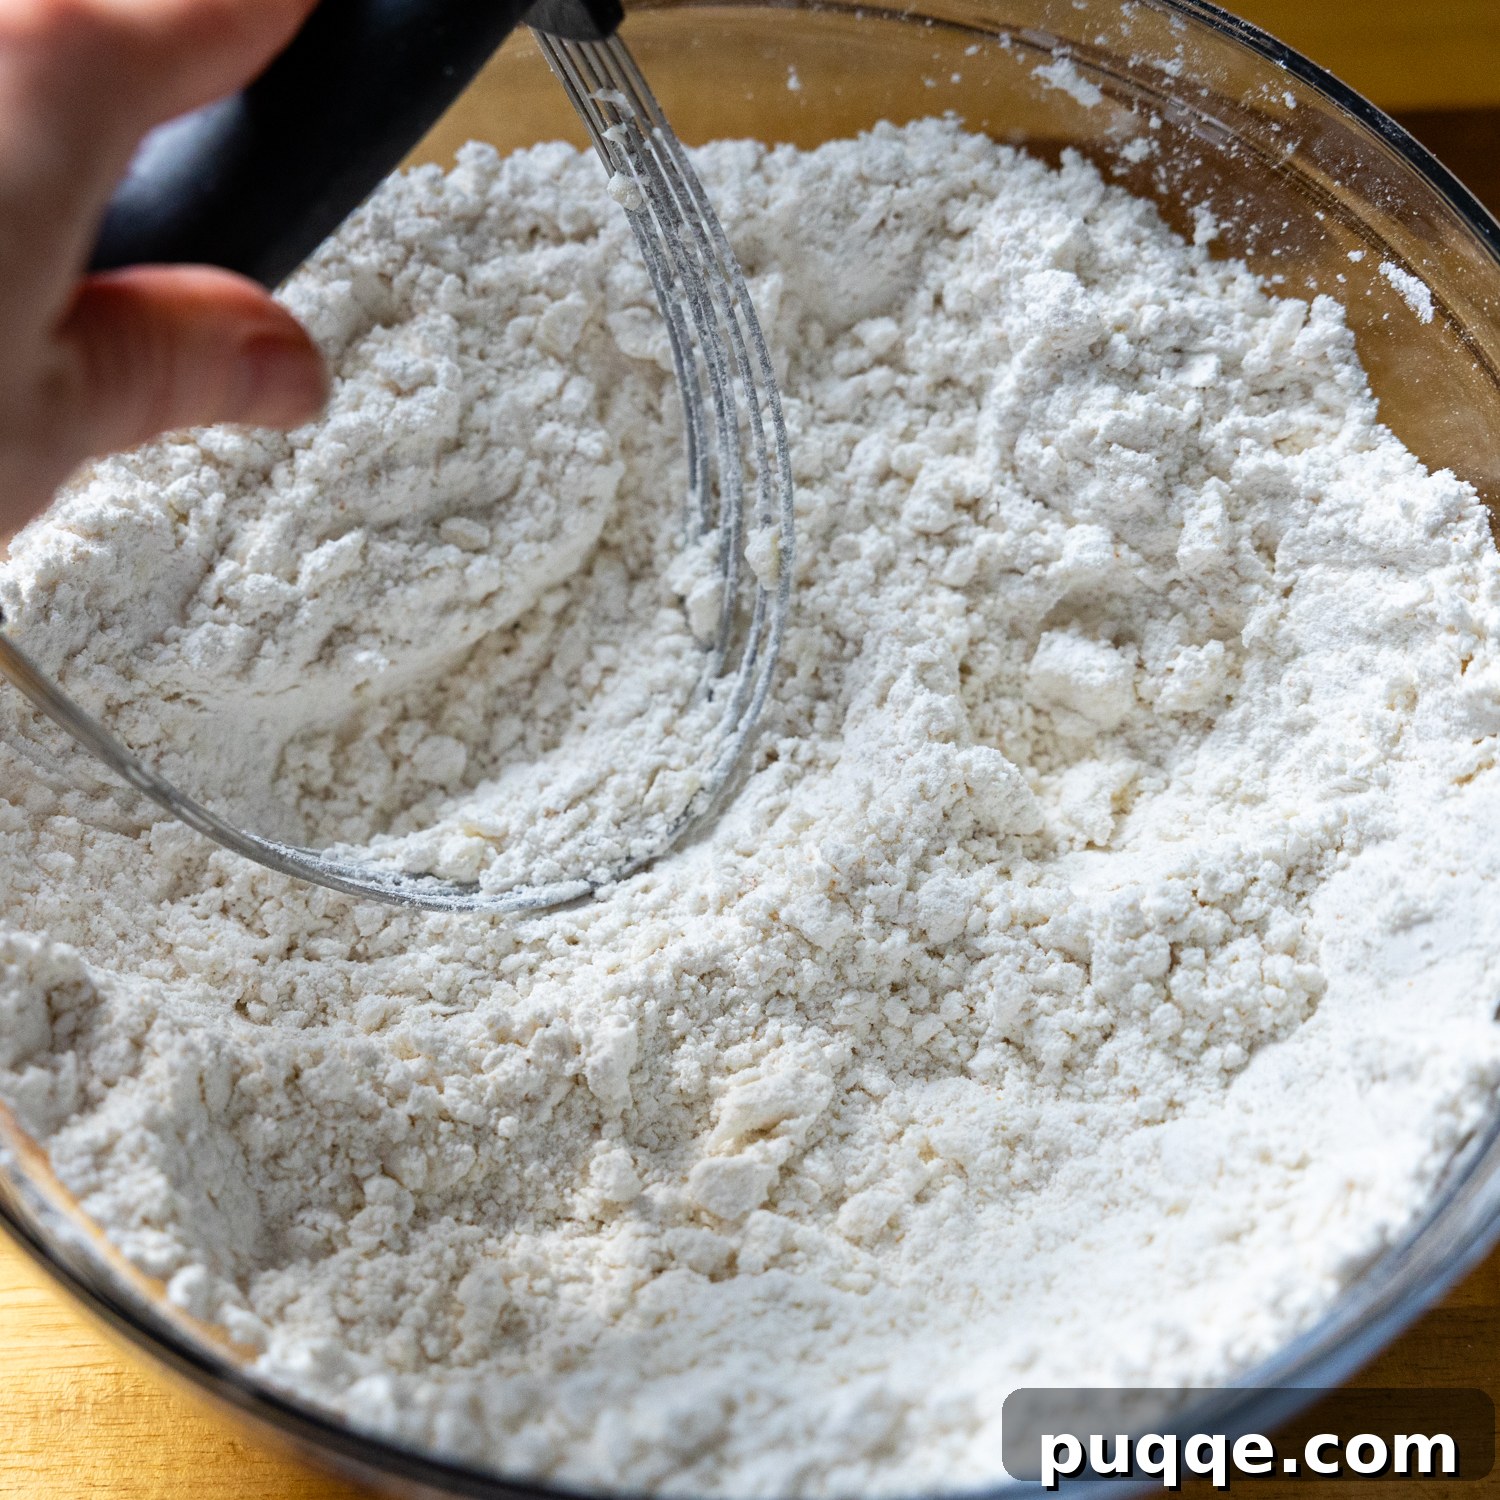
Begin by whisking together all the dry ingredients in a large bowl. It’s crucial that they are thoroughly combined before moving on. Next, add the cold butter, cut into small pieces. Work the butter into the dry mixture using a pastry blender, a fork, or even your fingertips. The goal is to incorporate the butter just enough so that the mixture resembles coarse sand, with no large clumps of butter remaining. Small, pea-sized pieces are ideal, as these pockets of butter will create steam in the oven, leading to those coveted flaky layers.
Step 2: Combine Wet Ingredients with Cheese, Then Chill
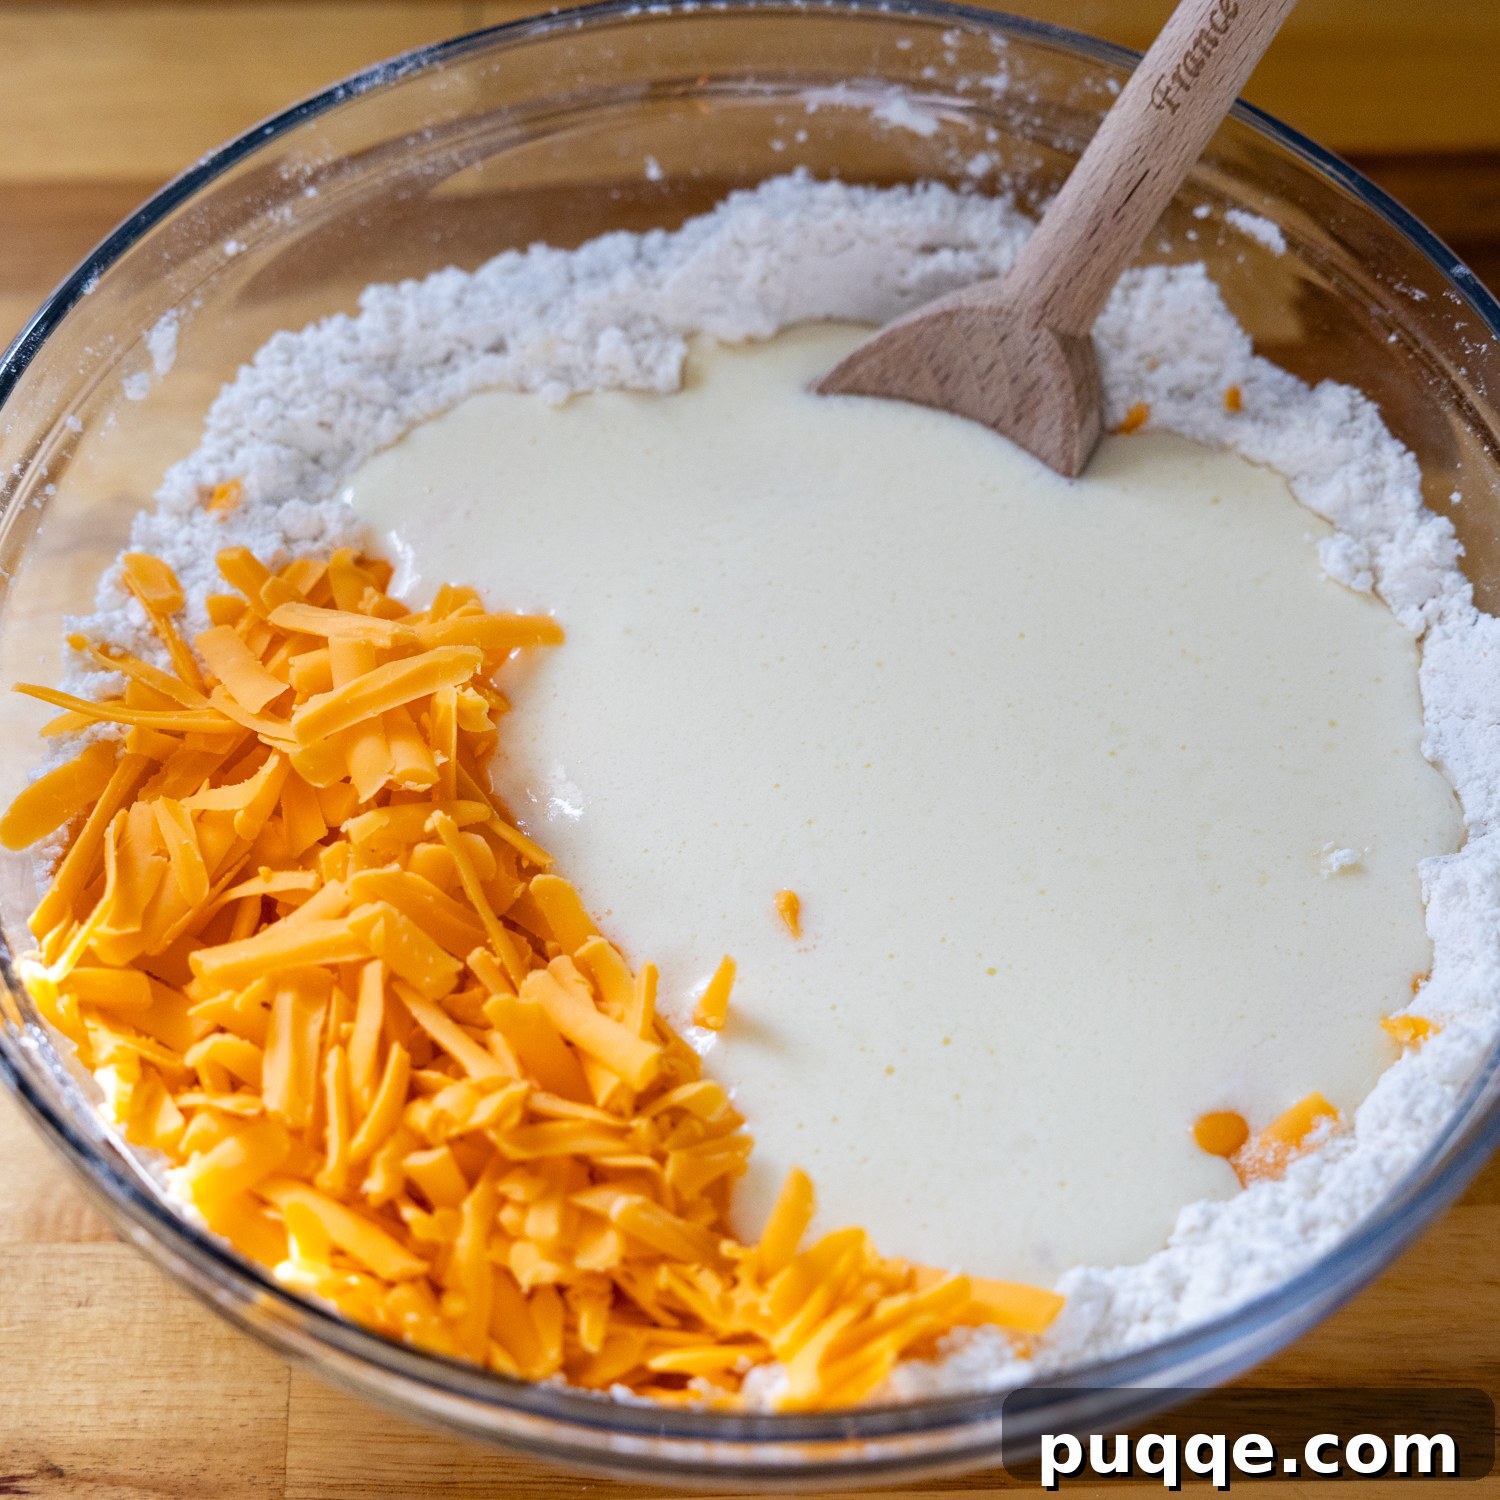
In a separate, smaller bowl, thoroughly whisk together the oil, milk, egg, yogurt, and lemon juice until well combined. This ensures all the wet ingredients are evenly distributed. Pour this wet mixture into your bowl of flour and butter, then add the generous amount of shredded cheddar cheese. Stir gently until just combined, being careful not to overmix. A soft, cohesive dough will form. Now comes a crucial step for gluten-free biscuits: chilling the dough. Cover the bowl with plastic wrap and refrigerate for a minimum of 30 minutes. This resting period allows the gluten-free flours to properly hydrate and relax, preventing a dry or gritty texture in your final biscuits. While the dough chills, preheat your oven to a precise 425℉ (230ºC).
Step 3: Scoop and Bake to Golden Perfection
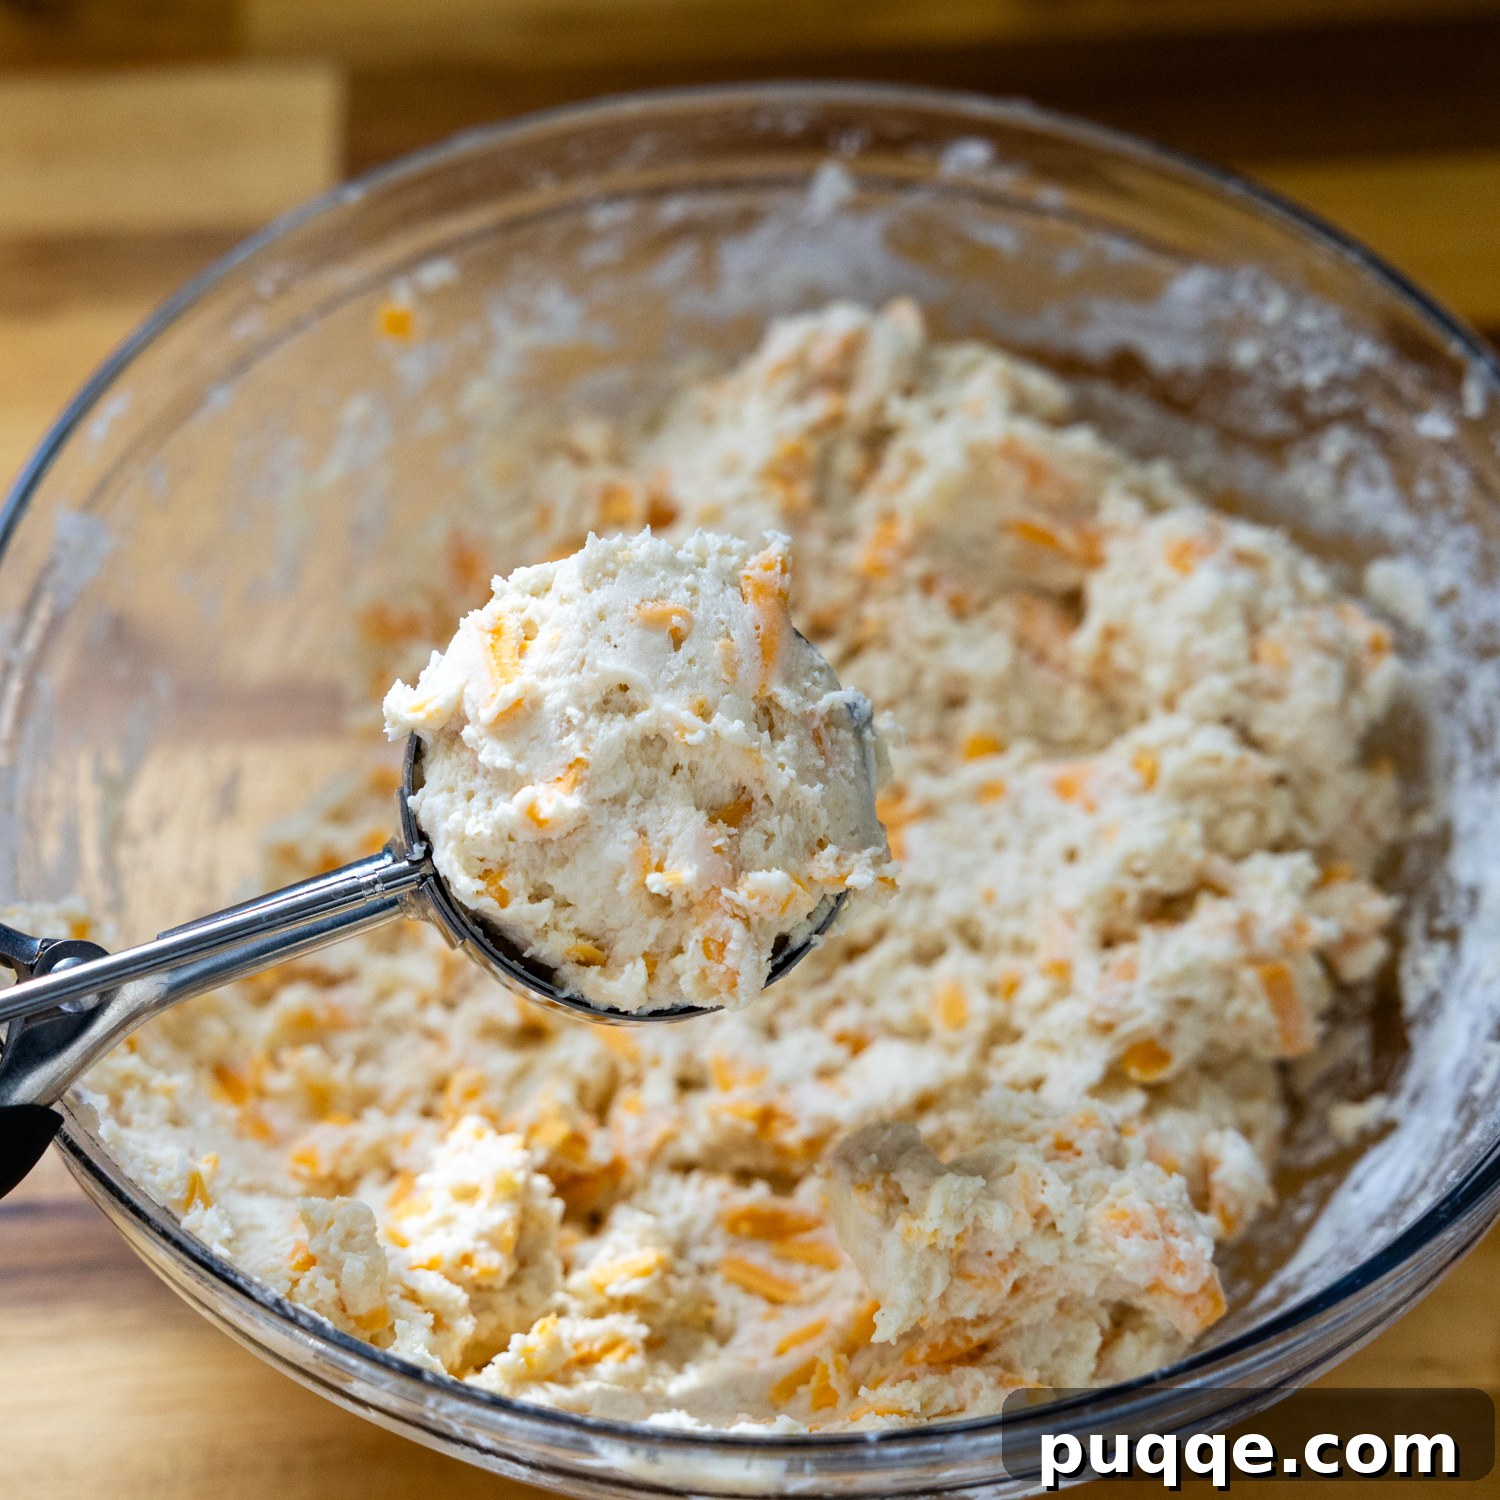
To ensure uniform biscuits, using a 4-tablespoon trigger scoop is the easiest and most efficient way to drop the dough. If you don’t have one, a ¼ cup measuring cup lightly greased with nonstick cooking spray will also work effectively for even portions. Prepare your baking setup by placing one baking sheet inside a second baking sheet – this double-layer technique insulates the bottom of your biscuits, preventing them from over-browning. Line the top sheet with parchment paper for easy cleanup. Scoop about 10-11 biscuits onto the prepared baking sheet, spacing them approximately 1 inch apart in the center. Placing them a bit closer together actually helps to create and trap steam, contributing to a more tender interior. Bake for about 16-17 minutes, rotating the pan halfway through baking to ensure even browning. Keep a close eye on them; you’re looking for a beautiful golden-brown color.
Step 4: The Best Part – Brush with Garlic Butter!
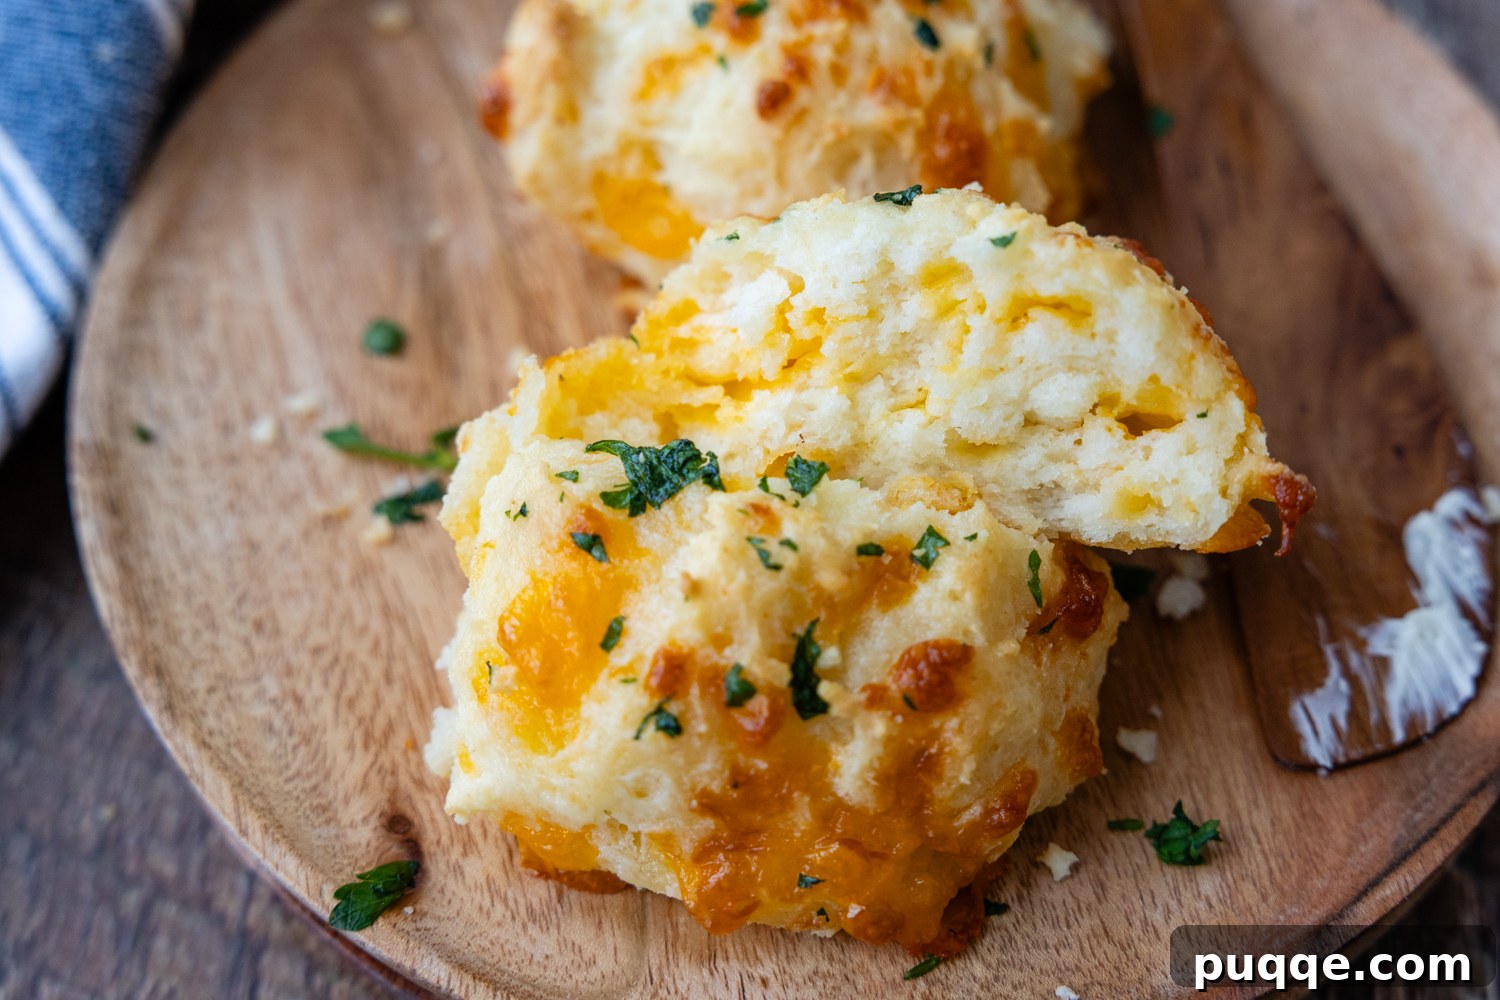
As soon as your glorious biscuits emerge from the oven, irresistibly golden and fragrant, it’s time for the final, most decadent touch. In a small bowl, melt together butter with a pinch of salt (especially if you’re using unsalted butter) and some fresh or dried parsley. This creates the iconic garlic butter topping that defines the Red Lobster experience. With a pastry brush, generously spread this aromatic butter over each warm biscuit. Watch it melt into the crevices, infusing every nook and cranny with rich flavor. Now, dive into these warm, buttery bites and rejoice in what can only be described as a gluten-free heaven on earth! They are truly best enjoyed immediately, so gather your loved ones and savor every moment.


My Favorite Biscuit Baking Method: The Secrets to Perfect Gluten-Free Biscuits
Achieving the perfect homemade biscuit, especially when baking gluten-free, relies on a delicate balance of heat and moisture. Traditionally, biscuits are baked at a high temperature to rapidly create and trap steam within, leading to a golden, crisp outer crust. However, with gluten-free breads and muffins, I often find it beneficial to slightly extend baking times. This allows sufficient moisture to evaporate, preventing a dense, gummy crumb – a common pitfall in gluten-free baking.
So, how do we strike this balance for our gluten-free cheddar biscuits? We employ a strategic approach. I opt for a slightly higher heat, 425℉ (230ºC), which is still robust enough to encourage a good rise and golden crust, but not as intensely high as some traditional wheat-based biscuit recipes. To ensure incredibly even baking and prevent the bottoms from becoming overly browned before the centers are fully cooked, I use a clever trick I learned from America’s Test Kitchen: stack two baking sheets inside each other. This creates an insulating layer for the bottom of the biscuits, distributing the heat more gently.
Furthermore, the placement of the biscuits on the baking sheet plays a vital role. Instead of spreading them out excessively, place the biscuits closer together, only about an inch apart, in the center of the sheet. This proximity helps to create and trap a little extra steam between the biscuits as they bake. Since we’re using a slightly lower oven temperature than some traditional methods, this “steam boost” is invaluable, contributing significantly to the soft, tender, and moist interior texture that we crave in a perfect biscuit. These simple yet effective techniques work in harmony to give you consistently delightful gluten-free cheddar biscuits every single time.
Serving Suggestions & Storage Tips
Just like their Red Lobster inspiration, these gluten-free cheddar biscuits are at their absolute best when served warm, soft, and dripping with garlic butter. They make an unforgettable accompaniment to nearly any meal. We adore serving them as elegant dinner rolls for special occasions like holidays, when entertaining guests, or for celebratory dinners. Beyond formal settings, they are also a quick and easy bread option that pairs wonderfully with comforting homemade soups, stews, or even a simple weeknight chili. Their versatile flavor profile means they’re welcome at breakfast, lunch, or dinner!
Storing and Freezing for Later Enjoyment:
These biscuits are truly a treat best enjoyed fresh from the oven. However, if you plan to make them ahead of time, simply bake and allow them to cool completely before brushing on the melted garlic butter. Store the cooled, unbuttered biscuits in an airtight container at room temperature for 1-2 days. When you’re ready to serve, simply rewarm them gently in the oven or microwave, then brush on the freshly prepared garlic butter just before serving. This ensures they retain their wonderful texture and flavor.
For longer storage, these biscuits freeze beautifully! Once completely cooled, wrap each biscuit individually in plastic wrap, then place them in an airtight freezer bag or container. They can be stored in the freezer for up to 2-3 months. To enjoy, thaw the frozen biscuits overnight in the refrigerator, then rewarm in a preheated oven (around 300°F/150°C) until heated through. Finish by brushing them generously with the melted garlic butter, and serve immediately. This way, you can always have a batch of these incredible gluten-free cheddar biscuits ready for any craving or last-minute meal!
Save This Irresistible Recipe to Your Pinterest Board!
Let’s be friends on Pinterest! I’m always sharing great recipes!
Did you make this recipe? I love hearing from you! Leave a star rating and comment below the recipe card. Your feedback helps others discover amazing recipes, and I truly appreciate hearing from our community. You will always hear back from me! -Melissa

Buttery Gluten-Free Cheddar Bay Biscuits (Copycat)

Melissa Erdelac
Pin Recipe
Recipe Video
Ingredients
- 2 cups (307 g) all-purpose gluten free flour blend, I recommend Cup4Cup gluten-free flour
- 4 teaspoons baking powder
- 1 teaspoon garlic powder
- 1 teaspoon sugar
- ½ teaspoon salt
- ¼ teaspoon baking soda
- 3 tablespoons (42 g) butter, chilled and cut into small pieces
- ¾ cup (200 g) plain whole-milk yogurt
- ½ cup (114 g) milk
- 1 large egg
- 2 tablespoons (27 g) oil
- 2 teaspoons lemon juice, I’ve substituted vinegar for this with good results
- 1½ cups (141 g) freshly grated Sharp cheddar cheese
For Topping
- 2 tablespoons melted butter
- 1 tablespoon fresh minced parsley, or 1/2 teaspoon dried parsley
- ⅛ teaspoon salt
Equipment
- Baking Sheets
- Cup4Cup Gluten Free Flour
- Large Trigger Scoop
Instructions
- Whisk flour, baking powder, garlic powder, sugar, salt, and baking soda in a large bowl until thoroughly combined. Add the chilled butter, cut into small pieces, and work it into the mixture using a pastry blender, fork, or your fingertips until small, pea-sized pieces remain and the mixture resembles coarse sand.
- In a separate bowl, whisk together the yogurt, milk, egg, oil, and lemon juice until smooth. Pour this liquid mixture into the dry ingredients with the freshly grated cheddar cheese. Stir gently until no pockets of dry flour remain and a soft dough forms. Cover the bowl with plastic wrap and chill for 30 minutes. This resting period is crucial for the gluten-free starches to hydrate, making the dough easier to handle and ensuring a tender biscuit. While the dough chills, preheat your oven to 425ºF (230ºC).
- Prepare your baking setup by placing one baking sheet inside a second baking sheet (creating a double layer for even heat distribution). Line the top baking sheet with parchment paper. Use a large trigger scoop (4 tbsp size) or a greased ¼ cup measuring cup to scoop and drop the dough onto the prepared baking sheet. Arrange the biscuits approximately 1 inch apart in the center of the sheet; this helps to trap steam and contribute to a more tender crumb.
- Bake for about 15-17 minutes, or until the biscuits are golden brown. Watch them carefully and rotate the pan halfway through baking to ensure even coloring. As soon as they come out of the oven, stir together the melted butter, fresh minced parsley, and a pinch of salt for the topping. Brush this flavorful mixture generously over the warm biscuits. Serve immediately and enjoy!
Notes
Storing and Freezing
These biscuits are truly best served warm and freshly baked. If you need to make them ahead of time, bake and allow them to cool completely before brushing on the butter. Store them in an airtight container at room temperature for 1-2 days. To serve, rewarm and then brush on the melted garlic butter.
For longer storage, wrap the cooled biscuits individually in plastic wrap, then place them in an airtight container or ziplock freezer bag. They can be frozen for up to 2-3 months. Thaw frozen biscuits in the refrigerator, then rewarm in the oven and brush on the butter before serving.
Nutrition Information
Carbohydrates: 19g
Protein: 7g
Fat: 15g
Saturated Fat: 7g
Polyunsaturated Fat: 1g
Monounsaturated Fat: 5g
Trans Fat: 0.2g
Cholesterol: 49mg
Sodium: 319mg
Potassium: 214mg
Fiber: 2g
Sugar: 3g
Vitamin A: 376IU
Vitamin C: 0.4mg
Calcium: 225mg
Iron: 1mg