
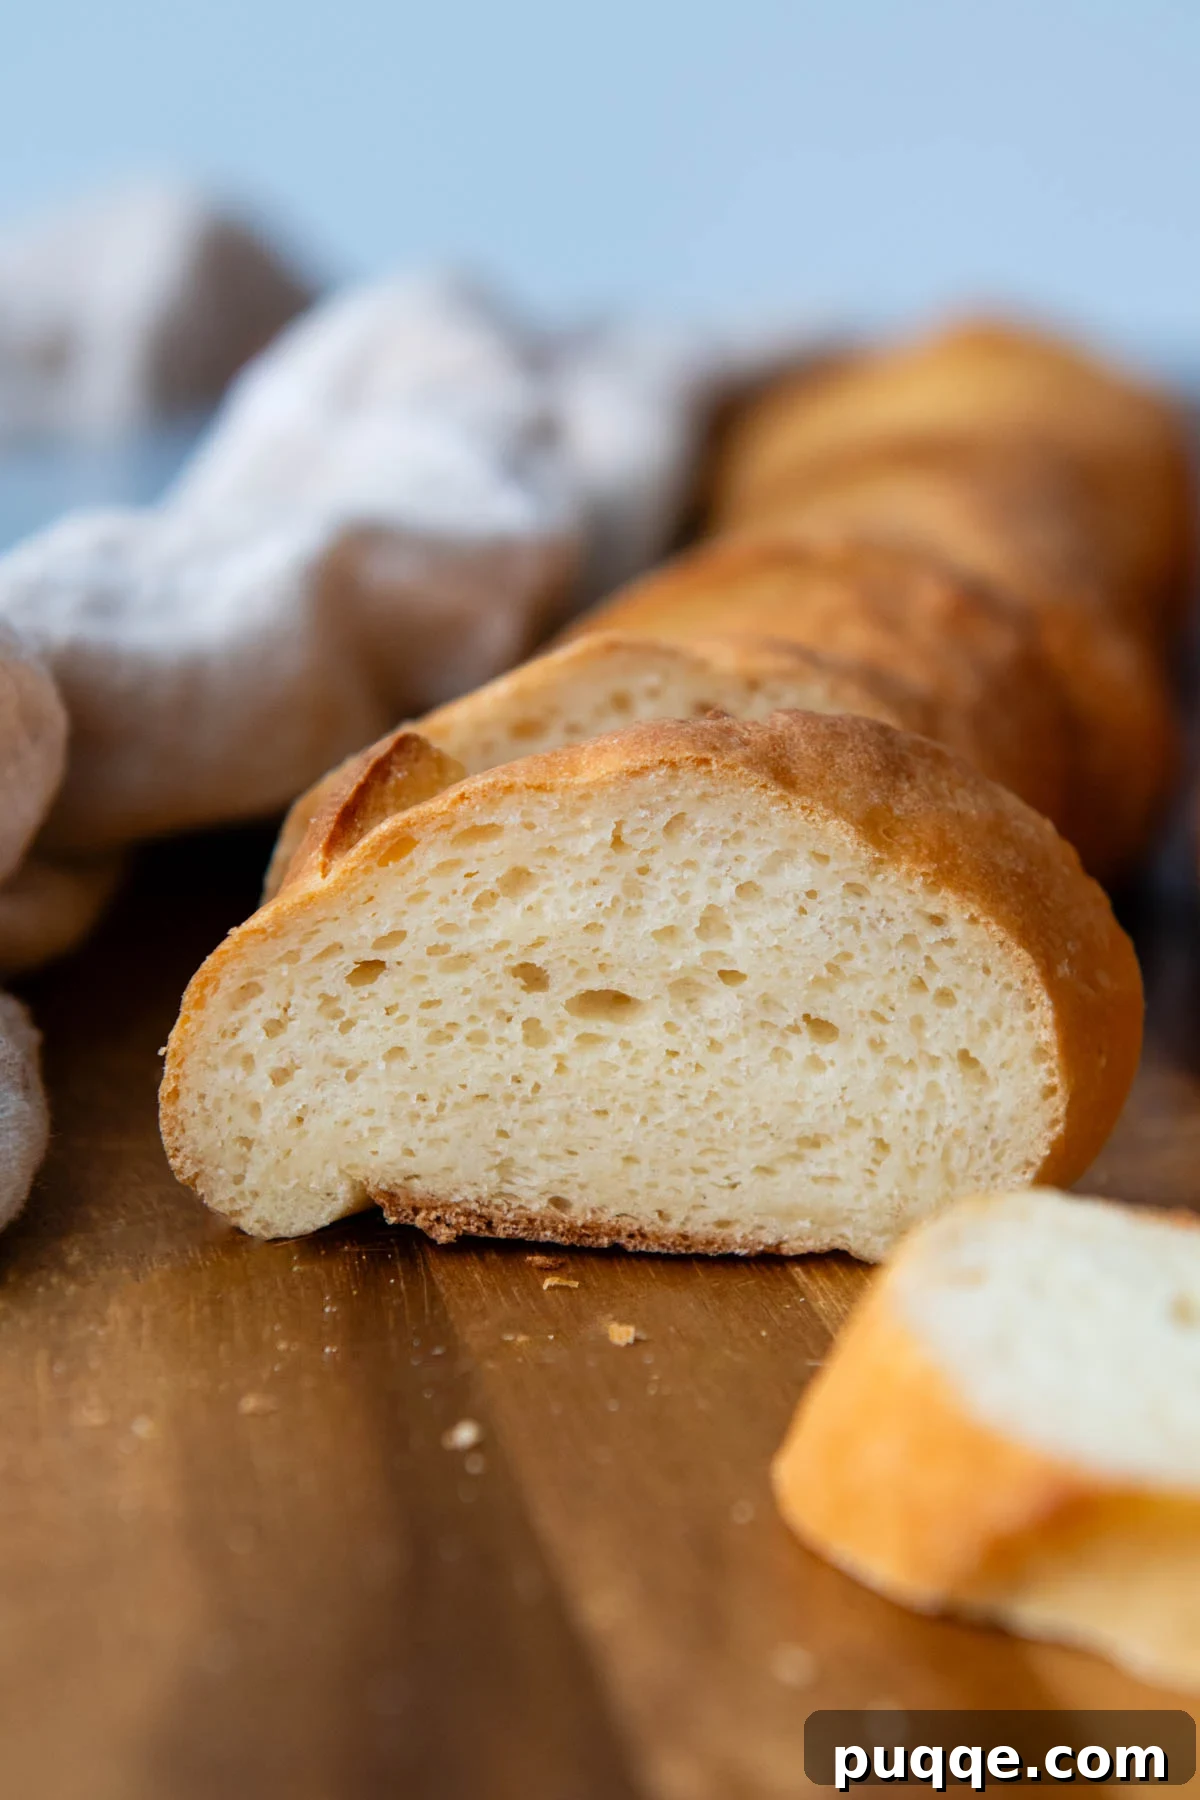
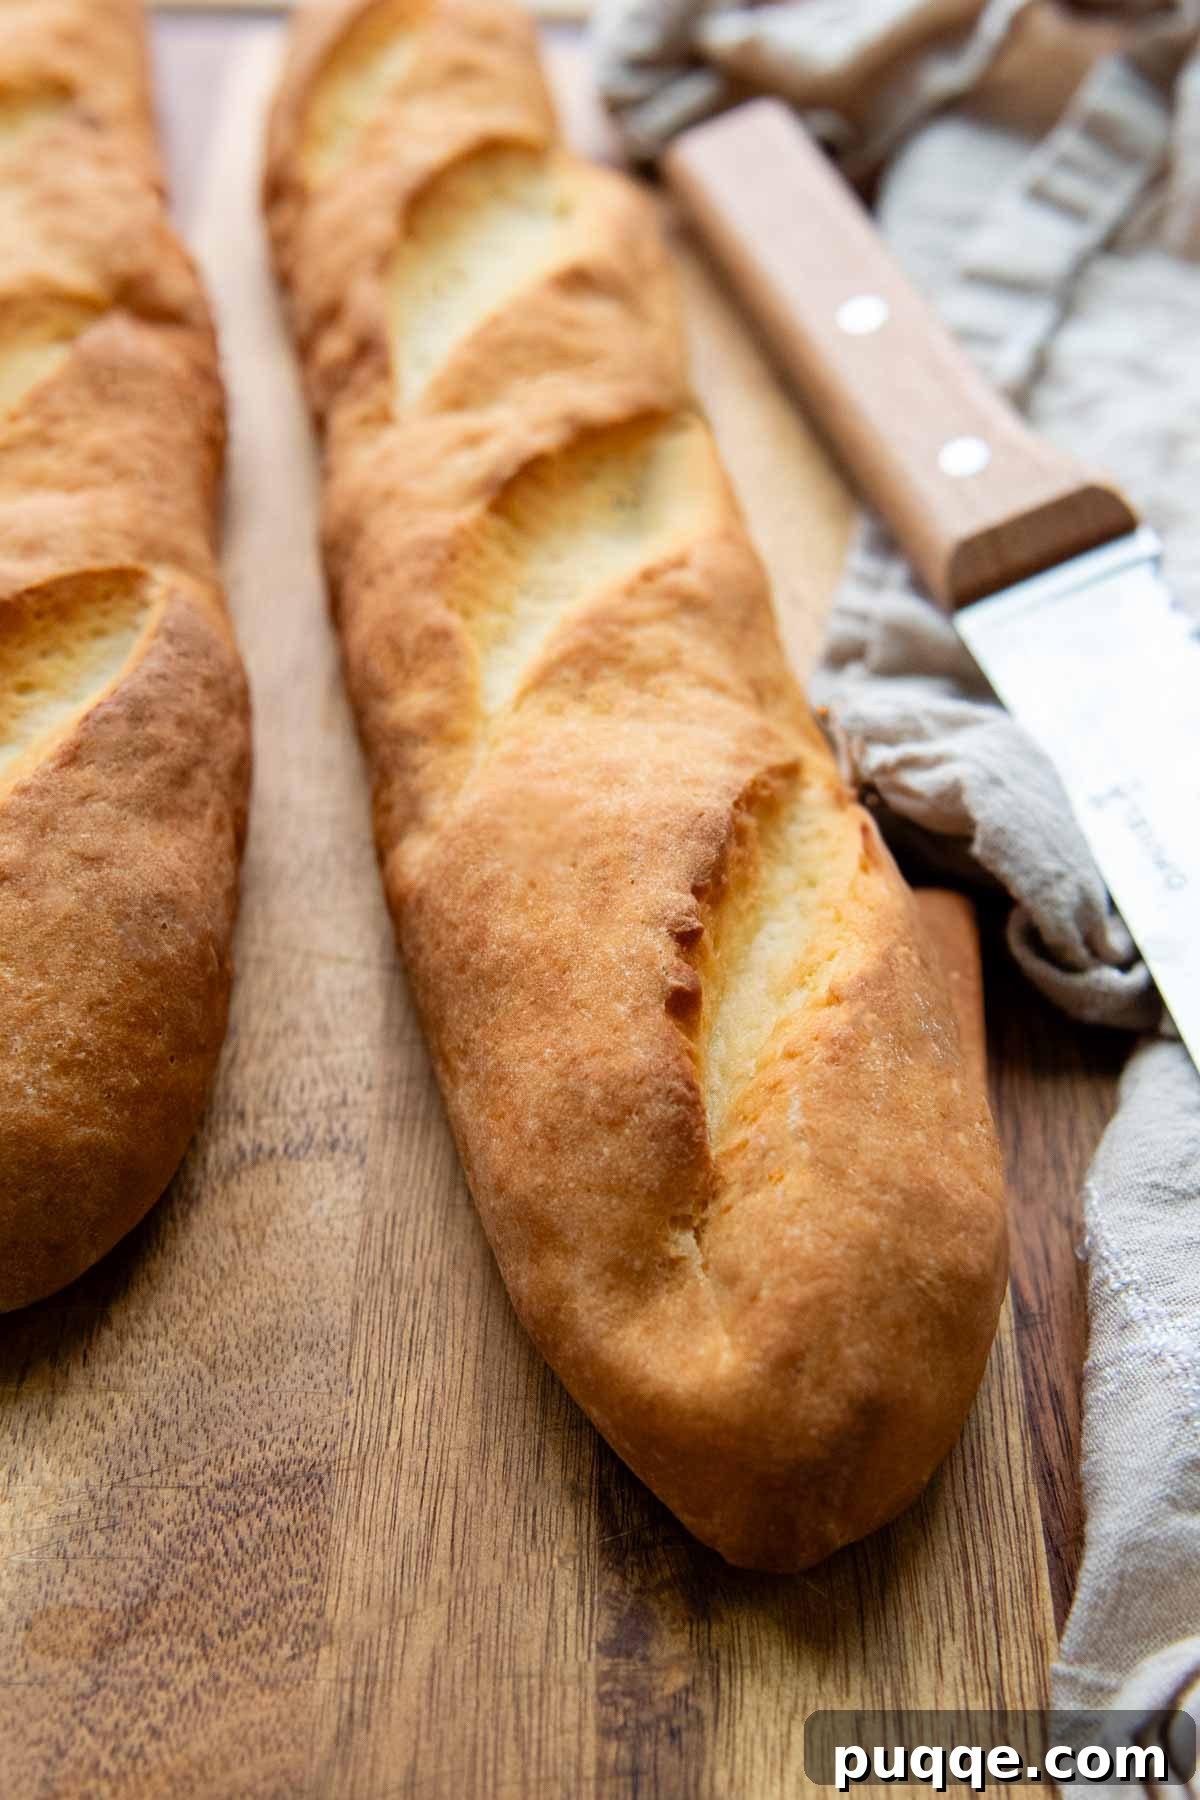
Discover the ultimate guide to baking the **best gluten-free French bread** with an incredibly easy and thoroughly tested recipe. As a seasoned gluten-free baker, I’ve spent countless hours perfecting simple yet effective techniques to achieve a truly authentic crusty baguette, complete with a soft, open, and airy crumb. This homemade loaf comes together in mere minutes, requires just one short rise, and bakes quickly, meaning you can enjoy fresh, warm baguettes in less than an hour! Say goodbye to dense, crumbly gluten-free bread and hello to a culinary masterpiece that will impress even the most discerning palates.
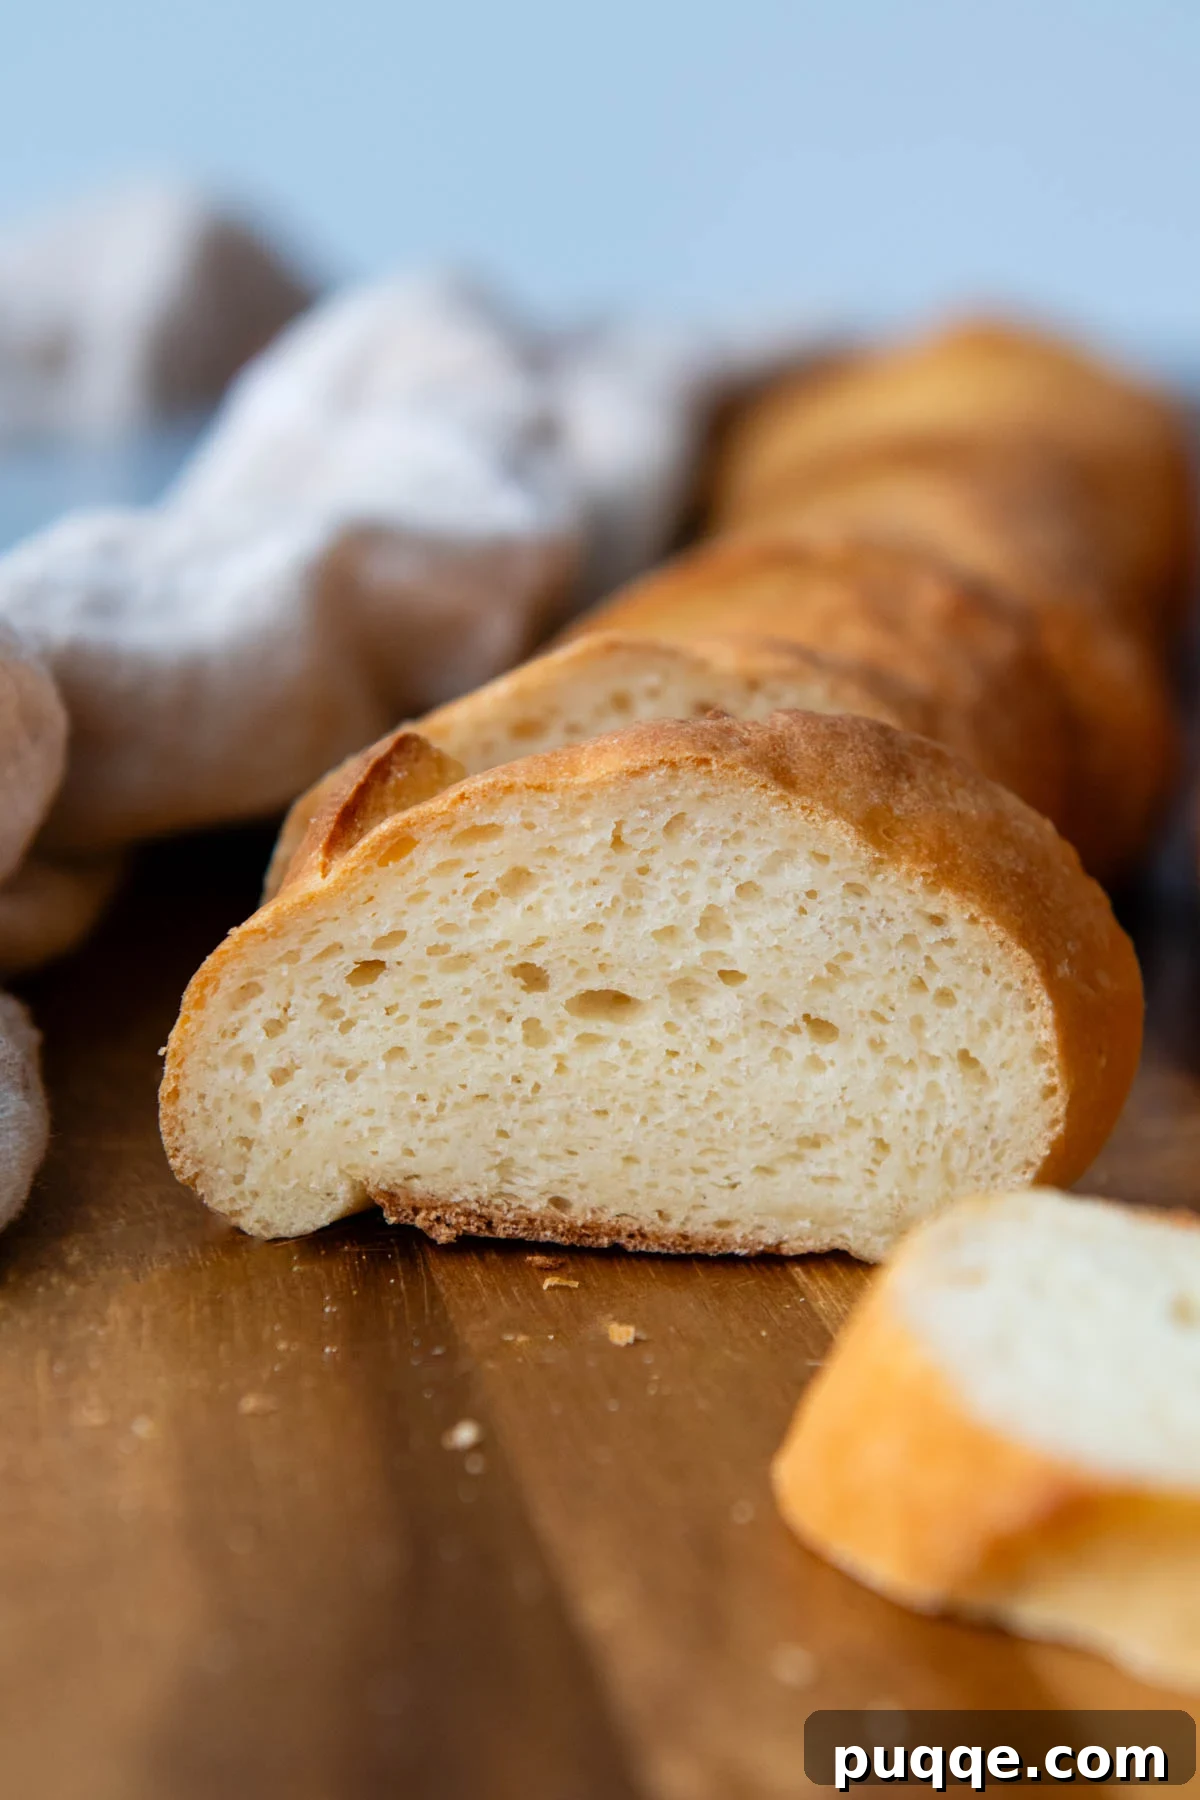
The Quest for Perfect Gluten-Free French Baguettes
Achieving the ideal French baguette texture without gluten can be a formidable challenge. When I first embarked on developing this homemade GF French bread recipe, I honestly didn’t anticipate the extensive trial-and-error it would take to replicate the quintessential elements: a robust, golden outer crust yielding to a soft, beautifully airy, and open crumb. Many gluten-free bread recipes fall short, resulting in dense or overly chewy loaves. My goal was to craft a recipe that not only tastes incredible but also truly mimics the structure and experience of traditional wheat-based baguettes.
The inspiration for this recipe initially stemmed from feedback from several readers who successfully adapted my easy gluten-free breadsticks recipe into a single large loaf. I was delighted by their creativity and resourcefulness, which ignited my passion to develop a dedicated, authentic, yet still incredibly easy, gluten-free baguette recipe.
While my initial experiments using the breadstick dough yielded a very pleasant taste and a satisfyingly crisp outer crust (a secret weapon being the use of ice cubes in the oven, which I’ll detail later!), I felt the interior crumb lacked the signature openness synonymous with classic French bread. Traditional baguettes achieve their characteristic large holes from high-protein wheat flour, a property inherently missing in gluten-free flour blends. This realization spurred me to delve deeper into the science of gluten-free baking.
Through extensive research and testing, I began incorporating ingredients designed to add protein, enhance binding, and retain moisture—all crucial for developing a superior gluten-free structure. My first key addition was eggs. Adding two whole eggs significantly boosted the dough’s protein content and improved its overall elasticity, contributing to a more cohesive and workable mixture. However, it still needed an extra push to achieve that truly open crumb.
Typically, I shy away from using apple cider vinegar in my gluten-free bread recipes, as I often find it an unnecessary addition that doesn’t yield a noticeable difference. However, in this specific baguette recipe, a full tablespoon of apple cider vinegar proved to be a game-changer. Its acidity creates an environment that not only aids in yeast activation but also helps to gently break down the starches in the gluten-free flour, resulting in a more expansive and open internal structure, truly mimicking traditional bread.
Finally, I employed a clever trick borrowed from my successful soft gluten-free rolls recipe: replacing a portion of the all-purpose gluten-free flour with potato starch. Baguettes require a dough that can be shaped with relative ease and hold its form. Rather than adding more flour, which often leads to a drier, denser bread, potato starch effectively absorbs moisture while contributing to a wonderfully soft and tender interior texture. This combination of ingredients, carefully balanced and perfected, delivers an unparalleled gluten-free French bread experience.
Now that this recipe is finally perfected, we’ve been enjoying these delicious baguettes in countless ways at home. They are absolutely divine simply slathered with butter and dunked into a comforting bowl of soup. They transform into the most incredible easy gluten-free garlic bread, perfect for any Italian meal. Get creative and make cheesy French bread pizzas, delightful French toast, or crispy garlic GF crostini for appetizers. They’re also fantastic for sandwiches, ideal for dipping into rich Swiss cheese fondue, or as the star of a fresh Panzanella salad. If you haven’t enjoyed a homemade baguette in a while, now is absolutely the time!
Essential Gluten-Free Baguette Ingredients: A Deeper Dive
Crafting exceptional gluten-free French bread relies on understanding the role of each ingredient. Here’s why these components are crucial for achieving that perfect crusty exterior and airy interior:
- Gluten-Free Flour Blend: The quality of your gluten-free flour blend is paramount and can genuinely make or break your baked goods. For the absolute best texture and results in this recipe, I enthusiastically recommend Cup4Cup gluten-free flour. It consistently delivers superior results, largely due to its balanced composition. However, it does contain milk powder, so if you require a dairy-free option, be sure to select a certified dairy-free gluten-free flour blend. Crucially, ensure your chosen blend already contains xanthan gum, or add it separately if not. Xanthan gum acts as a vital binding agent, mimicking gluten’s elasticity and helping to create structure in the absence of traditional wheat protein.
- Psyllium Husk Powder: This powerful ingredient is a game-changer in gluten-free baking. Psyllium husk powder significantly helps maintain moisture within the bread, preventing it from becoming dry and crumbly—a common issue with gluten-free loaves. More importantly, it acts as a phenomenal gluten mimic, providing the dough with structure and elasticity. This allows the dough to be shaped effectively and contributes to that desirable chewy texture that is often hard to achieve without gluten. For a deeper understanding, you can explore what psyllium husk is and its benefits in gluten-free baking.
- Apple Cider Vinegar: As mentioned, the addition of apple cider vinegar is critical for developing an open, airy crumb. Its acidic properties create an optimal environment for yeast activity and can help relax the starches in gluten-free flours, promoting a more expansive rise and a less dense interior. While other vinegars might be substituted in a pinch, apple cider vinegar consistently yields the best results for this specific baguette recipe, contributing to both texture and a subtle depth of flavor.
- Baking Powder: To ensure a light and airy texture, which can be particularly challenging to achieve in gluten-free breads, I pair baking powder with yeast. Yeast provides the primary leavening, but baking powder offers an immediate lift through a chemical reaction when exposed to moisture and heat, assisting the rise and contributing to the overall lightness and tender crumb.
- Olive Oil: A touch of olive oil in the dough adds a wonderful depth of flavor characteristic of artisan breads. Beyond taste, it incorporates a small amount of fat that coats the gluten-free starches, contributing to a more tender crumb and helping to keep the bread moist and prevent it from drying out too quickly.
- Eggs: The two large eggs in this recipe play a multifaceted role. They contribute essential protein, which helps provide structure and bind the ingredients together. Eggs also add moisture and richness to the dough, enhancing both its texture and flavor, while aiding in the elasticity needed for shaping. Ensure they are at room temperature for optimal incorporation into the dough.
Bake with Confidence: Step-by-Step Gluten-Free Baguette Instructions
Baking these gluten-free baguettes is a rewarding experience. Follow these detailed steps to achieve perfect results every time. (While the recipe card below provides precise measurements, these step-by-step photos and instructions offer additional guidance and tips.)
1. Preparing the Dough: Whip Up the Easy Batter
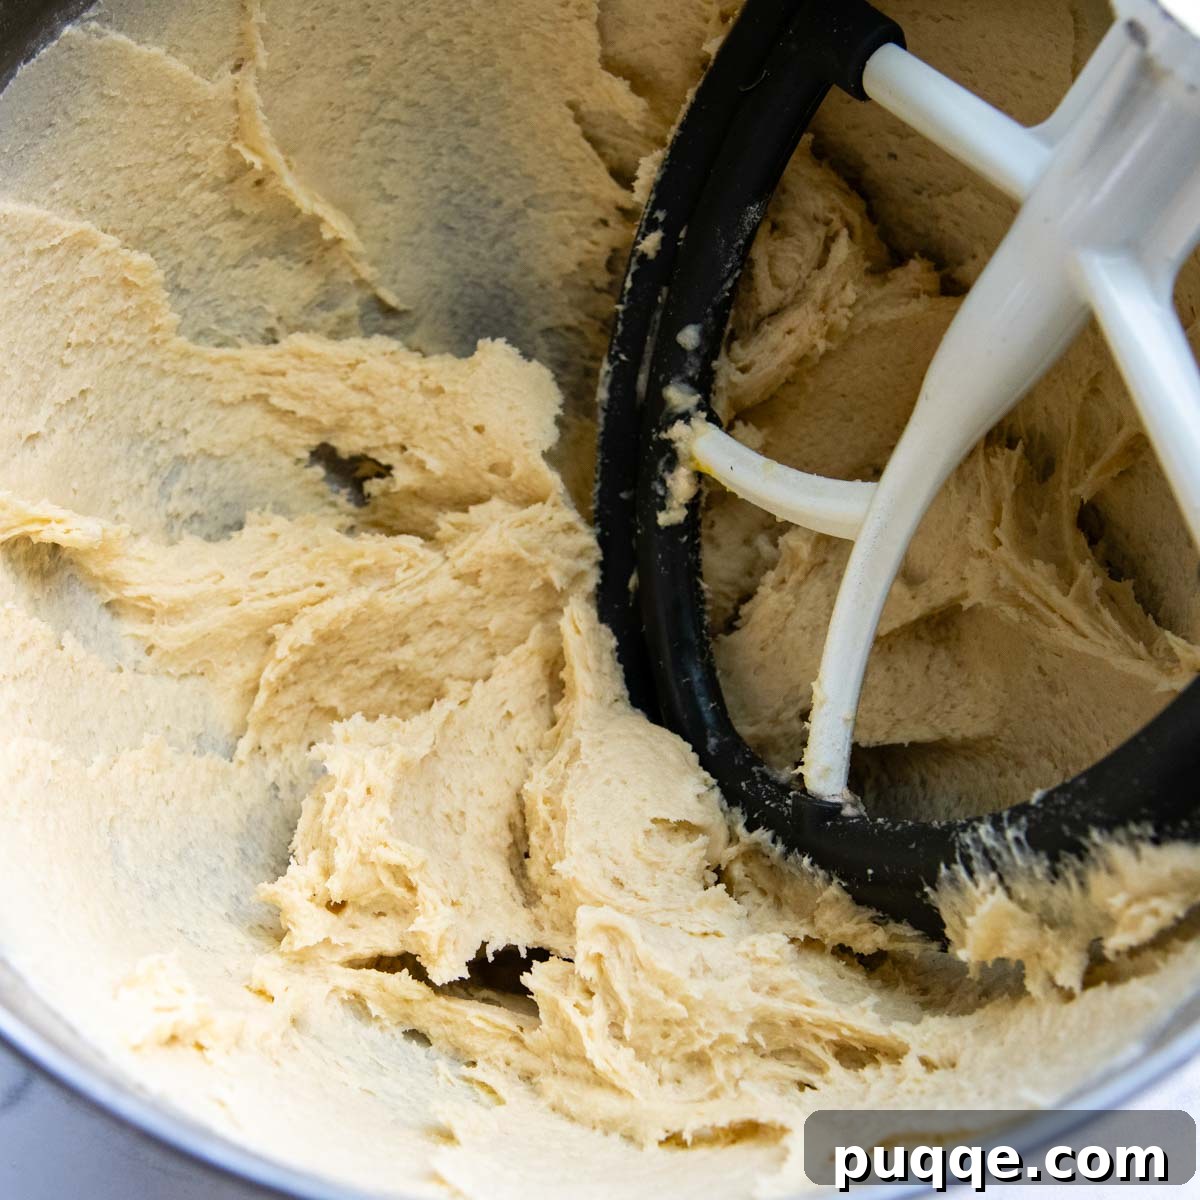
In the bowl of a stand mixer fitted with a paddle attachment, begin by thoroughly blending all the dry ingredients: gluten-free flour blend, potato starch, psyllium husk powder, instant rapid rise yeast, baking powder, and salt. Mix on low speed for about a minute to ensure even distribution. Then, add the wet ingredients: warm water, room temperature eggs, apple cider vinegar, honey, and olive oil. Start mixing on low speed, allowing the dough to come together into a cohesive mass. This usually takes about 1 minute. Once combined, increase the mixer speed to medium and beat the dough for a full 5 minutes. This extended mixing time is crucial for developing the structure and helping the batter thicken. Be sure to scrape down the sides of the bowl and the paddle attachment halfway through to ensure all ingredients are fully incorporated. The final dough will be very stiff and thick, but it should still be sticky and cling to the sides of the bowl. This is the correct consistency for shaping! See? That was incredibly easy, wasn’t it?
2. Shaping the Baguettes: Crafting Perfect Loaves
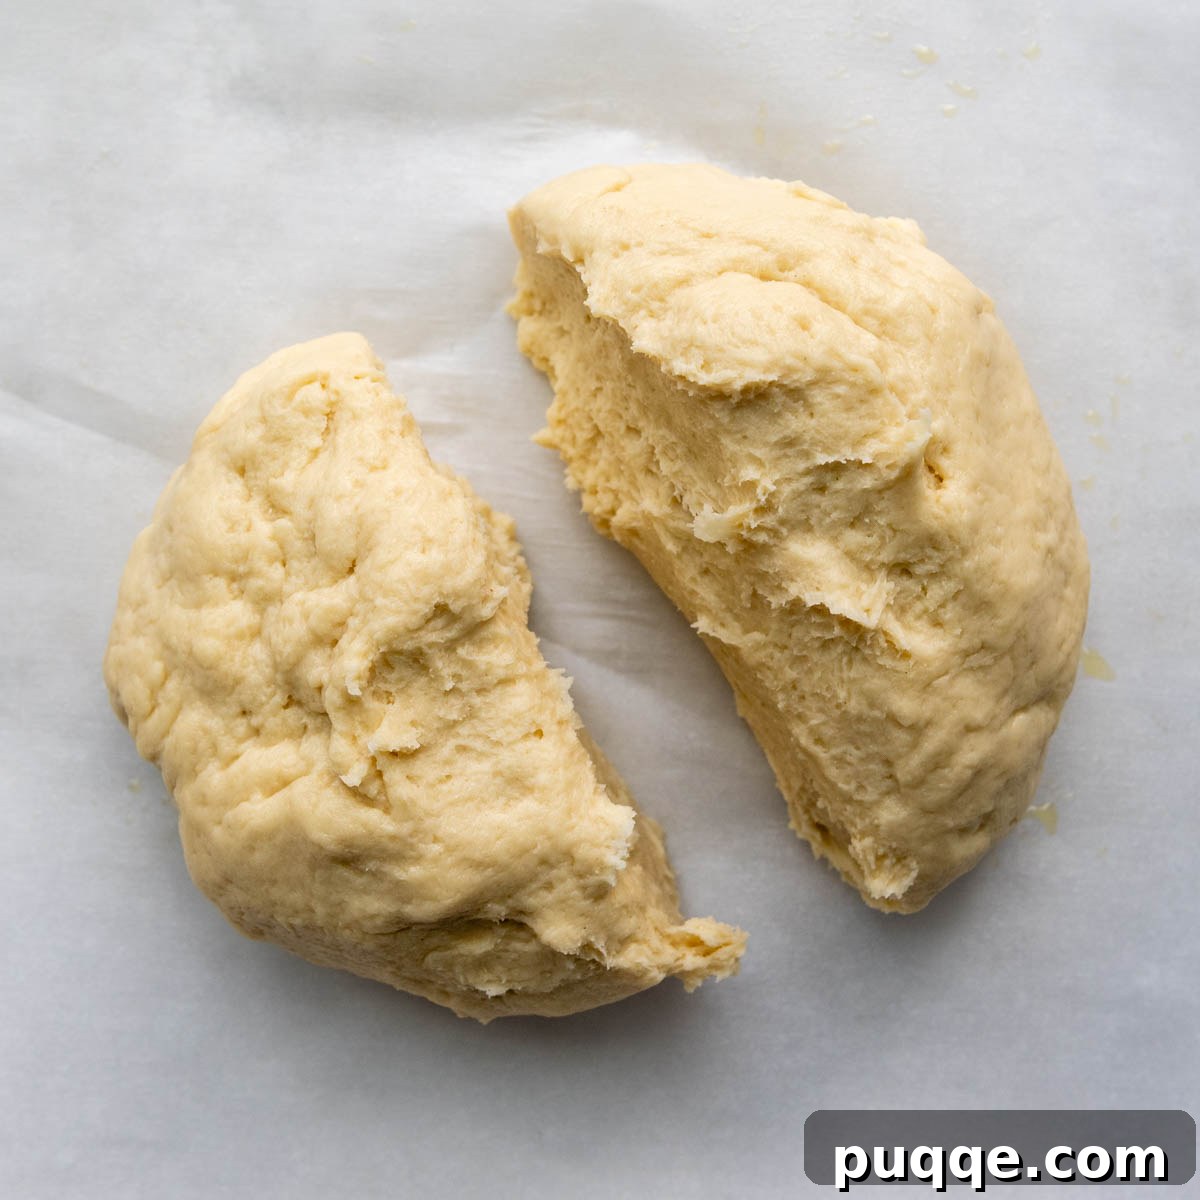
For your work surface, I highly recommend using a large piece of parchment paper laid out on a baking sheet. Lightly grease the parchment paper with a little olive oil or a nonstick cooking spray to prevent the sticky gluten-free dough from adhering. Carefully scrape the prepared dough out onto the greased parchment. Using greased hands (this is key to handling the sticky dough without adding excess flour), gently form the dough into a large ball. Then, use a sharp knife or a dough scraper to divide the dough evenly into two equal parts. Move one half to the side for a moment.
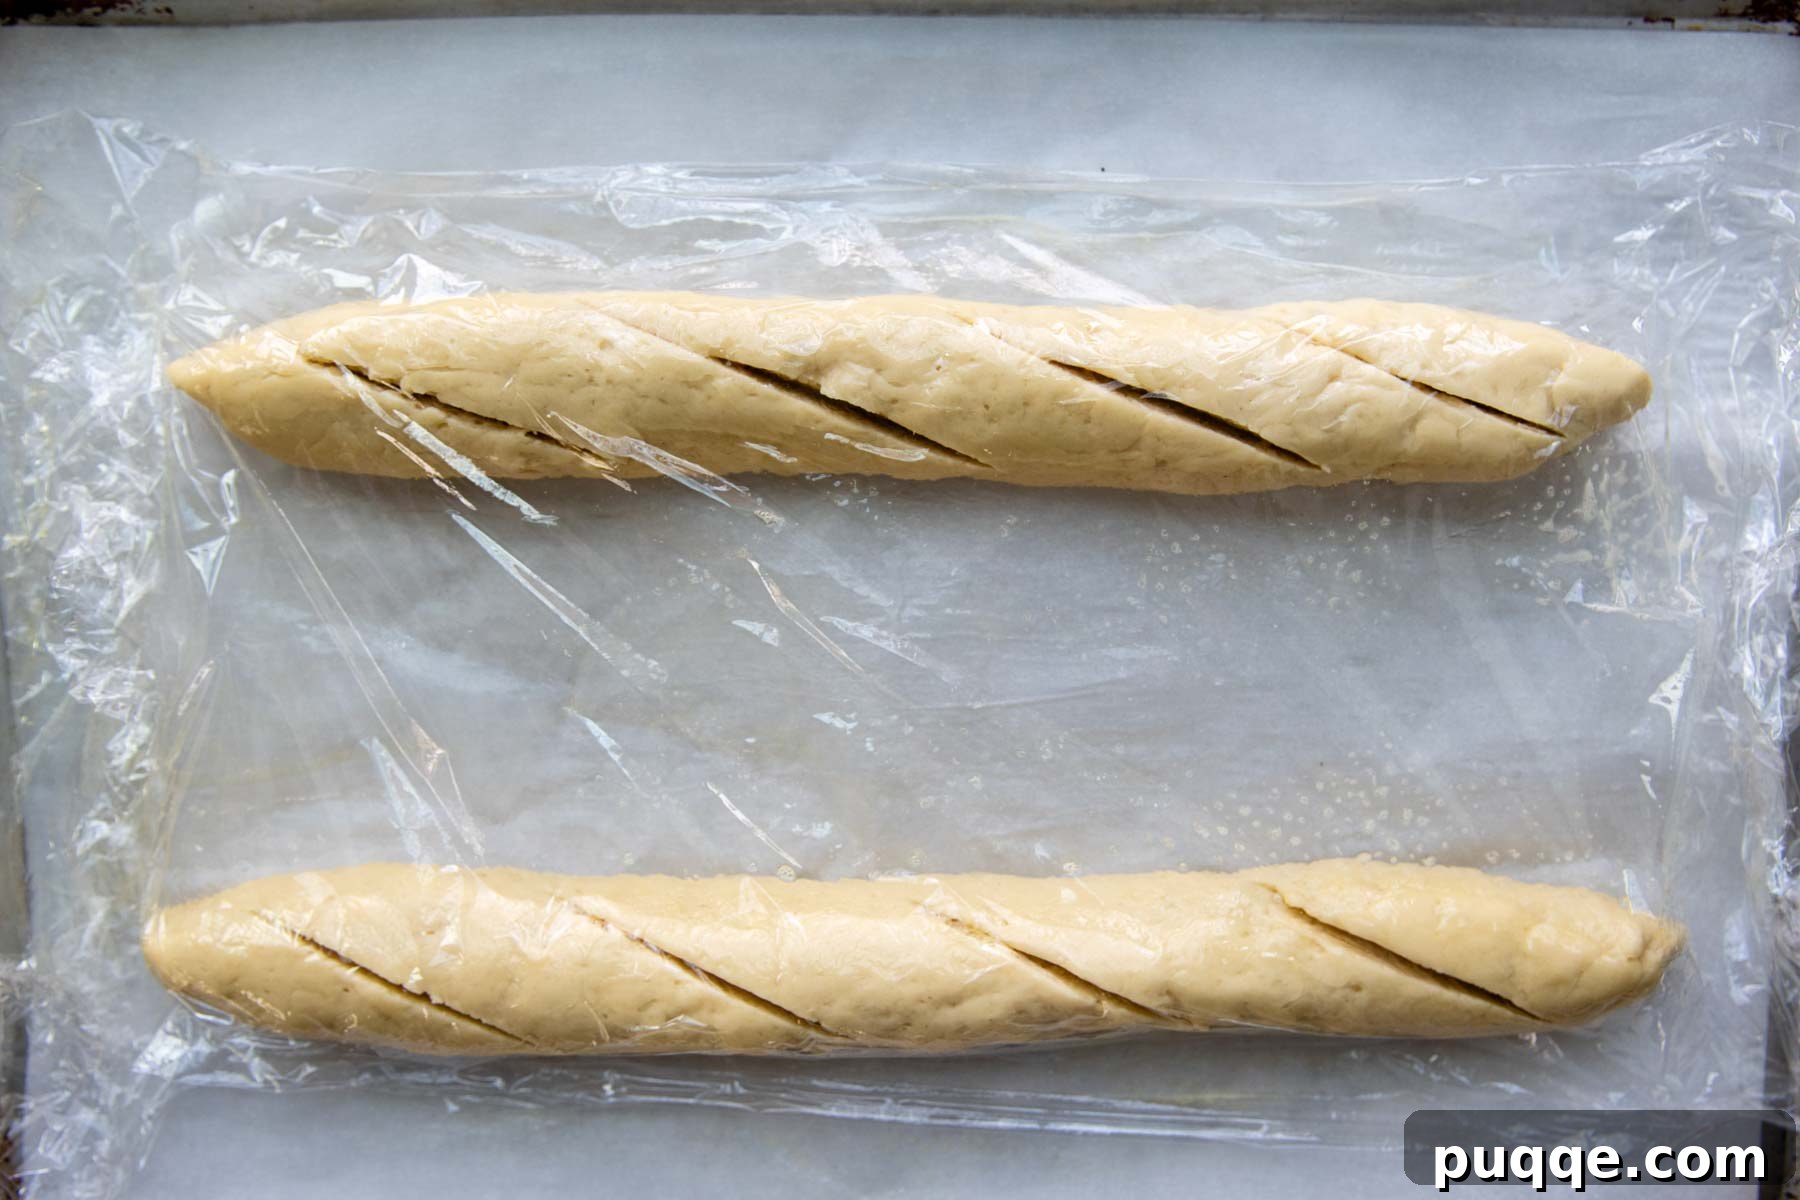
Now, with your greased hands, roll each section of dough into a smooth, even 12-inch log. As you shape, gently taper the ends of each log to create that classic baguette silhouette. Place the shaped logs about 3-4 inches apart on the parchment-lined baking sheet to allow space for rising and baking. Finally, take a sharp knife or a baker’s lame and carefully slash 3-4 shallow diagonal slits, about ¼-inch deep, across the top of each baguette. These slashes not only add to the authentic appearance but also help the bread expand properly during baking.
3. Rise and Bake: The Transformation
Once shaped, gently lay a piece of greased plastic wrap over the top of the baguettes, ensuring it doesn’t stick to the dough. Allow the bread to rise in a warm, draft-free place for 30 minutes. Don’t be concerned if the bread doesn’t appear fully risen at this stage; it will expand significantly more in the oven thanks to the baking powder’s activation. While the bread is rising, preheat your oven to a blazing hot 450℉ (230℃). This high initial temperature is essential for achieving that sought-after crusty outer texture.
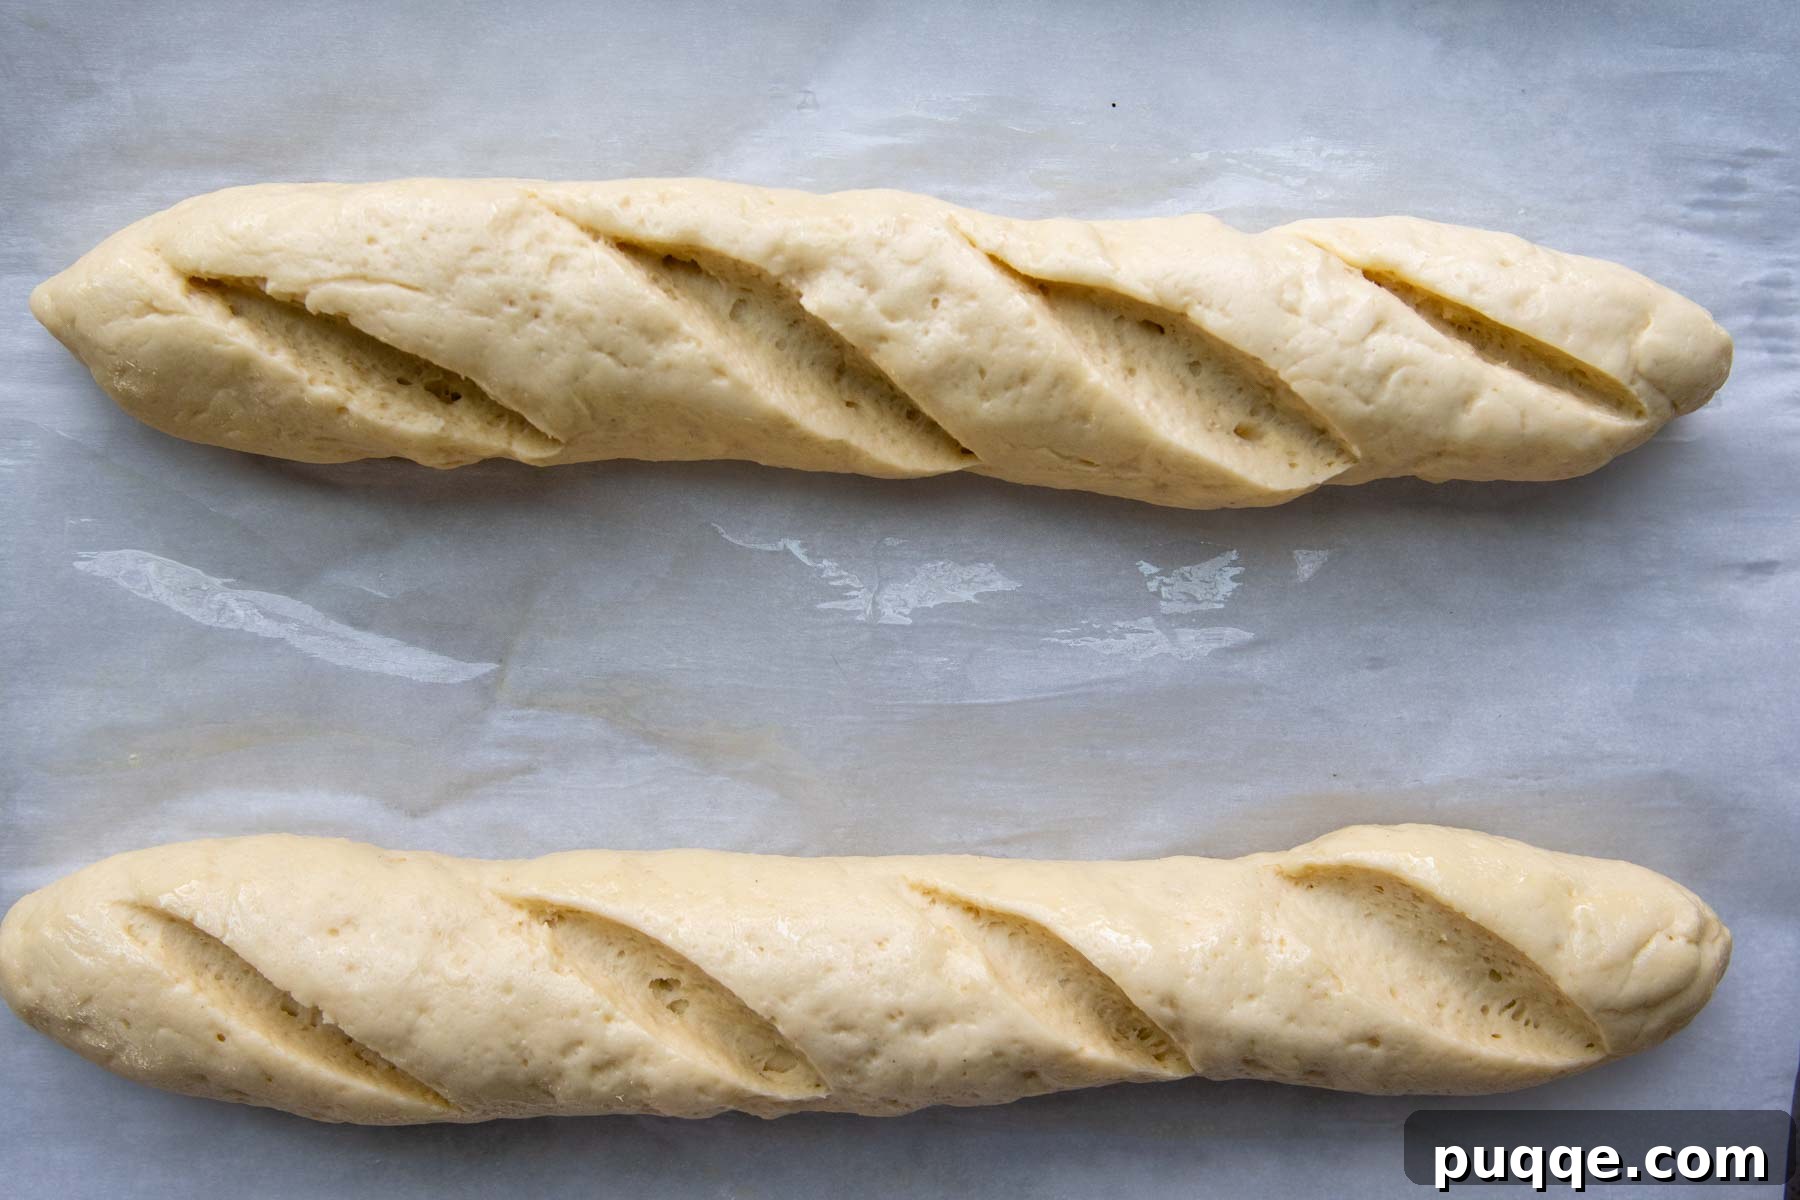
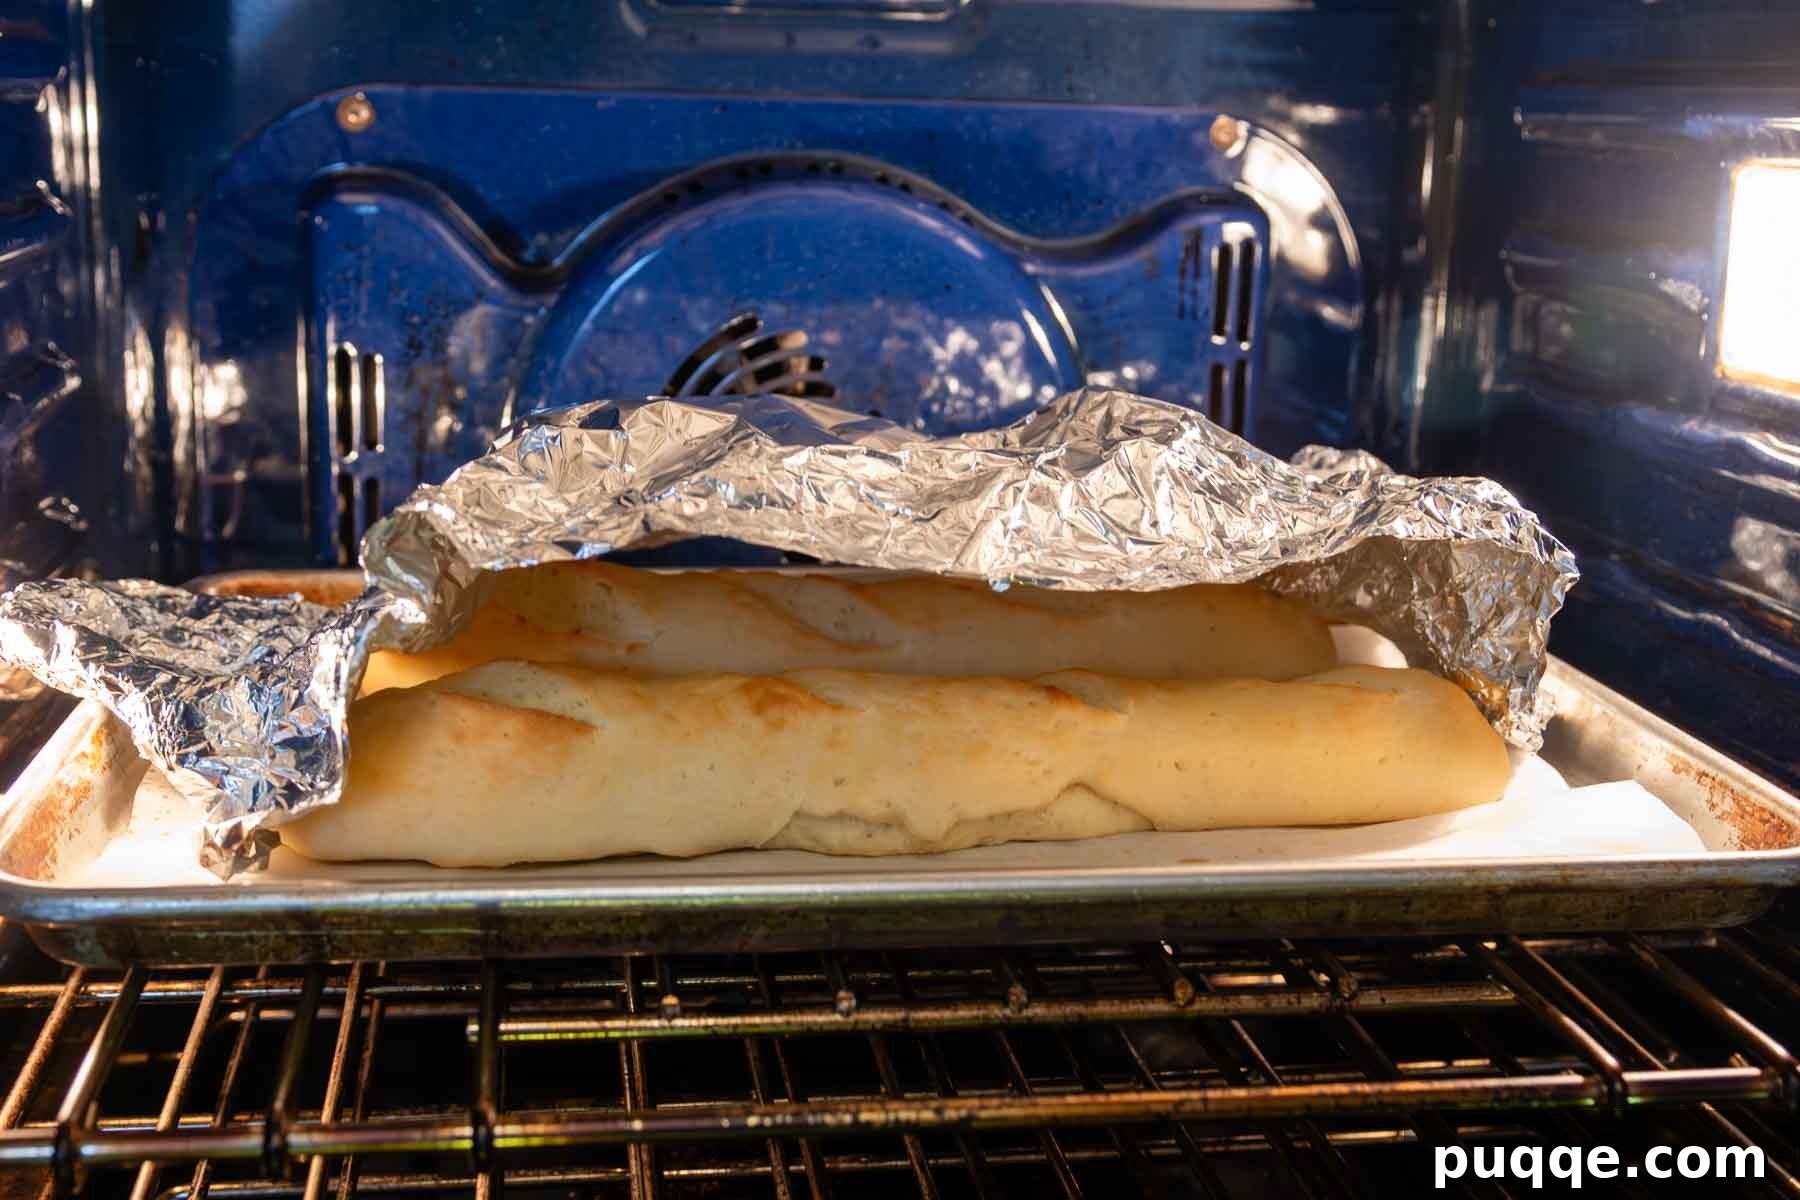
When your oven is preheated and you’re ready to bake, remove the plastic wrap from the baguettes. For that authentic crispy crust and a delightfully chewy interior, quickly throw 5-6 ice cubes directly onto the bottom of the hot oven. This ingenious trick creates a steamy environment that prevents the crust from hardening too quickly, allowing the bread to expand fully and creating a crisp, golden exterior. Immediately place your baking sheet with the baguettes on the middle rack. Bake for 10 minutes at 450℉ (230℃). After 10 minutes, loosely tent a large piece of aluminum foil over the baking sheet to prevent the bread from over-browning. Reduce the oven temperature to 350℉ (175℃) and continue baking for another 15 minutes. Once baked, remove the baguettes from the oven. Oui, Oui! Bon Appétit! Your perfectly crusty, airy gluten-free French bread is ready to enjoy!
No Baguette Pans? No Problem! Expert Shaping Tips
One of the beauties of this gluten-free French bread recipe is that you don’t need specialized equipment to achieve beautiful results. I often bake these without dedicated French bread pans, relying simply on parchment paper and a standard baking sheet. While baguette pans can be helpful for extremely loose doughs, this GF French baguette dough is designed to be easily shaped by hand, making them accessible to every home baker.
Here are some additional shaping tips for success:
- Grease Your Hands Generously: Since gluten-free doughs can be stickier than their wheat counterparts, liberally grease your hands with a little olive oil or nonstick cooking spray before you begin shaping. This is far more effective and preferable to adding extra flour to your work surface, which can inadvertently dry out the dough and result in a drier finished bread.
- Gentle and Even Pressure: When rolling your dough into logs, use gentle but consistent pressure. The goal is to create an even thickness throughout the baguette, with slightly tapered ends. Avoid pressing too hard, which can compact the dough and prevent a good rise.
- Achieving a Smooth Surface: For a truly professional and lump-free surface on your baguettes, lightly wet your fingertips with a little water and gently smooth out any ridges, seams, or imperfections before the dough goes in for its rise. This step makes a noticeable difference in the final appearance of your baked bread.
- Consistent Slashes: Ensure your diagonal slashes are even in depth and spacing. These aren’t just for aesthetics; they allow the bread to expand uniformly in the oven, contributing to that desirable open crumb.
Don’t Forget to Pin This Recipe!
Let’s be friends on Pinterest! I’m always sharing great recipes and gluten-free baking tips!
Did you make this recipe? I absolutely love hearing from you! Please leave a star rating and comment below the recipe card. Your feedback helps other bakers in our community discover and enjoy these recipes, and I truly appreciate hearing about your experiences. I promise you’ll always hear back from me! -Melissa
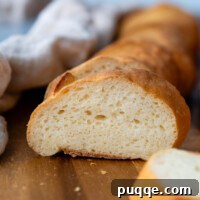
Crusty, Airy Gluten-Free French Bread (Ready in 1 Hour!)

Melissa Erdelac
Pin
Rate
Remove Ads
Ingredients
- 1 ½ cup (213 g) gluten free all purpose flour (I highly recommend Cup4Cup gluten-free flour blend)
- 3 tablespoons (31 g) potato starch (see recipe notes for substitution)
- 2 tablespoons (20 g) psyllium husk powder (helps with bread moisture & structure – what is psyllium husk?)
- 1 (9 g) packet (2 ¼ tsp) instant rapid rise yeast
- 1 teaspoon (5 g) baking powder
- 1 ½ teaspoon (9 g) salt
- ½-¾* cup (180 g) warm water (112°F) (*see recipe notes for amount)
- 2 large eggs, room temperature
- 1 tablespoon (16 g) apple cider vinegar
- 1 tablespoon (21 g) honey
- 1 tablespoon (15 g) olive oil
Equipment
- Baking Sheets
- Cup4Cup Gluten Free Flour
- Stand Mixer
Instructions
- Using a stand mixer with a paddle attachment, mix together gluten-free flour, potato starch, yeast, psyllium husk powder, baking powder, and salt on low speed until combined.
- Add warm water (see recipe note below for water adjustment), eggs, apple cider vinegar, honey, and olive oil. Mix on low speed for about 1 minute to allow the dough to come together. Increase the speed to medium and beat for 5 minutes (this is essential for thickening the batter and developing structure), scraping down the paddle and bowl halfway through. The batter will be thick and stiff, but still slightly sticky.
- On a greased large sheet of parchment paper, shape the dough into a large ball using greased hands (spray nonstick cooking spray or rub with olive oil). Use a sharp knife to evenly divide the dough in half.
- Move one half to the side and roll the other half into a smooth 12-inch log using greased hands. Repeat with the second log and position them about 3-4 inches apart on the parchment paper. For an authentic look, pinch the ends so they are slightly tapered. Use a sharp knife to slash 3 diagonal slits on top of each baguette, about ¼-inch deep. (Refer to the how-to images in the recipe post above for visual guidance.)
- Move the parchment with the shaped bread to a baking sheet. Place a large piece of greased plastic wrap loosely over the shaped baguettes and let them rise in a warm, draft-free place for 30 minutes. After 30 minutes, the bread will not be fully risen, but will rise more as it bakes due to the baking powder. Meanwhile, preheat your oven to 450℉ (230℃).
- When ready to bake, remove the plastic wrap. Quickly throw 5-6 ice cubes onto the bottom of the hot oven (this creates a steamy environment for a crisp outer crust) and immediately place the baking sheet with the bread on the middle rack. Bake for 10 minutes. Loosely tent a large piece of aluminum foil over the baking sheet (to prevent the bread from over-browning) and reduce the oven temperature to 350℉ (175℃). Bake for 15 minutes longer.
- Transfer the baked baguettes to a wire rack to cool slightly before slicing. Allow them to cool for about 30 minutes for the best texture.
Notes
*Update about Water Amount
Some readers have reported their batter being too thin. After additional testing, I haven’t found a single cause, as conditions can vary (humidity, specific flour blend, egg size, etc.). To ensure consistent results for everyone, I recommend starting with ½ cup of warm water and gradually adding more until your dough resembles the consistency shown in the step-by-step images in the recipe post above. My bread consistently takes the full ¾ cup of water, but it’s best to adjust as needed. The dough should be stiff and thick, but still manageable by the paddle attachment and slightly sticky. Also, allow the dough to mix for a couple of minutes before deciding if the water needs adjusting, as it naturally thickens as it mixes.
I also tested this recipe with Caputo gluten-free flour, which generally required slightly less water—around ½ cup plus 2 tablespoons.
Storing, Freezing, and Reheating Gluten-Free French Bread
Gluten-free breads tend to lose moisture and freshness more quickly than traditional wheat breads. For the best flavor and texture, I highly recommend serving these baguettes on the same day they are baked.
To prepare them ahead of time or store leftovers, allow the bread to cool completely to room temperature. Then, wrap each baguette tightly in plastic wrap, followed by a double layer of aluminum foil, or place it in a ziplock freezer bag. Properly stored, the baguettes can be frozen for up to 2 months.
When you’re ready to enjoy them again, ensure the frozen baguettes are brought to room temperature before reheating. Reheating them while still cold can result in a drier, less soft texture. For optimal taste and texture, warming them briefly before serving makes a world of difference.
You can warm them quickly by wrapping a slice or small piece in a paper towel and microwaving for a few seconds. For whole or larger pieces, wrap the baguette completely in aluminum foil and place it in a 350ºF (175℃) oven for 10-15 minutes until warmed through and crusty again.
Nutrition Information (per serving, estimated)
- Calories: 89 kcal
- Carbohydrates: 16g
- Protein: 3g
- Fat: 2g
- Saturated Fat: 0.4g
- Polyunsaturated Fat: 0.4g
- Monounsaturated Fat: 1g
- Trans Fat: 0.003g
- Cholesterol: 27mg
- Sodium: 207mg
- Potassium: 66mg
- Fiber: 3g
- Sugar: 2g
- Vitamin A: 40 IU
- Vitamin C: 0.1mg
- Calcium: 31mg
- Iron: 1mg
(Please note: Nutrition facts are estimated and may vary based on ingredients used and preparation methods.)
Please leave a star rating and review below. Your feedback is invaluable, and I love hearing from you!