
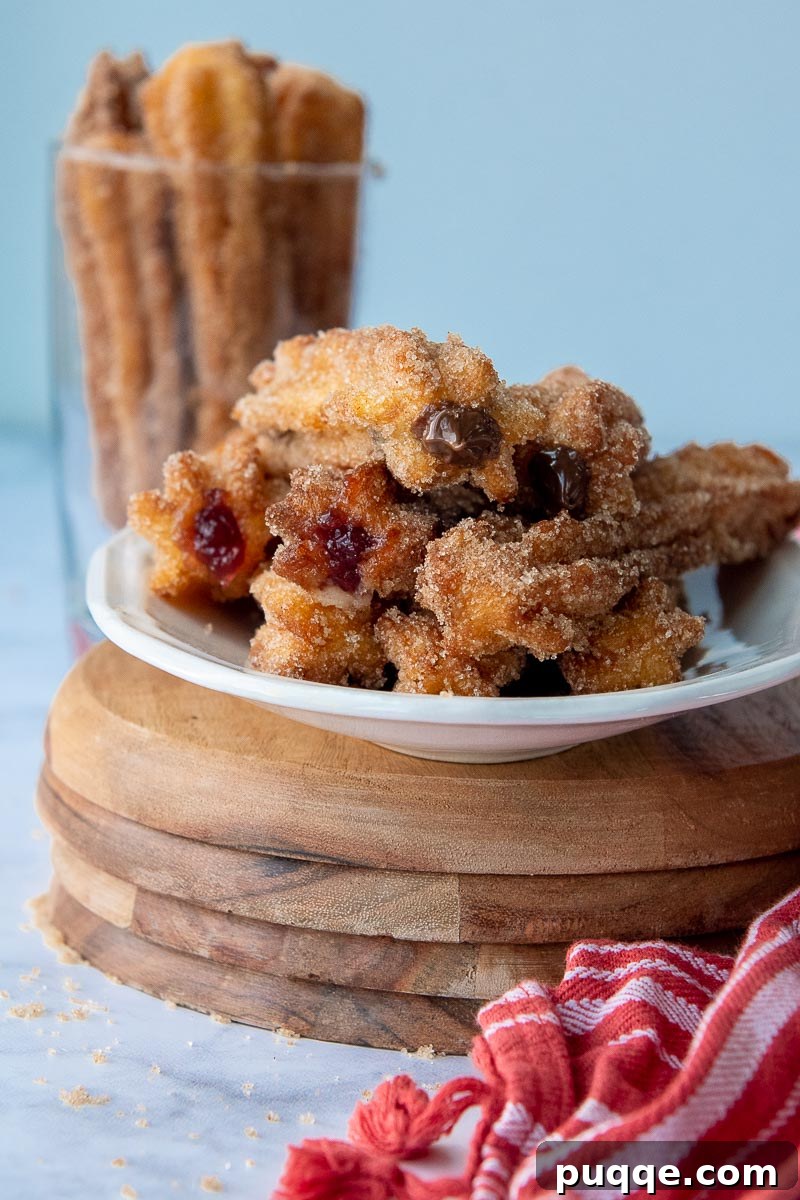
Indulge in a delightful culinary experience with these Easy Homemade Stuffed Churros. So incredibly decadent, light, and airy, **no one will ever guess they are gluten-free**! Imagine soft, crispy cinnamon sugar sticks perfectly wrapped around a **sumptuous, gooey filling** of your choice, whether it’s rich chocolate, sweet jelly, or a creamy custard. This recipe offers a fantastic way to enjoy a classic treat while catering to dietary needs, proving that gluten-free can be just as, if not more, delicious.
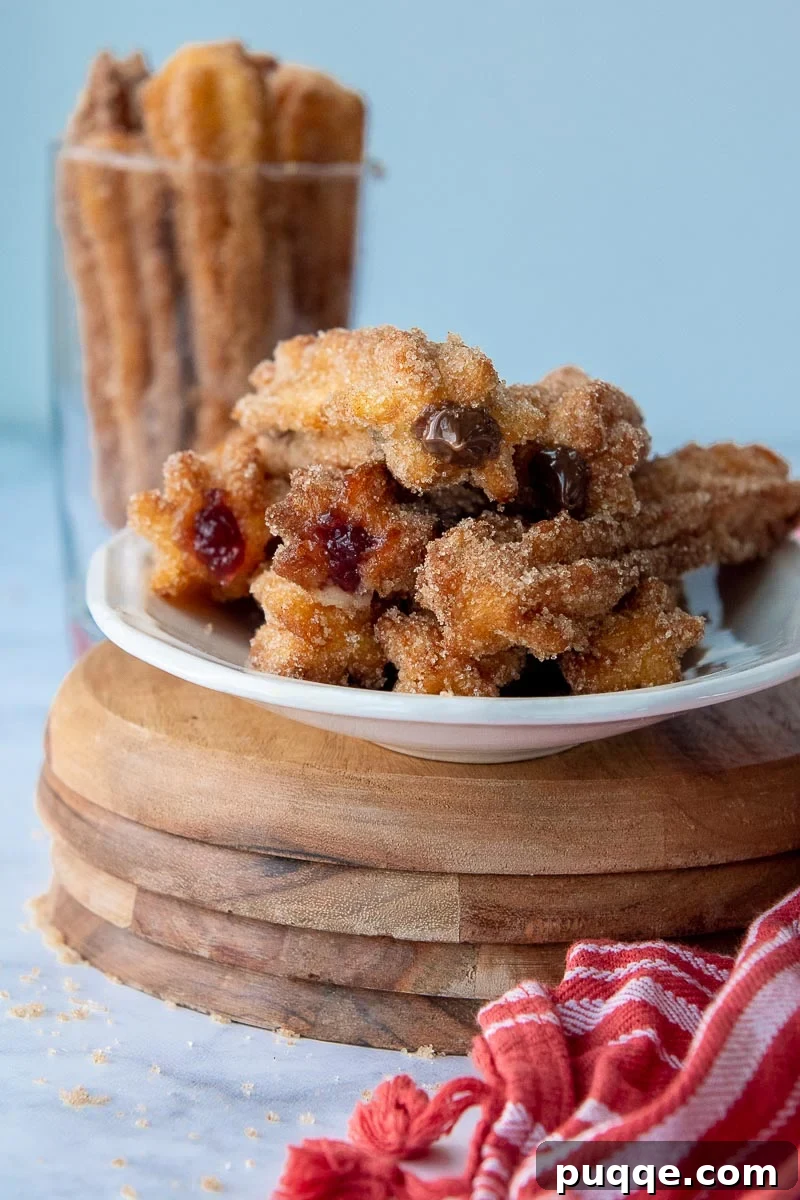
Are Churros Gluten-Free? Understanding the Gluten-Free Delight
Churros, those beloved fried dough pastries, are a staple at street fairs, theme parks, and many vibrant cultural celebrations. The irresistible aroma of freshly fried churros, often dusted with cinnamon sugar and served with chocolate, is enough to make anyone’s mouth water. However, for those with gluten sensitivities or Celiac disease, traditional churros, made with wheat flour, have long been off-limits. This can be a real disappointment when faced with such an enticing treat.
The good news is, you don’t have to miss out any longer! This revolutionary recipe for **easy stuffed churros** can be effortlessly transformed into a homemade, **gluten-free delight**, simple to prepare right in your own kitchen. By carefully selecting gluten-free ingredients, we can recreate the classic churro experience, ensuring that everyone can enjoy these crispy, soft, and utterly irresistible pastries.
Making churros at home not only gives you control over the ingredients, ensuring they are truly gluten-free, but also allows for endless customization. You can experiment with various fillings and toppings, tailoring them exactly to your taste preferences. Get ready to impress your family and friends with a batch of homemade churros so good, they’ll never suspect they’re gluten-free!
Essential Ingredients & Equipment for Homemade Stuffed Churros
Crafting the perfect batch of homemade gluten-free stuffed churros requires a few key ingredients and some specialized, yet easily adaptable, equipment. Gathering these items before you begin will ensure a smooth and enjoyable cooking process.
Ingredients You’ll Need:
- Unsalted Butter: Essential for richness and flavor in the churro dough. Ensure it’s at room temperature for optimal mixing.
- Granulated Sugar: Used both in the dough and for the classic cinnamon sugar coating.
- Gluten-Free All-Purpose Flour: This is the cornerstone of our gluten-free recipe. I highly recommend using Cup4Cup gluten-free flour blend, as its unique composition provides the perfect texture and consistency for churros, closely mimicking traditional wheat flour.
- Eggs: Act as a binding agent, adding structure and moisture to the dough. Using room temperature eggs helps them incorporate more smoothly.
- Vegetable Oil, for Frying: A neutral oil with a high smoke point is crucial for deep frying churros to a beautiful golden crisp.
- Churro Filling: This is where you get creative! Popular choices include rich chocolate (like Nutella or hot fudge), creamy cream cheese, sweet fruit jelly, decadent caramel (or dulce de leche), or light cream fillings.
Equipment for Success:
- Large Deep Frying Pan: A heavy-bottomed pan, such as a cast-iron skillet or Dutch oven, is ideal. It helps maintain a consistent oil temperature, which is key for evenly cooked churros. It should be deep enough to hold at least 2 inches of oil for proper frying.
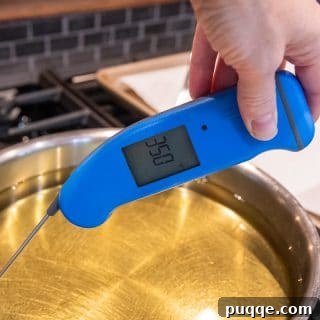
- Thermometer: Crucial for monitoring and maintaining the optimal oil temperature of 350°F. An inexpensive candy thermometer that clips to the side of the pan or an instant-read thermometer works perfectly for quick and accurate readings.
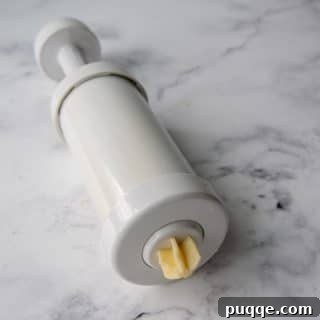
- Churro Maker or Pastry Bag with Open Star Tip: A dedicated churro maker makes shaping easy. Alternatively, a sturdy pastry bag fitted with a large open star tip (like an Ateco 826 or 827) will achieve the characteristic ridged churro shape.
- Pastry Bag and Small Open Tip, for Filling Churros: Once the churros are cooked, you’ll need another pastry bag with a smaller open tip to pipe in your chosen filling. The tip should be smaller than the hollowed opening of the churro.
- Slotted Spoon or Spatula: Essential for safely removing the fried churros from the hot oil, allowing excess oil to drain.
- Skewer, Chopstick, or Thermometer Probe: A thin, sturdy tool is needed to hollow out the center of the cooled churros, creating space for the delicious filling. If you prefer unfilled churros, this step can be skipped.
How To Make Gluten-Free Churros: A Step-by-Step Guide
Creating these delicious gluten-free churros is a rewarding process. Follow these detailed steps to achieve perfectly crispy on the outside, tender on the inside, and wonderfully flavorful churros.
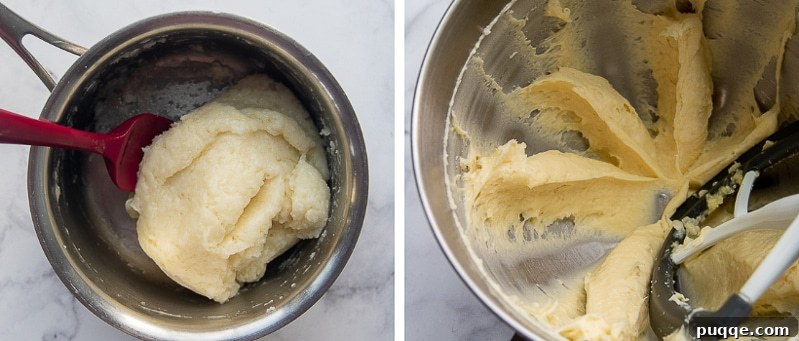
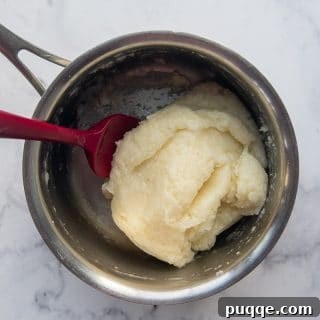
- Prepare the Dough Base: In a small saucepan, combine the water, butter, granulated sugar, and salt. Heat this mixture over medium heat until it comes to a rolling boil and the butter is fully melted. Immediately remove the saucepan from the heat. Add the gluten-free all-purpose flour all at once and stir vigorously with a wooden spoon or spatula until a smooth ball of dough forms and pulls away from the sides of the pan. This process is known as a choux pastry base, vital for churros.
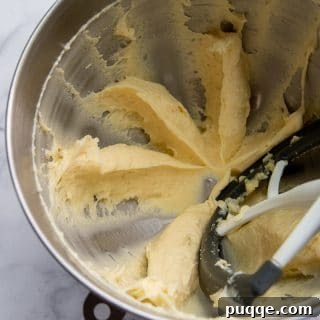
- Incorporate the Eggs: Transfer the warm dough into a large mixing bowl or the bowl of a stand mixer fitted with a paddle attachment. Allow the dough to cool for about five minutes. Then, beat the dough on high speed for a full 4 minutes, adding the eggs one at a time, ensuring each egg is fully incorporated before adding the next. This vigorous beating creates a light, airy dough perfect for frying.
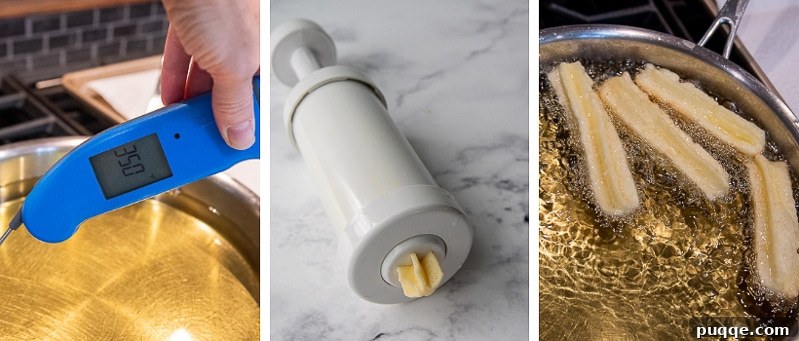
- Heat the Frying Oil: While your dough is resting, prepare your frying setup. Fill a large, heavy-bottomed skillet or Dutch oven with at least 2 inches of vegetable oil. Place it over medium heat. Allow the oil to heat for 10-15 minutes, or until your thermometer consistently reads 350°F (175°C). Maintaining this temperature is crucial for crispy, evenly cooked churros without them becoming greasy or burning.
- Prepare for Frying & Coating: In a separate shallow bowl, thoroughly mix together the ¾ cup of granulated sugar and 1½ teaspoons of cinnamon to create your delicious cinnamon sugar coating. Set this aside. Line two baking sheets with paper towels; one for draining excess oil immediately after frying, and the other for cooling the coated churros. Load your churro dough into a churro maker or a pastry bag fitted with a large open star tip.
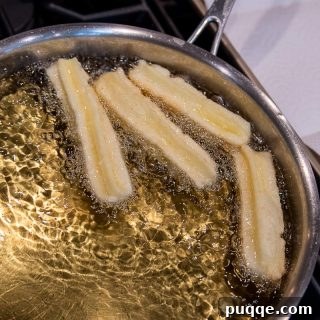
- Pipe and Fry the Churros: Once the oil has reached the target temperature, hold the churro maker or pastry bag straight above the hot oil. Carefully pipe out lengths of dough, aiming for about 4 inches each. Use a knife, dipped in the hot oil first to prevent sticking, to cleanly cut the dough from the tip. Fry 3-4 churros at a time, ensuring not to overcrowd the pan, which can drop the oil temperature.
- Even Frying & Cooking: Fry the churros for 3-4 minutes total, using tongs to flip them approximately every 30 seconds to ensure even cooking and a beautiful golden-brown color on all sides. It’s important to allow enough time for the churros to cook through, even if the outside appears done. Periodically check the oil temperature and adjust the heat as needed to keep it at 350°F.
- Coat with Cinnamon Sugar: Using a slotted spatula or spoon, carefully remove the cooked churros from the oil, allowing any excess oil to drip off. Immediately transfer the warm churros to the paper towel-lined baking sheet to absorb more oil. While still warm, move them to the bowl with the cinnamon sugar mixture. Use a fork or tongs to gently toss and roll each churro until it is thoroughly coated. Transfer the coated churros to the second paper towel-lined baking sheet to cool completely.
- Repeat and Cool: Continue this frying and coating process with the remaining churro dough, working in batches. Once all churros are cooked and coated, set them aside to cool completely before proceeding to the filling step. Cooling is essential for successful filling.
Mastering the Art of Filling Your Churros
The magic of a stuffed churro truly comes alive with its delicious center. While the churros are irresistible on their own, adding a luscious filling elevates them to an extraordinary dessert. Here’s how to perfect the art of filling your homemade churros.
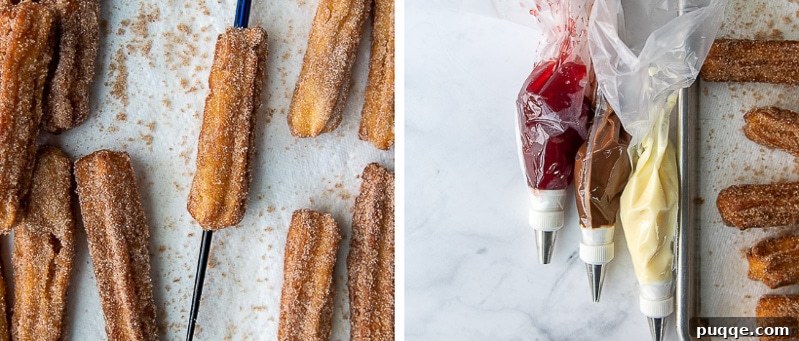
To create these wonderful stuffed churros, you’ll need two main things: a tool to hollow out the middle of each churro and a pastry bag fitted with a small open tip to pipe in your chosen filling.
Hollowing Out the Churros
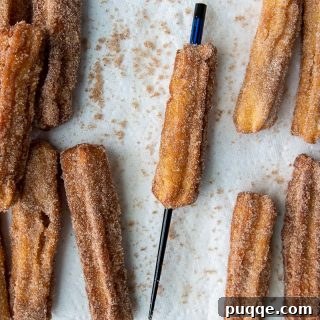
Once your churros have cooled completely, it’s time to create the cavity for the filling. Use a bamboo skewer, a chopstick, or even a thermometer probe to gently poke a hole through the middle of each churro. Push the tool through the entire length of the churro, wiggling it slightly to create enough room for the filling to pass through easily.
Pro Tip: I find a chopstick’s thickness to be ideal because it creates a sufficiently wide channel, making the filling process quicker and more efficient. Be careful not to poke through the side of the churro. Any accidental opening will cause your delicious filling to ooze out when piped, creating a messy situation.
Piping the Filling
Next, prepare your preferred filling (see below for an array of ideas!). Spoon your chosen filling into a clean pastry bag. Fit the bag with a small open round tip. This smaller tip is essential for precise filling and preventing the churro from tearing.
Insert the tip of the pastry bag into one end of the hollowed churro. Begin to slowly and steadily squeeze the filling into the cavity. Pipe about halfway through the churro from one end, then remove the tip, flip the churro, and insert the tip into the other end. Continue piping until the filling meets in the middle and the churro feels adequately filled. Squeezing slowly allows the filling to evenly distribute throughout the entire length of the churro without creating air pockets or bursting the churro.
Key Tips to Remember for Filling:
- Complete Cooling is Crucial: Always ensure the churros have cooled completely before attempting to hollow and fill them. Warm churros are more delicate and prone to breaking or collapsing under pressure.
- Mind the Sides: As mentioned, exercise caution when hollowing. If you poke through the side, the filling will escape, leading to a less satisfying experience.
- Two-Ended Approach: Piping half the filling from one end and finishing from the other ensures a more complete and even distribution of filling, preventing empty spots in the middle.
- Slow and Steady: Squeeze the filling gently and gradually. This technique allows the filling to fully occupy the hollow space, resulting in a perfectly stuffed churro every time.
- Warm Certain Fillings: For thicker fillings like Nutella or jam, gently warming them slightly in the microwave can make them smoother and easier to pipe.
Delicious Churro Filling Ideas
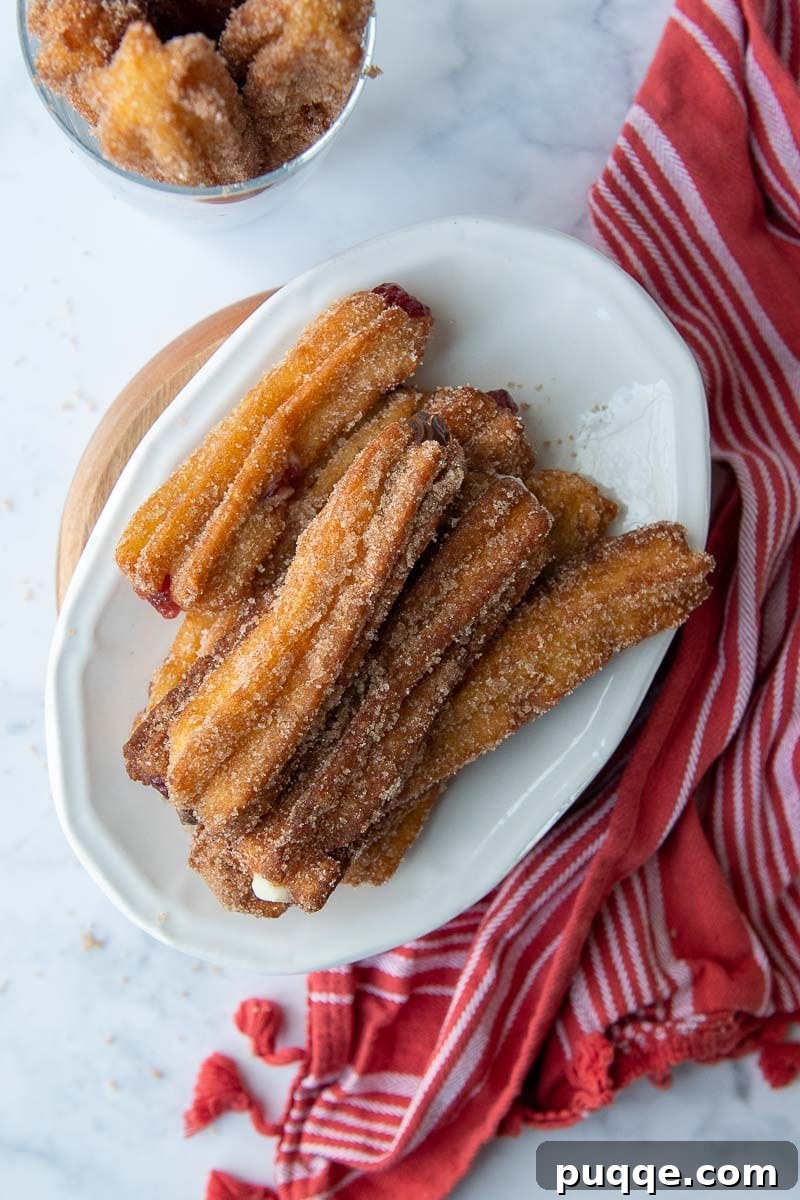
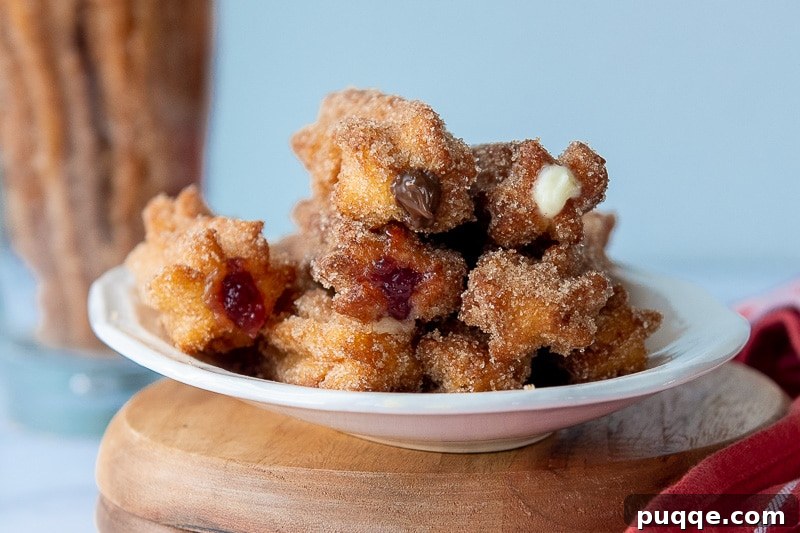
While I often opt for a classic chocolate hazelnut spread (Nutella) for my stuffed gluten-free churros, the possibilities for fillings are truly endless. Get creative and choose what tantalizes your taste buds:
- Cream Cheese: A creamy and slightly tangy option. You can use plain cream cheese, or get fancy with flavored cream cheese, like strawberry or cinnamon.
- Dulce de Leche or Caramel: For a rich, sweet, and incredibly gooey experience, caramel or dulce de leche is a fantastic choice, adding a luxurious depth of flavor.
- Chocolate Filled Churros: Beyond Nutella, consider a luscious homemade hot fudge sauce, a simple melted chocolate ganache, or even a rich chocolate pudding.
- Jam or Jelly: Fruity fillings like raspberry, strawberry, or apricot jam add a bright, sweet contrast to the crispy churro.
- Cream Filled: For a classic “cream-filled” treat, instant vanilla pudding is a quick and easy option. For a more gourmet touch, you could whip up a homemade vanilla pudding or a decadent Bavarian cream.
- Nothing at All! Don’t feel pressured to fill them. Unfilled churros, freshly made and coated in cinnamon sugar, are utterly delicious on their own. Save yourself the extra step, and no one will be remotely disappointed. You can also serve any of the aforementioned fillings on the side as a dipping sauce for an interactive treat.
Frequently Asked Questions About Stuffed Churros
Here are some common questions and helpful answers to ensure your churro-making journey is a sweet success!
Do I Have to Fill the Churros?
Absolutely not! While stuffed churros are a delightful variation, the beauty of a freshly fried churro rolled in cinnamon sugar is undeniable. If you’re not specifically looking for a stuffed churro recipe, or if you want to save yourself some time and an extra step, feel free to enjoy the churros simply after rolling them in the cinnamon and sugar mixture. They are a classic treat in their own right!
Alternatively, for an equally delicious experience, you can serve warm Nutella, caramel, or any of your favorite chocolate sauces on the side as a dipping sauce. This allows everyone to customize their churro with as much or as little dipping as they desire.
Can I Substitute Regular Flour?
Yes, you certainly can! To make traditional stuffed churros instead of gluten-free ones, simply swap out the same amount of gluten-free flour for an equal amount of regular all-purpose wheat flour. The method for making the dough and frying remains largely the same. However, you might notice a slight difference in cooking time; traditional wheat-based churros may take 1-2 minutes less time to cook to a golden brown perfection compared to their gluten-free counterparts. Always keep an eye on them and use the golden color as your guide.
Can I Freeze Churros?
Yes, churros freeze wonderfully! This is a great tip for making a big batch ahead of time or for enjoying a spontaneous churro craving later. Once your churros are completely cooled and filled (if you choose to fill them), you can freeze them for up to 3 months.
To freeze them properly, first arrange the cooled churros in a single layer on a parchment-lined baking sheet. Place the baking sheet in the freezer until the churros are solid (this prevents them from sticking together). Once frozen solid, transfer them to an airtight freezer-safe container or a gallon-sized freezer bag. When you’re ready to enjoy them, simply thaw the frozen churros at room temperature for about 1 hour. For best results, you can quickly reheat them in a toaster oven or air fryer for a few minutes to restore some of their crispiness.
Make-Ahead Tips for Easy Churro Preparation
Churros can be a fantastic make-ahead dessert, whether for a party or just for future indulgence. Here are a couple of helpful tips:
- Refrigerate Piped Dough: You can pipe the churro dough onto a parchment-lined baking sheet, cover it tightly with plastic wrap, and refrigerate it for up to 24 hours. When you’re ready to fry, simply take them out and drop them into the hot oil. This is perfect for preparing the dough in advance for an event.
- Freeze Uncooked Dough: For an even longer make-ahead option, you can freeze the piped dough before cooking. Once piped onto parchment paper, freeze the dough strips until solid. Then, transfer them to a freezer-safe bag or container. When you’re ready to fry, drop the frozen dough directly into the hot oil. Be mindful not to overcrowd the pan and only cook a few at a time, as adding frozen dough will temporarily lower the oil’s temperature. This method allows you to have fresh churros whenever the craving strikes!
For a visual guide to this recipe, be sure to check out the step-by-step web story instructions here!
SAVE These GLUTEN FREE STUFFED CHURROS TO YOUR PINTEREST BOARD!
Let’s be friends on Pinterest! I’m always sharing great recipes and culinary inspiration!
Homemade Stuffed Churros (Gluten Free)
 Melissa Erdelac
Pin Recipe
Ingredients
- 1 cup water
- 6 tablespoons butter,, room temperature
- 2 tablespoons sugar
- ½ teaspoon salt
- 1 cup gluten free all purpose flour,, I recommend Cup 4 Cup gluten free flour
- 2 eggs,, room temperature
- 1 quart vegetable oil,, for frying
Topping / Filling
- ¾ cup sugar
- 1 ½ teaspoon cinnamon
- ½ chocolate hazelnut spread (Nutella),, for filling (see recipe notes for more options)
Equipment
-
Churro Maker
-
Stainless Steel Skillet (Large, Heavy-Bottomed Frying Pan)
-
Pastry Bag / Tips
-
Candy Thermometer or Instant Read Thermometer
-
Slotted Spoon or Spatula
-
Skewer or Chopstick
Instructions
-
 Heat the water, butter, sugar, and salt together in a small saucepan until it starts to boil and the butter melts completely. Remove the saucepan from the heat and immediately stir in the gluten-free flour until a smooth ball of dough forms and pulls away from the sides of the pan.
 -
Let the dough cool for five minutes. Then, transfer it to a stand mixer fitted with a paddle attachment or a large mixing bowl. With the mixer on medium speed, gradually add the eggs one at a time, ensuring each egg is fully incorporated before adding the next. Beat for 4 full minutes until the dough is smooth and glossy.
-
Fill a large, heavy-bottomed skillet with vegetable oil, ensuring it has at least 2 inches of oil. Heat over medium heat for 10-15 minutes, or until an accurate thermometer reads 350°F (175°C).
-
Meanwhile, while the oil is heating, prepare the cinnamon sugar coating by mixing ¾ cup sugar and 1½ teaspoons cinnamon in a bowl large enough to toss cooked churros. Set aside. Line two baking sheets with paper towels and set aside. Transfer the churro dough into a pastry bag fitted with a large open star tip or into a churro maker.
-
Once the oil has reached 350ºF, hold the pastry bag or churro maker straight above the pan and pipe out approximately 4 inches of dough. Use a knife, first dipped into the hot oil to prevent sticking, to cut off the dough from the tip. Carefully pipe about 3-4 churros into the pan at a time to fry, making sure not to overcrowd.
-
Fry the churros for 3-4 minutes, using tongs to flip them approximately every 30 seconds to ensure even cooking and a consistent golden-brown color on all sides. (Tip: Even if they appear done on the outside, they need sufficient time to cook through in the center. Regularly check the oil temperature to ensure accurate cooking times.)
-
Use a slotted spatula or spoon to remove the cooked churros from the oil, allowing any excess oil to drain briefly. Transfer them immediately to the first paper towel-lined baking sheet. While still warm, move them to the bowl containing the cinnamon/sugar mixture and use a fork or tongs to toss and roll the churros until fully coated. Transfer the coated churros to the second paper towel-lined baking sheet to cool.
-
Repeat the piping, frying, and coating process with the remaining dough, working in batches. Set aside all coated churros to cool completely before proceeding with any filling.
Filling Churros:
-
Once the churros are completely cooled, use a chopstick or a wooden skewer to gently poke a hole through the middle of each churro. Wiggle the tool slightly to hollow out the inside enough to create space for the filling. (Tip: Be very careful not to poke a hole through the outside of the churro, as the filling will seep out when piped.)
-
Fill another pastry bag with your chosen filling, such as Nutella or other desired churro filling. Fit the bag with a small circle tip. Insert the tip into one end of the hollowed churro and slowly pipe the filling about halfway through. Then, flip the churro around, insert the tip into the other end, and continue filling until the entire middle cavity is full. (Tip: Squeeze the filling in slowly and steadily to ensure it fills the cavity completely and evenly.)
DID YOU MAKE THIS RECIPE?? DON’T FORGET TO LEAVE FEEDBACK AND RATE BELOW!
Notes
Important tips to remember:
- Gluten-free churros generally take a little longer to cook through. To ensure they are cooked perfectly in the middle before the outside browns too much, the oil absolutely has to be at the proper temperature of 350°F (175°C). Use an inexpensive candy thermometer or an Instant Read Thermometer to quickly and accurately monitor the oil temperature throughout the frying process.
- Always make sure the churros have cooled completely before attempting to hollow out and fill them. Warm churros are more fragile and prone to breaking.
- Be extremely careful not to poke through the side of the churro when hollowing. Any opening on the side will cause your delicious filling to ooze out when you pipe it in.
- Gently warming thicker fillings slightly, especially chocolate hazelnut spread (Nutella) or thicker jams/jellies, will make them smoother and significantly easier to pipe into the churros.
Churro fillings
- Cream cheese: Use regular or experiment with flavored cream cheese for a different twist.
- Dulce de leche or caramel: A rich, sweet, and classic choice that pairs perfectly with churros.
- Chocolate filled churros: Indulge with homemade hot fudge or smooth Nutella.
- Jam or jelly: Any of your favorite fruit jams or jellies will add a lovely fruity note.
- Cream filled: For convenience, instant vanilla pudding works wonders. If you have more time, a homemade vanilla pudding or classic Bavarian cream makes for an exquisite filling.
- Nothing! Don’t underestimate the simple pleasure of an unfilled, cinnamon-sugar churro. You can always save yourself the extra step, and no one will be remotely disappointed. Alternatively, serve one of these fillings on the side as a dipping sauce.
Adapted from Food Network
This post contains affiliate links. My opinions are always my own. If you purchase a product through an affiliate link, I make a small commission – at no cost to you. Read full disclosure policy here.