
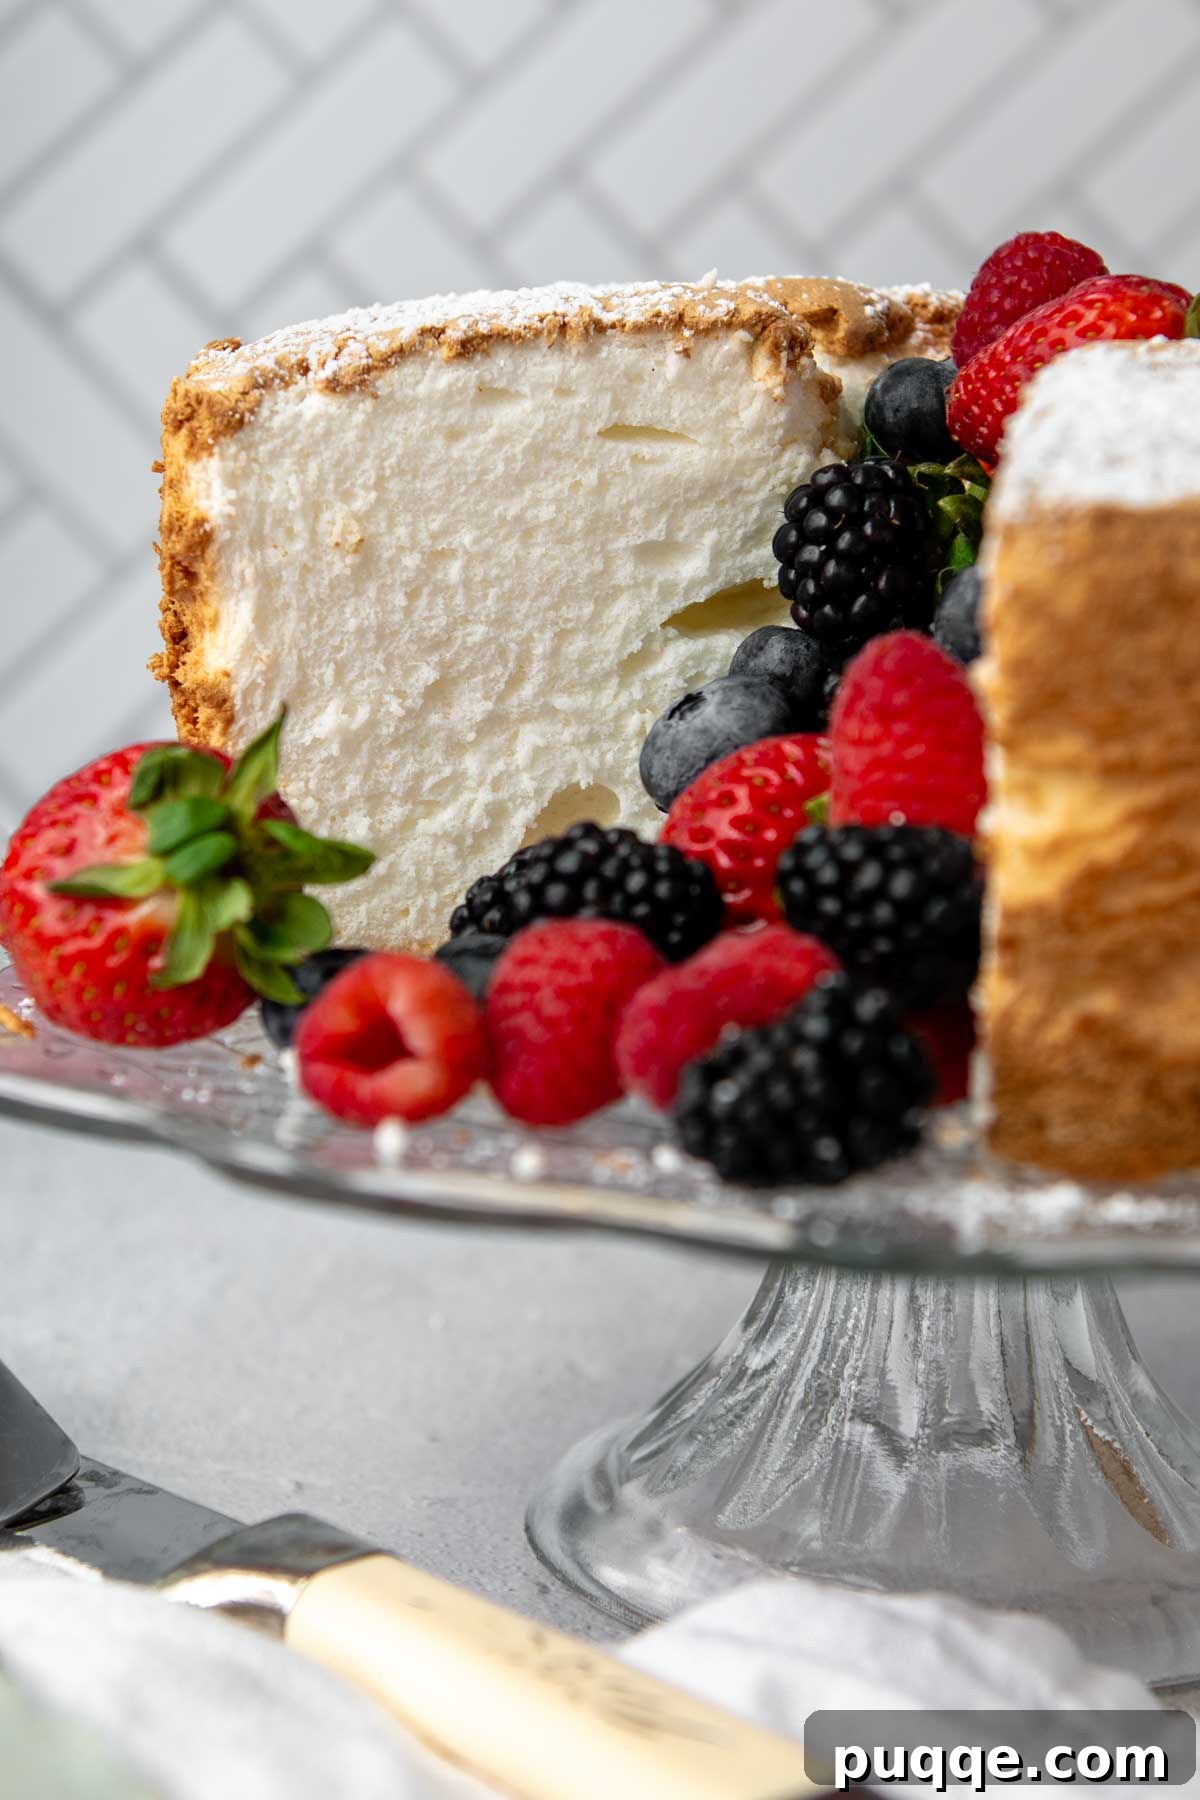
Embark on a delightful baking journey to create the most exquisite, pillowy soft gluten-free angel food cake from scratch. This comprehensive guide, meticulously crafted, is brimming with insider tips and proven techniques designed to help you successfully achieve a homemade masterpiece that boasts the legendary taste and delicate texture of a classic angel food cake, without any gluten. The secret to its signature delicate, airy crumb lies in a precise combination of specific ingredients and expert mixing methods, all unveiled here. Even if you’re a novice baker, you’ll find these steps clear, achievable, and rewarding, leading you to a truly remarkable dessert that will impress everyone.
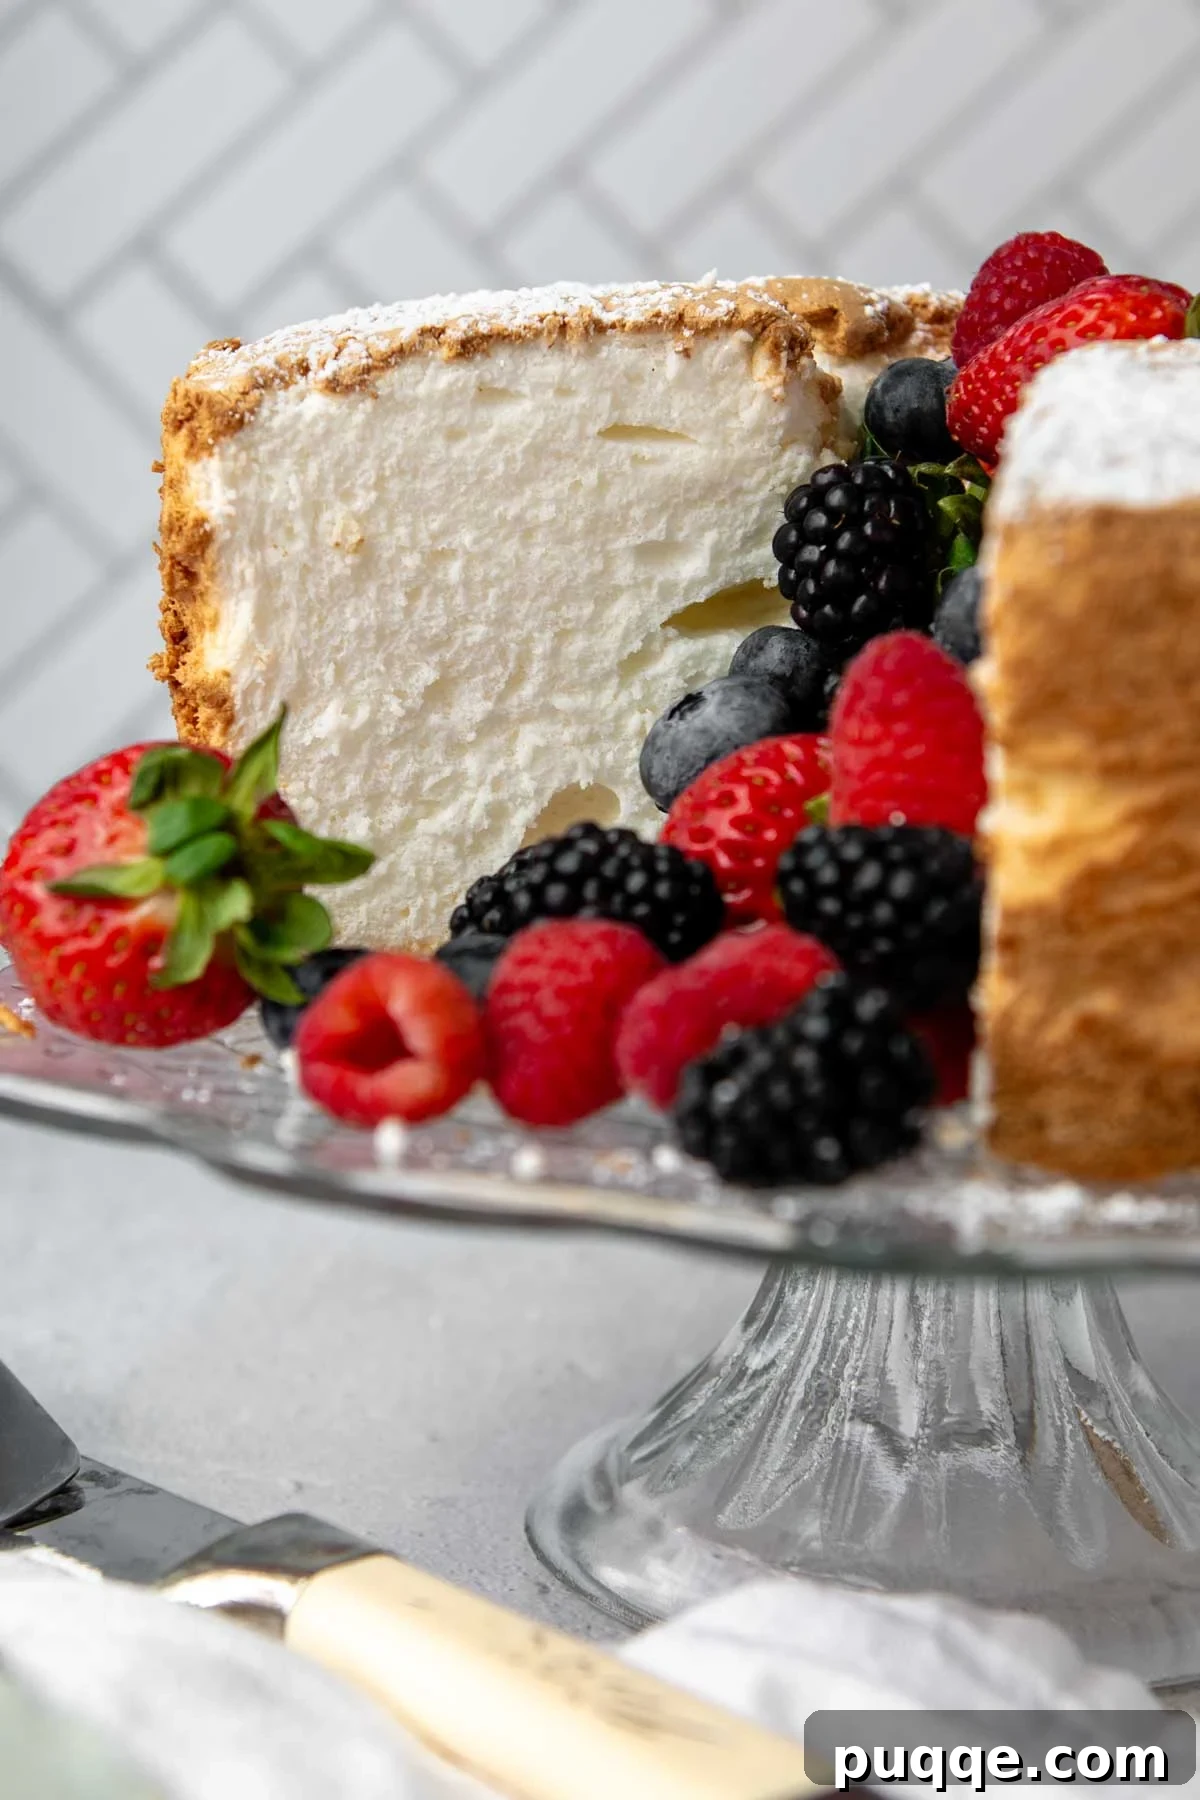
Experience Gluten-Free Angel Food Cake as You Remember It – Light, Airy, and Irresistible!
The quest for a truly authentic gluten-free dessert often feels like chasing a mirage, especially when it comes to delicate sponge cakes. Our primary goal in developing this recipe was to recreate the nostalgic texture and unparalleled flavor of traditional angel food cake, ensuring every bite evokes cherished memories, but without the gluten. We are proud to say we’ve achieved it! Time and again, guests have savored this incredibly light and fluffy gluten-free angel food cake, completely unaware it’s a gluten-free creation. This is a testament to the meticulous testing and fine-tuning that went into perfecting every aspect of this recipe.
Achieving such an ethereal texture in a gluten-free sponge cake might seem like a daunting challenge. However, the secret often lies in understanding the unique properties of gluten-free flours and making smart substitutions. Surprisingly, not many drastic adjustments were needed for this recipe, primarily due to our choice of gluten-free flour. We wholeheartedly recommend using Cup4Cup gluten-free flour. This particular blend shines in angel food cake recipes because it already contains a significant amount of cornstarch, which plays a crucial role in replicating the desired texture. Traditional sponge cakes rely on cake flour, which has a lower protein content than all-purpose flour, resulting in a tender crumb. Since cake flour isn’t gluten-free, we mimic its properties by incorporating additional cornstarch and meticulously sifting it with the other dry ingredients. Cornstarch is a game-changer in gluten-free baking; it significantly lightens the texture of cakes, preventing them from becoming dense. We’ve seen its magic work wonders in other recipes, such as our lemony almond flour cake, contributing to an incredibly soft and moist result.
The foundation of any great angel food cake is its voluminous meringue, built from perfectly whipped egg whites. For this recipe, you’ll need approximately 10 to 12 large egg whites. To ensure precise measurements and consistent results, we advise measuring out 1 ½ cups of egg whites. The temperature of your egg whites is also paramount; they should be at room temperature for optimal volume when whipped. But what about all those leftover egg yolks? Don’t let them go to waste! They are perfect for enriching other delightful desserts, like our zesty homemade gluten-free lemon bars, or enriching custards and puddings.
One key difference when baking a gluten-free angel food cake compared to its conventional counterpart is the baking time. Gluten-free versions typically require a slightly longer bake to ensure they are fully set and stable. To prevent the top from over-browning before the cake is cooked through, it’s essential to bake your angel food cake on the lower oven rack. This allows for more even heat distribution and a beautiful golden crust without risking a raw center. Patience is a virtue in baking, especially with delicate cakes like this.
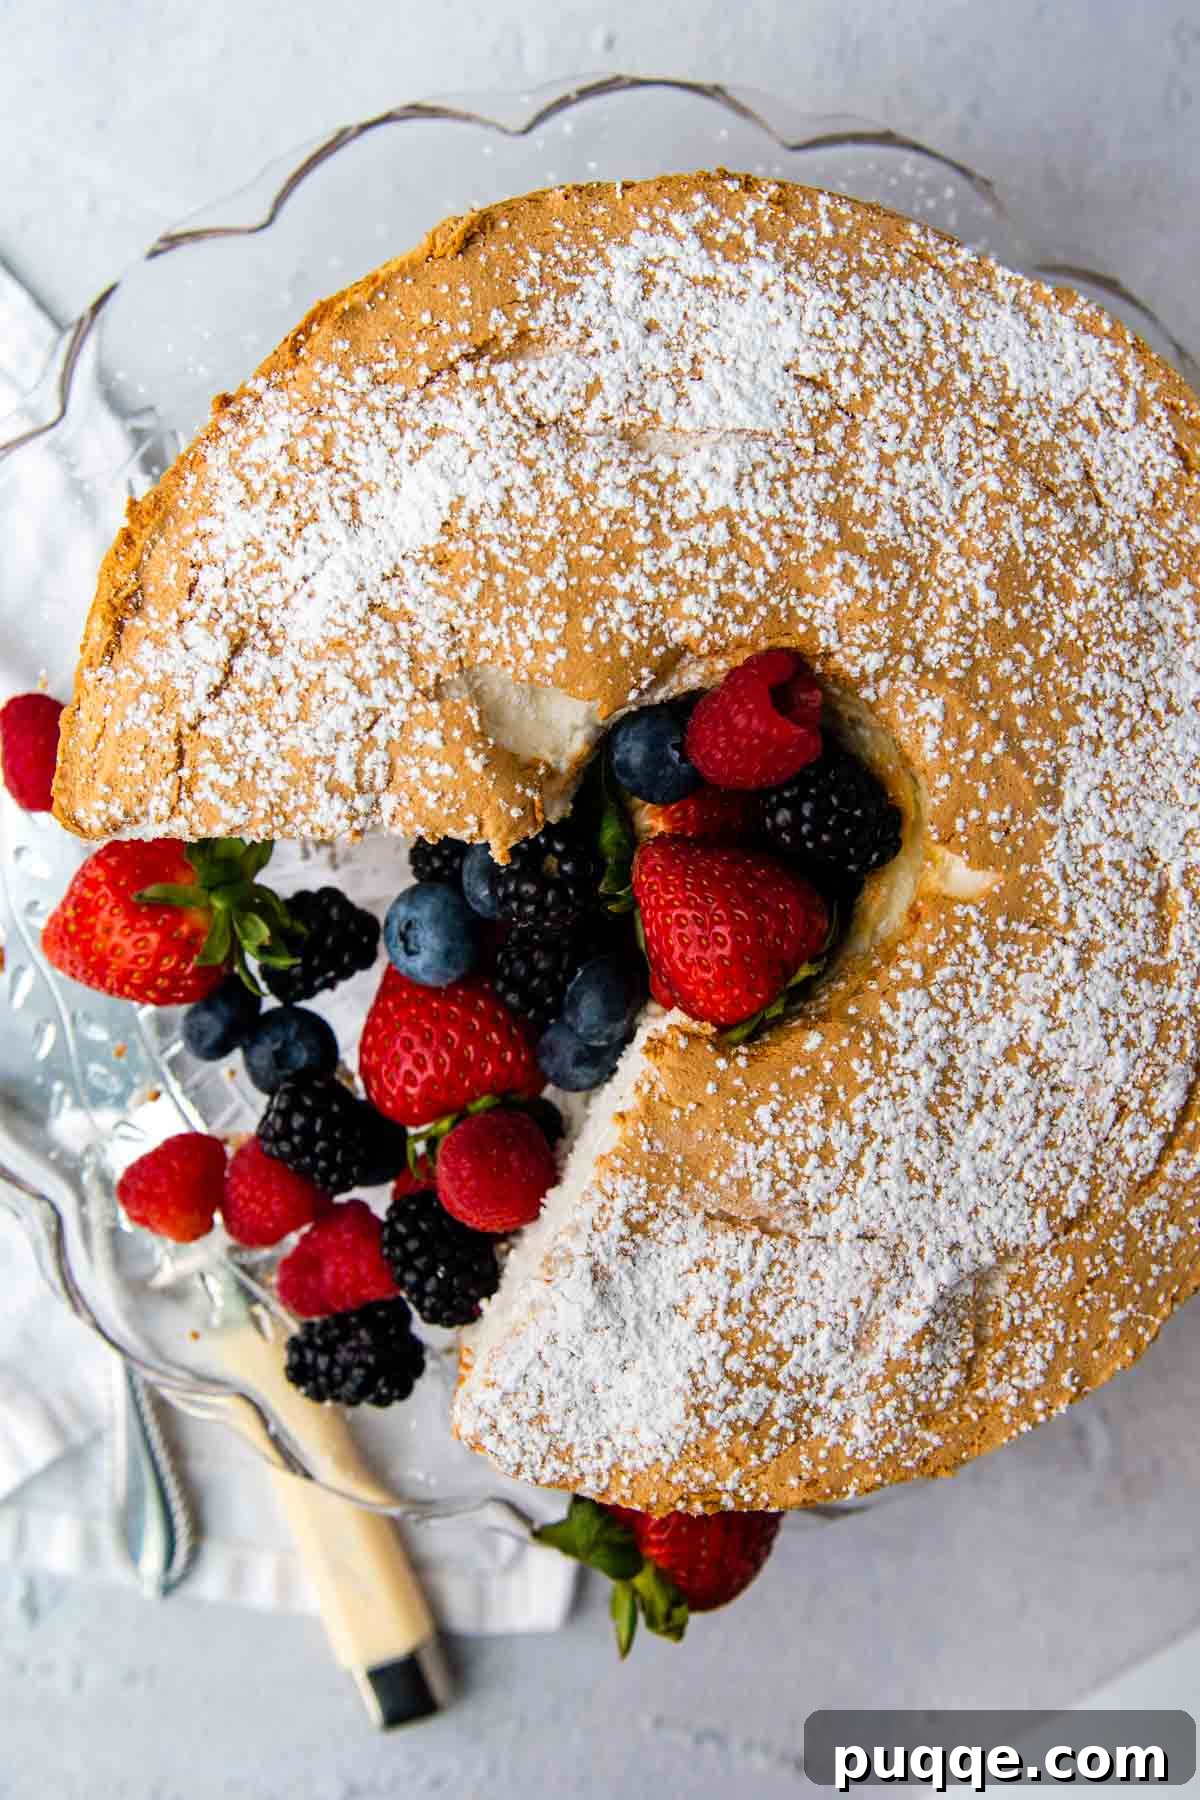
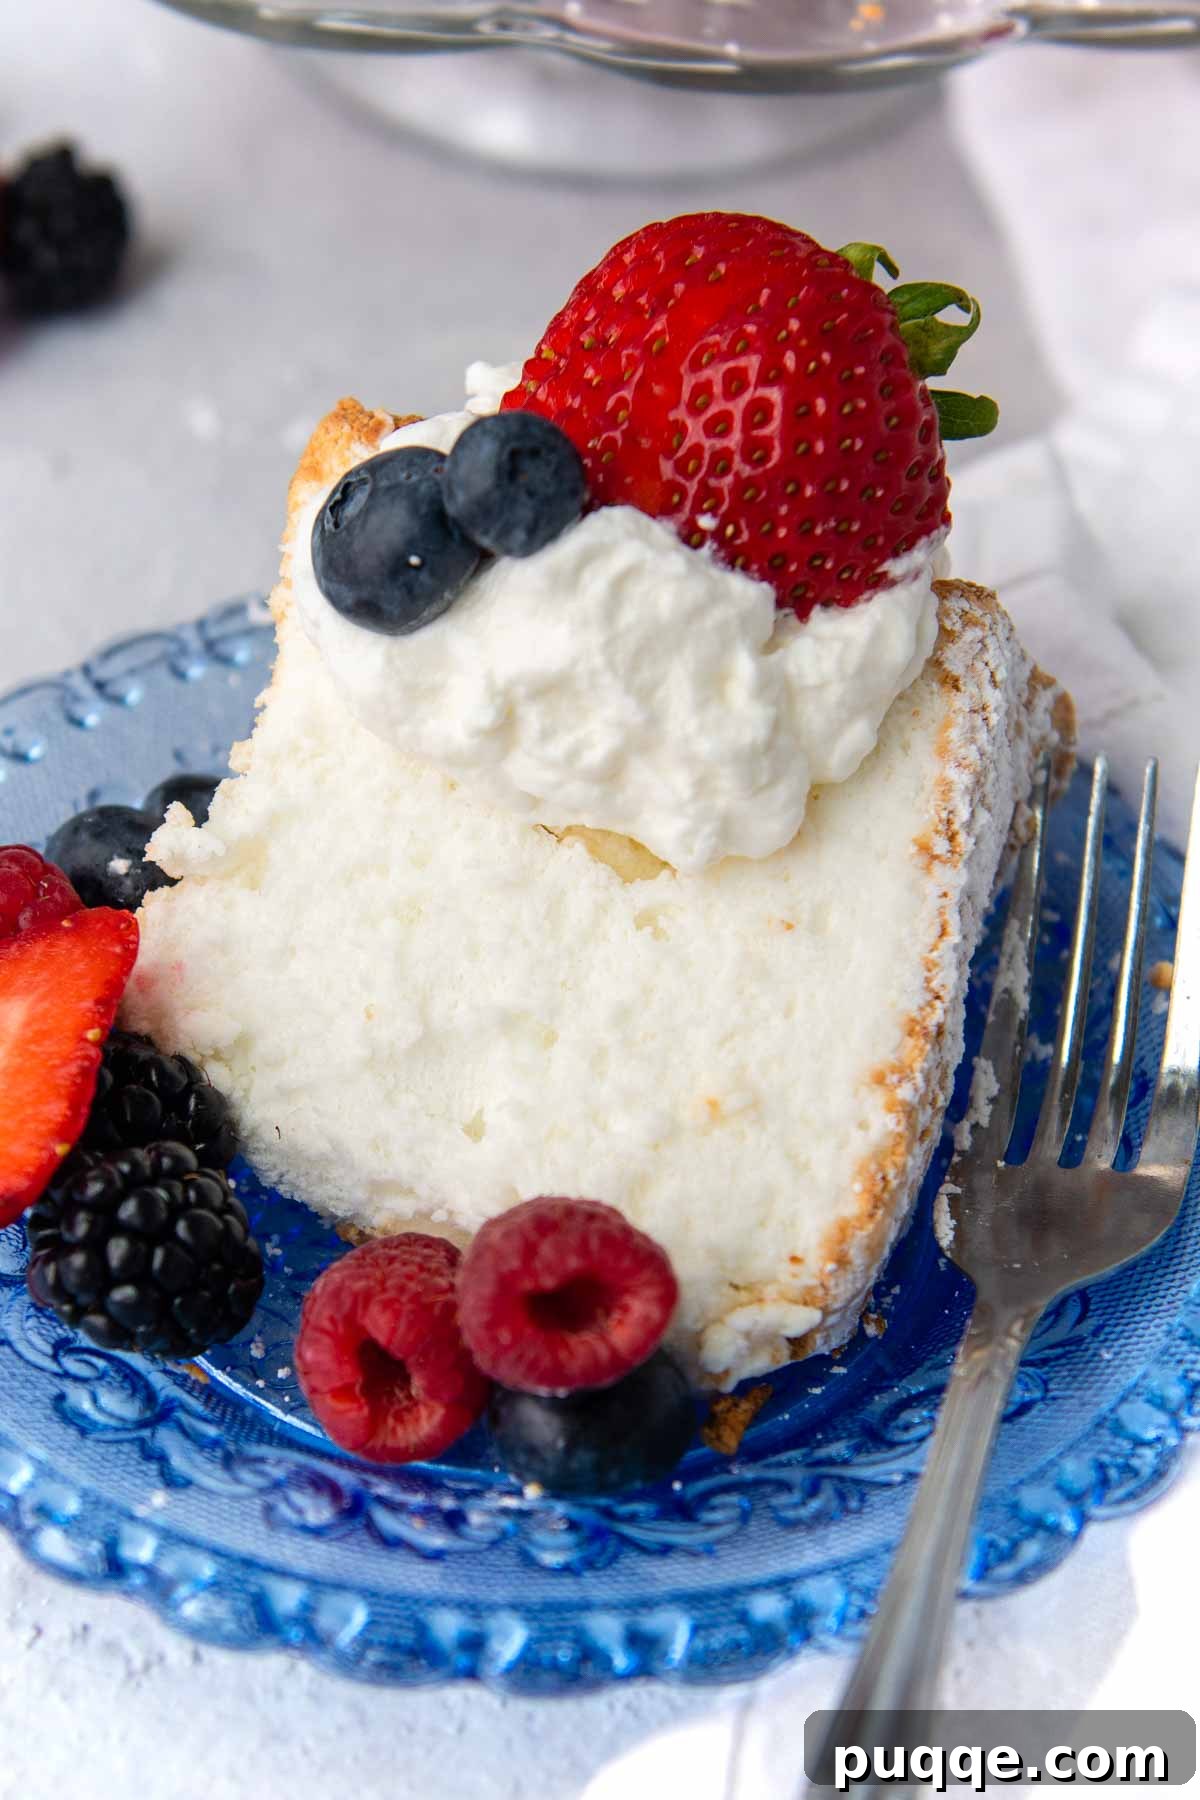
Once cooled, the true reward of your efforts awaits! We love serving this exquisite cake simply, with a generous helping of fresh seasonal berries and a dollop of freshly whipped cream. For those moments when you desire an extra touch of indulgence, consider pairing it with our easy chocolate whipped cream frosting. To transform it into a delightful shortcake experience, slice the cake, layer it with macerated strawberries, more whipped cream, and a drizzle of homemade strawberry syrup. The possibilities for enjoyment are endless!
As a family living with celiac disease, gluten-free baking is a staple in our home. This angel food cake recipe was an absolute revelation – truly delicious and surpassed all my expectations. My guests were so surprised it was gluten-free that many asked for seconds! I am incredibly grateful for the time and effort invested in creating such a perfect, delectable recipe.
— Erika
Let’s Bake This Masterpiece Together!
Below, you’ll find detailed step-by-step instructions accompanied by helpful photos to guide you through each stage of creating this magnificent gluten-free angel food cake. For a comprehensive list of all ingredients and precise measurements, please scroll down to the full recipe card at the bottom of this page.
Master the Art of Separating Egg Whites
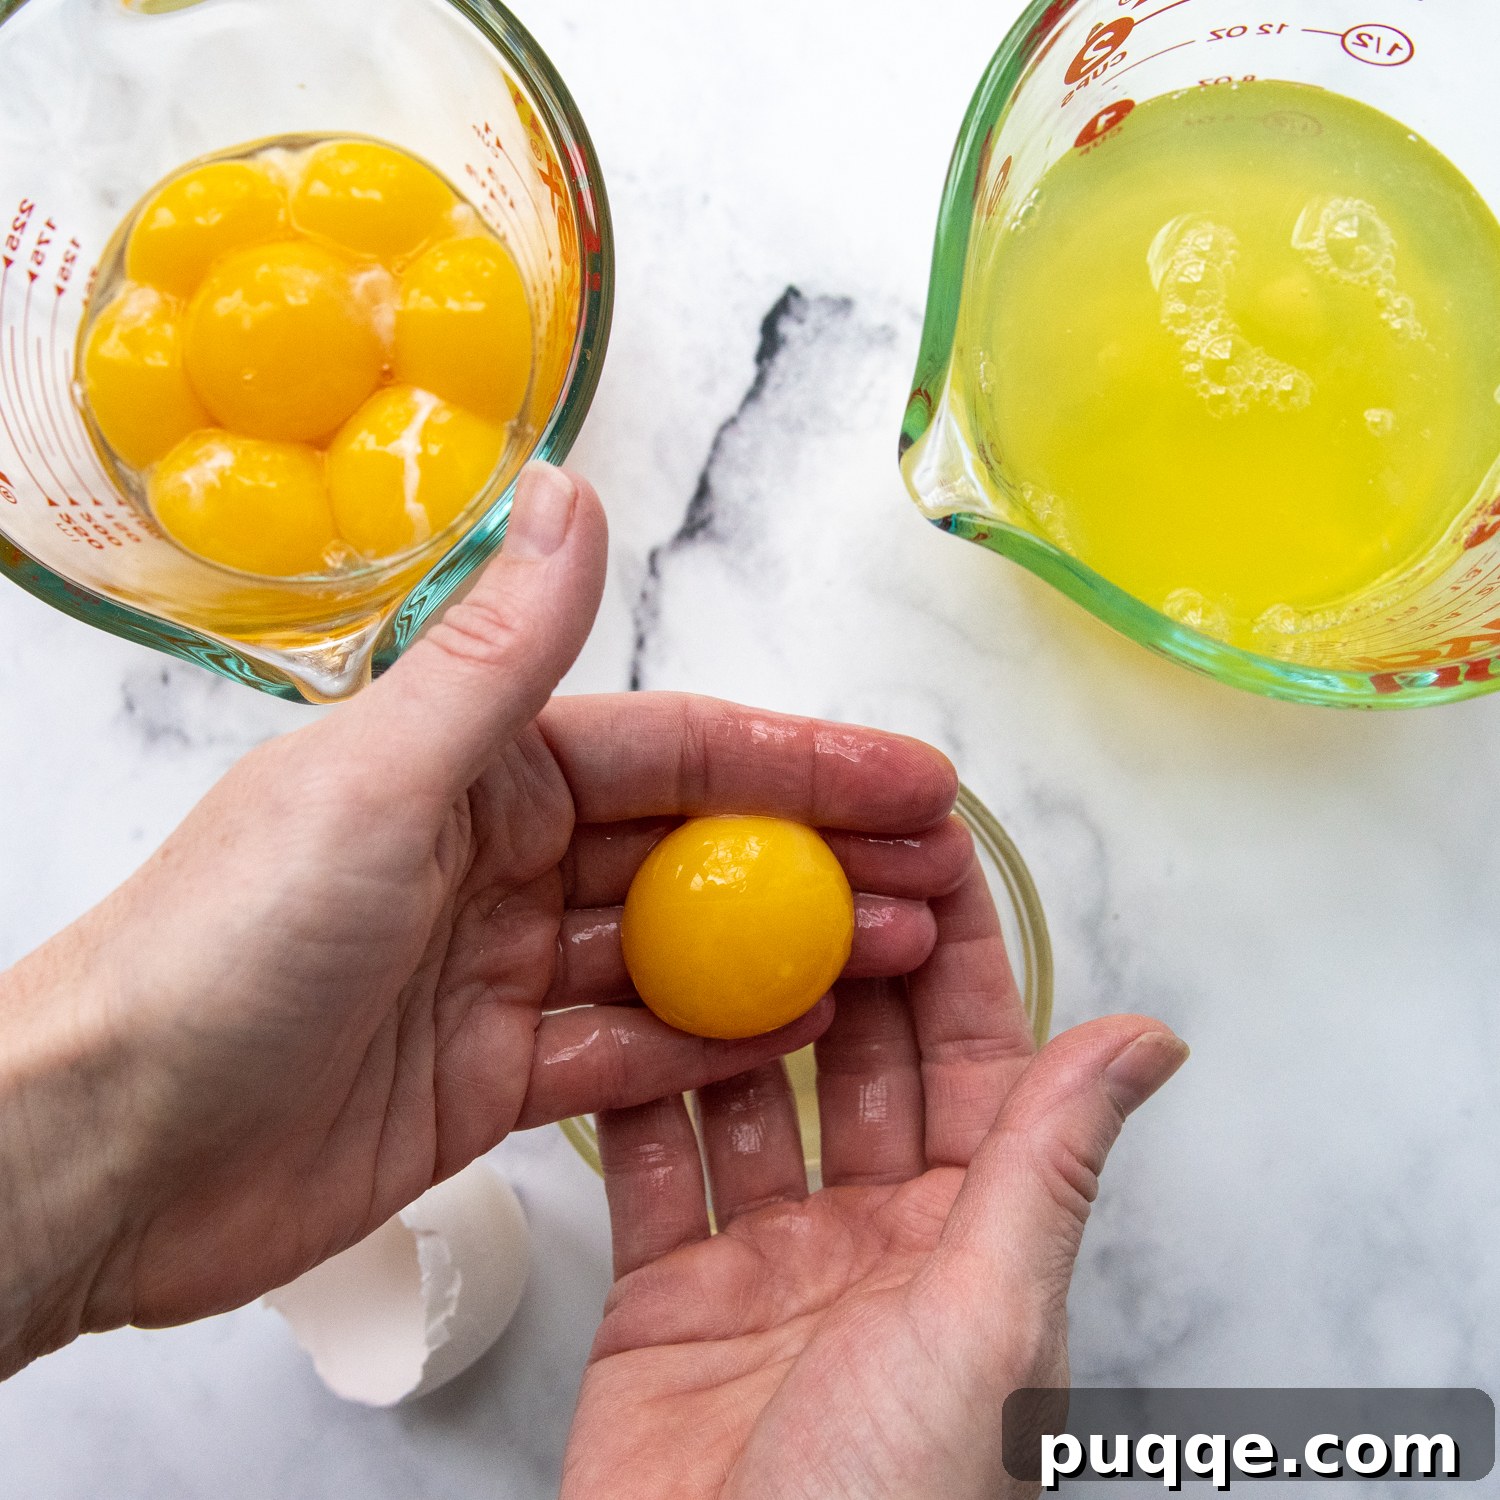
The foundation of a light and airy angel food cake is perfectly separated egg whites. For the easiest separation, work with eggs that are cold, directly from the refrigerator. Once separated, allow the egg whites to come to room temperature before whipping; this is crucial for achieving maximum volume and stable, stiff peaks. The most critical rule to remember: do not allow even a tiny speck of egg yolk to contaminate the whites. Yolk contains fat, which will prevent the egg whites from whipping up properly. If any yolk accidentally slips in, it’s best to discard that white and start fresh with a new egg.
To avoid ruining an entire batch, always separate eggs into a small, separate bowl first, rather than directly over your main mixing bowl. Once a white is successfully separated and yolk-free, you can transfer it to your large mixing bowl. A simple and effective technique is to gently transfer the yolk back and forth between your hands (as pictured below), allowing the whites to drip into a clean bowl. What about the leftover yolks? You can store them in an airtight container or freezer bag, or even in ice cube trays, labeled with the date. They freeze beautifully for up to one year and are fantastic for custards, hollandaise sauce, or lemon curd.
The Importance of Sifting Dry Ingredients
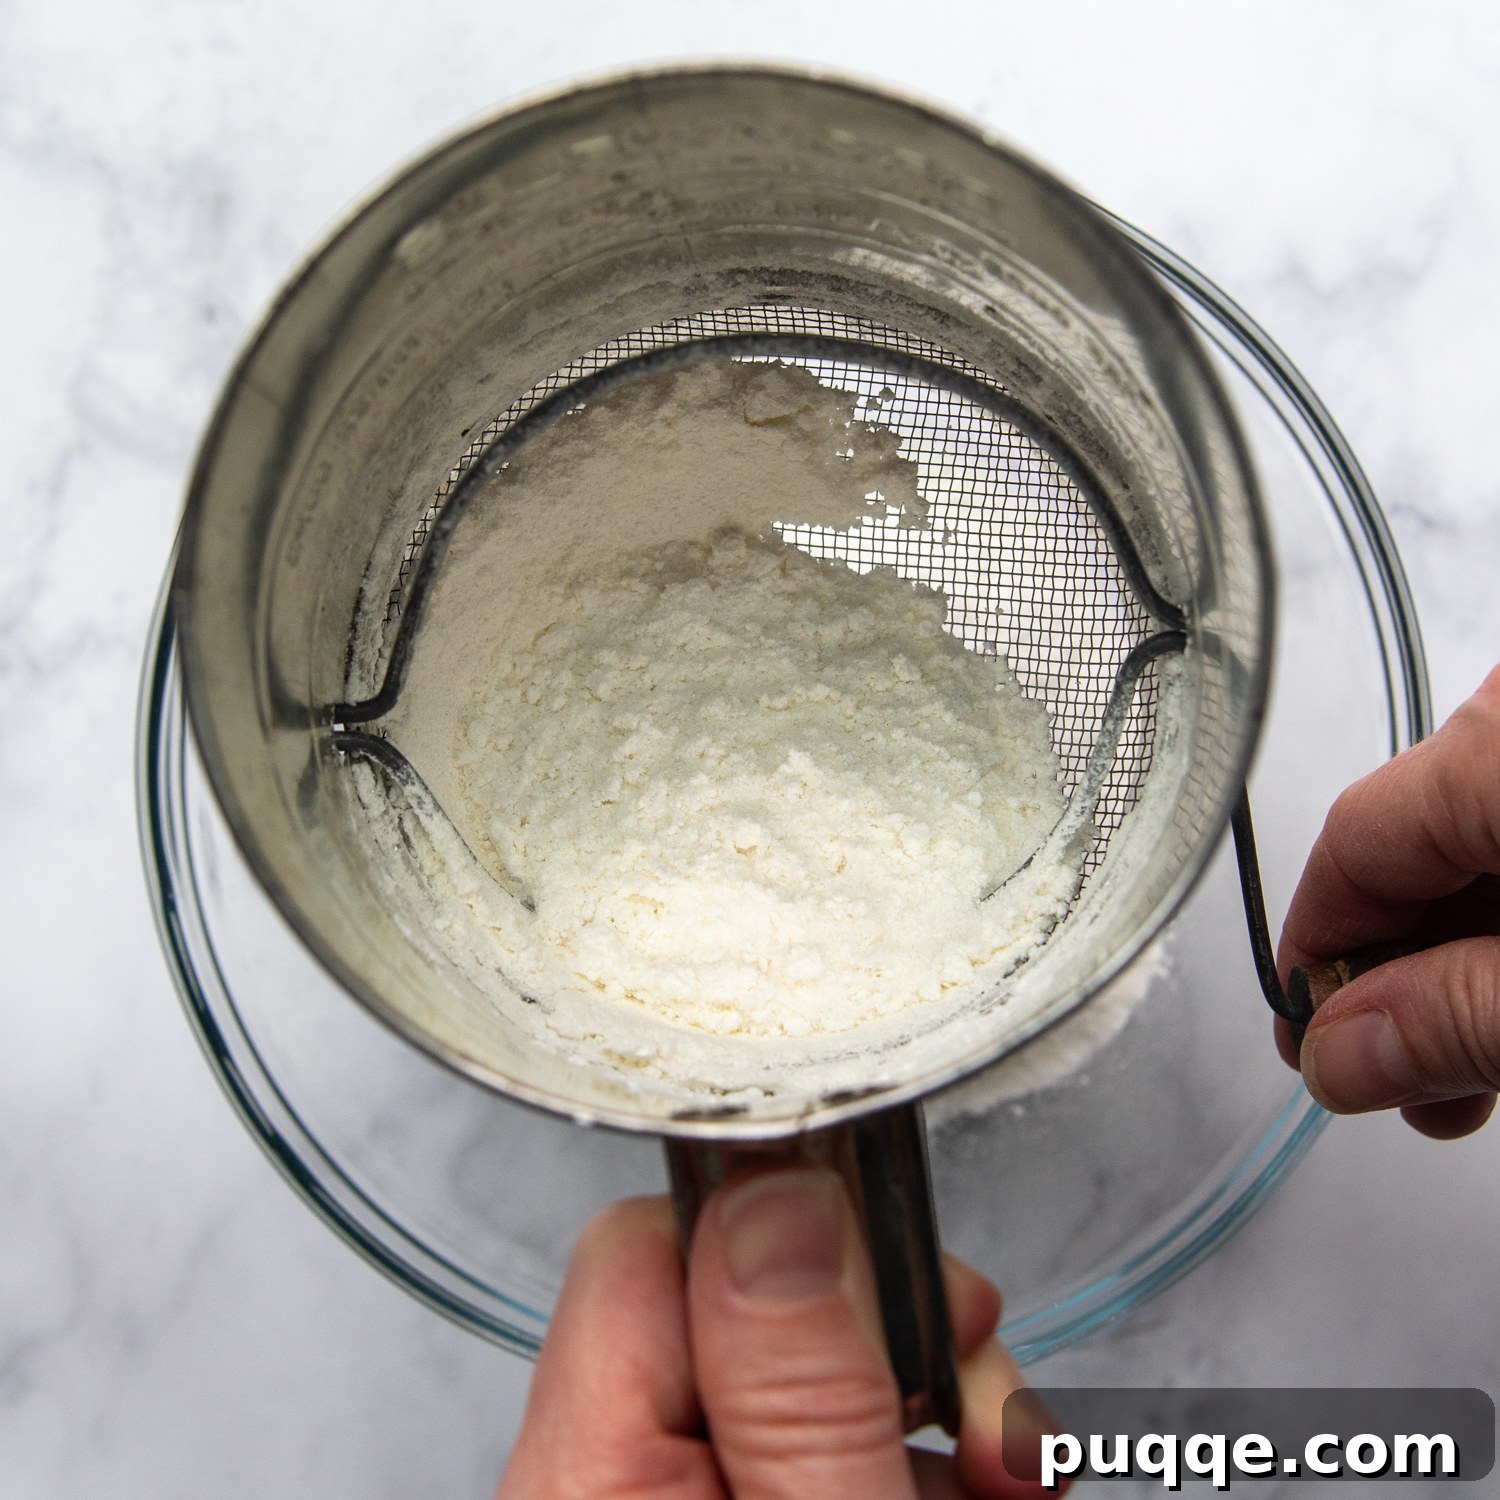
Now, it’s time to prepare our dry ingredients: gluten-free flour, cornstarch, sugar, and salt. Sifting these ingredients together, preferably through a fine-mesh sifter, is an absolutely essential step for achieving that signature light and airy crumb, preventing a dense cake. We recommend sifting the mixture at least twice. This process aerates the flours, breaks up any clumps, and ensures a uniform distribution of all components. This is especially vital when working with gluten-free flours, which can sometimes have a coarser texture or tendency to pack down more than traditional wheat flour, making them inherently heavier. Proper sifting combats this and sets the stage for a truly delicate cake.
Crafting the Perfect Meringue
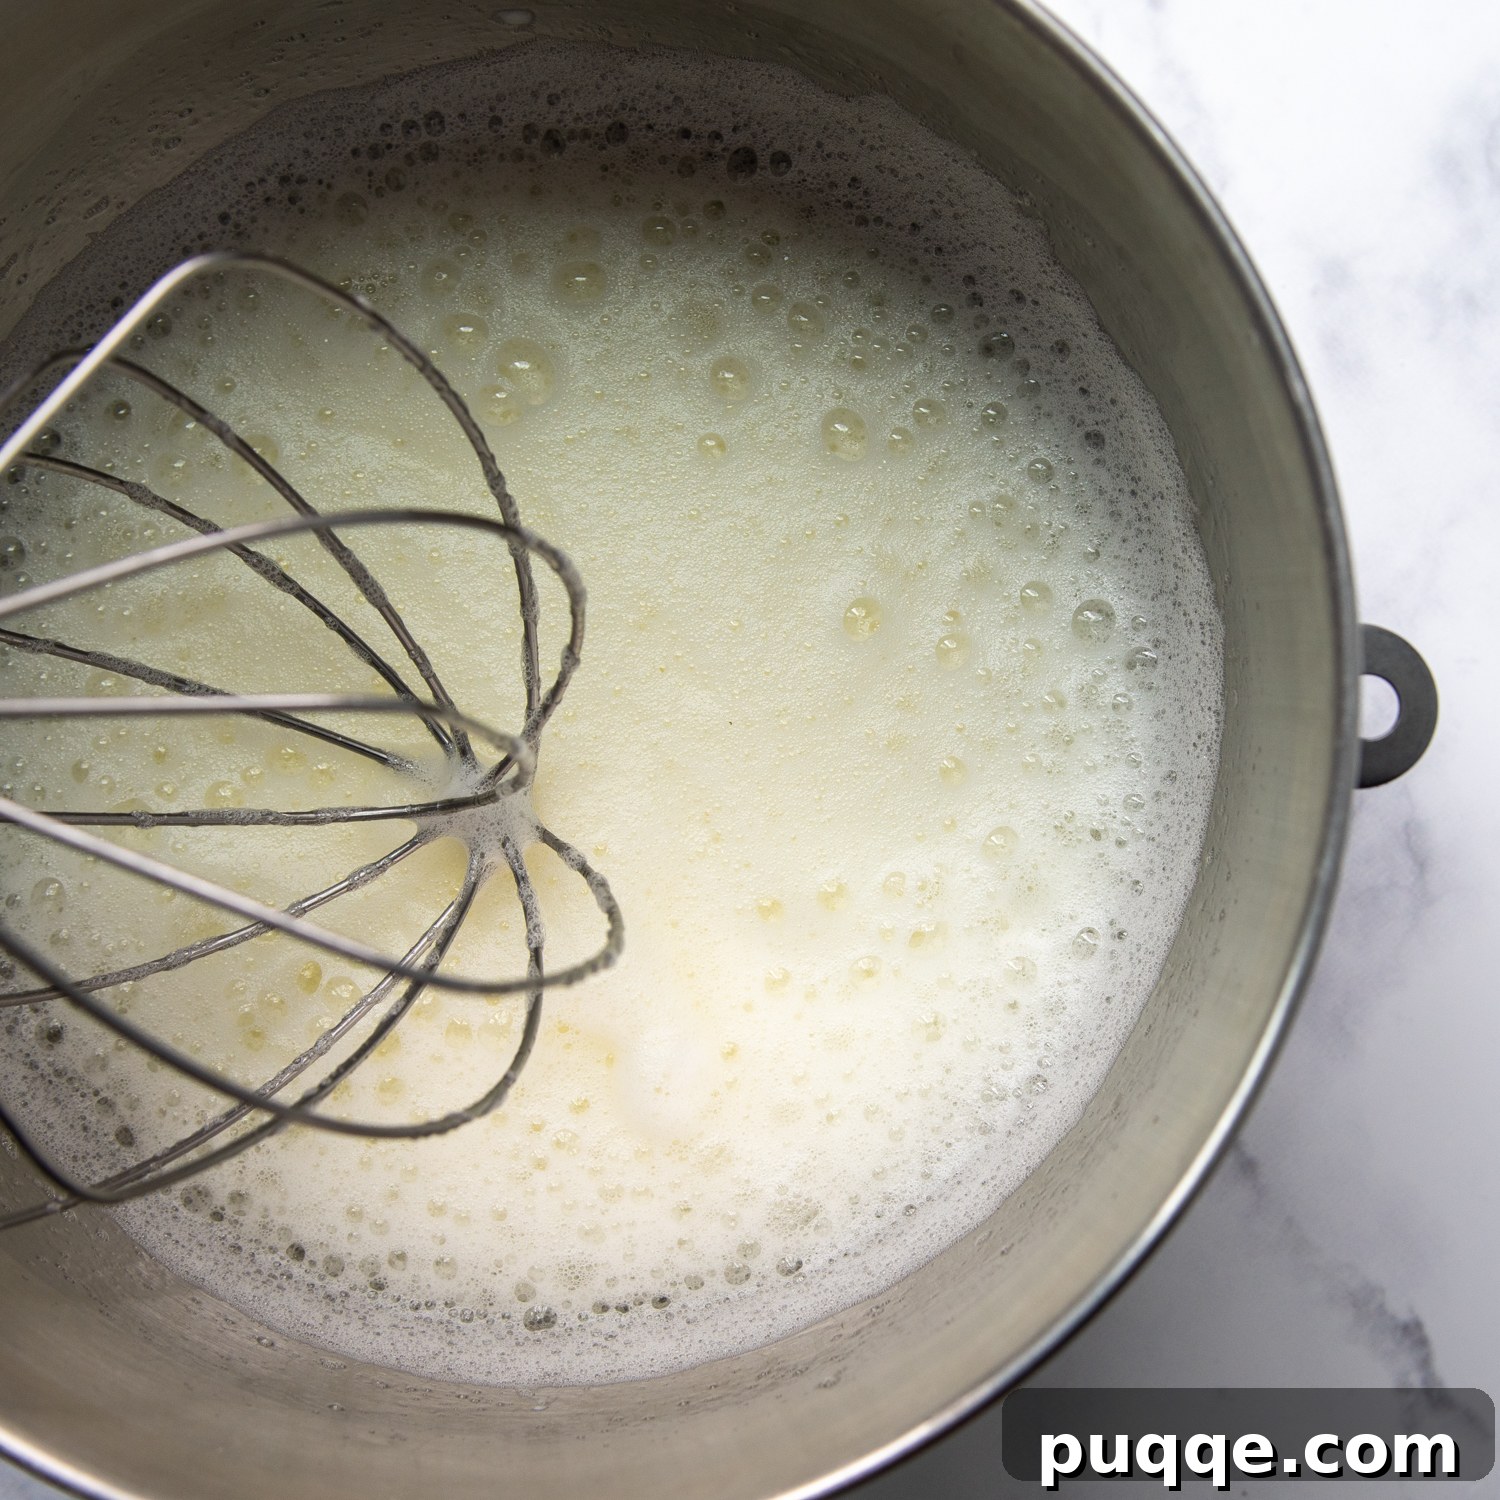
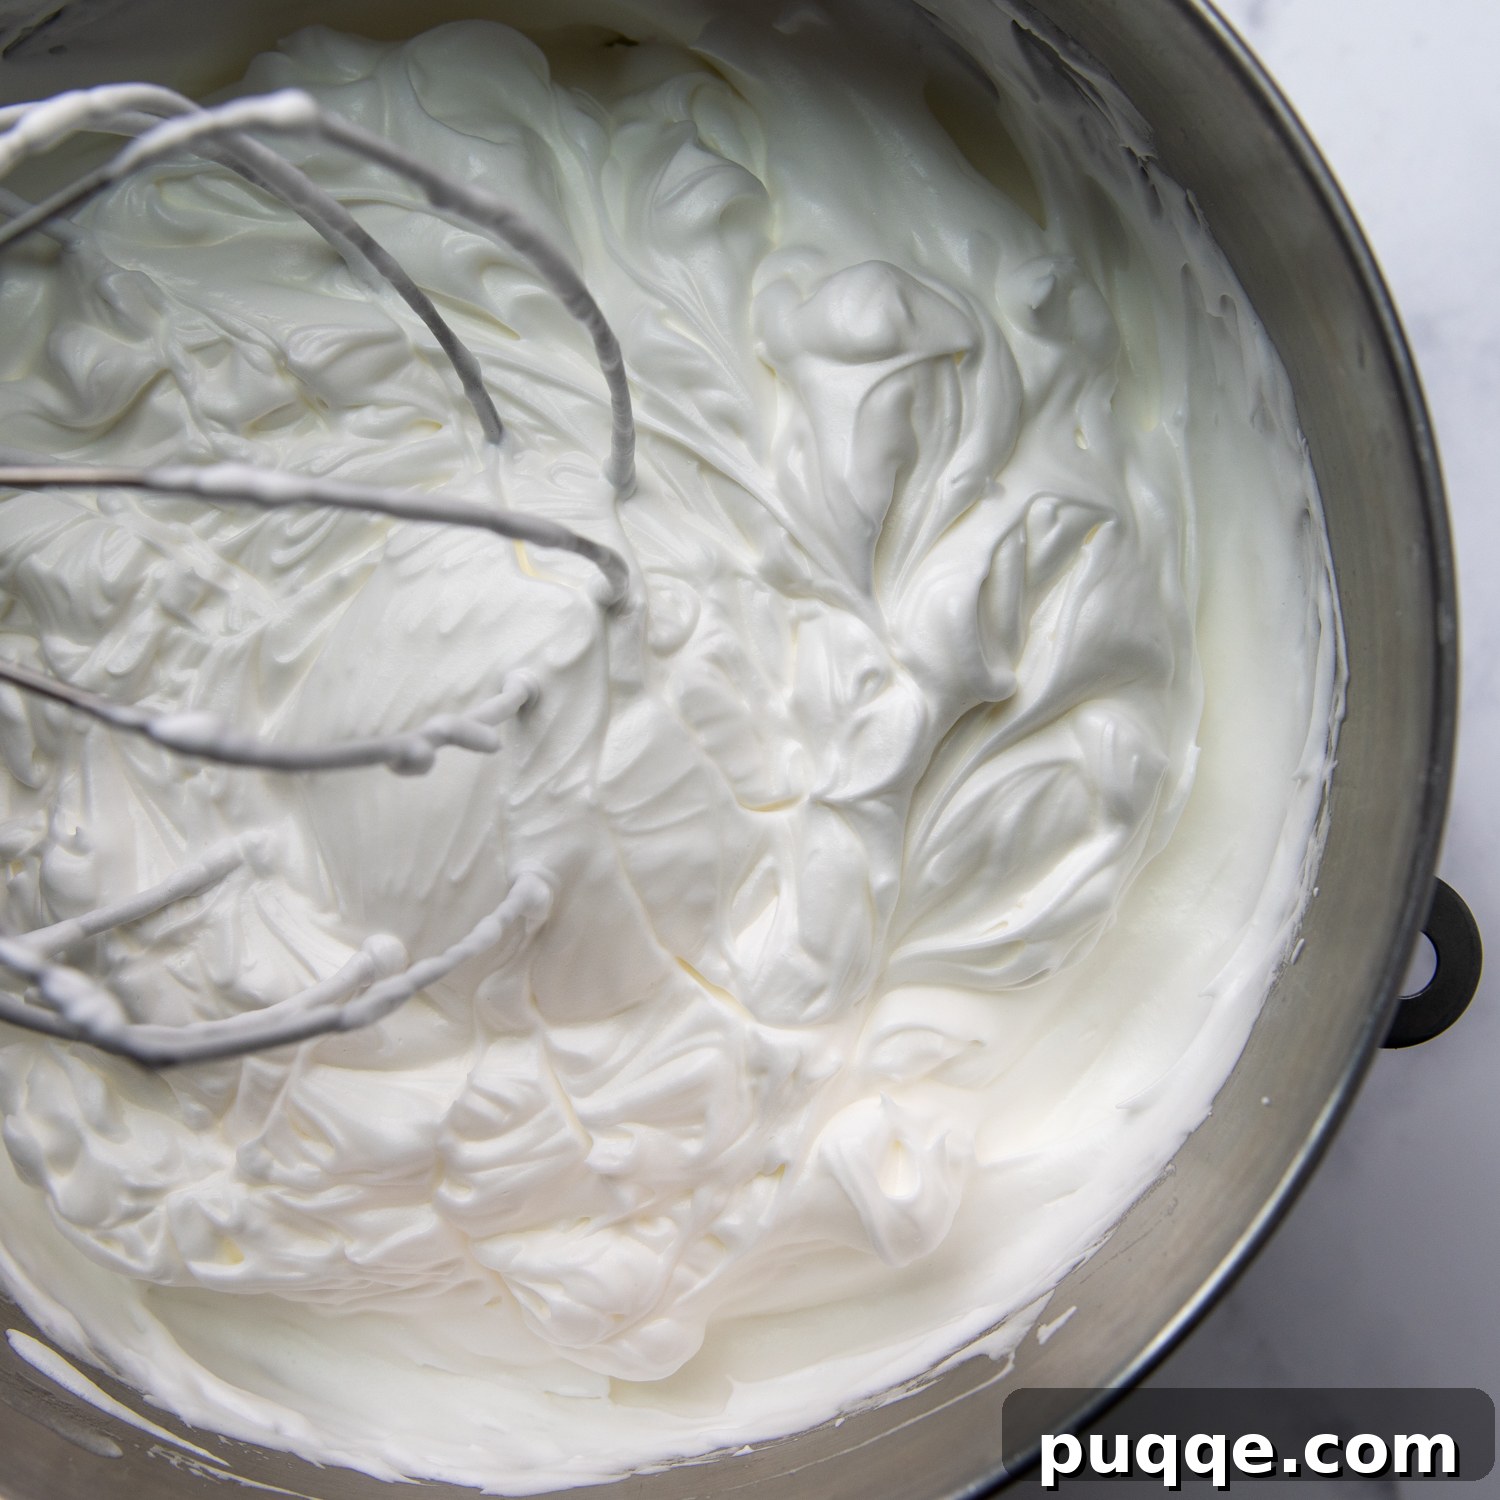
If the word “meringue” sounds intimidating, fear not – we’ll walk you through it! Begin by using the whisk attachment in a very large mixing bowl (a stand mixer is ideal, but a powerful hand mixer works too) to beat your room temperature egg whites along with cream of tartar and your chosen extracts (vanilla and almond). Start on medium-low speed until the mixture becomes visibly foamy. Cream of tartar acts as a stabilizer, helping the egg whites hold their volume. Once foamy, gradually begin adding the granulated sugar, a couple of tablespoons at a time, with the mixer running on medium-high speed. This slow addition allows the sugar granules to fully dissolve and absorb into the whipped egg whites, preventing a grainy texture in your finished meringue. Continue beating until all the sugar has been incorporated and the meringue forms glossy, stiff peaks. This means when you lift the whisk, the peaks should hold their shape firmly, curling slightly at the very tip, indicating a perfectly stable meringue ready to create a light-as-air cake.
Gentle Folding and Perfect Baking
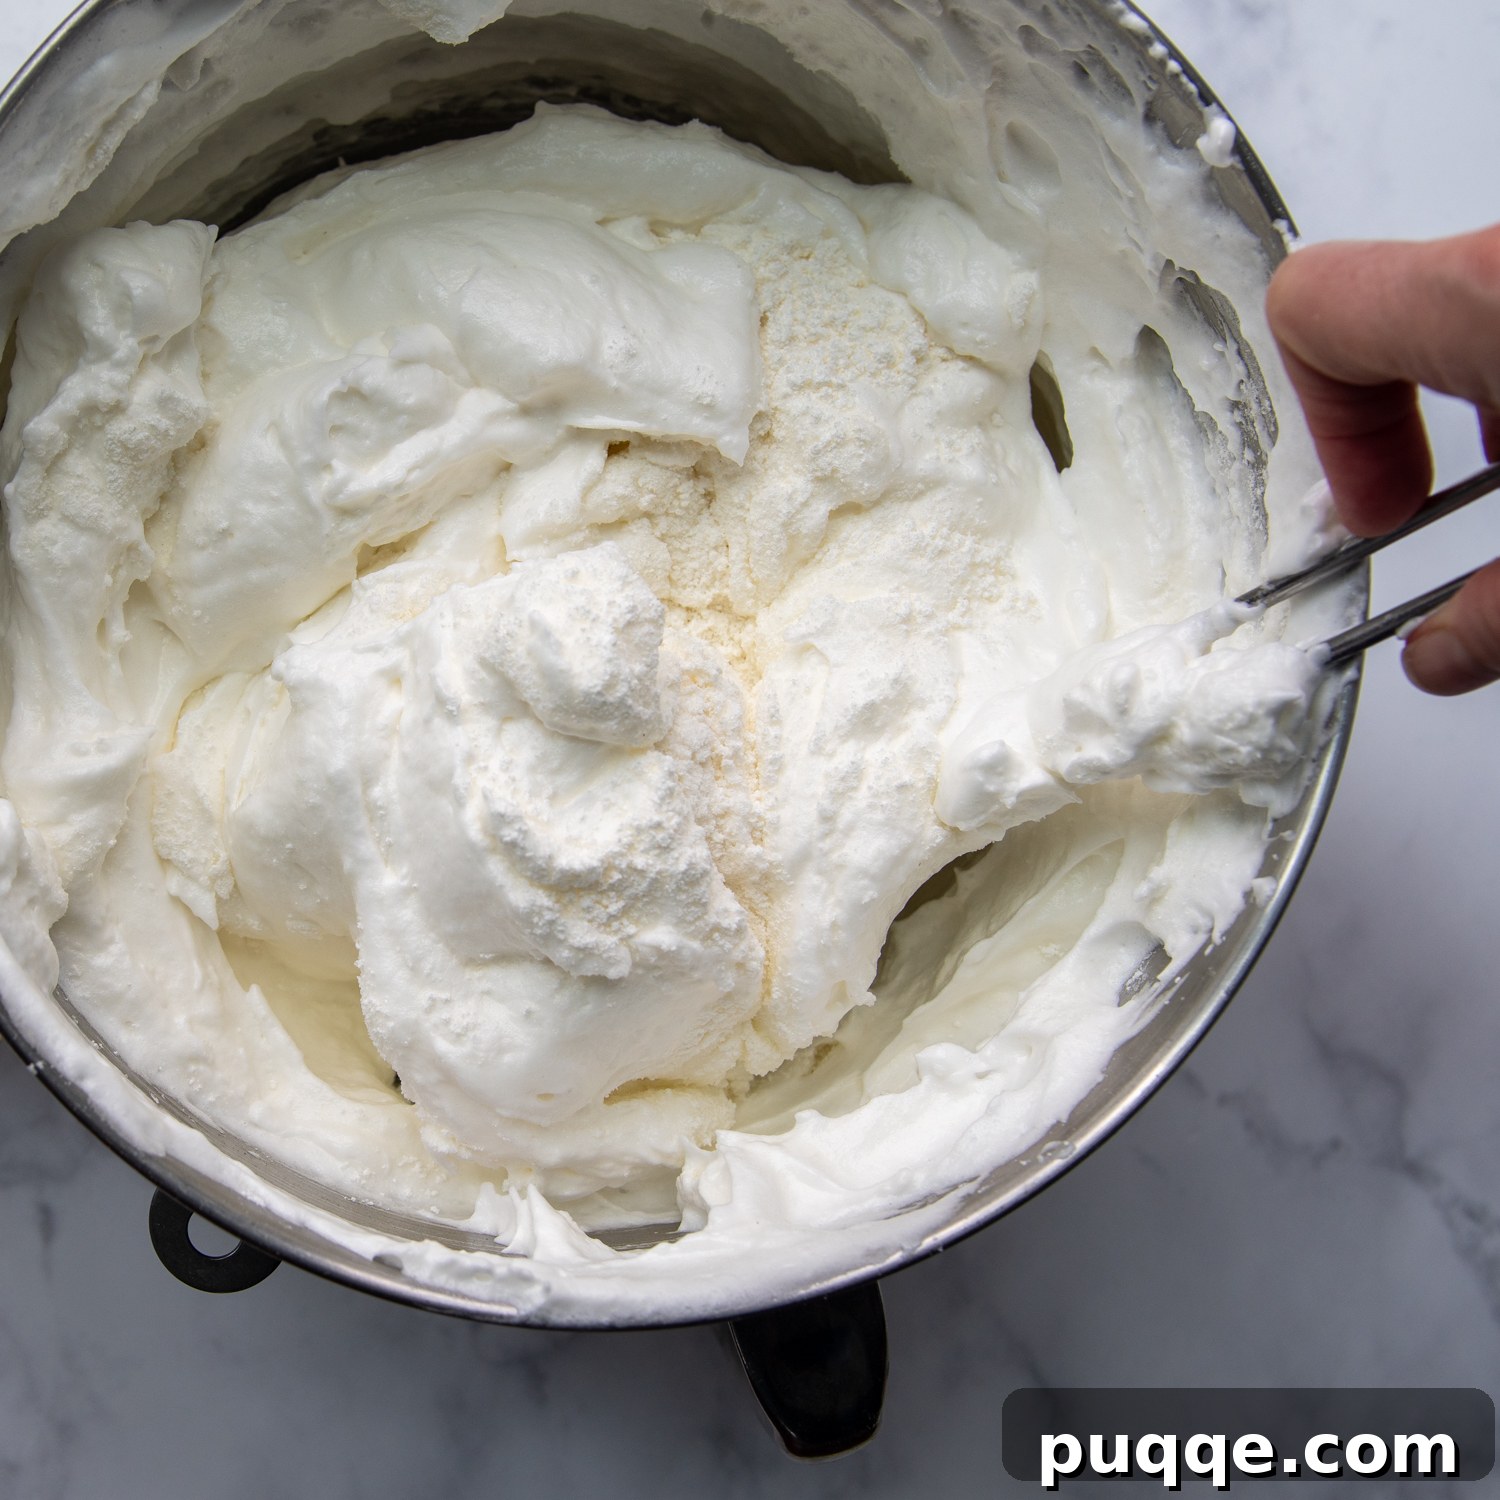
With your beautiful meringue ready, it’s time to incorporate the dry ingredients. Carefully remove the mixing bowl from the stand mixer. Add the sifted gluten-free flour mixture to the meringue in small portions, about a few tablespoons at a time. Using a rubber spatula, gently fold each addition into the egg whites. The “folding” technique involves cutting down through the center of the mixture, across the bottom of the bowl, and then up the side, turning the mixture over onto itself. This gentle motion is crucial for preserving the precious air you’ve whipped into the egg whites, which is responsible for the cake’s signature texture. Continue this delicate folding until all the flour mixture is just incorporated and no streaks remain.
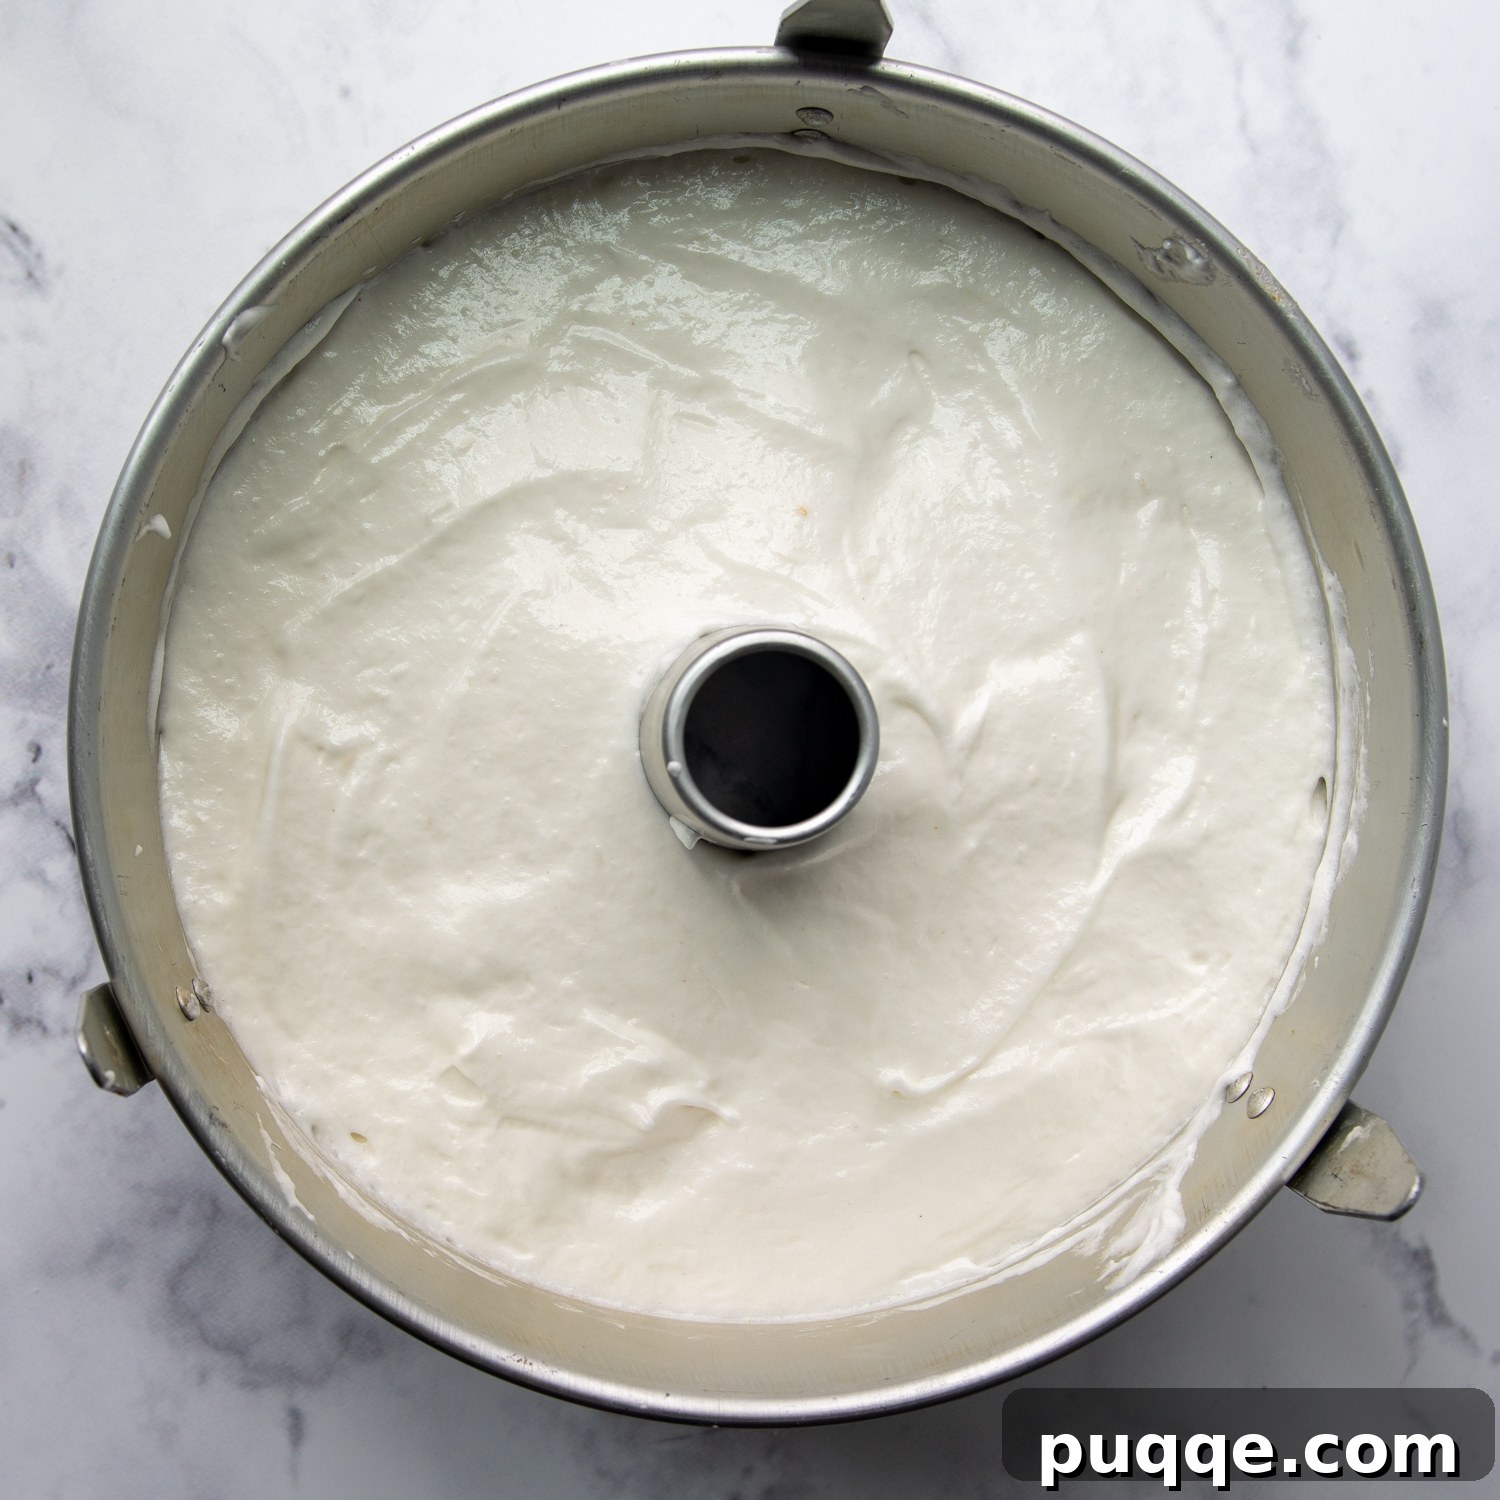
Once your batter is perfectly mixed, spoon it into an UNGREASED angel food cake tube pan. The ungreased surface is vital because it provides a rough texture for the delicate batter to “climb” as it bakes, allowing the cake to achieve its impressive height and light structure. Smooth the top of the batter with your rubber spatula, then gently tap the pan a few times on the counter to release any large air bubbles. Bake the cake on the LOWER rack of your preheated oven for 50-55 minutes. This placement prevents the top from browning too quickly before the center is fully cooked. Unsure if it’s done? Check our detailed doneness tips below! After baking, immediately invert the cake pan onto its cooling prongs (or over a bottle/funnel if your pan doesn’t have prongs) and allow it to cool completely for at least 2 to 3 hours. This inverted cooling prevents the delicate cake from collapsing under its own weight, maintaining its tall, fluffy structure. The waiting is undeniably the hardest part!
How to Determine if Your Angel Food Cake is Perfectly Baked & More Essential Tips!
Unlike many other cakes where a toothpick inserted into the center comes out clean, this method isn’t ideal for a porous sponge cake like angel food. So, how can you accurately tell when it’s done?
- The “Spring Back” Test: Gently touch the top of the cake. If it springs back immediately and no indentation is left from your finger, it’s likely done. If it feels soft or leaves a mark, return it to the oven for a few more minutes.
- Visual Cues: The exterior of a perfectly baked angel food cake will have a beautiful, uniform golden-brown color.
- Temperature Check: For the most precise measurement, insert an instant-read thermometer into the center of the cake. It should register at least 205℉ (96℃). This internal temperature ensures the cake’s structure is fully set, preventing it from collapsing after cooling.
Once baked, the cake must be inverted while still in its pan and allowed to cool completely for several hours. This critical step maintains the cake’s impressive height and fluffy texture, preventing it from compressing. When it’s fully cooled and you’re ready to release it, use a thin, sharp knife to carefully run around both the outer and inner rings of the pan. Gently turn the pan upside down to release the cake, then transfer it to a wire rack or a serving platter.
To preserve the cake’s beautiful, delicate height and prevent crushing, always use a serrated knife for slicing. A gentle sawing motion will create clean, even slices without tearing the fragile crumb.
Can I Use a Different Type of Pan for Angel Food Cake?
While a classic tube pan with a removable bottom is ideal for angel food cake, you can certainly use other types of baking pans if you don’t have one on hand. Since the cake batter needs a surface to “climb” up the sides as it bakes, you may need to adjust the amount of batter per pan or divide it into multiple pans.
Regardless of the pan you choose, remember these two golden rules for angel food cake:
- Never grease the pan before adding the batter. The ungreased surface is essential for the cake to rise properly.
- Always invert the pans and let the cake cool completely for 2-3 hours before attempting to remove it. This prevents collapse and maintains the cake’s airy structure.
Here are some alternative pan options and estimated baking times:
- 10-inch Springform Pan: Bake for approximately 40-45 minutes.
- Loaf Pans: Divide the batter evenly between two standard loaf pans and bake for 35-40 minutes.
- 9×13-inch Rectangular Pan: Bake for approximately 35-45 minutes.
Don’t Forget to Pin This Recipe to Your Pinterest Board!
Let’s connect on Pinterest! I’m always sharing fantastic recipes you’ll love!
Did you bake this incredible cake? We love hearing from our community! Please take a moment to leave a star rating and comment below the recipe card. Your feedback helps other bakers and is incredibly valuable to us. We always respond! -Melissa
4.75 stars (4 ratings)
Extra Soft, Fluffy Gluten Free Angel Food Cake

Melissa Erdelac
10 servings
20 mins
50 mins
1 hr 10 mins
Learn how to make pillowy soft gluten-free angel food cake from scratch. My detailed recipe is full of tips and tricks to help you successfully make the best homemade with a copycat taste and texture. The delicate airy crumb is achieved with specific ingredients and mixing methods — all of which I share below – but are easy enough for a novice baker to pull off with success.
Pin Recipe
Rate Recipe
Remove Ads
Recipe Video
Watch our video tutorial for a visual guide on making this delicious gluten-free angel food cake!
Ingredients
- 1 ½ cups egg whites (from 10-12 large eggs), at room temperature
- ¾ cup (107 g) gluten-free all-purpose flour (Cup4Cup GF flour highly recommended)
- 1 ½ cup (300 g) granulated sugar, divided
- 3 tablespoons (26 g) cornstarch
- ½ teaspoon salt
- 1 ½ teaspoon cream of tartar
- 1 ½ teaspoon vanilla extract
- ½ teaspoon almond extract (or use additional vanilla extract for a pure vanilla flavor)
Equipment
- Stand Mixer with whisk attachment (or large mixing bowl and hand mixer)
- Fine-Mesh Sifter
- 10-inch Tube Cake Pan with removable bottom (ungreased)
- Rubber spatula
- Measuring cups and spoons
Instructions
- Preheat your oven to 350°F (175°C). In a medium bowl, sift together the gluten-free flour, ¾ cup of the granulated sugar, cornstarch, and salt. Repeat the sifting process once more, for a total of two times. Set this dry mixture aside.
- In a very large bowl of a stand mixer fitted with the whisk attachment (or using a hand mixer), combine the room temperature egg whites, cream of tartar, vanilla extract, and almond extract. Beat on medium-low speed until the mixture becomes foamy and frothy.
- Increase the mixer speed to medium-high. Gradually add the remaining ¾ cup of granulated sugar, about 2 tablespoons at a time, allowing each addition to fully dissolve before adding the next. Continue beating until stiff, glossy peaks form. When you lift the whisk, the meringue should hold its shape firmly. This typically takes about 2-3 minutes after all sugar is added.
- Carefully remove the bowl from the stand mixer. Add the sifted flour mixture to the meringue, approximately 3 tablespoons at a time. Using a rubber spatula, gently fold in each addition until just combined. Be careful not to deflate the meringue by overmixing; use a light hand.
- Spoon the delicate batter evenly into an UNGREASED 10-inch angel food cake tube pan. Gently smooth the top of the batter with a rubber spatula. Lightly tap the pan on your counter a few times to release any trapped air bubbles.
- Bake the cake on the LOWER-MIDDLE rack of your preheated oven for 50-55 minutes, or until the top is beautifully golden brown and the cake springs back when lightly pressed. (Refer to the “How to Determine if Your Angel Food Cake is Perfectly Baked” section above for more detailed doneness tests).
- Immediately after removing the cake from the oven, invert the pan onto the counter. Use the prongs around the rim of the tube pan to elevate it, or if your pan lacks prongs, invert it over the neck of a bottle or a funnel to allow air to circulate. Let the cake cool completely in the inverted position for at least 2 to 3 hours. This crucial step prevents the cake from collapsing.
- Once completely cool, use a thin, sharp knife to carefully run around both the outer and inner edges of the pan to loosen the cake. Gently turn the pan upside down to release the cake, and then transfer it to a wire rack or serving platter. Slice with a serrated knife for best results and serve!
Notes
Baking Tips and Storage for Your Gluten-Free Angel Food Cake
- Ungreased Pan is Key: Always leave your tube pan ungreased. The batter needs to cling to the sides of the pan to “climb” and rise properly as it bakes, creating its characteristic tall, airy structure.
- Double Sifting: Sifting the dry ingredients two times is not an optional step; it’s crucial for aerating the gluten-free flour mixture and ensuring a truly light, airy crumb free of lumps.
- Bowl Size Matters: Use a very large mixing bowl for the egg whites, preferably at least 5 quarts. This provides ample room for the egg whites to expand significantly in volume and makes it easier to gently fold in the flour mixture without deflating the meringue.
- Temperature for Eggs: While it’s easiest to separate egg whites when they are cold, always allow them to come to room temperature before beating. Room temperature egg whites whip up with far greater volume and stability, leading to more voluminous, stiff peaks.
- Lower Oven Rack Placement: Baking the cake on the lower rack of your oven is important to prevent the top from becoming overly brown or even burnt before the center of the cake has a chance to fully bake through.
- Doneness Test: The “spring back” test is the most reliable. When gently pressed, a perfectly baked angel food cake will spring back without leaving any indentation. If it dents, it needs more time. For extra assurance, an internal temperature of 205℉ (96℃) in the center confirms doneness.
- Storing Leftovers: Wrap any leftover angel food cake securely in plastic wrap to prevent it from drying out. It can be stored at room temperature for up to two days.
- Freezing Instructions: For longer storage, angel food cake freezes exceptionally well. Wrap individual slices or the whole cake tightly in plastic wrap, then again in aluminum foil. It can be frozen for up to 3 months. Thaw overnight in the refrigerator or at room temperature.
Nutrition Information (per serving)
Calories: 178 kcal, Carbohydrates: 39g, Protein: 5g, Fat: 1g, Sodium: 178mg, Potassium: 134mg, Fiber: 1g, Sugar: 31g, Calcium: 9mg, Iron: 1mg
Did you make this recipe?
Please leave a star rating and review below. Your feedback helps others discover and enjoy this recipe, and I truly appreciate it!