
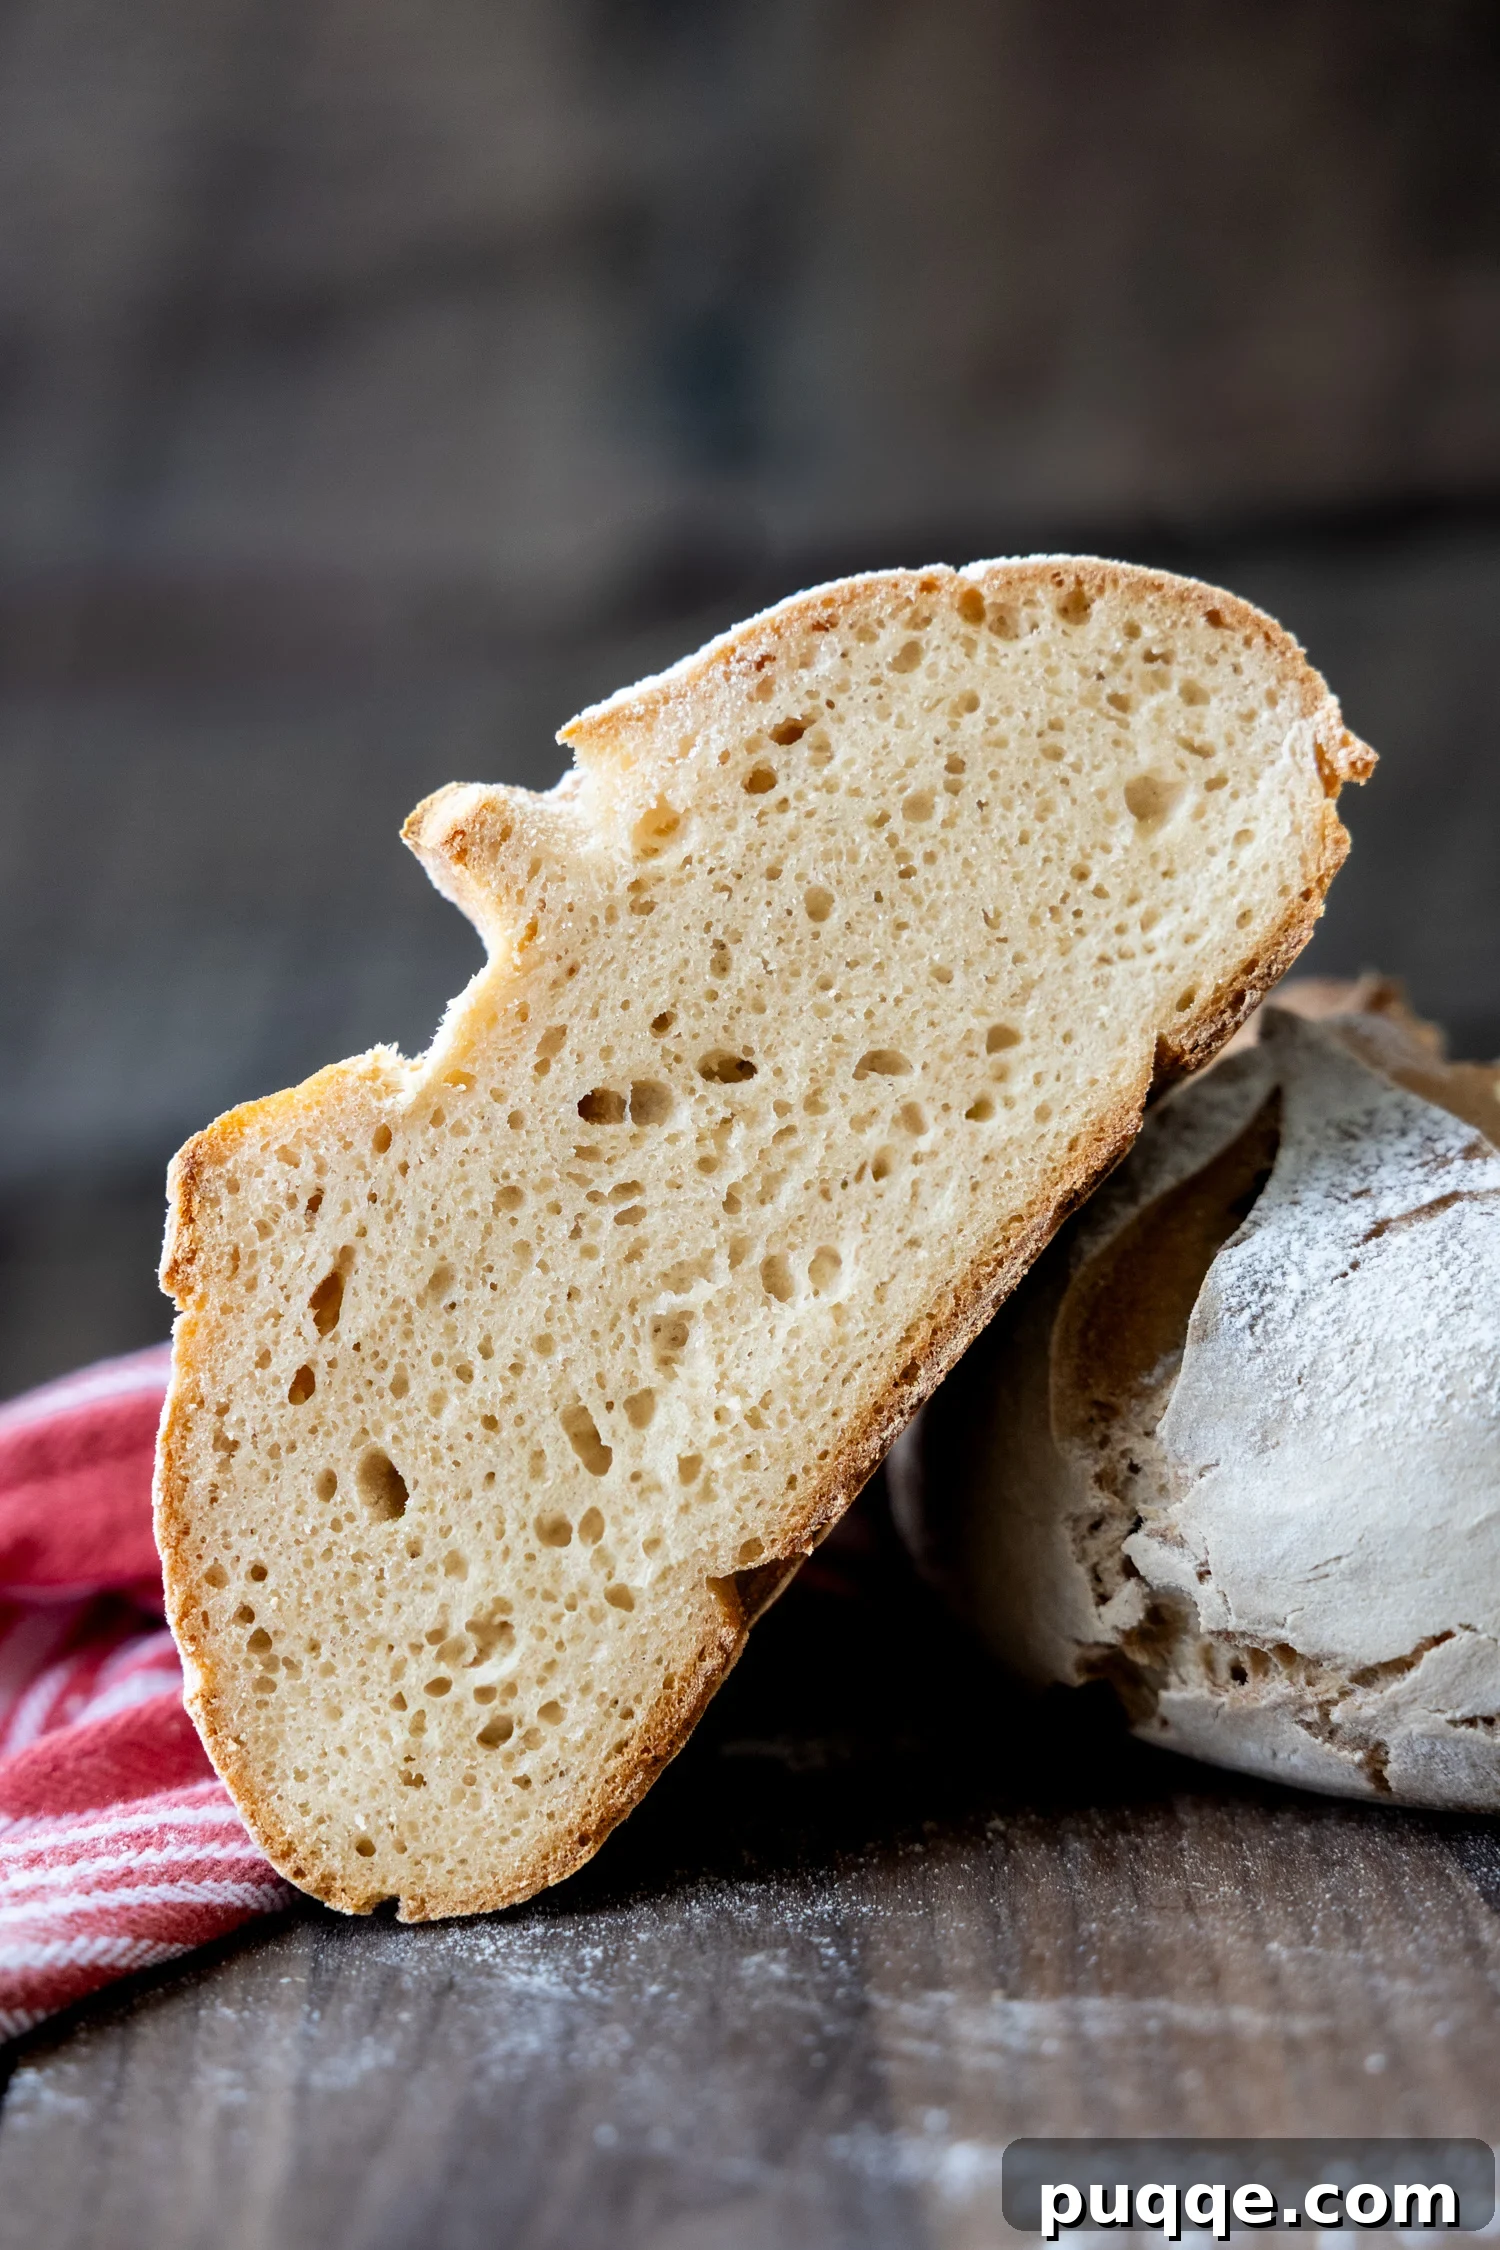
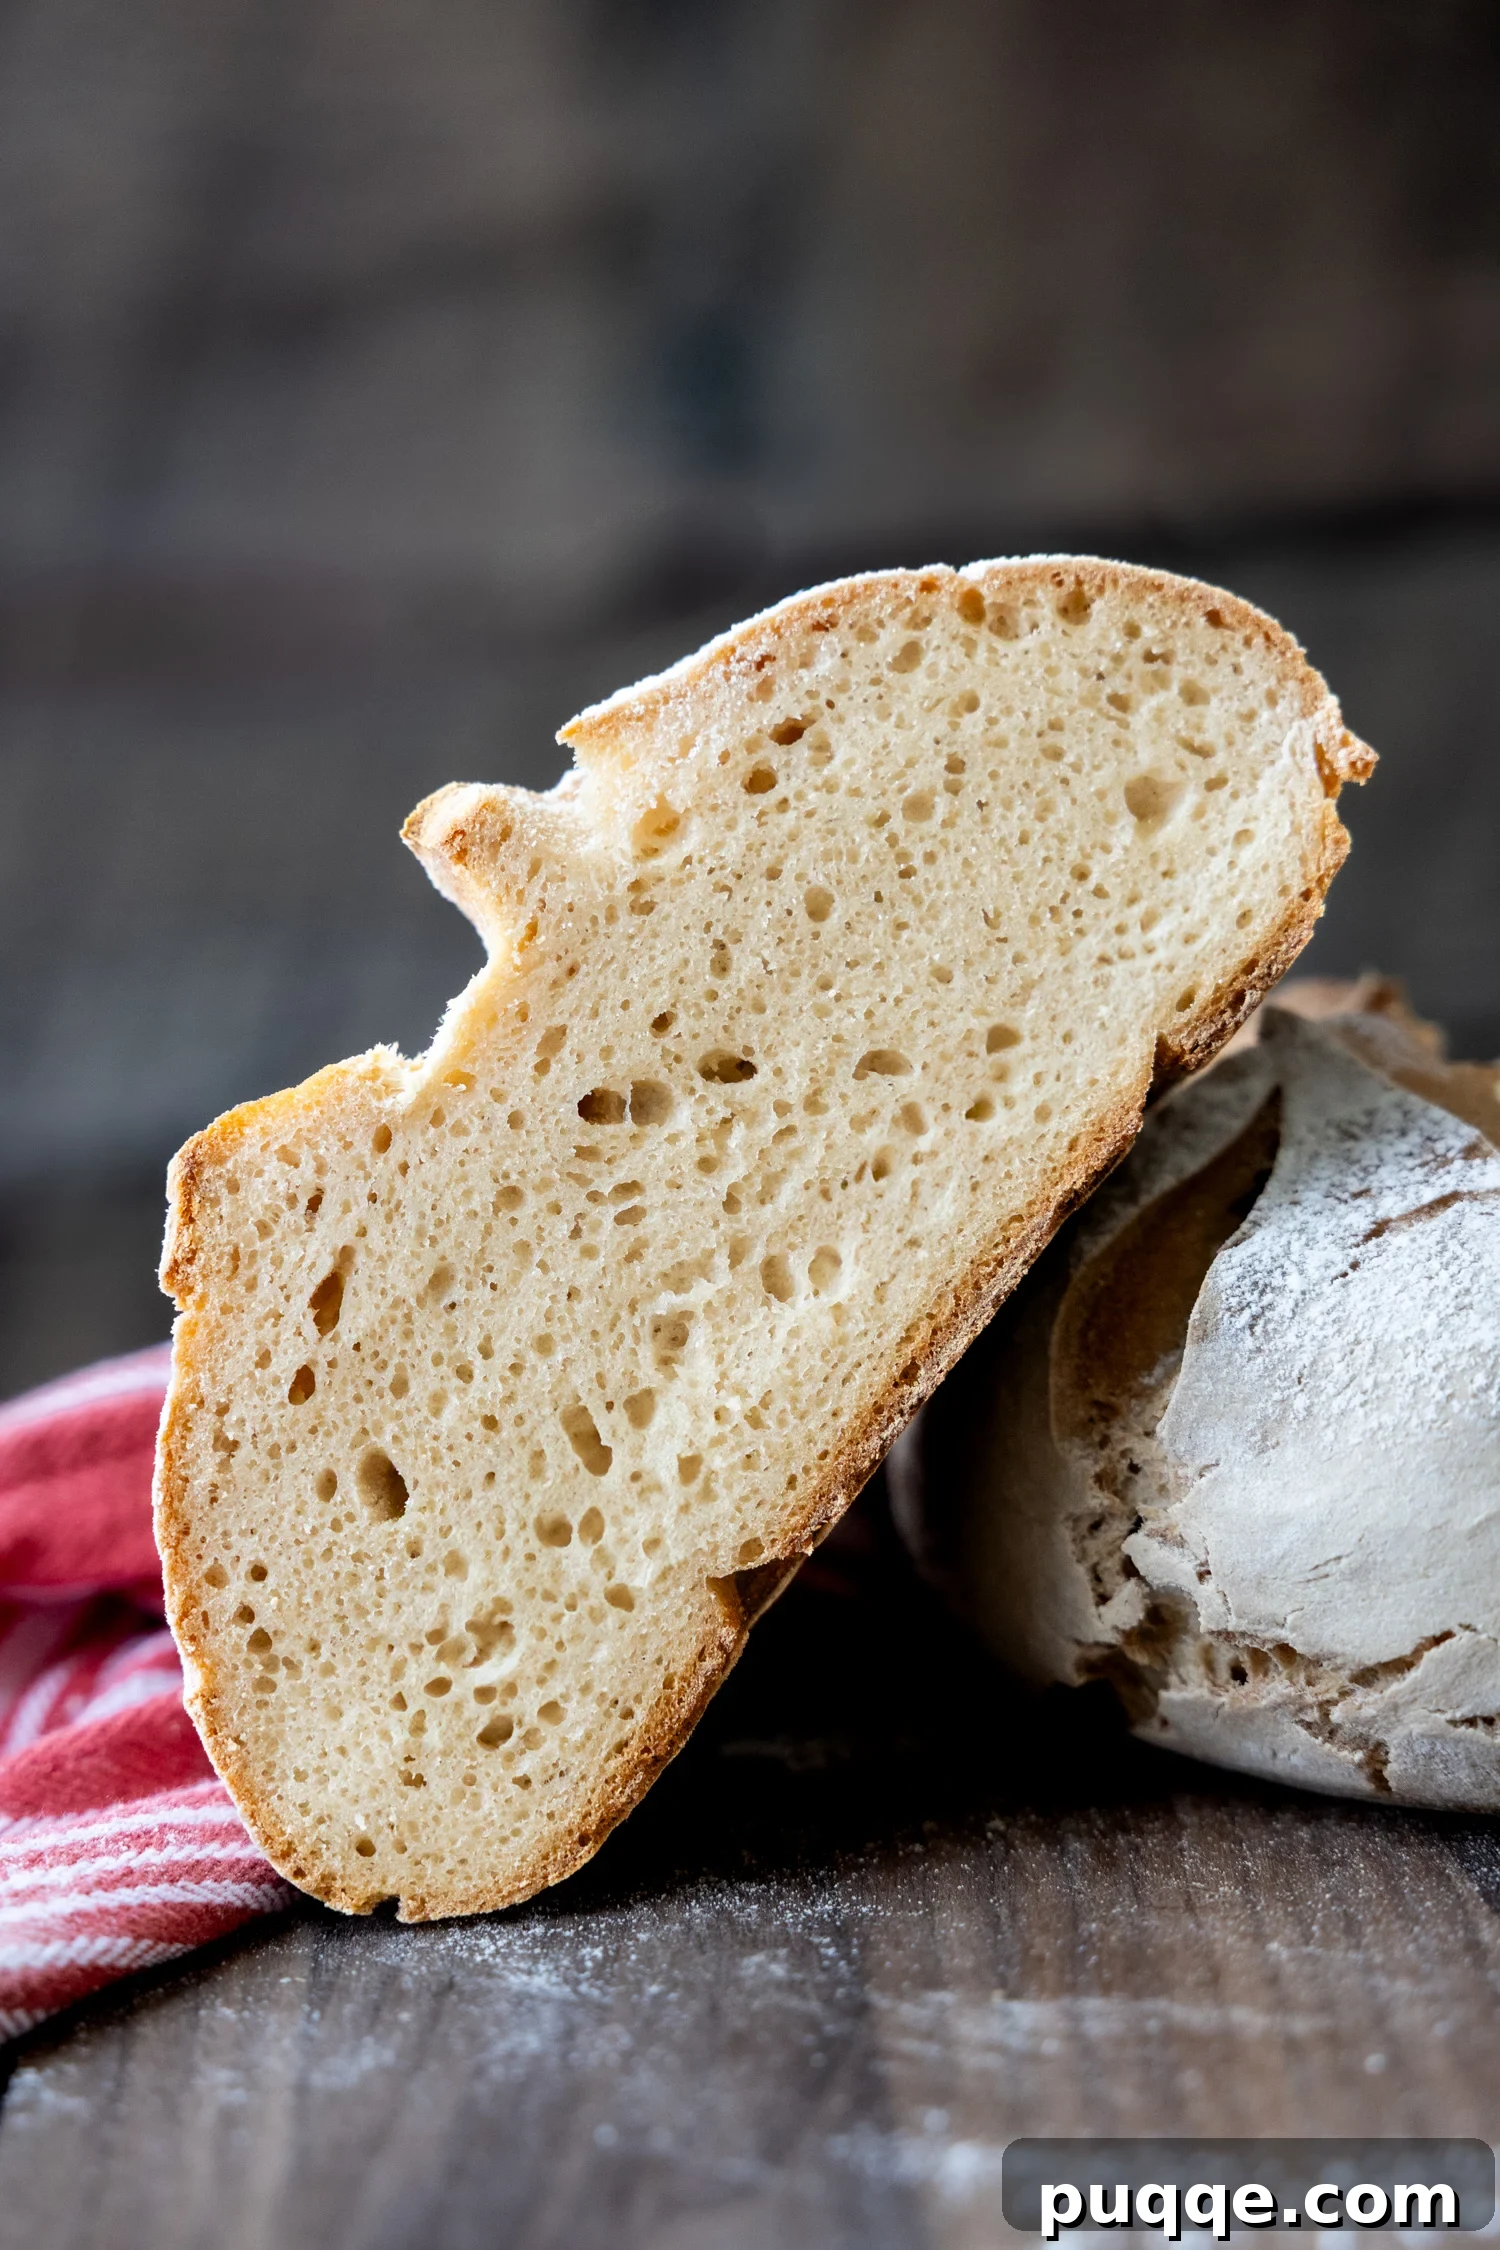
Embarking on the journey of baking homemade gluten-free sourdough bread might seem daunting, but rest assured, it’s an incredibly rewarding and surprisingly simple process! This meticulously tested recipe shatters the myth that artisan-quality gluten-free sourdough requires extensive effort or complex planning. Forget about pre-warming your starter or preheating your oven; this method embraces simplicity, starting with a cold sourdough starter and a cold oven. The result? A breathtakingly beautiful, gloriously squishy loaf with that coveted signature crusty, chewy shell that will make you forget it’s gluten-free.
The Ultimate Easy Gluten-Free Sourdough: A Game-Changer for Bakers
If my kitchen compost bin could recount tales, it would lament the numerous failed gluten-free sourdough experiments that paved the way to this perfect loaf. My journey involved countless bags of gluten-free flour, each attempt a step closer to achieving the ideal taste and texture, designed to complement my collection of fail-proof gluten-free bread recipes. Through this extensive trial and error, I encountered and overcame many common pitfalls, ensuring that the tips and tricks shared within this recipe card below will save you from similar frustrations.
Despite the initial challenges, the revelation was how remarkably easy it is to create an artisan-style gluten-free sourdough once you understand a few key principles. The most challenging aspect truly is ensuring all ingredients are accurately measured and added to the mixing bowl. If you can follow instructions and measure precisely, you are more than capable of producing a legitimate, bakery-quality sourdough boule right in your own kitchen. While making sourdough with gluten-free flour does benefit from certain kitchen equipment, I’ll detail exactly what’s essential and what can be substituted or skipped entirely.
What makes this particular gluten-free sourdough recipe stand out from the rest? My primary goal was to eliminate the traditional roadblocks that often deter home bakers. This means no more meticulous planning to activate your sourdough starter days in advance, no lengthy and fussy processes, and no obscure or complicated ingredients. This recipe simplifies gluten-free sourdough baking by using readily available all-purpose gluten-free flour, allowing you to use a cold starter straight from the fridge, and remarkably, it bakes beautifully in an oven that hasn’t been preheated. This streamlined approach ensures you achieve an exceptional loaf without compromising on that authentic sourdough taste or a desirable, airy texture.
This recipe isn’t just about baking bread; it’s about empowering gluten-free individuals to enjoy the simple pleasure of a warm, fresh slice of sourdough. It’s a testament to the fact that delicious, homemade gluten-free baked goods are not only possible but can also be incredibly accessible. Get ready to transform your kitchen into a gluten-free bakery!
Essential Ingredients and Equipment Demystified
Understanding your tools and components is key to successful baking. If specialized equipment poses a barrier for you, consider trying my 5-star gluten-free Italian bread recipe, which served as inspiration for this sourdough but requires no special tools. Below, I’ll clarify what’s helpful to have, what can be easily swapped, and provide insightful tidbits about the ingredients.
- Gluten-Free All-Purpose Flour: The foundation of our loaf. I extensively tested this recipe with several popular brands. Detailed recommendations and any necessary adaptations for achieving a stellar loaf with specific blends are included in the full recipe card. Just like my squishy soft gluten-free sandwich loaf, I believe in versatile GF bread recipes that deliver consistent results.
- Potato Starch: While all-purpose GF flour blends offer convenience, for breads, incorporating a small portion of a lighter starch like potato starch significantly improves the crumb. It helps create a lighter, more airy texture without making the bread dry. This is a subtle yet impactful change for the final product.
- Soda Water: This ingredient plays a crucial role in promoting a more open, tender crumb structure. The carbonation adds a lightness that plain tap water simply can’t replicate. However, if soda water isn’t readily available, regular tap water can be used as a straightforward substitute, though you might notice a slight difference in the final texture.
- Psyllium Husk Powder: This is truly essential for gluten-free sourdough. Without gluten to provide elasticity and structure, psyllium husk powder acts as a binder, making the dough manageable and shapeable without needing to add excessive amounts of extra flour, which can lead to a dry, dense crumb. I highly recommend using the specific brand linked in the recipe card; darker psyllium brands can impart an unappealing purplish hue to your bread, whereas the recommended brand helps maintain a desirable light color.
- Sourdough Starter: The heart of any sourdough. This recipe is designed to work beautifully with either a cold starter taken directly from the fridge or an activated starter. The flexibility here eliminates a common planning hurdle for many bakers, making the process much more spontaneous and accessible.
- Stand Mixer: Given the stiffness of gluten-free sourdough dough, a stand mixer fitted with a paddle attachment is highly recommended for efficient and thorough mixing. A hand mixer would likely struggle. If you own a bread machine, it can also be used for combining the ingredients before transferring the dough for rising.
- Banneton, Lame, & Bread Cloche/Dutch Oven:
- Bread Cloche or Dutch Oven: Of these, a bread cloche or a good quality Dutch oven is arguably the most critical for achieving that desirable, crusty shell. These enclosed baking vessels trap steam, which is vital for a strong rise and a crackly crust. A cast iron round baking pan with a ceramic dome also works perfectly.
- Lame: A lame (a specialized scoring tool) allows for precise, clean cuts on the dough surface. However, a very sharp knife can serve as an excellent substitute, creating the necessary scoring for controlled expansion during baking.
- Banneton: A banneton (proofing basket) helps the dough maintain its shape during the cold proof. If you don’t have one, a regular bowl generously lined with a large piece of parchment paper, well-floured, will work just as effectively.
Investing in some of these tools, especially a good quality Dutch oven or cloche, will significantly elevate your gluten-free bread baking experience. However, don’t let a lack of specialized items deter you; creativity and simple substitutions can often lead to equally delicious results.
Let’s Bake This Together! Step-by-Step Guide
Below, you’ll find detailed step-by-step photos and modified instructions to guide you through each stage of baking this incredible gluten-free sourdough. For the complete recipe, including precise ingredient amounts and nutritional information, please scroll down to the comprehensive recipe card.
Zero Planning: Dump, Mix, and Shape!
One of the most liberating aspects of this sourdough recipe is its incredible flexibility regarding your starter. During extensive testing, I experimented with both an activated starter (fed the day before and bubbly) and a cold starter taken straight from the fridge. To my genuine surprise, the difference in the final loaf was negligible! If you maintain a healthy, active sourdough starter, simply retrieve it from the fridge, give it a quick stir, and add it directly to your other ingredients. No need for elaborate pre-planning.
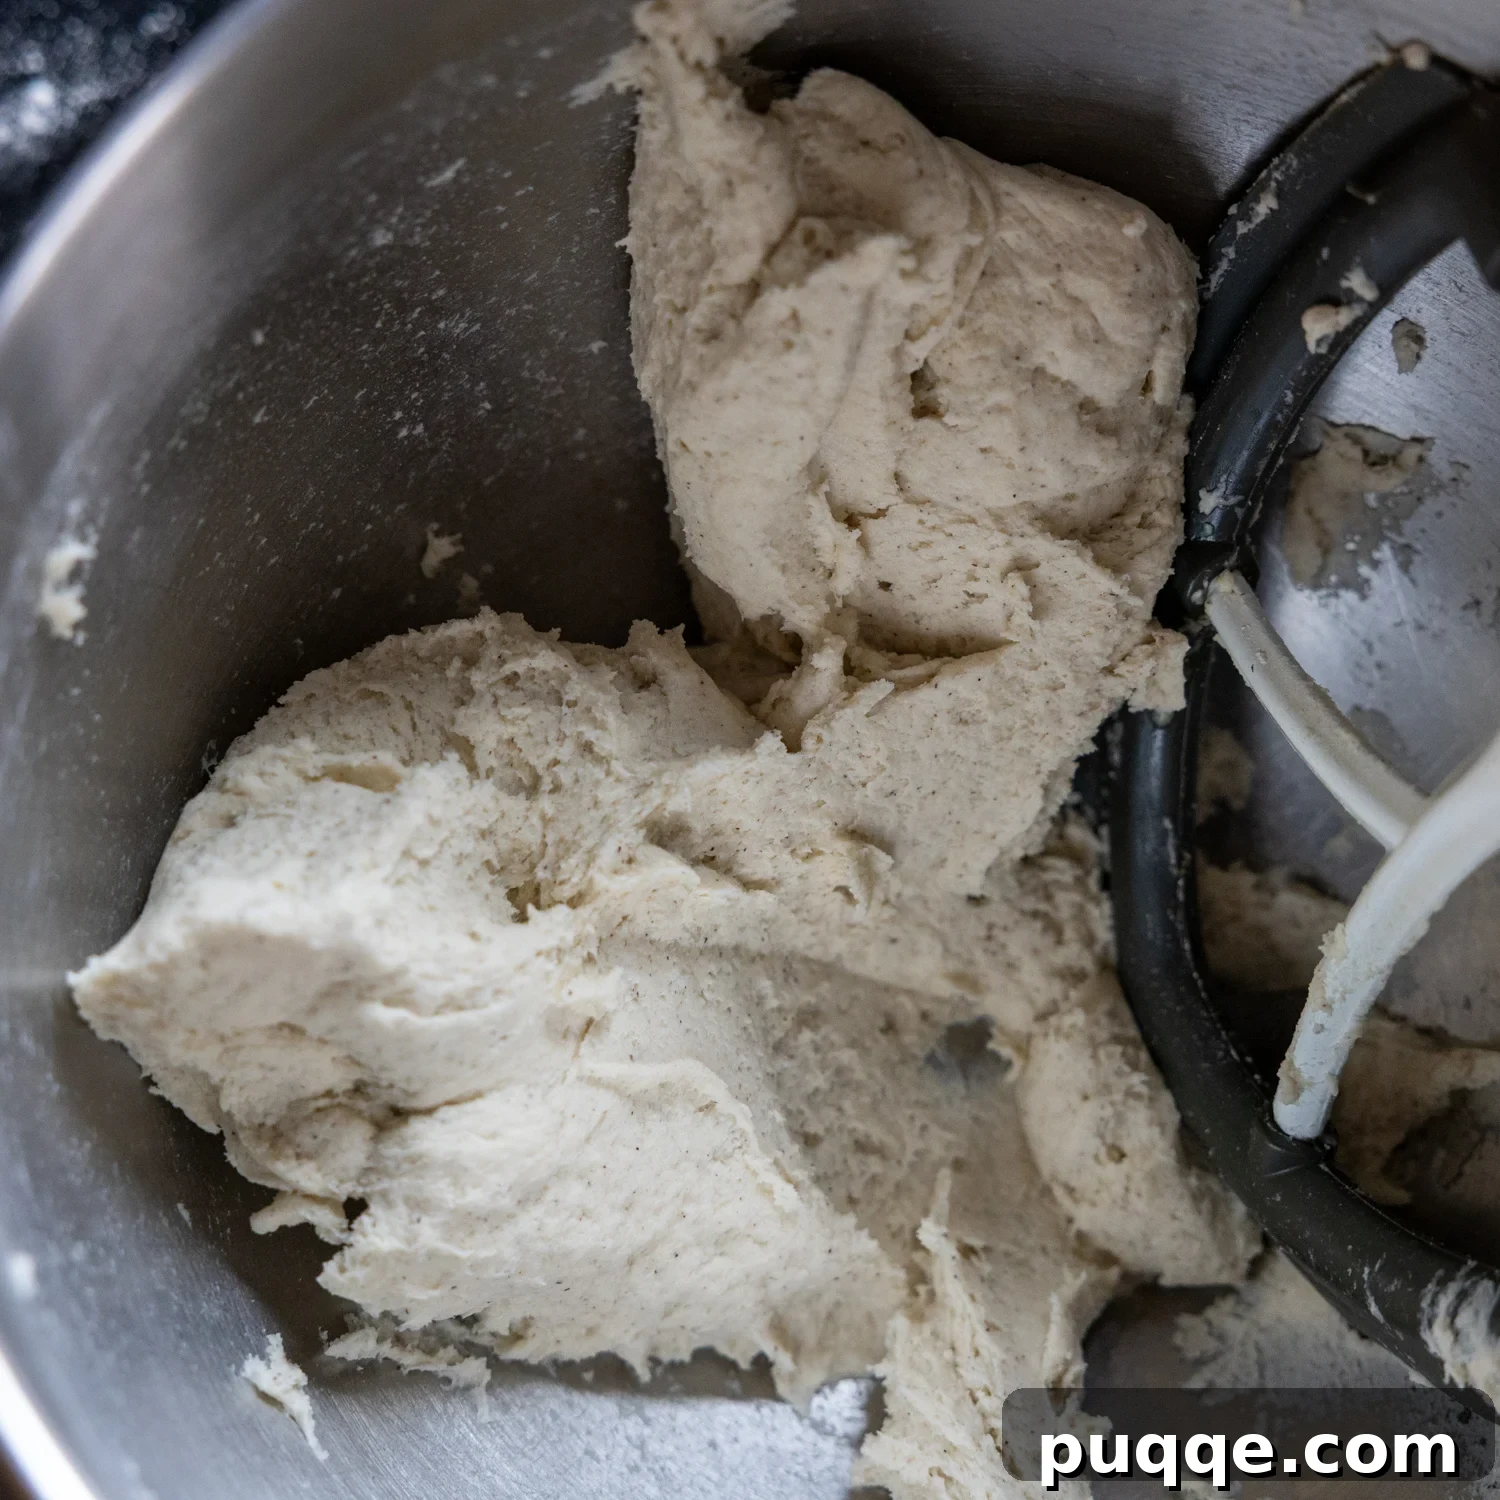
Begin by dumping all the listed ingredients into the mixing bowl of your stand mixer, fitted with a paddle attachment. A crucial tip from my own experience: always double-check that every ingredient has been added! I’ve regrettably discovered missing components too late in the process. Mix all ingredients together on a low speed for about 4 minutes. The dough will become quite stiff, yet it should retain a slight stickiness – a perfect consistency for gluten-free sourdough.
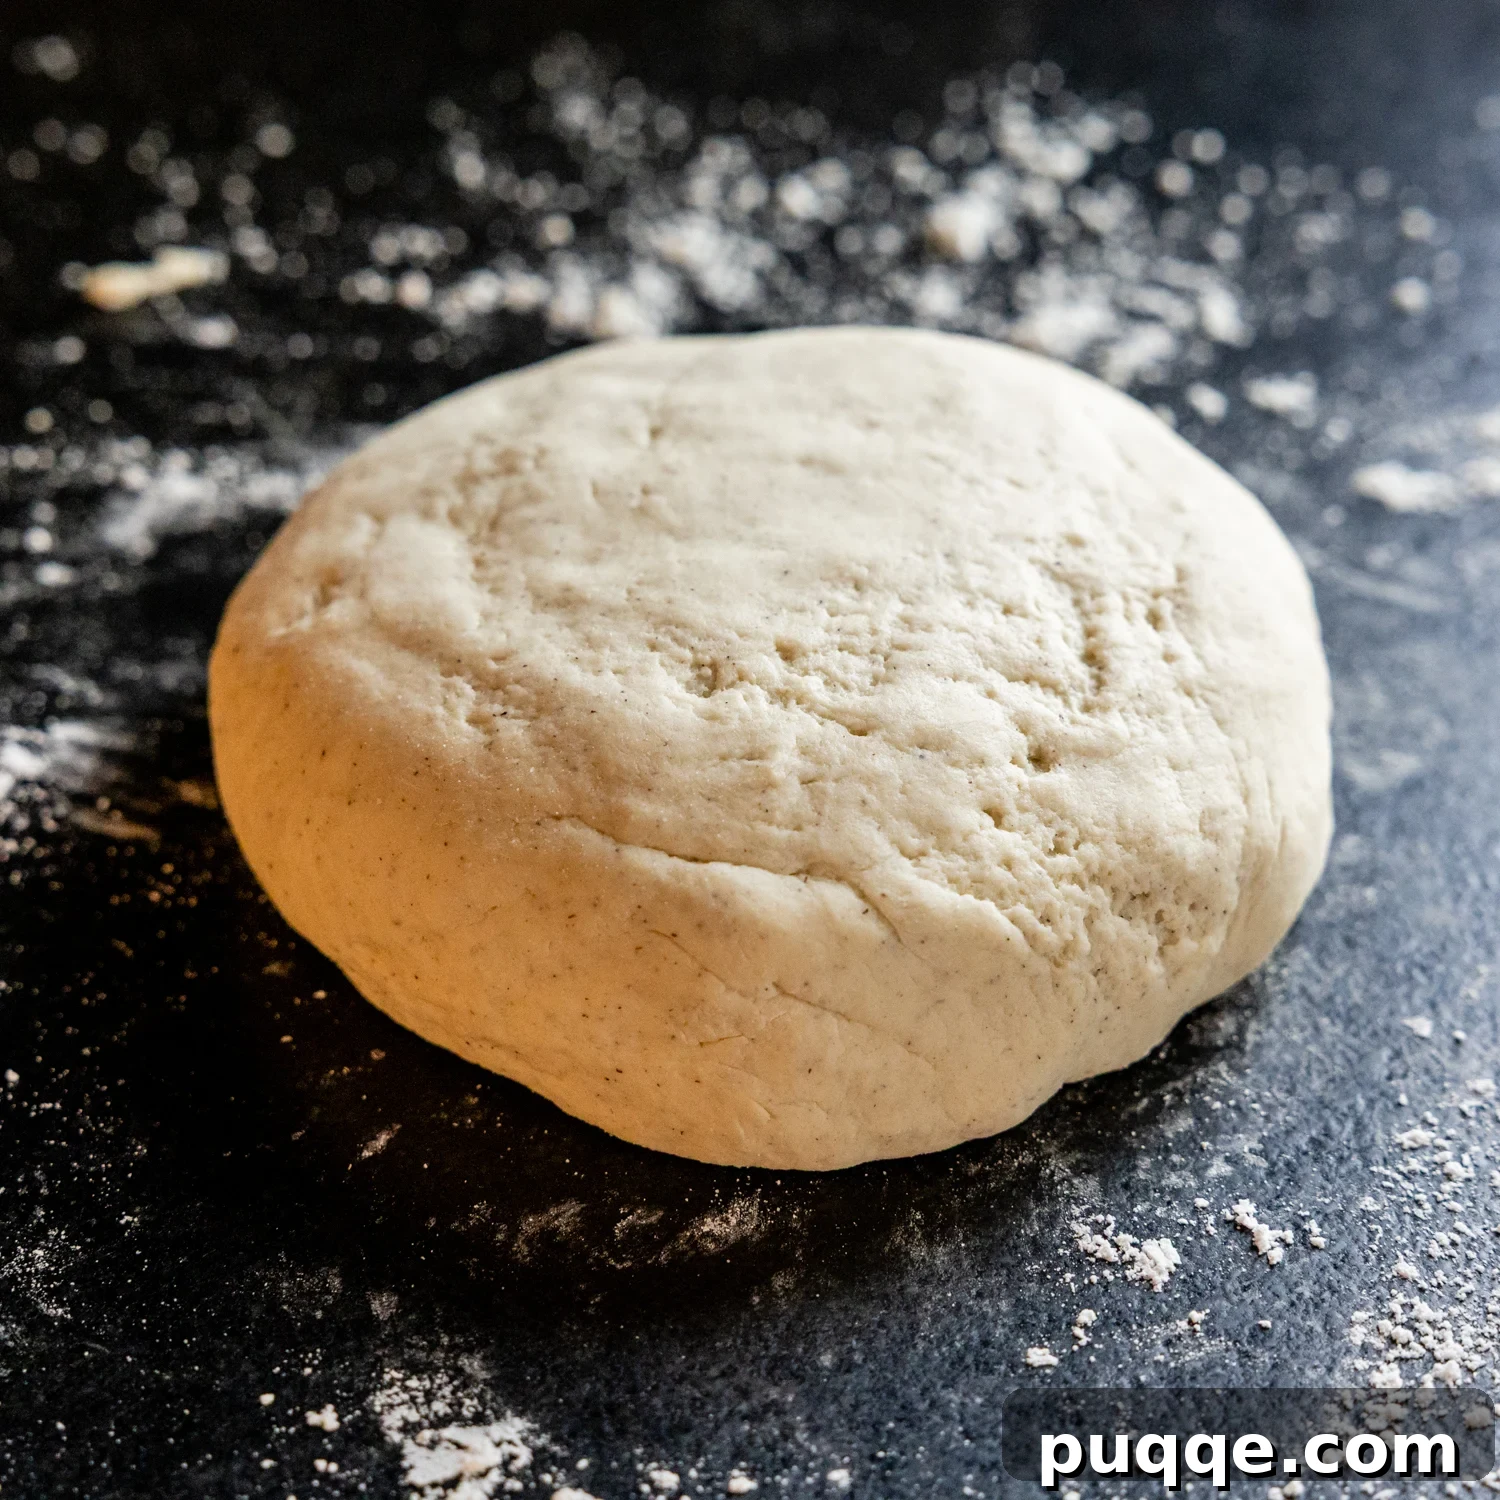
Once mixed, shaping the dough for its initial rise is remarkably straightforward. Lightly sprinkle your work surface with a small amount of gluten-free flour. Scrape the dough from the bowl onto this floured surface and use floured hands to gently shape it into a thick disc or a smooth ball. It shouldn’t require much extra flour at all to achieve this. And just like that, the most strenuous part of the process is complete!
The Power of Two Rises: Why Dual Proofing Matters
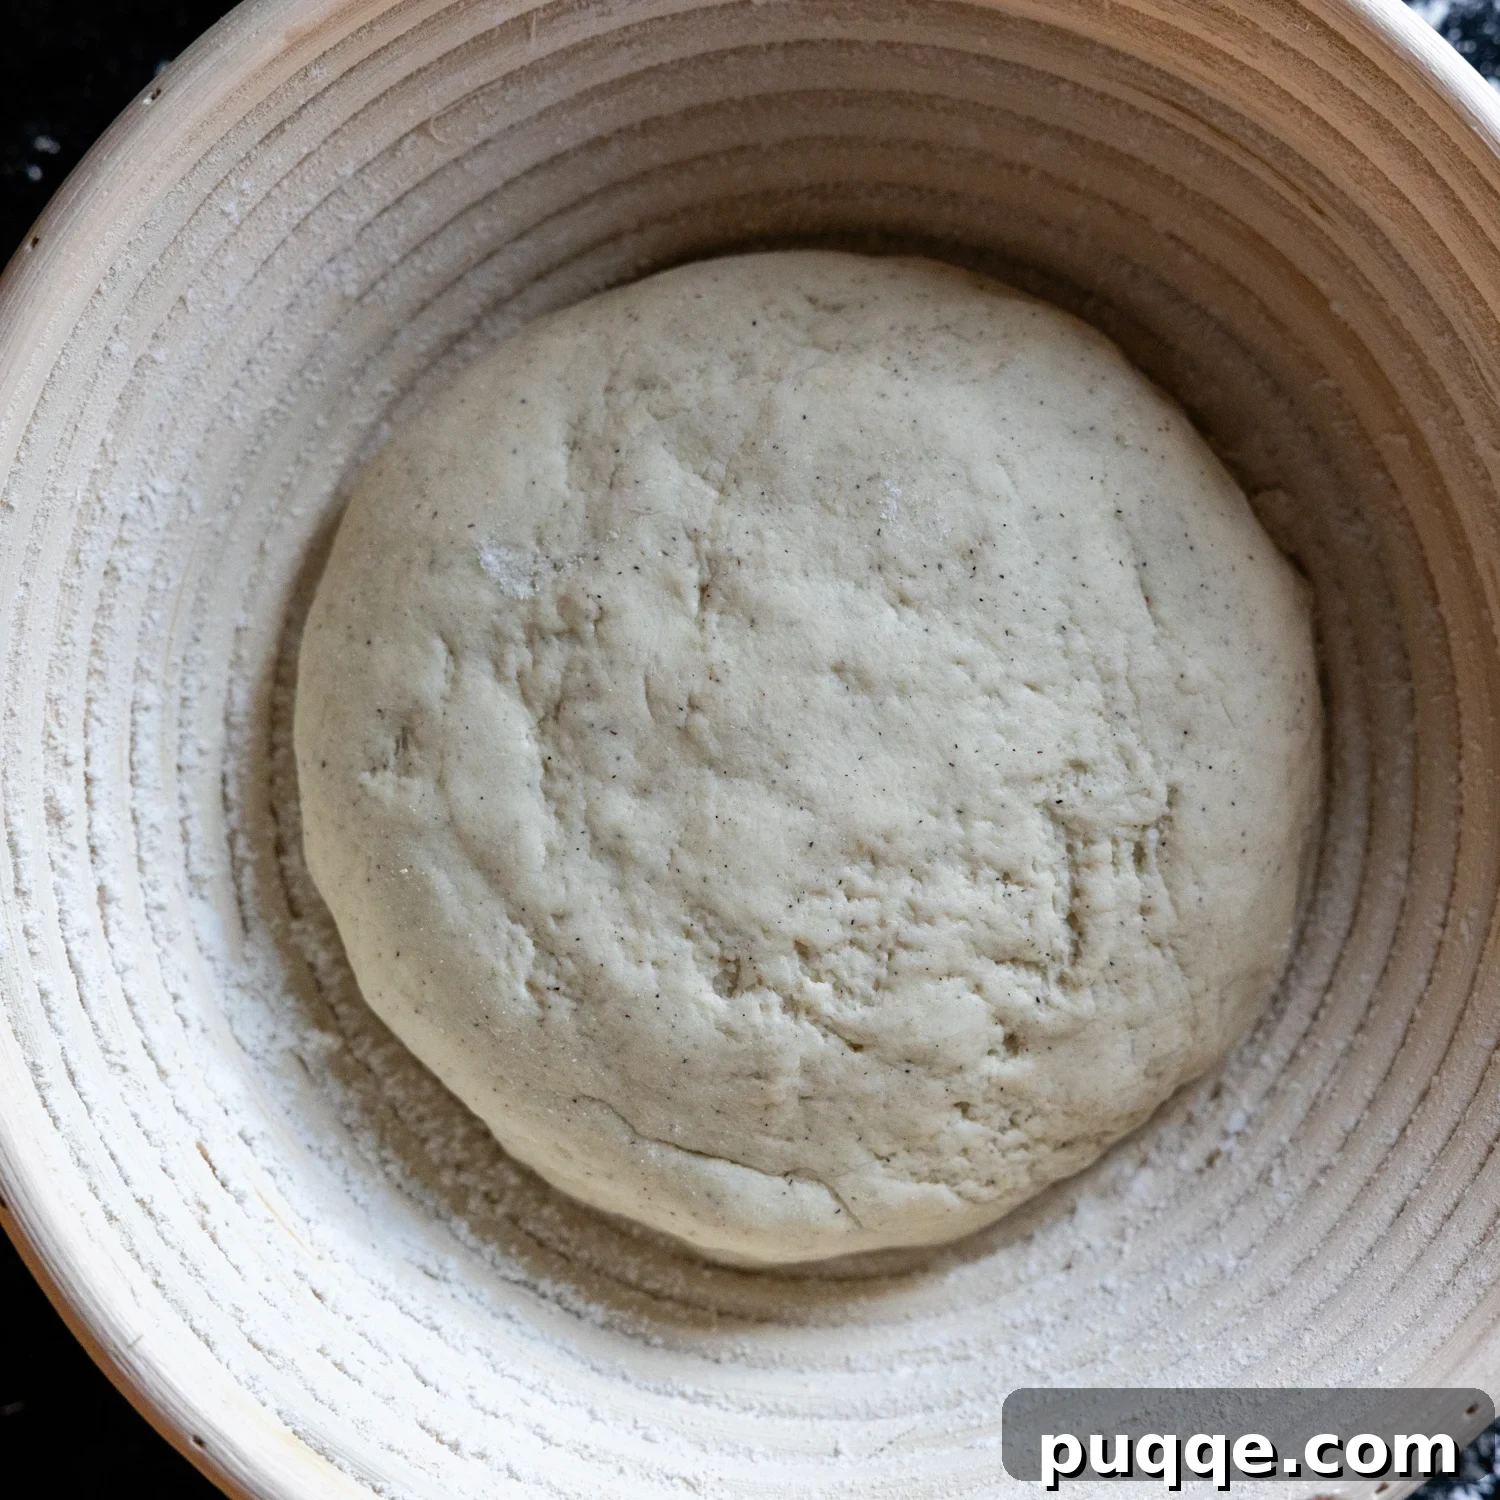
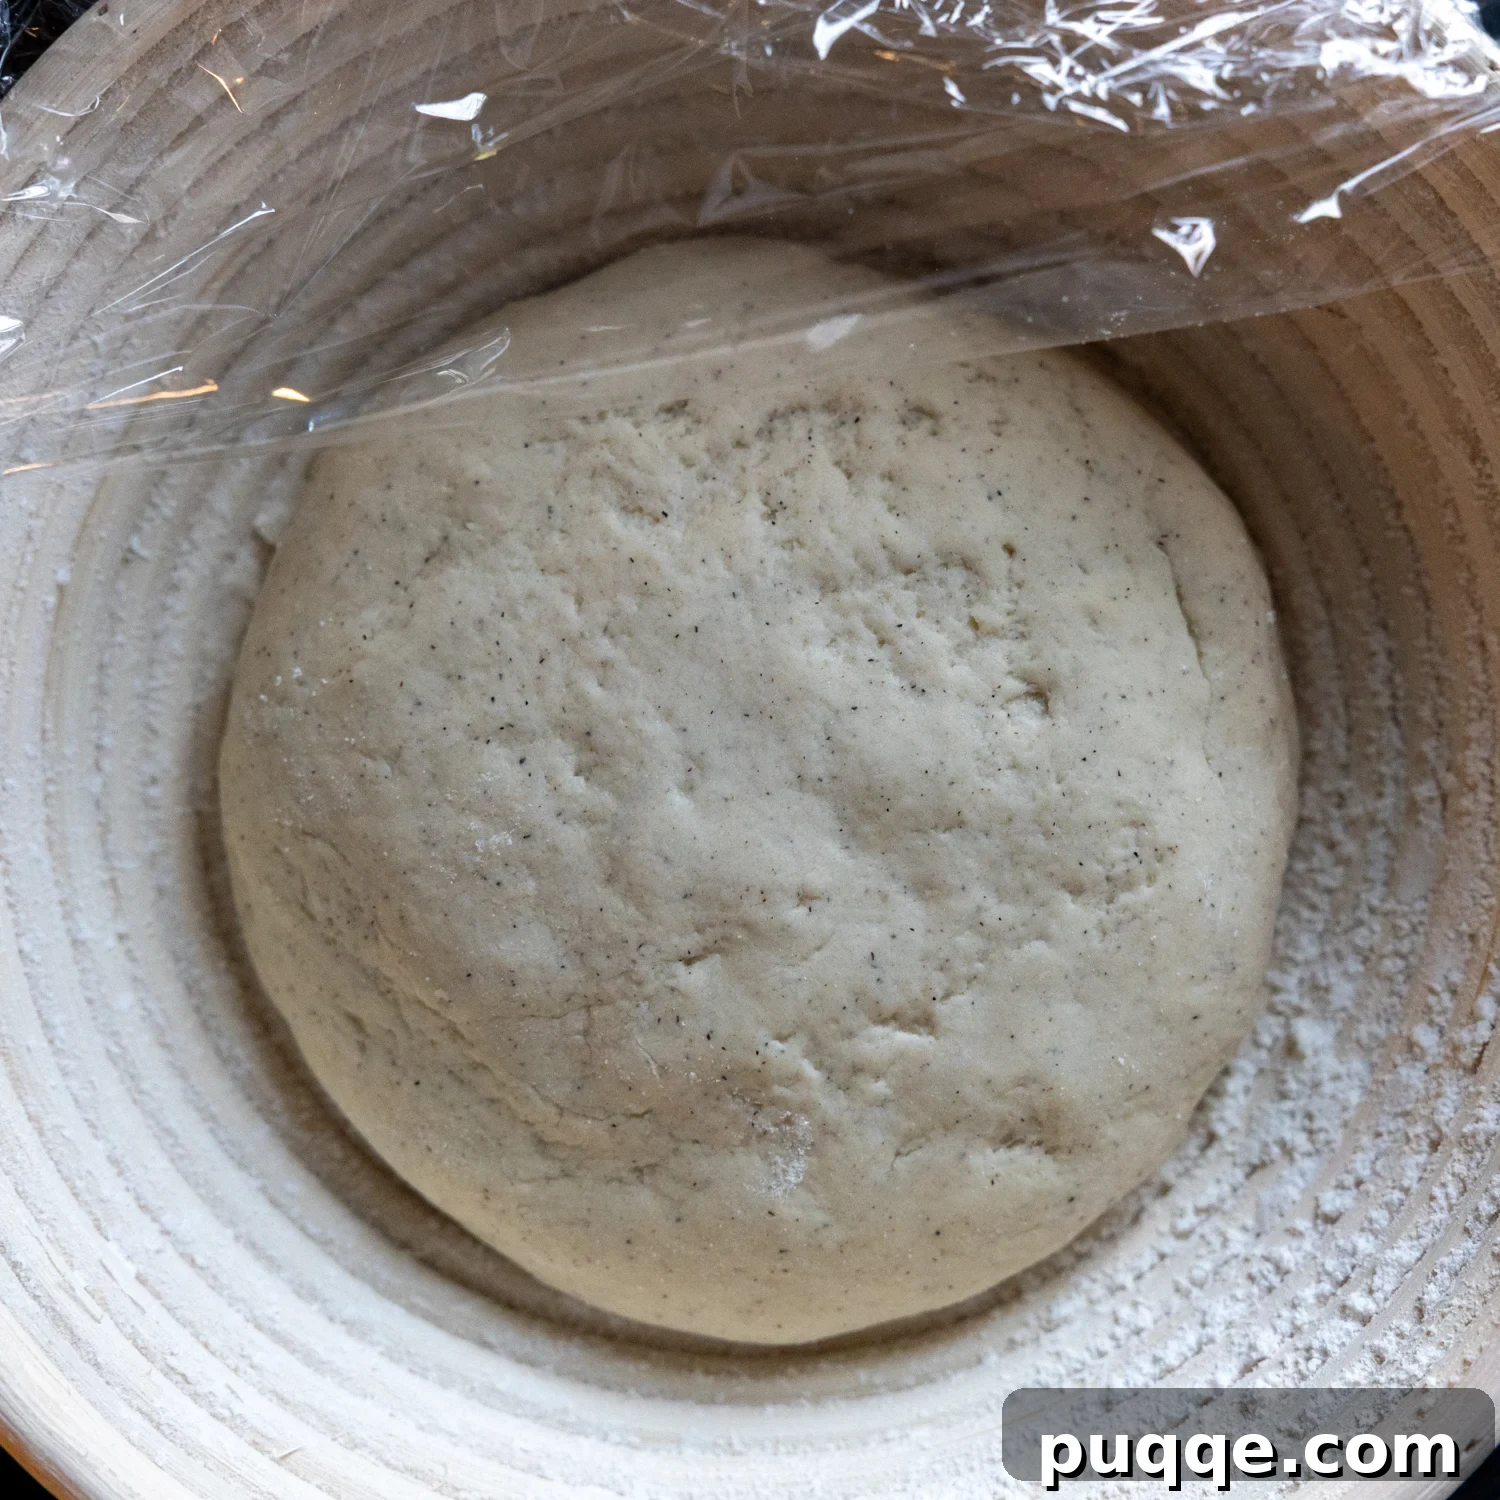
After shaping, carefully transfer your sourdough boule to a floured banneton or a mixing bowl generously lined with a large piece of oiled parchment paper. Cover it securely with plastic wrap, ensuring no drafts can reach it, and let it rise at room temperature for an initial period of 4-6 hours. For the best airy crumb, aim for a slightly warm, draft-free environment during this first rise. This crucial stage reactivates your starter and kickstarts the fermentation process, laying the groundwork for flavor development.
Following the room temperature rise, transfer the covered dough to the refrigerator for a second cold rise, which should last at least 4-6 hours. I typically opt for an overnight cold proof, allowing the flavors to deepen and mature beautifully. You’ll observe that gluten-free sourdough doesn’t undergo the dramatic rise seen in traditional gluten-rich doughs during proofing. This is entirely normal and expected; the true magic of expansion primarily occurs in the oven!
The strategic use of a two-stage rise, particularly the cold fermentation, serves multiple vital purposes. Firstly, it prevents the bread from overproofing, a common issue that can lead to a dense crumb. Secondly, and perhaps most importantly, it significantly extends the sourdough activation period. This prolonged, slow fermentation is what truly allows the complex, tangy, and nuanced flavors characteristic of authentic sourdough to fully develop. It’s the secret behind that signature sourdough taste we all crave.
Score, Cold Oven Bake, and My Critical Reminder!
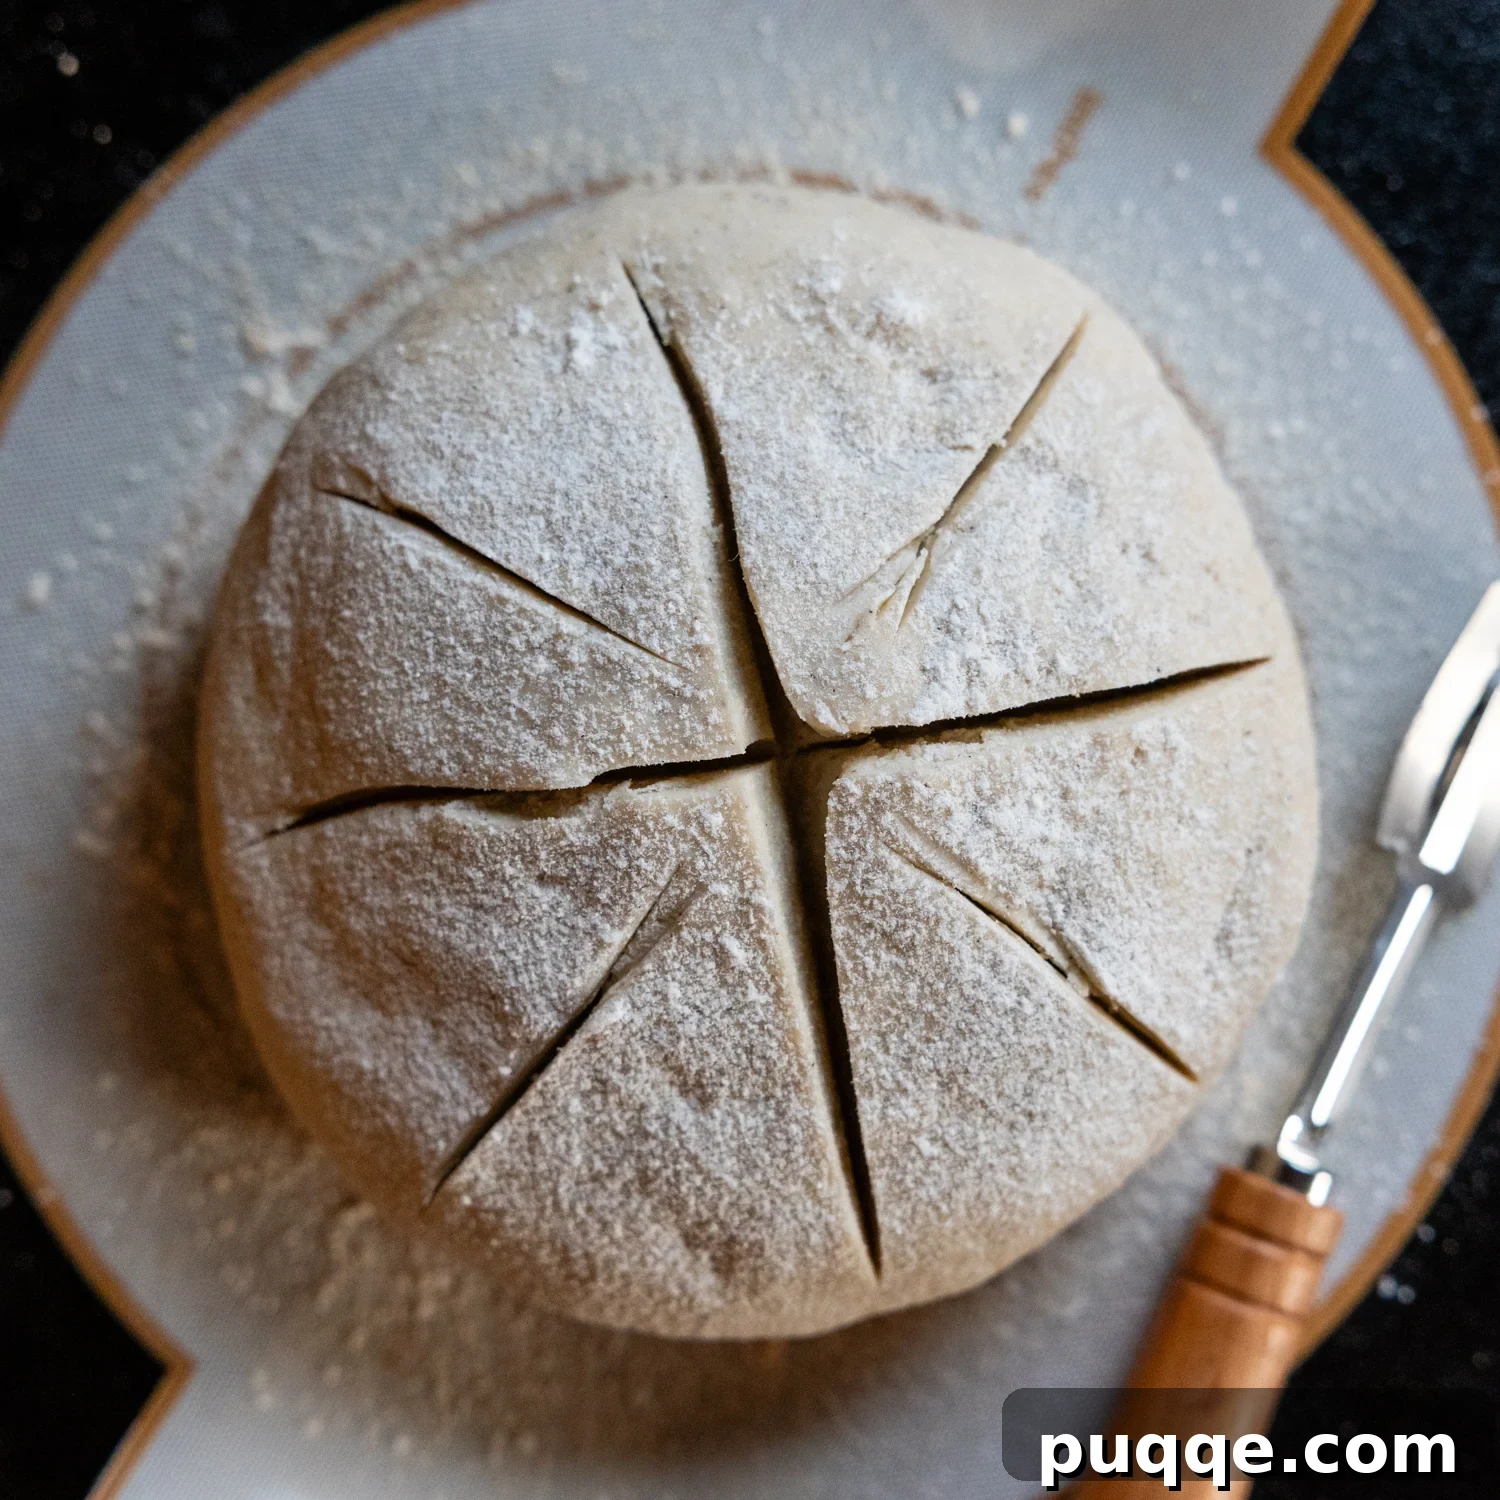
This stage is where lessons learned from past mistakes can save your loaf! First, once you remove the dough from the fridge, it’s time to score it. Aim for a pretty deep cut, approximately 1/2 to 3/4-inch deep, across the top. This deep score is vital as it provides a pathway for the bread to expand rapidly and dramatically in the hot oven, often referred to as “oven spring.” You can also make a few shallower decorative slashes around the main cut for aesthetic appeal.
Next, carefully transfer the scored bread to your Dutch oven or cloche, ensuring it’s lined with parchment paper or a silicone sling for easy removal. Place the lidded vessel into a cold oven, then set the oven temperature to 450℉ (232°C). Set your timer for 40 minutes. After this initial baking period, reduce the oven temperature to 350℉ (177°C), carefully remove the dome or lid from your baking vessel, and set the timer for an additional 30 minutes.
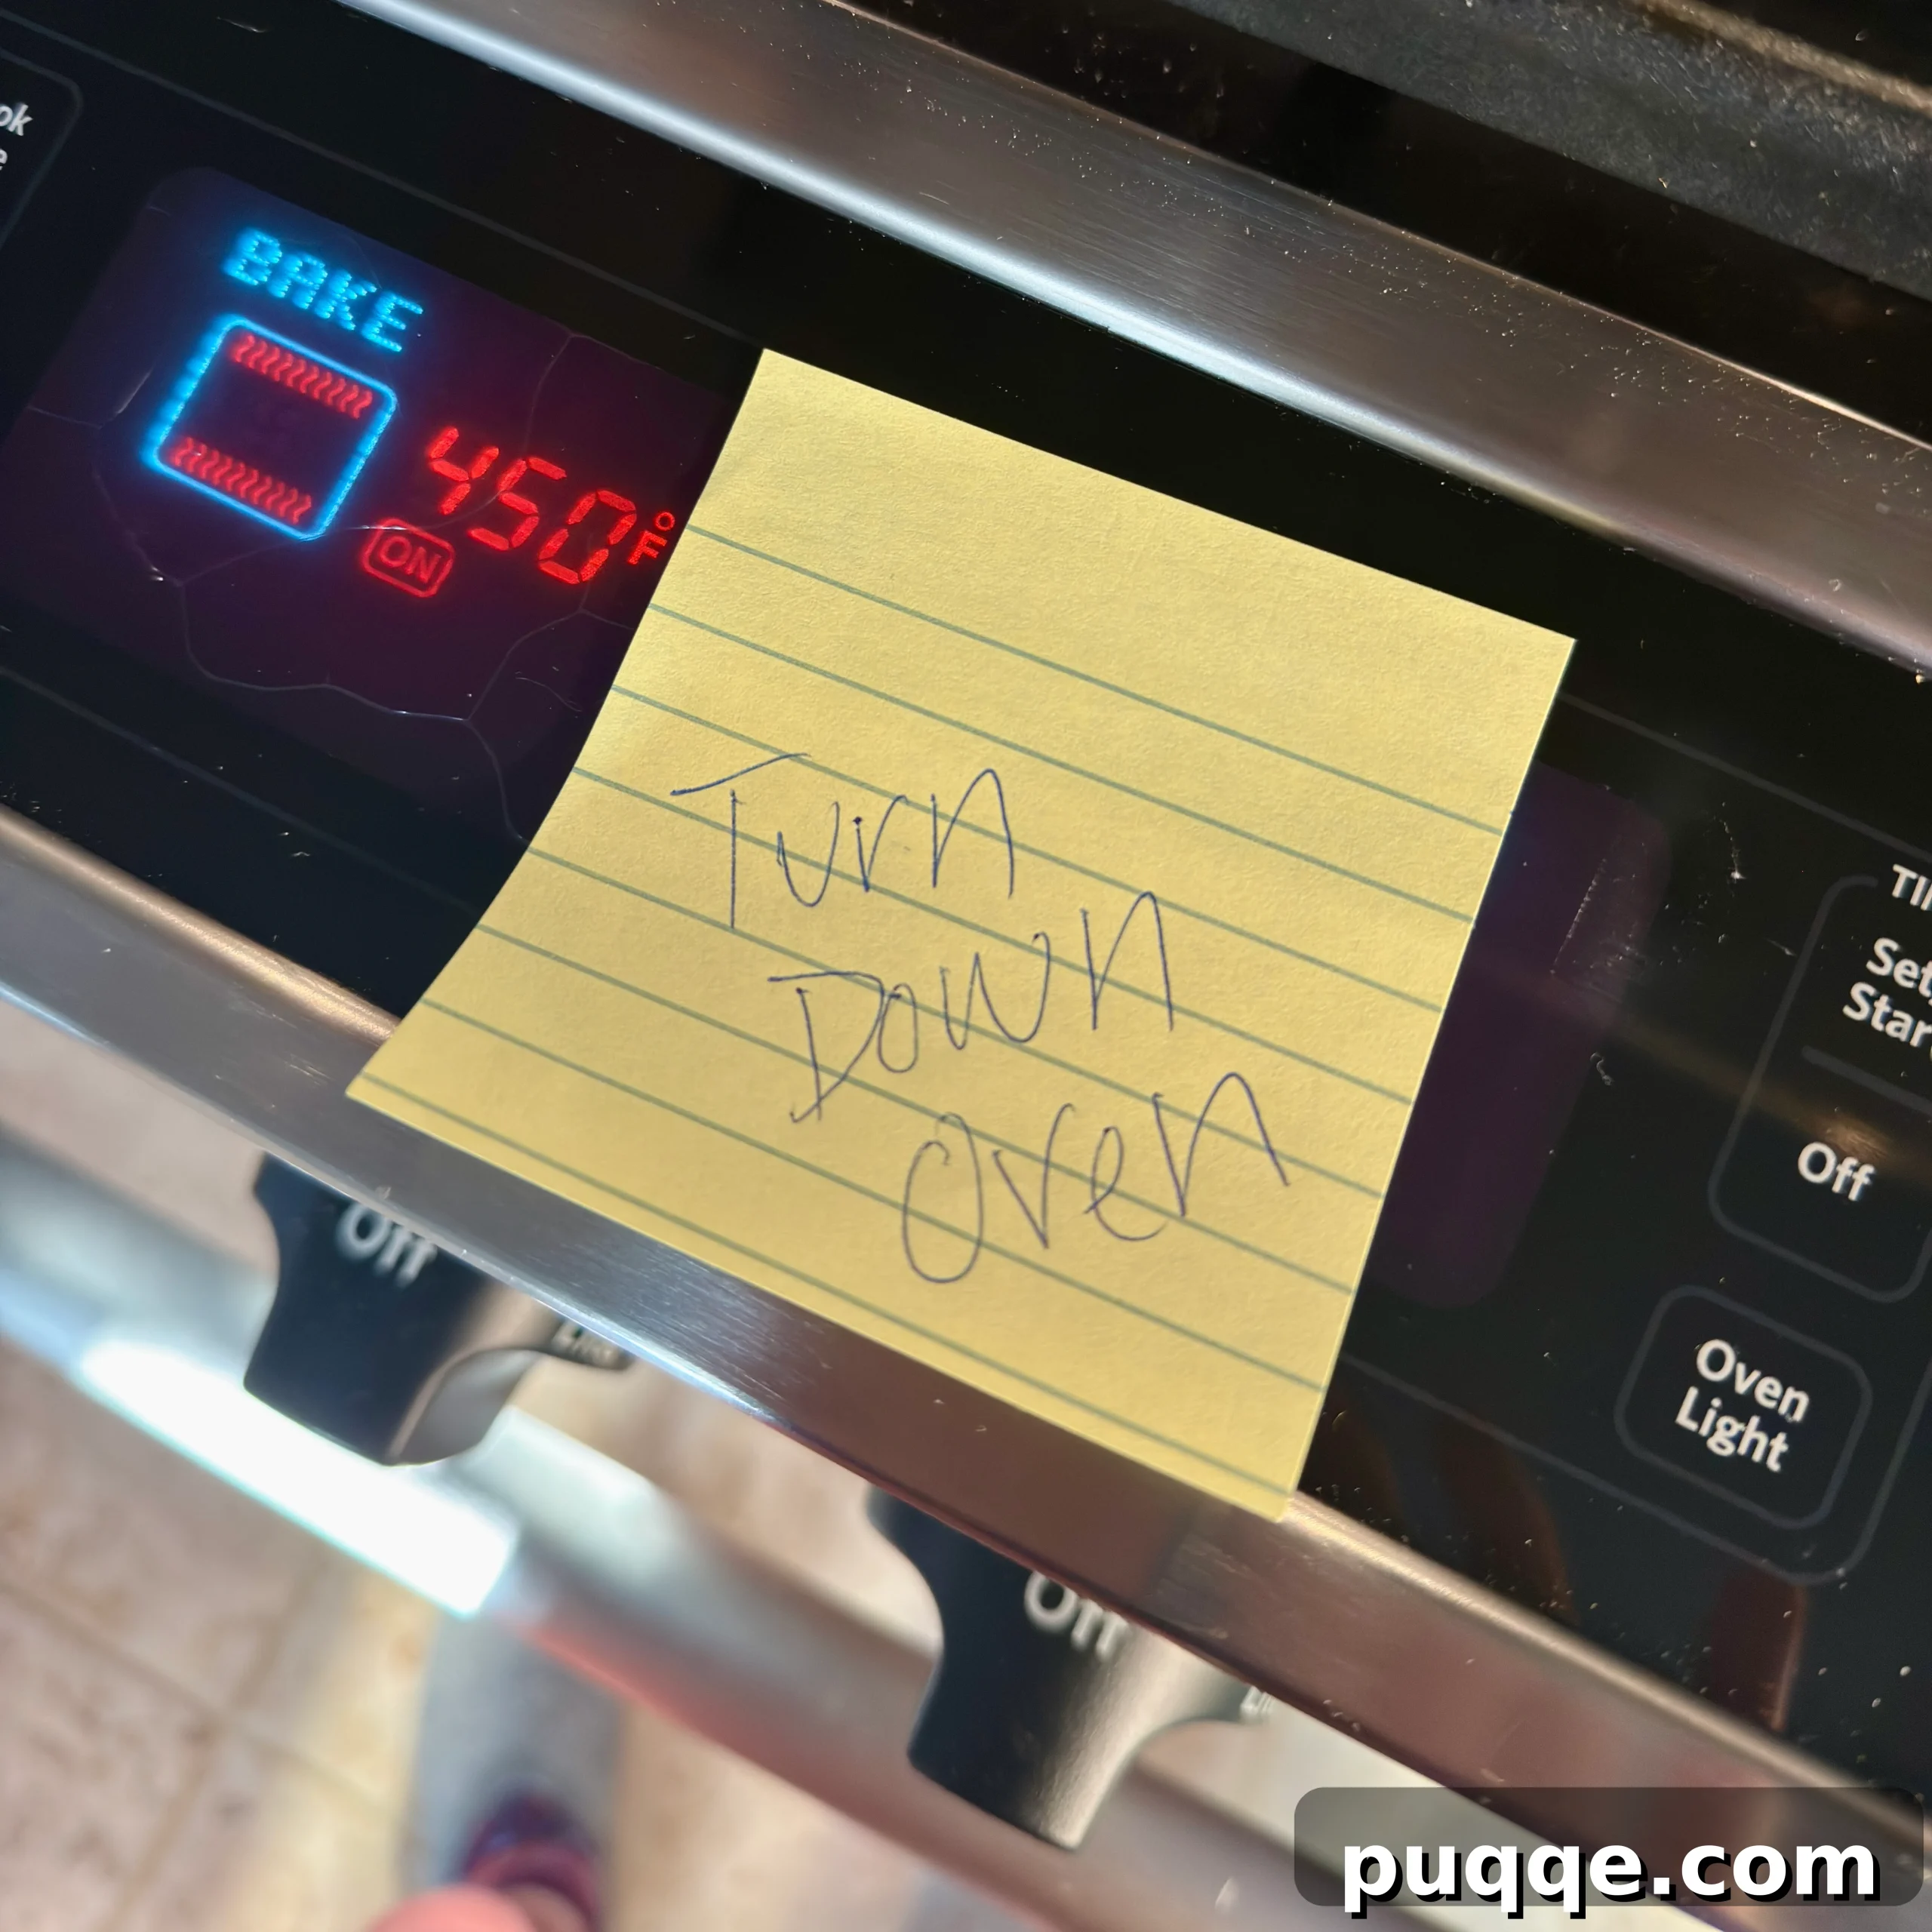
I must confess, with a hint of embarrassment, how many times I’ve diligently turned off the first 40-minute timer, reset it for 30 minutes, removed the dome, but then completely forgotten to turn down the oven temperature! Baking bread for a full 70 minutes at 450℉ is definitely not the desired outcome, leading to a burnt exterior and a dense interior. To prevent this all-too-common oversight, I now make it a ritual to stick a bright note on my oven every single time. Problem solved! Learn from my forgetfulness and make that temperature adjustment a priority.
Understanding Sourdough Timing: Flexibility for Your Schedule
The truly wonderful news about making homemade sourdough, particularly with this forgiving gluten-free recipe, is that it doesn’t demand constant babysitting. The risk of overproofing is significantly minimized, and in fact, extending the rise time beyond the minimum often only serves to further build and enhance the complex flavors. However, it does require a little foresight and planning to fit into your schedule:
- Same-Day Bread: For a fresh loaf by evening, begin by mixing the dough first thing in the morning. Allow it to complete its room temperature rise for 4-6 hours. Around midday or early afternoon, transfer the dough to the refrigerator for at least another 4 hours of cold proofing. It will then be ready to bake that same evening, just in time for dinner.
- Overnight Bread (My Preferred Method): This method offers maximum convenience. Mix your dough at any point during the day and let it undergo its room temperature rise for a minimum of 4 hours, though I’ve successfully stretched this to 8 hours for deeper flavor development. Transfer the dough to the fridge overnight, where it will continue to slowly ferment. This allows you the flexibility to bake it the following morning or at any convenient time throughout that day. This extended cold fermentation is excellent for flavor!
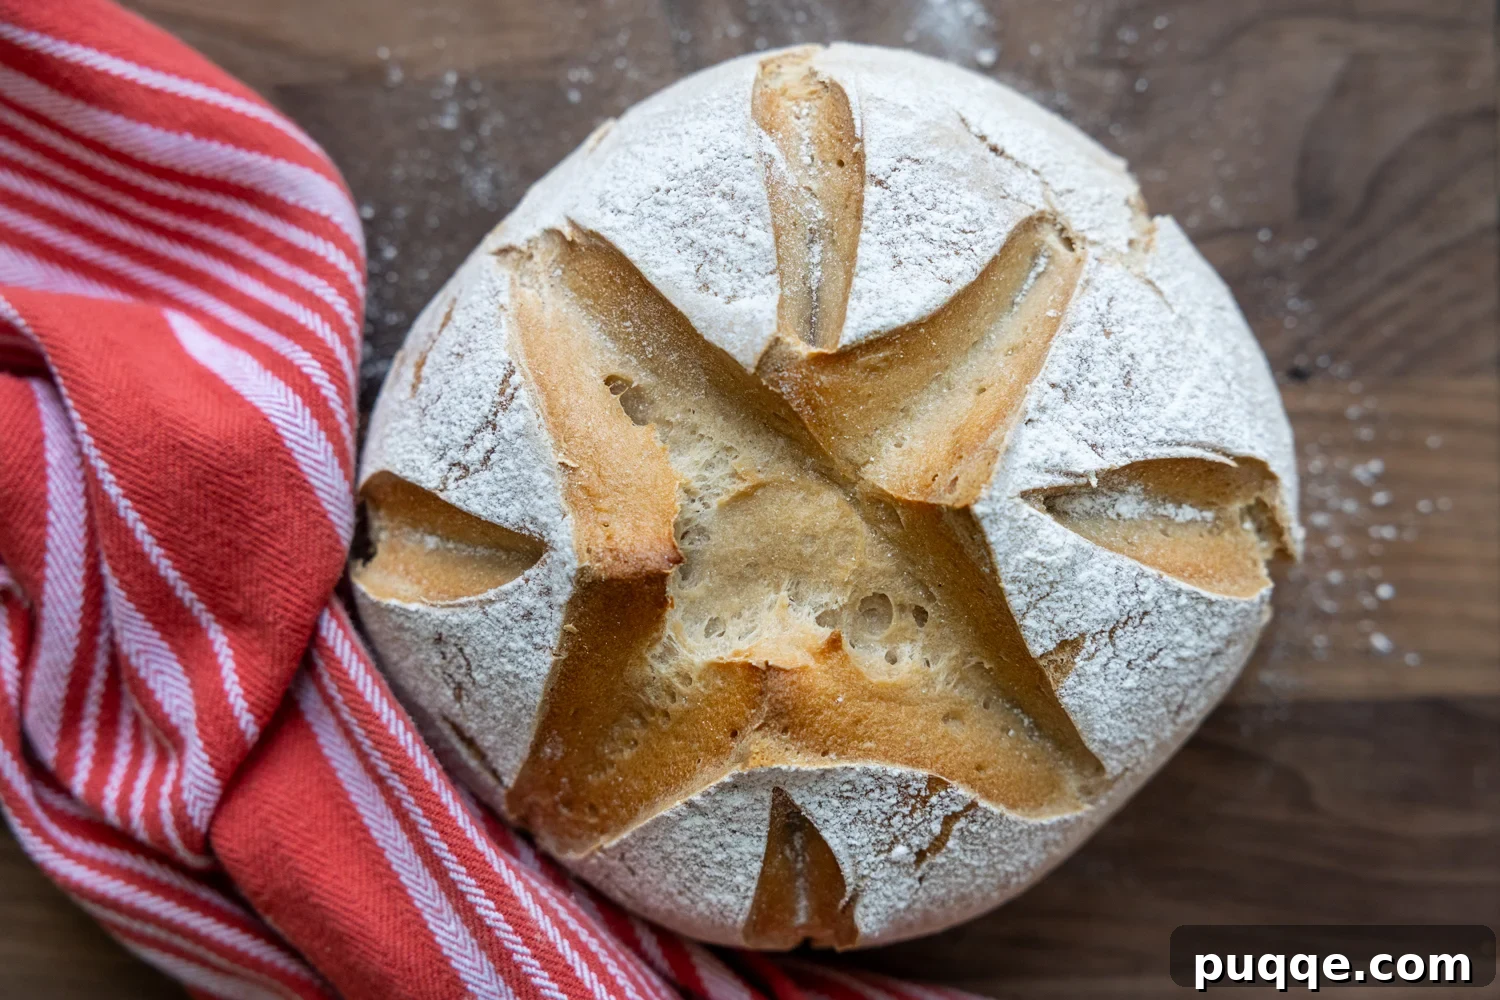
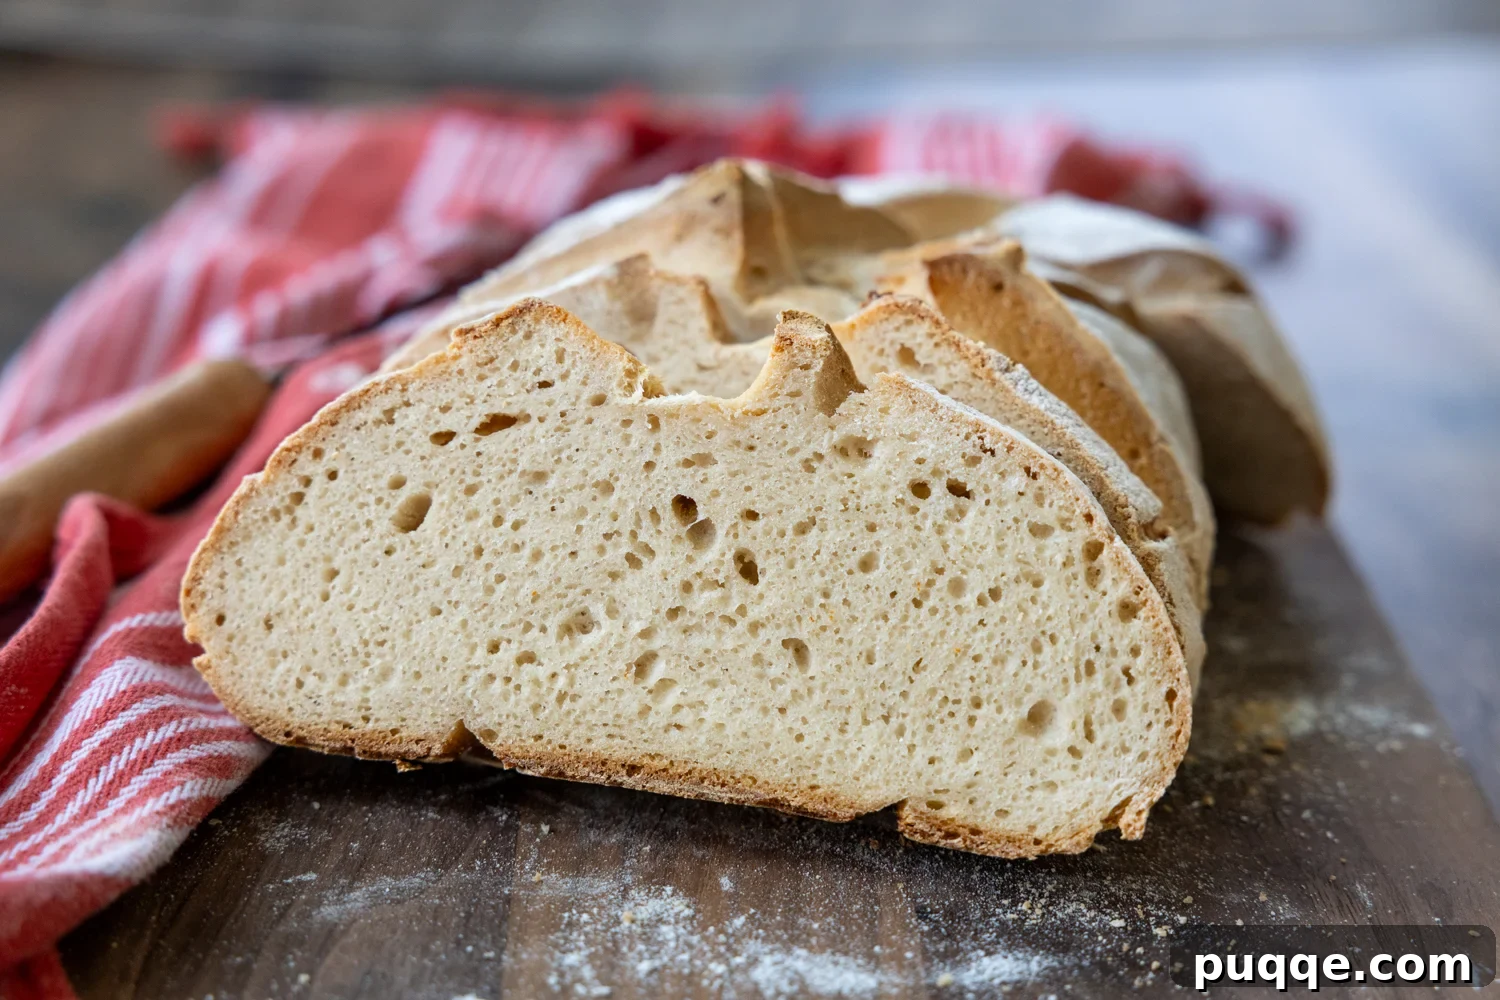
While this recipe is designed to produce a more traditional, round boule shape, the versatile dough can be adapted and shaped into various forms, even baked successfully in a standard bread pan. If achieving a perfectly crispy outer crust isn’t your highest priority, you can certainly skip baking it in a Dutch oven or cloche. Just remember, regardless of your chosen baking vessel, it’s crucial to score the bread well. This allows for rapid expansion during baking, preventing the crust from tearing haphazardly and ensuring a good rise.
Don’t Miss Out! Save This Recipe to Your Pinterest Board!
Let’s connect! Follow me on Pinterest for more amazing recipes and gluten-free inspiration!
Did you bake this recipe? Your feedback is invaluable! Please take a moment to leave a star rating and comment below the recipe card. Your reviews genuinely help other home bakers searching for reliable recipes, and I deeply appreciate hearing from our wonderful community. You’ll always receive a reply from me! -Melissa
10-Minute Gluten-Free Sourdough Bread (Silly Easy!)

Melissa Erdelac
10
slices
10
10
11
20
Pin Recipe
Rate This Recipe
Remove Ads
Ingredients
-
1 ½ cups (230 g)
gluten free all purpose flour
, see recipe notes for recommended brands -
3 tablespoons (25 g)
potato starch
-
2 tablespoons (36 g)
psyllium husk powder
, helps with bread moisture & structure (what is psyllium husk?) -
120 grams (120 g)
sourdough starter
, cold or activated -
1 teaspoon (5 g)
baking powder
-
2 teaspoons (14 g)
salt
-
¾ cup (178 g)
soda water
- 1 large egg
-
1 tablespoon (21 g)
honey
-
1 tablespoon (13 g)
olive oil
-
1 tablespoon (11 g)
apple cider vinegar
Equipment
-
Dutch Oven
-
Stand Mixer
-
Banneton
Instructions
-
Using a stand mixer with a paddle attachment, combine all ingredients on low speed until just mixed. Increase speed slightly and beat for 3-4 minutes, scraping down the paddle and bowl halfway through. The dough will be thick and stiff, yet slightly sticky.
-
Scrape the dough onto a lightly gluten-free floured surface and use floured hands to shape it into a smooth ball or thick disc.
-
Transfer the shaped dough to a floured banneton or a bowl lined with a large piece of lightly oiled parchment paper. Cover with plastic wrap and let it rise in a draft-free place for at least 4 hours, up to 8 hours. Don’t worry if the dough looks barely risen; this is completely normal for GF sourdough.
-
Transfer the covered banneton or bowl to the fridge to rise overnight, or for a minimum of 4-6 hours.
-
When ready to bake, remove the dough from the fridge and carefully transfer it to a parchment-lined Dutch oven or bread cloche. Use a lame or a very sharp knife to deeply score the top of the bread crosswise, about ½-¾ inch deep, allowing plenty of room for rapid expansion. Make a few shallower cuts around the main score for decoration. Place the lid on the baking vessel and transfer it to a cold oven.
-
Turn the oven temperature to 450℉ (232°C) and set a timer for 40 minutes. After 40 minutes, remove the lid, set another timer for 30 minutes, AND IMMEDIATELY TURN DOWN THE OVEN TO 350℉ (177°C).
-
After the 30-minute timer, if you feel the bread could use a few more minutes to reach your desired crustiness (especially in larger ovens), simply turn off the oven and let the bread sit inside for an additional 5 minutes before removing it to a cooling rack. For smaller ovens, you might be able to pull it right after the 30-minute timer.
-
Allow the bread to rest for at least 1 hour on a cooling rack before slicing. This crucial resting period allows the internal moisture to redistribute evenly throughout the crumb, resulting in a perfectly fluffy and delicious interior.
Calories:
111
kcal
Carbohydrates:
21
g
Protein:
3
g
Fat:
2
g
Saturated Fat:
0.3
g
Polyunsaturated Fat:
0.3
g
Monounsaturated Fat:
1
g
Trans Fat:
0.002
g
Cholesterol:
16
mg
Sodium:
477
mg
Potassium:
73
mg
Fiber:
3
g
Sugar:
2
g
Vitamin A:
24
IU
Vitamin C:
0.1
mg
Calcium:
35
mg
Iron:
1
mg
Did you make this recipe?
Please leave a star rating and review below. It helps others when searching for recipes and I LOVE feedback!