
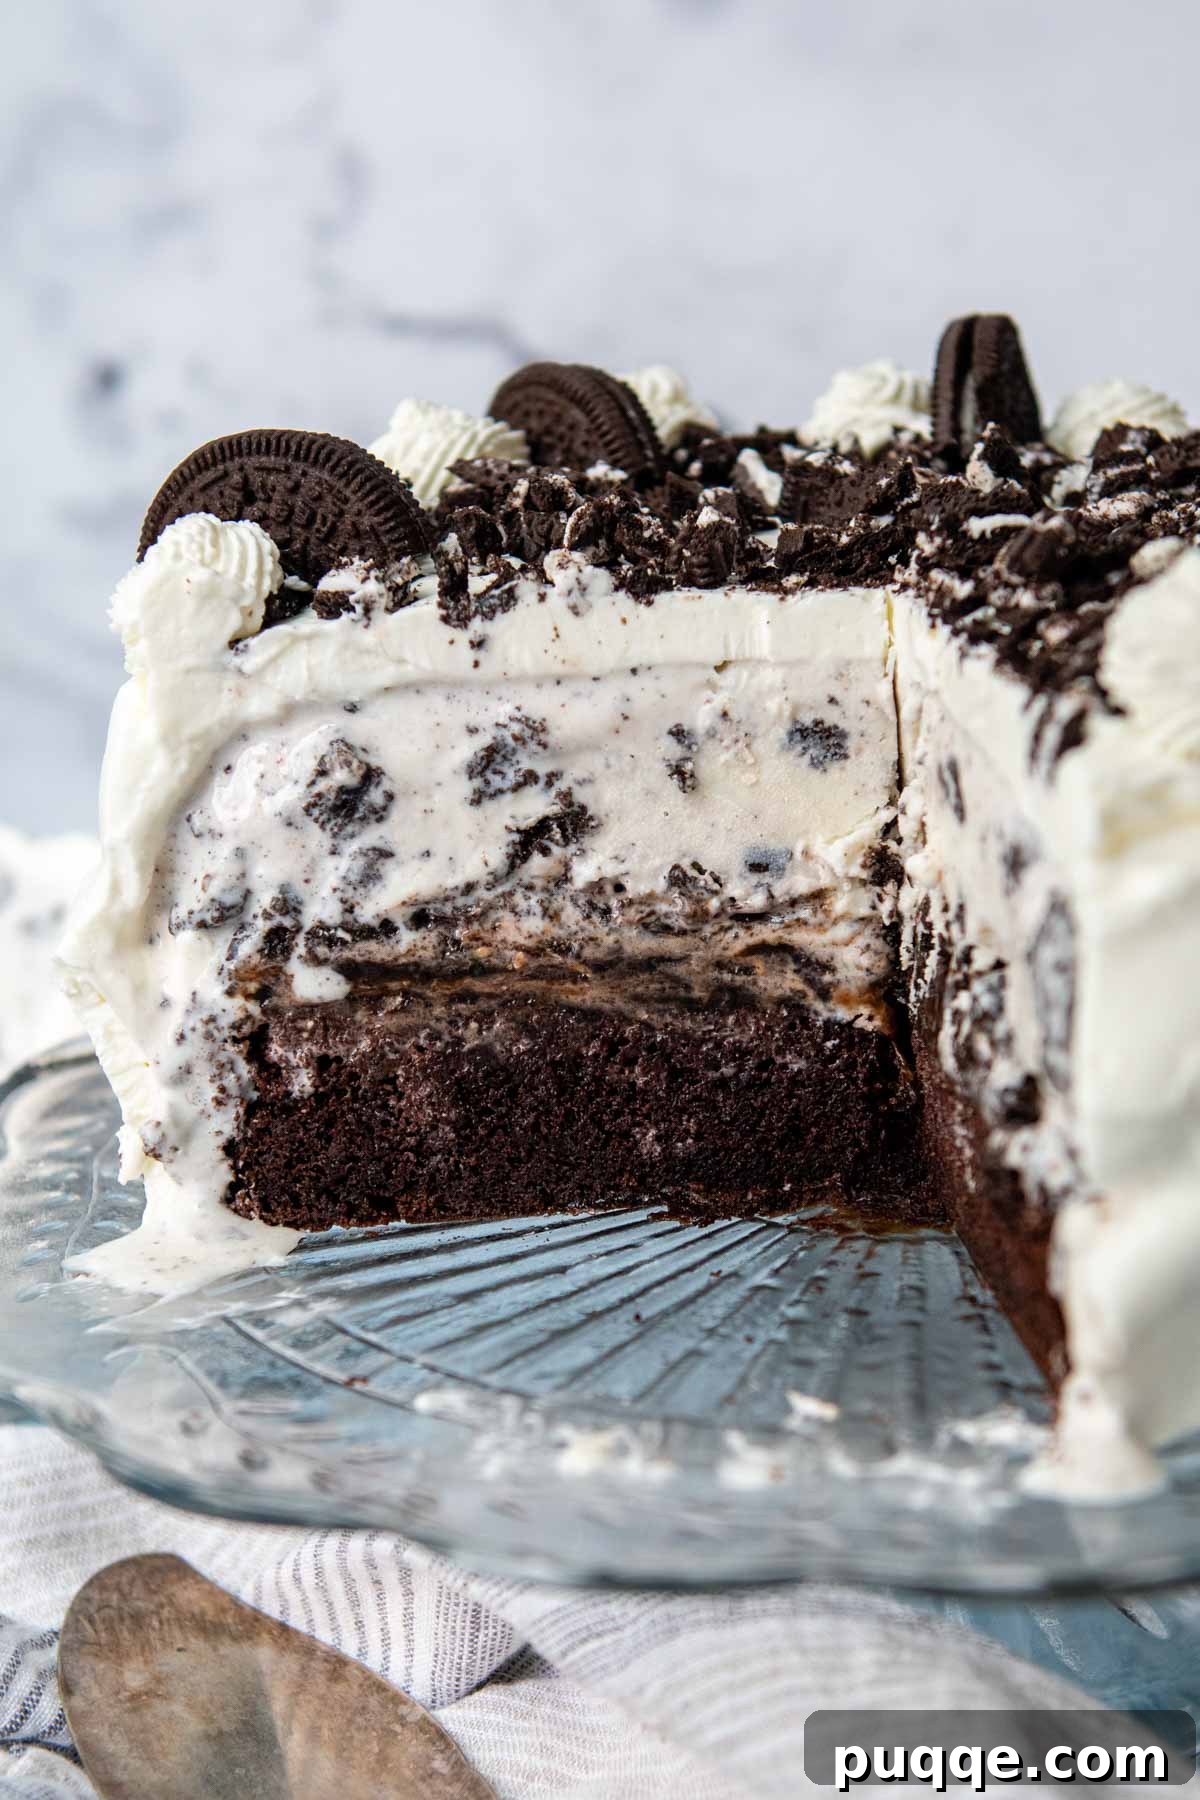
Prepare to delight your taste buds and impress your guests with the ultimate homemade gluten-free ice cream cake! Forget those ordinary store-bought options – this recipe elevates celebration desserts to a whole new level. Imagine a rich, moist chocolate cake, generously layered with crunchy gluten-free Oreo cookies, luscious hot fudge, and creamy vanilla ice cream, all crowned with a cloud of fluffy whipped cream frosting. It’s the perfect showstopper for birthdays, anniversaries, or any special occasion that calls for something truly extraordinary. Plus, with our simple step-by-step guide and clear instructions, even novice bakers can achieve a stunning, professional-looking result. We’ve also included a fantastic dairy-free option, ensuring everyone can enjoy a generous slice of this incredible, nostalgic treat.
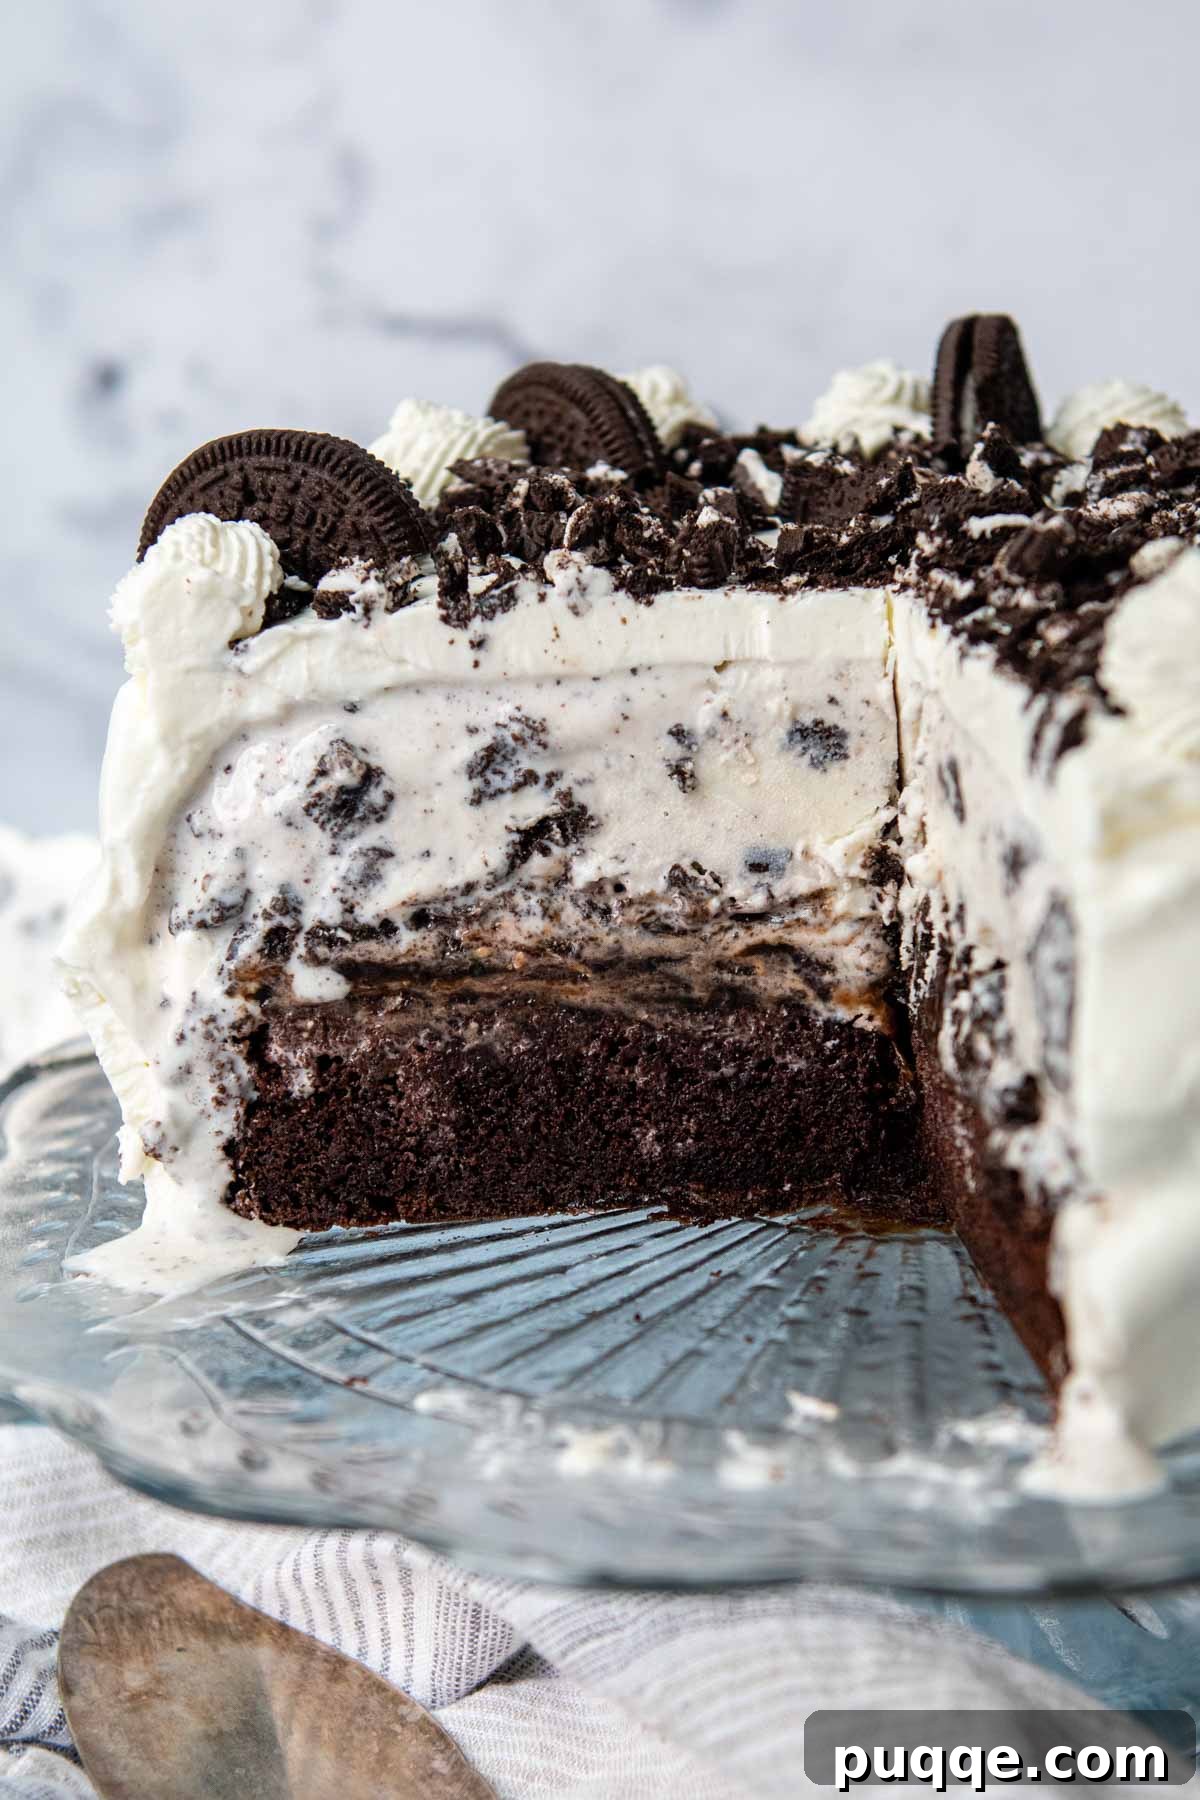
Experience the World’s Best Gluten-Free Ice Cream Cake (Seriously!)
For many years, the idea of enjoying a classic ice cream cake felt like a distant memory, especially after embracing a gluten-free lifestyle. Who doesn’t fondly recall the anticipation of a Dairy Queen, Baskin Robbins, or Cold Stone birthday cake, eagerly awaited by all the guests? These iconic desserts were once staples of joyful celebrations, and the thought of missing out could be disheartening for those with dietary restrictions.
However, thanks to the culinary marvel of gluten-free Oreos (a heartfelt thank you to Nabisco!), the landscape of gluten-free desserts has been revolutionized. This incredible ingredient means that classic treats like this cookies and cream gluten-free ice cream cake, or even a decadently creamy gluten-free Oreo cheesecake, are now back on the menu. This recipe ensures that no one has to miss out on a beloved classic, and we’ve even made it simple to adapt for those following a dairy-free diet!
Our masterpiece begins with a famously moist gluten-free chocolate cake base, offering a perfect balance of tenderness and rich cocoa flavor. This sturdy foundation is then crowned with a gooey layer of homemade or store-bought hot fudge sauce, followed by a generous sprinkle of crushed gluten-free Oreo cookies, adding an irresistible crunch and cookies-and-cream essence. For the star ice cream layer, we combine softened vanilla ice cream with even more chopped Oreos, creating an easy and intensely flavorful cookies and cream experience. Finally, the entire creation is enveloped in a light, airy, and utterly delicious whipped cream frosting, making every bite a heavenly experience.
If you’re ready to create a show-stopping dessert that will truly blow a loved one’s mind, making their gluten-free dessert dreams come true, then you’re in the right place. I’ll walk you through each step of how to make one of the most epic gluten-free ice cream desserts you’ll ever encounter—a cake that might just rival these legendary gluten-free ice cream sandwiches in its deliciousness. Let’s embark on this exciting baking adventure together!
“I made this as a surprise for my husband’s birthday and he couldn’t believe it wasn’t store-bought! It was the best ice cream cake ever! Better than DQ 😀 so good and really good directions! I also used the homemade hot fudge recipe as well. Delicious!!”
—Rhea
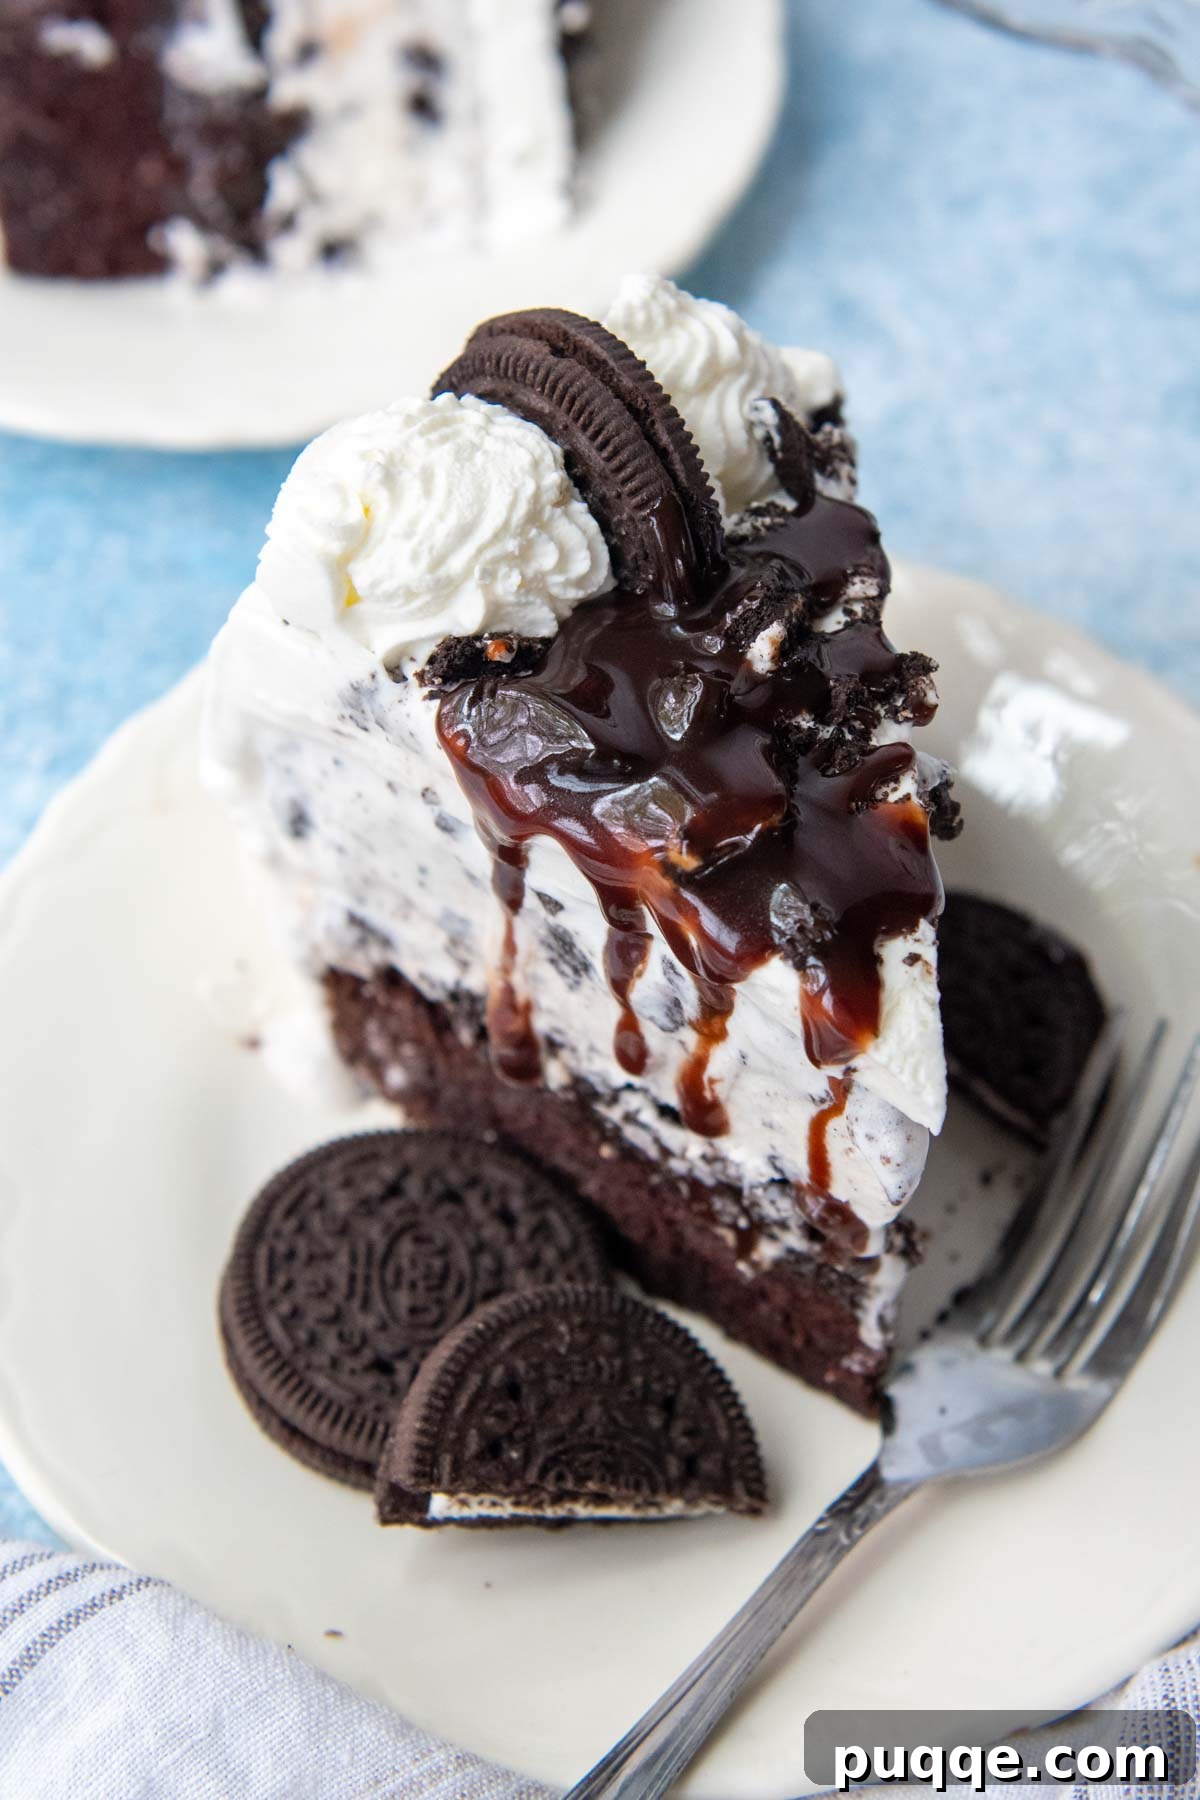
Essential Ingredients for Your Gluten-Free Ice Cream Masterpiece
One of the best aspects of a homemade ice cream cake is its incredible versatility. The ingredients are highly adaptable, allowing you to customize flavors and combinations to perfectly suit any preference or dietary need. While we feature a fantastic gluten-free Oreo cookies and cream version, feel free to swap the chocolate cake for a homemade gluten-free white cake or use any gluten-free or dairy-free ice cream to create a unique dessert beyond our suggested theme.
- Ice Cream: Our recipe calls for vanilla ice cream mixed with chopped gluten-free Oreos for that classic cookies and cream flavor. However, don’t hesitate to get creative! You can use any gluten-free ice cream flavor you adore, such as mint chocolate chip, peanut butter cup, or even a rich chocolate ice cream. For a dairy-free option, select your favorite plant-based ice cream. Ensure it’s slightly softened before mixing to make it easier to spread evenly.
- Gluten-Free Cake: You’ll need one 9-inch cake layer. While our recipe for a single homemade layer is included below and highly recommended for its perfect texture and flavor, you can also opt for a high-quality gluten-free cake mix for convenience. If using a mix that yields two layers, simply bake one and freeze the other for a future dessert adventure!
- Hot Fudge: A luscious layer of hot fudge is non-negotiable for this cake. You can use a trusted store-bought brand, whip up our delicious homemade recipe (included below), or select a vegan-friendly sauce to make your cake completely dairy-free. The richness of the fudge perfectly complements the other layers.
- Gluten-Free Oreos: These are the heroes of our cookies and cream creation! We use them generously, both mixed into the ice cream layer and sprinkled over the hot fudge for an extra layer of crunch and flavor. If Oreos aren’t your preference, or you’re looking for another twist, you can easily substitute them with any other preferred gluten-free cookie crumbs, such as chocolate chip cookies or shortbread.
- Heavy Cream: This is the base for our light and fluffy homemade whipped cream frosting, which provides a beautiful, airy finish to the cake. For a quick alternative, a 12-ounce container of frozen whipped topping like Cool Whip can be used. If you’re going dairy-free, a coconut whipped topping (often found in cans or tubs) is an excellent substitute, offering a similar texture and delightful taste.
Let’s Craft This Delightful Cake Together!
This section provides easy-to-follow step-by-step photos and modified instructions to guide you through the cake-making process. For precise ingredient amounts and the complete, detailed recipe, please scroll down to the dedicated recipe card below.
1. Begin with the Ice Cream Layer
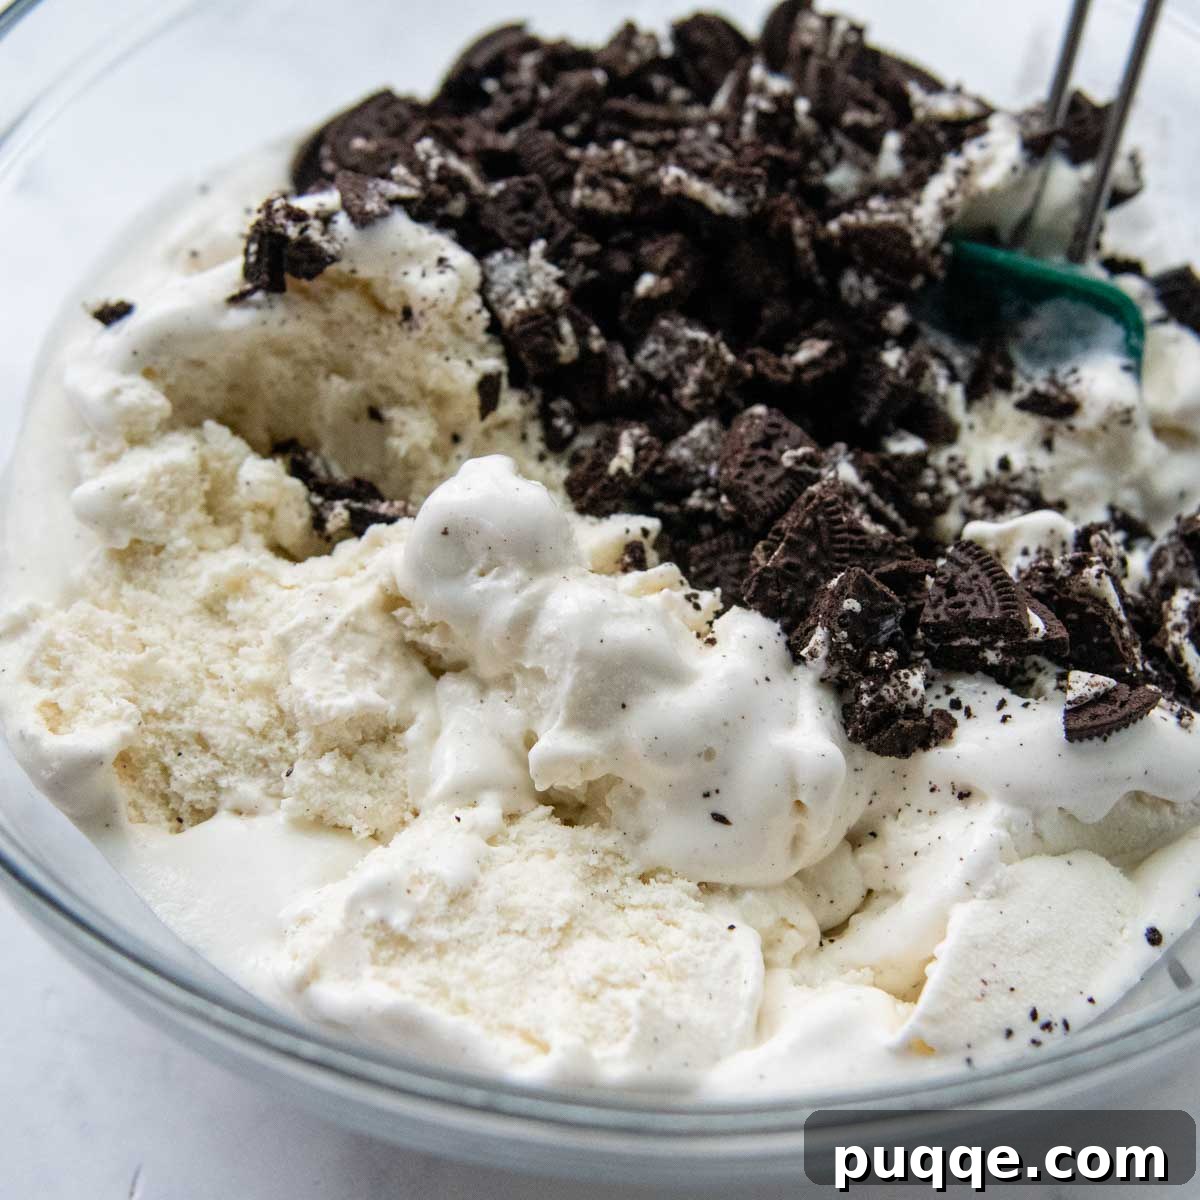
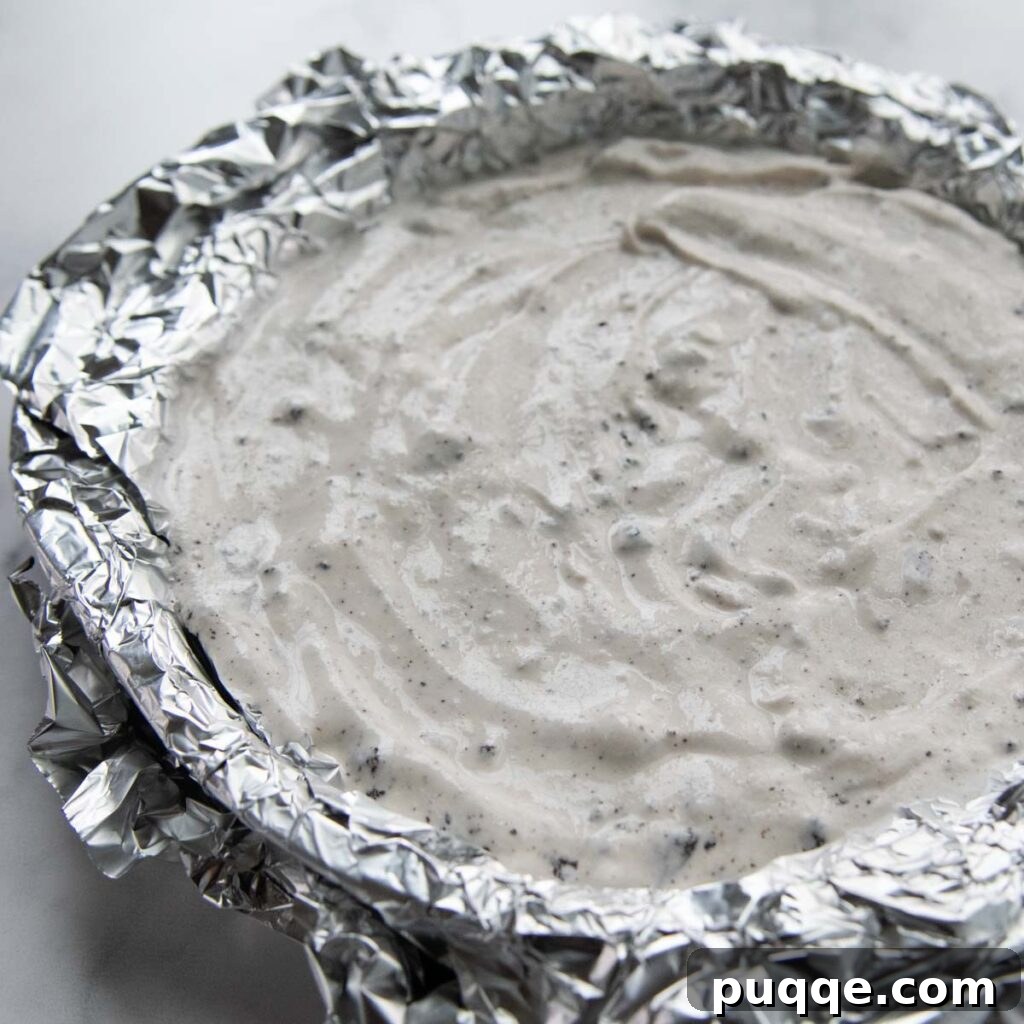
The first crucial step is preparing the ice cream layer, allowing ample time for it to freeze solid. Start by slightly softening your chosen gluten-free ice cream for about 20-30 minutes at room temperature. In a large bowl, gently mix the softened ice cream with roughly 12 chopped or crushed gluten-free Oreos. This infuses the ice cream with that irresistible cookies and cream flavor throughout.
Line a 9-inch cake pan or springform pan with two large pieces of foil, criss-crossed, ensuring enough overhang to easily lift the frozen layer later. Pour the ice cream mixture into the prepared pan, spreading it evenly. Press a layer of plastic wrap directly onto the surface of the ice cream to prevent freezer burn, then freeze until completely solid, which will take at least 3 hours or ideally, overnight.
2. Next, Prepare the Gluten-Free Cake
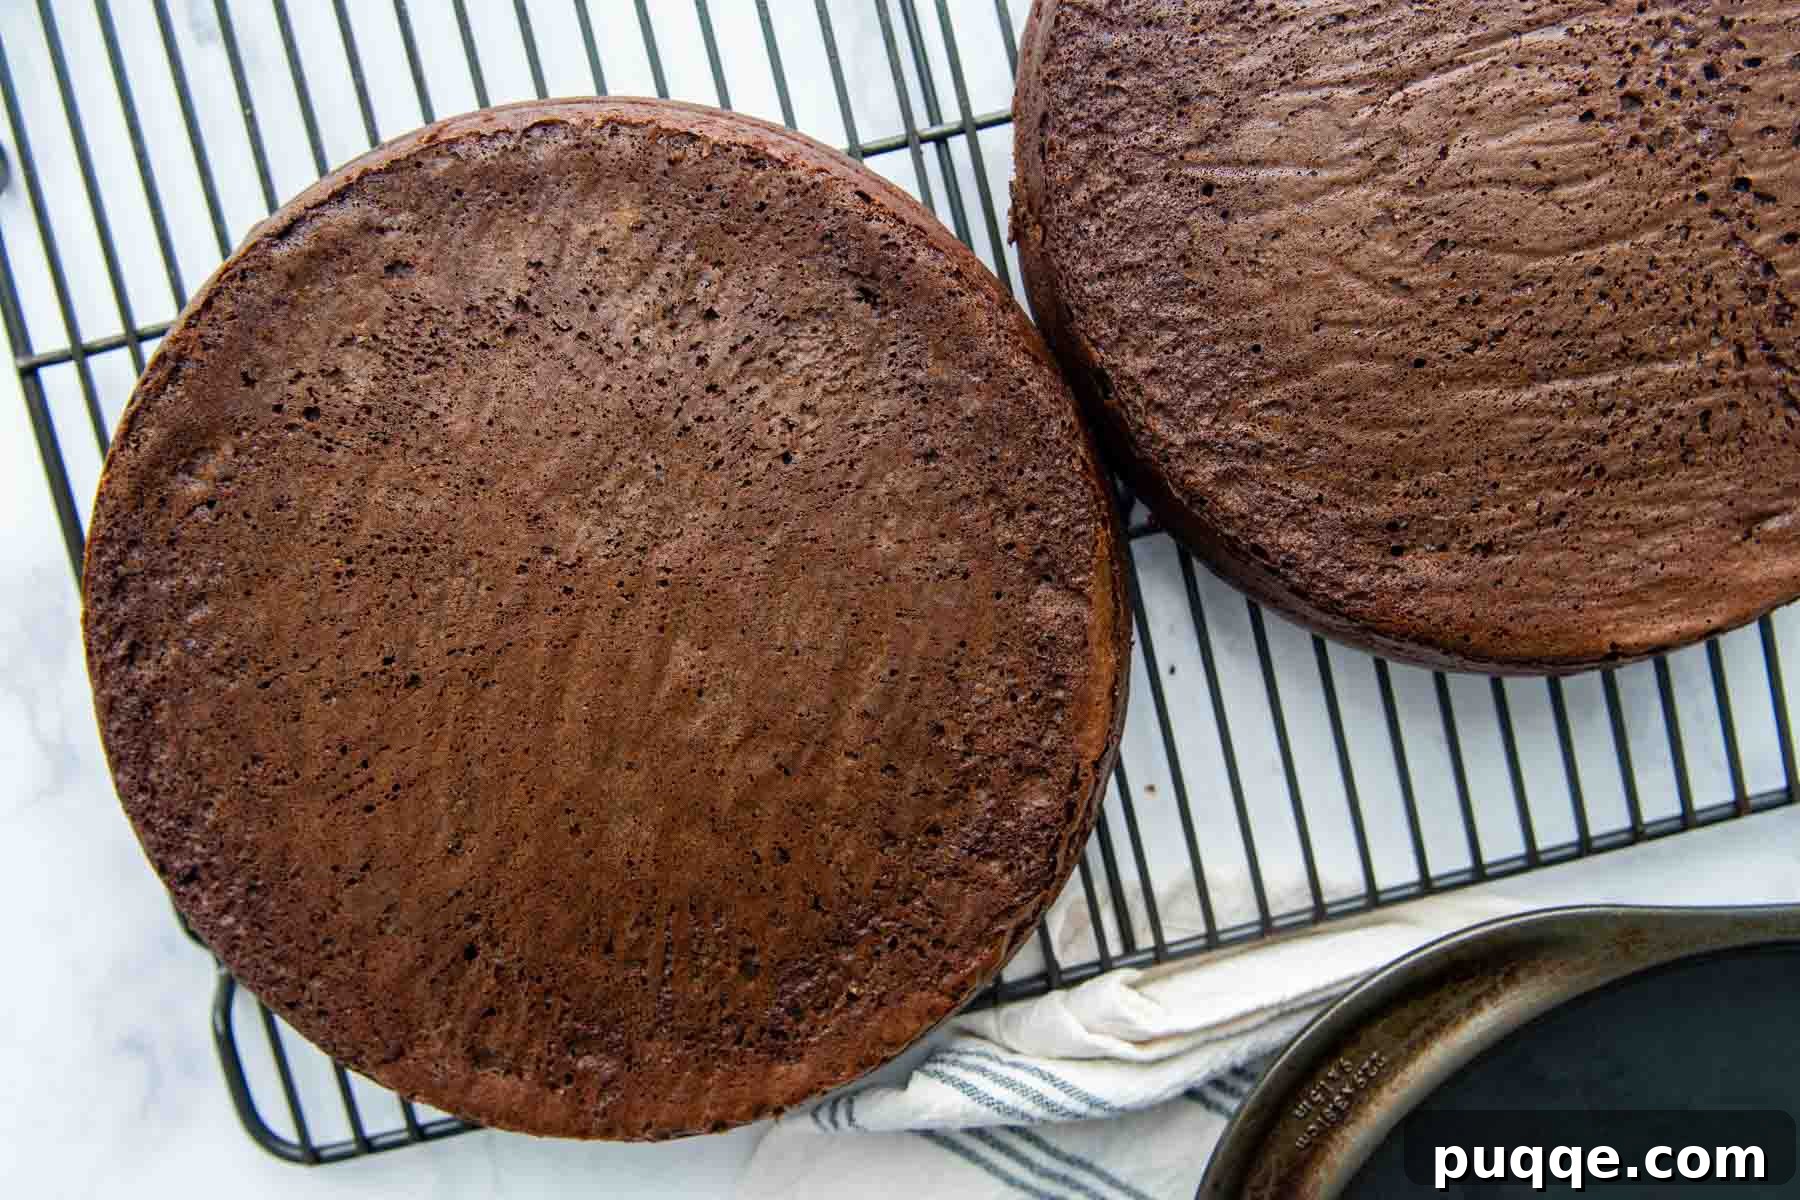
For this recipe, you will need only one perfectly baked 9-inch cake layer. Our detailed recipe below provides the exact ingredients for a single, moist gluten-free chocolate cake. If you opt to use a gluten-free box mix, which often yields two layers, you can simply bake one layer for this cake and then wrap and freeze the second layer for a future ice cream cake, trifle, or another delightful dessert. Ensure your cake is completely cooled before proceeding with assembly to prevent melting the ice cream and fudge layers.
3. Time to Assemble the Delicious Layers
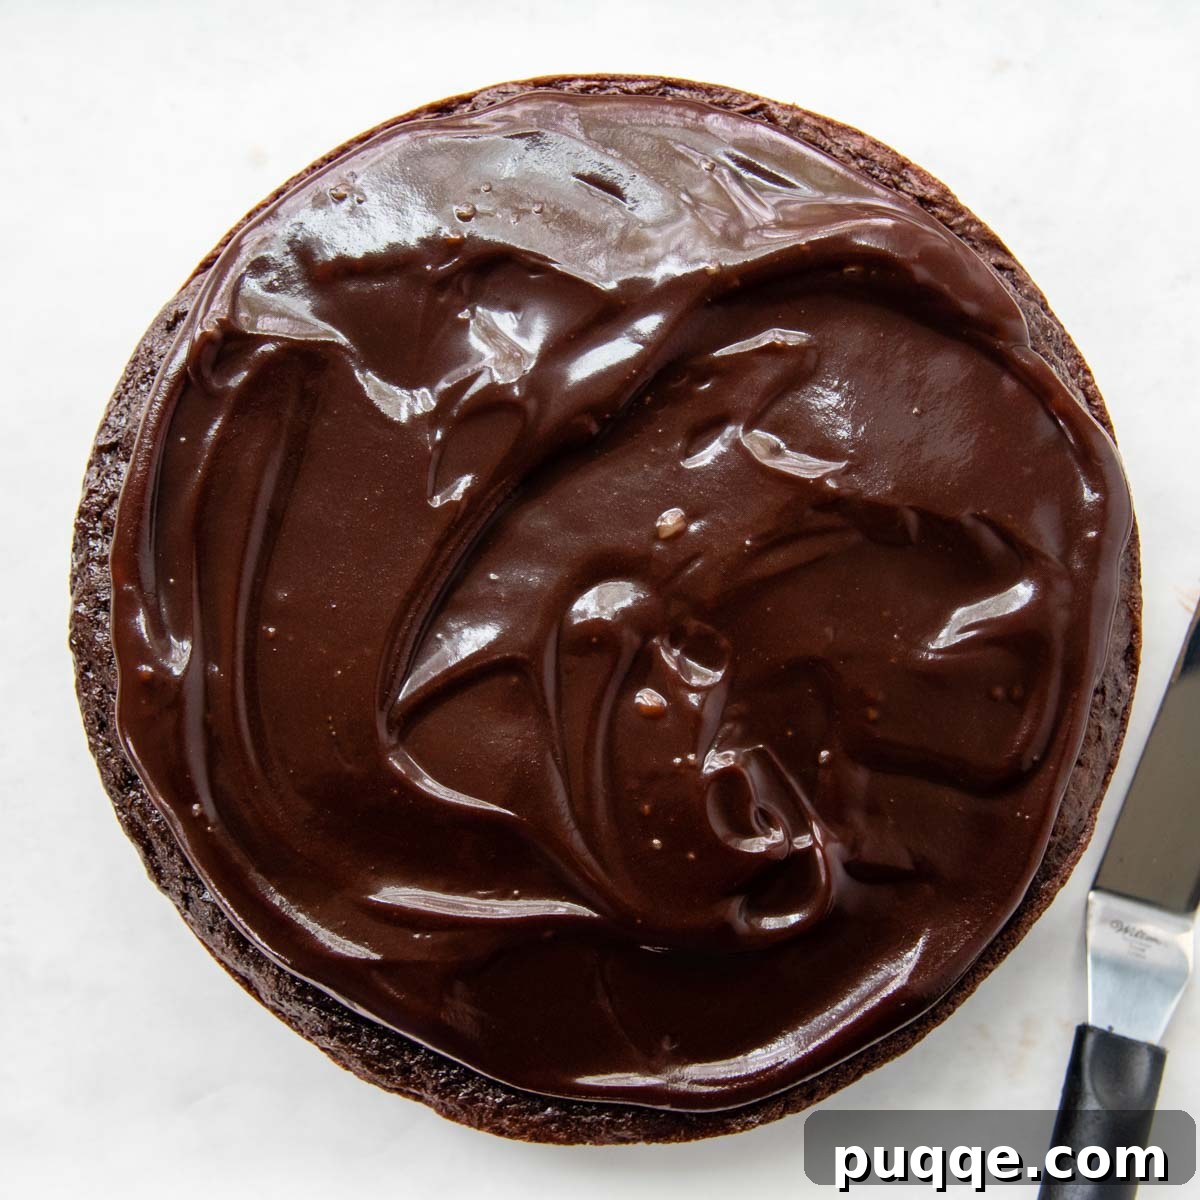
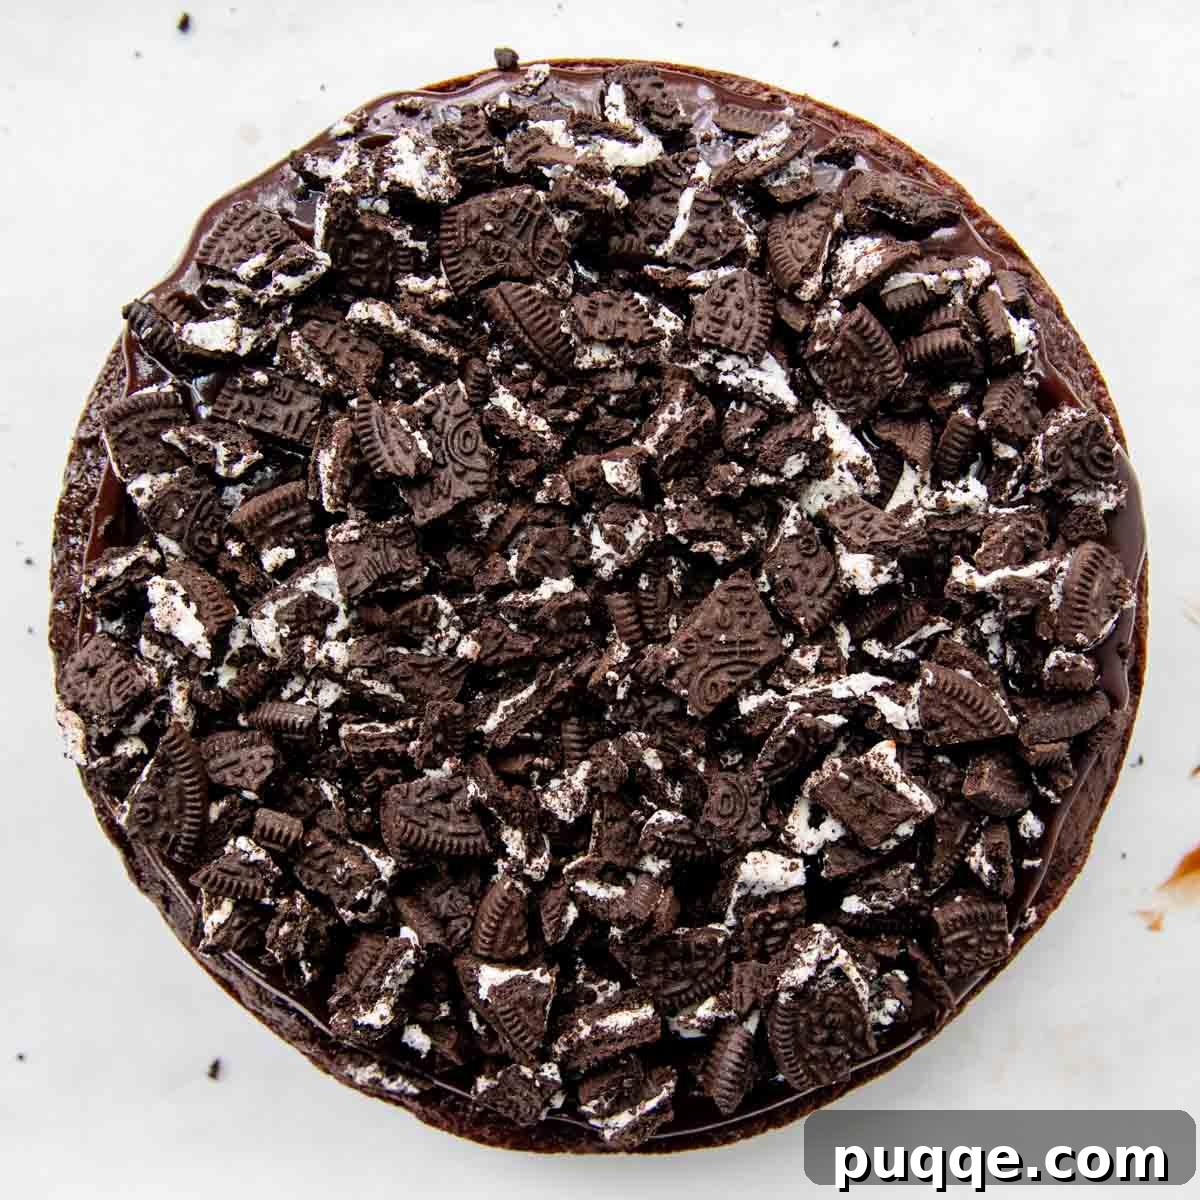
Once your cake is completely cooled, carefully place it on your chosen cake platter or serving stand. For a clean presentation, tuck strips of waxed paper or parchment paper underneath the edges of the cake. This will catch any drips of fudge or frosting and can be easily removed before serving. Next, evenly spread a generous layer of hot fudge sauce over the top of the cake. Follow this with a sprinkle of about 12 more chopped gluten-free Oreos, creating a delightful crunchy layer that adheres to the warm, gooey fudge.
I told you this recipe was the best, didn’t I? But just wait, it truly gets even better with the next steps!
4. Finish and Frost Your Masterpiece
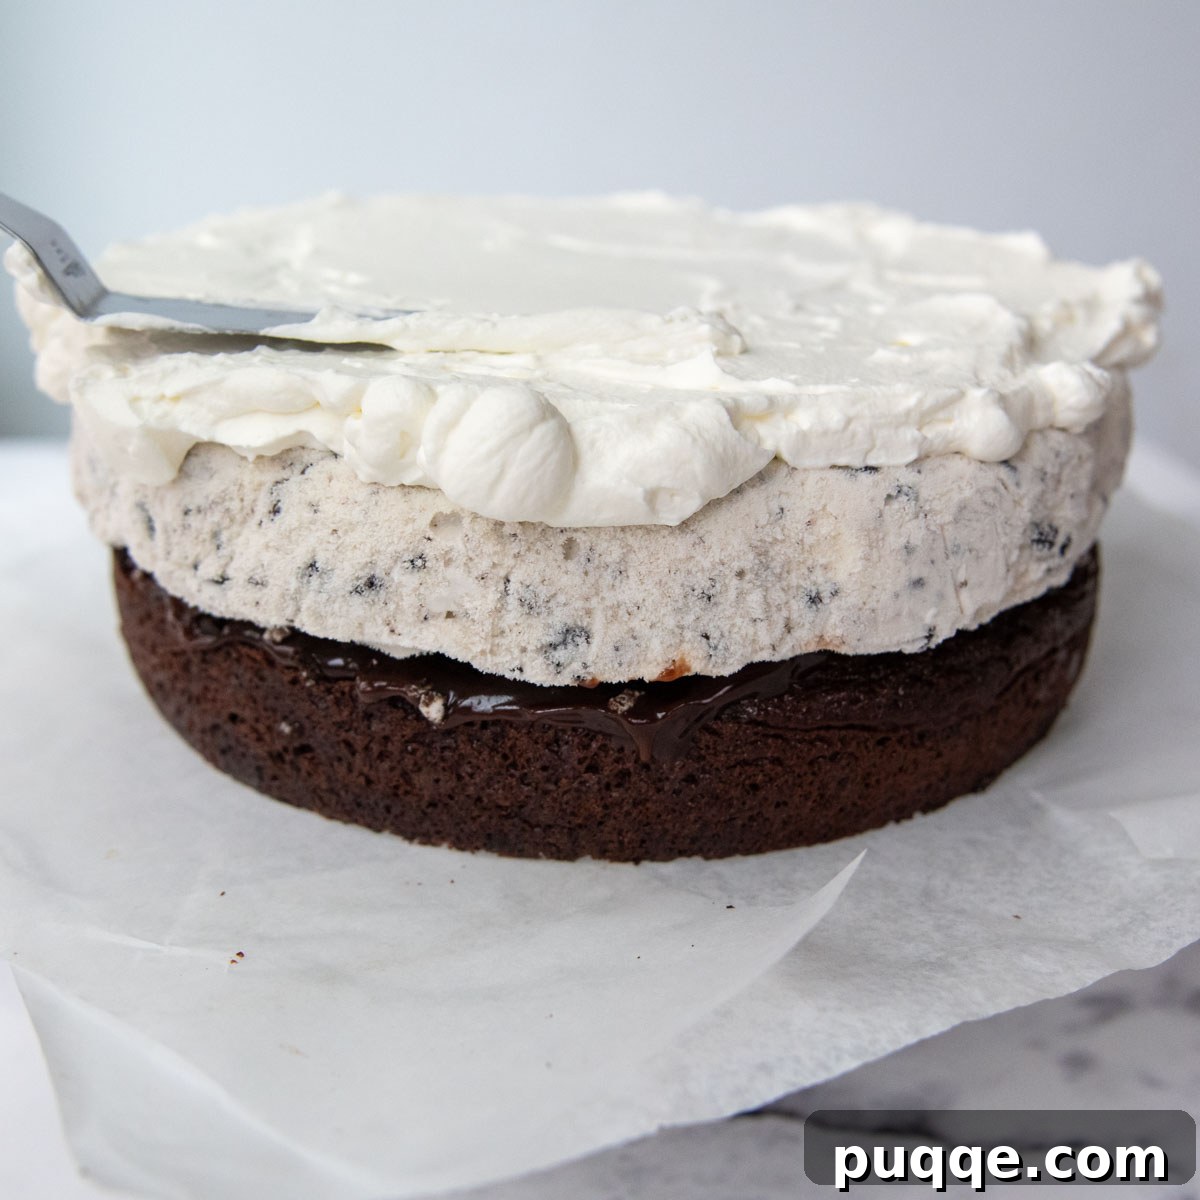
Now for the most exciting parts – the ice cream and the whipped cream frosting! Carefully remove your solid ice cream layer from the freezer and peel off the foil lining. Gently invert it and place it directly on top of the crushed Oreo cookies and hot fudge layer on your cake. At this point, I highly recommend placing the partially assembled cake back into the freezer for about 15-20 minutes. This ensures the ice cream layer is firm and stable, preventing it from sliding or melting while you prepare and apply the whipped cream frosting.
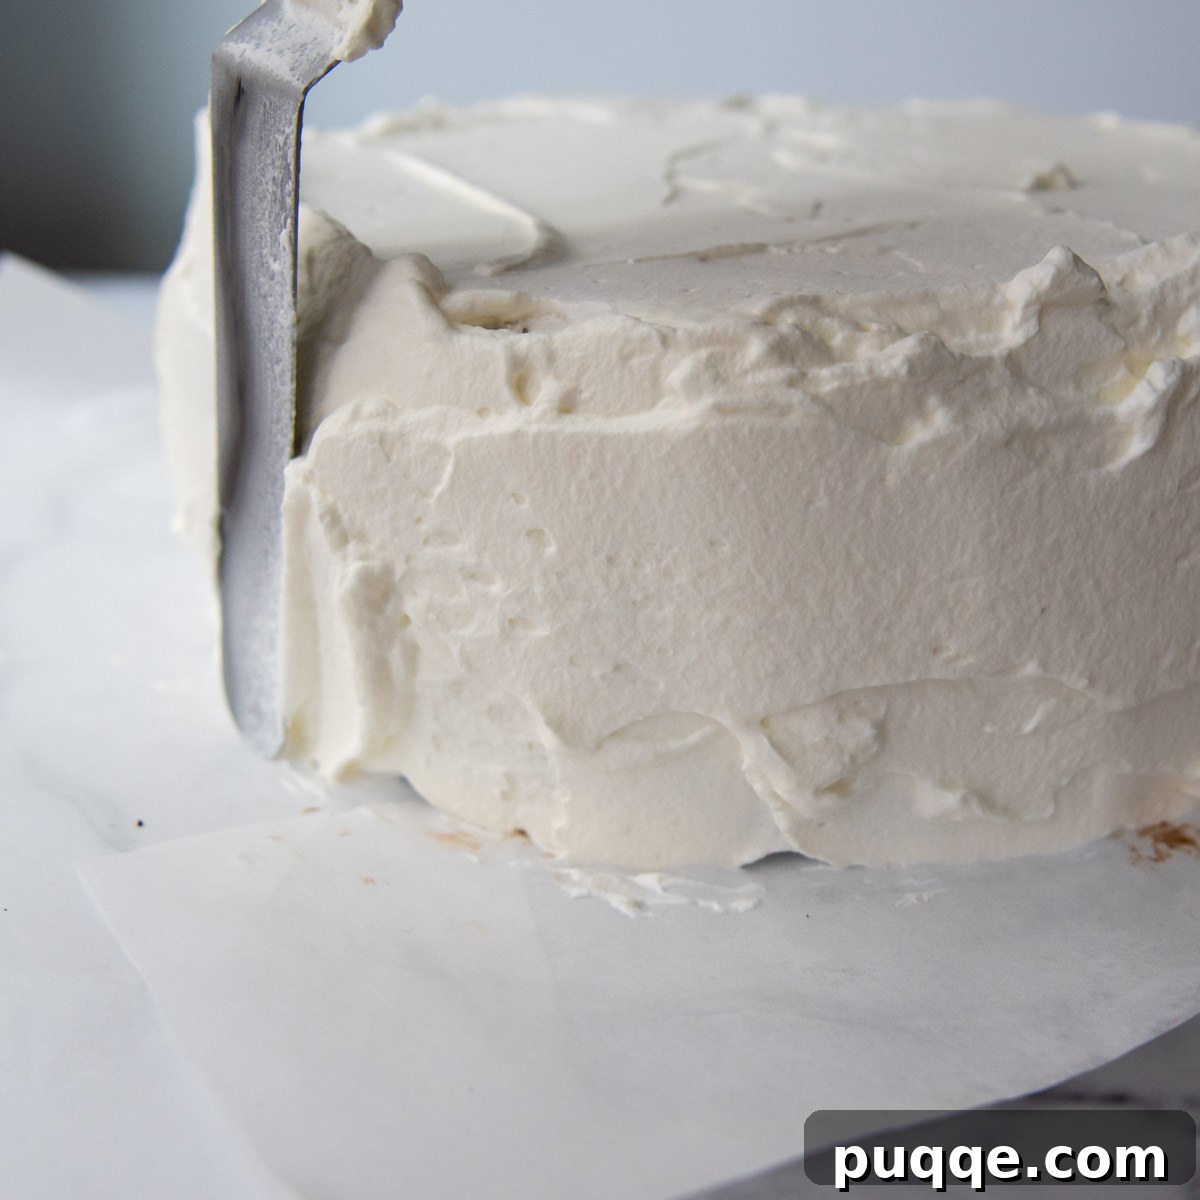
Once the cake is firm, retrieve it from the freezer. Start by generously spreading the freshly whipped cream over the top and down the sides of the cake. Use an offset spatula for smooth, even coverage. If you wish to add a decorative touch, reserve a portion of the whipped cream to pipe elegant swirls or borders on top. For an extra flourish, sprinkle more crushed Oreos over the frosting or drizzle with any remaining hot fudge sauce. Honestly, this cake is just unbelievably good!
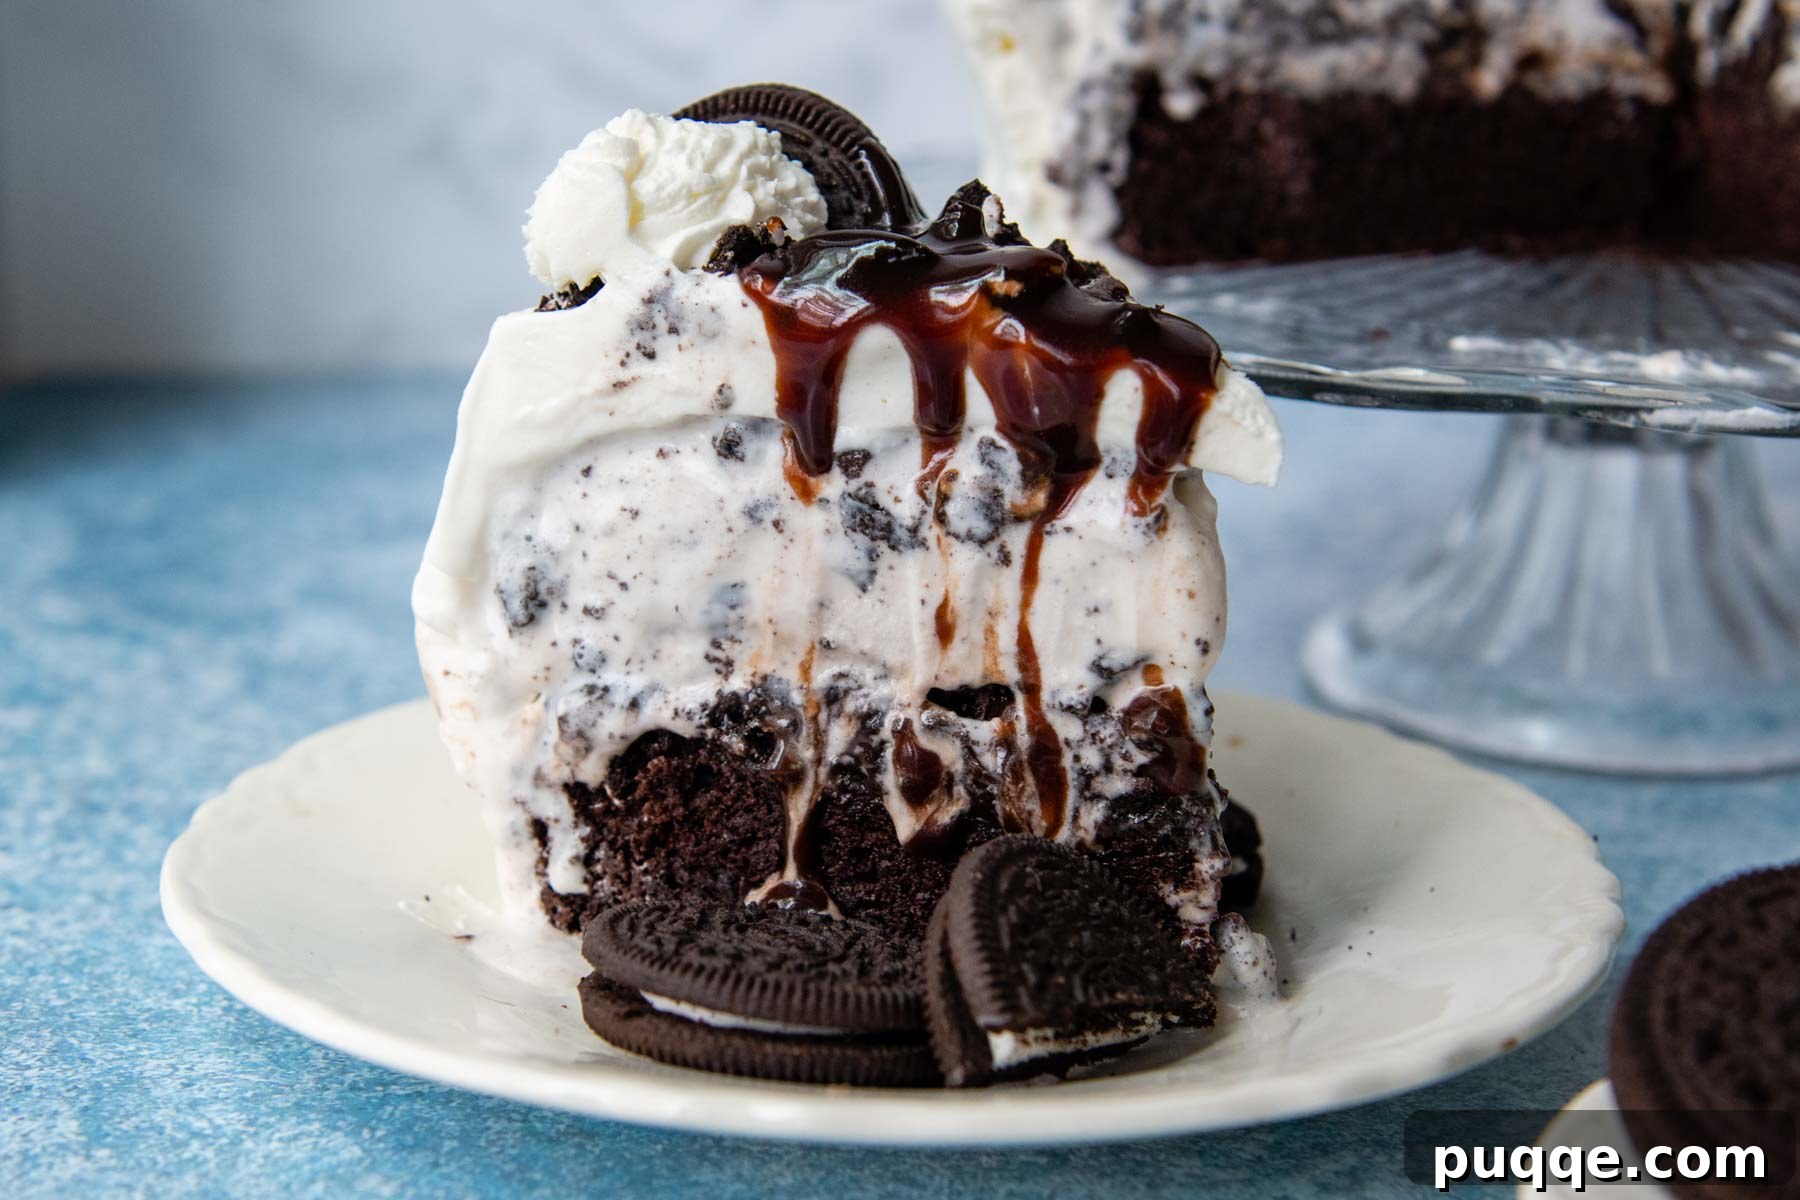
When you’re ready to serve, remember to check out our helpful ice cream cake cutting tutorial to ensure you slice it like a professional, creating perfect, clean servings. Place the finished cake back in the freezer until it’s time to enjoy!
Let’s Mix It Up – Delicious Variations!
This gluten-free ice cream cake recipe is a fantastic canvas for creativity! If you’re making this for a birthday or a special celebration, honor your guest of honor by customizing it with their absolute favorite flavors. They can choose their preferred ice cream, or you can get inspired by some of our delightful suggestions below to make this cake uniquely theirs.
- Funfetti Cake Layer: Transform the chocolate cake into a celebratory funfetti masterpiece! Simply add gluten-free sprinkles to a homemade vanilla cake batter or a vanilla gluten-free cake mix. Remember you’ll only need a half recipe for a single 9-inch layer, so adjust accordingly.
- Alternative Ice Cream Flavors: While cookies and cream is a classic, the possibilities are endless. Consider using mint chocolate chip ice cream for a refreshing twist, peanut butter cup ice cream for a rich, nutty flavor, or a decadent chocolate ice cream for the ultimate cocoa experience. Many brands now offer excellent gluten-free versions of these popular flavors.
- Different Gluten-Free Cookies: If Oreos aren’t your top pick, feel free to omit them entirely or swap them out for other delicious gluten-free cookies. Crushed gluten-free chocolate chip cookies, shortbread, or even graham crackers can provide a wonderful texture and flavor contrast.
- Frosting Alternatives: While our homemade whipped cream frosting is divine, you have other options. A 12-ounce container of frozen whipped topping (like Cool Whip) offers convenience. For a richer chocolate flavor, try a chocolate whipped cream frosting. A classic buttercream frosting adds a different level of sweetness and stability. And for a fantastic dairy-free option, use a coconut whipped topping like TruWhip, which mimics the lightness of traditional whipped cream.
Frequently Asked Questions (FAQs)
To help ensure your gluten-free ice cream cake turns out perfectly every time, here are answers to some common questions:
Can I make this ice cream cake ahead of time?
Absolutely! This gluten-free ice cream cake is an excellent make-ahead dessert. You can prepare and assemble the entire cake up to one week in advance. Simply ensure it’s tightly covered with plastic wrap and stored in the freezer until about 30 minutes before you plan to serve it. This makes it a perfect choice for stress-free party planning!
How do I store leftover ice cream cake?
Any leftover slices or the remainder of the cake should be immediately returned to the freezer. Cover it tightly with plastic wrap or place it in an airtight freezer-safe container to prevent freezer burn and keep it fresh. When ready to enjoy another slice, let it sit at room temperature for about 10-15 minutes to soften slightly for easier cutting and a more enjoyable texture.
What gluten-free flour blend do you recommend for the chocolate cake?
For the gluten-free chocolate cake layer, I highly recommend using a high-quality all-purpose gluten-free flour blend that contains xanthan gum. My personal favorite is Cup4Cup gluten-free flour, which consistently yields excellent results, creating a cake that is incredibly moist and tender. If you use a blend without xanthan gum, you may need to add about ¼ teaspoon per cup of flour.
Can I use a different size cake pan?
While this recipe is designed for a 9-inch cake pan, you can adapt it for other sizes. If you use an 8-inch pan, your cake and ice cream layers will be slightly thicker, and the baking time for the cake might need to be extended by a few minutes. For a larger 10-inch pan, the layers will be thinner, and baking time might be reduced. Always adjust freezing and baking times as needed and ensure your cake layers are completely cool before assembling.
Ready to Impress? Pin This Recipe for Later!
Let’s be friends on Pinterest! I’m always sharing fantastic recipes and gluten-free baking inspiration!
Did you make this incredible recipe? I absolutely love hearing from you and seeing your creations! Please leave a star rating and a comment below the recipe card. Your feedback is invaluable, helping other home bakers discover and enjoy this recipe. I truly appreciate hearing from our community, and I promise you’ll always hear back from me! -Melissa
Easy Peasy Gluten-Free Ice Cream Cake Recipe
Prep Time:
Cook Time:
Total Time:
This ultimate gluten-free ice cream cake recipe surpasses any store-bought version! Perfect for celebrating birthdays or any special occasion, it features a rich chocolate cake layered with crunchy gluten-free Oreos, luscious hot fudge, and creamy ice cream, all generously topped with fluffy whipped cream frosting. Includes clear step-by-step guidance and a convenient dairy-free option.
Pin Recipe
(Video demonstrating the recipe steps would typically be embedded here.)
Ingredients
For the Ice Cream Layer:
- 1.5 quarts vanilla ice cream (or any preferred gluten-free flavor), softened for 20-30 minutes
- 1 package Gluten-Free Oreo Cookies, divided
For the Gluten-Free Chocolate Cake:
- 1 cup all-purpose gluten-free flour (I highly recommend Cup4Cup gluten-free flour)
- 1 cup granulated sugar
- 6 tablespoons unsweetened baking cocoa
- 1 teaspoon baking powder
- ¾ teaspoon baking soda
- ½ teaspoon salt
- ½ cup milk or non-dairy milk
- ¼ cup vegetable, canola, or coconut oil
- 1 large egg
- 1 teaspoon vanilla extract
- ½ cup boiling water
For the Whipped Cream Frosting:
- 2 cups heavy cream
- ¼ cup powdered sugar
- 12 ounce (gluten-free) hot fudge, divided
Equipment
- 9-inch Cake Pans
- Offset Spatula
- Stand Mixer (or hand mixer)
Instructions
Ice Cream Layer:
- Line a 9-inch cake pan (or springform pan) with two large pieces of foil, criss-crossed. Press the foil down to conform to the shape of the pan, leaving ample overhang edges to easily lift the ice cream layer out later.
- In a large bowl, combine the softened vanilla ice cream with 12 chopped or crushed gluten-free Oreo cookies. Mix until well combined. Spread this mixture evenly into the prepared foil-lined pan. Press a layer of plastic wrap directly onto the surface of the ice cream mixture. Freeze until completely solid, ideally for at least 3 hours or overnight.
Gluten-Free Chocolate Cake:
- While the ice cream layer solidifies, prepare your chocolate cake layer. Preheat your oven to 350ºF (175ºC). Prepare another 9-inch cake pan by spraying it thoroughly with cooking spray, lining the bottom with a cut-to-size piece of parchment paper, and then spraying the parchment as well. Set aside.
- In a large mixing bowl, combine the gluten-free flour, granulated sugar, unsweetened baking cocoa, baking powder, baking soda, and salt. Whisk these dry ingredients together thoroughly, or if using a stand mixer, mix with the paddle attachment until just combined.
- Add the milk (or non-dairy milk), vegetable oil, large egg, and vanilla extract to the flour mixture. Beat on medium speed until all ingredients are well combined and the batter is smooth. Reduce the mixer speed to low, then slowly and carefully pour in the ½ cup of boiling water. Once the boiling water is fully incorporated, increase the speed to high and beat for 1 minute to aerate the batter.
- Spread the cake batter evenly into your prepared 9-inch cake pan. Bake for 30-35 minutes, or until a wooden toothpick inserted into the center of the cake comes out clean, indicating it’s fully cooked.
- Remove the cake from the oven and allow it to cool in the pan for 5 minutes. After 5 minutes, carefully invert the cake onto a wire rack to cool completely. Ensure the cake is entirely cool to the touch before assembling the ice cream cake.
Assembling the Cake:
- Place the completely cooled chocolate cake layer on your desired cake platter or serving stand. To keep your platter clean during assembly, tuck strips of waxed paper or parchment paper underneath the edges of the cake. These can be easily removed before serving.
- Evenly spread ¾ cup of the gluten-free hot fudge over the top surface of the chocolate cake. Take another 12 gluten-free Oreo cookies, chop or crush them, and sprinkle them generously over the hot fudge layer.
- Carefully remove the solidified ice cream layer from the freezer. Gently pull on the foil overhangs to release it from the pan, then peel off the foil. Place this firm ice cream layer directly on top of the crushed cookies and hot fudge. At this point, return the partially assembled cake to the freezer while you prepare the whipped cream frosting. This ensures the ice cream remains firm and the layers stay stable.
Whipped Cream Frosting:
- In a clean, large mixing bowl (preferably chilled), combine the cold heavy cream and powdered sugar. Beat with an electric mixer on high speed until the cream holds stiff peaks and is light and fluffy. Be careful not to overbeat, or it may turn grainy.
- Using an offset spatula or a standard spatula, gently spread the freshly whipped cream evenly over the top and down the sides of the frozen cake. If you desire a decorative edge, you can reserve a small portion of the whipped cream and pipe it onto the cake using a piping bag fitted with a star tip.
- For a beautiful finish, sprinkle more crushed gluten-free Oreos on top of the whipped cream, and if desired, drizzle any remaining hot fudge sauce over the cake. Return the finished cake to the freezer immediately until you are ready to serve.
- Before slicing and serving, allow the cake to sit at room temperature for about 20-30 minutes. This allows the ice cream to soften slightly, making it much easier to cut into clean, elegant slices. For a complete easy step-by-step guide on perfect slicing, see this how to cut ice cream cake post. Cover and store any leftovers in the freezer for up to 1 week.
Notes
Dairy-Free Modifications:
This recipe can be easily adapted to be completely dairy-free!
The chocolate cake recipe included is already dairy-free; simply ensure you use a non-dairy milk (like almond milk, soy milk, or oat milk) as specified. For the ice cream layer, substitute with your favorite dairy-free ice cream flavor. Many brands offer delicious almond milk, coconut milk, or oat milk-based ice creams that work wonderfully. For the frosting, instead of heavy cream, use full-fat canned coconut milk (chilled overnight, then whip the thick cream that separates) or a store-bought dairy-free whipped topping. When it comes to hot fudge, many store brands are surprisingly dairy-free, but always check labels. Alternatively, use a reliable homemade dairy-free hot fudge recipe.
Recipe adapted from Preppy Kitchen.
Nutrition Facts (per serving)
- Calories:
- 780kcal
- Carbohydrates:
- 102g
- Protein:
- 11g
- Fat:
- 38g
- Saturated Fat:
- 21g
- Polyunsaturated Fat:
- 3g
- Monounsaturated Fat:
- 12g
- Trans Fat:
- 1g
- Cholesterol:
- 112mg
- Sodium:
- 526mg
- Potassium:
- 535mg
- Fiber:
- 5g
- Sugar:
- 71g
- Vitamin A:
- 1119IU
- Vitamin C:
- 1mg
- Calcium:
- 239mg
- Iron:
- 6mg
(Nutritional information is an estimate and may vary based on specific ingredients used.)
Did You Make This Recipe?
Please leave a star rating and review below. Your feedback is truly appreciated and helps other home bakers!