
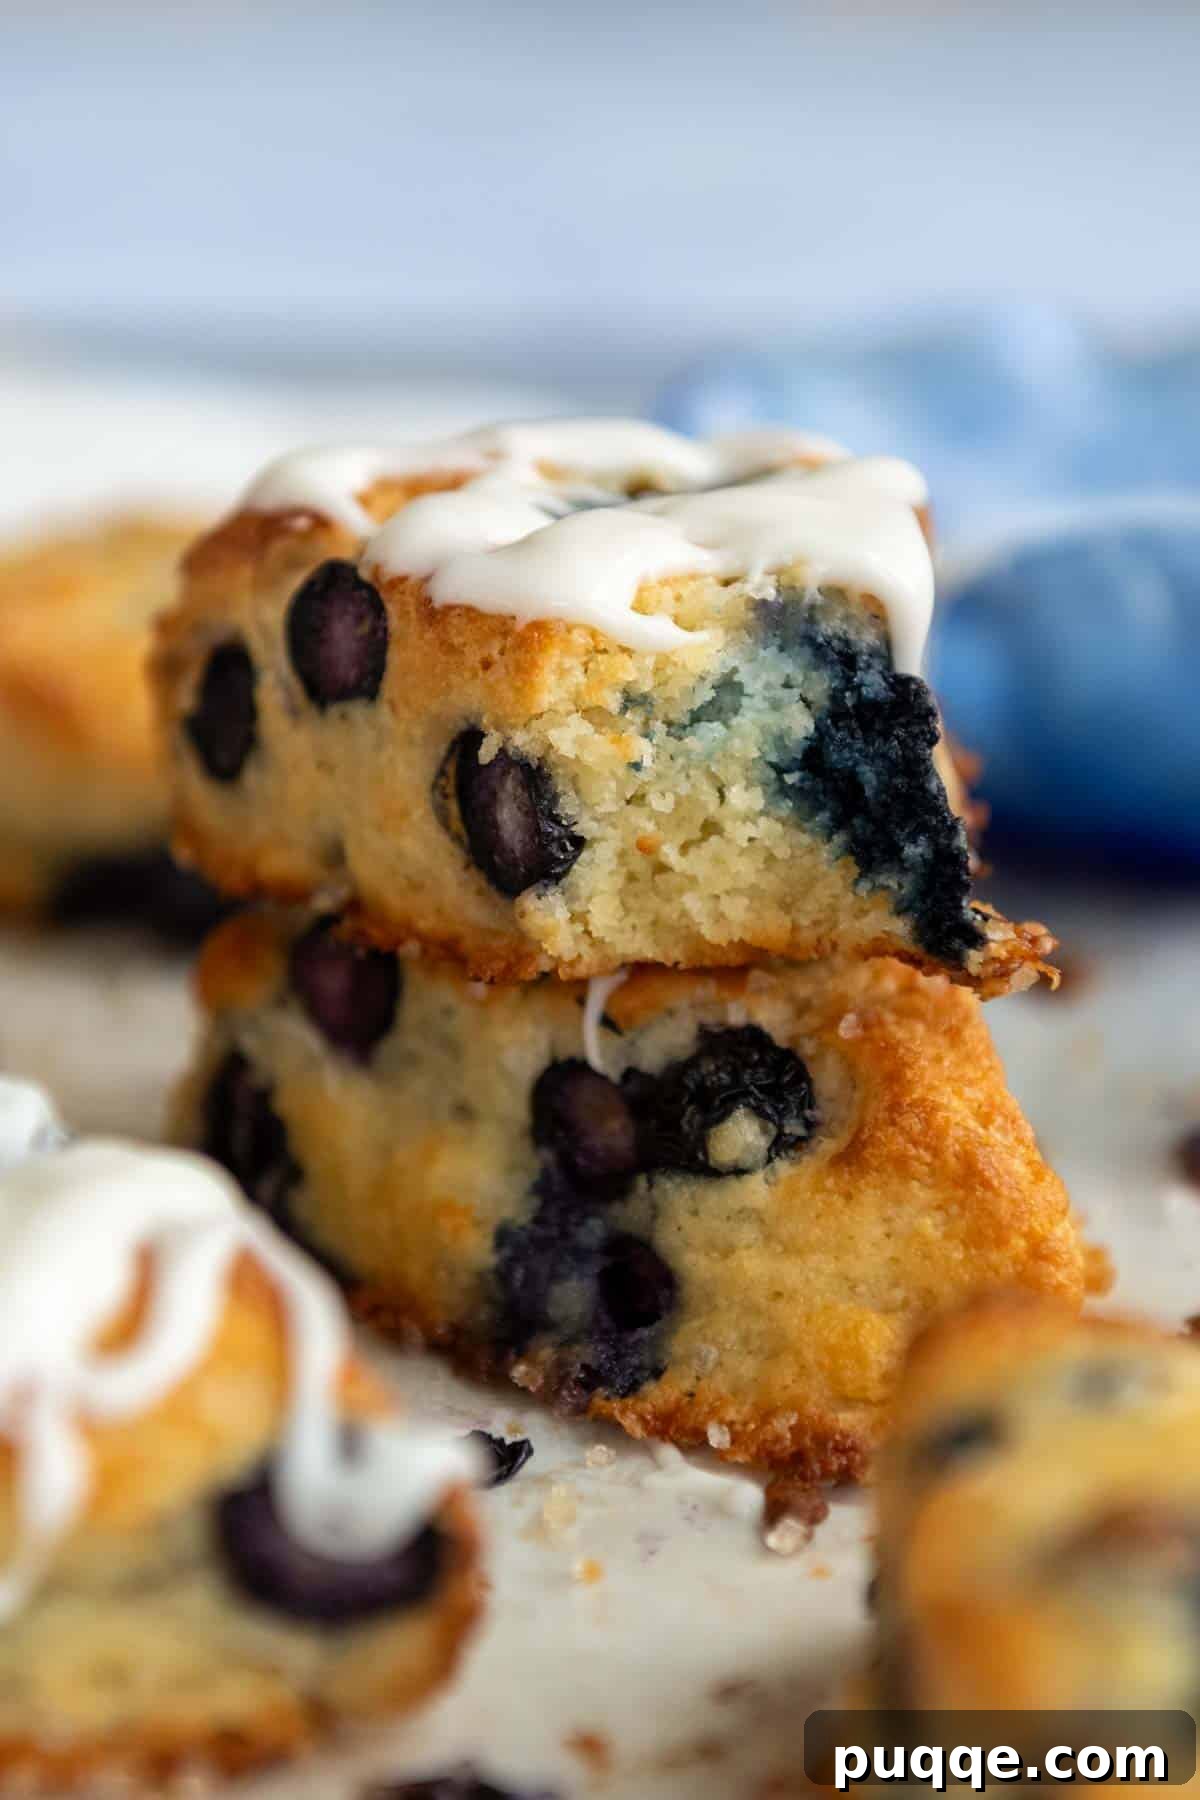
Achieve Bakery-Style Fluffy Almond Flour Scones (Gluten-Free & Easy!)
Embark on a culinary journey to gluten-free perfection with these irresistibly tender and exquisitely fluffy scones, crafted with the goodness of almond flour. If your past experiences with almond flour recipes have left you with dense, heavy, or crumbly results, prepare for a revelation. These blueberry almond flour scones are a true game-changer, delivering a luxurious bakery-style treat that boasts crisp, delicately chewy edges, a rich buttery and nutty flavor, and an unbelievably light texture. The secret? A simple, magical ingredient likely residing in your pantry right now.
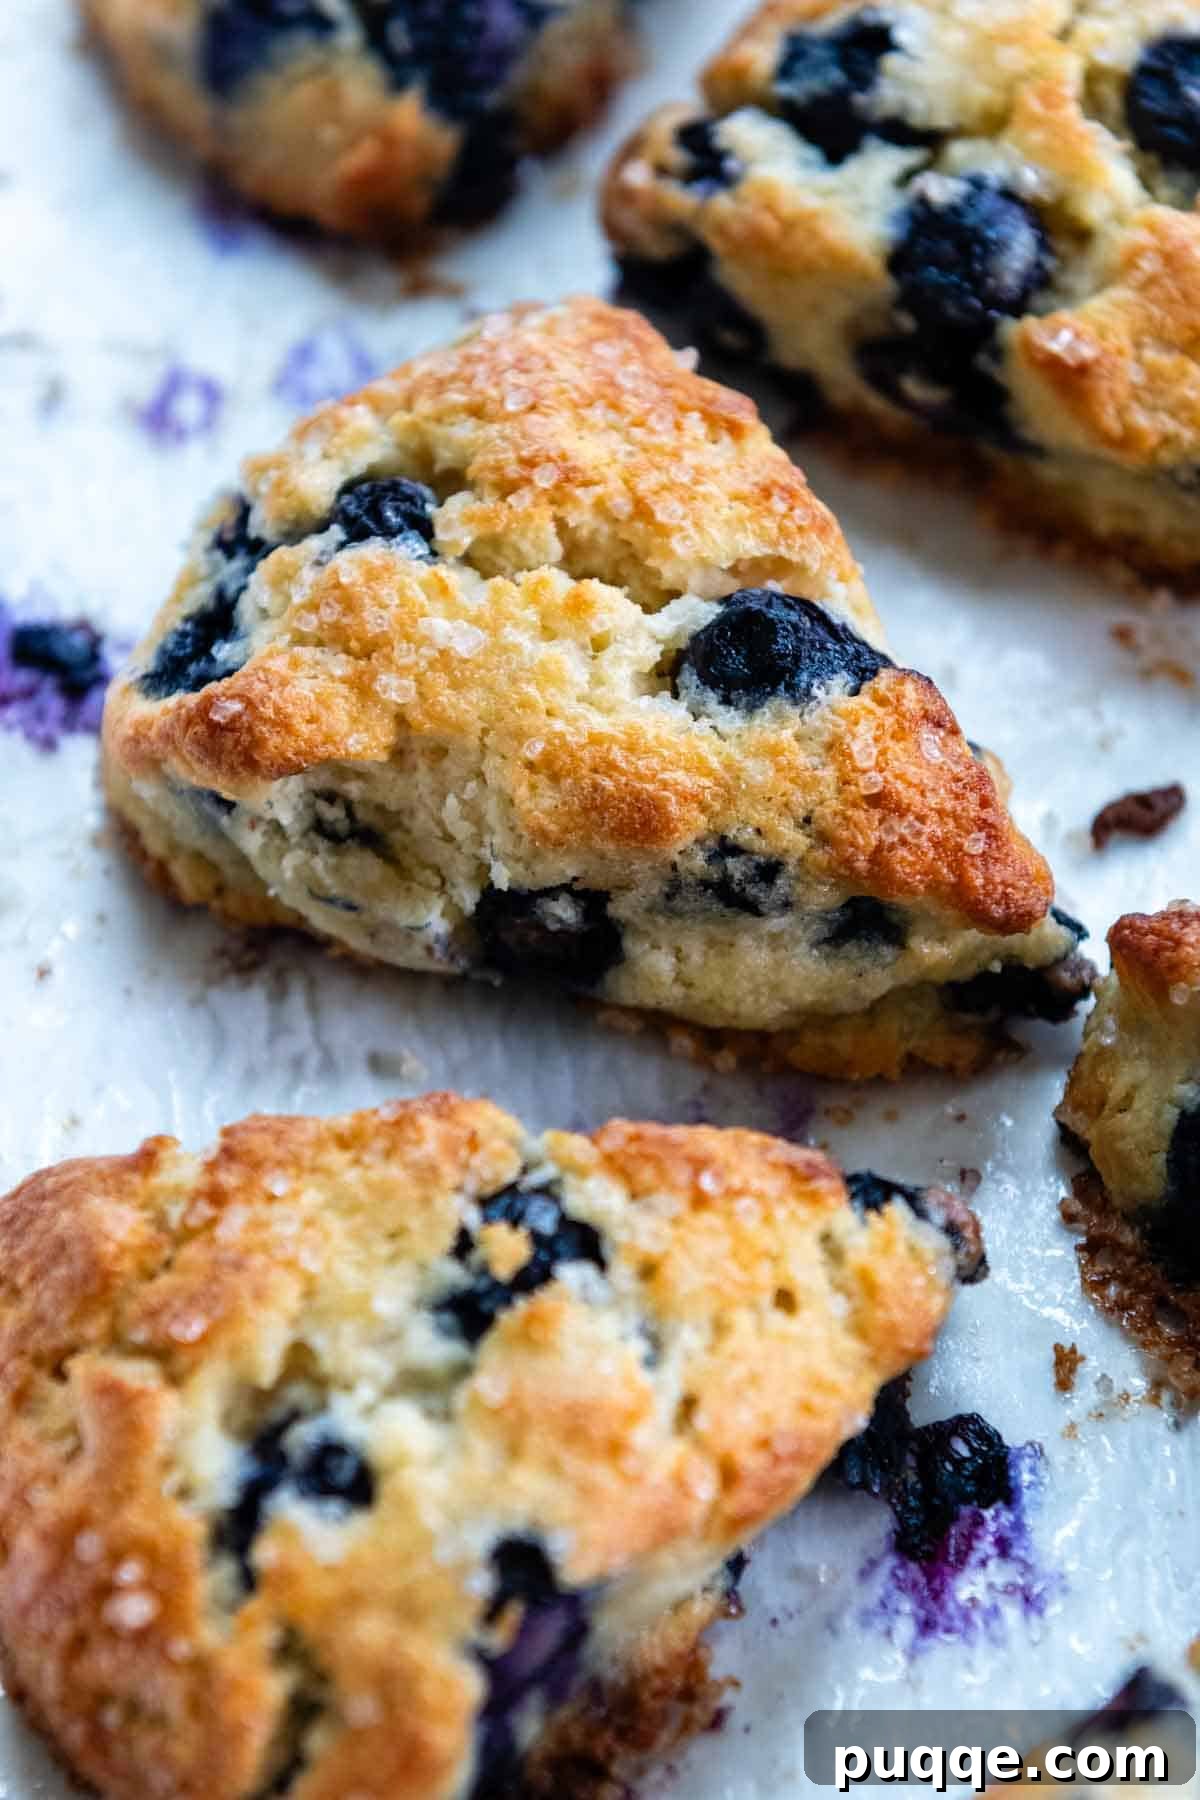
Goodbye to Dense Almond Flour Baking: The Secret to Lightness
When venturing into the world of gluten-free and grain-free baking, especially with almond flour, the most common pitfall is a dense, compressed texture. Imagine biting into what should be a light, fresh blueberry morning treat, only to be met with disappointment. That’s precisely the challenge this scone recipe was designed to overcome, ensuring every bite is a moment of pure bliss.
To achieve this desired lightness, we’ve implemented time-tested techniques that expertly counteract almond flour’s natural density and richness. These innovative almond flour hacks have consistently brought joy and garnered rave reviews from our community, proving their efficacy in beloved creations like our Almond Flour Carrot Cake and Moist & Fluffy Almond Flour Lemon Cake. The success of these recipes laid the foundation for perfecting these remarkable scones.
The Magical Ingredient for a Tender Crumb: Cornstarch or Tapioca Starch
When working with almond flour to achieve a lighter, more tender crumb, bakers often have a couple of primary approaches. For cakes, where a greater number of eggs are typically used, separating and whipping egg whites can introduce significant aeration, leading to an incredibly light texture. However, scones require fewer eggs, making this method less practical.
This led us to our alternative, and equally effective, easy trick: introducing a lighter-density flour. By replacing a portion of the almond flour with either cornstarch or tapioca starch, we significantly reduce the overall heaviness of the dough. Cornstarch is a readily available pantry staple for most, while tapioca starch offers an excellent grain-free alternative for those with specific dietary needs. This simple substitution not only lightens the texture but also simplifies the process, saving you the extra time and effort of separating and beating eggs.
Let’s delve deeper into each step of this recipe, where we’ll share all the essential tips and insights to ensure your homemade blueberry scones are an absolute triumph. And for those who might not be blueberry enthusiasts, fear not! The versatile dough serves as a perfect canvas for countless other flavor combinations. We’ve brainstormed a wealth of possibilities below to spark your creativity. Get ready to bake something truly extraordinary!
“I am so pleased with this recipe. I have tried 5 (almond flour) blueberry scone recipes all to my disappointment. This recipe is by far the ONLY recipe that resembles the consistency of a scone with flakiness and light texture. I believe it is the cornstarch. I tried it with Greek yogurt but will make it again with sour cream to compare. It is my go-to recipe now and I am so thankful I found this!”
—Linda
Ingredient Deep Dive: Tips, Tricks, and Substitutions for Perfect Scones
Almond flour is a star ingredient in gluten-free baking, offering a wonderful chewiness and a delightful subtly sweet, nutty flavor that elevates baked goods. If you haven’t yet experienced how it transforms the texture of crunchy almond flour biscotti, you absolutely must add that recipe to your baking queue!
- Blanched Almond Flour: Precision is paramount when measuring almond flour. For optimal results, we recommend using the “scoop and level” method, which typically yields approximately 92 grams per cup. If you prefer the “spoon and level” technique, or if consistency is a concern, measuring by weight with a kitchen scale is the most accurate approach to ensure perfect proportions.
- Sweetener: This recipe calls for granulated white sugar, but it’s remarkably flexible. Any granulated sweetener will work, but avoid liquid sweeteners as they can drastically alter the dough’s texture. For those seeking a sugar-free option, these scones can be made entirely without sugar (a discovery made during testing when the sugar was accidentally omitted!). Alternatively, a low-carb powdered sweetener like monk fruit can be used. You can also easily adjust the sugar quantity to suit your personal preference.
- Cornstarch (or Tapioca Starch): As highlighted earlier, this is our “magic ingredient” for achieving a light, tender crumb. We’ve successfully tested this recipe with both corn flour and tapioca starch, both yielding excellent results. However, we strongly advise against using coconut flour, as its absorbency and weight properties are vastly different and incompatible with this recipe’s delicate balance.
- Butter: In scone making, fat is essential for developing that desirable flaky, tender texture. Given almond flour’s inherent fat content, we’ve carefully reduced the amount of added butter to prevent the scones from becoming overly greasy. For a dairy-free rendition, solid vegan butter sticks are an excellent substitute, but coconut oil is not recommended due to its different melting properties and flavor profile.
- Sour Cream (or Yogurt): This ingredient is another clever hack we frequently employ in our gluten-free baking. Instead of relying solely on butter or oil for fat, incorporating sour cream (or plain yogurt) contributes fat while also introducing acidity. This unique combination helps coat the starches in the flour, building structure and promoting a wonderfully tender crumb without weighing down the dough. Non-dairy alternatives for sour cream or yogurt can also be successfully substituted.
- Blueberries: We recommend fresh blueberries for their ease of handling and minimal moisture contribution. While frozen blueberries can be used, they may introduce extra moisture, requiring slight adjustments.
- Egg & Extracts: The large egg acts as a binder, while vanilla or almond extract infuse these scones with delightful aroma and flavor.
- Baking Powder & Salt: These essential leavening agents and flavor enhancers ensure your scones rise beautifully and taste perfectly balanced.
Watch the Recipe Video!
For a visual guide, watch our step-by-step video on how to create these incredible almond flour scones. It’s packed with helpful tips to ensure your baking success!
Let’s Make These Together! A Step-by-Step Guide
(Below you’ll find detailed step-by-step photos and modified instructions. For the complete recipe, including precise ingredient amounts, please scroll down to the comprehensive recipe card.)
1. Combine Dry Ingredients & Work in Cold Butter
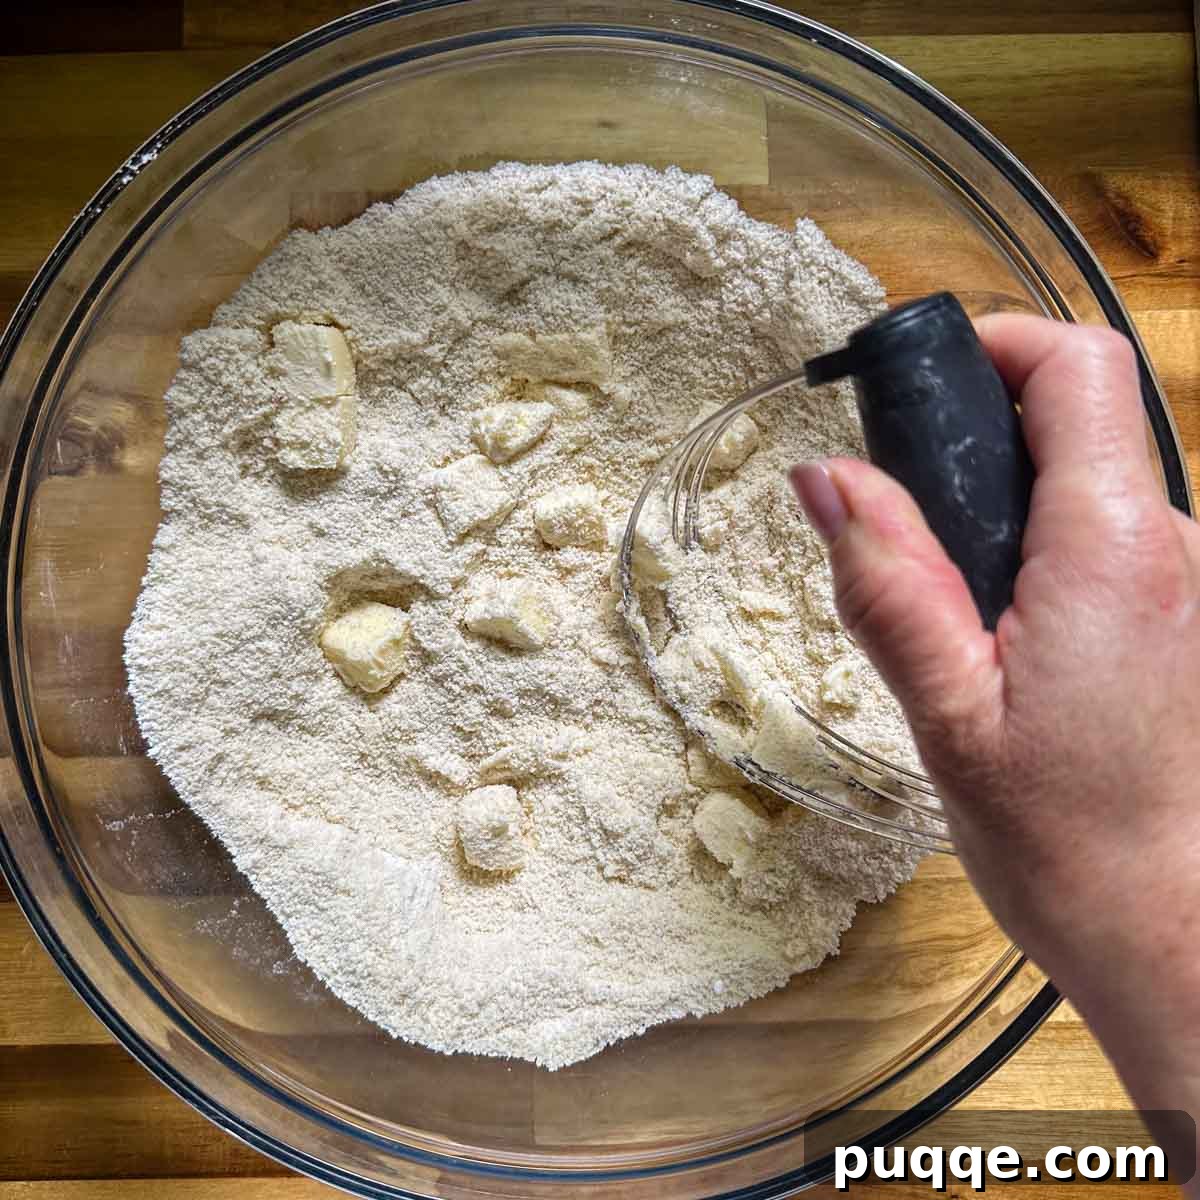
Begin by whisking together the blanched almond flour, granulated sugar, cornstarch, baking powder, and salt in a large mixing bowl until thoroughly combined. Next, add the cold, chopped unsalted butter. The colder the butter, the flakier your scones will be! You can use a pastry blender, as shown, to cut the butter into the dry mixture. If you don’t have one, a fork or even your fingertips will work perfectly. Work the butter in until the mixture resembles coarse sand with pea-sized butter pieces. Avoid overworking, as warmth from your hands can melt the butter.
2. Fold in Blueberries or Other Mix-ins
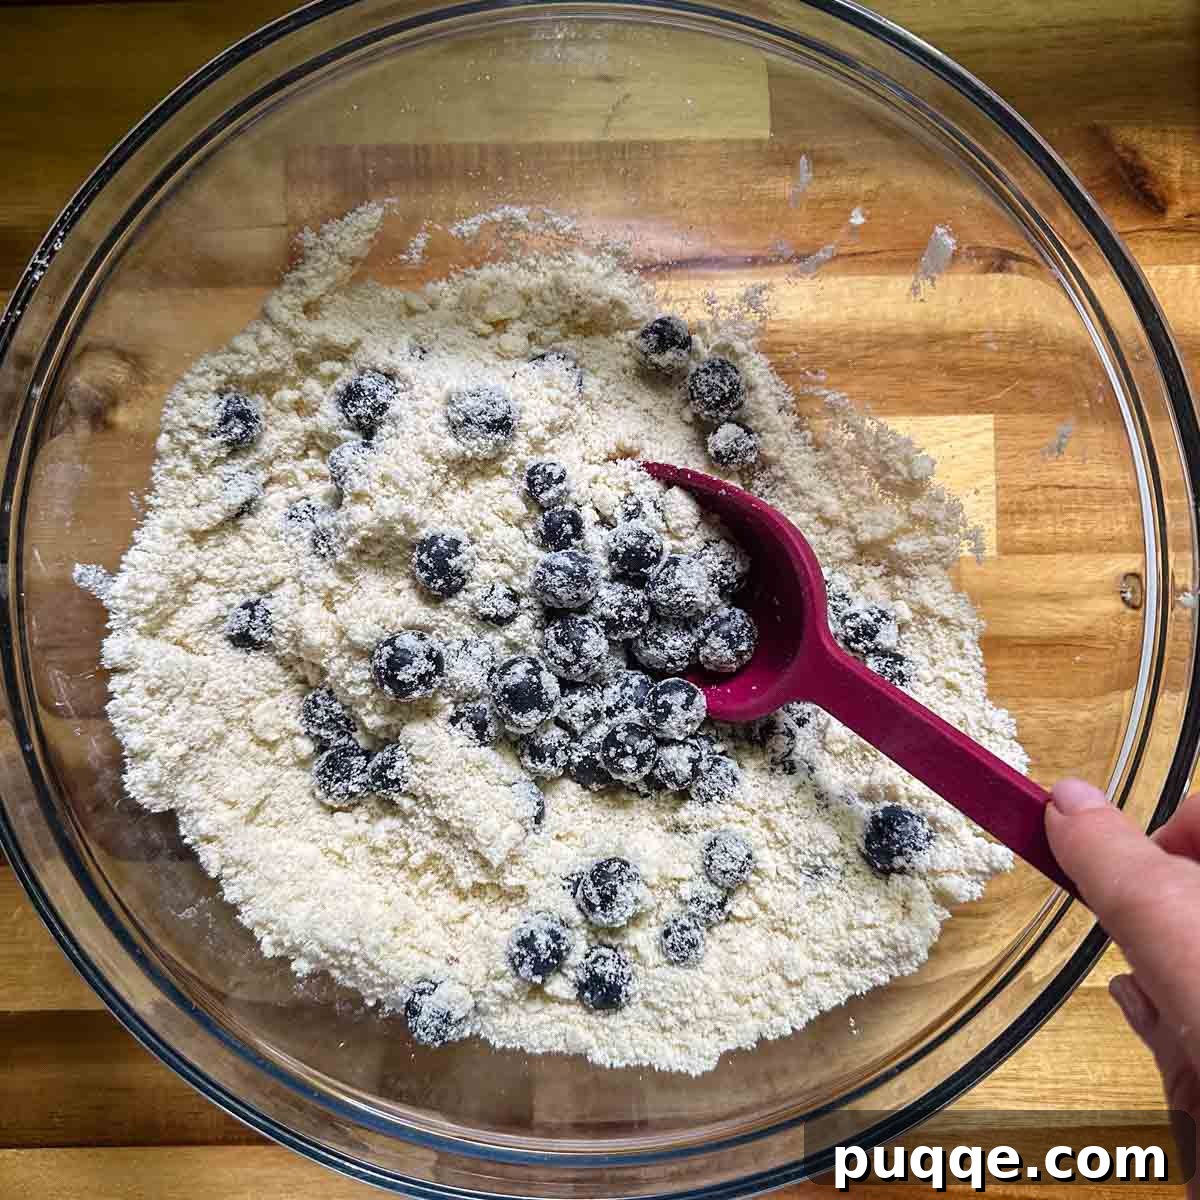
Once the butter is incorporated, it’s the ideal moment to gently stir in your chosen mix-ins. Whether you’re using fresh blueberries, chocolate chips, nuts, or dried fruit, adding them now ensures they get lightly coated in the almond flour mixture. This helps prevent them from sinking to the bottom during baking and makes it easier to distribute them evenly without having to work them into a thicker, wet dough later.
3. Add Wet Ingredients, Mix, and Chill the Dough
In a separate small bowl, whisk together the egg, sour cream (or yogurt), and vanilla extract until smooth. Pour this wet mixture into the dry ingredients and stir gently until just combined, ensuring no dry pockets of flour remain. Be careful not to overmix; a slightly shaggy dough is perfect. This easy-peasy dough is now ready for chilling! Cover the bowl and place it in the freezer for at least 30 minutes, or refrigerate for up to 2 hours. Chilling is crucial as it re-solidifies the butter, which is vital for achieving an extra tender and flaky crumb during baking.
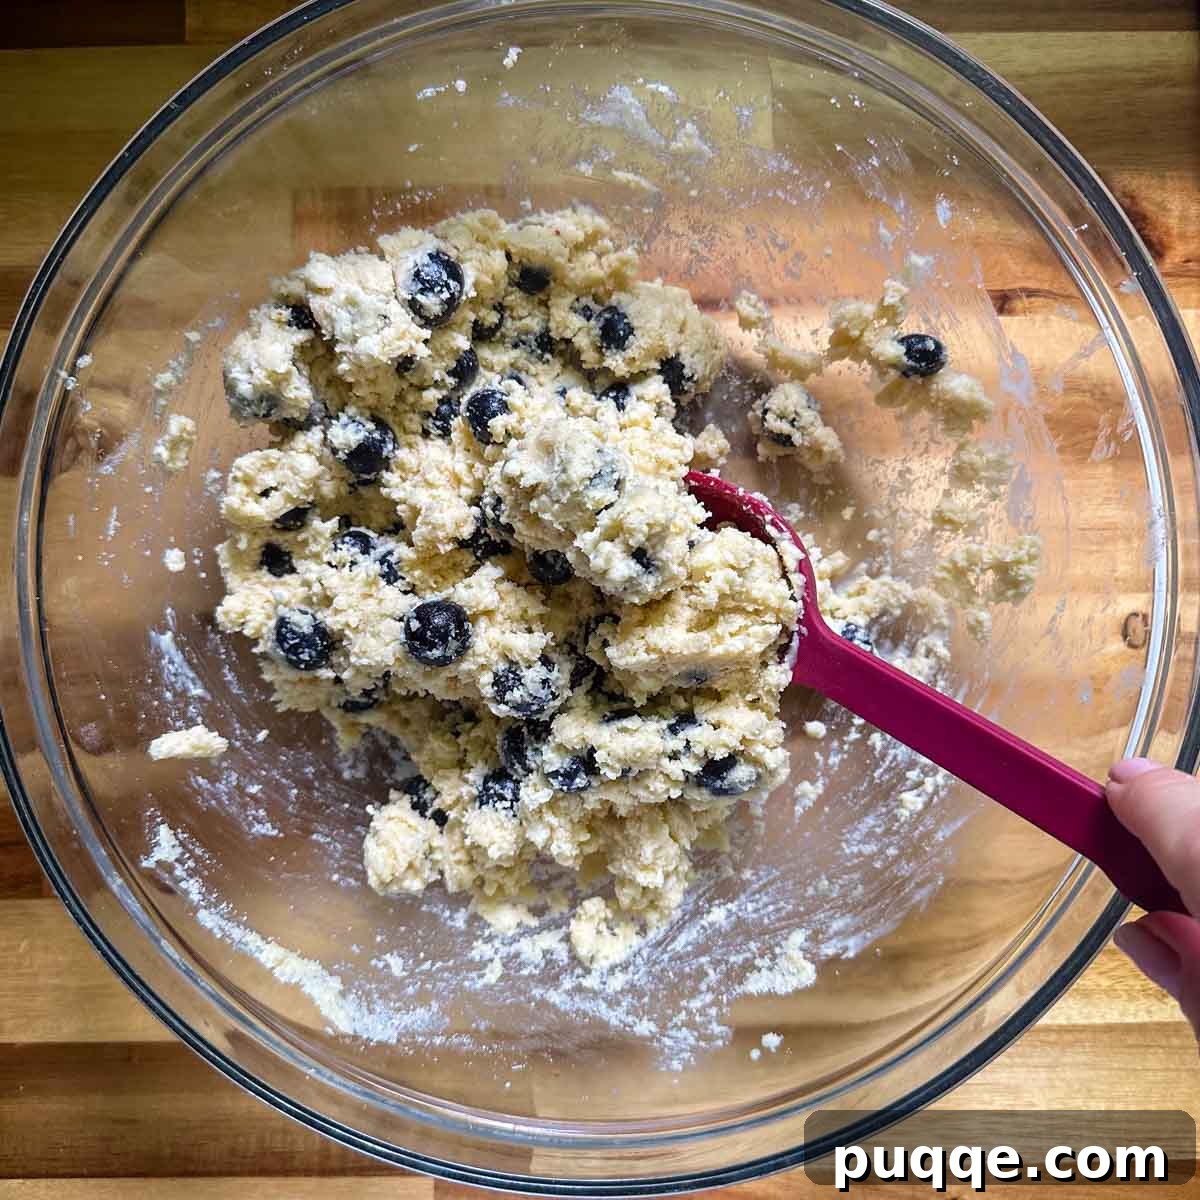
4. Shape, Cut, and Bake to Golden Perfection
Once chilled, transfer the dough onto a greased parchment-lined baking sheet or a silicone baking mat. Gently shape it into a thick disc, approximately 6-7 inches (15-18 cm) in diameter and about 1 to 1½ inches (2.5-4 cm) thick. Using a sharp knife, cut the disc into 8 equal wedges (or “wedgies,” if you prefer a playful term!). Carefully spread the wedges slightly apart on the baking sheet to allow for even baking. For optimal shape retention and to prevent over-browning, pop the entire baking sheet into the freezer for another 30 minutes. Meanwhile, preheat your oven to 375ºF (190°C). Bake the frozen scones for 22-25 minutes, rotating the pan halfway through, until they are golden brown on top and cooked through. Cool slightly, then enjoy immensely!
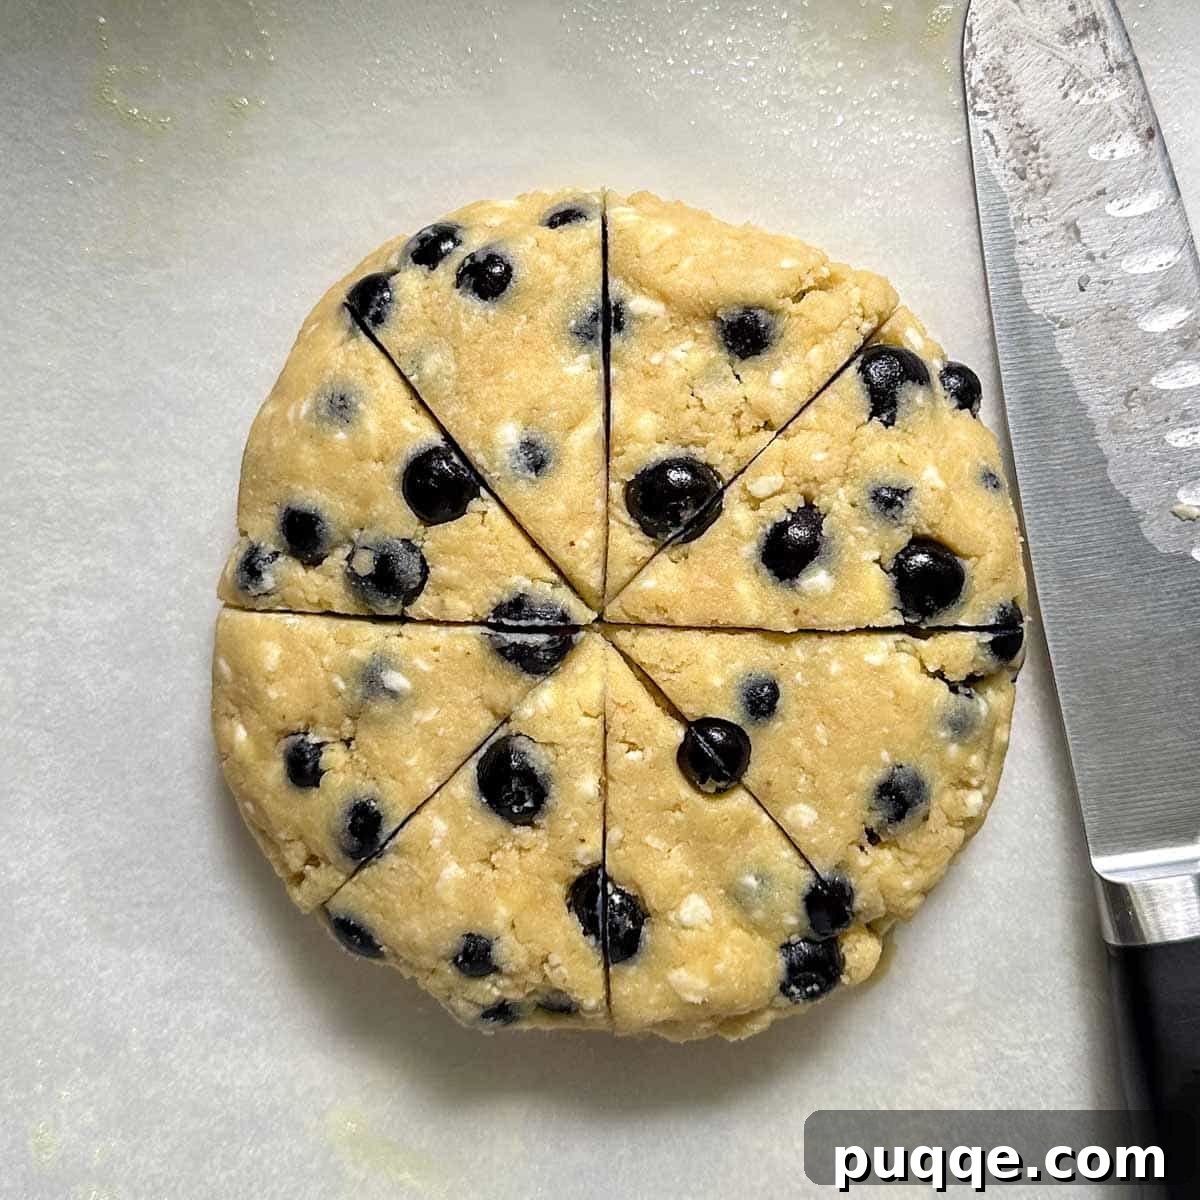
Endless Possibilities: Creative Variations for Your Scones!
While fresh blueberries are often preferred for their ease of use and minimal moisture contribution, you can certainly use frozen blueberries in this recipe. Just be aware that they might add a bit more moisture, so adjust baking time slightly if needed. Of course, if blueberry scones aren’t quite what you’re craving, this versatile dough is a perfect base for a myriad of other flavors. Simply substitute an equal amount of strawberries, raspberries, or blackberries for the blueberries.
But why stop there? The possibilities are truly boundless! Experiment by swapping out the berries for other exciting mix-ins. Imagine decadent chocolate chip scones, crunchy nut scones, or a comforting apple-cinnamon combination with finely diced apples. You can further play with the flavor profile by adding a tablespoon of citrus zest for a bright twist, incorporating dried fruits like cranberries or apricots, or even venturing into savory territory with a cheesy herb scone. Let your creativity soar and customize these delightful almond flour scones to your heart’s content!
Make-Ahead, Freeze, and Bake Method for Convenience
One of the best features of this scone recipe is its freezer-friendly nature, making it an excellent make-ahead option for busy mornings or unexpected guests. Baking the dough when it’s cold is key to achieving that perfect tender crumb, and freezing them beforehand is a fantastic way to ensure this.
To prepare your scones in advance, first place the scone dough in the refrigerator for at least 30 minutes to firm up before shaping and cutting. Once chilled, gently shape the dough into a disc and cut it into 8 wedges as instructed in the main recipe. If desired, you can brush the tops with a little cream and sprinkle with coarse sugar at this stage for a beautiful finish. Then, transfer the cut scones directly onto a baking sheet and place them in the freezer.
Once the scones are frozen solid (this usually takes a couple of hours), individually wrap each scone tightly in plastic wrap. Then, transfer the wrapped scones to a gallon-sized freezer bag or an airtight container. They can be stored in the freezer for up to 3 months.
When you’re ready to enjoy fresh-baked scones, simply unwrap them and place them on a parchment-lined baking sheet. Bake them directly from frozen, adding an extra 1-2 minutes to the suggested baking time to ensure they are fully cooked through. This method allows you to have warm, bakery-quality gluten-free scones whenever the craving strikes!
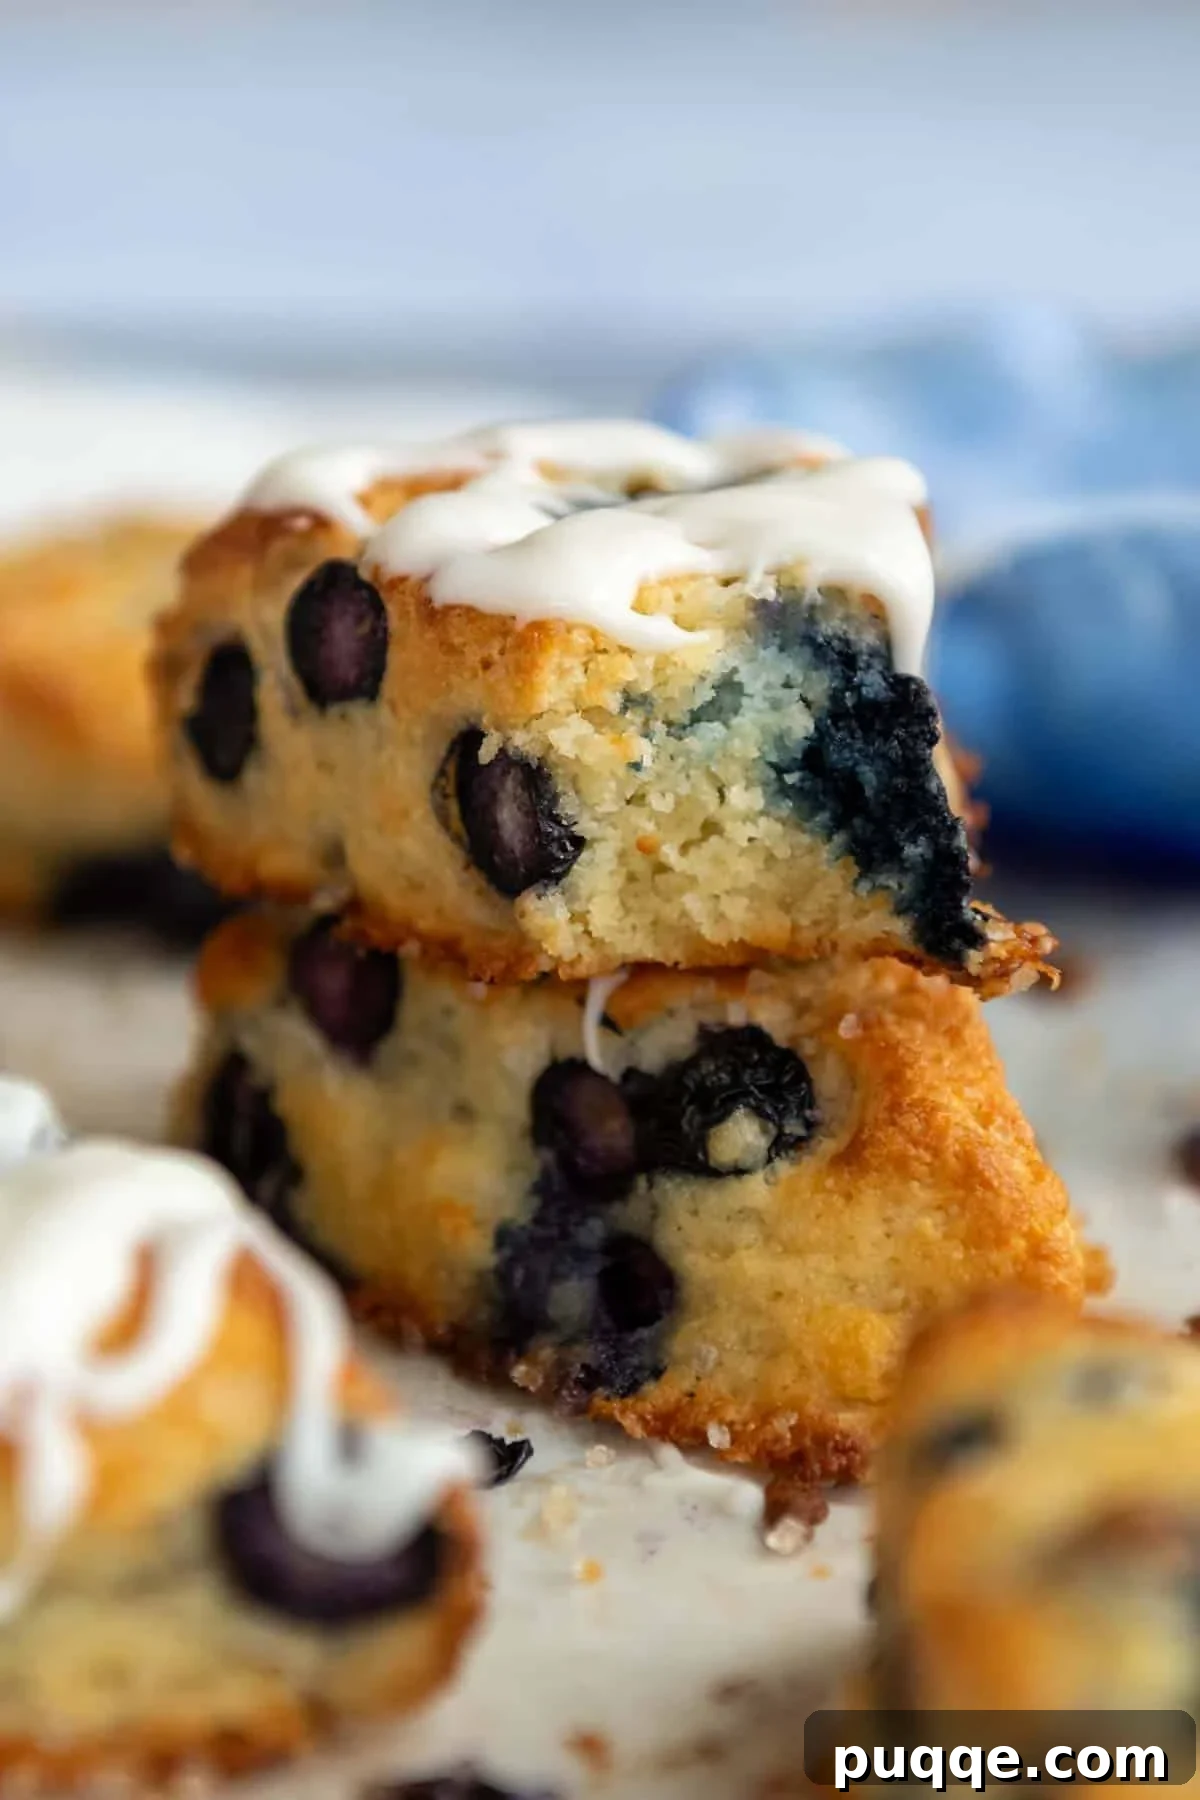
Save This Recipe to Your Pinterest Board!
Let’s be friends on Pinterest! I’m always sharing great recipes!
Did you make this recipe? I love hearing from you! Leave a star rating and comment below the recipe card. It helps others when searching for recipes and I appreciate feedback from our community. You will always hear back from me! -Melissa

Legit Easy Peasy Fluffy Almond Flour Scones

Melissa Erdelac
8
15 minutes
25 minutes
1 hour 40 minutes
Pin Recipe
Rate This Recipe
Remove Ads
Ingredients
- 2 ¼ cups (240 g) blanched almond flour
- ⅓ cup (72 g) granulated sugar
- ¼ cup (35 g) cornstarch, or tapioca starch
- 2 teaspoons baking powder
- ¼ teaspoon salt
- 4 tablespoons (58 g) cold unsalted butter, chopped
- 1 cup (190 g) blueberries, fresh preferred
- 1 large egg
- ¼ cup (61 g) sour cream, or yogurt
- 1 teaspoon vanilla or almond extract
- optional heavy cream, for brushing on before baking
- optional turbinado (coarse) sugar, for sprinkling on before baking
Equipment
-
Baking Sheets
-
Pastry Cutter
-
Almond Flour
Instructions
-
In a large mixing bowl, whisk together the almond flour, sugar, cornstarch, baking powder, and salt until uniformly combined.2 ¼ cups (240 g) blanched almond flour, ⅓ cup (72 g) granulated sugar, ¼ cup (35 g) cornstarch, 2 teaspoons baking powder, ¼ teaspoon salt
-
Add the cold, chopped butter pieces to the dry mixture. Use a pastry blender, a fork, or your fingertips to quickly work the butter into the flour until it resembles a coarse, sandy mixture with some pea-sized butter chunks remaining. Gently stir in the blueberries or any alternative mix-ins you choose.4 tablespoons (58 g) cold unsalted butter, 1 cup (190 g) blueberries
-
In a separate small bowl, whisk together the egg, sour cream, and vanilla extract. Pour this wet mixture into the almond flour mixture and stir until just combined and no dry pockets of flour remain. Cover the bowl with plastic wrap and place it in the freezer for 30 minutes to quickly chill, or refrigerate for up to 2 hours.1 large egg, ¼ cup (61 g) sour cream, 1 teaspoon vanilla or almond extract
-
Meanwhile, line a baking sheet with parchment paper and lightly spray with nonstick cooking spray. Once the dough is chilled, dump the mixture onto the prepared baking sheet and gently shape it into a thick disc, about 6-7 inches (15-18 cm) in diameter and 1 – 1½ inches (2.5-4 cm) thick.
-
Using a sharp knife, cut the disc into 8 equal triangular wedges. Use a small spatula to carefully separate the cut scones on the baking sheet, ensuring they are at least 2 inches apart to allow for even baking. If desired, brush the tops and sides of the scones with heavy cream and sprinkle with turbinado (coarse) sugar for a beautiful golden crust.
-
For the best results, place the baking sheet with the separated scones into the freezer for an additional 30 minutes. This extra chill helps them maintain their shape and prevents them from spreading too much or becoming overly browned during baking. While the scones are chilling, preheat your oven to 375℉ (190°C).
-
Bake the scones on the middle rack of your preheated oven for 22-25 minutes, rotating the pan halfway through the baking time. The scones are ready when their tops are set, lightly golden brown, and an internal thermometer registers 205-207℉ (96-97°C). Allow them to cool on the baking sheet for 10 minutes before carefully transferring them to a wire rack to cool completely.
Notes
Storing and Freezing
Once completely cooled, store your baked scones in an airtight container at room temperature for up to 2 days. For extended freshness, wrap individual scones tightly in plastic wrap and transfer them to a freezer-safe bag or airtight container. They can be frozen for up to 3 months. For best enjoyment, reheat them slightly before serving.
Calories: 311kcal
, Carbohydrates: 22g, Protein: 8g, Fat: 23g, Saturated Fat: 6g, Polyunsaturated Fat: 0.4g, Monounsaturated Fat: 2g, Trans Fat: 0.2g, Cholesterol: 40mg, Sodium: 129mg, Potassium: 135mg, Fiber: 4g, Sugar: 12g, Vitamin A: 259IU, Vitamin C: 2mg, Calcium: 123mg, Iron: 1mg
Did you make this recipe?
Please leave a star rating and review below. It helps others when searching for recipes and I LOVE feedback!