
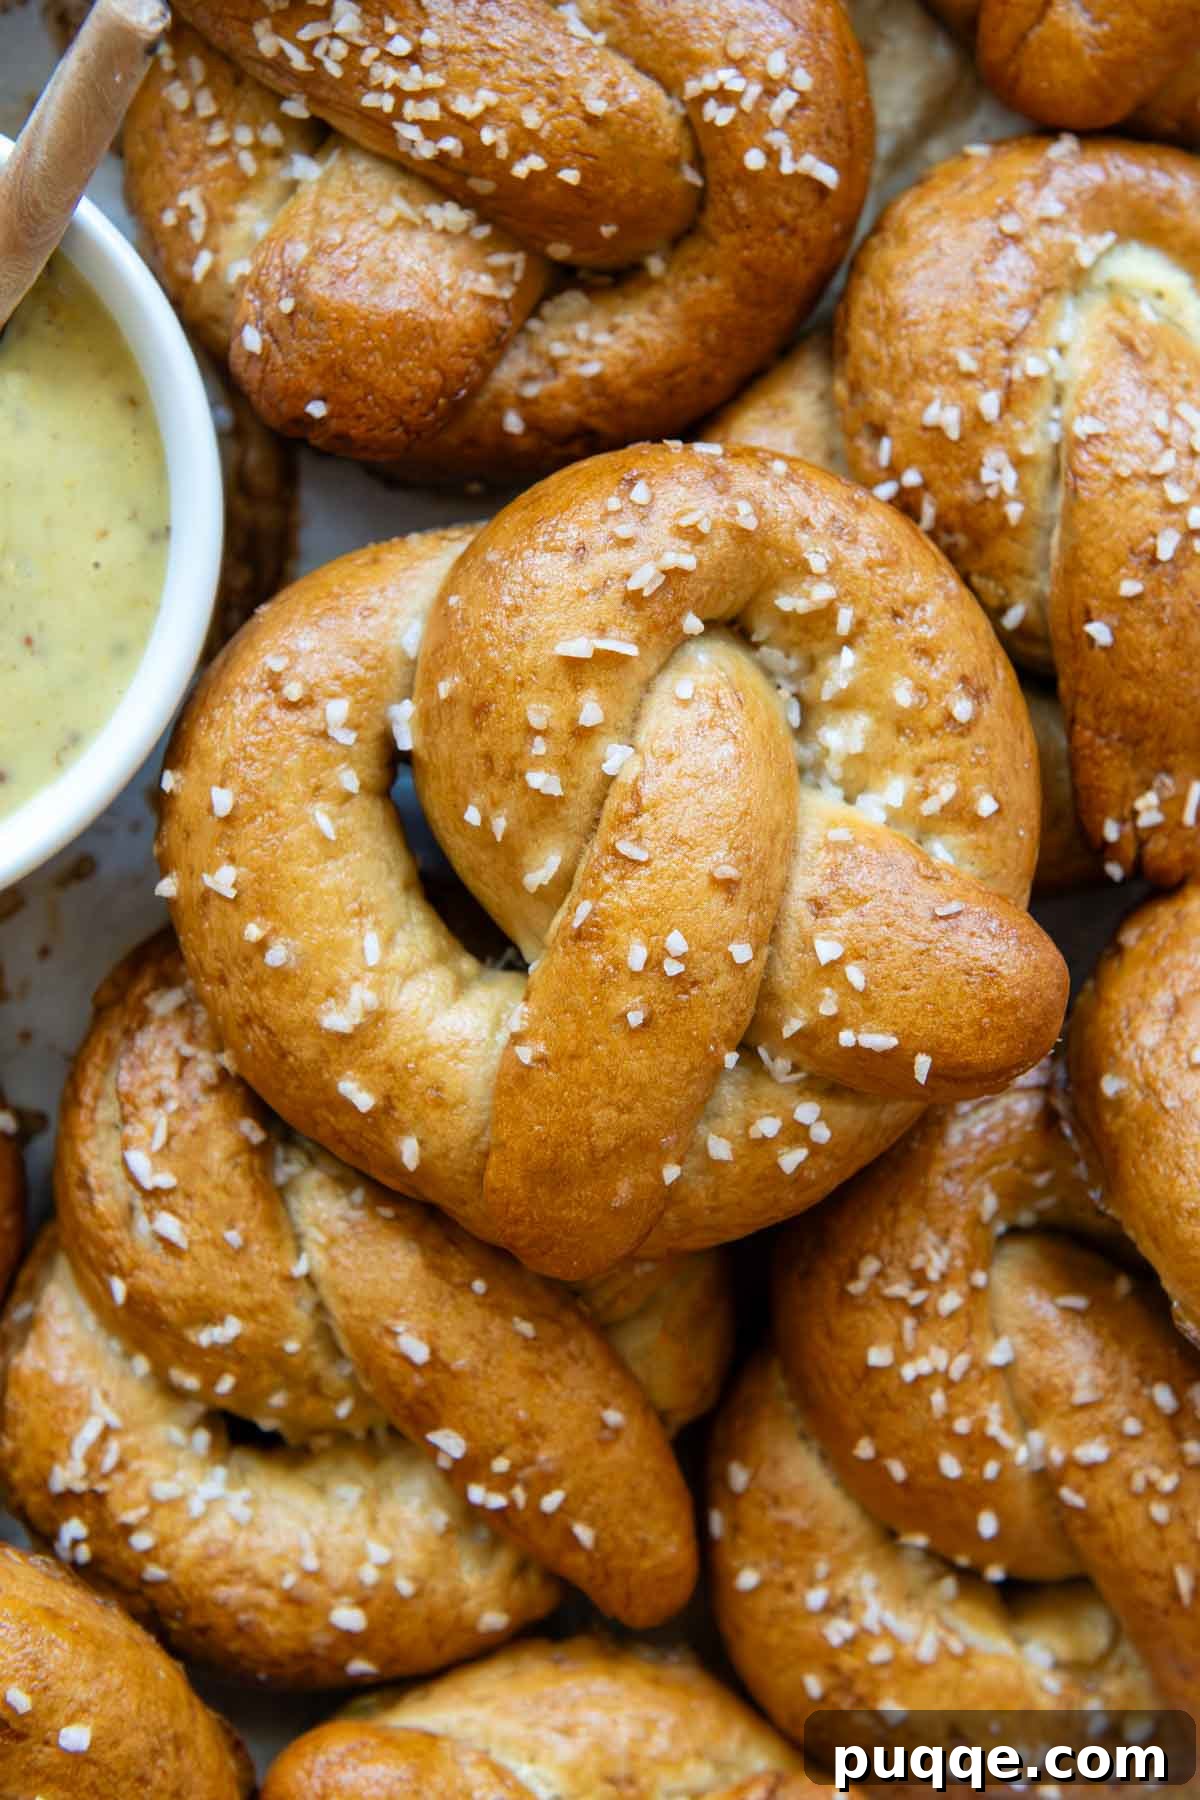
If you’ve been yearning for that delightful mall snack experience, look no further! These homemade soft gluten-free pretzels are here to transport you back to those food court days, complete with their signature golden, chewy crusts and wonderfully doughy interior. Crafted with a premium all-purpose gluten-free flour blend and enhanced with special ingredients, this easy-to-follow recipe ensures a taste and texture so authentic, no one will guess they’re entirely gluten-free. Get ready to indulge in the ultimate GF pretzel victory!
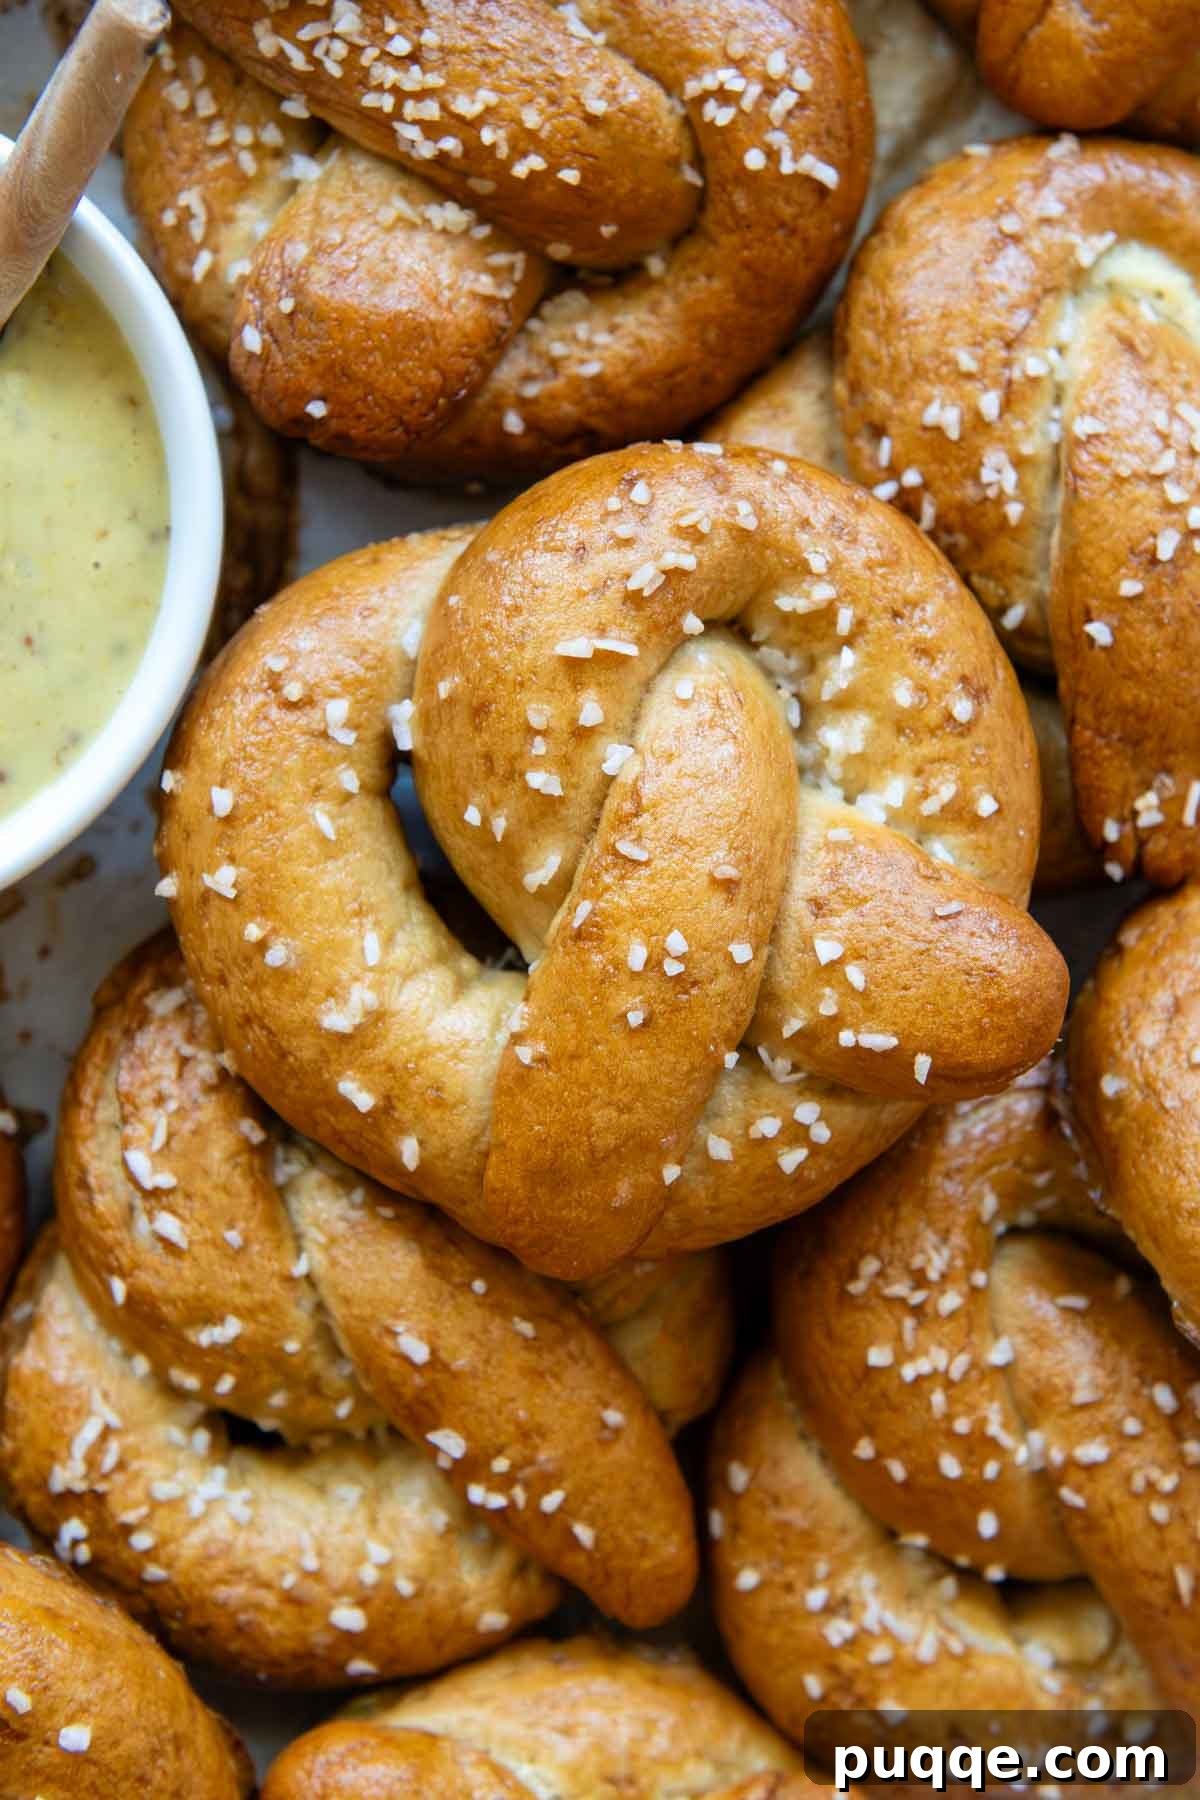
Crafting the Ultimate Soft Gluten-Free Pretzels at Home
For too long, the soft pretzel has been a forbidden pleasure for those navigating a gluten-free diet. The mere thought of recreating that iconic, chewy, and soft texture without gluten seemed like an impossible dream. But I am thrilled to share a groundbreaking recipe that defies expectations! These incredibly soft, perfectly doughy gluten-free pretzels are not only achievable but surprisingly simple to make, requiring basic ingredients and straightforward steps. They truly capture the authentic taste and texture of your beloved mall pretzels, making the “say it ain’t so” moments a thing of the past.
Just like our crispy gluten-free mozzarella sticks, this recipe unlocks the joy of a classic treat for everyone. Our easy, homemade gluten-free pretzel recipe uses a reliable all-purpose GF flour blend, but its secret weapon lies in the addition of a few key ingredients designed to deliver an exceptionally soft and pliable crumb. This thoughtful combination is what makes the dough a dream to work with, allowing for easy shaping and a truly remarkable end product.
My journey to perfecting gluten-free dough began with my famously soft gluten-free dinner rolls. Through extensive experimentation, I discovered that incorporating a specific gluten-free starch, such as potato starch, significantly contributes to a light, fluffy texture. This ingredient is crucial for providing structure to the dough, making it highly workable for intricate shapes like pretzels, without the need for excessive flour that can lead to a dry, dense result. The process, from mixing the dough to the final bake, is designed to be approachable and rewarding. With step-by-step guidance, including helpful photos, you’ll be making the best GF pretzels like a seasoned pro. Let’s dive in and bring those cherished snack memories to life!
Essential Ingredients for Perfect Gluten-Free Pretzels
Navigating a gluten-free diet can be challenging enough, so our goal is to keep the ingredient list simple and accessible without compromising on quality or flavor. For successful gluten-free yeast breads, selecting the right ingredients is paramount. Below, we’ll delve into each key component, offering insights and potential modifications to ensure your pretzels turn out perfectly.
- Gluten-Free All-Purpose Flour Blend: The foundation of any successful GF baked good is a high-quality flour blend. For this recipe, and indeed for many of my baking endeavors, I highly recommend Cup4Cup gluten-free flour. Its unique composition consistently yields a softer texture, especially vital for breads and doughs where pliability is key. While other blends may work, Cup4Cup offers superior results for this recipe.
- Potato Starch (not flour): This is a game-changer for achieving that desired soft, yet structured dough. Instead of adding more gluten-free flour, which can dry out the dough, potato starch provides essential structure without increasing density. It’s crucial for a workable dough that can be shaped into pretzels. For best results, stick to potato starch, though tapioca starch or a minimal amount of additional GF flour can be substituted in a pinch, understanding that the texture may vary slightly.
- Psyllium Husk Powder: This ingredient is a secret weapon in gluten-free baking. It acts as a binder, mimicking the elasticity of gluten, which is essential for shaping soft pretzels. Beyond structure, psyllium husk powder is excellent at retaining moisture, preventing your pretzels from becoming tough or crumbly. For best visual results, I recommend using a linked brand that ensures the baked dough remains light-colored, as some psyllium husk powders can impart a dark or even purplish hue, which can be unexpected.
- Active Dry Yeast: While I often opt for instant dry yeast for its convenience, active dry yeast is preferred here. Its slightly longer activation and rise time work synergistically with the dough’s structure, contributing to the perfect texture of these soft pretzels. Activating it in warm water with a touch of sugar ensures it’s bubbly and ready to work its magic.
- Softened Butter: Butter adds richness and tenderness to the dough. For those seeking a dairy-free option, this is the only necessary modification. Simply substitute with your favorite vegan butter in equal amounts for equally delicious results, maintaining the soft interior and delicious flavor profile.
Let’s Make These Delicious Pretzels Together!
Get ready to roll up your sleeves and create some magic! Below, you’ll find detailed, step-by-step instructions accompanied by photos to guide you through each stage of the pretzel-making process. For precise ingredient quantities and a full printable recipe card, please scroll further down the page.
Activate the Yeast for Optimal Rise
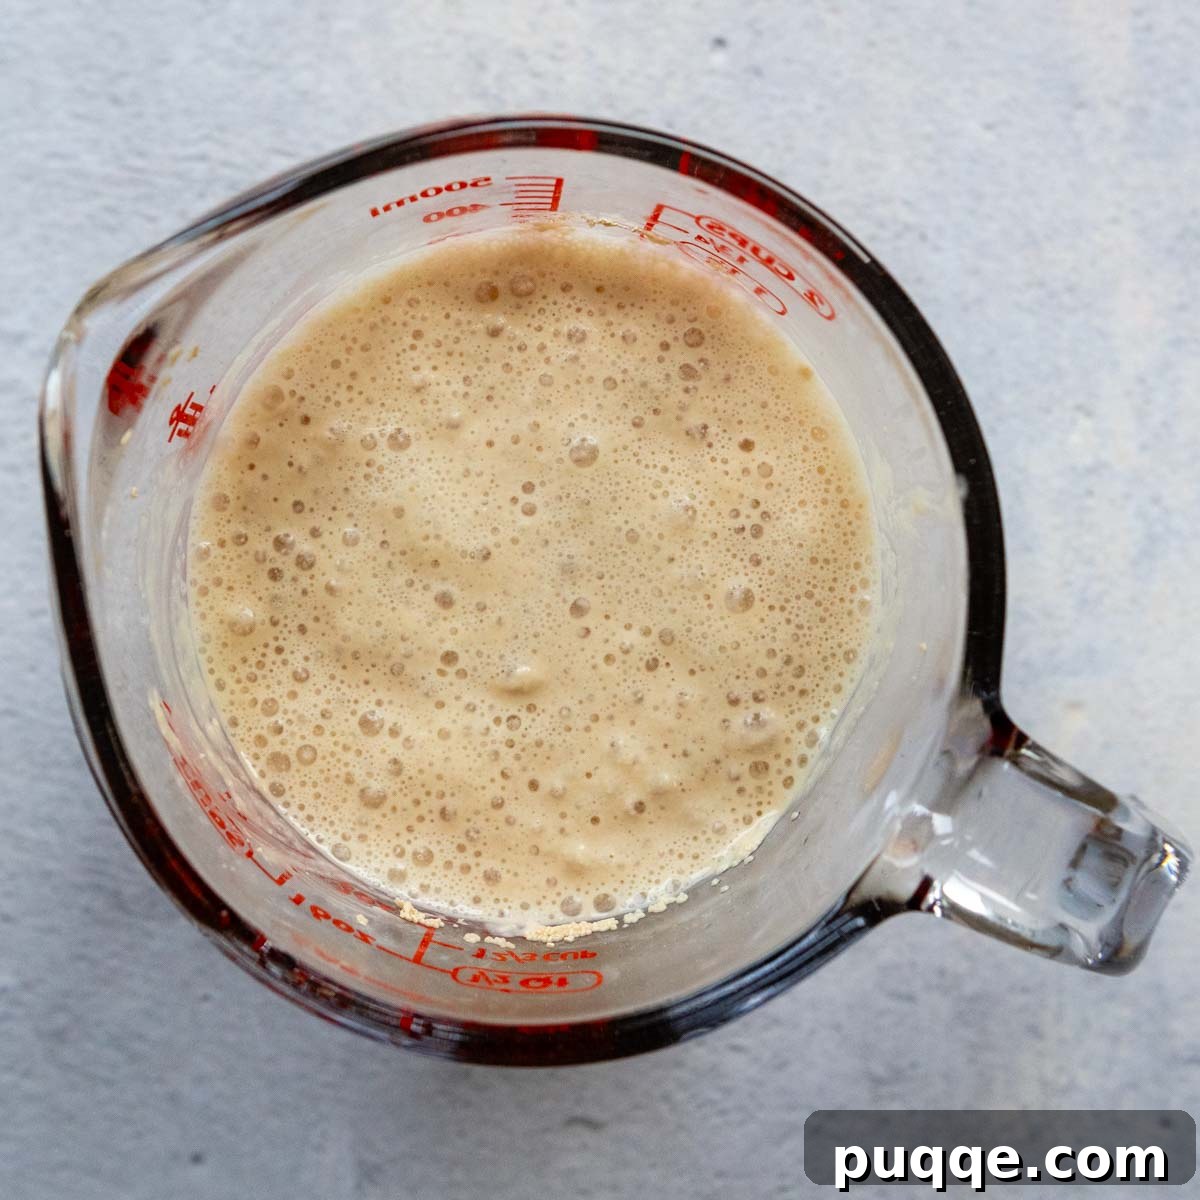
The first crucial step is activating your yeast. In a small bowl or glass measuring cup, combine the active dry yeast with warm water (ideally around 110ºF) and one teaspoon of granulated sugar. Give it a gentle stir. Allow this mixture to rest for about 5 minutes. You’ll know your yeast is active and thriving when the surface becomes visibly frothy and bubbly, as demonstrated in the image below. Using an instant-read thermometer is highly recommended to ensure the water is at the perfect temperature, which is vital for yeast activation.
Combine and Mix the Pretzel Dough
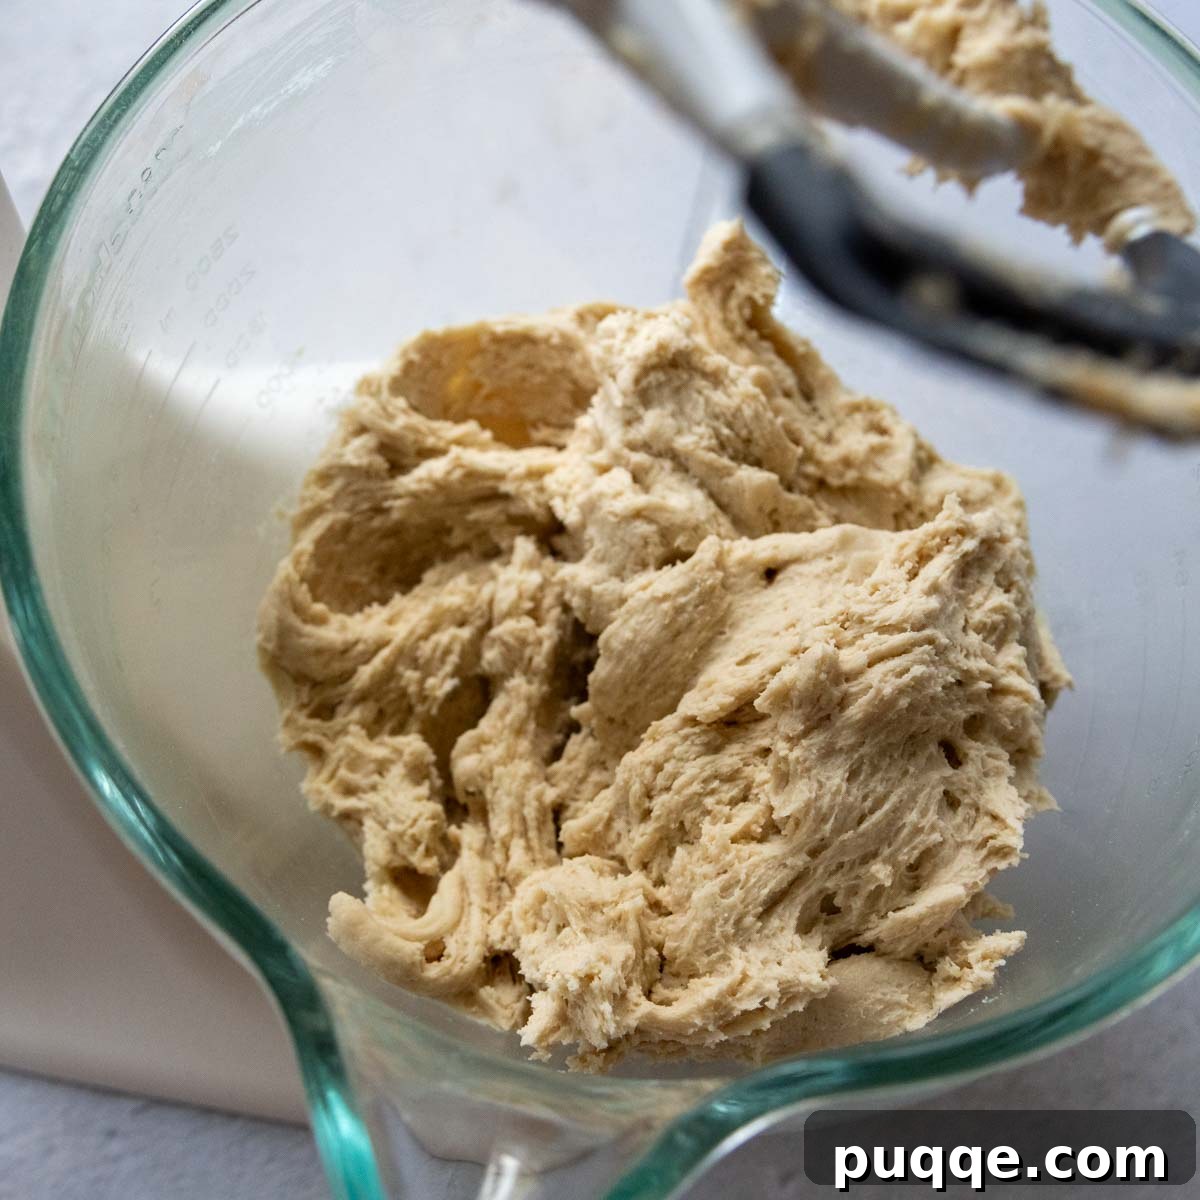
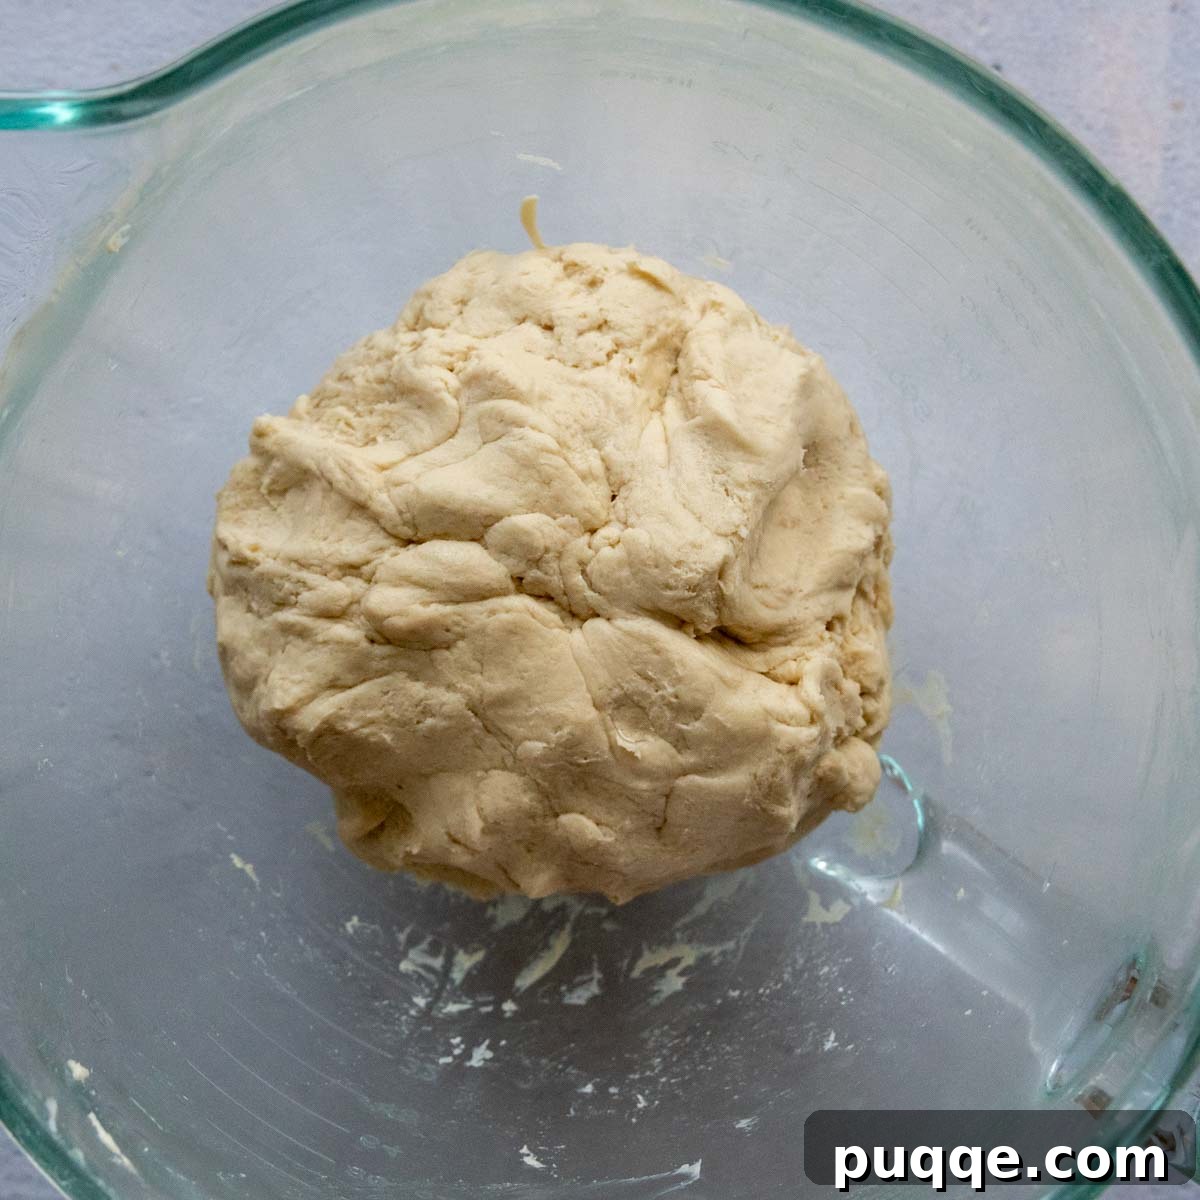
Making the dough for these gluten-free pretzels is surprisingly simple. Begin by combining all your dry ingredients – the gluten-free all-purpose flour blend, potato starch, brown sugar, psyllium husk powder, salt, and baking powder – in the bowl of a stand mixer. Ensure your mixer is fitted with a paddle attachment. Once the dry ingredients are gently mixed, add the activated yeast mixture, the room-temperature egg, and the softened butter. Start mixing on low speed until all ingredients are just combined, then increase the speed slightly to medium-low and continue mixing for 3-4 minutes. At this stage, the dough will be quite stiff. If it appears excessively dry or struggles to come together, you may gradually add 1-2 tablespoons of additional water, one tablespoon at a time. Remember, pretzel dough naturally has a lower hydration level compared to other bread doughs, so avoid adding too much extra water, as this could result in a gummy texture in your baked pretzels.
Allow the Dough to Rest and Rise
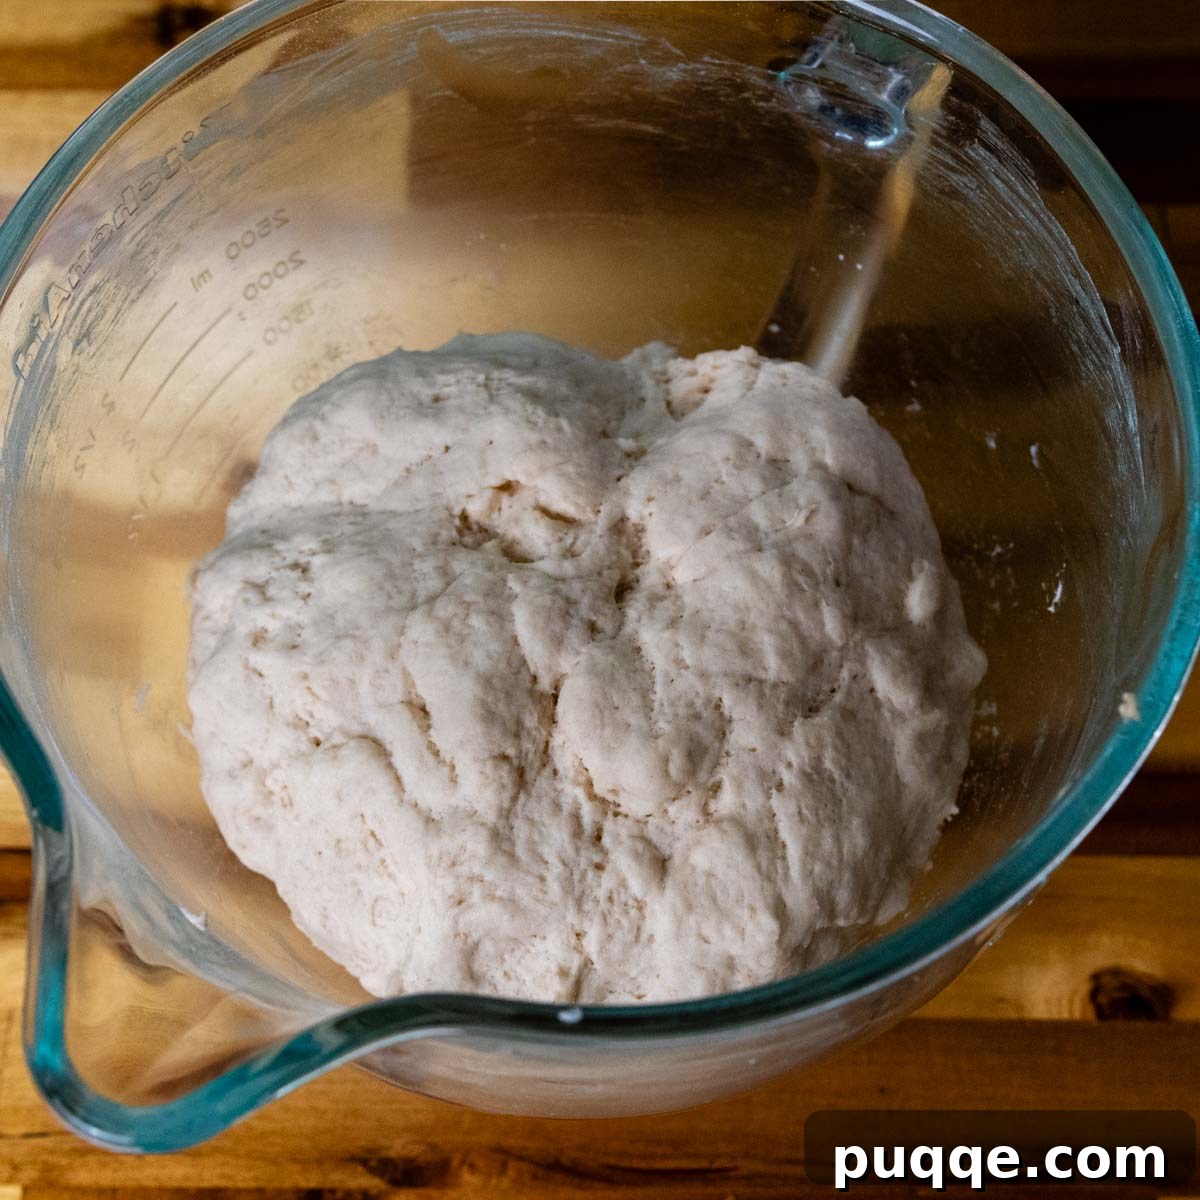
After mixing, use a silicone spoon or spatula to scrape the dough down from the sides of the bowl, forming it into a neat ball at the bottom. Cover the bowl tightly with plastic wrap to create a warm, humid environment. Place the covered bowl in a warm, draft-free location to rise until it has almost doubled in size. This process typically takes approximately 60 to 90 minutes, depending on the warmth of your kitchen. The second picture below illustrates the appearance of the dough after it has successfully risen, showcasing its increased volume and airy texture.
Mastering the Art of Pretzel Shaping
Once your dough has risen beautifully, it’s time for one of the most enjoyable and uniquely satisfying parts of the process: shaping the dough into those familiar, iconic pretzel twists! While it might seem daunting at first, with a few simple tips, you’ll be shaping perfect pretzels with ease.
Easy How-To: Shape Your Pretzels to Perfection
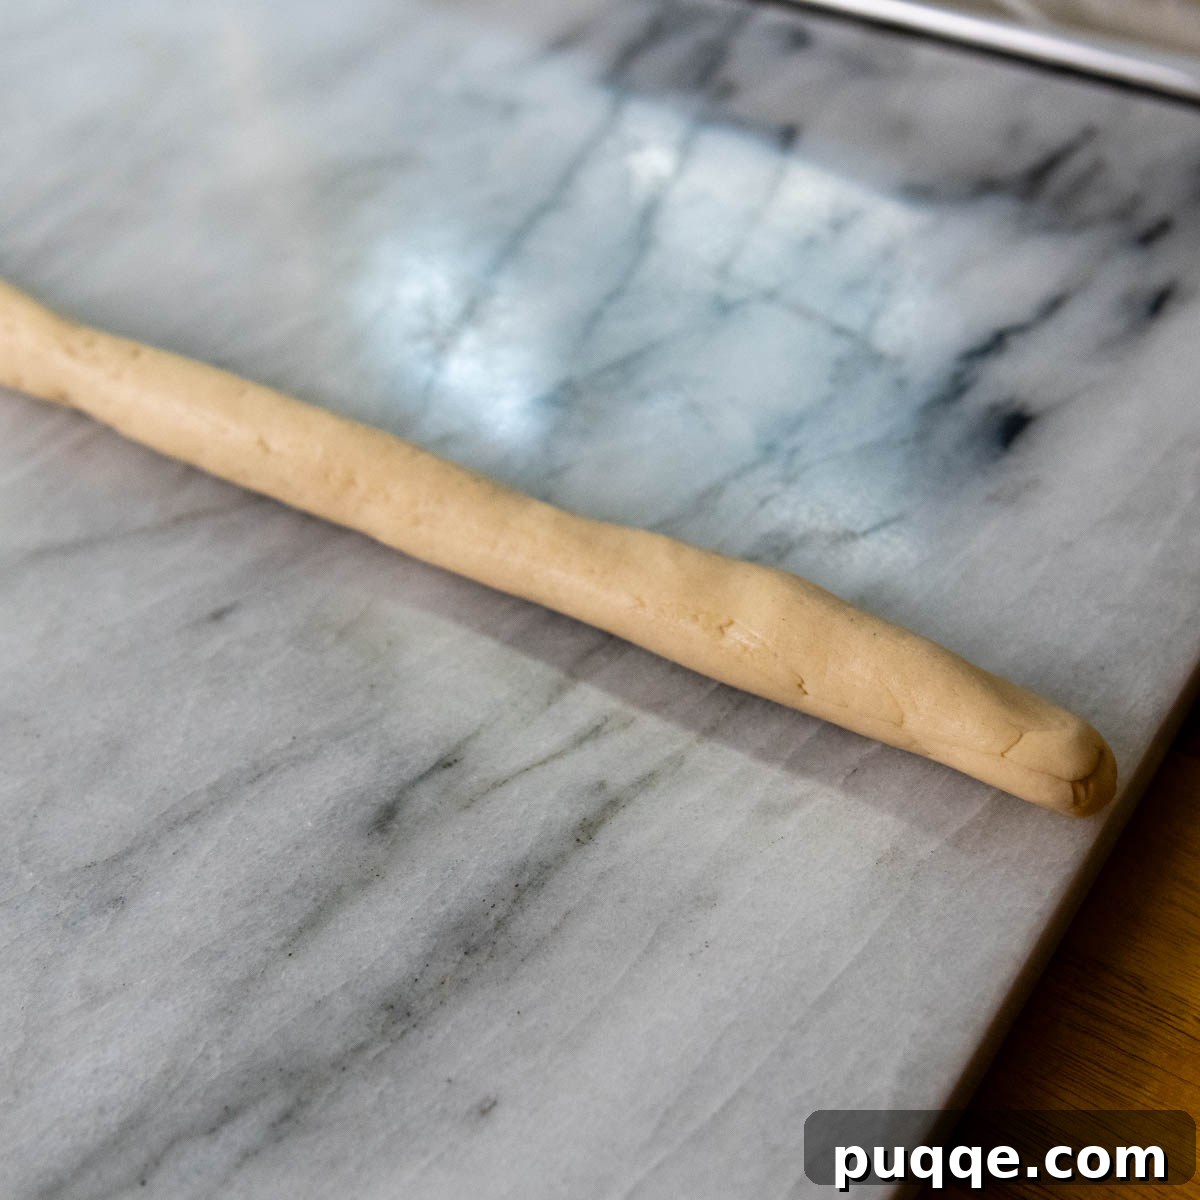
The key to effortlessly shaping your pretzels lies in the length of your dough rope. A longer rope is far easier to twist and manipulate into the traditional pretzel form. I highly recommend aiming for a 16-inch rope. This length strikes the perfect balance: it’s long enough to create distinct twists but still manageable enough to easily transfer from your workspace to the baking sheets and eventually into the boiling water.
When working with gluten-free dough, I generally advise against using excessive flour on your work surface, as this can dry out the dough and alter its delicate texture. Instead, a silicone baking mat or a smooth marble slab works exceptionally well as a non-stick surface for shaping. It’s also a good idea to keep some nonstick cooking spray close by to lightly grease your hands if the dough becomes a little sticky, ensuring a smooth and frustration-free shaping experience.
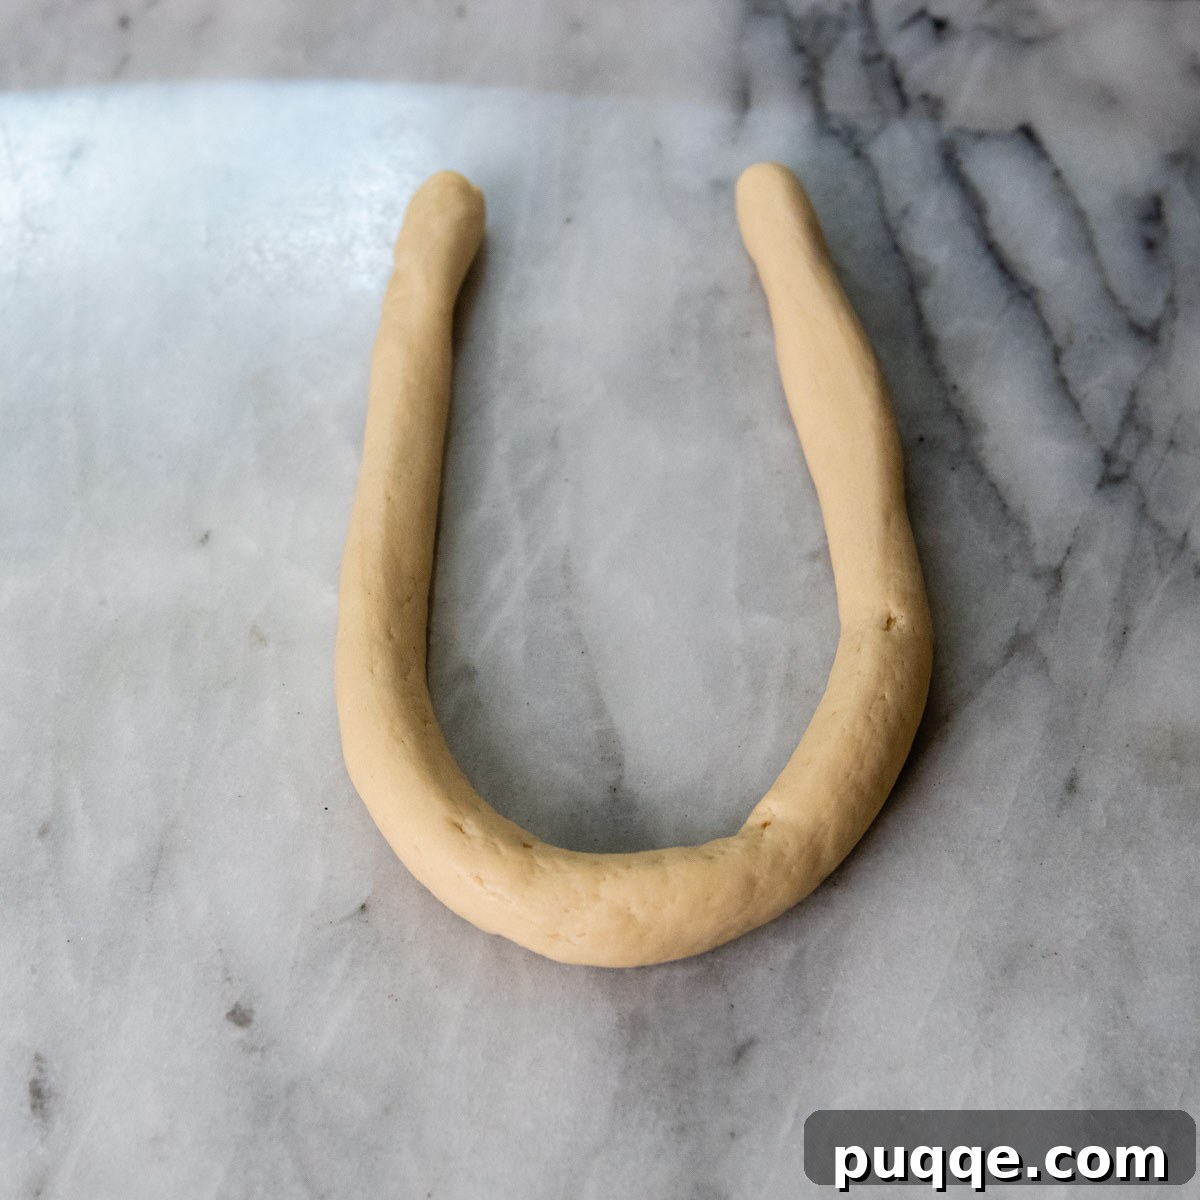
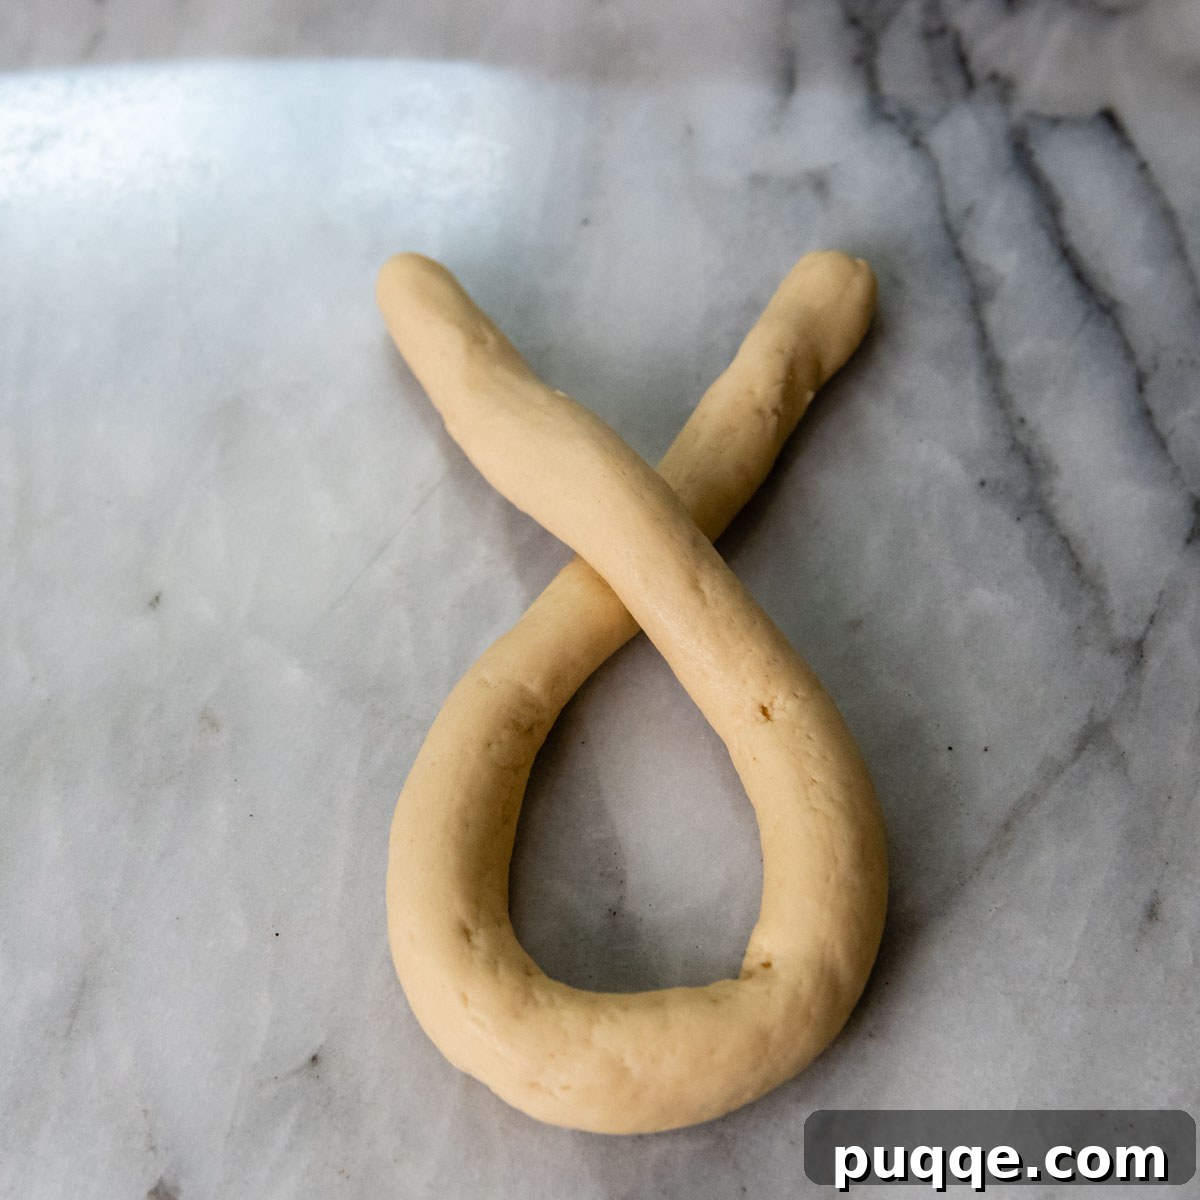
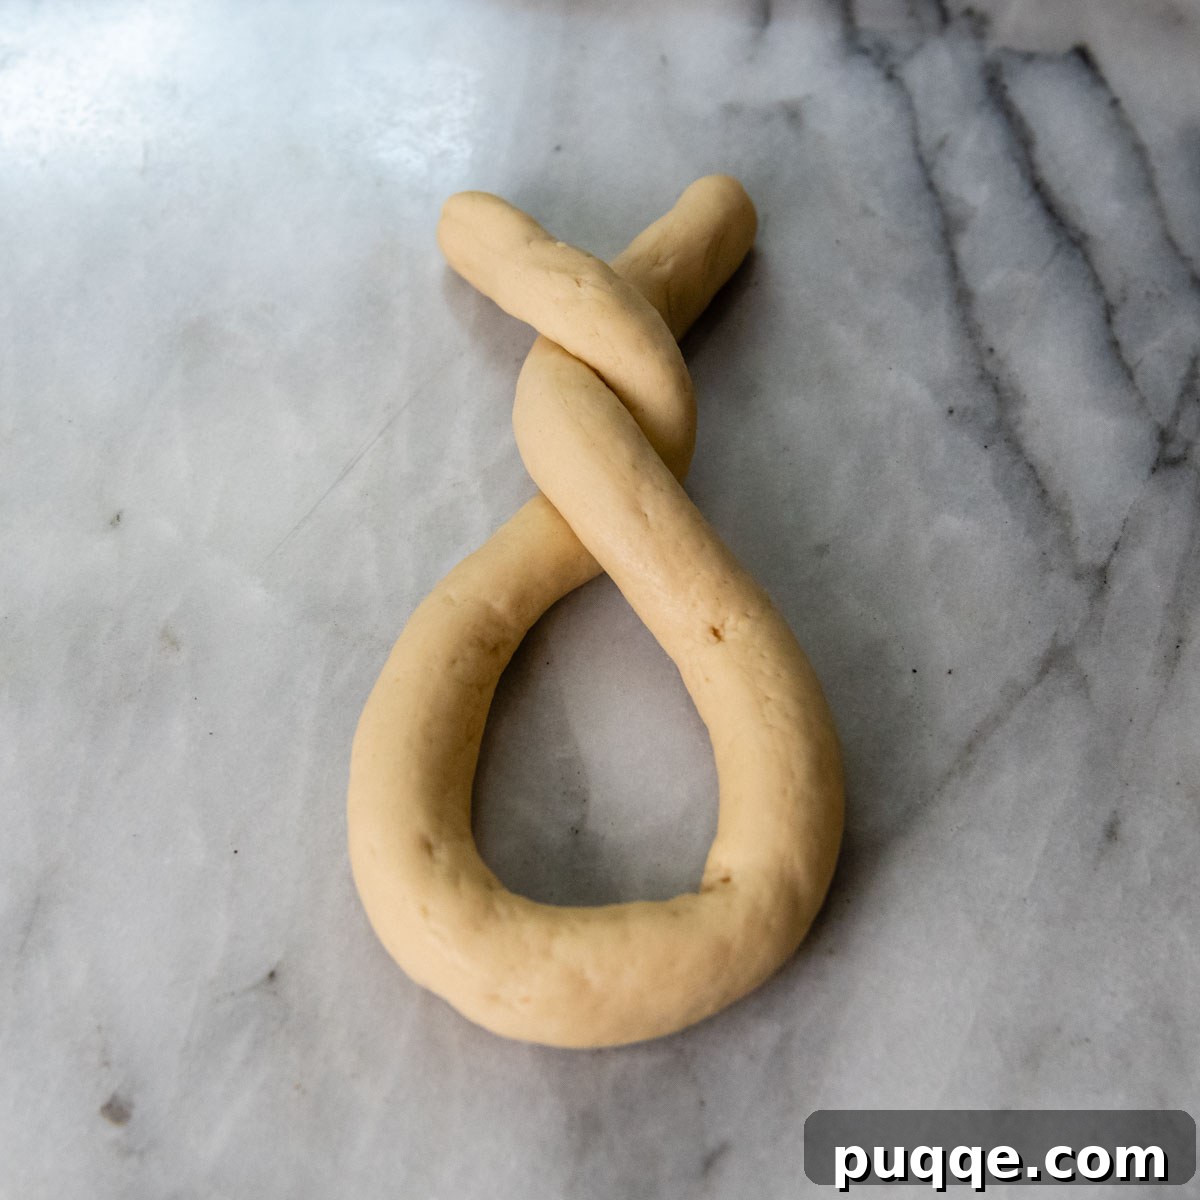
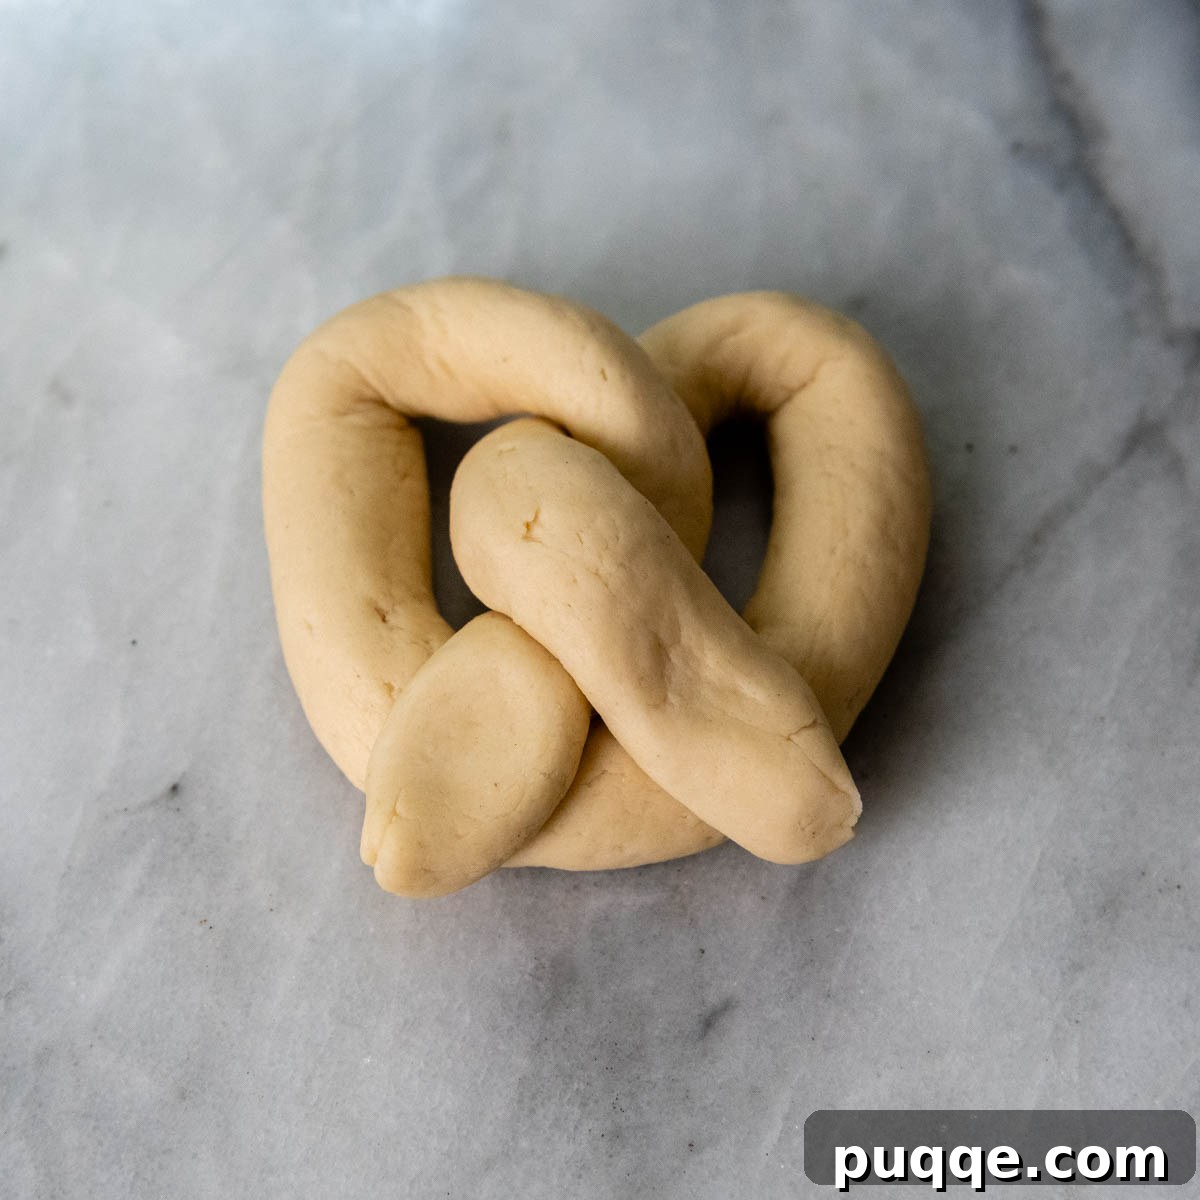
Here’s the simple shaping technique: First, roll a portion of dough into a smooth, uniform 16-inch rope. Then, gently bend the rope upwards to form a ‘U’ shape. Take the two top ends of the ‘U’ and twist them over each other twice, creating a neat, intertwined section (refer to the detailed photos below for visual guidance). Finally, bring the twisted end down to meet the bottom curve of the ‘U’. Lightly press the ends onto the bottom section to secure the classic pretzel shape, which will help them maintain their form during the boiling process. This method ensures your pretzels look professionally crafted and hold their integrity.
Boiling and Baking for the Perfect Pretzel
Achieving that signature chewy crust and beautiful golden-brown color on soft pretzels is not magic; it’s a precise, essential step involving a brief dip in an alkaline water bath. This crucial process sets the outer layer of the dough, preventing it from over-expanding during baking, and contributes significantly to the shiny, darker, and perfectly chewy exterior that makes soft pretzels so irresistible.
The Essential Baking Soda Bath
While you are busy shaping your pretzels, begin by bringing 4 quarts of water to a rolling boil in a large pot. It’s important not to add the baking soda and sugar yet; these will be incorporated just before you’re ready to dip the shaped pretzels. This timing is key to maintaining the optimal alkalinity for the bath.
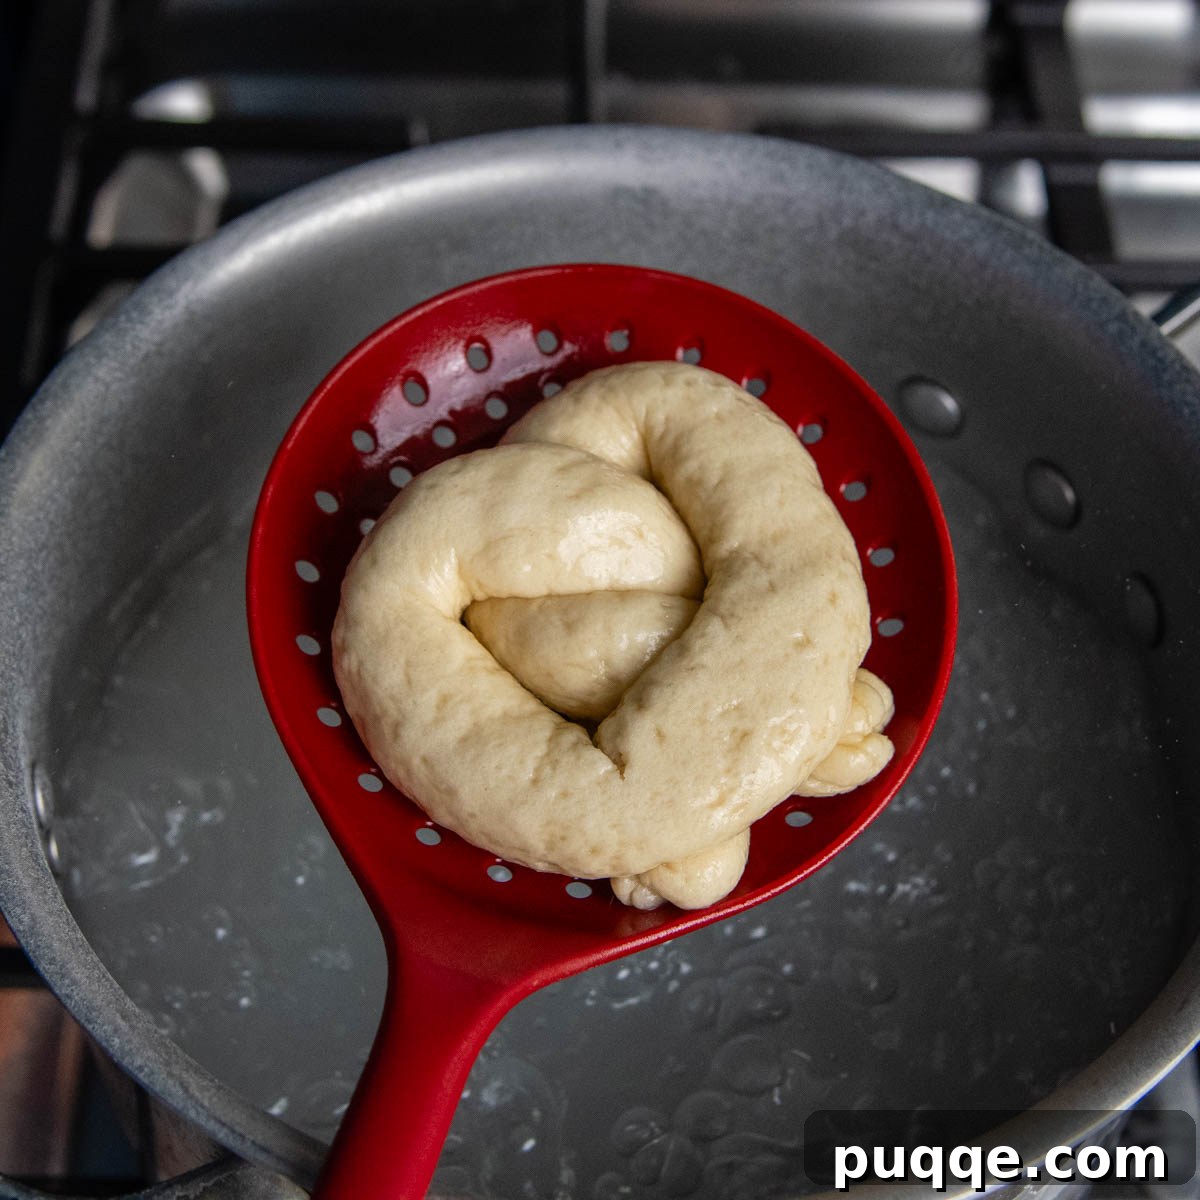
Here’s a crucial piece of advice I learned the hard way: when adding the baking soda, do so very slowly and gradually! If you pour it in too quickly, the water will foam up dramatically and likely boil over, creating a big mess. Add it in small increments, allowing the water to settle between additions. It will bubble up quite a lot initially but will then subside. Once the bath is ready, use a large slotted spoon to gently lower each shaped pretzel into the water. Boil each side for 10 seconds, then use the spoon to carefully flip it and boil for another 10 seconds. Promptly remove the pretzel to a parchment-lined baking sheet, ensuring it’s right side up, and continue with the remaining pretzels.
Egg Wash, Salt, and Bake to Golden Perfection
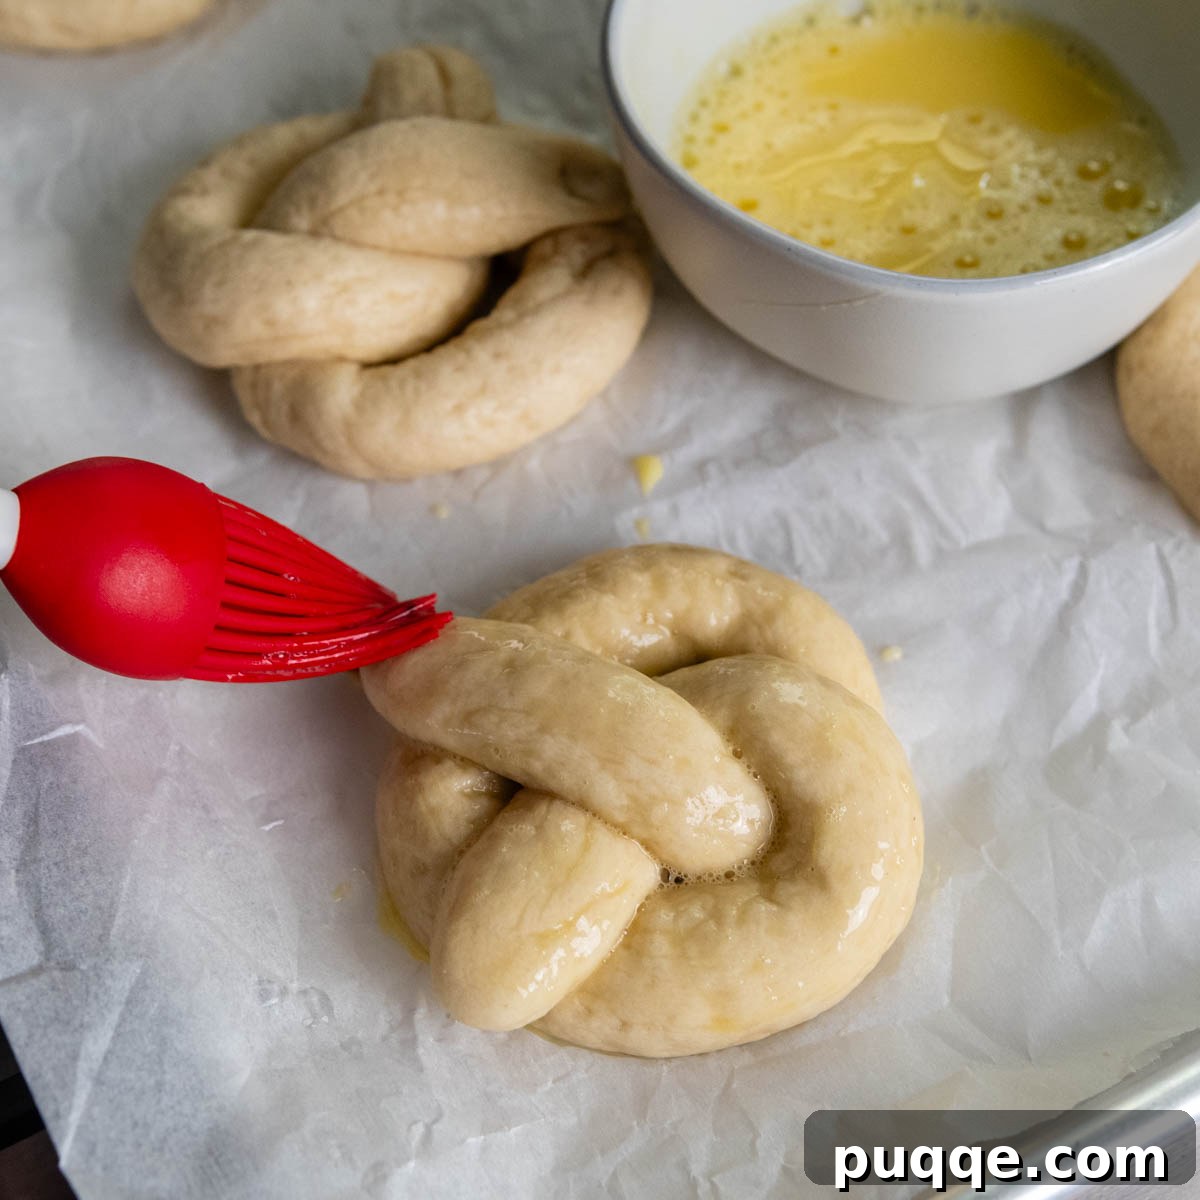
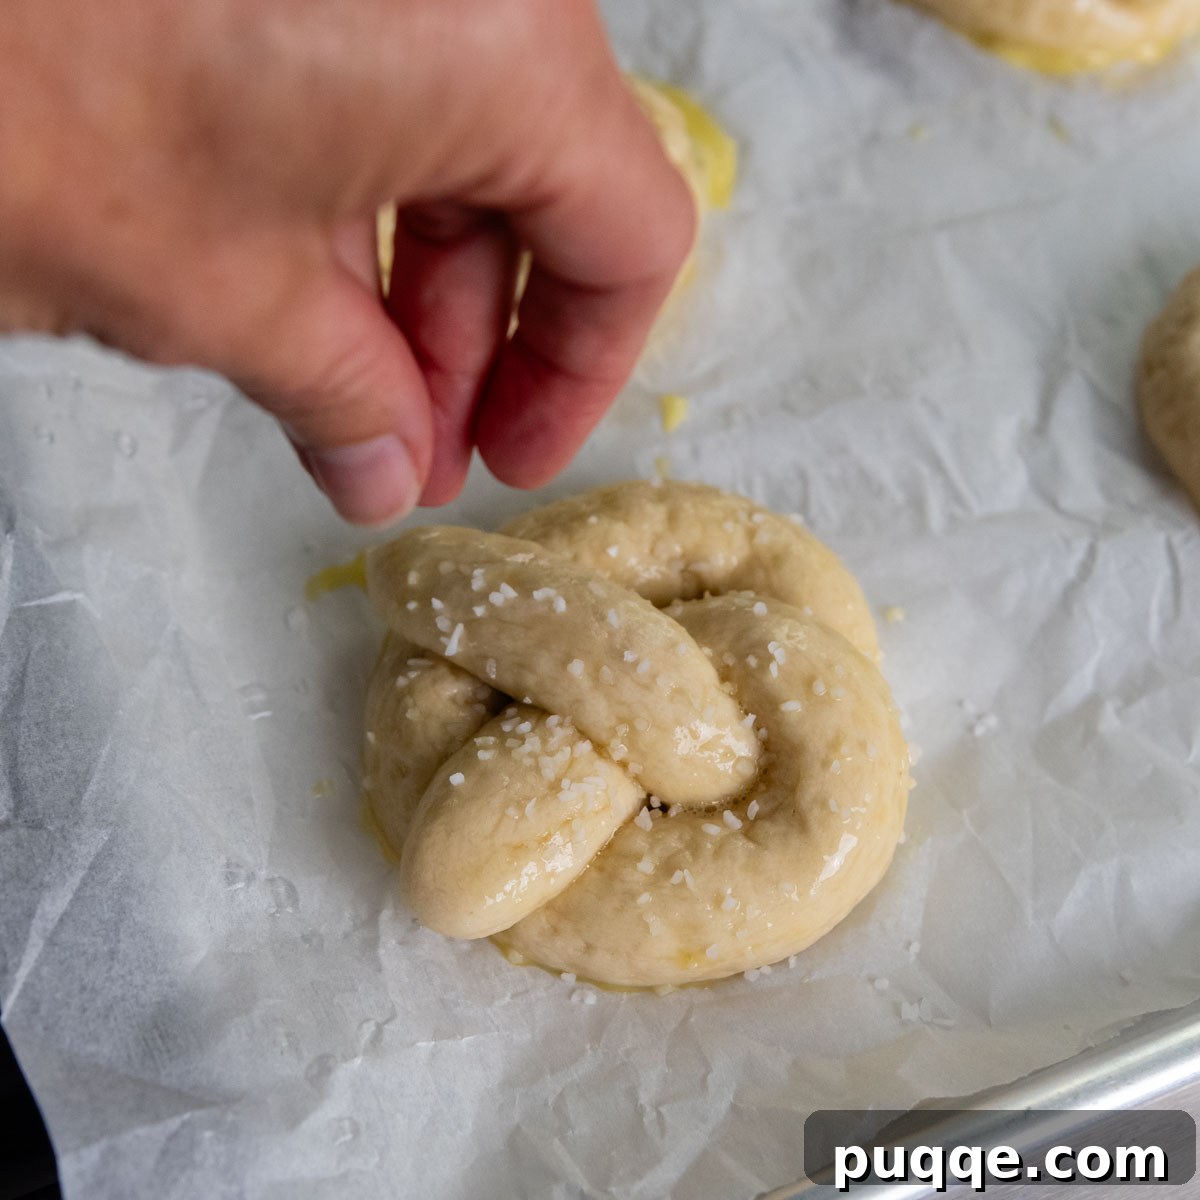
After all your pretzels have enjoyed their brief, bubbly bath, it’s time for the finishing touches before baking. In a small bowl, whisk together one large egg with a tablespoon of water to create an egg wash. Use a pastry brush to generously coat the entire surface of each pretzel with this mixture. The egg wash serves two important purposes: it gives the pretzels a beautiful, glossy sheen, and it acts as a perfect adhesive for the coarse pretzel salt. Immediately after brushing, sprinkle a generous amount of coarse kosher salt or specialized pretzel salt over each pretzel. This ensures the salt adheres perfectly before baking.
Now, it’s time to bake your masterpieces and prepare to indulge! Preheat your oven to 425°F (220°C). For classic soft pretzels, bake for approximately 18-20 minutes, or until they achieve a rich golden-brown color. If you prefer a slightly chewier pretzel, extend the baking time by an additional 5 minutes. For those who love the satisfying crunch of hard gluten-free pretzels, bake them for about 35 minutes, keeping a close eye to prevent over-browning. Always rotate your baking sheets halfway through the cooking time to ensure even baking.
Elevate Your Pretzel Experience with Delicious Dipping Sauce Ideas
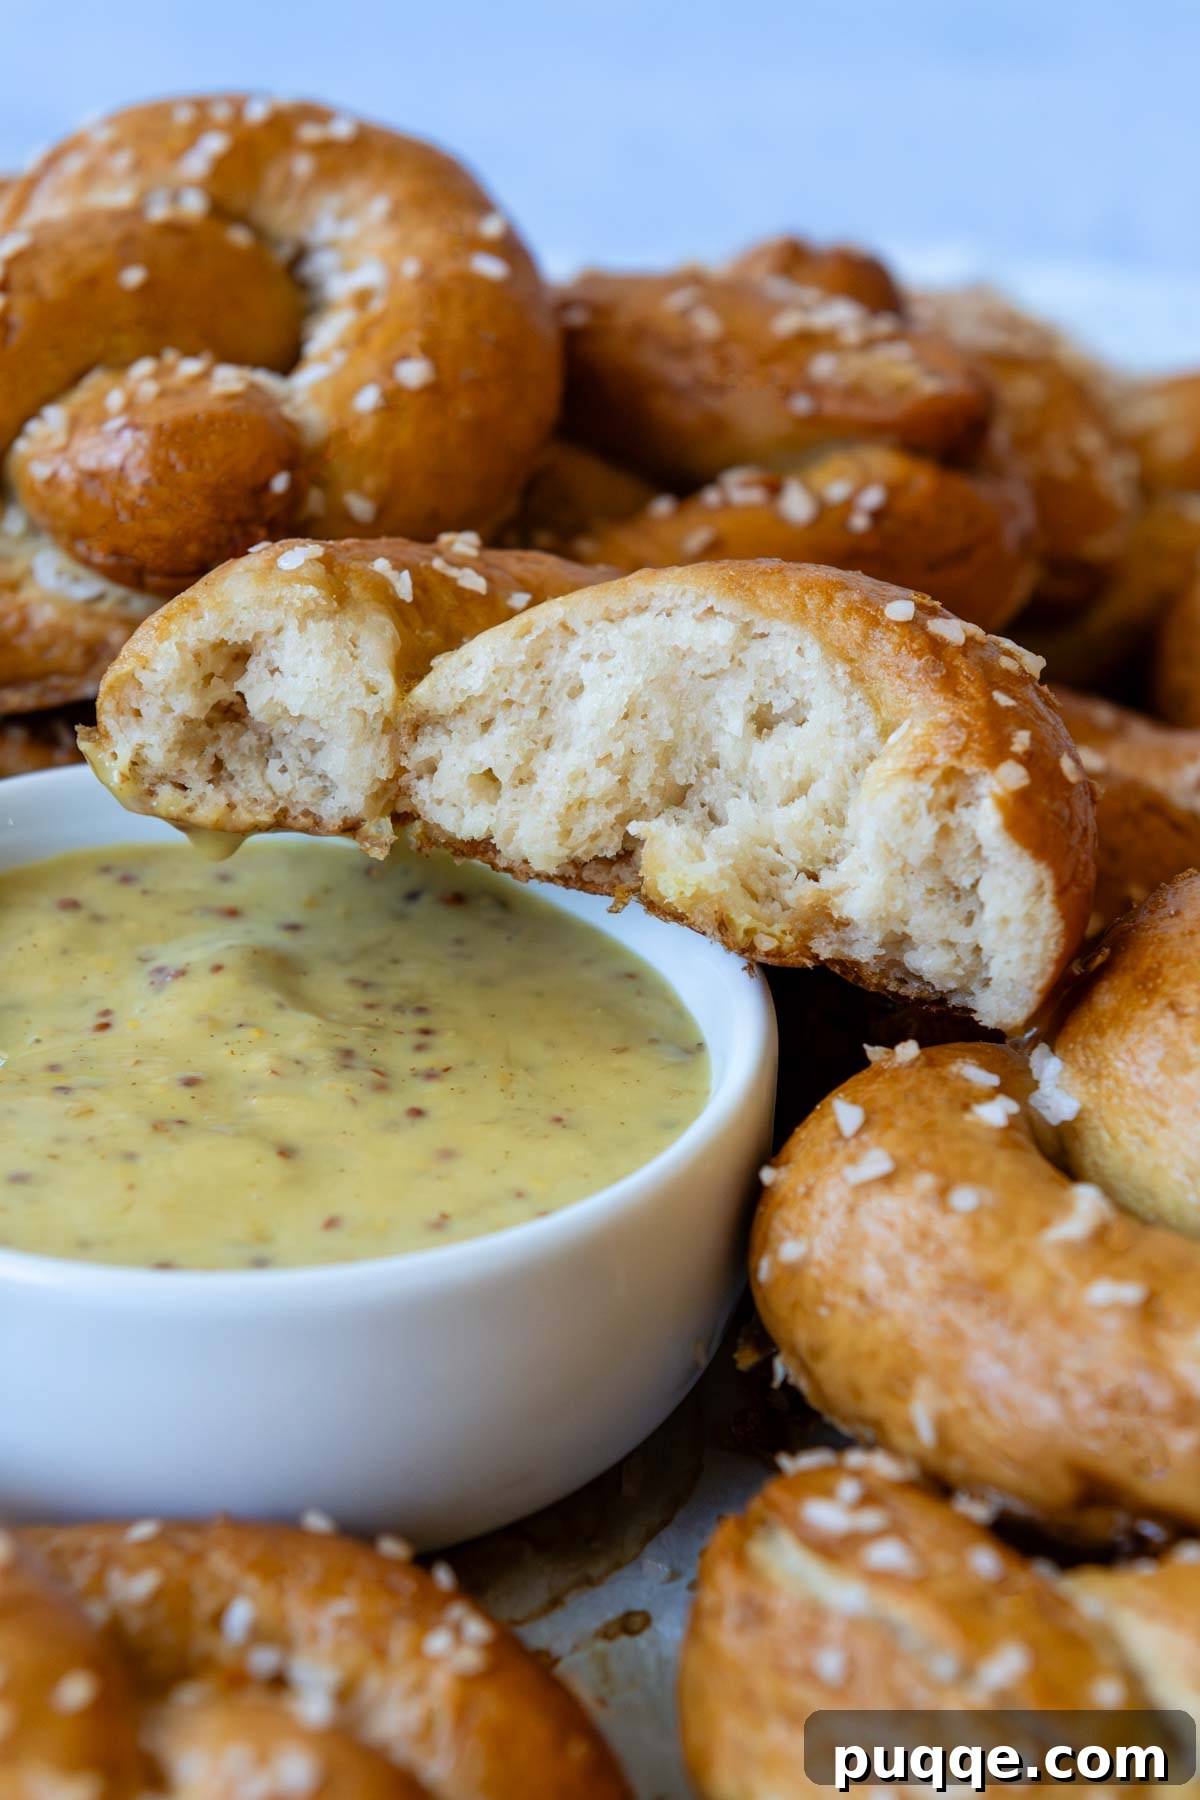
Now that you’ve mastered the art of making the best homemade gluten-free pretzels, it’s time to think about the essential accompaniment: the dipping sauce! A great sauce transforms a simple pretzel into an unforgettable snack. To truly recreate that beloved Auntie Anne’s experience, you have a plethora of options. Consider classic marinara sauce, a rich caramel (simply use a store-bought GF ice cream topping for convenience), or dive into our game-changing 10-minute gluten-free cheese sauce for a savory delight. Softened cream cheese also offers a wonderful, tangy contrast, or for an elegant touch, try our gluten-free Swiss fondue.
For a quick, creamy, and irresistible option, I love whipping up a one-minute creamy honey mustard sauce. In a small bowl, simply stir together 3 tablespoons of smooth Dijon mustard, 3 tablespoons of robust whole grain mustard, 2 tablespoons of mayonnaise, and 2 tablespoons of honey until thoroughly combined. This sauce is incredibly delicious and perfectly complements the salty chewiness of the pretzels. Prepare to be amazed by this super delish combination!

Save This Recipe to Your Pinterest Board!
Let’s be friends on Pinterest! I’m always sharing great recipes!
Did you make this recipe? I love hearing from you! Leave a star rating and comment below the recipe card. It helps others when searching for recipes and I appreciate feedback from our community. You will always hear back from me! -Melissa
The Softest Gluten-Free Pretzels (Easy How-To Guide)
 Melissa Erdelac
Pin
Rate
Remove Ads
Ingredients
Dough
- 1 ¼ cups + 2 tablespoons (330 g) warm water, 110ºF
- 1 tablespoon (9 g) dry active yeast
- 1 teaspoon granulated sugar
- 3 cups (438 g) gluten-free-all-purpose flour, Cup4Cup gluten-free flour recommended
- ½ cup (88 g) potato starch
- 3 tablespoons (45 g) light brown sugar, packed
- 1 tablespoon (11 g) psyllium husk powder
- 1 ¼ teaspoons salt
- ¾ teaspoons baking powder
- 1 large egg, room temperature
- 2 tablespoons (28g) butter, softened
Water Bath & Topping
- 4 quarts water
- ¼ cup (60g) baking soda
- 2 tablespoons (25g) granulated sugar
- Egg wash: 1 whisked egg + 1 tbsp water
- Coarse kosher salt or pretzel salt, optional
Equipment
- Baking Sheets
- Cup4Cup Gluten Free Flour
- Strainer Spoon
Instructions
Gluten-Free Pretzel Dough Preparation
- Combine the warm water, yeast, and 1 teaspoon sugar in a small bowl. Use a fork to combine and let it sit for 5 minutes until the yeast activates and the mixture becomes frothy.
- Meanwhile, in a large bowl of a stand mixer fitted with a paddle attachment, combine the dry ingredients on low speed: gluten-free flour, potato starch, brown sugar, psyllium, salt, and baking powder.
- Add the water/yeast mixture, egg, and butter to the dry ingredients. Mix on low speed until the dough comes together. Increase the speed to medium-low and mix for 3-4 minutes. The dough should become quite stiff. If it is too dry or doesn’t mix together, add 1-2 tablespoons of water, adding one tablespoon at a time only if necessary.
- Use a silicone spoon to scrape the dough down into a ball within the bowl. Cover with plastic wrap and let rise in a warm, draft-free place until almost doubled in size, typically 60 to 90 minutes.
Shaping, Boiling, and Baking the Pretzels
- Preheat your oven to 425°F (220°C). Begin to bring 4 quarts of water to a boil in a large pot. Do not add the baking soda and sugar yet; these will be added after the pretzels have been shaped.
- Line two baking sheets with parchment paper and set them aside. Gently deflate the risen dough and transfer the dough ball onto a clean work surface. A silicone baking mat or marble stone works best. If not available, you can tape down a large piece of parchment paper on your counter. Keep nonstick cooking spray nearby to lightly grease your hands as needed.
- Shape the dough into an even ball, then divide it in half. Divide each half into 6 equal pieces, resulting in 12 uniform pieces in total. If using a kitchen scale, each piece should weigh approximately 3 ounces.
- Cover the dough pieces with a lint-free dish towel to prevent them from drying out while you work. Take one piece at a time and first roll it into a very smooth ball (this helps prevent cracks during baking). Then, shape the ball into a 16-inch rope. Bring the ends of the rope up to form a U-shape. Cross the top ends over each other, then twist them once more, so they are wrapped twice at the top (refer to photos in the post for visual guidance). Bring the twisted end down to meet the bottom of the U to form the pretzel shape, pressing the ends down slightly to secure them in place. Move the shaped pretzel to one of the prepared baking sheets, cover with another towel, and repeat with the remaining dough pieces.
- Once all the dough has been shaped into pretzels, it’s time for the boiling step. Very slowly and gradually (to prevent boiling over) add the baking soda and granulated sugar to the boiling water. It will bubble up significantly, then subside.
- Using a large slotted spoon or strainer, gently lower the pretzels one at a time into the boiling water. Boil each pretzel for approximately 20 seconds, flipping it halfway through to ensure even cooking.
- Use the slotted spoon to return the boiled pretzels to the parchment-lined baking pans, ensuring they are face up. Once all pretzels are boiled, brush them generously with the egg wash and immediately sprinkle with coarse kosher salt or pretzel salt. (Note: If you plan to freeze some pretzels after baking, brush them with egg wash but do not sprinkle with salt until they are reheated. See reheating tips in the recipe notes below.)
- Bake the pretzels in the preheated oven until golden brown. For soft pretzels, this will take about 18 to 20 minutes. For a chewier texture, bake for 25 minutes. If you desire crunchy, hard gluten-free pretzels, extend baking to 35 minutes. Remember to flip and rotate the pans halfway through baking for even browning. Serve warm with creamy honey mustard (recipe in notes) or a delicious gluten-free cheese sauce.
Notes
Storing, Freezing, and Reheating Tips
If you don’t plan on eating all your pretzels the day they are made, follow these tips to keep them fresh and delicious:
- Only sprinkle salt on the pretzels you intend to enjoy immediately. If frozen with salt, it tends to dissolve into the crust upon thawing. It’s best to add salt when reheating.
- For best quality, either enjoy the pretzels fresh on the day they are made or freeze them until ready to serve.
- To reheat frozen pretzels, first thaw them on the counter or use the defrost setting on your microwave. Lightly brush the tops with wet fingers (or a damp paper towel) and sprinkle with salt. Place them in a 375ºF (190°C) air fryer for 3 minutes, or until hot and crisp. If you don’t have an air fryer, place them on a baking sheet and bake in a 400ºF (200°C) oven for 3-4 minutes.
Quick Creamy Honey Mustard Dipping Sauce
To prepare this delightful dipping sauce, combine 3 tablespoons Dijon mustard, 3 tablespoons whole grain mustard, 2 tablespoons mayonnaise, and 2 tablespoons honey in a small bowl. Stir until smooth and well-combined. Store any leftovers, refrigerated, in an airtight container.