
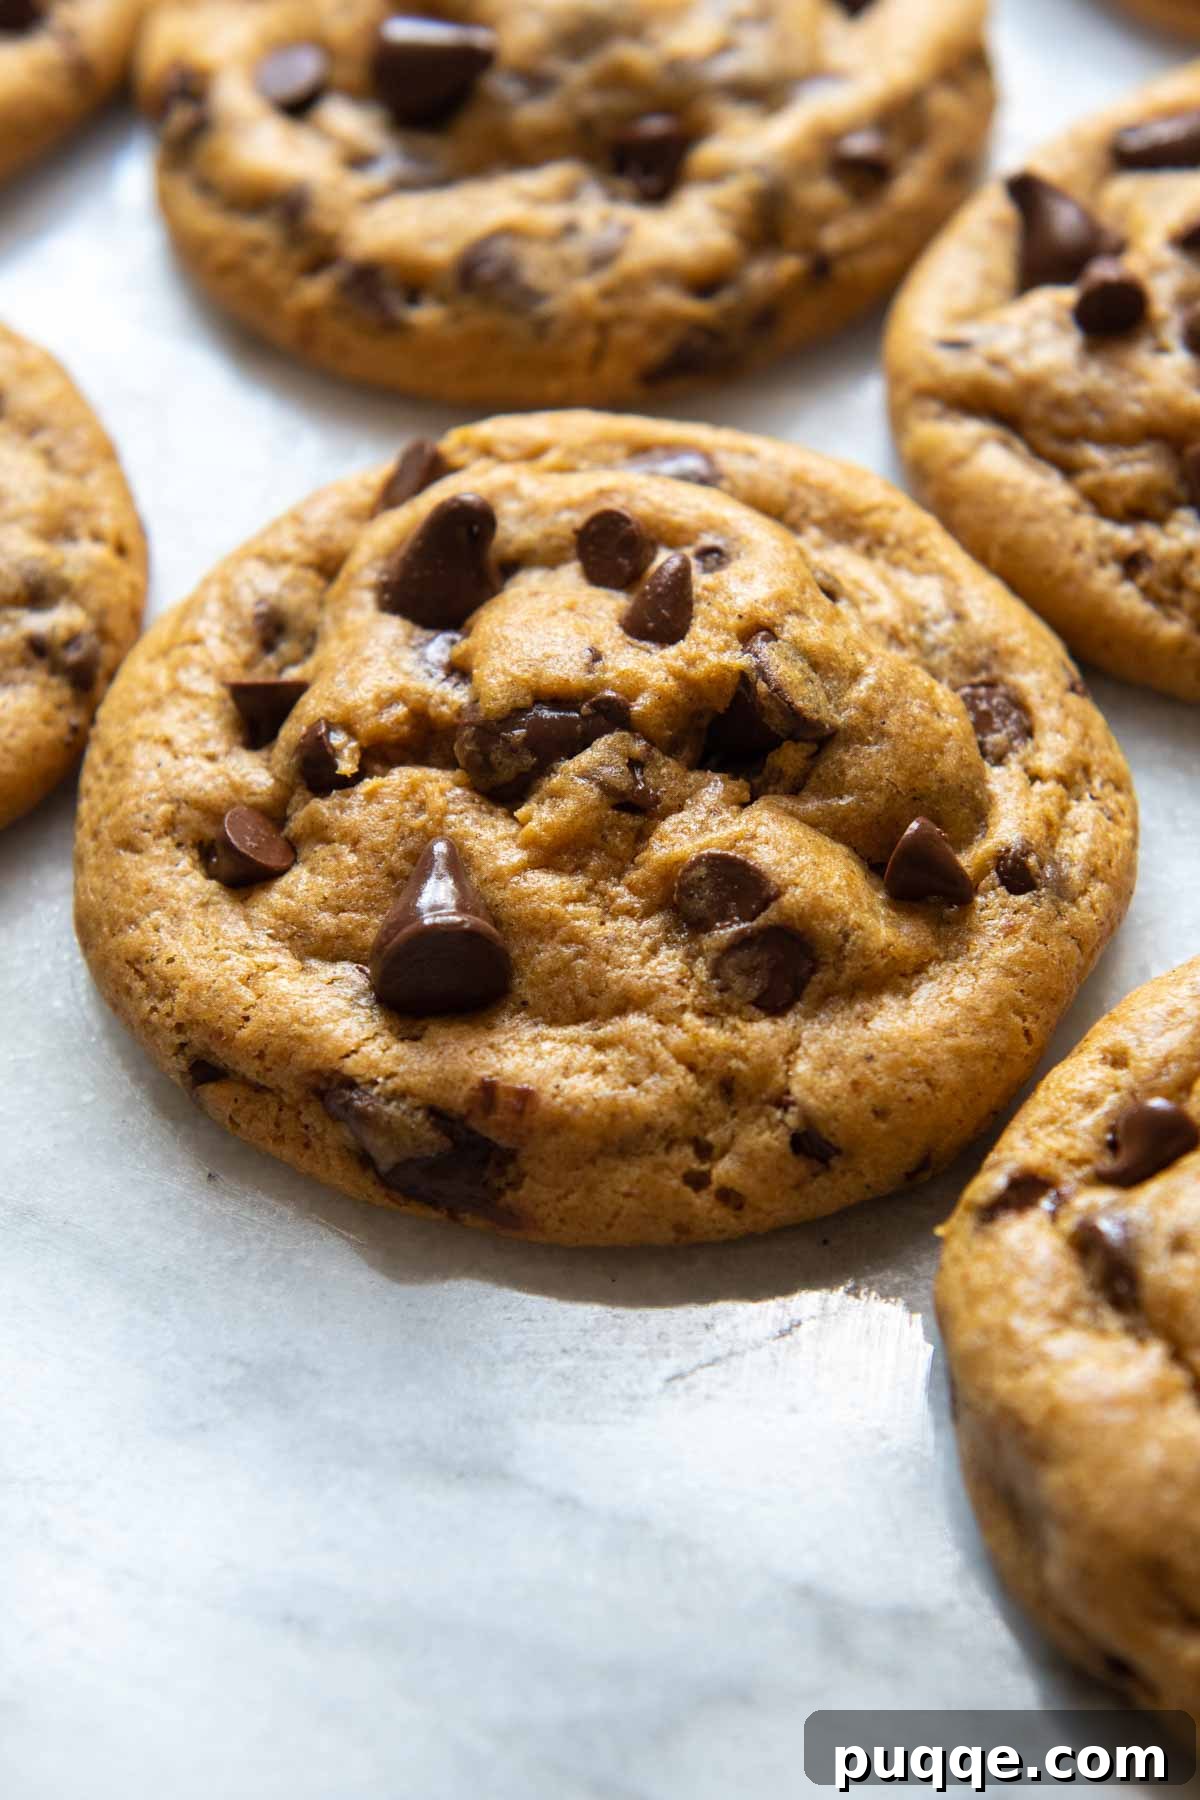
As a seasoned gluten-free baker, I’ve dedicated years to perfecting the art of soft, chewy, and genuinely bakery-style gluten-free cookies. While many recipes require clever substitutions and precise techniques, crafting the perfect pumpkin spice treat presents its own unique challenge. If your heart desires truly chewy gluten-free pumpkin cookies – the kind that are rich in flavor, boast a satisfying texture, and are distinctly *not* fluffy or cakey – then you’ve absolutely landed in the right place. The secret to achieving this delightful texture lies in one surprisingly simple yet profoundly effective trick: effectively eliminating the excess moisture naturally present in canned pumpkin before it even touches your warm spices, luscious chocolate chips, and other wholesome ingredients. This crucial step transforms what could be a mediocre, crumbly cookie into an extraordinary autumnal delight that will impress even the most discerning palates and leave them craving more of these perfectly spiced, perfectly chewy gluten-free pumpkin treats.
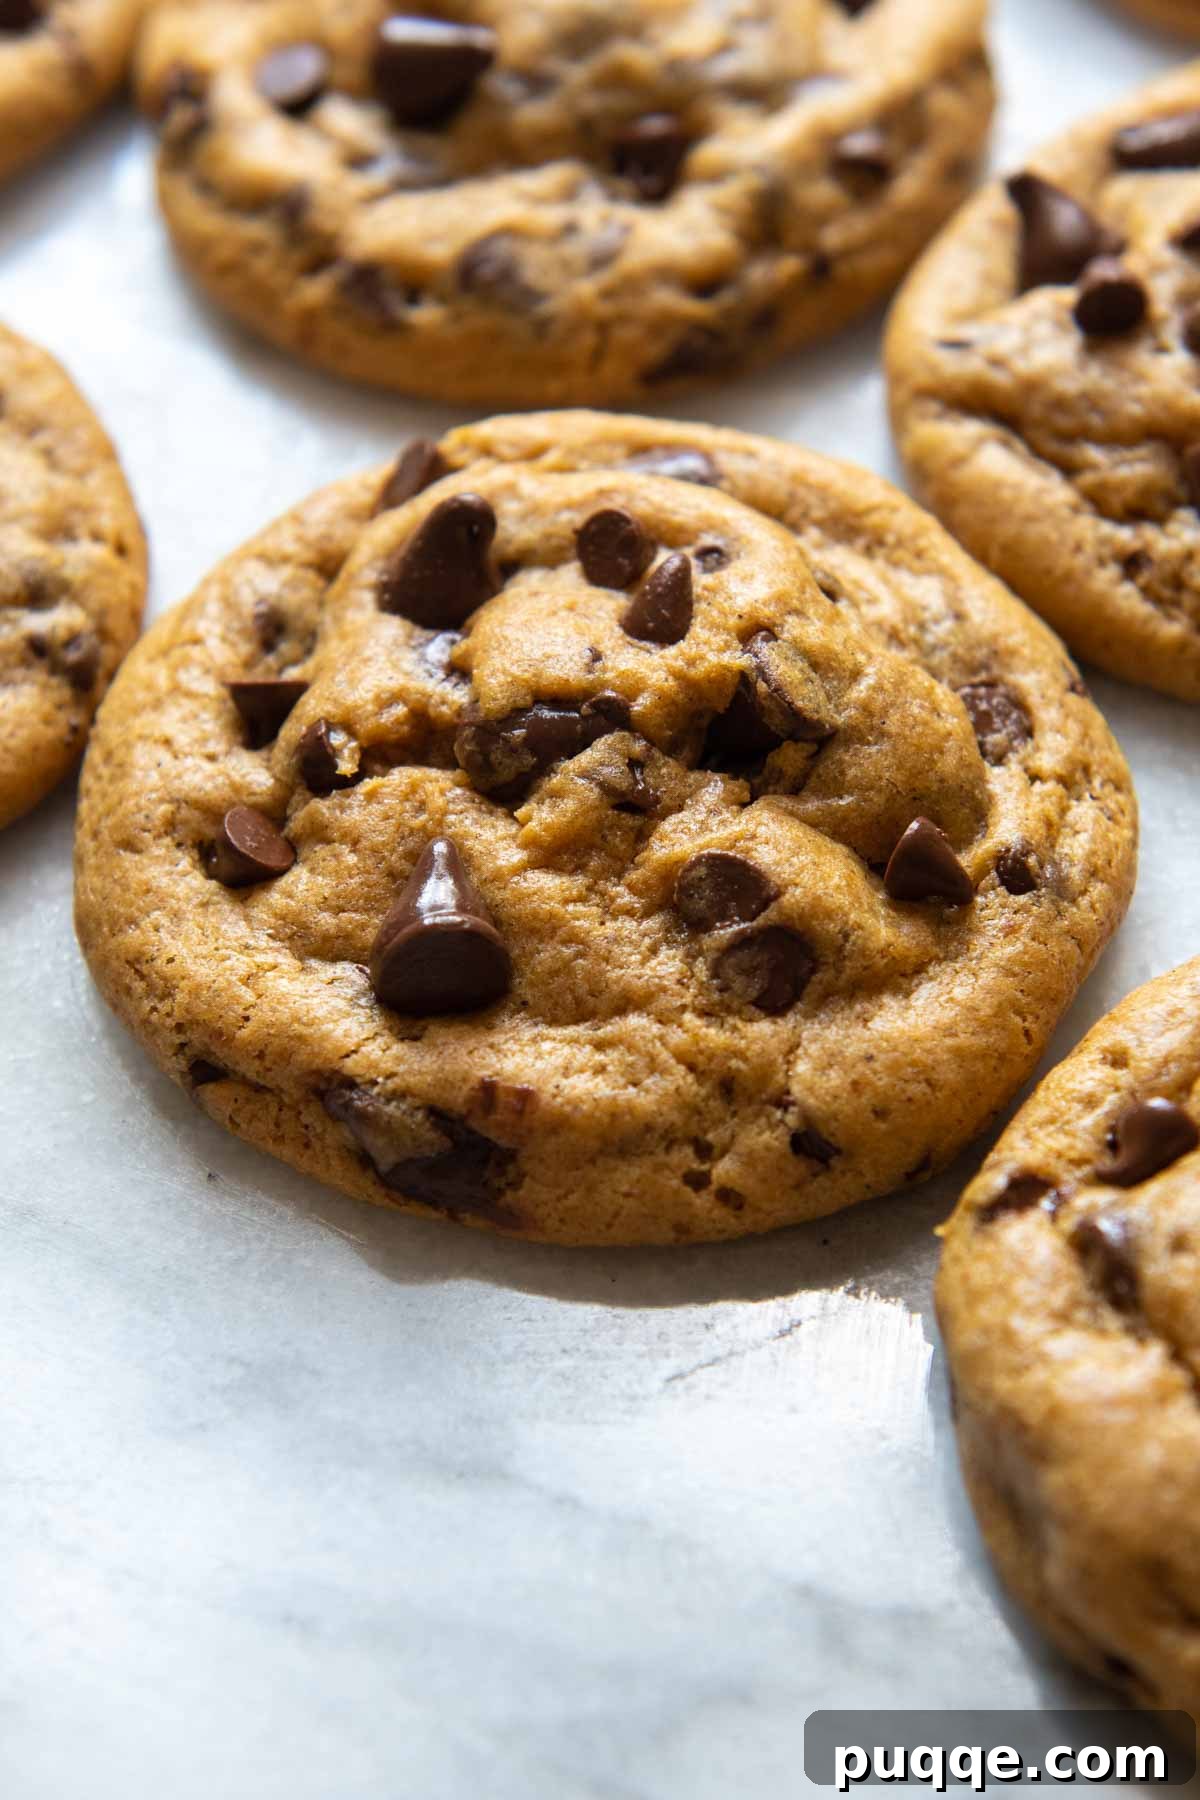
Unlock the Secret to Extra Chewy Gluten-Free Pumpkin Chocolate Chip Cookies
The arrival of autumn heralds pumpkin spice season, a time for warm flavors and comforting treats that evoke cozy memories. For those navigating gluten sensitivities or dietary restrictions, enjoying these seasonal delights often means searching for reliable gluten-free alternatives. Far too often, “gluten-free” can unfortunately translate to “substandard” or “compromised texture” in the baking world, leaving many feeling disappointed. However, I’m thrilled to share that these easy gluten-free pumpkin cookies don’t just meet the mark; they genuinely surpass it, offering an improved taste and a wonderfully satisfying, chewy texture that even many traditional, gluten-containing recipes struggle to achieve. Prepare to be utterly amazed by cookies that are so profoundly delicious, you’ll momentarily forget they’re entirely gluten-free!
So, what’s the revolutionary trick that sets these cookies apart from the rest, transforming them into chewy masterpieces? It all comes down to a fundamental understanding of canned pumpkin puree. While incredibly convenient and a pantry staple, canned pumpkin naturally contains a significant amount of water. In conventional baking, the elastic network of gluten helps to absorb and manage this moisture, contributing to the structure and pliability of baked goods. However, in the realm of gluten-free baking, where starches and flour blends lack that crucial gluten network, this excess moisture can lead to a host of undesirable outcomes – think gummy, overly dense, or an unappealingly cake-like texture that misses the mark for a true cookie. Through extensive experimentation and countless batches, particularly when developing my fluffy gluten-free pumpkin bread recipe (which demanded a similar approach to avoid a dense, heavy crumb), I discovered that proactively eliminating this surplus moisture yields exponentially better and more consistent results across the board for gluten-free baked goods.
When this simple yet highly effective moisture-removal technique is precisely applied to spiced pumpkin cookies, the benefits are even more pronounced and immediately noticeable. Conventional pumpkin cookie recipes frequently result in a cake-like consistency precisely because of the high water content inherent in pumpkin puree. But once you skillfully remove that excess liquid, you’re left with a concentrated burst of pure pumpkin flavor, unadulterated by unnecessary water. This allows your carefully selected gluten-free flour blend to fully hydrate and develop, creating a cookie with a gorgeously soft, undeniably chewy interior and perfectly crisp, caramelized edges – a texture that is truly the hallmark of a high-quality, bakery-style treat. Say goodbye to dry, crumbly gluten-free cookies that fall apart and wholeheartedly embrace the ultimate chewy perfection that awaits!
Beyond this essential pumpkin preparation, I’ve incorporated other proven and invaluable techniques borrowed directly from my popular homemade gluten-free chocolate chip cookies. These foundational strategies include chilling the dough, a step that allows the gluten-free starches ample time to fully hydrate and prevents any undesirable gritty texture from developing, and baking at a slightly lower oven temperature, which ensures more even cooking and further discourages dryness while promoting that desired chew. Together, these simple yet powerful and scientifically-backed strategies culminate in a gluten-free pumpkin cookie experience that is nothing short of extraordinary, making them a fall favorite for everyone.
Throughout this comprehensive guide, I’ll share even more invaluable gluten-free pumpkin cookie tips and tricks. You’ll find detailed step-by-step photos that vividly illustrate each crucial stage of the baking process, expert advice on how to properly shape your cookie dough for that coveted, thick, bakery-style appearance, flexible ingredient substitutions for those needing dairy-free options without compromising taste or texture, and the very best methods for storing and freezing your delicious creations to extend their freshness and enjoy them longer. Get ready to embark on a delightful baking journey and create the most incredible, chewy gluten-free pumpkin chocolate chip cookies you’ve ever tasted!
These are amazing! I did half the batch with white chocolate chips and the other half with chocolate chips… perfection! I can’t thank the author enough for putting this recipe together and meticulously detailing the hows and whys of it!! They are beyond yummm. Bravo!!!
—Robin
Essential Ingredients and Their Role in Perfect Pumpkin Cookies
Crafting the perfect chewy gluten-free pumpkin cookie relies on a thoughtful selection of ingredients, where each component plays a vital and specific role in achieving that desirable texture, rich flavor profile, and overall exceptional outcome. Here’s a closer look at the key elements that make these cookies truly special:
- Canned Pumpkin Puree: This is unequivocally the star of our show, but with a critical distinction that cannot be overstated. Always ensure you are using pure, unsweetened pumpkin puree and not pumpkin pie filling. Pie filling contains added sugars, spices, and often other ingredients that will significantly alter the recipe’s balance, texture, and sweetness. I particularly recommend Libby’s brand because of its naturally thicker consistency and lower inherent moisture content compared to many other brands. This advantageous characteristic makes our initial moisture-removal step even more efficient and effective. Since you won’t use the entire can for this specific cookie recipe, be resourceful and consider transforming the remaining puree into these quick and delightful gluten-free pumpkin oat muffins or wholesome flourless pumpkin pancakes!
- Unsalted Butter: Softened unsalted butter is the foundation of richness and provides the necessary fat for a tender crumb. It helps create that light, fluffy, and aerated base when properly creamed with sugar, which is essential for cookie texture. Using unsalted butter also gives you precise control over the overall salt content in your cookies, allowing you to fine-tune the flavor balance. For those needing dairy-free options, a high-quality, solid stick plant-based butter substitute that bakes well can be successfully used.
- Light Brown Sugar: This is an absolutely crucial ingredient for achieving the desired chewiness in these cookies. The use of all brown sugar, rather than a combination with white granulated sugar, contributes significantly to the soft, wonderfully moist, and undeniably chewy texture that defines these treats. Brown sugar contains molasses, which not only adds a subtle depth of flavor but also provides additional moisture, helping to keep the cookies exceptionally soft and pliable long after they’ve been baked.
- Egg Yolks: Incorporating only egg yolks is another clever and effective trick for yielding exceptionally chewy cookies with a rich mouthfeel. By using just the yolks, we add concentrated richness and superior binding power to the dough without introducing the extra liquid found in egg whites. Excess liquid from whites can often lead to a cakier, less chewy result in gluten-free baking. Ensure your egg yolks are at room temperature before adding them to the mixture for optimal emulsification with the butter and sugar, preventing a broken or lumpy dough. And don’t waste those leftover egg whites! Simply refrigerate them in an airtight container and use them for a healthy, protein-packed egg white scramble the very next day.
- Vanilla Extract: A universal staple in virtually all cookie recipes, pure vanilla extract serves to enhance the overall flavor profile, adding a delightful depth and warmth that beautifully complements the natural sweetness of pumpkin and the complexity of the spices. Always opt for a good quality vanilla for the best flavor.
- Molasses: Even a small amount of molasses goes a long way in this recipe. It imparts a distinctive smoky, slightly spiced undertone that perfectly harmonizes with the pumpkin flavor and further boosts the cookies’ desirable chewiness, creating a more complex and satisfying taste. If you unexpectedly find yourself without molasses on hand, you can substitute it with an equal amount of pure maple syrup, though be aware that the resulting flavor profile will be slightly different, leaning more towards mapley sweetness.
- Gluten-Free All-Purpose Flour Blend: The choice of gluten-free flour blend is paramount to the success of these cookies. I particularly favor Cup4Cup gluten-free flour blend because its specific composition, which often includes cornstarch, significantly contributes to the desired soft and chewy texture of these cookies. It’s important to note that different gluten-free blends can vary widely in their composition, protein content, and absorption rates. Therefore, if you opt to use another brand, be mindful that slight adjustments to liquid or flour quantities might be necessary to achieve the optimal dough consistency.
- Ground Spices (Cinnamon, Ginger, Nutmeg, Cloves): This aromatic quartet forms the quintessential foundation of the classic pumpkin spice blend. Ground cinnamon brings a warm, sweet, and comforting note; ginger adds a subtle peppery kick and zing; nutmeg offers a sweet earthiness and depth; and cloves provide a strong, sweet, and pungent aromatic layer. For the sake of convenience and to save a step of measuring individual spices, you can easily replace this entire blend with 1 tablespoon of pre-mixed pumpkin pie spice.
- Baking Soda and Baking Powder: These two leavening agents work synergistically in tandem to give the cookies a desirable slight lift and a tender crumb without making them overly cakey or heavy. Baking soda typically reacts with the acidic components present in brown sugar and molasses, while baking powder provides additional lift for a lighter, more delicate texture.
- Salt: A small but mighty ingredient, salt is absolutely essential for balancing the sweetness of the cookies and dramatically enhancing all the other complex flavors in the recipe. Never skip the salt, as it brightens and brings out the best in every bite.
- Chocolate Chips: For maximum chocolatey goodness that is evenly distributed throughout each and every cookie, I highly recommend using a combination of regular semi-sweet chocolate chips and miniature chocolate chips. This clever approach ensures that you get a delightful burst of melted chocolate in every single bite, from edge to edge. If you’re baking for those with dairy allergies or dietary preferences, be sure to use high-quality dairy-free chocolate chips. Don’t hesitate to get creative and experiment with other varieties like white chocolate chips, gluten-free butterscotch chips, or larger chocolate chunks to customize your cookies!
Watch The Recipe Tutorial: Achieve Perfect Gluten-Free Pumpkin Cookies
For those who prefer visual guidance or want to ensure they’re mastering each step, this helpful video tutorial walks you through the entire process of the recipe. From properly preparing your pumpkin puree and creaming your butter and sugar to expertly shaping and baking your perfectly chewy gluten-free pumpkin cookies, you can see all the essential techniques in action. This visual aid is designed to empower your baking success and help you achieve flawless results every time!
Let’s Bake These Irresistible Cookies Together: A Detailed Step-by-Step Guide!
Baking these extraordinary gluten-free pumpkin cookies is a rewarding and enjoyable process, especially when guided by these detailed step-by-step instructions and accompanying photos. While the condensed recipe card below provides all precise ingredient amounts, these expanded directions offer the crucial nuances, expert tips, and helpful explanations needed to ensure perfect, consistently chewy results. Let’s roll up our sleeves and get started on this delicious autumnal adventure!
Step 1: Prepare Your Oven and Master Moisture Removal from Pumpkin Puree
First things first, preheat your oven to a precise 325°F (160°C). Baking gluten-free cookies at this slightly lower temperature is a genuine game-changer. It gently extends the baking time, allowing the gluten-free starches sufficient opportunity to fully hydrate and beautifully meld with the fats in the dough. This crucial process is key to eliminating any potential grittiness and ensuring a tender, uniform crumb that is wonderfully soft. For the easiest cleanup and consistent baking, generously line your baking sheets with high-quality parchment paper. If you don’t have parchment paper readily available, simply leave them ungreased – the generous fat content in the cookie dough typically prevents sticking.
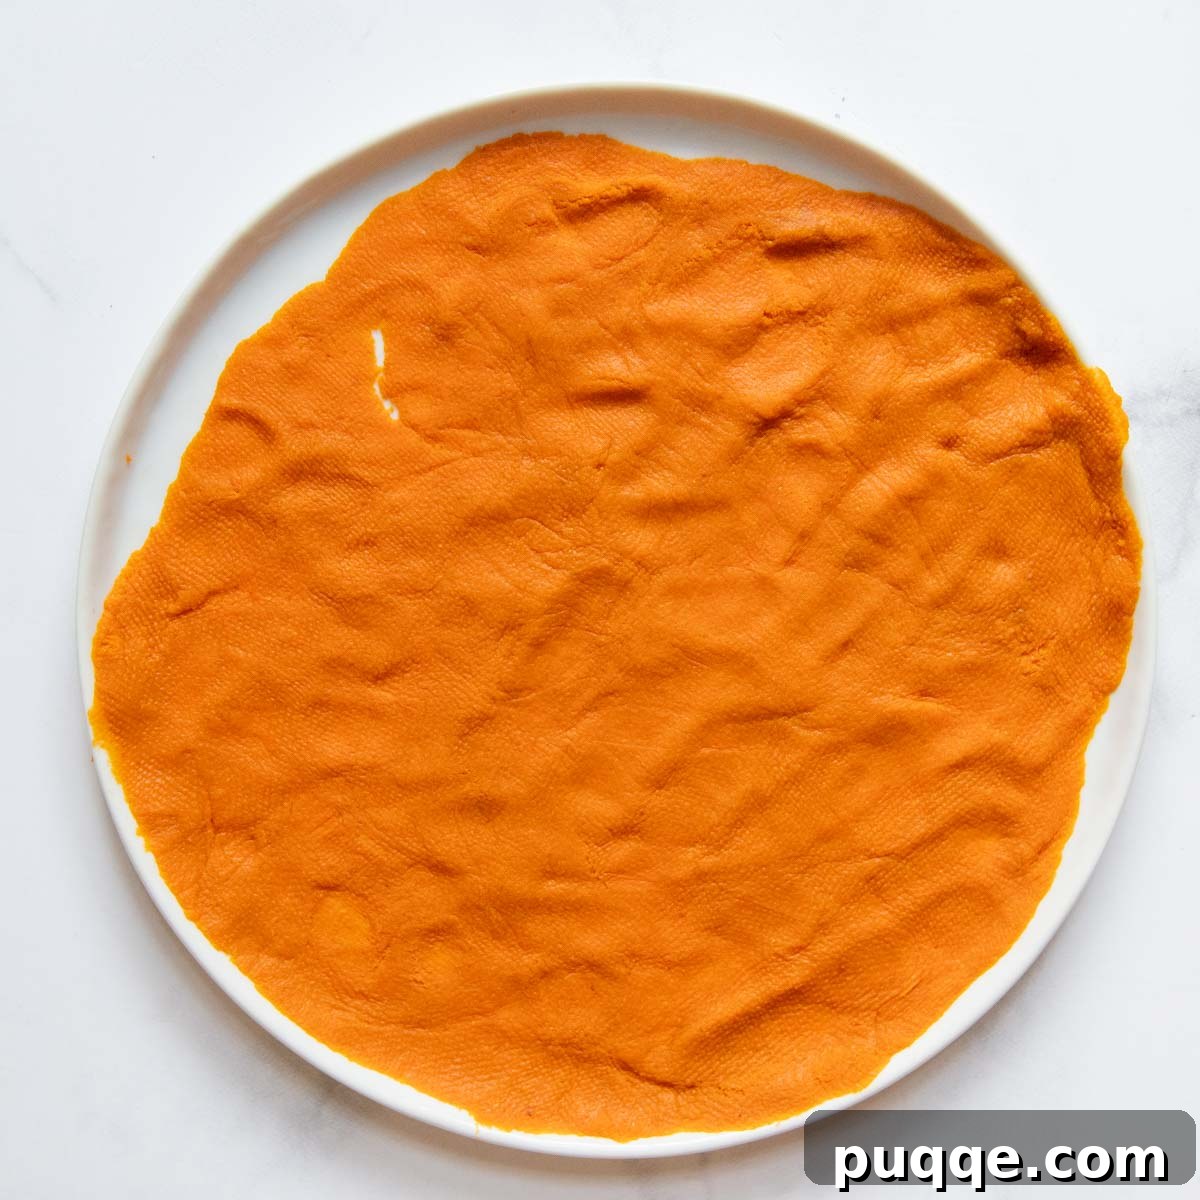
Now for our ultimate secret weapon: moisture removal from the pumpkin puree. This step is non-negotiable for chewy cookies! Spread the canned pumpkin puree in a very thin, even layer across a large, flat plate. The thinner the layer, the more surface area is exposed, allowing moisture to be drawn out much more efficiently. Lay a fresh paper towel flat over the entire top surface of the pumpkin puree and press down gently but firmly across all areas. You’ll immediately notice the paper towel quickly absorbing liquid. Discard this saturated paper towel and repeat this blotting process with a new, fresh paper towel. Continue this technique 6-8 more times, or until the paper towel shows significantly less moisture absorption, indicating most of the excess liquid has been removed. This critical, patient step is precisely what transforms your pumpkin cookies from a potentially “cakey,” soft texture into the wonderfully soft, intensely flavorful, and delightfully chewy treats we’re aiming to create.
Step 2: Cream Butter and Sugar, Then Incorporate All Wet Ingredients
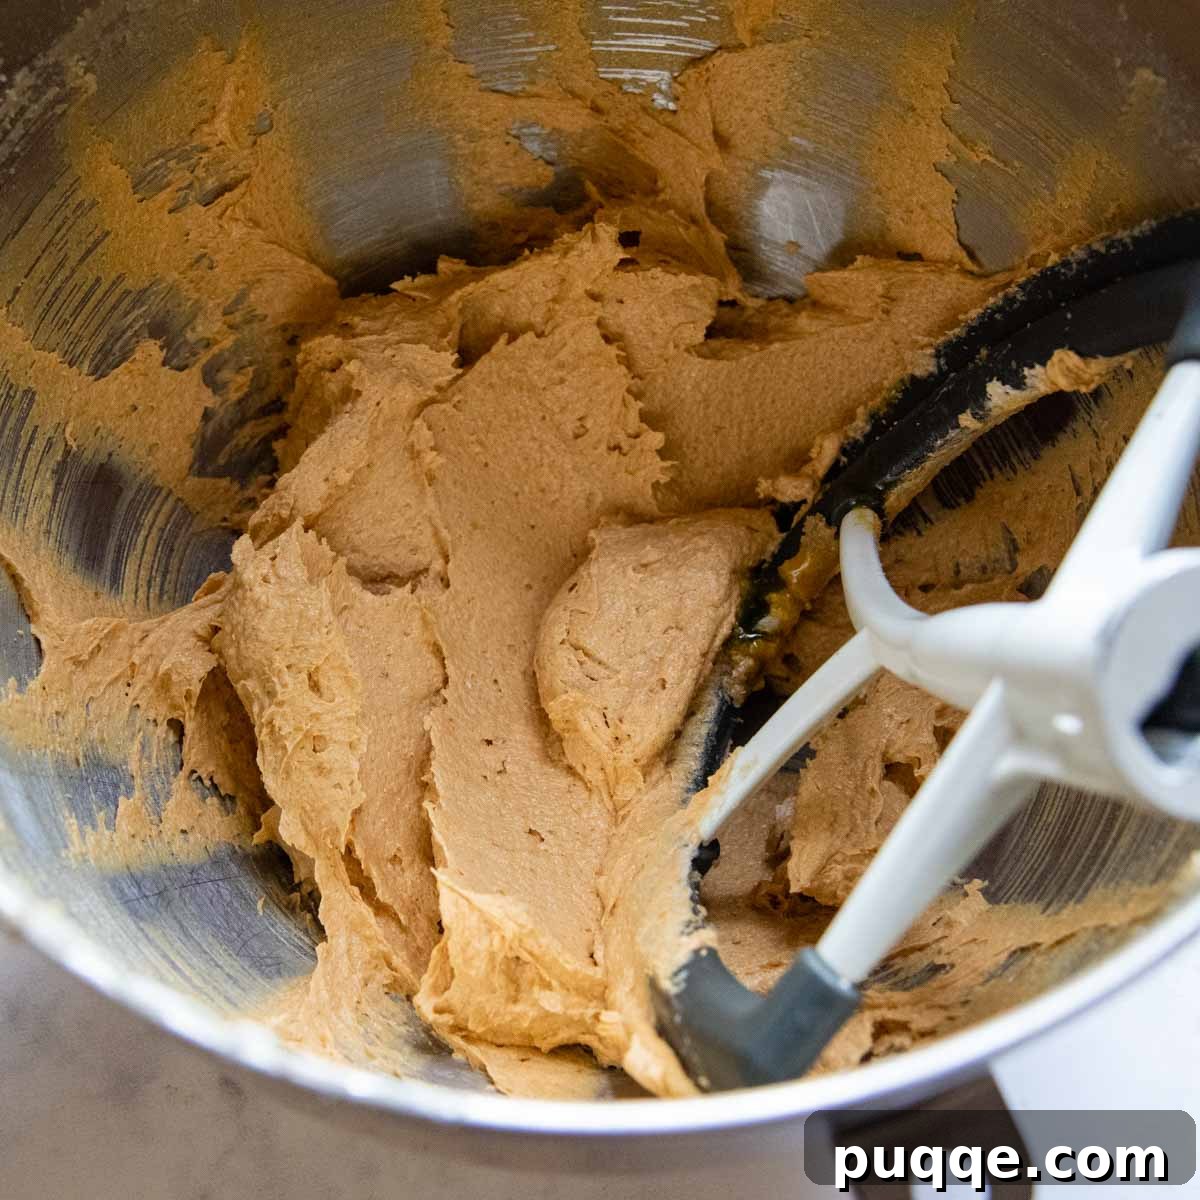
In a large mixing bowl, or the bowl of a stand mixer fitted with the paddle attachment, combine the softened unsalted butter with the packed light brown sugar. It’s important that your butter is truly softened, not melted, to achieve the right consistency. Beat these ingredients together on medium-high speed for approximately 3 minutes, or until the mixture becomes notably light, wonderfully fluffy, and significantly pale in color. This essential creaming process rigorously incorporates air into the butter and sugar, which actively contributes to the cookies’ final tender texture and their slight, desirable lift as they bake.
Next, meticulously add your meticulously prepared (blotted) canned pumpkin puree, the room-temperature egg yolks (remember, room temperature helps with emulsification), pure vanilla extract, and the rich molasses to the beautifully creamed butter and sugar mixture. Mix again on medium speed, just until all these wet ingredients are thoroughly combined and the entire mixture appears smooth, homogeneous, and uniformly colored. Be sure to stop occasionally and scrape down the sides of the bowl with a spatula to ensure everything is fully incorporated and no unmixed pockets remain. This careful attention to mixing ensures an even distribution of flavor and moisture throughout the dough.
Step 3: Combine Dry Ingredients and Generously Fold in Chocolate Chips
In a separate, medium-sized bowl, meticulously whisk together your chosen gluten-free all-purpose flour blend, the warm ground cinnamon, pungent ground nutmeg, zesty ground ginger, fragrant ground cloves, baking soda, baking powder, and the essential salt. Whisking these dry ingredients thoroughly ensures they are evenly distributed throughout the mixture, which is absolutely crucial for uniform leavening, consistent flavor, and proper texture development in your finished cookies. This prevents pockets of unmixed leavening or spice.
Gradually add the prepared dry ingredient mixture to the wet ingredients in the large mixing bowl. Mix on low speed, just until the flour is fully incorporated and absolutely no dry streaks or pockets of flour remain visible. It’s particularly important to be careful not to overmix the dough, especially when working with gluten-free flours, as excessive mixing can sometimes lead to a tougher or denser texture. Once the dry ingredients are just combined and the dough is smooth, it’s time for arguably the best part! Add a generous mixture of both semi-sweet chocolate chips and miniature chocolate chips. Using two different sizes ensures that you get plenty of delightfully gooey, melted chocolate dispersed evenly throughout every single bite, maximizing that chocolatey bliss. Gently fold the chocolate chips into the dough using a sturdy spatula until they are uniformly distributed, without overworking the dough.
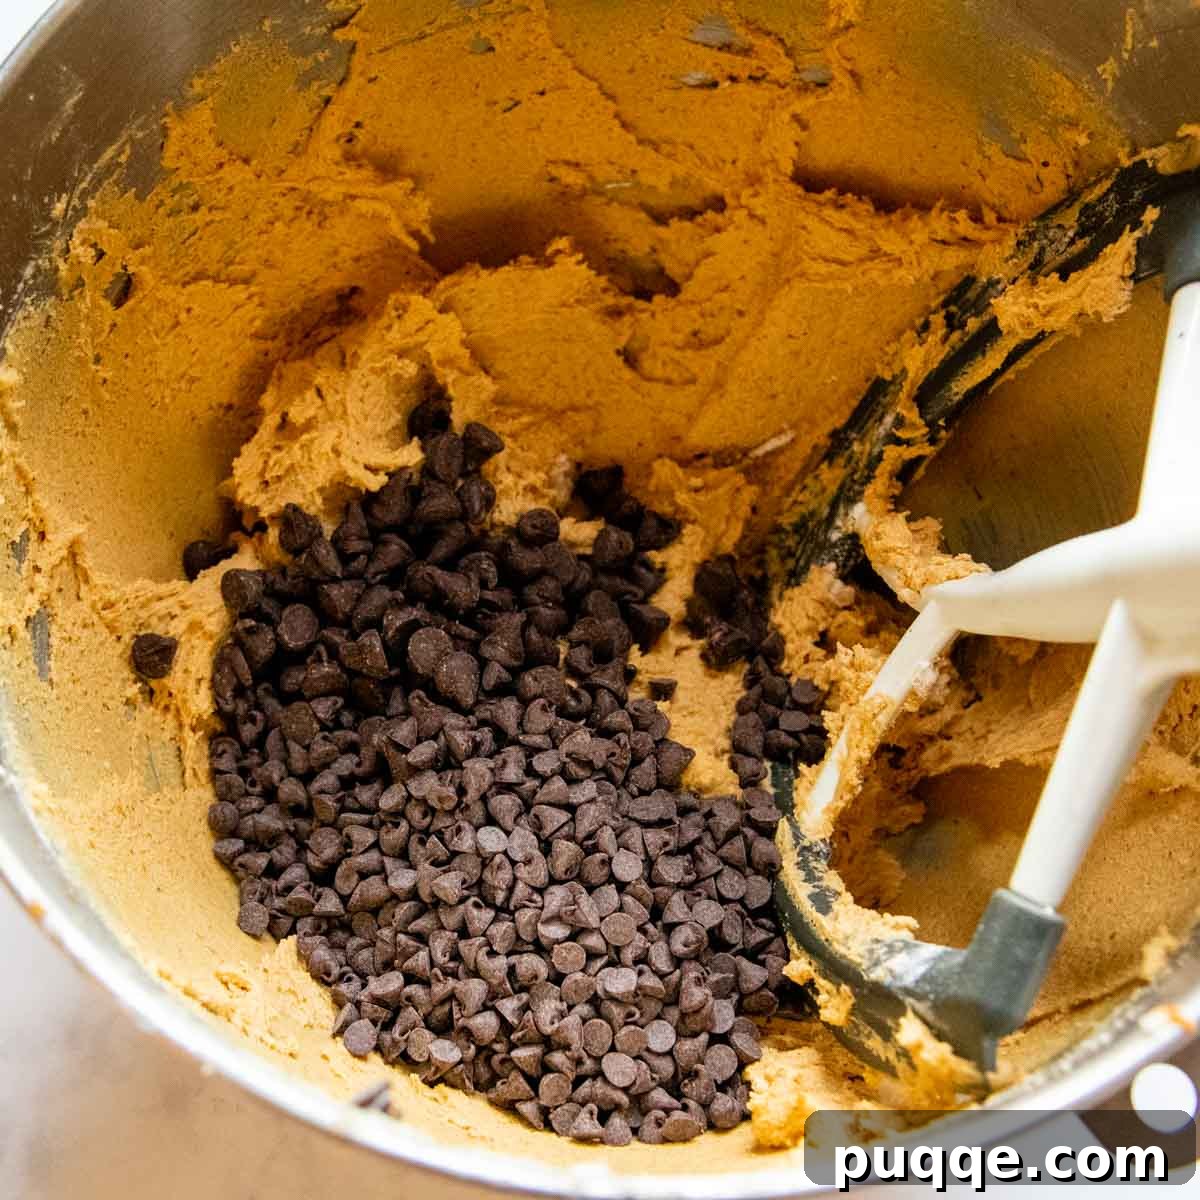
Step 4: Chill Your Dough, Expertly Shape, and Bake to Chewy Perfection
Once your cookie dough is thoroughly mixed, cover the bowl tightly with plastic wrap and refrigerate it for a minimum of 30-45 minutes. This chilling period is absolutely indispensable for successful gluten-free baking. It generously allows the gluten-free starches sufficient time to fully absorb the moisture from the wet ingredients, which is vital for developing a smooth, cohesive texture and effectively eliminating any trace of grittiness that can sometimes plague gluten-free treats. Additionally, thoroughly chilled dough spreads significantly less in the oven, consistently leading to thicker, chewier, and more perfectly shaped cookies.
After the dough has sufficiently chilled, use a large cookie scoop (approximately 3 tablespoons of dough per cookie is ideal) to neatly portion out the dough. For that coveted, impressive bakery-style appearance, don’t just bake the round scoop. Instead, take a moment to gently roll each portion into a smooth ball, and then skillfully shape it into a tall cylinder with a flat bottom. This unique shaping technique encourages the cookies to melt downwards and outwards in beautiful, ridged layers as they bake, rather than spreading into thin, flat discs. Arrange about 6 large cookies per prepared baking sheet, ensuring you leave adequate space between them for natural spreading.
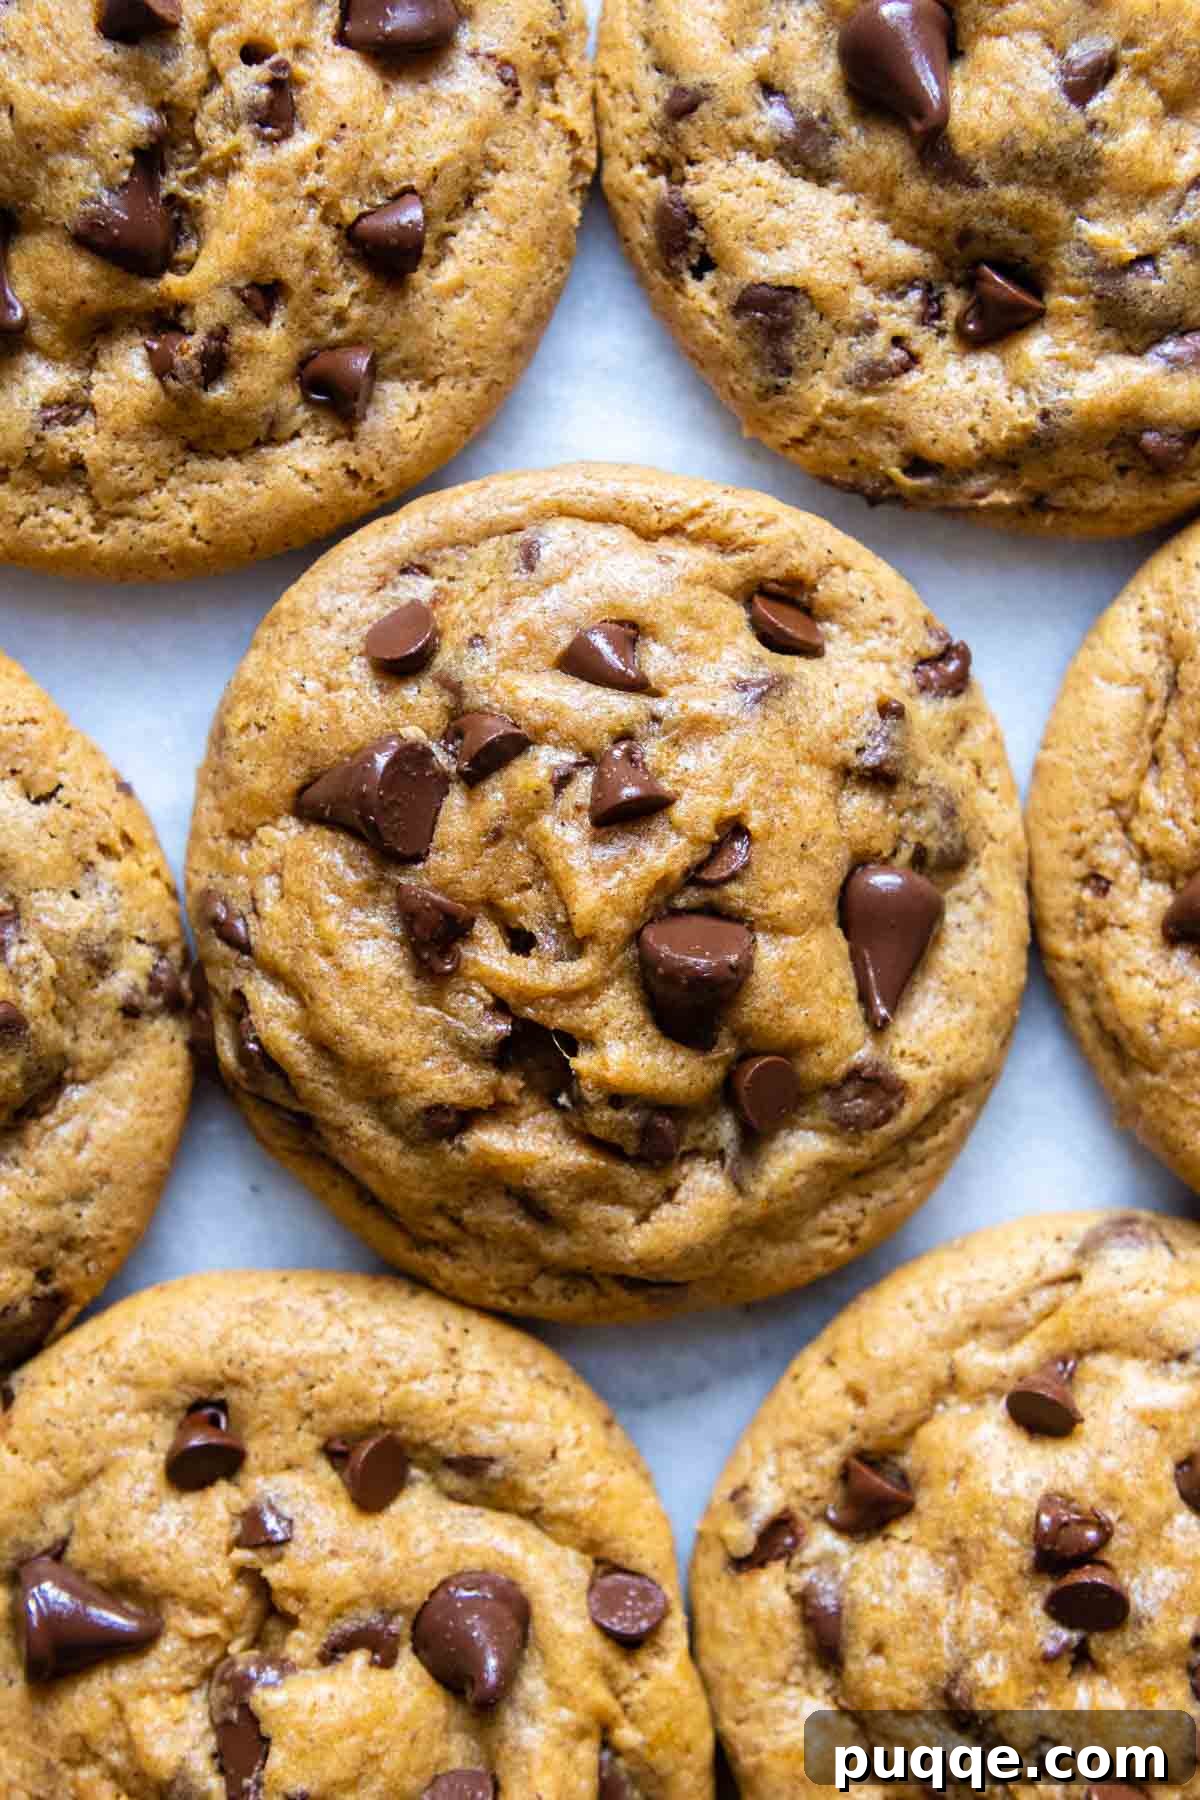
Bake your cookies for 14-16 minutes, making sure to rotate the baking sheets halfway through the baking time. This rotation ensures even cooking and uniform browning across all your cookies. Your cookies are perfectly done when their edges are lightly golden, they begin to show small, delicate cracks on top, and they lose their glossy, wet sheen, appearing more matte. Crucially, they might still look slightly underbaked and soft in the very center, but this is exactly what we want for achieving that ultimate, signature chewiness! Overbaking will lead to dry cookies.
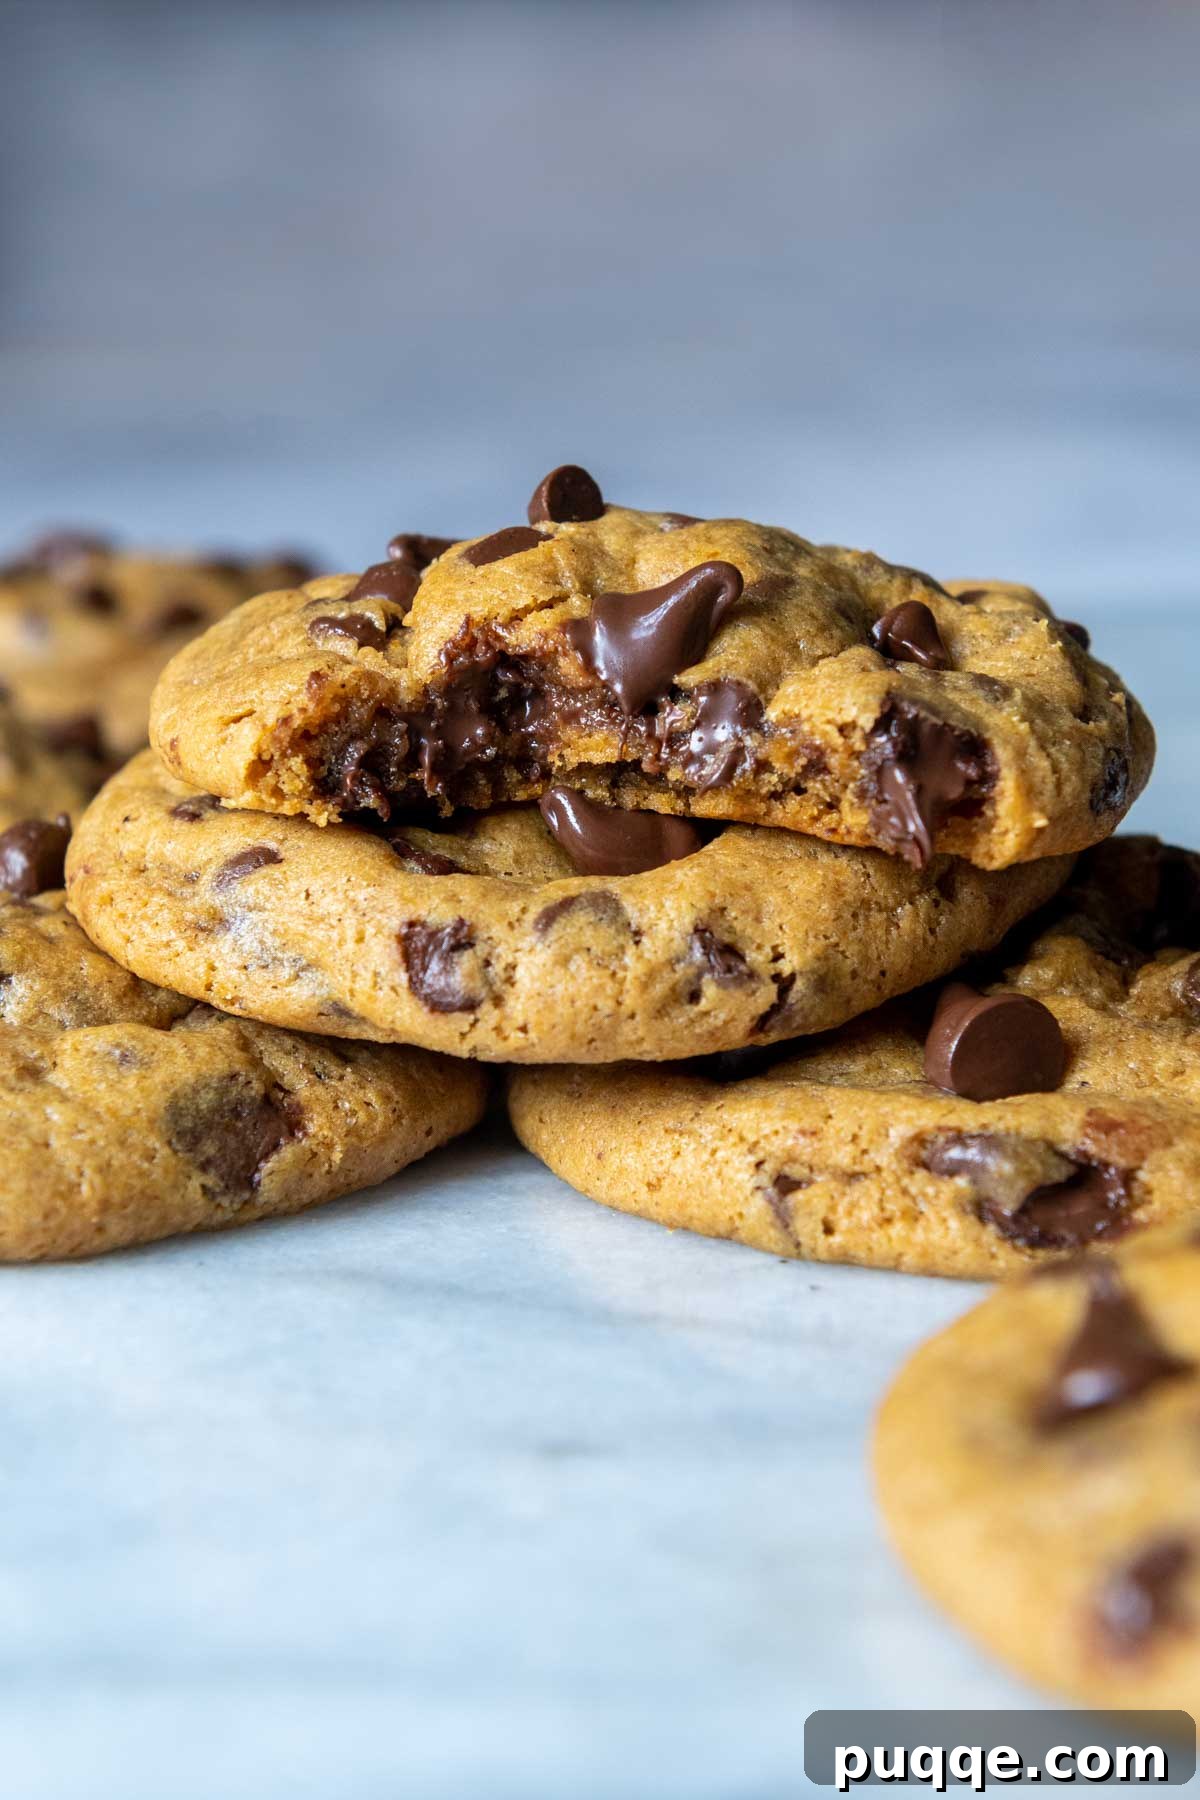
These particular gluten-free pumpkin cookies require a little extra patience during the cooling process. When they first emerge from the oven, they will appear quite puffy, almost surprisingly “cakey.” Have no fear – this is a completely normal and expected part of the magic! They will gradually collapse and settle into their gloriously soft and chewy form as they cool to room temperature. Allow them to cool on the hot baking pan for at least 10-15 minutes before attempting to transfer them to a wire cooling rack. This crucial initial cooling time on the hot pan allows them to set properly and firm up, preventing them from breaking apart when moved. For even more expert tricks on achieving that perfect bakery-style look and soft, ridged texture, continue reading in the dedicated section below.
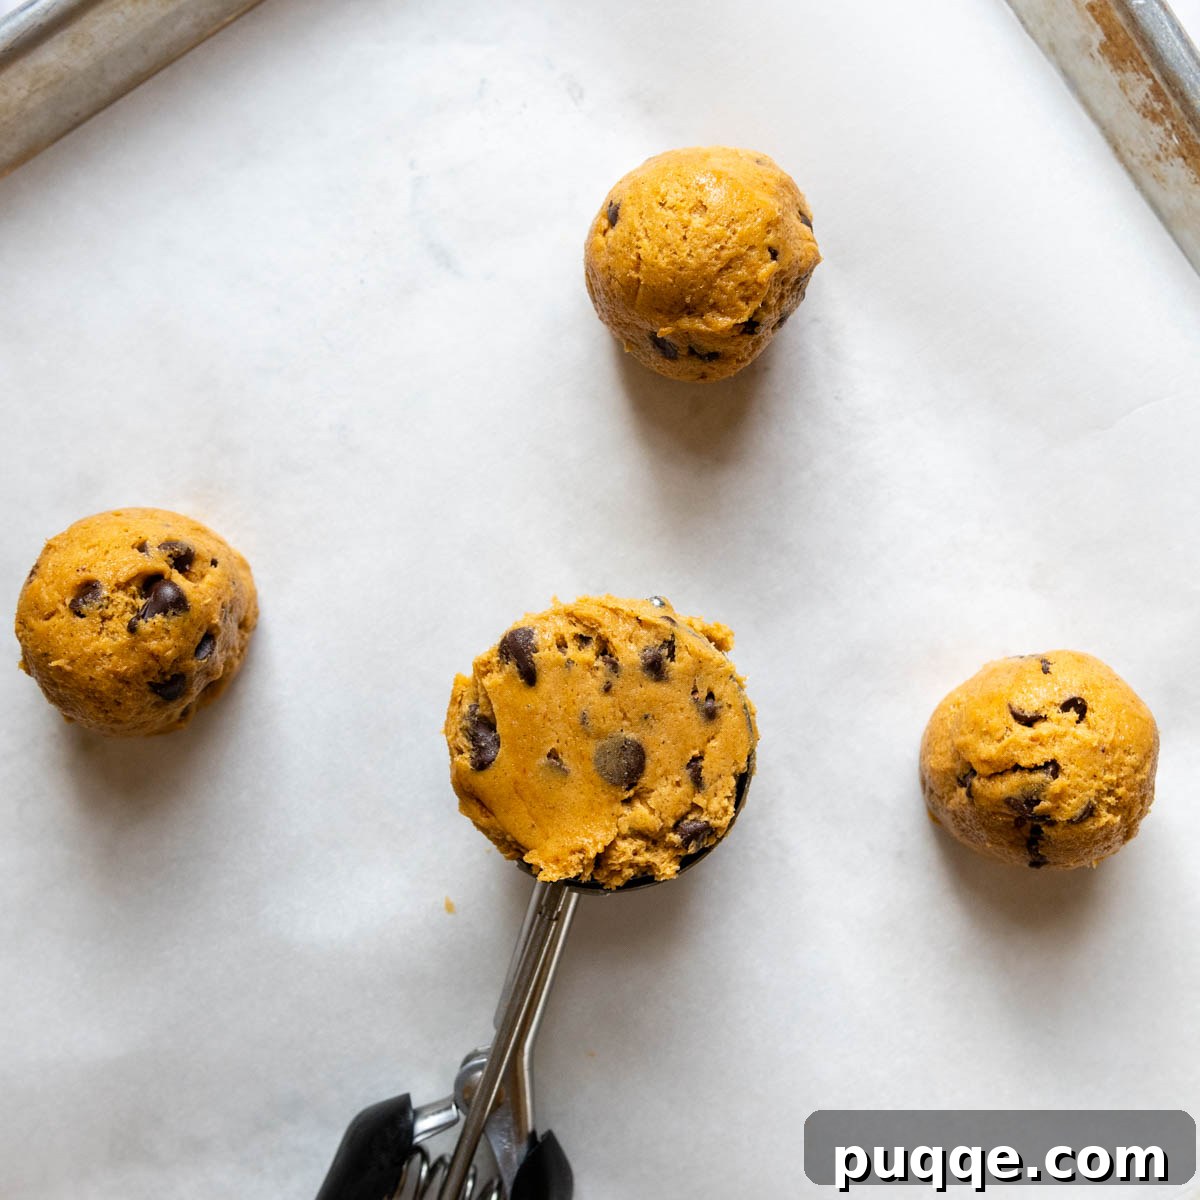
Pro Tips for Shaping Your Gluten-Free Pumpkin Cookie Dough (Achieve Epic Bakery-Style Results!)
Achieving those thick, gloriously soft, and delightfully craggy bakery-style cookies isn’t solely about the ingredients or the baking time; it’s also profoundly influenced by how you handle and shape the dough. For gluten-free pumpkin cookies, avoiding flat, thin cookies that spread too much in the oven can be a common challenge, but there’s an incredibly easy and highly effective trick that virtually guarantees magnificent, professional-looking results every single time:
Once your gluten-free pumpkin cookie dough has been thoroughly and properly chilled (I cannot emphasize enough how non-negotiable this step is for gluten-free baking success!), use a large cookie scoop to portion it out evenly. A scoop that holds approximately 3 tablespoons of dough is absolutely ideal for creating perfectly substantial, generously sized cookies. After scooping, instead of simply leaving the dough in a round ball to bake, take a brief moment to roll it gently into a perfectly smooth cookie ball in the palms of your hands. Then, and this is the absolute key, gently shape this smooth ball into a tall cylinder with a distinct flat bottom. Visualize a small, mini-drum standing upright or a neatly formed hockey puck on its side. This specific and deliberate shaping method cleverly encourages the dough to melt downwards and outwards in beautiful, visible layers as it bakes, rather than uncontrollably spreading into a thin, featureless disc. The result? Impressively thick, robust bakery-style cookies adorned with those desirable, natural ridges that signal quality and deliciousness.
Don’t be alarmed as your beautiful cookies emerge from the oven looking quite puffy and even somewhat “cakey” – this initial appearance is precisely what we want! This temporary puffiness is a magical part of the process and completely normal. As they begin their cooling journey, they will gradually and gracefully collapse and settle into their wonderfully soft, dense, and supremely chewy form. If you happen to be a fan of slightly flatter, even more ridged cookies, or if you simply wish to expedite the cooling and collapsing process to get to tasting faster, there’s another fun and effective trick you can employ: immediately after carefully removing the hot baking sheets from the oven, gently but firmly “bang” the sheets onto your countertop. For best practice, lay a couple of thick dish towels down first to cushion the impact and diligently protect your counter surface. This controlled, forcible collapse helps to create those desirable, concentric ripples and ensures an incredibly dense, satisfyingly chewy texture throughout the entire cookie. It’s a clever technique that many professional bakers utilize, and it works absolute wonders for these gluten-free pumpkin treats, elevating them to an art form!
Don’t Forget to Pin This Recipe to Your Pinterest Board!
Let’s connect and be friends on Pinterest! I’m always sharing delicious and inspiring recipes!
Did you bake this delightful recipe? I absolutely love hearing about your baking successes and experiences! Please leave a star rating and comment below the recipe card. Your feedback is incredibly valuable, not only for me but also for other home bakers searching for fantastic recipes. I always make sure to respond to every comment! -Melissa
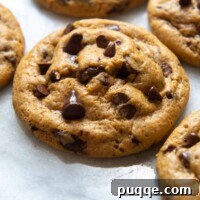
Extra Chewy Gluten-Free Pumpkin Chocolate Chip Cookies (Never Cakey!)

Melissa Erdelac
17
cookies
10 minutes
14 minutes
54 minutes
Pin
Rate
Remove Ads
Ingredients
-
½ cup canned pumpkin puree, Libby’s brand recommended -
¾ cup unsalted butter, softened -
1 cup packed light brown sugar -
2 egg yolks, room temperature -
2 teaspoon vanilla extract -
2 teaspoons molasses -
1 ¾ cup gluten free all purpose flour, Cup4Cup gluten-free flour recommended -
1 ½ teaspoons ground cinnamon, (or substitute 1 tablespoon pumpkin pie spice for spices) -
½ teaspoon ground nutmeg -
½ teaspoon ground ginger -
¼ teaspoon ground cloves -
½ teaspoon baking soda -
¼ teaspoon baking powder -
½ teaspoon salt -
1 cup semisweet chocolate chips, (I use ½ cup semisweet, ½ cup miniature chocolate chips)
Equipment
-
Baking Sheets -
Cup4Cup Gluten Free Flour -
Stand Mixer
Instructions
-
Preheat your oven to 325°F (160°C). Prepare your baking sheets by lining them with parchment paper for easy non-stick baking and cleanup.
-
Spread the canned pumpkin puree in a thin, even layer on a large plate. Place a paper towel over the pumpkin and press down gently to absorb moisture. Discard and repeat with new paper towels 6-8 times, or until significantly less moisture is absorbed. This crucial step prevents cakey cookies and promotes a chewy texture.½ cup canned pumpkin puree
-
In a large mixing bowl (or stand mixer with a paddle attachment), beat the softened unsalted butter with the packed light brown sugar on medium-high speed for about 3 minutes until the mixture is light and fluffy.¾ cup unsalted butter, 1 cup packed light brown sugar
-
Add the blotted pumpkin puree, room-temperature egg yolks, vanilla extract, and molasses to the bowl. Mix on medium speed until all ingredients are well combined and the mixture is smooth.2 egg yolks, 2 teaspoon vanilla extract, 2 teaspoons molasses
-
In a separate bowl, whisk together the gluten-free all-purpose flour, ground cinnamon, nutmeg, ginger, cloves, baking soda, baking powder, and salt. Gradually add this dry mixture to the wet ingredients, mixing on low speed until just combined and no flour streaks remain. Then, gently stir in the semi-sweet chocolate chips and miniature chips until evenly distributed.1 ¾ cup gluten free all purpose flour, 1 ½ teaspoons ground cinnamon, ½ teaspoon ground nutmeg, ½ teaspoon ground ginger, ¼ teaspoon ground cloves, ½ teaspoon baking soda, ¼ teaspoon baking powder, ½ teaspoon salt, 1 cup semisweet chocolate chips
-
Cover the bowl with plastic wrap and refrigerate for 30-45 minutes. This chilling period is essential for gluten-free starches to fully hydrate, preventing grittiness and promoting a desirable chewy texture.
-
Using a large cookie scoop (about 3 tablespoons per cookie), portion the chilled dough. Roll each portion into a smooth ball, then gently shape it into a tall cylinder with a flat bottom for bakery-style results. Place 6 cookies per baking sheet. Bake for 15-16 minutes, rotating the sheets halfway through. Cookies are done when edges are lightly golden, cracks appear on top, and they lose their wet sheen.
-
Upon removal from the oven, cookies will be puffy. They will settle into a chewy texture as they cool. For flatter, ridged cookies, gently “bang” the baking sheets on a towel-lined counter a few times. Allow cookies to cool on the pan for 10-15 minutes before transferring to a wire rack to cool completely. Enjoy your perfect gluten-free pumpkin cookies!
Tips & Notes for Your Gluten-Free Pumpkin Cookies
Customizing Your Cookies with Additional Mix-Ins
This recipe provides a fantastic base for delicious chewy pumpkin cookies, but feel free to get creative and personalize them with your favorite mix-ins! To maintain the ideal cookie dough to mix-in balance and ensure proper baking, aim for approximately 1 cup total of any combination of these delightful additions:
- Chopped Nuts: Elevate the texture and nutty flavor with the addition of toasted pecans, walnuts, or even luxurious macadamia nuts for a richer profile and satisfying crunch.
- Dried Fruits: Introduce a burst of chewy sweetness and complementary tang with dried cranberries, tart cherries, finely chopped dried figs, sweet currants, or classic plump raisins.
- Alternative Chocolate Varieties: Don’t limit yourself to just semi-sweet! Experiment with creamy milk chocolate chips, rich dark chocolate chunks, sweet white chocolate chips, or nostalgic gluten-free butterscotch chips. A combination of different chocolate types can add wonderful complexity and visual appeal.
- Sea Salt Flakes: For a truly gourmet touch and to enhance the sweet-savory balance, sprinkle a tiny pinch of flaky sea salt on top of each cookie just before they go into the oven for baking. This simple addition beautifully enhances both the chocolate and the pumpkin spice flavors.
Troubleshooting Common Gluten-Free Cookie Issues
Even with the best recipes and intentions, baking can sometimes present unexpected challenges. Here are solutions to common issues you might encounter when making these gluten-free pumpkin cookies:
- Cookies Spreading Too Much: If your cookies are spreading excessively thin during baking, first ensure your butter wasn’t too soft or even melted (it should be soft enough to indent easily, but not greasy). Also, double-check that your pumpkin puree had sufficient moisture removed through the blotting process. Crucially, never skip the dough chilling step; a warmer dough will always spread more. You can try chilling the dough for a longer period, up to 2 hours, or even a quick 15-minute freeze if you’re in a hurry.
- Gritty Texture: A gritty texture in gluten-free baked goods usually indicates that the starches in the flour blend haven’t fully hydrated. The extended chilling period in this recipe is specifically designed to prevent this. Ensure you chill your dough for the full recommended time, and consider using a high-quality gluten-free flour blend known for excellent texture, such as Cup4Cup, for the best results.
- Too Cakey/Not Chewy Enough: This particular issue almost always points back to excess moisture still present in the pumpkin puree. Revisit the blotting technique and ensure you’ve thoroughly removed as much liquid as possible. Additionally, remember that using only brown sugar and egg yolks (without whites) significantly helps achieve that desirable chewy, non-cakey outcome.
- Dry Cookies: Overbaking is the single most common culprit for dry, hard cookies. Keep a close eye on your cookies towards the very end of the baking time. They should still look slightly soft, puffy, and perhaps a touch underbaked in the center when you remove them from the oven, as they will continue to cook and set on the hot baking sheet even after removal.
Storing and Freezing Your Gluten-Free Pumpkin Cookies for Lasting Freshness
Proper storage is absolutely key to maintaining the deliciousness, soft texture, and fresh quality of your gluten-free cookies for as long as possible:
Storing Baked Cookies:
Gluten-free cookies, especially those that lack gluten’s natural binding structure, tend to dry out more quickly than their traditional counterparts. To keep them at their absolute best, ensure they have cooled completely to room temperature before storing. Stack 2-3 cookies together and place them in an airtight container at room temperature. They will remain wonderfully soft and delightfully chewy for 2-3 days. For slightly longer storage at room temperature, an old baker’s trick is to add a slice of plain white bread to the container; the bread’s moisture will help to keep the cookies softer by drawing moisture from the bread itself rather than the cookies.
Freezing Cookie Dough (Before Baking – Prep Ahead!):
This is a fantastic option for meal prep or having fresh cookies on demand! Prepare your cookie dough fully up to the shaping stage. Drop portioned cookies (shaped into cylinders as described) onto a parchment-lined baking sheet and freeze them until they are completely solid (this usually takes about 1-2 hours, depending on size). Once hardened, transfer the frozen cookie dough balls to a freezer-safe ziplock bag or an airtight freezer container. They can be safely frozen for up to 3 months. When you’re ready to bake, simply place the frozen dough balls directly onto a parchment-lined baking sheet and bake them directly from frozen, adding an additional 1-3 minutes to the standard baking time. This method ensures you always have warm, fresh-baked cookies with minimal effort!
Freezing Baked Cookies:
If you’ve baked a large batch of these delicious cookies and don’t plan on enjoying all of them within a day or two, freezing the baked cookies is an excellent way to preserve their freshness and texture. Once the baked cookies are completely cool to room temperature, wrap stacks of 2-3 cookies tightly in plastic wrap. Then, transfer these individually wrapped stacks to a large ziplock freezer bag or an airtight freezer-safe container. They can be frozen for up to 3 months. To enjoy, simply thaw them at room temperature for an hour or two, or for that irresistible freshly baked feel, gently warm them in the microwave for a few seconds until soft and gooey again.
Recipe adapted from In Bloom Bakery.
Carbohydrates: 30g,
Protein: 2g,
Fat: 12g,
Saturated Fat: 7g,
Polyunsaturated Fat: 0.5g,
Monounsaturated Fat: 2g,
Trans Fat: 0.3g,
Cholesterol: 46mg,
Sodium: 178mg,
Potassium: 57mg,
Fiber: 2g,
Sugar: 21g,
Vitamin A: 1427IU,
Vitamin C: 0.4mg,
Calcium: 45mg,
Iron: 1mg
Did you make this recipe?
Please leave a star rating and review below. It helps others when searching for recipes and I LOVE feedback!