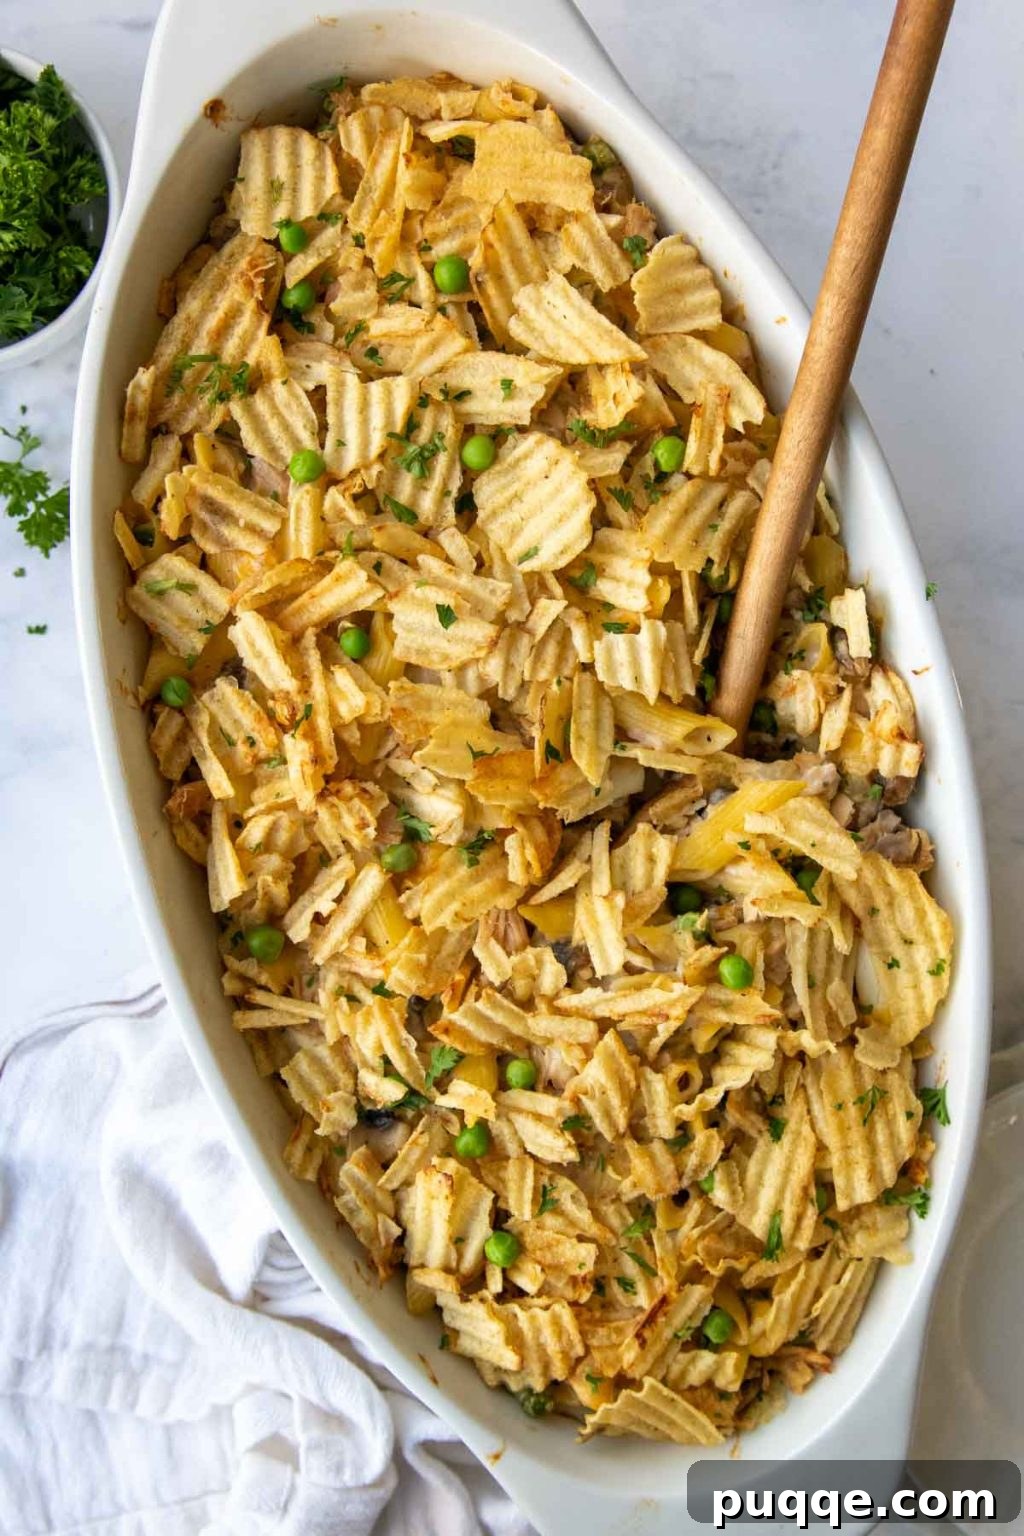
Discover the secrets to flawlessly reheating your favorite casseroles in the oven, ensuring they emerge just as delicious, moist, and flavorful as the day they were first baked. Say goodbye to dry, crusty leftovers and hello to perfectly warmed, comforting meals. This comprehensive guide covers everything from safely thawing frozen casseroles to mastering the art of preserving crispy and cheesy toppings, guaranteeing optimal results every time.

How to Reheat a Casserole in the Oven: The Essential Guide to Perfect Leftovers
Casseroles are the epitome of comfort food, offering hearty, satisfying meals perfect for family dinners or feeding a crowd. The beauty of a casserole often lies in its ability to be prepared ahead of time, making it an excellent choice for meal prep or busy weeknights. However, reheating leftovers can sometimes be a daunting task, especially when the goal is to maintain that original moisture and flavor. Nobody wants a dried-out, unappetizing dish that has lost its creamy texture or tender ingredients.
This ultimate guide will walk you through the most effective techniques for reheating casseroles in the oven, covering various scenarios from single servings to entire baking dishes, and from fresh leftovers to deeply frozen concoctions. Our primary focus is always on preventing your beloved casserole from becoming dry, ensuring every bite is as delightful as the first. Get ready to transform your leftovers into another culinary triumph!
Step-by-Step Guide to Flawlessly Reheating Casseroles in the Oven
For the absolute best results when reheating most casseroles, whether they contain meat, pasta, vegetables, or a combination, follow these foundational steps. These methods are meticulously designed to evenly warm your dish while locking in precious moisture and preserving its original deliciousness.
Step One: Bring Your Casserole to Room Temperature (and Thaw if Frozen)
One of the most crucial, yet often overlooked, steps in achieving a perfectly reheated casserole is allowing it to come to room temperature before placing it in the oven. This simple act significantly reduces the overall reheating time required, which in turn minimizes the risk of moisture loss, prevents uneven heating, and helps avoid a rubbery texture. If your casserole is frozen, the process begins even earlier:
- For Frozen Casseroles: The ideal method is a gradual thaw. Transfer the frozen casserole dish from the freezer to the refrigerator the night before you plan to reheat it. This slow, controlled thawing process typically requires 12-24 hours, depending on the casserole’s size and density. Avoid thawing a casserole at room temperature for extended periods, as this can lead to dangerous bacterial growth. Once thawed, proceed to the next step.
- For Refrigerated Casseroles: Once thawed (or if starting with a casserole directly from the refrigerator), remove it from the fridge approximately 30-60 minutes before you intend to reheat it. The exact duration depends on how cold it still feels and the ambient temperature of your kitchen. A larger, denser casserole will naturally take longer to shed its chill and equilibrate with room temperature.
Starting with a casserole closer to room temperature means the oven has less work to do to bring it up to a safe internal temperature. This gentle approach prevents the edges from drying out or overcooking while the center struggles to warm through, ensuring a uniformly heated and moist result.
Step Two: Prepare for Baking and Set the Oven Temperature
Proper preparation before placing your casserole in the oven is paramount to maintaining its texture and moisture. The right oven temperature and covering technique are vital for success.
- Preheat Your Oven: Set your oven to a moderate and consistent temperature of 350°F (175°C). This temperature is ideal for reheating most casseroles slowly and evenly, preventing any scorching of the edges or excessive drying out of the interior. A lower temperature ensures a gentle re-warming process.
- Cover with Aluminum Foil: Carefully place the casserole dish onto a baking tray (this is a good practice to catch any potential spills or boil-overs). Then, cover the casserole tightly and securely with aluminum foil. The foil acts as a protective barrier, effectively trapping steam and moisture inside the dish. This crucial step is your best defense against a dry casserole. For casseroles topped with cheese, consider a quick spray of nonstick cooking spray on the underside of the foil to prevent the melted cheese from sticking.
- Estimate Baking Time: The duration required for reheating will vary based on several factors: the casserole’s initial temperature (room temp vs. still chilled), its density (e.g., a meat-heavy vs. a vegetable-light casserole), and the overall volume of the dish. Generally, a refrigerated casserole that has been brought to room temperature will take approximately 20-30 minutes to reheat thoroughly. Larger or denser casseroles might require up to 45 minutes to an hour.
Step Three: Check for Doneness and Serve Safely
Ensuring your casserole is heated all the way through is paramount for both enjoyment and food safety. Discovering cold spots in the middle of your dish is not only unpleasant but can sometimes indicate unsafe temperatures where bacteria might thrive.
- The Traditional “Knife Test”: Carefully insert a thin dinner knife or a metal skewer into the very center of the casserole, allowing it to penetrate the thickest part. Hold it there for 10-15 seconds, then quickly pull it out and touch the tip (be cautious, it will be hot!). If the knife feels hot to the touch, the casserole is likely warmed through to the core.
- The Foolproof Thermometer Method: For absolute certainty and uncompromised food safety, we highly recommend using an instant-read thermometer. Insert the thermometer into the thickest part of the casserole, being careful to avoid any bones (if present) or touching the bottom of the dish. The internal temperature should register at least 165°F (74°C) to be considered safely reheated, especially crucial for casseroles containing meat, poultry, or eggs.
Once your casserole reaches the desired internal temperature, it’s ready to be served and savored! If your casserole boasts a crispy or cheesy topping, you might want to remove the foil for the last few minutes to revive its texture and appeal, as detailed in the sections below.
The Quickest Way to Reheat a Casserole When Time is Limited
While the oven provides the most even and gentle reheating, delivering superior results for most casseroles, sometimes you’re short on time, or you only have a small portion to warm up. In such cases, a smart combination of microwave or stovetop pre-heating followed by a quick oven finish can significantly speed up the process without sacrificing too much quality. This hybrid method is particularly useful for single slices or smaller portions of pasta-based or saucy casseroles that you want to enjoy quickly.
- Initial Boost (Microwave or Stovetop):
- Microwave Method: For individual servings, place your casserole slice in a microwave-safe dish. To retain crucial moisture and prevent the edges from hardening, place a damp paper towel loosely over the top of the dish. Heat on 40-50% power for 1-2 minutes, then check and continue heating in 30-second increments until it feels moderately warm. Avoid using high power, as it can cause food to become rubbery, tough, or dry out quickly.
- Stovetop Method (for creamy/saucy casseroles): Transfer a portion of your creamy or saucy casserole (like a mac and cheese or a chicken pot pie filling) to a skillet over low heat. Add a splash of milk, cream, or broth (1-2 tablespoons) to prevent sticking and help rehydrate the sauce. Stir gently and heat until warm, then proceed to the oven for a finishing touch.
- Transfer to Oven: Once the casserole has been partially warmed using the microwave or stovetop, transfer it to an oven-safe baking dish (if it wasn’t in one already suitable for oven use). Cover it securely and tightly with aluminum foil to trap moisture.
- Finish in the Oven: Place the covered dish in a preheated 350°F (175°C) oven. Reheat for an additional 10-20 minutes, or until it’s hot throughout (always check with an instant-read thermometer for 165°F internal temperature). If your casserole features a crispy or cheesy topping, remove the foil for the final 5 minutes of baking to help restore its texture and make it appealing.
This hybrid approach expertly uses the microwave or stovetop for quick internal warming, while the oven provides even heat distribution and, most importantly, allows for textural improvement, especially for delicious toppings.
Mastering the Art of Reheating Frozen Casseroles for Delicious Results
Preparing casseroles in advance and freezing them is a fantastic and convenient way to save precious time on future meals. With the right technique, you can confidently reheat a frozen casserole to taste just as good, if not better, than fresh. These steps apply equally to both previously baked and unbaked frozen dishes, ensuring consistent quality.
- Thawing is Paramount for Optimal Results: For the absolute best outcome, always aim to thaw your frozen casserole in the refrigerator overnight (for a minimum of 12-24 hours) before reheating. This slow, gradual thawing process is critical as it prevents uneven cooking, helps preserve the delicate texture of ingredients (like pasta or vegetables), and drastically reduces the oven time required. Thawing in the fridge also ensures food safety by keeping the casserole out of the bacterial “danger zone.”
- Bring to Room Temperature (Post-Thaw): Even after a thorough thawing in the refrigerator, letting the casserole sit at room temperature for at least 30 minutes before baking is highly beneficial. This extra step helps the casserole shed its deep chill, promoting more even heating in the oven. If you’re particularly pressed for time, you can carefully use your microwave’s defrost function (on a microwave-safe dish) to bring it to room temperature more quickly. Alternatively, for very large or dense casseroles, you can cover it with foil and thaw it in a 300°F (150°C) oven for about 1-2 hours, checking periodically, before increasing the temperature to the reheating stage.
- Oven Reheating for Perfection: Once thawed and brought to room temperature, transfer the casserole to an oven-safe container (if it’s not already in one suitable for oven use). Cover it tightly and securely with aluminum foil. Place the dish in a preheated 350°F (175°C) oven. The reheating time will typically be 30-45 minutes, but it’s essential to always check with an instant-read thermometer to ensure it reaches a safe internal temperature of 165°F (74°C) in the center.
While direct reheating from frozen is technically possible at a lower temperature (e.g., 325°F/160°C for a longer duration, like 1.5-2 hours, always covered), thawing first is overwhelmingly recommended for superior texture, moisture retention, and overall flavor. It’s an extra step that truly makes a difference in the quality of your reheated meal.
To Cover or Not to Cover? Your Guide to Reheating Casseroles
This is a common question when it comes to reheating casseroles, and the answer largely depends on your desired outcome and the type of casserole you’re warming up. For most reheating scenarios, covering your casserole with foil is the overwhelmingly preferred method to maintain moisture and ensure even, gentle heating.
When to Cover with Aluminum Foil:
- Preventing Dryness: This is the paramount reason to cover a casserole with foil during reheating. The foil acts as a shield, trapping steam and moisture inside the dish. This creates a humid, self-basting environment, which is absolutely essential for preventing the top and edges from drying out, becoming crusty, or turning tough. This is especially vital for casseroles with creamy sauces, delicate pasta, tender rice, or soft vegetables.
- Ensuring Even Heating: Foil plays a significant role in distributing heat more uniformly throughout the casserole. It helps ensure that the center warms up thoroughly without the edges becoming overcooked or dried out before the rest of the dish is ready.
- Preserving Texture: For dishes like a hearty baked ziti, a savory Mexican chicken casserole, or any creamy chicken and rice bake, keeping them covered will preserve their soft, tender texture and prevent pasta or rice from becoming hard.
When to Uncover (or Remove Foil):
- Crispy Toppings: If your casserole is crowned with a topping you want to be crispy, golden, and crunchy again (e.g., breadcrumbs, fried onions, crushed crackers, or potato chips), you will strategically remove the foil for the last 5-10 minutes of reheating. This allows direct heat to interact with the topping, making it beautifully golden and satisfyingly crunchy.
- Cheesy Toppings: Similarly, for casseroles featuring a glorious melted cheese topping, removing the foil for the final few minutes can help the cheese become wonderfully bubbly, slightly browned, and irresistibly gooey – just like it was when freshly baked.
- Developing a Browner Crust: If you desire a slightly browned crust on the casserole itself (beyond just the topping), you can carefully uncover it towards the very end of the cooking cycle for a few minutes.
In most reheating scenarios, the best approach is to start with the casserole covered. Then, assess the progress and decide whether to remove the foil based on the desired texture of your topping or crust. This two-stage method gives you maximum control over the final outcome.
Reheating Casseroles with Crispy Toppings for that Perfect Crunch
Casseroles crowned with crunchy elements like golden breadcrumbs, savory french fried onions, or delightfully crushed potato chips are incredibly popular, offering a delightful textural contrast that elevates the entire dish. Reheating these without turning the topping soggy, stale, or burning it to a crisp requires a specific and thoughtful approach.
Initially, you will want to reheat these casseroles with the foil on top, just as you would any other. This crucial step ensures the body of the casserole warms evenly and retains its vital moisture without affecting the delicate topping prematurely. Once the casserole is thoroughly heated through (always confirm with an instant-read thermometer for 165°F internal temperature), it’s time to work on restoring that irresistible crispy finish:
- Remove Foil and Consider Increasing Heat: Carefully remove the aluminum foil from the casserole dish. At this point, if desired, you can slightly increase the oven temperature to 375°F (190°C) for a brief period. This higher heat helps to crisp the topping more quickly and effectively.
- Add Fresh Topping (Optional, but Highly Recommended): For the absolute best and most authentic results, consider adding a fresh layer of your chosen crispy topping at this stage. This could be a sprinkle of extra breadcrumbs, a handful of more french fried onions, or additional crushed potato chips. This fresh layer will crisp up beautifully and provide that ‘just baked’ crunch that makes a casserole truly special.
- Bake Uncovered for Crispness: Place the uncovered casserole back into the hot oven for an additional 5-10 minutes, or until the topping achieves your desired level of golden brown crispness. It is vital to keep a very close eye on it during this final stage, as toppings can quickly go from perfectly golden to burnt in a matter of moments.
This strategic two-stage reheating process ensures that the interior of your casserole is perfectly warm and moist, while the topping achieves that irresistible crunch, making your leftover dish feel brand new and utterly delicious, much like a comforting old fashioned tuna noodle casserole.
Reheating Casseroles with Cheesy Toppings for Gooey Perfection
A bubbling, gloriously golden cheese topping is often the hallmark of a truly great casserole, adding both flavor and visual appeal. Reheating a dish with a prominent cheese layer, such as a delightful chicken and broccoli bake, while preserving that luscious, melted texture (and preventing it from stubbornly sticking to the foil) is straightforward with the application of a few smart tips.
Just like with casseroles featuring crispy toppings, you’ll want to start by carefully covering your cheesy casserole with aluminum foil during the initial reheating phase. This fundamental step ensures that the casserole warms through evenly from the inside out and, critically, prevents the cheese from drying out or burning prematurely before the internal components are thoroughly hot.
- Pro Tip for Non-Stick Cheese: Before placing the aluminum foil on top of your casserole dish, remember to generously spray the underside of the foil with a nonstick cooking spray. This simple yet effective trick creates a crucial barrier that prevents any wonderfully melted cheese from adhering to the foil, ensuring a clean, easy lift-off and leaving you with a beautiful, intact cheese layer.
Once the casserole has reached its safe and desired internal temperature (165°F / 74°C), it’s time to perfect that cheesy finish and make it truly irresistible:
- Remove Foil: Carefully and gently remove the foil from the casserole dish. Appreciate the steam escaping, ready to reveal your revived dish.
- Add More Cheese (Optional, but Highly Recommended): For an extra luxurious, fresh-tasting, and visually appealing topping, consider sprinkling a fresh layer of your preferred shredded cheese over the casserole at this point. This new cheese will melt beautifully, blend with the existing layer, and give the entire dish that desirable “just made” appeal, enhancing its richness and flavor.
- Bake Uncovered for Bubbling Perfection: Return the uncovered casserole to the oven for an additional 5-10 minutes. During this time, watch closely as the cheese melts, begins to bubble enticingly, and turns a lovely golden brown. This final uncovered bake will revitalize the cheese, making it gooey, bubbly, and utterly irresistible.
By diligently following these steps, your cheesy casserole will emerge from the oven just as gooey, bubbly, and incredibly delicious as it was when it first came out, perhaps even better with that fresh cheese touch!
Best Tips to Avoid a Dried Out Casserole (Your Moisture-Retention Handbook)
Preventing your casserole from drying out during the reheating process is paramount to enjoying delicious, satisfying leftovers that live up to their original glory. A dry casserole can be disappointing, but with these proven strategies, you can ensure your dish remains moist, flavorful, and perfectly textured every single time:
- Always Start at Room Temperature (When Possible): This is arguably the most impactful tip for moisture retention. Whenever feasible, allow your refrigerated casserole to come to room temperature for 30-60 minutes before placing it in the oven. This significantly reduces the overall reheating time required, which directly translates to less time for moisture to evaporate, keeping your casserole wonderfully juicy and tender. It also promotes more even heating, reducing the risk of overcooking the edges while the center remains cool.
- Cover with Aluminum Foil Without Fail: This cannot be stressed enough. Covering the baking dish tightly and securely with aluminum foil is your absolute best defense against dryness. The foil traps steam within the dish, creating a humid, self-basting environment where moisture cycles back down into the casserole. This not only keeps the dish moist but also helps it heat more evenly and quickly, as the trapped heat circulates efficiently.
- Introduce Extra Liquid for Creamy/Saucy Casseroles: If your casserole contains creamy ingredients, pasta, or rice (like a beloved baked mac and cheese or a rich chicken tetrazzini) and appears a bit dry, thick, or clumpy after refrigeration, do not hesitate to add a splash of liquid before reheating. A tablespoon or two of milk, cream, chicken broth, or even plain water can work wonders. Gently stir it into the saucy parts of the casserole. This technique effectively rehydrates the sauce, helping the dish regain its original luscious consistency and preventing it from becoming stiff or pasty.
- Utilize the Right Oven Temperature: Reheating at a moderate temperature (350°F / 175°C) is generally the most effective and safest approach. High heat can cause the exterior of the casserole to dry out or even burn before the interior is heated through, leading to an undesirable texture contrast. A gentler, lower heat ensures a more even and consistently moist result throughout the dish.
- Avoid Over-Reheating at All Costs: Once the casserole reaches a safe internal temperature of 165°F (74°C) – confirmed with an instant-read thermometer – remove it from the oven immediately. Prolonged heating beyond this point will only continue to drive out precious moisture, inevitably making the dish dry and less appealing. Timely removal is key.
- Prioritize Proper Storage: The effort to prevent dryness begins even before reheating. Ensure your casserole is stored correctly in an airtight container in the refrigerator as soon as it has cooled sufficiently. This proactive step minimizes moisture loss during storage and contributes greatly to the overall success of the reheating process.
Frequently Asked Questions About Reheating Casseroles
To further assist you in achieving reheating perfection, here are answers to some of the most frequently asked questions about reheating casseroles:
Q: Can I reheat a casserole more than once?
A: While technically possible, it’s generally not recommended to reheat a casserole multiple times. Each reheating cycle can degrade the texture and flavor of the ingredients, making them mushy or dry. Additionally, it increases the risk of bacterial growth if not handled properly through repeated cooling and heating. For the best quality and safety, it’s advisable to reheat a portion once and consume it. If you have a large casserole, consider reheating only the amount you plan to eat at a given time.
Q: How do I properly store leftover casserole?
A: Once your casserole has cooled down to room temperature (within two hours of cooking), transfer the leftovers into airtight containers. Refrigerate promptly. Most casseroles can be safely stored in the refrigerator for 3-4 days. If you plan to freeze it for longer storage, ensure it’s in a freezer-safe container or wrapped tightly in plastic wrap and then foil to prevent freezer burn. Frozen casseroles can maintain quality for 2-3 months.
Q: What if my casserole has a lot of liquid already?
A: For very soupy or liquid-rich casseroles (like certain stews or wet pasta bakes), you might still want to cover them for the initial reheating phase. This ensures even heat distribution without boiling off too much liquid too quickly. However, you can remove the foil sooner in the process, or even keep it uncovered for the last 15-20 minutes, if you desire some of the liquid to reduce and thicken the sauce slightly. Monitor closely to prevent excessive reduction.
Q: Can I reheat casserole in an air fryer?
A: For small portions or individual slices, an air fryer can indeed be a good option, especially if you’re aiming for a crispy exterior. Place the casserole slice in the air fryer basket (ensure it fits without crowding). For the first half of the cooking time, cover it loosely with a small piece of foil to prevent it from drying out. Then, remove the foil for the last few minutes to crisp up the topping. Reheat at around 300-325°F (150-160°C) for 10-15 minutes, checking frequently to avoid burning.
Q: Is it safe to reheat a casserole that was left out overnight?
A: No. Any perishable food, including casseroles that contain meat, dairy, or eggs, should not be consumed if left at room temperature for more than two hours (or one hour if ambient temperatures are above 90°F / 32°C). This is because bacteria can multiply rapidly in the “danger zone” (between 40°F and 140°F / 4°C and 60°C), making the food unsafe to eat even after reheating. When in doubt, throw it out to prevent foodborne illness.
Conclusion: Enjoying Your Leftover Casseroles to the Fullest
Reheating a casserole doesn’t have to be a culinary compromise or a gamble on dryness. By understanding and applying the principles of gentle, even heating, and proactive moisture retention, you can consistently bring your favorite comfort foods back to life with their original deliciousness, perfect texture, and rich flavor fully intact. Whether it’s a hearty breakfast casserole, a cheesy pasta bake, or a savory meat and vegetable medley, the tips and techniques outlined in this guide will empower you to enjoy perfectly reheated meals time and time again.
Say goodbye to dry, lackluster leftovers and embrace the joy of a wonderfully revived casserole. Your taste buds (and your family) will thank you!
Save these easy tips for how to reheat a casserole in oven to your Pinterest board!
Let’s be friends on Pinterest! I’m always sharing great recipes and kitchen wisdom!