
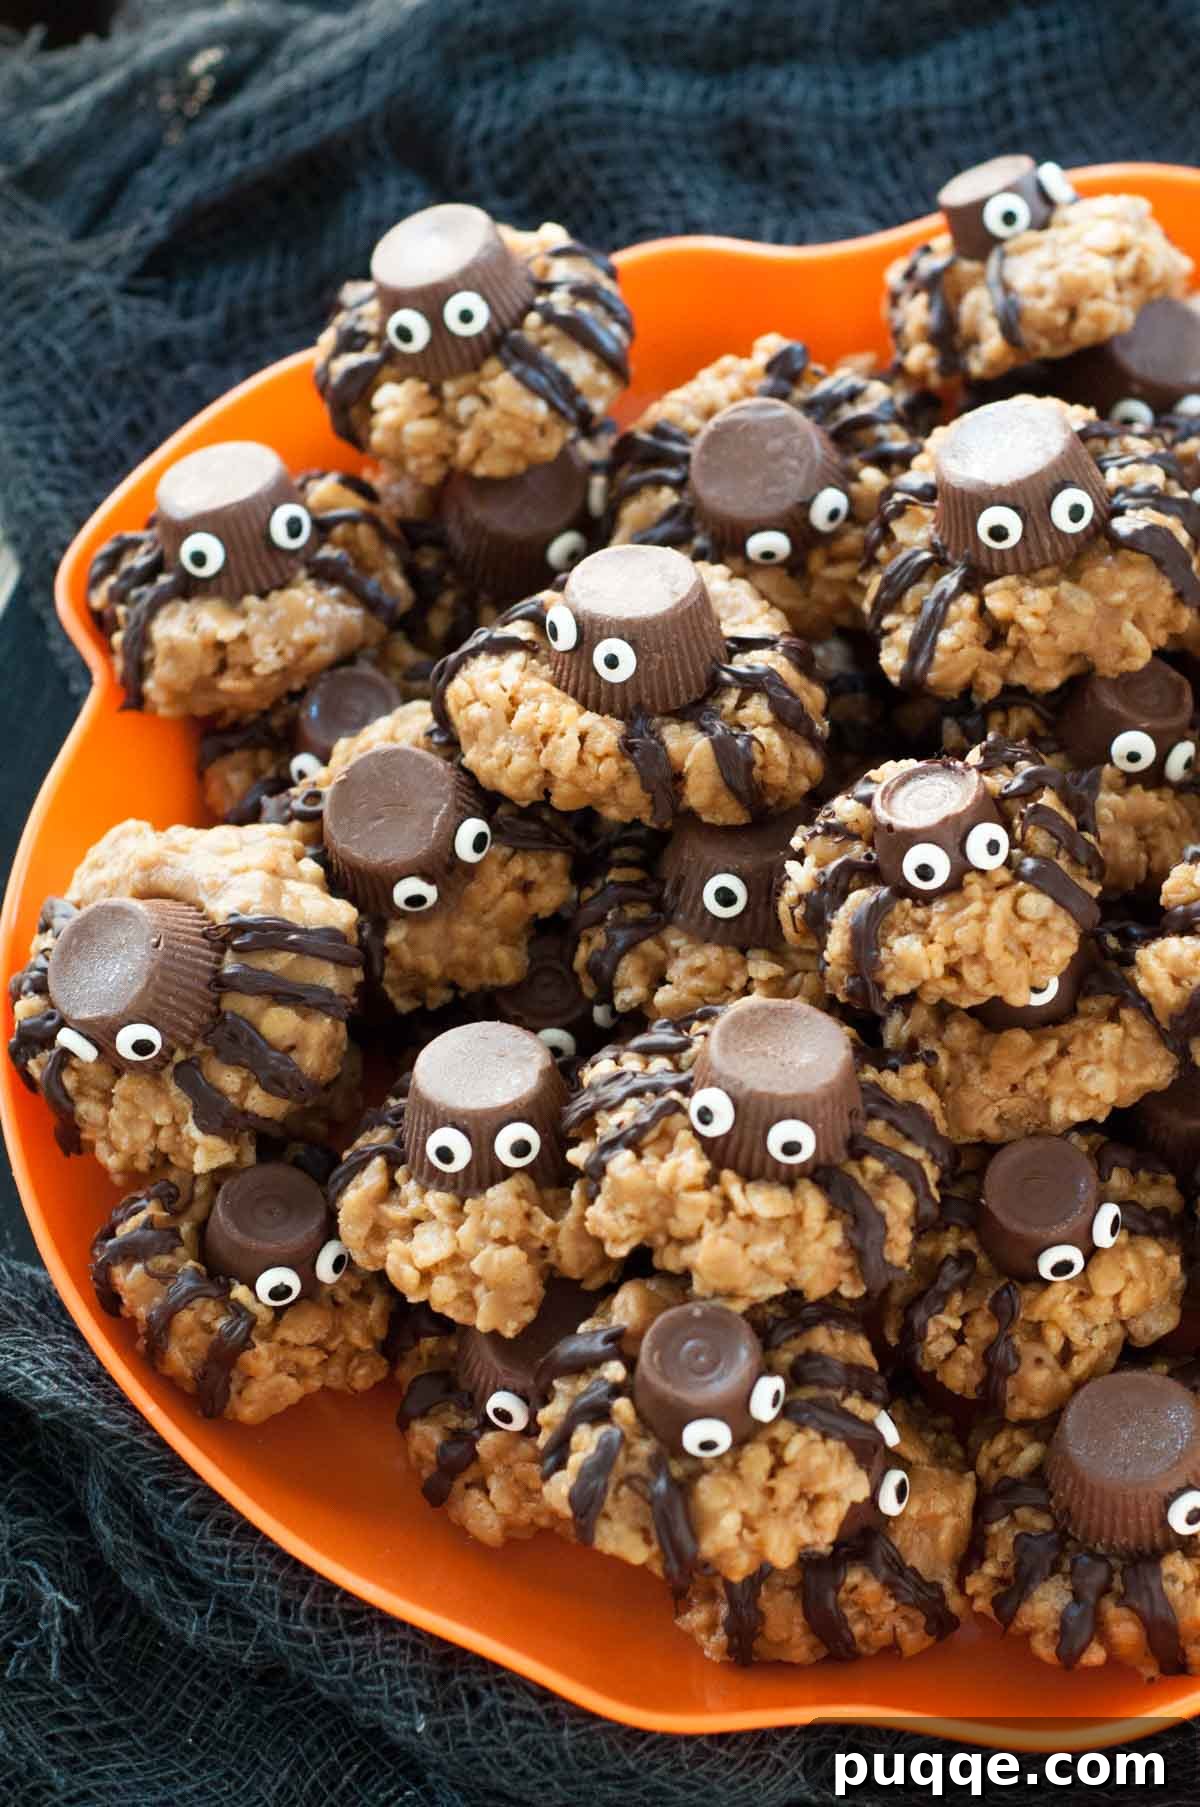
Get ready to spin a web of delight this Halloween with these incredibly
**easy no-bake spider cookies**! Perfect for both kids and adults, these fun
and festive treats are not only adorable but also
**gluten-free Halloween cookies**, making them a hit for everyone. Combining
the irresistible flavors of Reese’s peanut butter cups with crispy rice
cereal, these spooky-cute delights come together in minutes, requiring no
oven time. Say goodbye to complicated baking and hello to simple, delicious
Halloween magic!
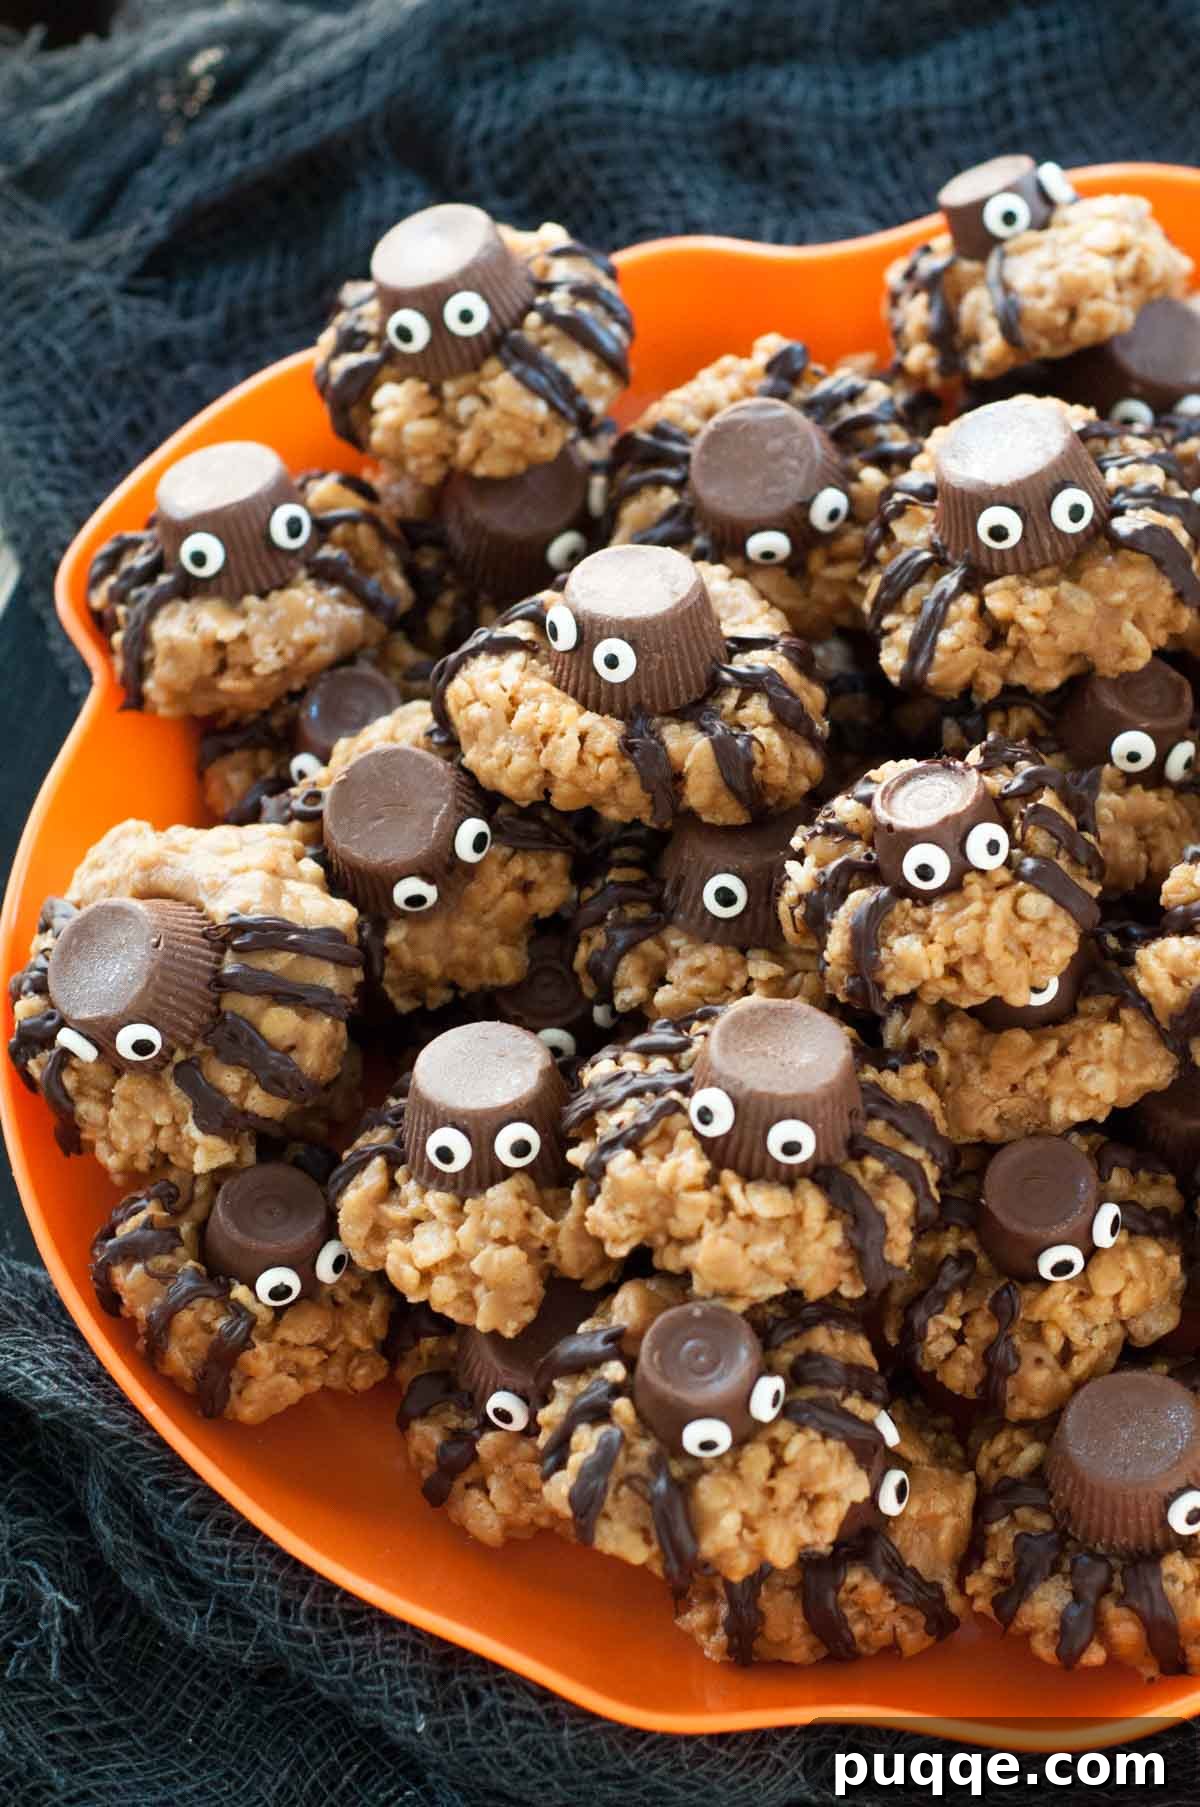
Easy No-Bake Spider Cookies: Your Go-To Gluten-Free Halloween Treat!
When the spooky season arrives, the quest for creative yet simple Halloween
dessert ideas often leads to overwhelming Pinterest boards. Many elaborate
creations seem out of reach for the average busy parent. But what if we told
you that you could create a show-stopping Halloween treat that looks
intricate but is incredibly simple? Enter these delightful
**no-bake spider cookies** made with crispy rice cereal!
These cookies are designed to make you feel like a superstar without spending
hours in the kitchen. They take mere minutes to mix and drop, and the
decorating process is both straightforward and irresistibly cute. Best of
all, just like your favorite
gluten-free sugar cookies, these
**gluten-free Halloween cookies** are allergen-friendly, ensuring that more
guests can enjoy the festivities without worry. This recipe not only guides
you step-by-step to create the perfect spooky treat, but it’s also easy
enough for your kids to lend a helping hand. It’s a win-win situation for a
fun, family-friendly Halloween!
Why Choose No-Bake for Halloween Treats? Convenience Meets Creativity
No-bake recipes are a lifesaver, especially during busy holiday seasons like
Halloween. They eliminate the need for an oven, making them perfect for
small kitchens, hot weather, or when your oven is occupied with other
holiday dishes. But beyond convenience, no-bake treats like these
**spider-themed cookies** offer a unique appeal.
The simplicity of combining a few staple ingredients to create something
magical is incredibly satisfying. For parents, it means less stress and more
time to enjoy the holiday with their children. For kids, it means instant
gratification and the joy of participating in the creation of their spooky
treats without handling hot ovens. These
**no-bake Halloween cookies** harden quickly, meaning you can whip up a
batch for a last-minute party or school event with minimal fuss. They’re
also fantastic for parties where you might not have access to an oven for
reheating or preparing food. Plus, the delightful texture of crunchy crispy
rice cereal combined with creamy peanut butter and chocolate is simply
irresistible, appealing to a wide range of palates.
Ingredient Deep Dive: Allergen-Friendly Choices
Crafting delicious **gluten-free Halloween cookies** requires careful
attention to ingredient labels. While many components seem inherently
gluten-free, hidden additives can sometimes contain gluten. Here’s a
detailed look at the ingredients for these
**easy no-bake spider cookies** and what to watch out for to keep them
allergen-friendly:
-
Crispy Rice Cereal: This is a crucial base for our
cookies. While most people instantly think of “Rice Krispies,” it’s
important to note that Kellogg’s brand Rice Krispies
IS NOT gluten-free due to the inclusion of malt flavoring,
which contains barley. For a certified **gluten-free** option, look for
brands such as Aldi, Malt-O-Meal, Wegmans, or Erewhon. Always double-check
the label for a “gluten-free” certification. -
Peanut Butter: For the best consistency and ease of
mixing, creamy peanut butter is recommended over natural peanut butter.
Natural peanut butter often separates, requiring extensive stirring and
can result in a greasier or less cohesive cookie base. Standard creamy
peanut butter provides the necessary binding and rich flavor. -
Miniature Peanut Butter Cups (or Rolo Candy): These
serve as the adorable “spider bodies” or “heads.” Reese’s peanut butter
cups are generally gluten-free in their classic wrapped miniature form.
However, be cautious with unwrapped mini versions or seasonal shapes
(like pumpkins), as their manufacturing process or ingredients might
differ and could contain gluten. Rolo candy is another excellent
gluten-free alternative that works perfectly for this recipe, offering a
delicious caramel twist. -
Candy Eyeballs: These are essential for bringing our
spiders to life! While candy eyeballs typically do not contain wheat or
wheat-derivative ingredients themselves, they are often processed in
facilities that handle wheat. If severe gluten allergies are a concern,
look for brands explicitly stating “gluten-free” or consider making your
own edible eyes from melted white chocolate dots with a tiny dark
chocolate center. -
Corn Syrup and Brown Sugar: These form the sweet,
sticky binder for our crispy rice cereal. Ensure your brown sugar is
fresh and packed firmly for accurate measurements. -
Vanilla Extract: A touch of vanilla enhances the
overall flavor profile, adding warmth and depth to the peanut butter.
Most vanilla extracts are gluten-free, but it’s always wise to check if
you’re being extra cautious. -
Semi-Sweet Chocolate Chips: Used for creating the
spider legs and adhering the candy eyeballs. Most major brands of
semi-sweet chocolate chips are gluten-free, but always verify the label,
especially for severe allergies. Melting them provides a perfect “glue”
and “ink” for decorating.
Let’s Craft These Spooky Treats Together!
(Below, you’ll find detailed step-by-step photos and modified
instructions to guide you. For the complete recipe, including precise
ingredient amounts and nutritional information, please scroll down to the
recipe card at the end of this post.)
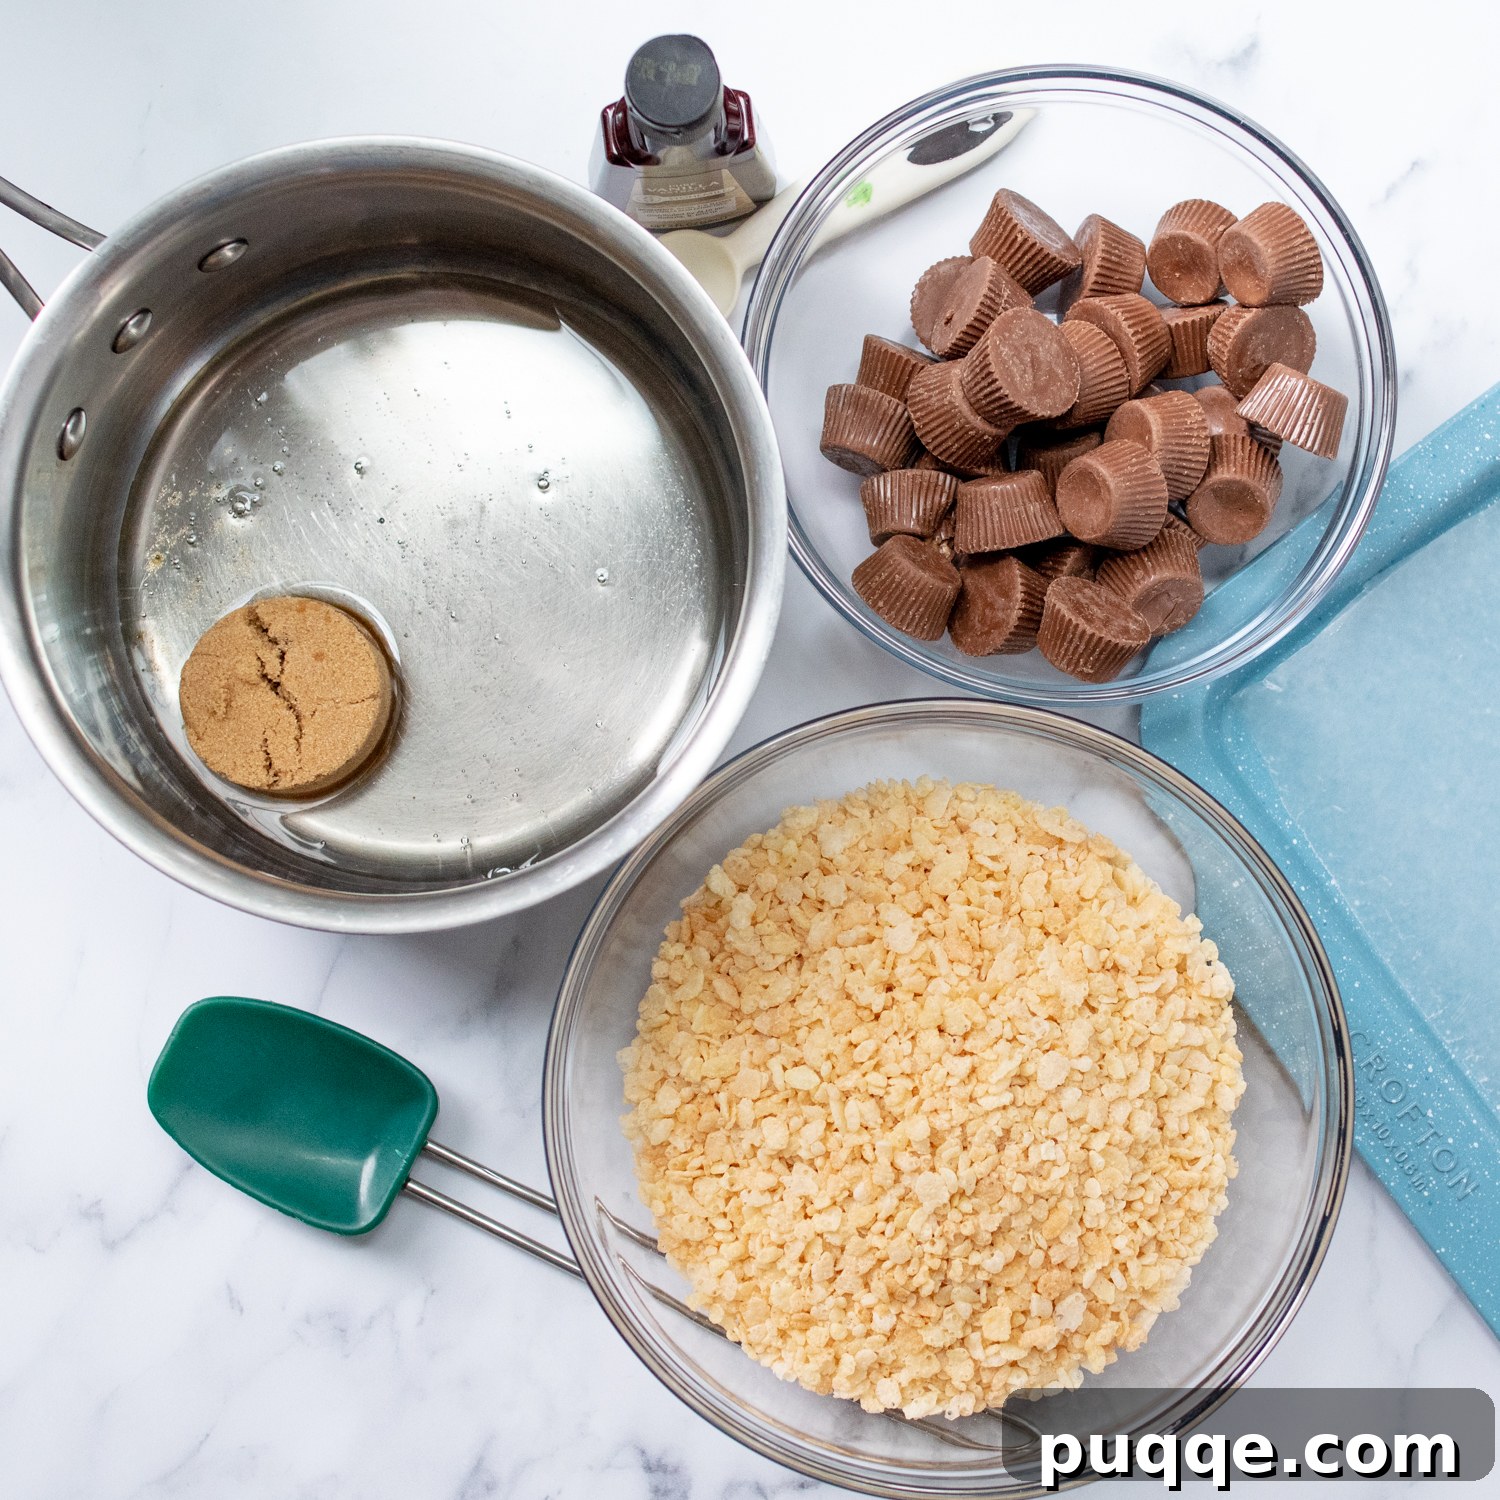
Preparation is Paramount: Get Organized First!
Before you begin, gather and measure all your ingredients: crispy
rice cereal, brown sugar, and creamy peanut butter. This crucial
first step ensures a smooth and stress-free process. Unwrap all
the miniature peanut butter cups and have them ready; they need
to be placed on the warm cookies immediately after scooping.
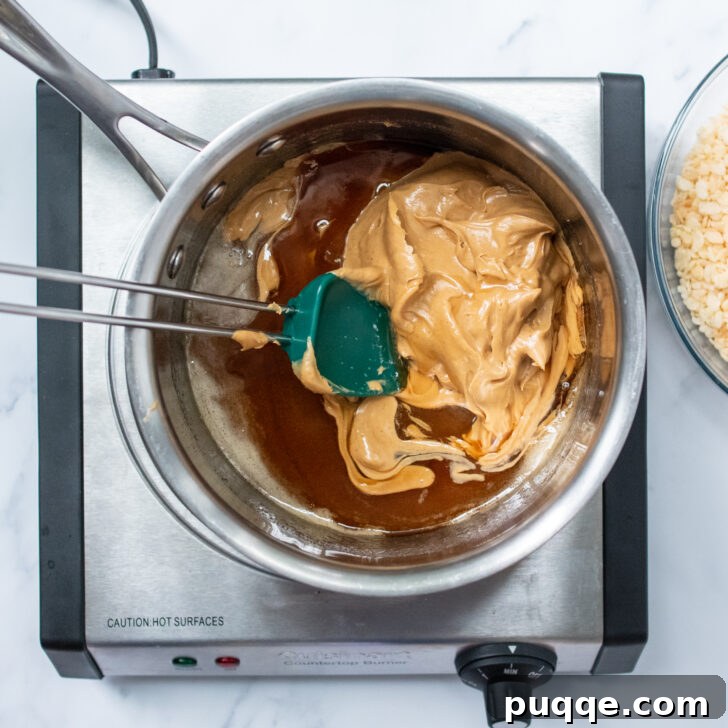
Crafting the Cookie Mixture: The No-Bake Base
In a medium saucepan, gently combine the corn syrup and brown
sugar over medium heat. Stir constantly until the mixture just
reaches a boil. As soon as it bubbles, remove the saucepan from
the heat. Quickly stir in the creamy peanut butter and vanilla
extract until everything is well combined and smooth, forming the
sticky base for your cookies.
Forming the Spider Bodies: Scoop and Press
Working quickly while the mixture is still warm, stir in the
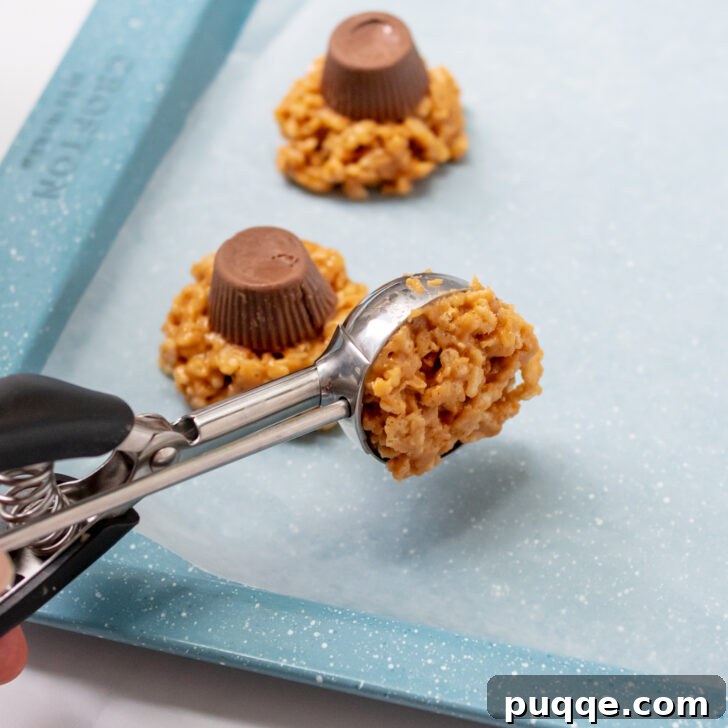
crispy rice cereal until it’s evenly coated. Immediately scoop
1.5-inch balls onto baking sheets lined with wax paper. A
cookie scoop
is the quickest method for uniform cookies, but you can also roll
them by hand. As soon as each ball is on the cookie sheet, gently
press a miniature peanut butter cup onto the top, ensuring it
adheres to the warm cereal base. Allow them to cool completely.

The Fun Part: Time to Decorate Your Spiders!
Once the cookies have cooled and set, it’s time to bring your
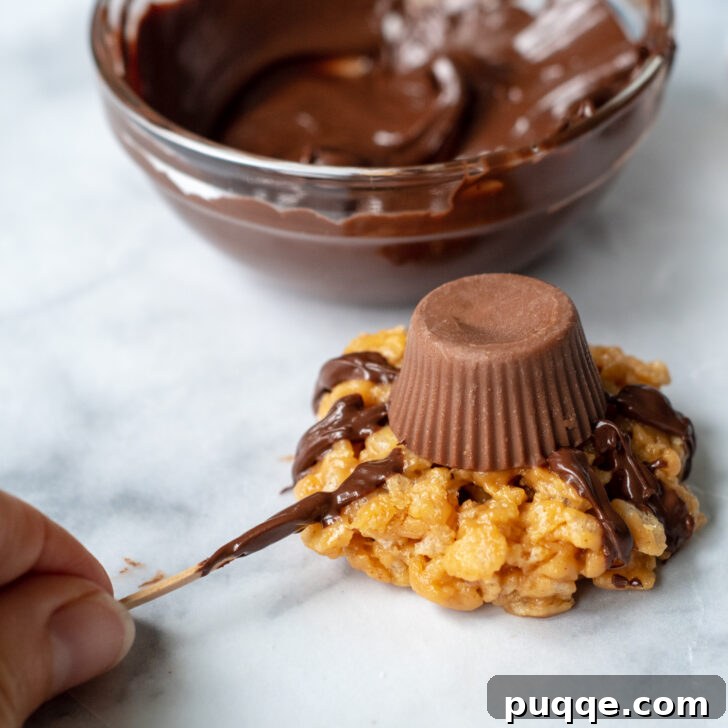
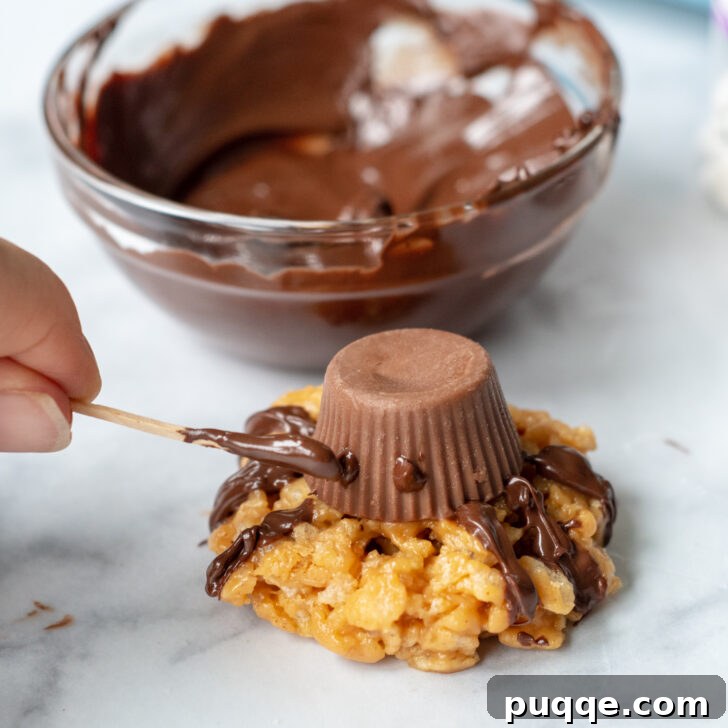
spiders to life! Melt the chocolate chips in a small,
microwave-safe bowl, stirring frequently until smooth. Dip a
toothpick into the melted chocolate and carefully paint on eight
thin “spider legs” around the base of each peanut butter cup. Use
the same toothpick and melted chocolate to dot small spots on the
peanut butter cups where the
candy eyes
will be placed. Press the candy eyeballs onto these chocolate
dots to secure them.
Kid Helper Tips: Get Them Involved!
Halloween treats are always more fun when made with little helpers!
These **no-bake spider cookies** offer plenty of legitimate (and
safe!) ways for kids to get involved in the kitchen, fostering their
creativity and making memories.
-
Unwrapping Duty: Assign the crucial task of
unwrapping the miniature peanut butter cups. Kids love this
simple job, and it’s a great way to ensure all 28 (or more!)
candies are ready for quick assembly. They might even enjoy being
a “taste tester” for quality control! -
Measuring Masters: Before the cooking begins,
have them help measure out the crispy rice cereal, brown sugar,
and peanut butter. This teaches them about measurements and gets
them familiar with the ingredients. -
Spider Body Assembly: Once the adult has rolled
the warm cereal mixture into balls and placed them on the baking
sheets, children can take over placing the peanut butter cups
(the “spider heads”) firmly on top. This is a quick and satisfying
step for them. -
Decorating Extravaganza: This is where kids
truly shine! After the cookies are assembled and the chocolate is
melted, they can draw on the eight spider legs with toothpicks.
They can also dot the chocolate spots for the eyes and carefully
adhere the candy eyeballs. Supervise for neatness, but let their
creativity flow!

Pro Tips for Perfect No-Bake Spider Cookies
Achieving perfectly spooky and delicious **no-bake spider cookies** is
simple with these expert tips:
-
Efficient Setup is Key: The cookie assembly
process moves quickly, as the mixture needs to be warm for the
peanut butter cups to adhere properly. Before you even start
mixing, prepare everything: line two cookie sheets with wax
paper, unwrap all your peanut butter cups, and accurately measure
your peanut butter and cereal. This pre-planning ensures a smooth
workflow. -
Invest in a Cookie Scoop: A
medium cookie scoop
(approximately 1.5 tablespoon size) is a game-changer. It
significantly simplifies the process of creating quick, uniform-sized
balls, making your spiders consistent and appealing. -
Immediate Peanut Butter Cup Placement: As soon
as a rolled ball of crispy rice mixture is placed on the cookie
sheet, immediately press a peanut butter cup on top. The warmth
of the base will slightly melt the chocolate on the peanut butter
cup, creating a perfect bond that holds the “spider head” in place.
Don’t delay this step! -
Flexible Decorating Schedule: Don’t feel
pressured to decorate all the cookies at once. You can assemble
all the cookies with their peanut butter cup bodies, then take a
break. Decorate the legs and eyes at your convenience. -
Re-melting Chocolate: If your melted chocolate
for decorating cools and hardens, simply pop the bowl back into
the microwave for a few seconds (stirring every 15 seconds) until
it’s smooth and pliable again. This allows for stress-free,
staggered decorating. -
Cooling Time Matters: Ensure the cookies are
completely cooled and set before you start decorating. This will
prevent the chocolate legs from smearing and ensure the candy eyes
stay put. A brief stint in the refrigerator can speed this up.

Love this Recipe? Save it to Your Pinterest Board!
Let’s be friends on Pinterest! I’m always sharing great recipes!
Serving and Storing Your Spooky Spider Cookies
These no-bake spider cookies are best served once the chocolate legs and
eyes have fully set, giving them a firm and appealing texture. They make a
fantastic addition to any Halloween party platter, classroom treat, or a
fun snack for a spooky movie night.
To store, place the cooled and decorated cookies in an airtight container at
room temperature for up to 3-4 days. If your home is particularly warm, or
if you want to extend their freshness, you can refrigerate them. Just be
sure to bring them to room temperature for about 15-20 minutes before
serving for the best flavor and texture. Avoid stacking them before the
chocolate is completely firm to prevent smudging the decorations.
Variations & Customizations: Get Creative!
While these **easy no-bake spider cookies** are perfect as is, there’s always
room to get creative and customize them to your liking or dietary needs:
-
Nut-Free Version: If you need a nut-free option,
substitute the peanut butter with a sunflower seed butter (like
SunButter). Ensure the chocolate candies are also nut-free (e.g., use
caramel candies instead of peanut butter cups if necessary, or seek out
certified nut-free chocolate cups). -
Different Candy Bodies: Instead of peanut butter cups,
you can use other small, round candies like Rolo (as mentioned), Junior
Mints, or even small chocolate-covered caramels. -
Chocolate Drizzle: For extra indulgence, after adding
the spider legs, drizzle a little extra melted white chocolate or
another colored candy melt over the cookies for a “spider web” effect. -
Sprinkle Fun: Before the chocolate legs set, sprinkle
some festive Halloween sprinkles onto the chocolate for added color and
texture. -
Vegan Adaptation: To make these cookies vegan, ensure
you use vegan chocolate chips, vegan butter (if substituting any part of
the base), and vegan miniature peanut butter cups (check labels carefully
as many contain dairy).
Frequently Asked Questions (FAQs)
-
Can I make these spider cookies ahead of time? Yes,
absolutely! These cookies can be made 2-3 days in advance and stored in
an airtight container at room temperature. This makes them ideal for
party prep. -
What if my cookie mixture is too sticky or too dry? If
the mixture is too sticky to handle, you might need a little more
cereal. If it’s too dry and crumbly, it’s possible it cooled too much
before the cereal was added, or your measurements were slightly off. A
tiny bit more melted peanut butter can help bind it. -
Can I use natural peanut butter? It’s not
recommended. Natural peanut butter tends to be oilier and can separate,
leading to a greasier or less stable cookie. Creamy, processed peanut
butter works best for this no-bake recipe’s consistency. -
Are these suitable for school parties? Yes, with
caution. Since they contain peanut butter, always check with the school’s
allergy policy. For nut-free environments, consider the sunflower seed
butter variation.
Did you make this recipe? I love hearing from you!
Leave a star rating and comment below the recipe
card. It helps others when searching for recipes and I appreciate feedback
from our community. You will always hear back from me!
-Melissa

Easy No Bake Spider Cookies

Melissa Erdelac
28
30 minutes
10 minutes
1 hour
both kids and adults this Halloween. These fun, festive
gluten-free Halloween cookies combine Reese’s peanut butter
cups and crispy rice cereal for a cute treat all can enjoy!
Pin
Rate
Remove Ads
Ingredients
-
½
cup
corn syrup -
¼
cup
packed light brown sugar -
1
cup
creamy peanut butter -
1
teaspoon
vanilla extract -
3
cups
crisp rice cereal, read label for gluten-free (see recipe notes) -
28
miniature peanut butter cups or Rolo candy, read label for gluten-free (see recipe notes) -
¼
cup
semi-sweet chocolate chips -
56
candy eyeballs, read label for gluten-free
Equipment
-
Medium Cookie Scoop
-
Baking Sheets
Instructions
-
Prepare everything first. Line two cookie
sheets with wax paper, unwrap all miniature
peanut butter cups, and measure your peanut
butter and cereal accurately. Set aside to
ensure a smooth assembly process.28 miniature peanut butter cups or Rolo candy, 3 cups crisp rice cereal -
In a medium saucepan, combine the corn syrup
and light brown sugar over medium heat. Bring
the mixture to a gentle boil, stirring
constantly to prevent burning. As soon as it
boils, remove it immediately from the heat
and stir in the creamy peanut butter and
vanilla extract until smooth and well combined.½ cup corn syrup, ¼ cup packed light brown sugar, 1 cup creamy peanut butter, 1 teaspoon vanilla extract -
Immediately stir the crisp rice cereal into
the warm peanut butter mixture until it’s
fully coated. Quickly drop 1 ½ inch balls of
the mixture onto the prepared wax paper-lined
cookie sheets. TIP: Using a
medium cookie scoop
makes this process very easy and ensures
uniformity, but you can also roll the balls
with lightly greased hands. Once each ball is
on the cookie sheet, flatten it slightly with
your fingers, and immediately press a miniature peanut butter cup on top,
pushing down gently to secure it to the warm
base. -
Once all the cookies are formed, transfer the
cookie sheets to the refrigerator for a few
minutes to help the chocolate peanut butter
cups set firmly. In the meantime, melt the
semi-sweet chocolate chips in a small
microwave-safe bowl. Heat for 30 seconds to 1
minute, stirring every 15 seconds, until
smooth and creamy.¼ cup semi-sweet chocolate chips -
Use a toothpick dipped into the melted
chocolate to carefully paint on eight distinct
spider legs around the base of each peanut
butter cup. Then, use the same toothpick to
create two small chocolate dots on each peanut
butter cup where the eyes will go. Immediately
press the candy eyeballs onto these chocolate
dots to “glue” them in place before the chocolate
hardens. -
Return the decorated cookie sheets to the
refrigerator for another 5-10 minutes. This
final chill will harden the chocolate legs and
secure the candy eyeballs. Once fully set,
store your adorable spider cookies in an
airtight container at room temperature.
Notes
Gluten-Free Ingredient Specifics
While crisp rice cereal is commonly referred to as “Rice
Krispies,” the Kellogg’s brand is
NOT gluten-free due to malt flavoring. For a
gluten-free option, look for brands like Aldi, Malt-O-Meal,
Wegmans, or Erewhon that explicitly state “gluten-free.”
Miniature wrapped Reese’s peanut butter cups or Rolos
are generally gluten-free and suitable for this recipe.
However, exercise caution with unwrapped mini versions
and seasonal shaped candies (like pumpkins), as their
ingredients or manufacturing processes may vary and could
contain gluten. Always double-check labels.
This recipe was adapted from
Six Sisters’ Stuff.
Did you make this recipe?
Please leave a star rating and review below. It helps others when searching for recipes and I LOVE feedback!