
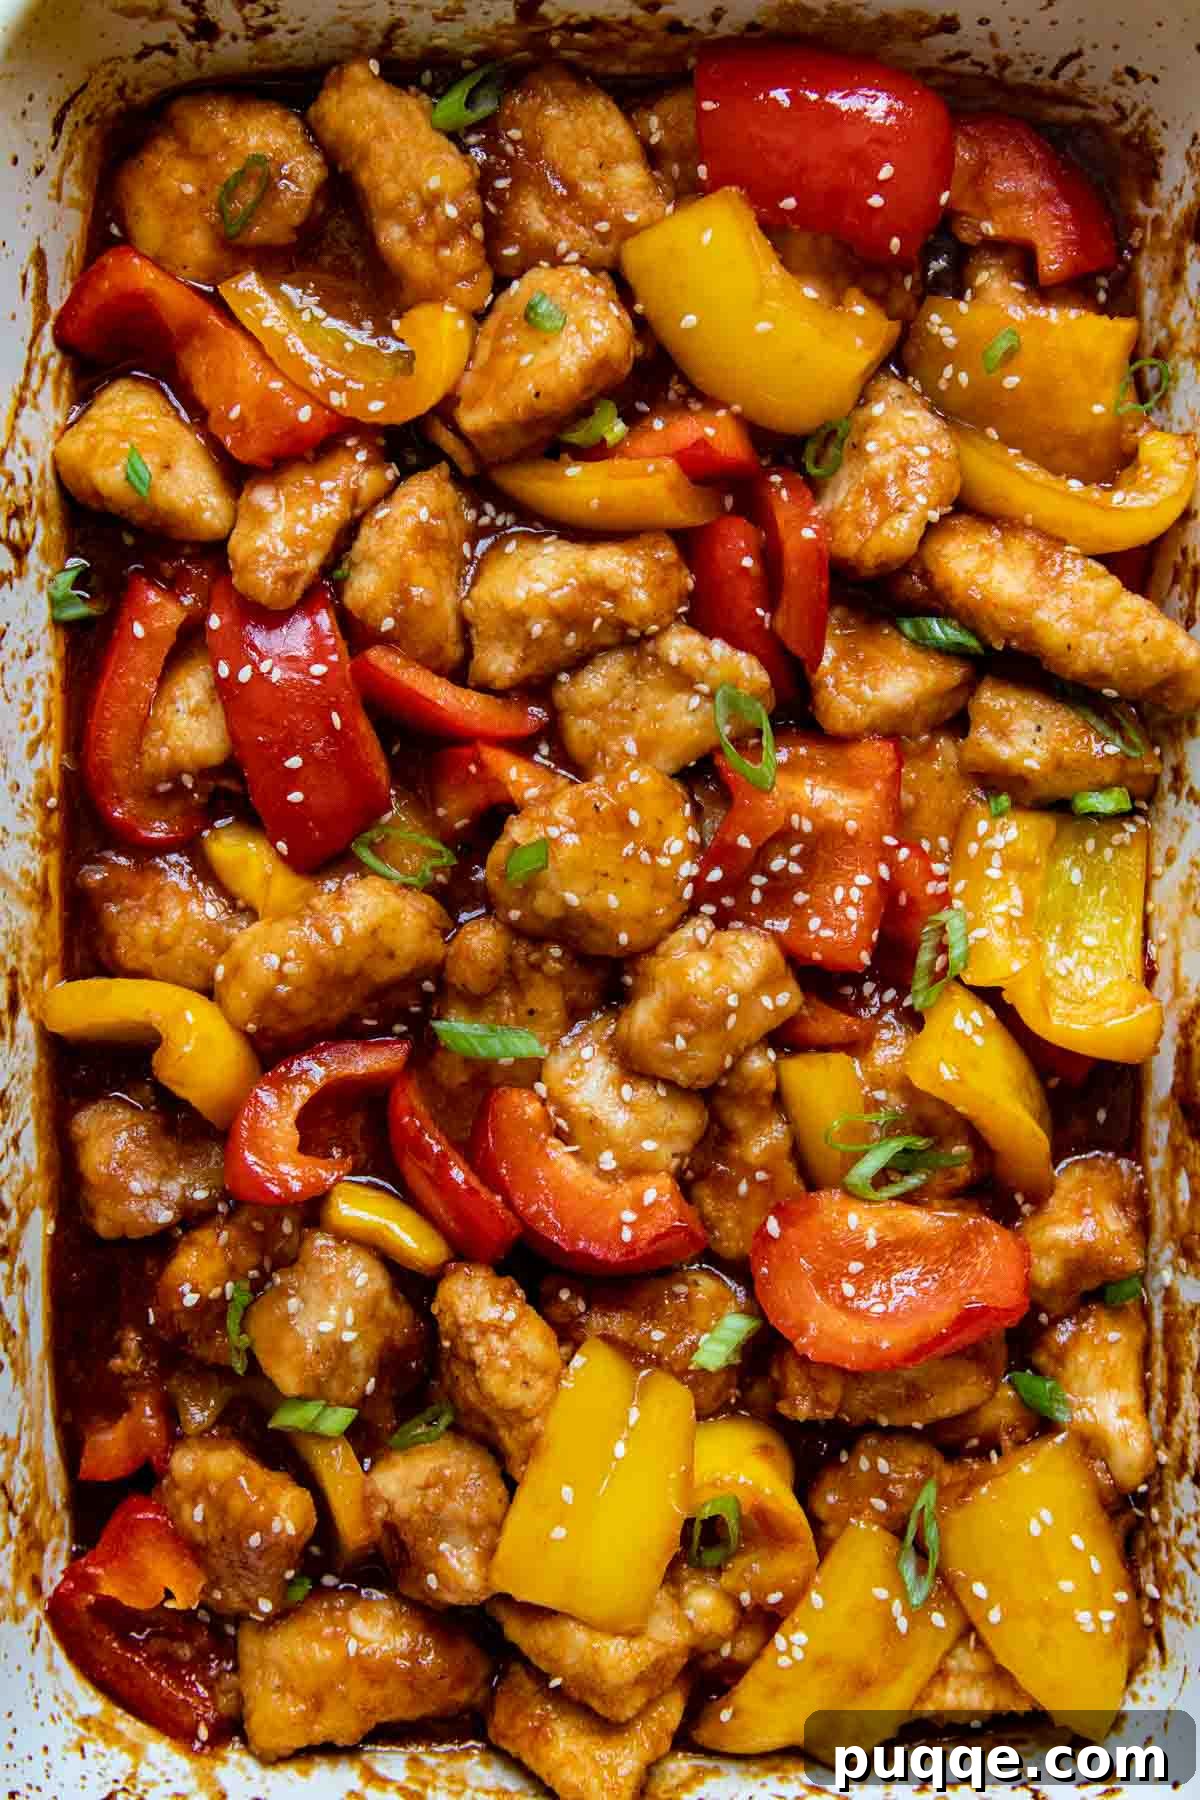
Craving the vibrant, savory-sweet flavors of your favorite Chinese takeout but need it to be gluten-free? Look no further! This incredible recipe for Gluten-Free Sweet and Sour Chicken delivers all the authentic taste and satisfying texture you desire, right in your own kitchen. Forget the deep fryer and complex preparations – this simplified, oven-baked method ensures perfectly golden, crispy chicken coated in a rich, sticky, and tangy gluten-free sweet and sour sauce, all made effortlessly in one pan. Get ready to enjoy a healthier, homemade version of a classic without compromising on flavor or crispness.
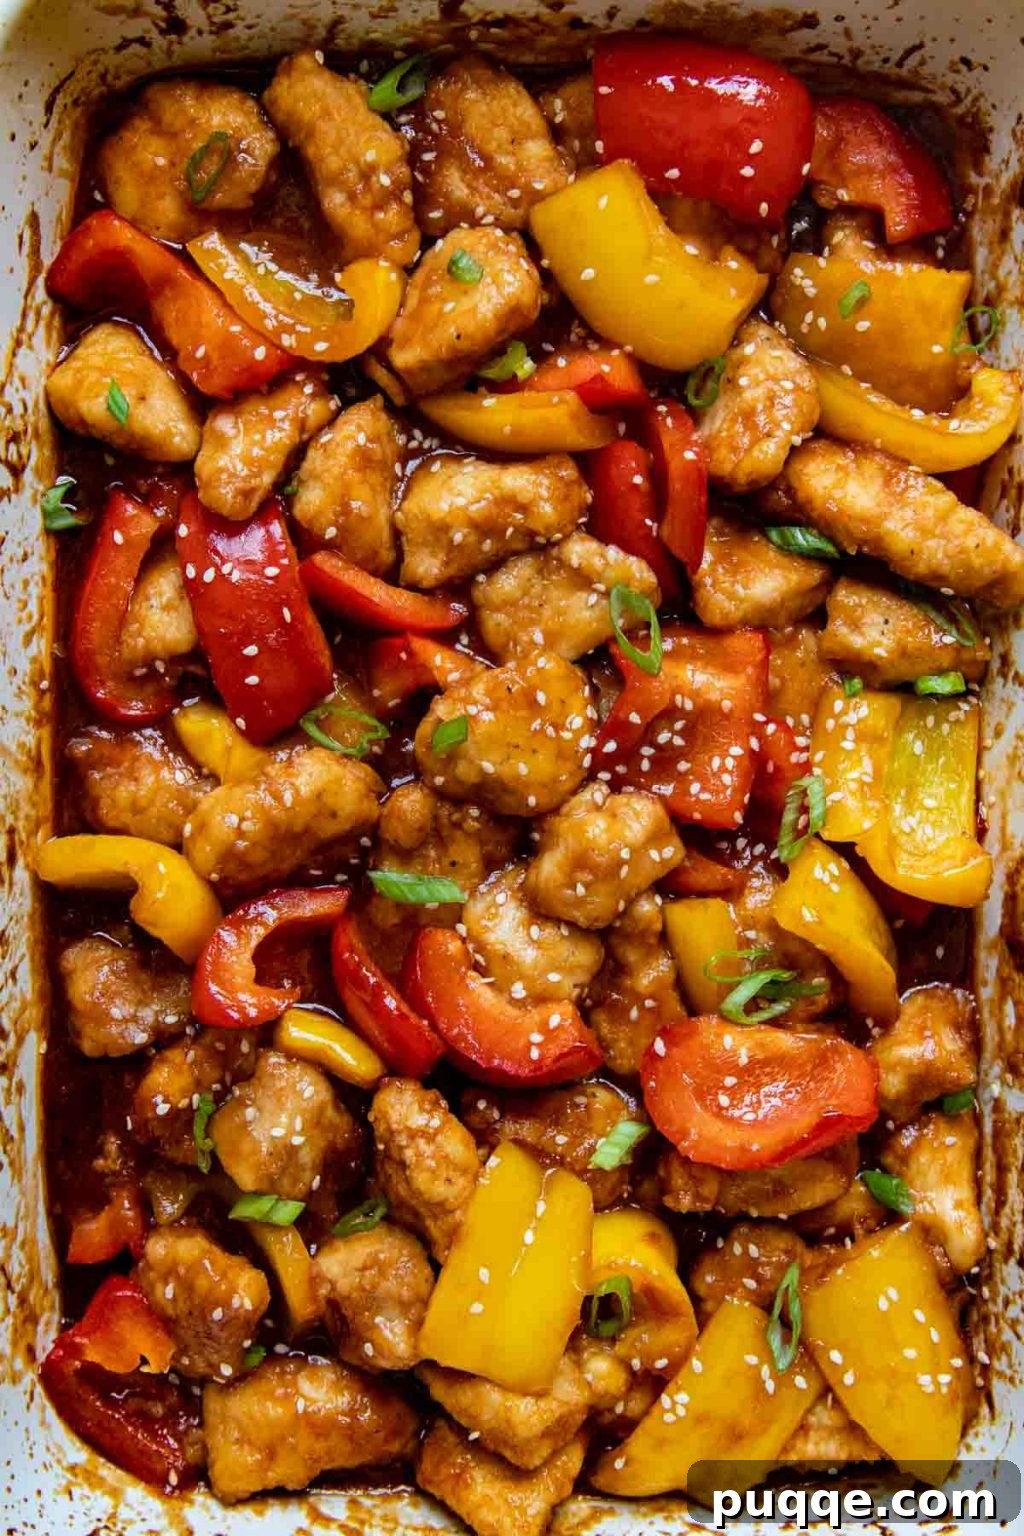
Baked to Perfection: Crispy Gluten-Free Sweet and Sour Chicken Without the Fryer!
Recreating the magic of crispy sweet and sour chicken at home, especially a gluten-free version, might seem daunting. Many recipes call for deep-frying, which can be messy, time-consuming, and adds unnecessary fats. Our goal was to develop a “no-fry,” “dump and bake” recipe that truly simplifies the process while still achieving that irresistible crunch and authentic flavor profile. The journey began with perfecting the gluten-free breading.
Traditional Chinese recipes often rely on a batter of egg, flour, and cornstarch. For a truly gluten-free solution, we discovered that omitting the wheat flour entirely and coating the chicken solely in cornstarch creates a naturally gluten-free and remarkably crispy crust. Cornstarch, when properly baked at high temperatures, forms a delicate yet firm shell that mimics the crispiness of fried chicken without the need for excessive oil.
Our innovative “oven-fry” method is the key to this dish’s success. It involves an initial short burst of high heat in the oven, allowing the cornstarch coating to “set” and crisp up beautifully. This quick bake provides the foundational crunch before the chicken is introduced to the luscious sweet and sour sauce. This approach not only makes the recipe significantly healthier but also dramatically reduces cleanup and hands-on time, making it perfect for busy weeknights. It’s a technique that also works wonders for other Asian-inspired dishes, like homemade gluten-free orange chicken.
Once the chicken has achieved its initial crisp, it’s simply tossed with our vibrant, homemade gluten-free sweet and sour sauce and returned to the oven to finish baking. This second baking phase allows the sauce to caramelize and thicken around each piece of chicken, creating that signature sticky, glossy coating. While your sweet and sour chicken is crisping and melding with the sauce, you’ll have ample time to prepare a complementary side dish, such as easy homemade gluten-free fried rice, transforming your meal into a complete and satisfying feast.
Crafting the Perfect Gluten-Free Sweet and Sour Sauce
The heart of any sweet and sour chicken dish is its sauce, and for those following a gluten-free diet, ensuring the sauce is safe is paramount. Many people wonder, “Is all sweet and sour sauce naturally gluten-free?” The answer, unfortunately, is not always. While homemade sauces commonly use cornstarch as a thickener, which is naturally gluten-free, the inclusion of soy sauce for its distinctive umami flavor often introduces gluten.
Standard soy sauce is brewed with wheat, making it unsuitable for gluten-free consumption. The good news is that numerous gluten-free alternatives are readily available. For this recipe, we highly recommend La Choy brand gluten-free soy sauce, which is widely available in most supermarkets and explicitly labeled as GF. Celiac.com has also verified its safety for those with celiac disease. If La Choy isn’t an option, you can easily substitute an equal amount of tamari or liquid aminos. Both are excellent gluten-free soy sauce alternatives that will deliver the necessary depth of flavor without the gluten.
If you opt for a store-bought sweet and sour sauce, diligent label reading is crucial. Many commercial sauces may use wheat-based thickeners, contain ingredients derived from wheat, or utilize non-gluten-free soy sauce. Always check the ingredient list for hidden gluten sources like “modified food starch” (unless specified as corn or potato), “wheat flour,” or simply “soy sauce” without the “gluten-free” certification.
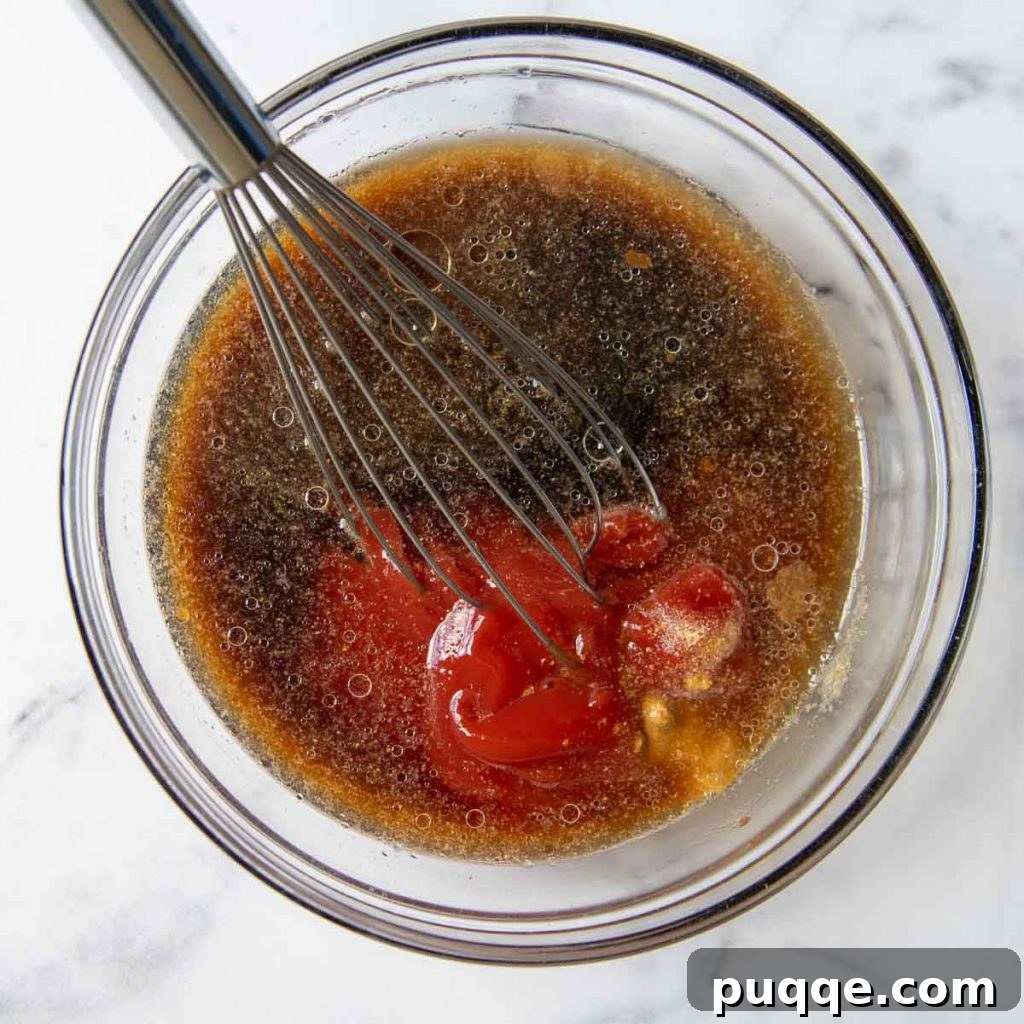
Our homemade gluten-free sweet and sour sauce strikes the perfect balance of sweetness, tanginess, and savory depth. Combining ketchup, light brown sugar, apple cider vinegar, water, gluten-free soy sauce, ground ginger, and garlic powder, it creates a robust flavor profile that clings beautifully to the crispy chicken. This versatile gluten-free soy sauce can also be enjoyed in other delightful dishes like gluten-free bulgogi or unstuffed egg rolls, proving its utility beyond this specific recipe.
Let’s Make This Together! Step-by-Step Instructions
This section provides a detailed, step-by-step guide to preparing your crispy gluten-free sweet and sour chicken. For precise ingredient measurements and a comprehensive recipe overview, please refer to the full recipe card at the bottom of this article.
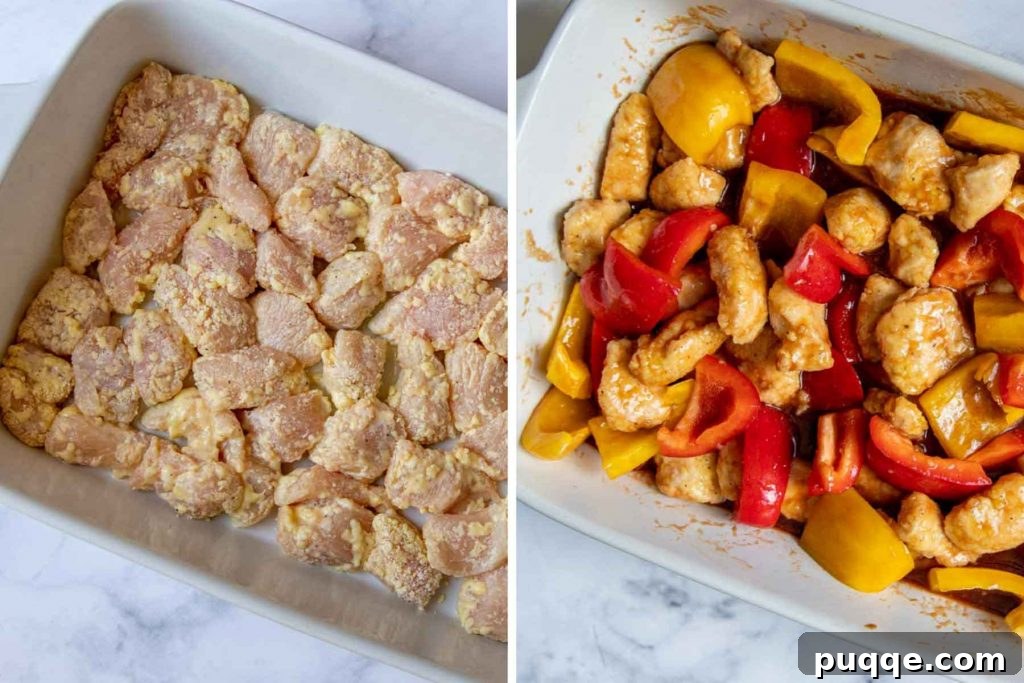
- Prepare the Oven and Baking Dish: Begin by preheating your oven to a high temperature of 425ºF (220ºC). While the oven preheats, pour the vegetable or canola oil into a 9×13 inch baking dish. Place the dish with the oil into the oven as it heats. This crucial step allows the oil to get very hot, ensuring an immediate sizzle and crisping effect when the chicken is added.
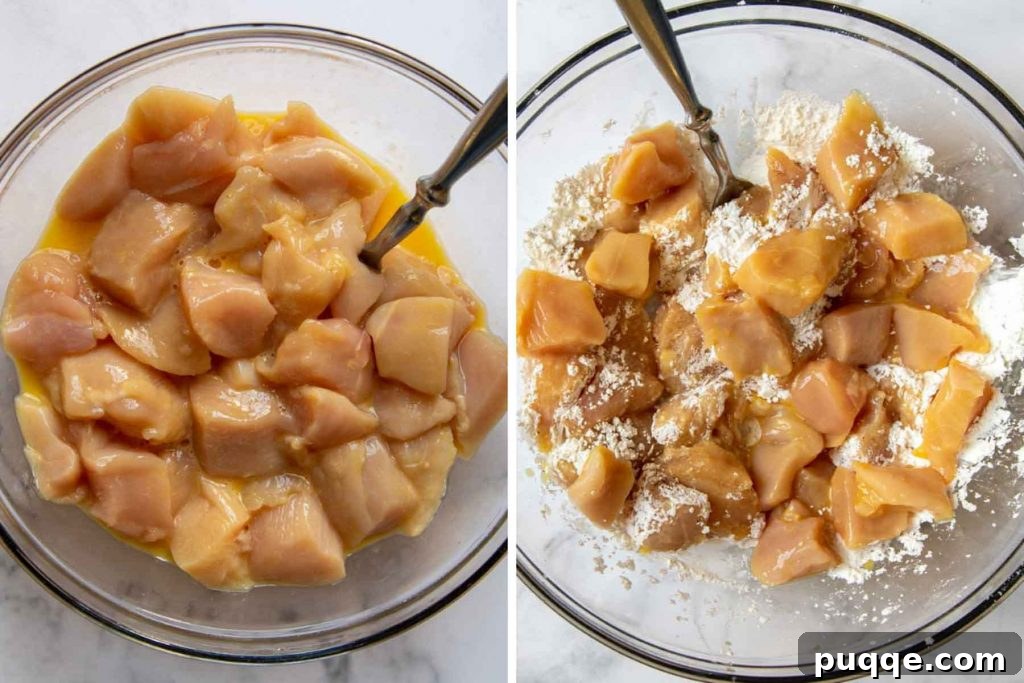
- Coat the Chicken in Egg: In a medium-sized bowl, lightly whisk one large egg until the yolk and white are fully combined. Add your 1.5 pounds of chicken breasts, cut into uniform 1-inch pieces, to the egg mixture. Stir thoroughly to ensure each piece of chicken is evenly coated.
- Dredge the Chicken in Cornstarch: In a separate, larger bowl (one with enough space to comfortably toss the chicken), combine ½ cup cornstarch, ½ teaspoon salt, and ⅛ teaspoon pepper. Using a fork, transfer the egg-coated chicken pieces to the cornstarch mixture, allowing any excess egg to drip off first. Toss the chicken vigorously with the dry ingredients until every piece is completely coated. For best results, don’t be afraid to use your hands to separate any clumped pieces and ensure a thorough, even coating. This cornstarch layer is essential for achieving that sought-after crispiness.
- Initial Bake for Crisping: Carefully remove the preheated baking dish with the hot oil from the oven. Arrange the cornstarch-coated chicken pieces in a single layer within the hot dish. Bake for 5 minutes. After 5 minutes, carefully toss the chicken in the hot oil to ensure even cooking and browning, then return it to the oven for another 5 minutes. While the chicken bakes, whisk together all the ingredients for the sweet and sour sauce (ketchup, light brown sugar, apple cider vinegar, water, gluten-free soy sauce, ground ginger, garlic powder) in a small bowl.
- Reduce Oven Temperature: After the initial 10-minute high-heat bake, remove the dish from the oven. Immediately REDUCE THE OVEN TEMPERATURE to 325ºF (160ºC).
- Combine with Sauce and Final Bake: Add the chopped red and yellow bell peppers (or your preferred vegetables) and the prepared sweet and sour sauce to the baking dish with the partially cooked chicken. Toss everything gently to combine, ensuring all the chicken and vegetables are well coated in the vibrant sauce. Return the dish to the now lower-temperature oven and bake for an additional 30-35 minutes, stirring halfway through the cooking time. The chicken is done when the sauce is bubbly and thickened, and the chicken is cooked through to an internal temperature of 165ºF (74ºC).
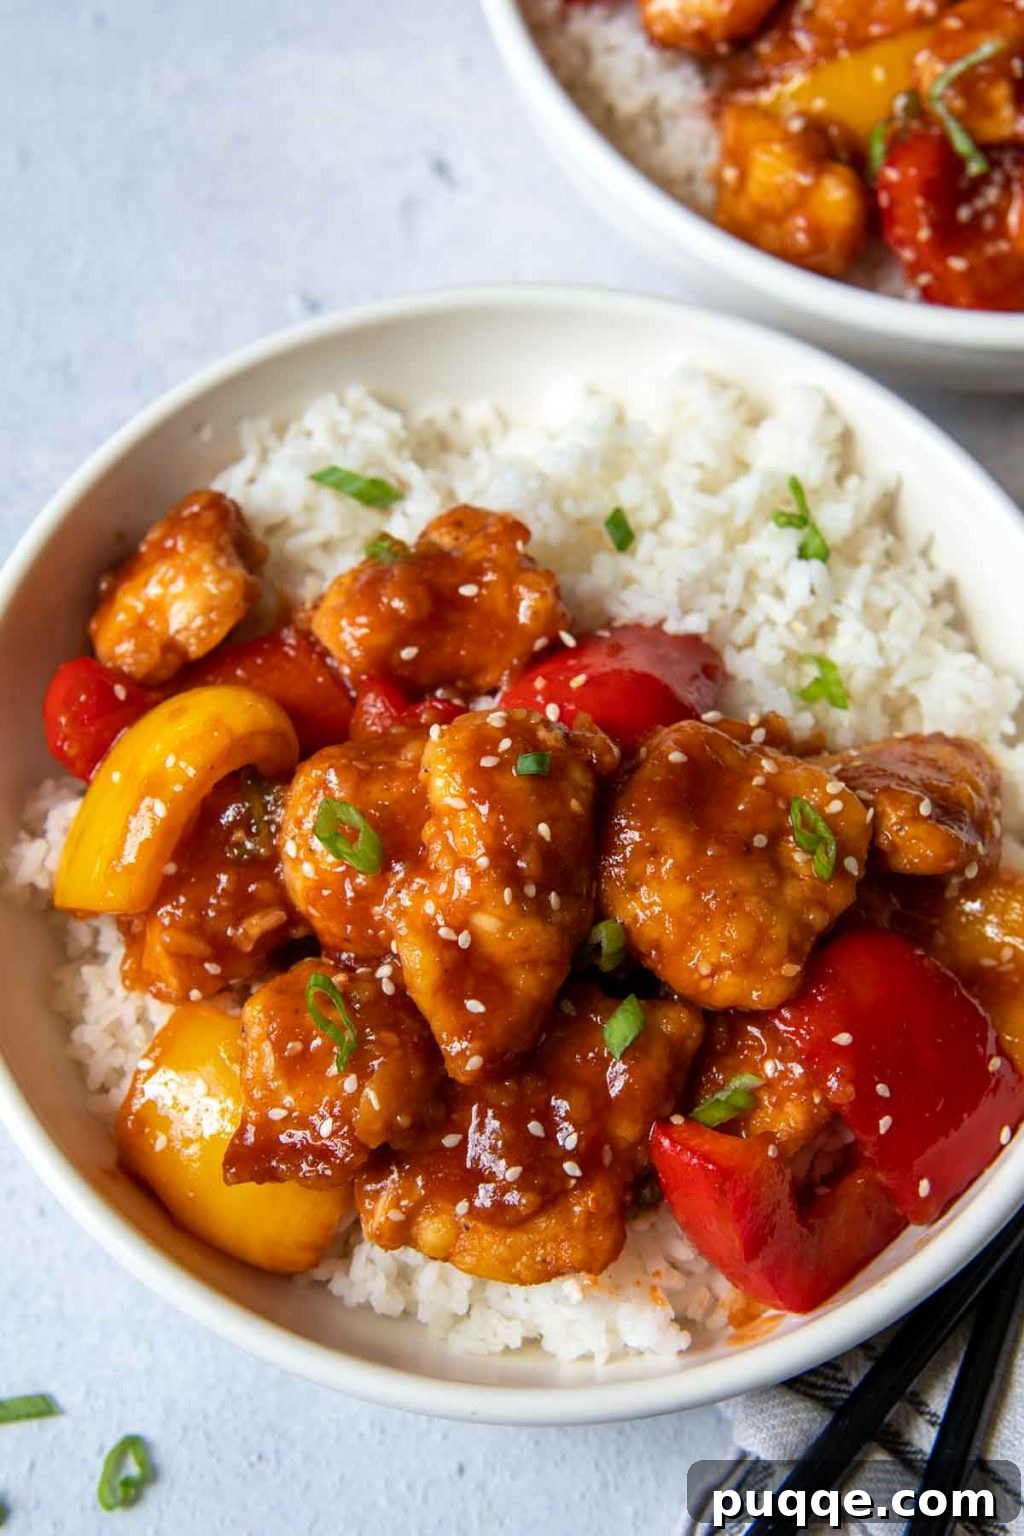
- Serve Immediately: Garnish with optional sesame seeds and serve your delicious homemade gluten-free sweet and sour chicken immediately with cooked rice or your favorite side dish.
Why Choose Gluten-Free Sweet and Sour Chicken?
Beyond catering to dietary restrictions, opting for a gluten-free sweet and sour chicken recipe offers several compelling benefits. For individuals with celiac disease or gluten sensitivity, this recipe provides a safe and delicious way to enjoy a beloved dish that is often off-limits when ordered from restaurants. Many traditional Chinese recipes use wheat flour in their batters, making them problematic. By consciously selecting gluten-free ingredients, you can savor this vibrant meal without the worry of adverse reactions.
Furthermore, making it at home gives you complete control over the ingredients. You can choose high-quality chicken, fresh vegetables, and ensure no unwanted additives are present. This baked, no-fry version also significantly reduces the fat content compared to its deep-fried counterparts, offering a lighter, healthier alternative without sacrificing flavor or texture. It’s a smart choice for anyone looking to eat well while still enjoying comforting, flavorful meals.
Mastering the Crisp: The Secret to Oven-Fried Perfection
The “oven-fry” technique is a game-changer for achieving that desired crispy texture without the mess and added fat of deep-frying. The process involves two key elements: the cornstarch coating and the strategic temperature changes in your oven.
Cornstarch is an ideal gluten-free alternative to wheat flour for breading. When heated rapidly, it forms a light, crisp shell. By preheating your baking dish with oil in a very hot oven (425ºF), you create an environment similar to a hot skillet. When the chicken coated in cornstarch hits this hot oil, it immediately begins to crisp and brown. The high heat sets the coating quickly, preventing it from becoming soggy later when the sauce is introduced. Tossing the chicken halfway through this initial bake ensures all sides get exposed to the hot oil and air, promoting even crispness.
Reducing the oven temperature to 325ºF for the final bake with the sauce is equally important. This lower temperature allows the chicken to cook through gently, and the sauce to thicken and caramelize without burning the exterior. The initial crisp created by the high heat is maintained, while the sauce develops its signature sticky, glossy texture. This two-stage baking process is the secret to a perfectly crispy, saucy sweet and sour chicken.
Using Chicken Thighs for a Richer Flavor
While chicken breasts are a popular choice for sweet and sour chicken due to their lean nature and quick cooking time, chicken thighs offer a wonderfully succulent and flavorful alternative. If you prefer the richer taste and more tender texture of dark meat, simply substitute boneless, skinless chicken thighs for the breasts. Cut the thighs into 1-inch, bite-sized pieces, just as you would with breast meat. The cooking times and preparation steps remain largely the same, but you might find the final dish to be even more moist and intensely flavored. Chicken thighs are also more forgiving if slightly overcooked, making them a great option for beginner cooks.
Suggested Additions and Variations
This sweet and sour chicken recipe is wonderfully versatile, allowing for various additions to customize it to your liking. We highly recommend adding a mix of red and yellow bell peppers for a burst of color and a fresh, slightly sweet flavor that beautifully balances the tangy sauce. Green peppers can also be used, or you can omit them entirely if preferred. For those who enjoy a fuller vegetable medley, consider adding:
- Onions: Cut into large wedges, they become sweet and tender.
- Broccoli Florets: Add during the last 15-20 minutes of baking for tender-crisp results.
- Snap Peas or Snow Peas: A great addition for a touch of green and crispness.
- Carrots: Sliced into thin rounds or julienned for sweetness and texture.
While this recipe traditionally omits pineapple, it’s a classic sweet and sour ingredient that can easily be incorporated. If adding pineapple, use either canned pineapple chunks (drained) or fresh pineapple cut into 1-inch pieces. Add the pineapple during the last 20 minutes of baking to allow it to warm through and caramelize slightly without becoming mushy. For a subtle heat, a pinch of red pepper flakes can be added to the sauce mixture. Finally, for an extra flourish, a sprinkle of toasted sesame seeds and thinly sliced green onions (scallions) make excellent garnishes just before serving, adding both visual appeal and a fresh, aromatic touch.
Make-Ahead Tips for Easy Meal Prep
Streamline your meal preparation with these helpful make-ahead tips, allowing you to enjoy this delicious gluten-free sweet and sour chicken even on your busiest days:
- Pre-Coated Chicken: After the chicken has been tossed with the beaten egg and thoroughly dredged in the cornstarch mixture, arrange the pieces on an ungreased baking sheet. Cover it tightly with plastic wrap and refrigerate for up to several hours. This allows you to quickly transfer it to the hot baking dish when you’re ready for the initial oven-fry.
- Partially Baked Chicken: For even faster preparation on the day of, you can complete the initial high-heat baking step (10 minutes at 425ºF). Once baked, let the chicken cool completely to room temperature. Transfer the partially baked chicken to an airtight container, cover, and refrigerate for up to 2-3 days. When you’re ready to finish the dish, simply proceed from step 5, adding the sauce and peppers and baking at 325ºF.
- Prepared Sweet and Sour Sauce: The sweet and sour sauce can be mixed entirely ahead of time. Whisk all the sauce ingredients together, then transfer to an airtight container or jar, cover, and refrigerate for up to two days. This allows the flavors to meld beautifully, and it will be ready to toss with the chicken whenever you are.
Save this Recipe to Your Pinterest Board!
Let’s be friends on Pinterest! I’m always sharing great recipes!
Did you make this recipe? I love hearing from you! Leave a star rating and comment below. It helps others when searching for recipes and I appreciate feedback from our community. You will always hear back from me! -Melissa

Average Rating: 4.63 stars (8 ratings)
Crispy Gluten-Free Sweet and Sour Chicken (Baked)

Melissa Erdelac
Enjoy your favorite Chinese take-out again with this easy, oven-baked Gluten-Free Sweet and Sour Chicken recipe! Make this dish at home with one pan, no frying, and a sticky, tangy gluten-free sweet sour sauce coating golden, crispy chicken.
Pin Recipe
Leave a Review
Remove Ads
Ingredients
- 2 ½ tablespoons vegetable or canola oil
- 1 large egg
- 1 ½ pounds chicken breasts, cut in 1″ pieces
- ½ cup cornstarch
- ½ teaspoon salt
- ⅛ teaspoon pepper
- 1 red pepper, cut in 1″ pieces
- 1 yellow pepper, cut in 1″ pieces
Gluten Free Sweet and Sour Sauce
- ½ cup ketchup
- ⅓ cup light brown sugar
- ¼ cup apple cider vinegar
- ¼ cup water
- 2 tablespoons gluten free soy sauce, I use La Choy brand
- ½ teaspoon ground ginger
- ½ teaspoon garlic powder
- (optional) sesame seeds, for garnish
- (optional) cooked rice, for serving
Equipment
- 9X13 Baking Dish
- Santoku Knife
- Batter Bowl
Instructions
- Preheat the oven to 425ºF. Pour the 2 ½ tablespoons vegetable or canola oil in a 9X13 baking dish and place in the oven while it’s preheating to get very hot.
- Whisk the 1 large egg in a medium bowl. Add the 1 ½ pounds chicken breasts and stir to coat well.
- In a large bowl, with enough room to move and coat chicken well, combine the ½ cup cornstarch, ½ teaspoon salt, and ⅛ teaspoon pepper. Use a fork transfer the chicken pieces, letting the excess egg drip off, to the cornstarch mixture. Use a fork to coat the pieces all over with the cornstarch. TIP: At this point, I use my hands to separate the chicken and make sure they are coated.
- Carefully remove the hot dish and oil from the oven. Arrange the chicken pieces in a single layer. Bake for 5 minutes. Toss in oil, and then bake for 5 minutes more. Meanwhile, whisk together all the ingredients for the sweet and sour sauce (½ cup ketchup, ⅓ cup light brown sugar, ¼ cup apple cider vinegar, ¼ cup water, 2 tablespoons gluten free soy sauce, ½ teaspoon ground ginger, ½ teaspoon garlic powder) in a small bowl.
- Remove from the oven and REDUCE OVEN TEMPERATURE TO 325ºF.
- Add the 1 red pepper and 1 yellow pepper and sweet and sour sauce to the dish. Toss to combine. Bake for 30-35 minutes, stirring halfway through, or until sauce is bubbly, has thickened and chicken is cooked through. Serve immediately.
Notes
Adjusting Sauce Consistency
Nutrition Information
Per Serving:
- Calories: 318 kcal
- Carbohydrates: 30g
- Protein: 26g
- Fat: 10g
- Saturated Fat: 6g
- Trans Fat: 1g
- Cholesterol: 100mg
- Sodium: 859mg
- Potassium: 619mg
- Fiber: 1g
- Sugar: 17g
- Vitamin A: 837 IU
- Vitamin C: 64mg
- Calcium: 30mg
- Iron: 1mg
Did you make this recipe?
Please leave a star rating and review below. It helps others when searching for recipes and I LOVE feedback!