
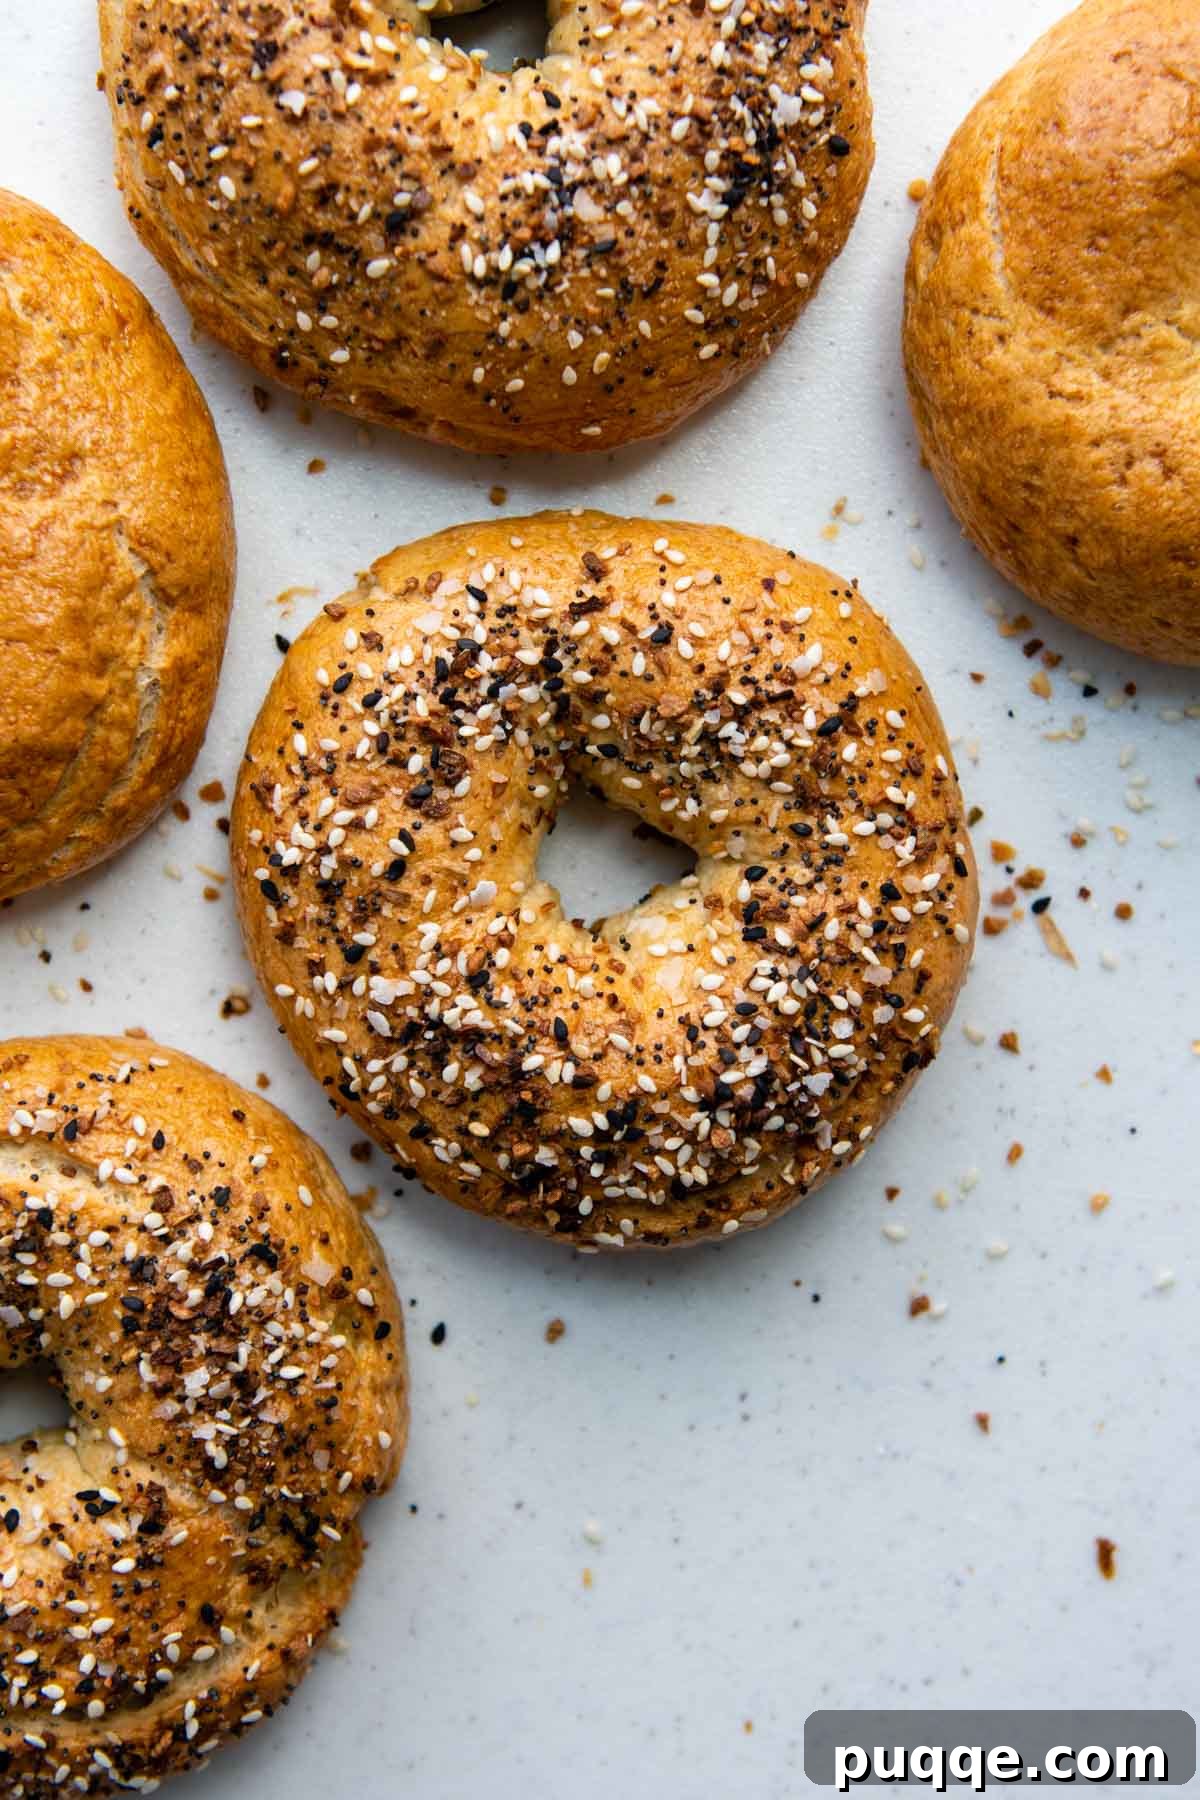
Homemade Gluten-Free Bagels: Your Guide to Perfectly Soft & Chewy New York-Style Bagels
Craving a true New York-style bagel, but living gluten-free? This comprehensive guide reveals the secrets to baking your own homemade, gloriously soft, and delightfully chewy gluten-free bagels right from your kitchen! Forget grainy textures and dense disappointments; our recipe guarantees a satisfying experience that rivals traditional bagels. Discover how to create your favorite flavors, from classic everything bagels to sweet cinnamon raisin, with simple adaptions for both vegan and dairy-free diets.
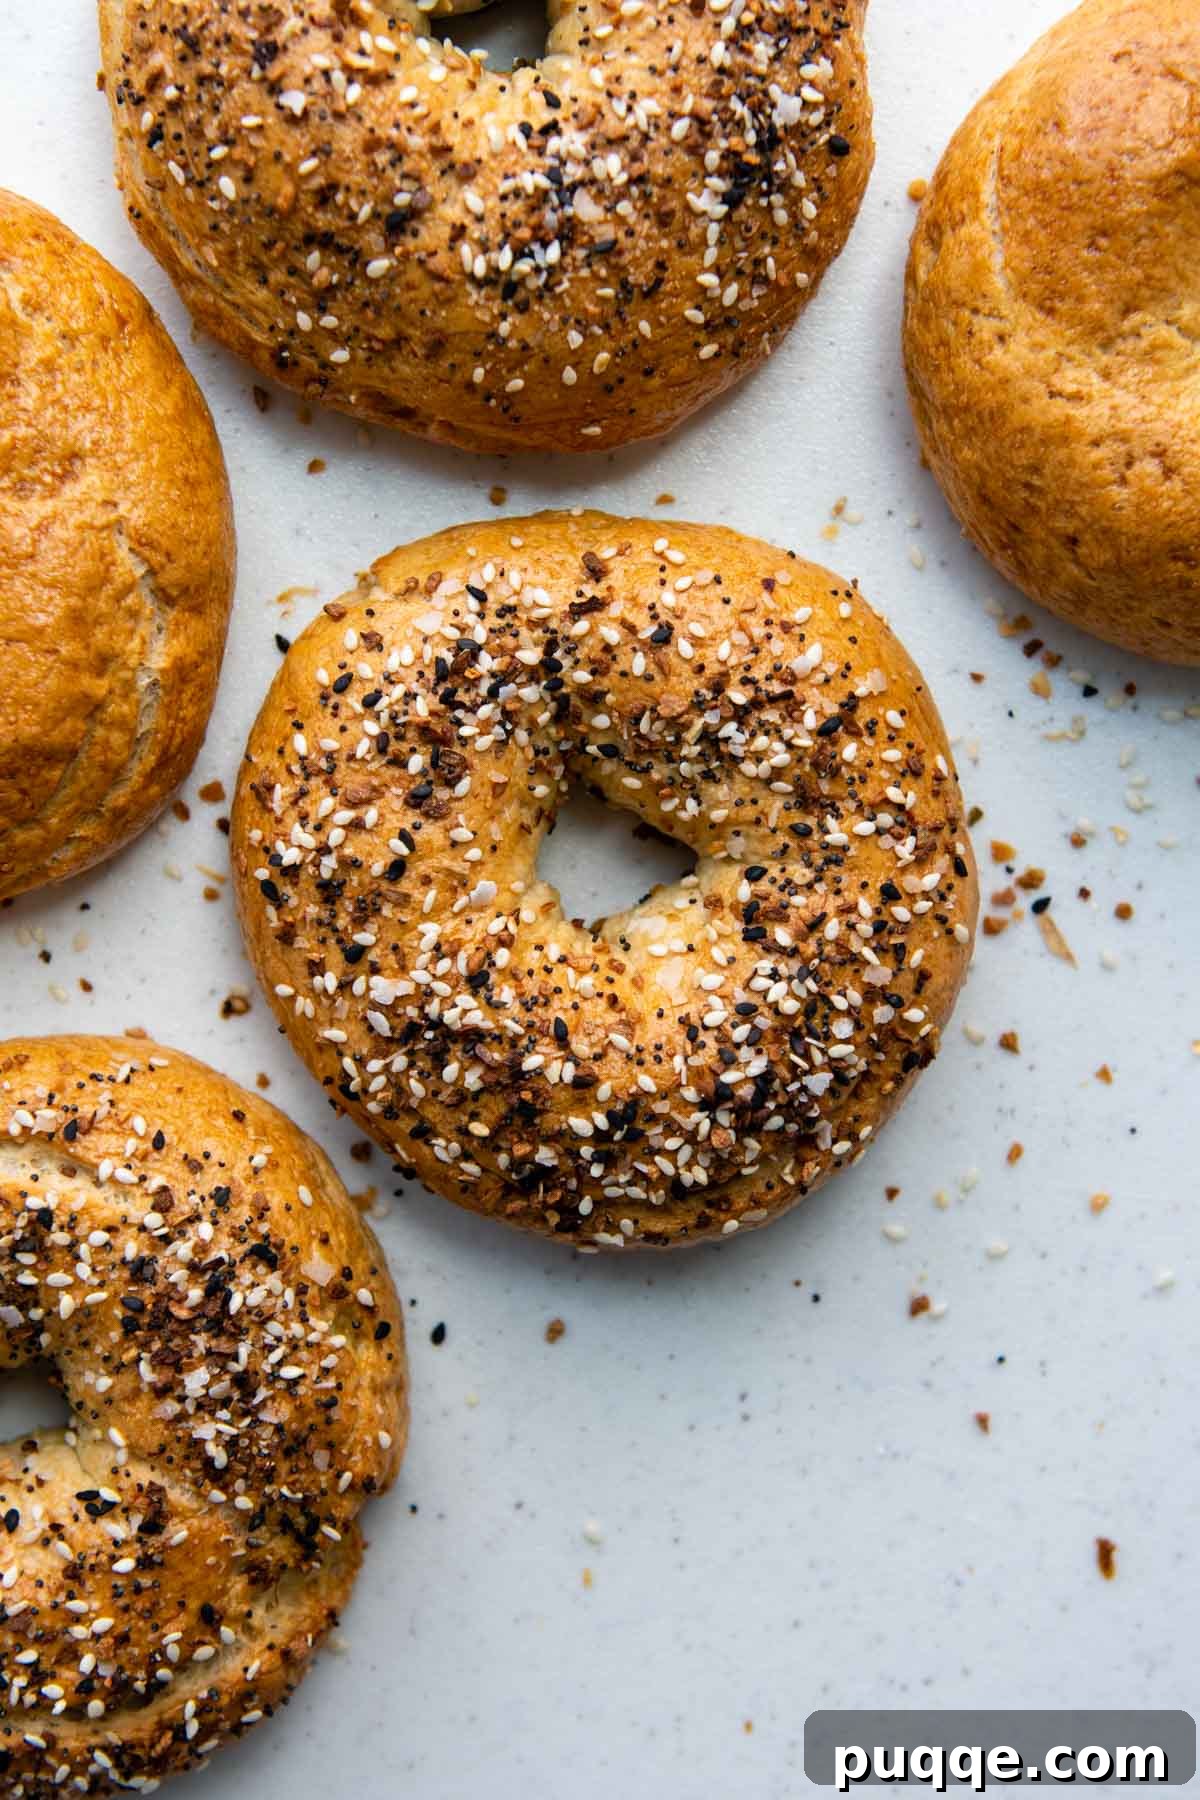
Why This Gluten-Free Bagel Recipe Stands Out
Developing a gluten-free bagel recipe that truly emulates the iconic New York bagel experience was no small feat. Traditional bagels rely heavily on gluten for their characteristic chewiness and open crumb structure. Without gluten, baked goods often fall flat, becoming either too crumbly or too gummy. However, after extensive testing and perfecting, we’ve cracked the code to deliver a gluten-free bagel that is not only easy to make but consistently delivers on taste and texture.
Many readers have hailed this recipe as superior to any store-bought or homemade gluten-free bread they’ve ever tried. It’s part of a winning streak of gluten-free triumphs, including highly-praised gluten-free breadsticks so delicious, no one suspects they’re actually gluten-free! If these impressive feats are possible, why should you miss out on soft, doughy, and chewy gluten-free bagels? You shouldn’t! This simple recipe, combined with specific ingredients and smart gluten-free baking techniques (also used in our easy gluten-free English muffins), brings bagels back into your life. We’ll show you exactly how to achieve these incredible results!
“First of all, I followed this recipe exactly, using Cup4Cup flour. These are so good!!! I have tried sooo many different bagel recipes. Even going so far as to try gluten free bread flour and they were “ok”. This recipe though! Wow. These bagels are AMAZING. So easy too!! Thank you!!!”
— Megan, Satisfied Baker
Essential Ingredients for Gluten-Free Bagel Perfection
Success in gluten-free baking often comes down to the quality of your ingredients and a few secret weapons. When developing recipes for this site and our gluten-free cookbook, two ingredients consistently proved most important for achieving superior results: a high-quality gluten-free flour blend and the transformative power of psyllium husk powder. Let’s explore these and other key components.
- Gluten-Free Flour Blend: The foundation of any good gluten-free bake. We highly recommend and use Cup4Cup all-purpose gluten-free flour. This blend already contains xanthan gum, an essential ingredient for mimicking gluten’s elasticity. If you choose another brand, ensure it contains xanthan gum or add it separately as per package instructions. Many readers have shared success with other blends, so feel free to check the comments section for alternative recommendations.
- Oat Flour: A small but mighty addition, oat flour plays a crucial role in preventing a gummy texture by absorbing excess moisture. Beyond its functional benefits, it imparts a lovely nutty flavor and acts as an excellent gluten-free binding agent, contributing to the overall structure and taste of the bagels. Learn more about baking with oat flour.
- Psyllium Husk Powder: This is truly the “secret weapon” for gluten-free yeast recipes. Psyllium husk powder works wonders by mimicking the elasticity and crumb structure found in traditional gluten-containing baked goods. In this bagel recipe, it helps create a pliable dough that is easy to shape and prevents crumbling, without requiring excessive additional flour that could negatively impact the final texture. Its moisture-absorbing properties are key to achieving that perfect doughy interior. Dive deeper into baking gluten-free breads with psyllium husk powder.
- Butter (or Vegan Butter): A modest amount of melted butter adds rich flavor and helps coat the gluten-free starches, ensuring a smooth, grit-free texture. For those needing dairy-free bagels, simply substitute with a high-quality vegan butter stick and reduce the salt in the recipe to 1 teaspoon to account for the saltiness often found in vegan butter alternatives.
- Instant Dry Yeast: Essential for the rise and characteristic airy texture of bagels. Ensure your yeast is fresh and active.
- Granulated Sugar: A touch of sugar provides food for the yeast, helping it activate and rise effectively.
- Baking Powder: Contributes to the overall lift and tender crumb of the bagels, working in conjunction with the yeast.
- Salt: Balances the flavors and helps control yeast activity.
- Baking Soda (for the Water Bath): Crucial for the water bath. This alkaline environment helps create the signature chewy crust and gives bagels their distinct shiny exterior.
- Egg Wash (Optional): A simple whisked egg with water brushed on before baking provides a beautiful golden-brown, glossy crust and helps toppings adhere. For vegan bagels, this can be omitted.
Let’s Bake Together: A Step-by-Step Guide to Gluten-Free Bagels
Creating these delicious gluten-free bagels is a rewarding process. Follow these detailed steps to ensure a successful bake. (For precise ingredient measurements and the complete recipe, please scroll down to the full recipe card below.)
- Prepare Your Rising Environment: Before you start mixing any ingredients, set your oven to 200ºF. Once it reaches temperature, immediately turn it off. This creates a warm, draft-free space ideal for the shaped bagels to rise quickly. Line a baking sheet with parchment paper and lightly grease it; this will prevent sticking.
- Activate the Yeast: In a small bowl or liquid measuring cup, combine warm water (ensure it’s around 110ºF – an instant-read thermometer is incredibly helpful for accuracy), instant dry yeast, and a pinch of granulated sugar. Stir gently to dissolve the sugar and yeast, then let this mixture sit for 5 minutes. You should see it become foamy, indicating active yeast. After 5 minutes, stir in the melted and cooled unsalted butter.
- Combine Dry Ingredients: In the large mixing bowl of a stand mixer fitted with the paddle attachment, combine your gluten-free all-purpose flour blend, oat flour, psyllium husk powder, baking powder, and salt. Mix briefly on low speed to ensure everything is well combined.
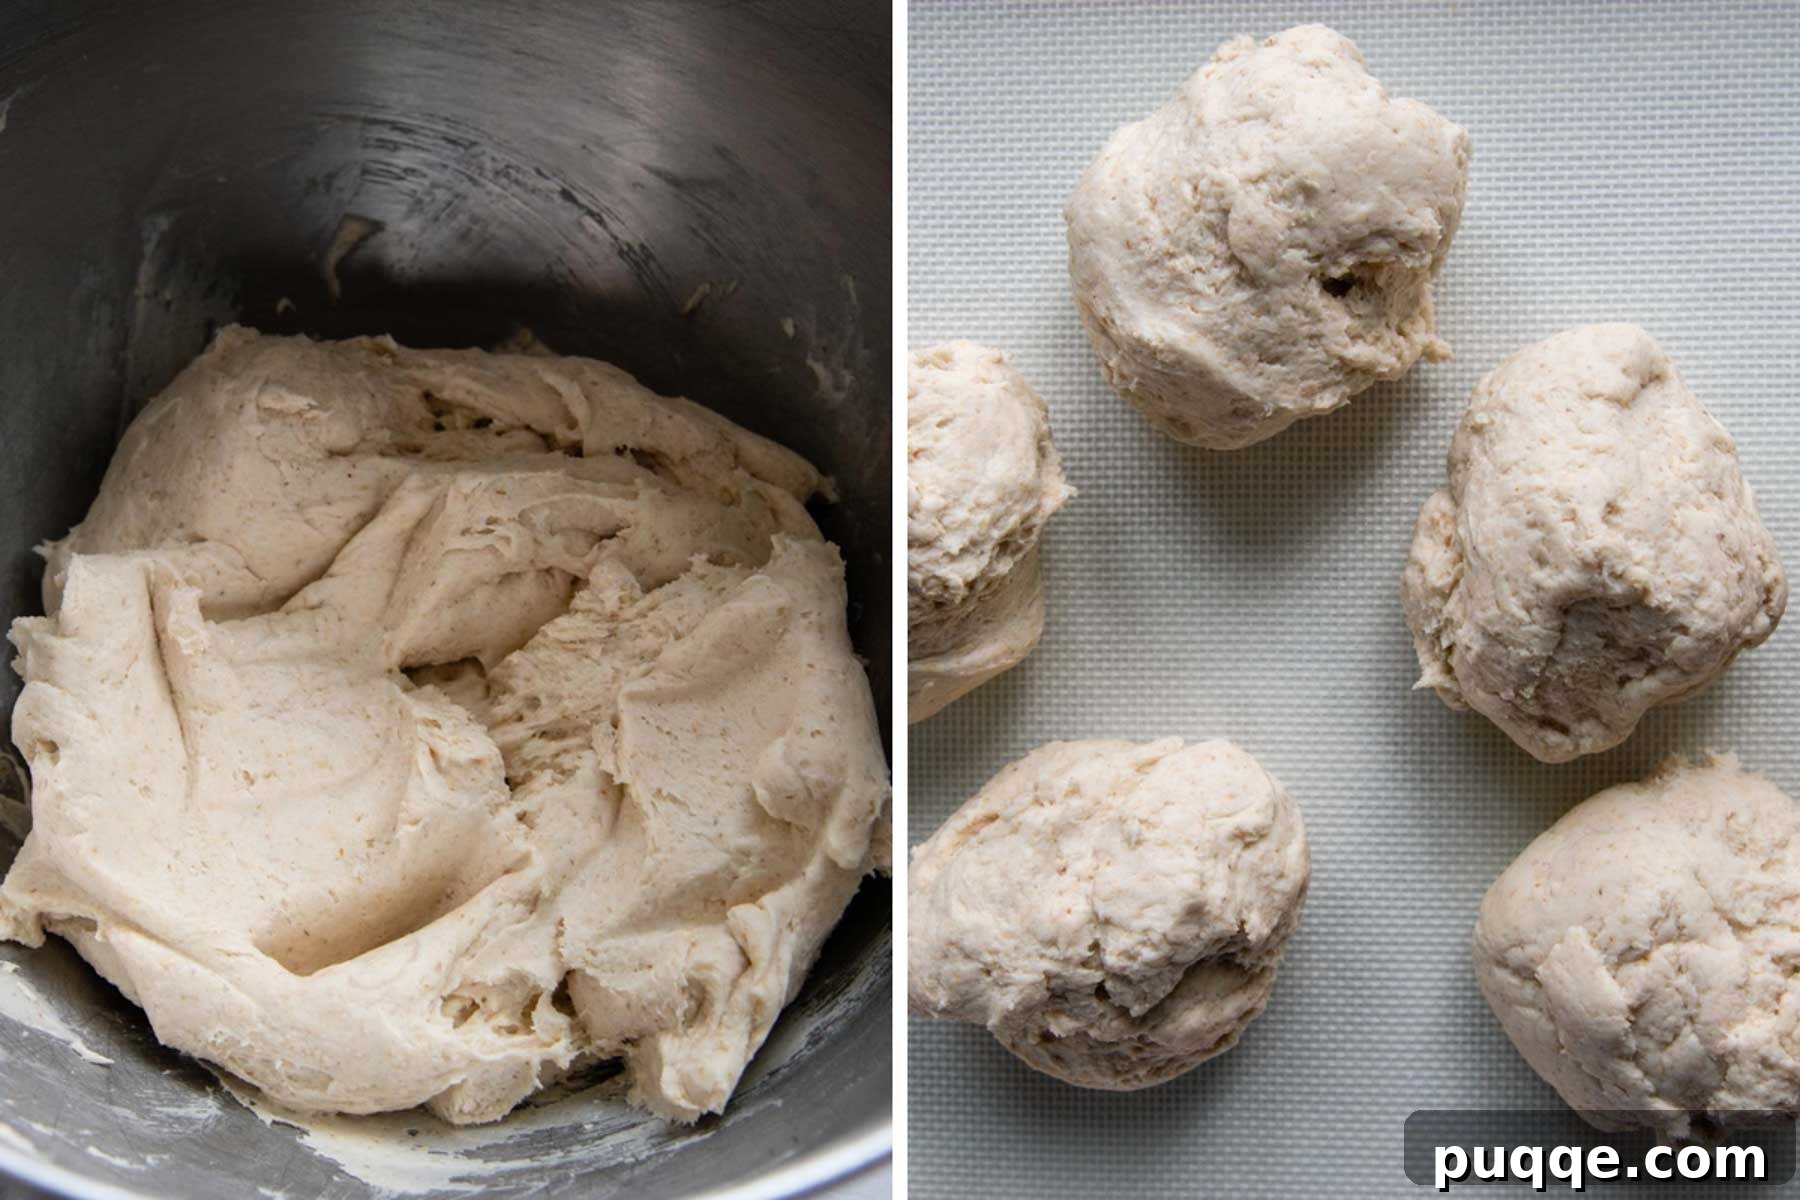
- Form the Dough: Gradually add the yeast and butter mixture to the dry ingredients while the mixer is on low speed. Mix until the dough just starts to come together.
- Knead for Structure: Increase the mixer speed to medium and beat the dough for a full 6 minutes. The dough will be quite stiff, which is normal for gluten-free bagel dough. You may need to stop the mixer once or twice to scrape down the sides of the bowl to ensure all ingredients are thoroughly incorporated. This beating process is vital for developing structure and elasticity without gluten.
Expert Tips for Shaping Gluten-Free Bagel Dough
Shaping is a crucial step for achieving that classic bagel appearance and even baking. While gluten-free dough can be a bit different to work with, these tips will help you create beautifully formed bagels.
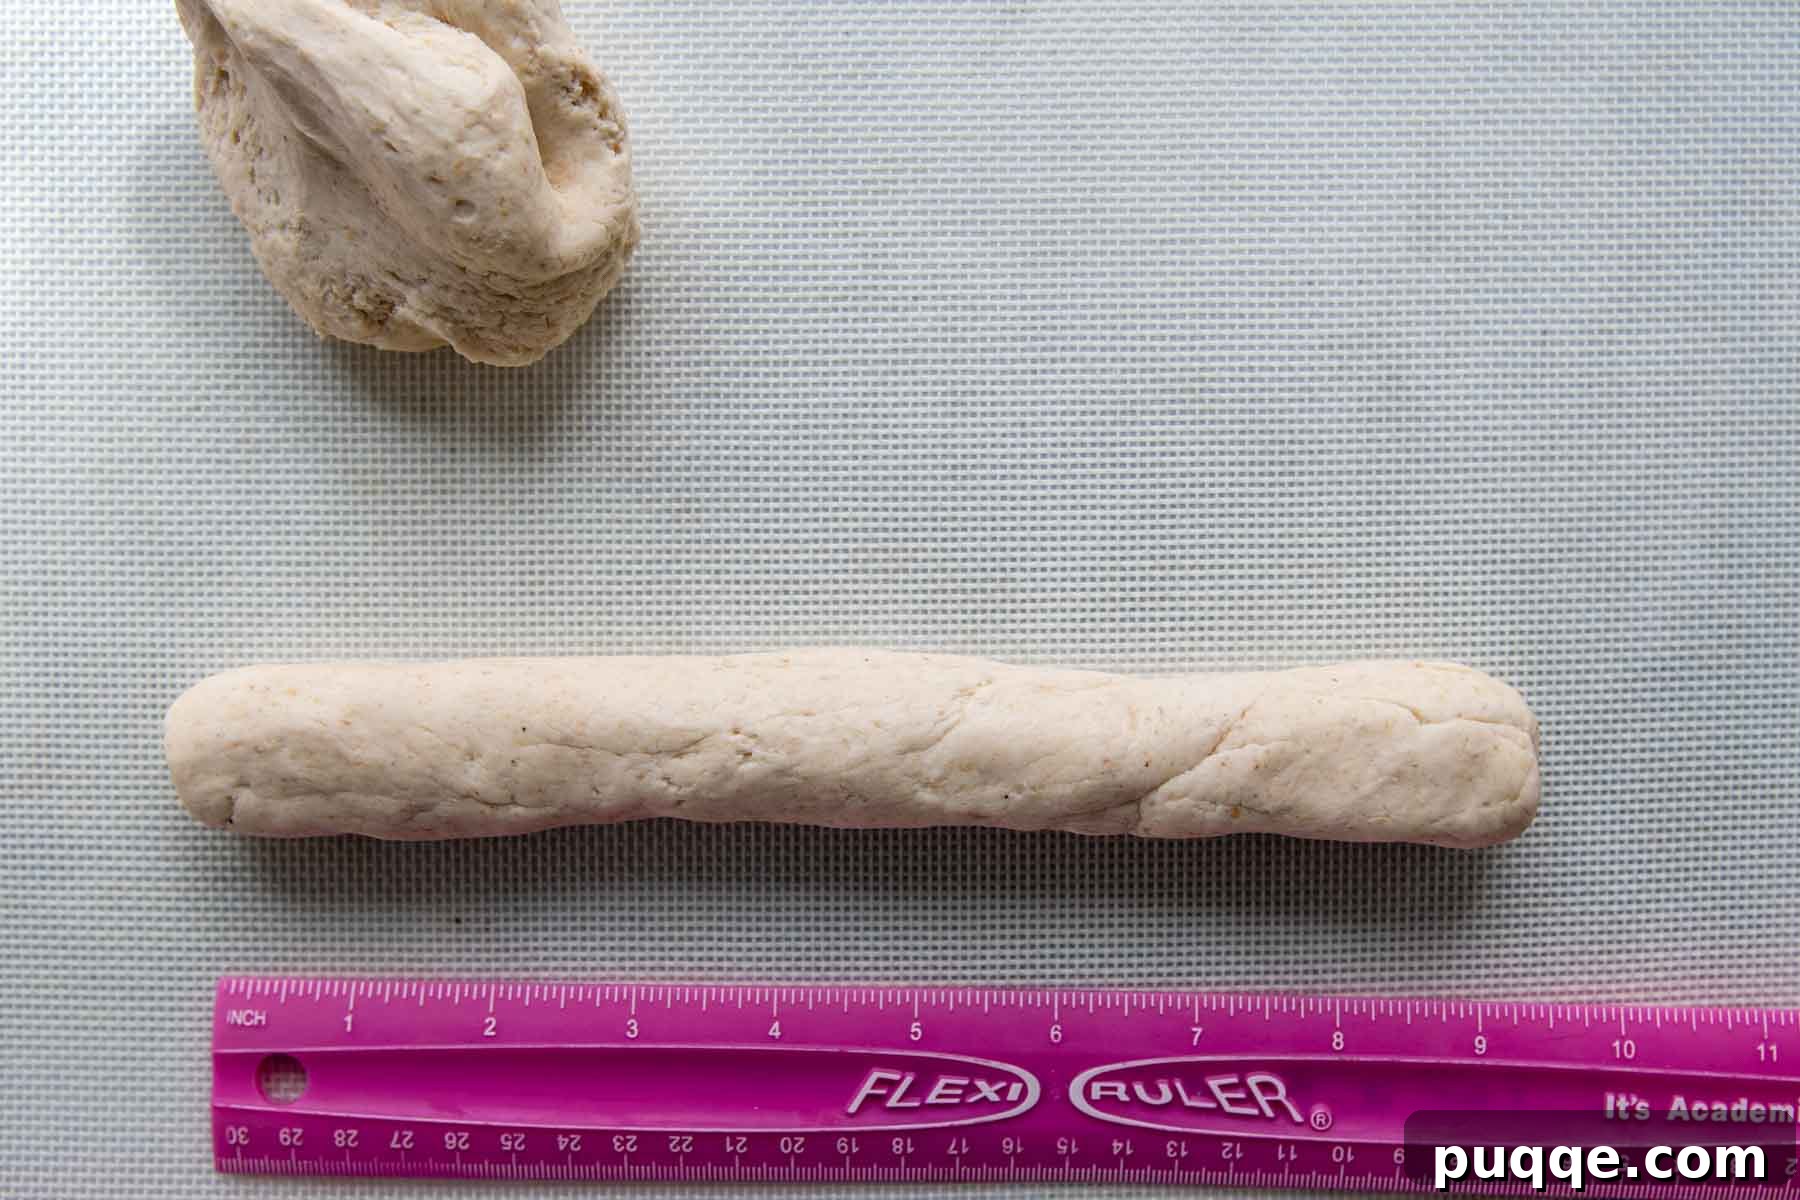
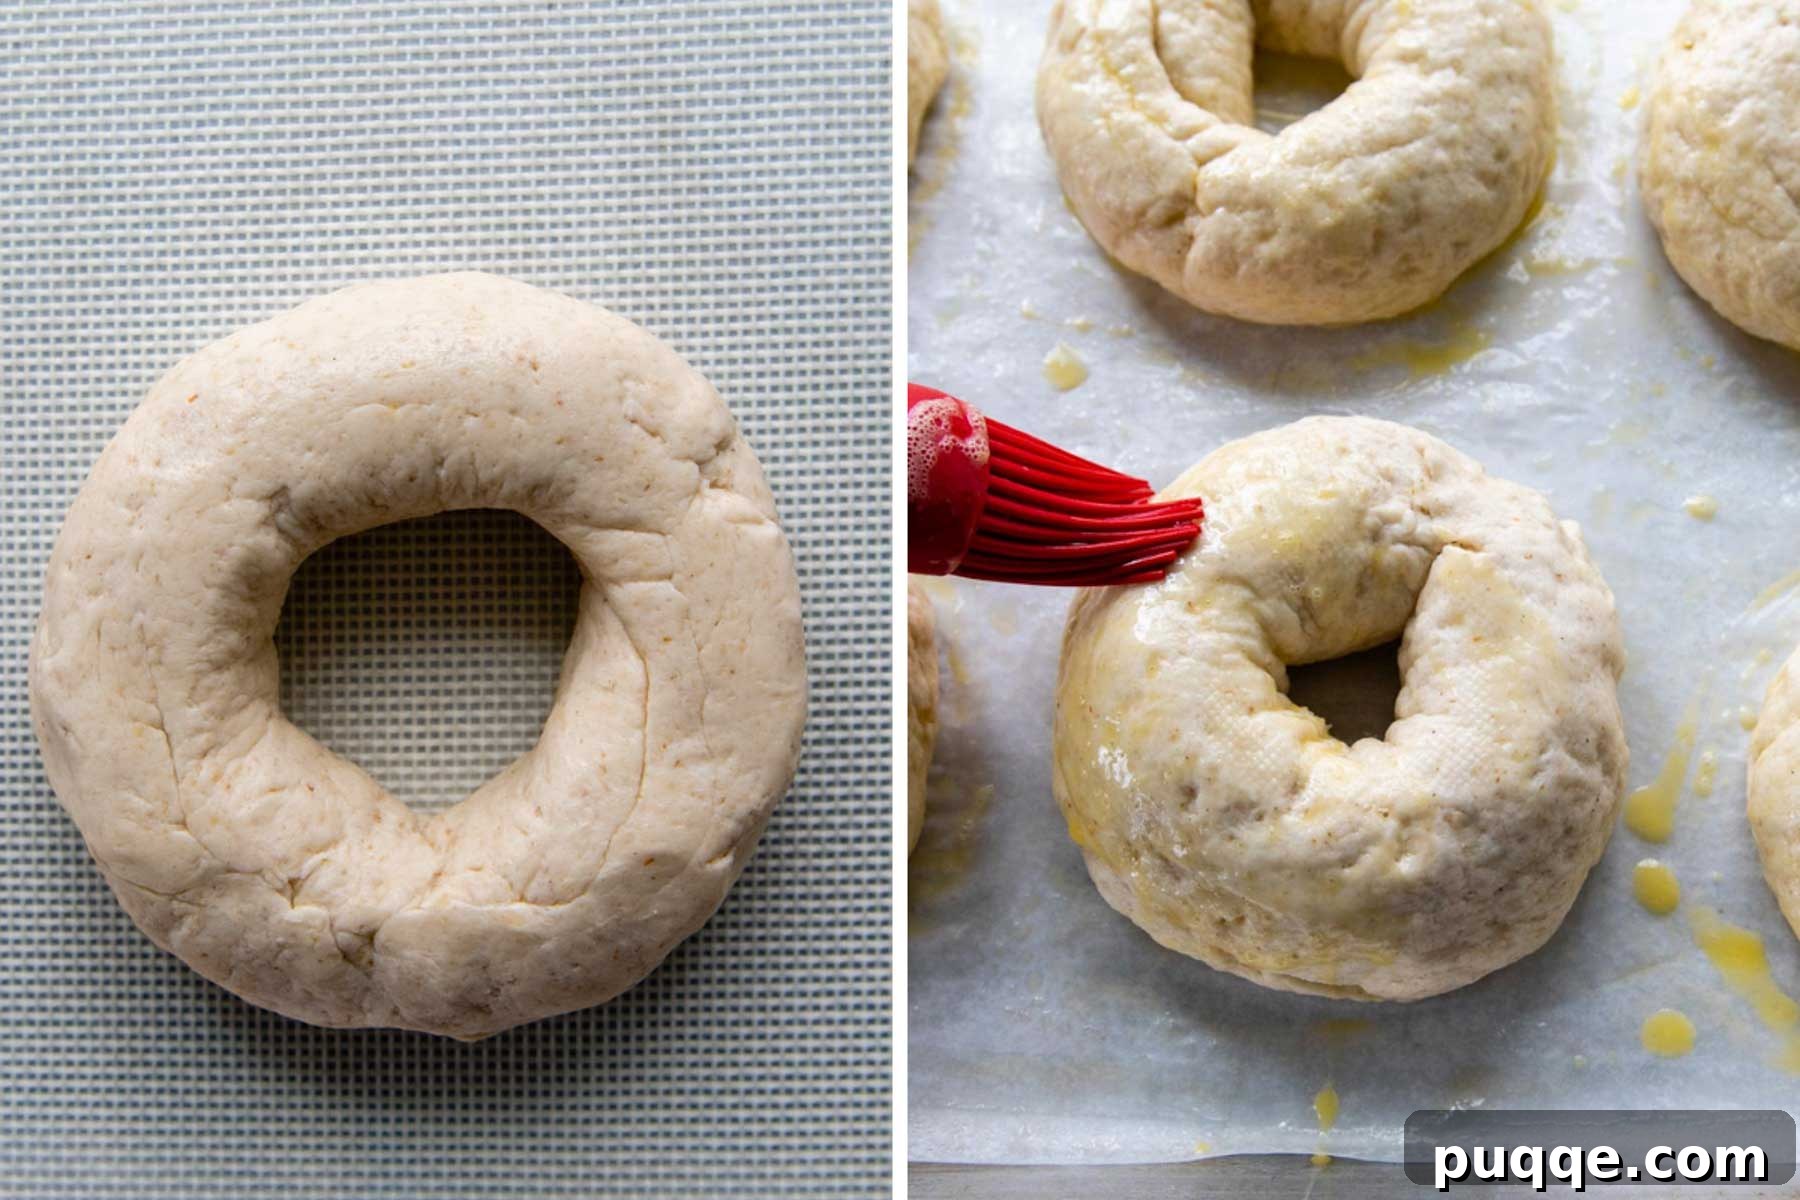
- Divide the Dough: Scrape the stiff dough onto a clean, nonstick surface, such as a silicone baking mat. Gently form it into a large ball, then use a knife or a dough scraper to divide it into 6 equal pieces. Aim for consistency in size for even baking.
- Roll into Ropes: Take one piece of dough at a time. Using the palms of your hands, roll it on your prepared surface until you have a thick, uniform 9-inch rope. This step helps create a smooth exterior for your bagels.
- Form the Circle: Bring the ends of the rope together to form a circle. This is where attention to detail is key! Gently but firmly press the ends together, ensuring they are securely pinched on both the top and bottom of the bagel. If the ends are not well sealed, they risk coming apart during the boiling water bath or while baking, losing that perfect bagel shape. Smooth out any seams to create a neat circle. Repeat for all remaining dough pieces.
- First Rise: Carefully transfer the shaped bagels to your prepared, greased parchment-lined baking sheet. Cover the entire sheet loosely with plastic wrap. Place the baking sheet into the warmed (but now turned off) oven for 10 minutes. This provides a gentle, consistent warmth for an initial quick rise. After 10 minutes, remove the baking sheet from the oven and let the bagels continue to rise at room temperature for an additional 20 minutes. During this time, preheat your oven to 425°F.
The Essential Water Bath: Key to Chewy Gluten-Free Bagels
The water bath is perhaps the most critical step in achieving that signature chewy exterior and slightly crisp crust of an authentic bagel, even for gluten-free versions. This step might seem unusual for bread, but it’s what transforms a simple dough into a true bagel.
While your shaped bagels are undergoing their second rise, bring a large pot of water (about 4 quarts) to a rolling boil. Add 1 tablespoon of baking soda to the boiling water. This alkaline water bath does several things: it gelatinizes the starches on the bagel’s surface, creating a protective layer that helps lock in moisture, contributes to the shiny, dark crust, and, most importantly, provides that characteristic chewy texture. This is a similar method used in our popular soft gluten-free pretzel recipe.
Once the bagels have finished their rise and the water is boiling, gently submerge one bagel at a time into the water using a slotted spoon or skimmer. Boil each bagel for only 10 seconds, flipping it halfway through (5 seconds per side). The short boiling time is sufficient to create the desired crust without overcooking. Promptly return the boiled bagels to your prepared baking sheet, ensuring they are spaced evenly. Proceed with the remaining bagels, being careful not to overcrowd the pot.
Homemade Flavor Variations for Your Gluten-Free Bagels
After your bagels have had their vital water bath, it’s time for the final touches: creating a beautiful, glossy crust and adding any desired toppings. This is where you can truly customize your homemade gluten-free bagels to match your cravings. While I particularly adore gluten-free everything bagels for slicing and making sandwiches, any of these flavor combinations are perfect popped into a toaster and slathered with your favorite cream cheese.
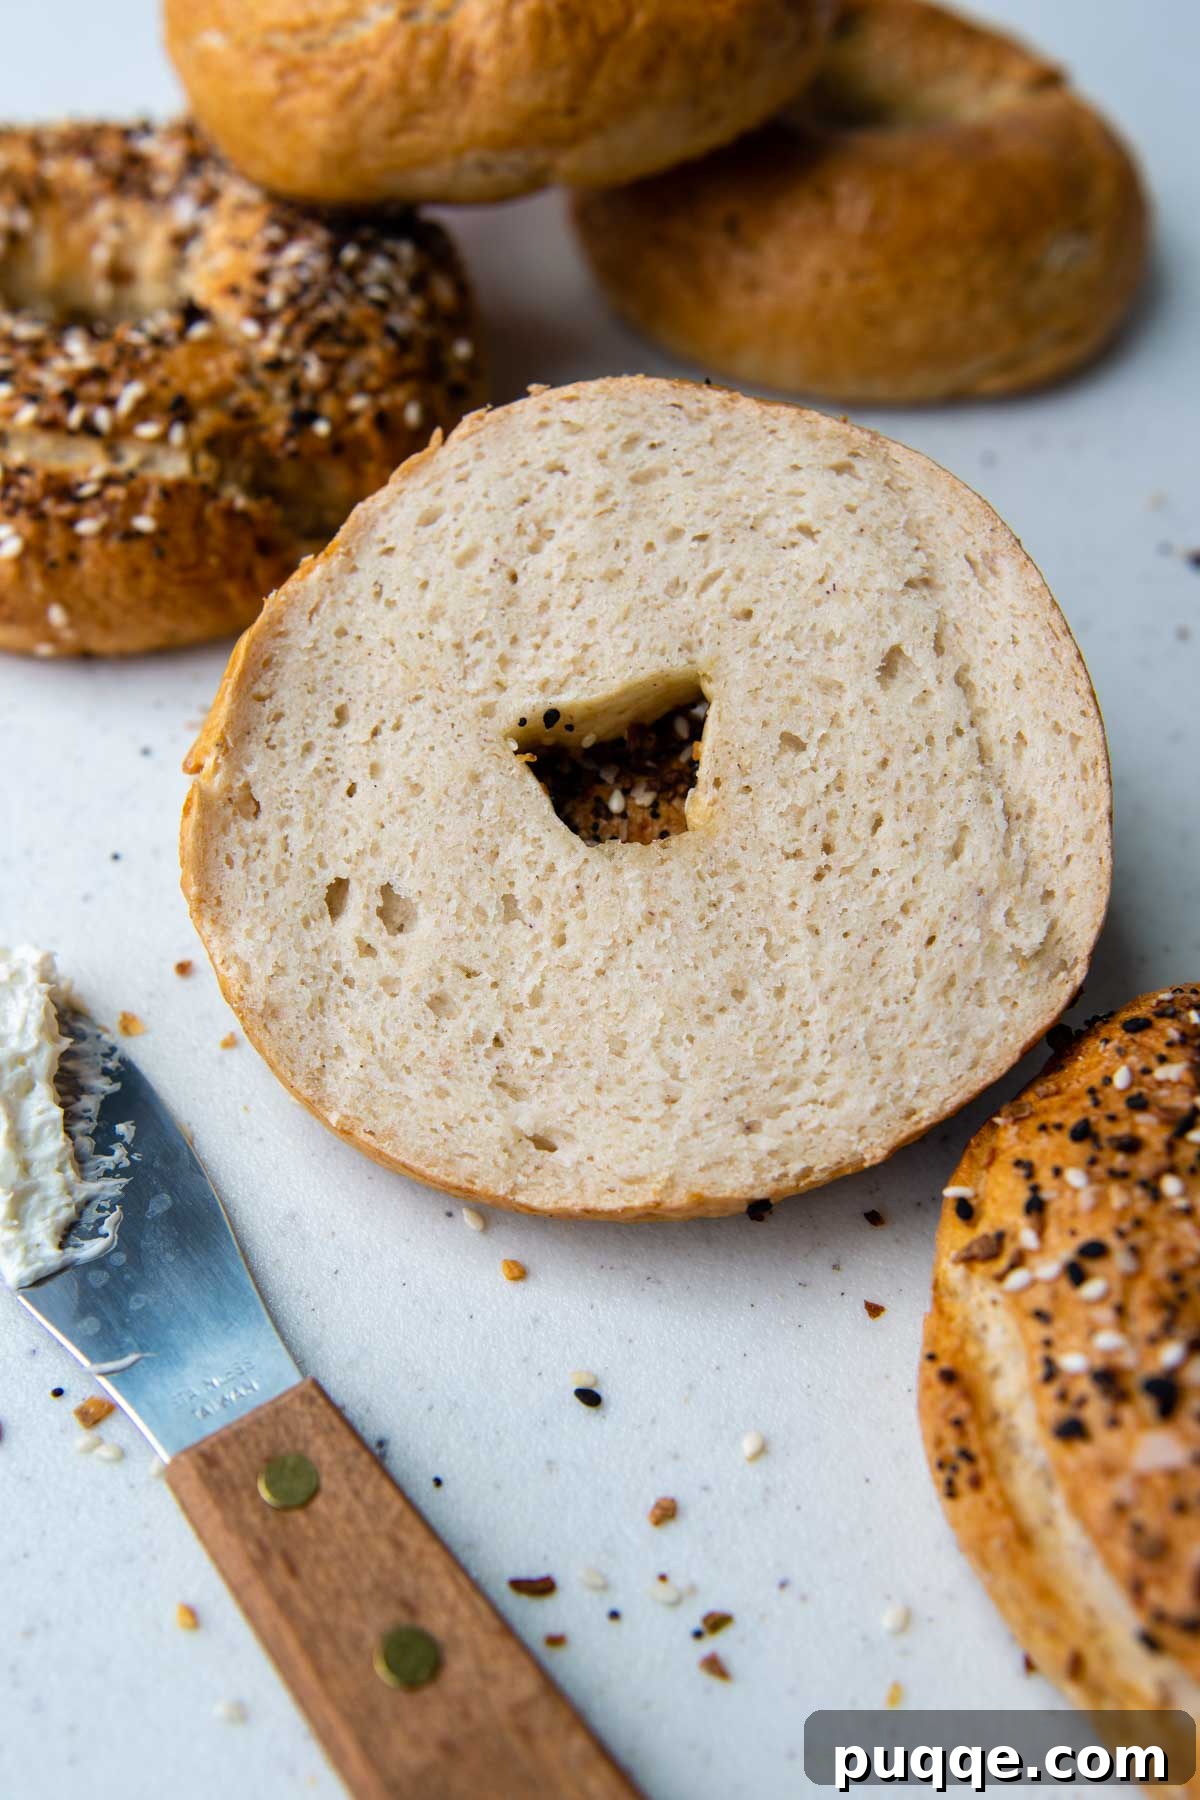
To achieve a shiny, golden-brown crust and help your chosen toppings adhere, whisk together an egg wash (one egg whisked with one tablespoon of water) and generously brush it over the top, sides, and center hole of each boiled bagel. For plain bagels, you can simply brush on the egg wash, or for a completely matte finish, omit it entirely.
- Everything Bagels: The ever-popular choice! For convenience, use a store-bought everything bagel seasoning mix. If you prefer to make your own, consult the recipe notes for exact spice measurements (typically a blend of poppy seeds, sesame seeds, dried garlic, dried onion, and flaky sea salt).
- Poppy Seed Bagels: A classic simple topping. Just sprinkle generously over the egg-washed bagels.
- Sesame Seed Bagels: Another timeless option. Sprinkle with white or black sesame seeds (or a mix of both) for a subtle nutty flavor and satisfying crunch.
- Cinnamon Sugar Bagels: For a sweet treat, incorporate 1 teaspoon of ground cinnamon and 1 tablespoon of brown sugar directly into your bagel dough during the mixing phase. Before baking, sprinkle the tops with an additional cinnamon sugar topping for extra sweetness and sparkle.
- Onion Bagels: Add a savory depth by mixing 2 teaspoons of onion powder into the dough. Before baking, sprinkle dried minced onion over the egg-washed bagels for a robust flavor.
- Cinnamon Raisin Bagels: A beloved breakfast staple. During dough preparation, add 2/3 cup of plump raisins, 1 teaspoon of ground cinnamon, and 1 tablespoon of brown sugar to the mixture.
- Cheese Bagels: For a savory, cheesy delight, fold 1/2 cup of shredded cheese (such as cheddar or mozzarella) into the dough after it’s formed. Before baking, sprinkle additional cheese on top of the egg-washed bagels for a melty, golden crust.
Baking, Cooling, and Storage Tips
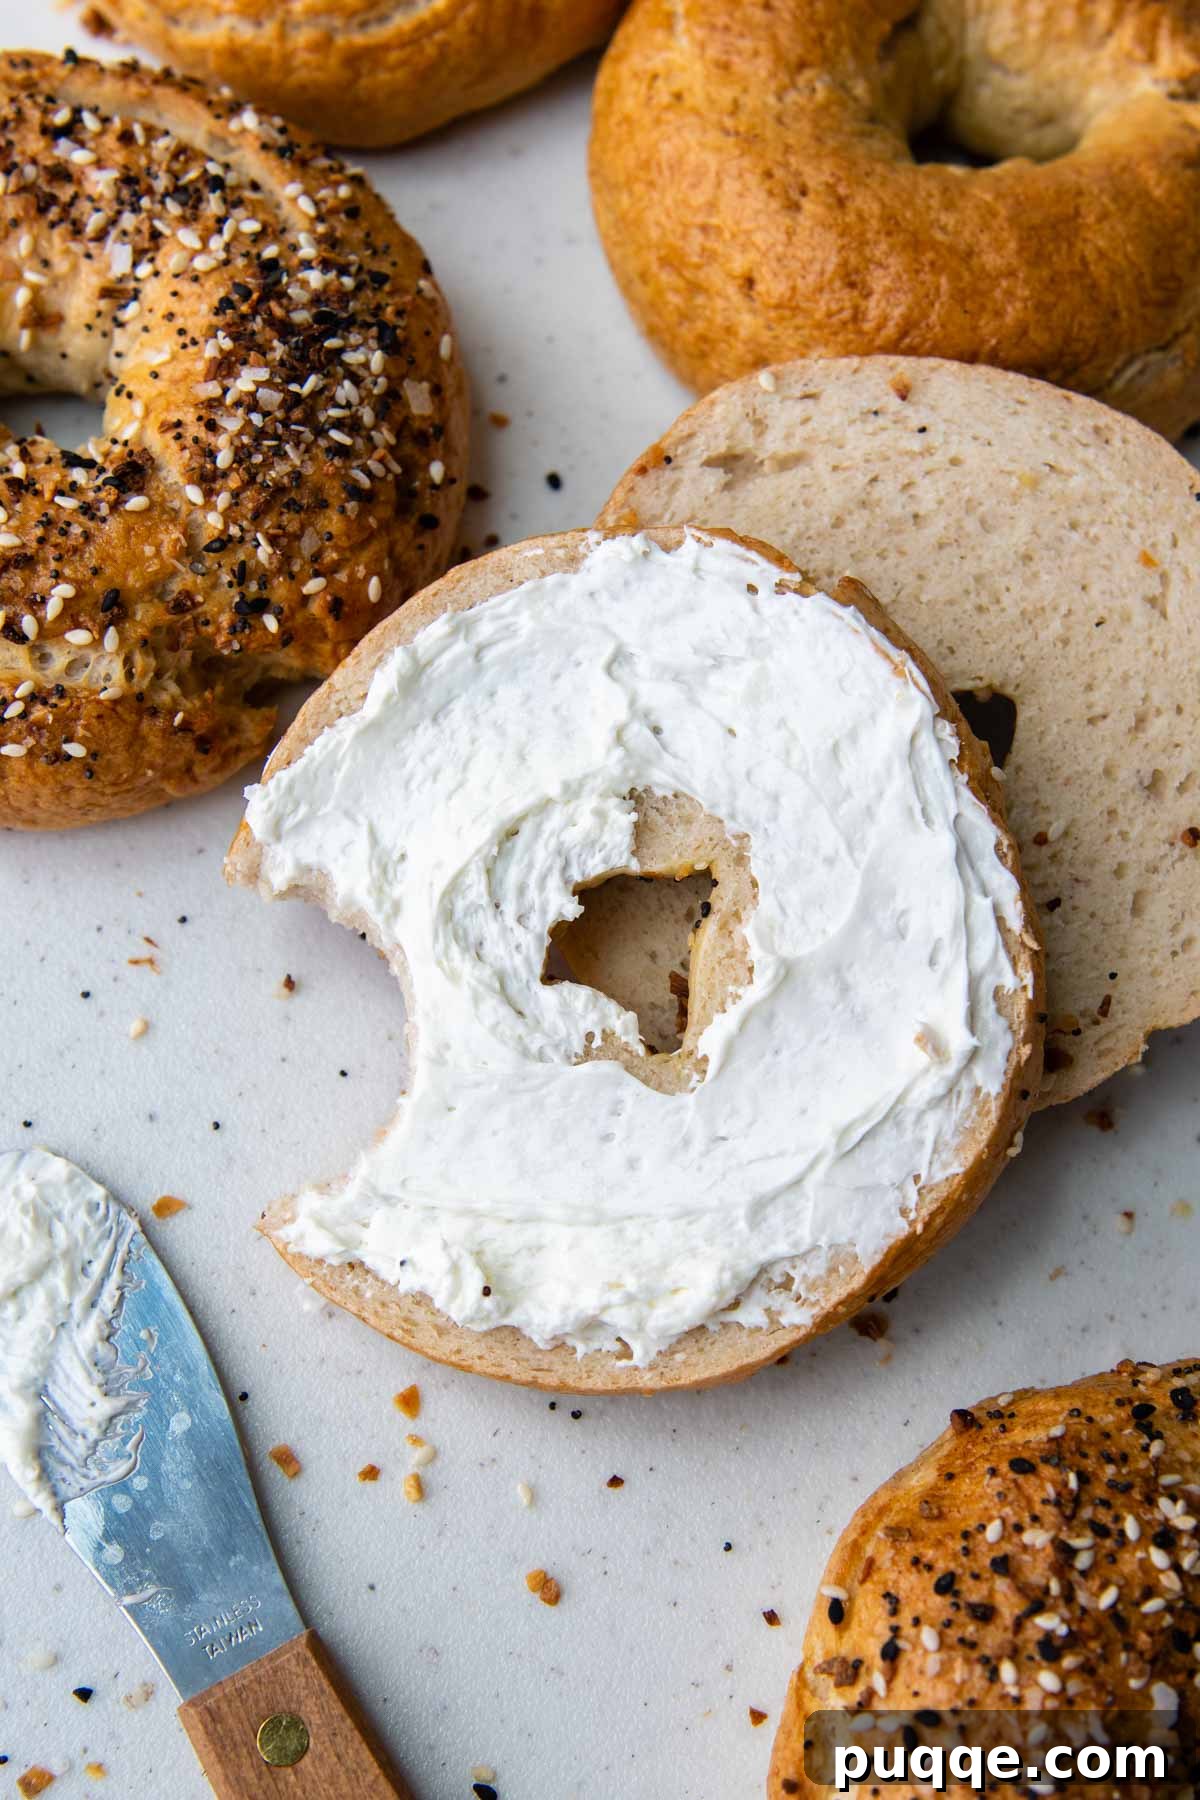
Once your bagels are boiled, egg-washed, and topped, they are ready for the oven! Bake at 425°F for 15 minutes. Then, reduce the oven temperature to 350°F, rotate your baking sheet for even browning, and continue baking for another 20 minutes, or until the bagels are beautifully golden brown and sound hollow when tapped on the bottom.
Allow the bagels to cool on the baking sheet for 5 minutes immediately after removing them from the oven. This helps them set. Then, transfer them to a wire rack to cool completely for at least 20 minutes before slicing and serving. Cooling is important for the final texture. These bagels are best enjoyed fresh, but they also store beautifully!
Storing and Freezing Your Homemade Gluten-Free Bagels
Gluten-free baked goods tend to lose moisture and freshness more quickly than their wheat counterparts. Proper storage is key to enjoying your bagels for longer:
- Room Temperature Storage: Once your bagels have completely cooled, wrap each one individually in plastic wrap. Then, transfer the wrapped bagels to an airtight container. They will stay fresh at room temperature for up to two days.
- Avoid Refrigeration: We do not recommend refrigerating gluten-free bagels, as this tends to dry them out rapidly and negatively affect their texture.
- Freezing for Longer Term Storage: If you don’t plan to eat all your bagels within a day or two, freezing is the best option for extended freshness. Wrap each cooled bagel individually in plastic wrap, then place them in an airtight freezer-safe container or a heavy-duty ziplock freezer bag. They can be frozen for up to 3 months.
- Thawing and Reheating: When you’re ready to enjoy a frozen bagel, you can thaw it at room temperature for a few hours or quickly defrost it in the microwave. For the best experience, slice it in half and toast until warm and slightly crispy. They’ll taste almost as good as fresh out of the oven!
This recipe has been carefully adapted to bring you the highest quality gluten-free bagels, drawing inspiration from meticulous testing and successful techniques, including those pioneered by America’s Test Kitchen.
Save this recipe to your Pinterest board!
Let’s be friends on Pinterest! I’m always sharing great recipes!
Did you make this recipe? We love hearing from you! Leave a star rating and comment below the recipe card. Your feedback helps other home bakers find and enjoy our recipes, and we always appreciate hearing about your creations! -Melissa
Best Gluten-Free Bagels Recipe (Soft & Doughy)
 Melissa Erdelac
Pin
Rate
Remove Ads
Ingredients
- 1 ⅔ cup (320 g) warm water (110°F)
- 1 tablespoon (12 g) instant dry yeast
- 1 tablespoon (13 g) granulated sugar
- 3 tablespoons (42 g) melted and cooled unsalted butter, (see recipe notes for dairy-free)
- 3 cups (438 g) gluten free all purpose flour, (I recommend Cup4Cup GF flour)
- ⅔ cup (63 g) oat flour, see recipe notes
- 1 ½ tablespoon (17 g) psyllium husk powder, (what is psyllium husk?)
- 2 teaspoons baking powder
- 1 ½ teaspoon salt
- 1 tablespoon baking soda, for boiling water bath
- Egg wash – 1 egg whisked with 1 tbsp water, (omit for vegan)
- Optional topping everything bagel seasoning mix,, or see recipe notes for more flavor suggestions
Equipment
-
Skimmer Spoon
-
Cup 4 Cup Gluten Free Flour
-
Stand Mixer
Instructions
-
Before you begin mixing the bagel dough, turn the oven to 200ºF. Once it reaches the temperature, turn it off. Line a baking sheet with greased parchment paper.
-
Add the yeast and sugar to the warm water. I found it helpful to use an instant read thermometer to get an accurate water temperature reading. Stir to combine and let sit for 5 minutes. Stir in the melted butter.1 ⅔ cup (320 g) warm water (110°F), 1 tablespoon (12 g) instant dry yeast, 1 tablespoon (13 g) granulated sugar, 3 tablespoons (42 g) melted and cooled unsalted butter
-
While the yeast sits, use a stand mixture with a paddle attachment to combine the flour, oat flour, psyllium husk powder, baking powder, and salt. Slowly add the yeast mixture and mix on low speed to combine.3 cups (438 g) gluten free all purpose flour, ⅔ cup (63 g) oat flour, 1 ½ tablespoon (17 g) psyllium husk powder, 2 teaspoons baking powder, 1 ½ teaspoon salt
-
Once the dough comes together, increase to medium speed and beat for 6 minutes. The dough will be pretty stiff, so you may want to stop the mixer and scrape down the bowl once or twice.
-
Scrape the dough into a large ball and then divide up into 6 equal pieces. Using a clean surface or silicone baking mat, roll each piece into a thick, 9-inch rope. Bring the ends around to make a circle. Press the ends together, both on the top and bottom of the bagel. You will want to make sure the ends are securely pressed together or they will come apart in the water bath and during baking. Finish by shaping into a smooth circle.
-
Transfer the shaped bagels to the prepared baking sheet. Cover with plastic wrap and place in the warmed, turned off oven for 10 minutes. Remove the pan from the oven and let sit at room temperature for 20 more minutes. Preheat oven to 425°F.
-
While the bagels are rising, boil 4 quarts water with baking soda in a large pot. Use a slotted spoon or skimmer to submerge them, one at a time. Boil for 10 seconds, flipping halfway through. Return the bagels to the baking sheet.1 tablespoon baking soda
-
Brush the top, sides, and center with the egg wash, if using. Sprinkle on the everything bagel seasoning mix or other desired toppings. Bake for 15 minutes. Reduce oven to 350°F, rotate baking sheet, and bake for 20 minutes more, or until golden brown.
-
Remove from the oven and cool for 5 minutes on baking sheet. Transfer to a wire rack and cool for at least 20 minutes before serving. Store in an airtight container up to 2 days or freeze up to 2 months.
Notes
Oat Flour
To make your own, blend 2/3 cup gluten-free quick oats in a food processor or high-speed blender. Process until no large flakes remain and it is a powdery mixture.
Dairy-Free / Vegan Adaptations
Replace the butter with vegan butter sticks and reduce salt to 1 teaspoon. The egg wash may be omitted before baking. Read the ingredient label on your GF flour blend. Some mixes contain milk powder.
Storing and Freezing
Once the bagels have completely cooled, wrap individually in plastic wrap and transfer to an airtight container. Store at room temperature for two days.
I don’t recommend refrigerating because it will dry the bagels out. Gluten-free baked goods lose moisture quicker than their wheat flour versions, so if you don’t plan on consuming within a day or two, freeze for longer storage.
To freeze, transfer the wrapped bagels to an airtight freezer container or ziplock freezer bag. Freeze up to 3 months.
When ready to enjoy thaw at room temperature or defrost in the microwave. Toast or enjoy as is!
Recipe adapted from America’s Test Kitchen