
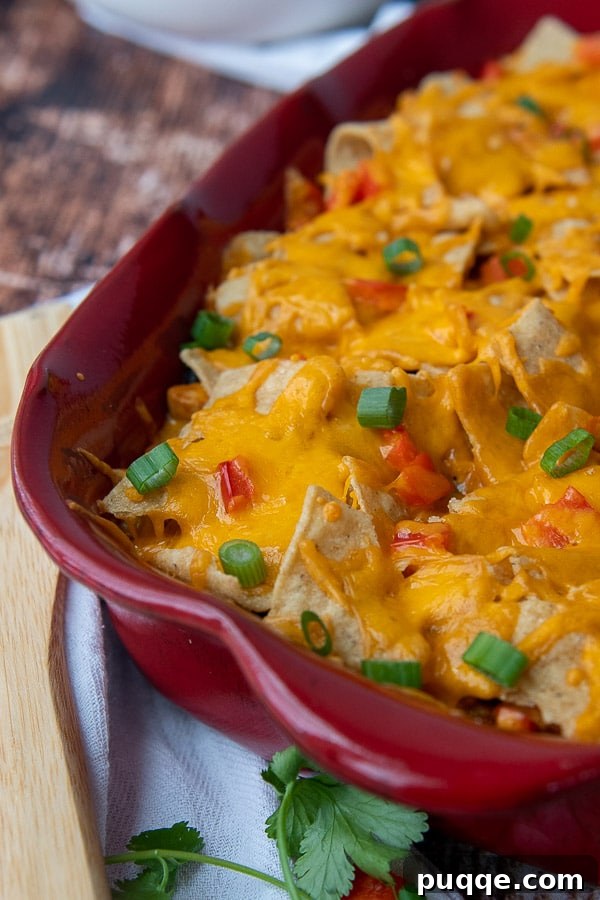
Easy Mexican Chicken and Rice Casserole: Your Ultimate Weeknight Dinner Solution
Transform your ordinary weeknight into a vibrant fiesta with our incredibly easy Mexican Chicken and Rice Casserole recipe. This hearty, flavor-packed dish brings together the best elements of taco night into one convenient, comforting bake that your entire family will adore. Imagine succulent, tender chicken, fluffy rice, rich melted cheese, wholesome black beans, and the satisfying crunch of tortilla chips – or for an extra kick, zesty Doritos! Even better, with simple ingredient choices, this delightful casserole can easily be a gluten-free Mexican meal that everyone at the table can enjoy without compromise.
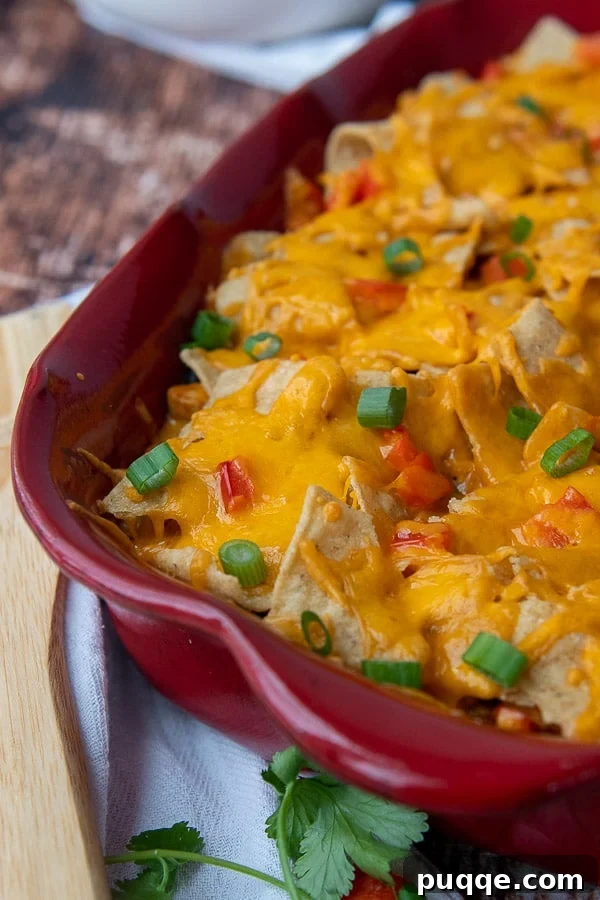
Why This Mexican Chicken Casserole Will Become Your Family Favorite
This Mexican chicken bake isn’t just another dinner recipe; it’s a culinary experience designed for ease and maximum flavor. It perfectly captures all the essential, mouth-watering flavors of chicken tacos, expertly wrapped into a single, easy-to-serve casserole. Forget the fuss of multiple dishes and elaborate preparations. This recipe streamlines the cooking process, allowing everything to come together beautifully in one pot on the stove before being layered with crunchy tortillas, a rich salsa base, hearty black beans, and an abundance of gooey, melted cheese. Baked until golden and bubbly, it promises a satisfying crunch with every bite.
What sets this recipe apart is its ingenious one-pot approach for the base mixture. Similar to our popular 30-minute Mexican fish dish, you won’t need separate pans to cook your protein. Instead, vibrant peppers, savory onions, and bite-sized chicken pieces are sautéed together, building a foundational layer of flavor. Then, broth and uncooked rice are added directly to the pan, creating a deeply infused, zesty sauce as they simmer. This method ensures that every grain of rice and every piece of chicken is permeated with the rich, Mexican-inspired spices, making each spoonful an explosion of taste.
After a quick simmer for just about 20 minutes, the chicken and rice are perfectly cooked within their flavorful sauce, thanks to a convenient shortcut: taco seasoning. A generous stir of black beans, a dash of tangy sour cream for creaminess, and a portion of shredded cheese completes the filling. The magic continues as this flavorful mixture is layered into a casserole dish with your choice of crispy tortilla chips or Doritos, crowned with more cheese, and then baked to a crunchy, cheesy perfection. It’s truly a celebration of textures and flavors!
Much like other adaptable family favorites such as our easy walking taco casserole or the classic old school tamale pie with beef, this mostly hands-off dinner is incredibly versatile. It can be easily customized to suit a wide array of tastes and dietary preferences. We’ve even included an extensive list of ideas below, ranging from vegetarian options to spice level adjustments, ensuring that this Mexican Chicken and Rice Casserole can be tailored perfectly for your household.
This was a hit in our Mexican-food-loving household. So easy that all the ingredients are in one simple dish. It doesn’t seem too heavy either, which Mexican food can be known for. Definitely try this recipe!!!
—Ellen
I have made this several times. It’s easy (and I hate to cook), tastes great, and is wonderful comfort food.
—Aime
Gather Your Ingredients for a Zesty Fiesta
Before we dive into the cooking process, let’s ensure you have all the vibrant components ready for this incredible casserole. The beauty of this dish lies in its accessible ingredients, many of which you might already have in your pantry. Using fresh produce elevates the flavors, but quality canned goods and pantry staples make it effortlessly convenient. (For exact measurements and a printable recipe card, please scroll down to the end of this article.)
Essential Ingredients:
- Olive Oil: The starting point for sautéing, adding a subtle richness.
- Red Bell Pepper: Provides a sweet, mild crunch and beautiful color. Feel free to use green or yellow bell peppers for variety.
- Small Onion: A fundamental aromatic that builds a savory base.
- Garlic Cloves: Minced garlic offers an indispensable pungent and savory depth to the dish.
- Skinless, Boneless Chicken Breasts: Cut into bite-sized pieces, these cook quickly and become wonderfully tender. Rotisserie chicken can be a fantastic shortcut for even faster prep.
- Taco Seasoning Packet: Your flavor shortcut! Ensure you read the label if you require a gluten-free option, or easily make your own homemade gluten-free taco seasoning.
- Salsa: Choose your favorite mild, medium, or hot salsa to infuse the casserole with authentic Mexican flavor and moisture.
- Chicken Broth: Essential for cooking the rice and creating a flavorful sauce base. Opt for a gluten-free broth if needed.
- Uncooked White Rice: Short or long-grain white rice works best, absorbing all the delicious liquids and flavors. Brown rice can be used, but will require longer simmering time.
- Canned Black Beans: Drained and rinsed, these add earthy flavor, fiber, and substance. Pinto beans are a good alternative.
- Sour Cream: Stirred in at the end, it adds a luscious tang and creaminess to the filling, balancing the spices beautifully.
- Fresh Cilantro: Chopped cilantro brightens the entire dish with its fresh, herbaceous notes. Don’t skip it if you love cilantro!
- Lightly Crushed Tortilla Chips or Doritos: These are crucial for the signature crunch and flavor layers. While many tortilla chips are gluten-free, always check the label, especially for Doritos, as their processing may not guarantee it.
- Shredded Cheddar or Colby Jack Cheese: The star of the show for that irresistible melted, gooey layer. Mexican blend cheese also works wonderfully.
- Optional Toppings: Shredded lettuce, diced tomatoes, extra salsa, green onions, avocado or guacamole, and more sour cream or cilantro for serving.
Let’s Create This Casserole Together! (Step-by-Step Guide)
This recipe is designed for maximum flavor with minimal effort, making it ideal for a busy weeknight. Follow these simple steps for a truly delicious result. (The step-by-step photos below offer visual guidance. For precise ingredient amounts, please refer to the complete recipe card at the bottom.)
Step 1: Sauté Your Aromatics and Chicken Base
Begin by heating a tablespoon of olive oil in a large skillet over medium-high heat. Add your chopped onions and bell peppers, sautéing them until they just begin to soften, typically about 3 minutes. This initial step builds a foundational flavor layer. Next, stir in the minced garlic and cook for an additional 30 seconds until fragrant, being careful not to burn it.
Now, introduce your bite-sized chicken pieces to the skillet. Cook them for 4-5 minutes, or until the chicken is no longer pink on the outside. Don’t worry about cooking it through completely at this stage, as it will continue to cook with the rice. If you’re opting for a convenient shortcut, you can swap out raw chicken for pre-cooked rotisserie chicken – simply add it in step 3 to warm through. Once the chicken has seared, sprinkle in the taco seasoning packet, stirring well to coat all the ingredients and infuse them with rich, zesty flavor. Then, pour in the salsa, chicken broth, and uncooked white rice. Bring the mixture to a boil, then reduce the heat to low, cover the skillet, and simmer for approximately 22 minutes, or until the rice is tender and has absorbed most of the liquid. Meanwhile, preheat your oven to 350°F (175°C).
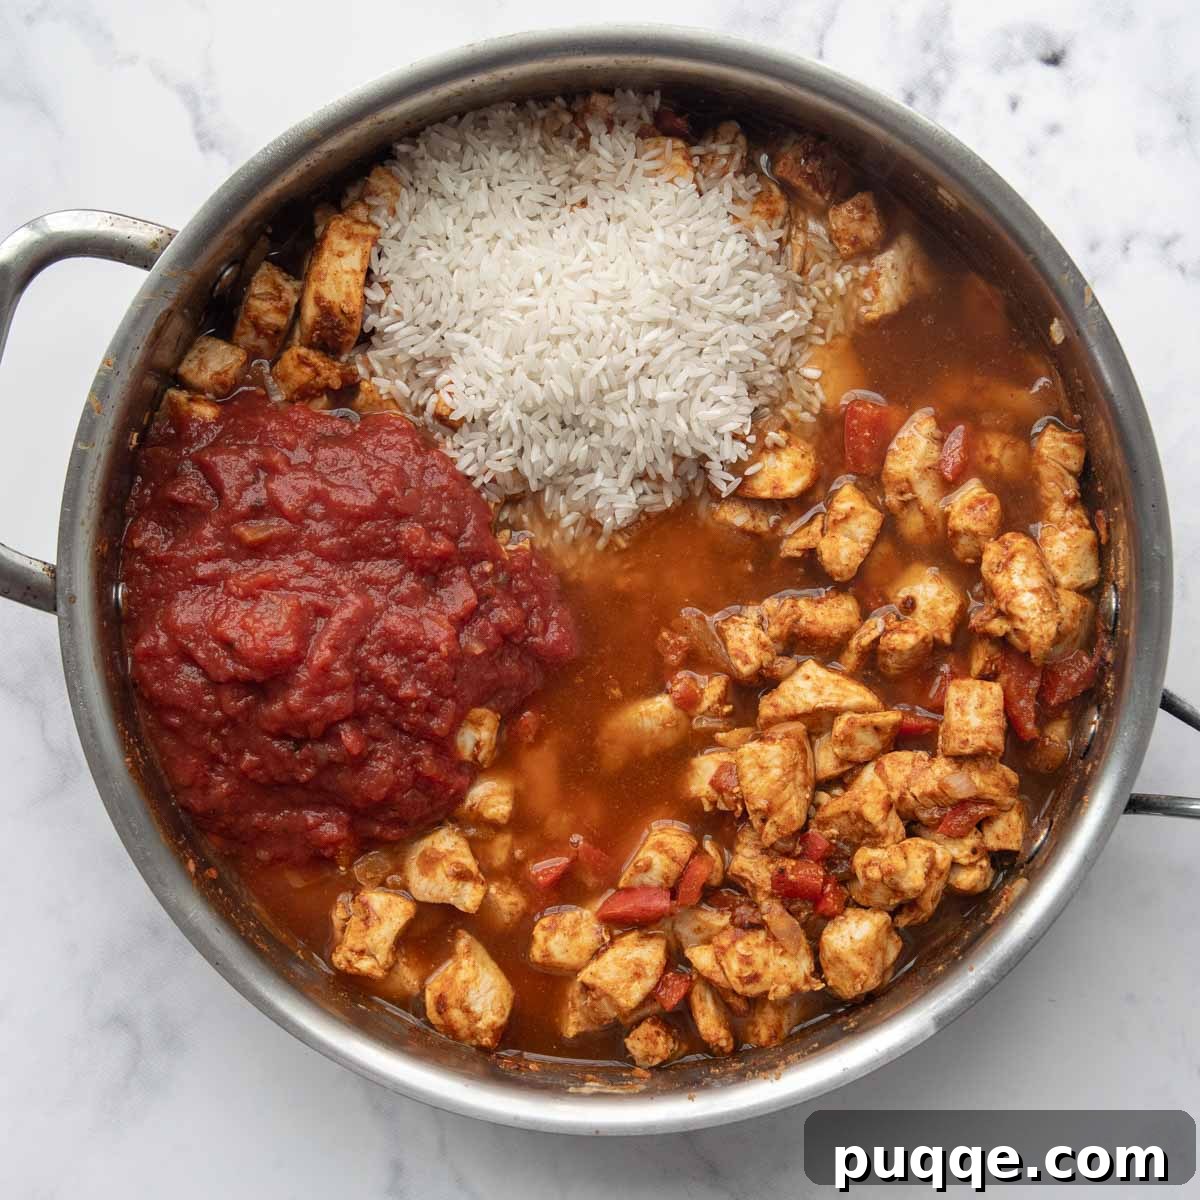
Step 2: Fold in the Black Beans and Creamy Goodness
Once the rice is tender and has absorbed the liquid, remove the lid from the skillet. You might notice a bit of liquid on top, but it will be absorbed as you stir. Now, it’s time to incorporate the black beans, chopped fresh cilantro, and the sour cream for that essential tangy creaminess. Stir everything together gently until well combined. If you happen to have canned or frozen corn on hand, this is a fantastic point to toss it in for an extra touch of sweetness and texture. Mix well, then remove the skillet from the heat, as the filling is now ready for layering.
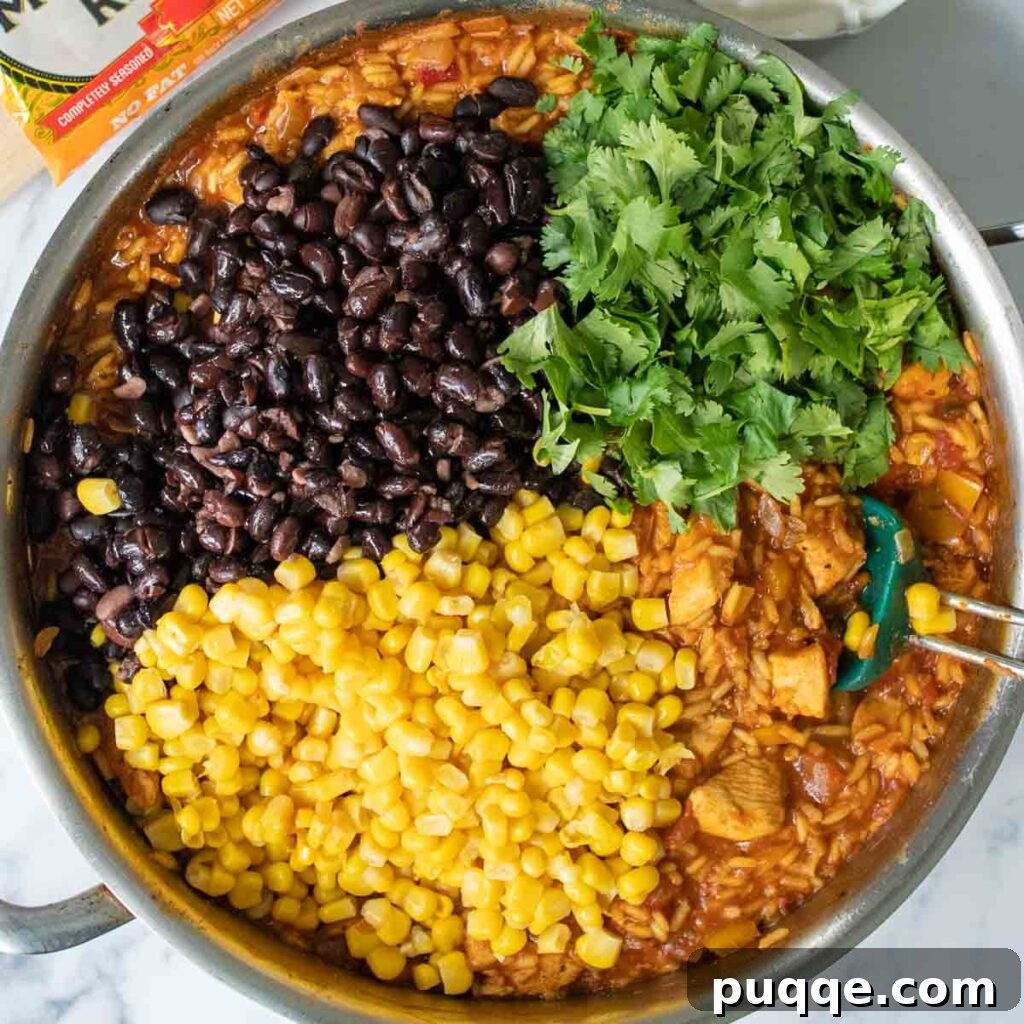
Step 3: Layer and Bake to Cheesy Perfection
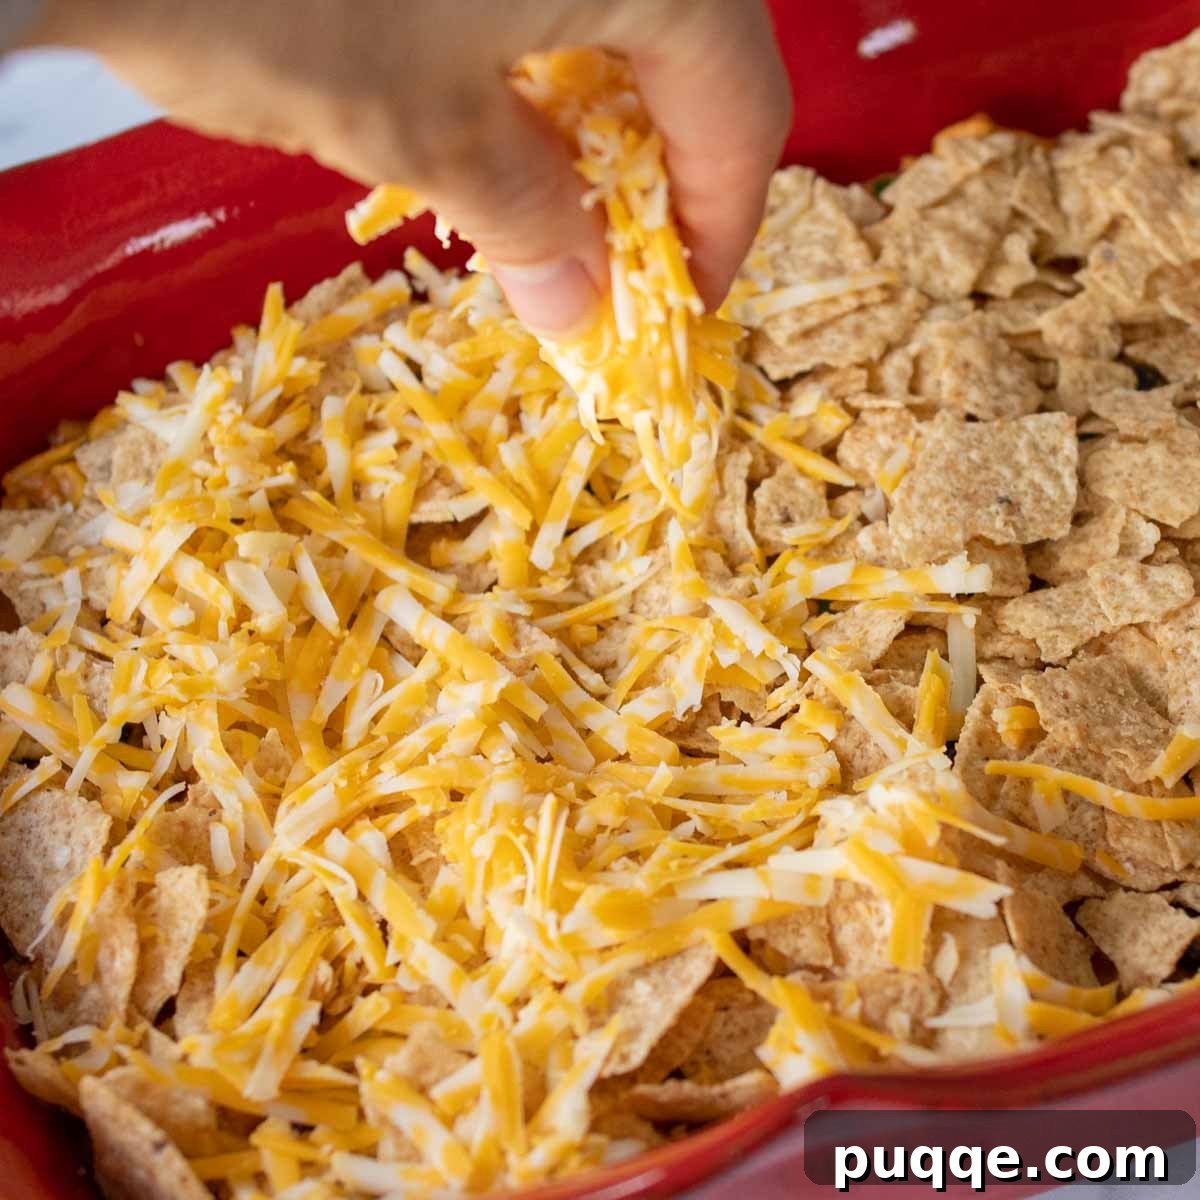
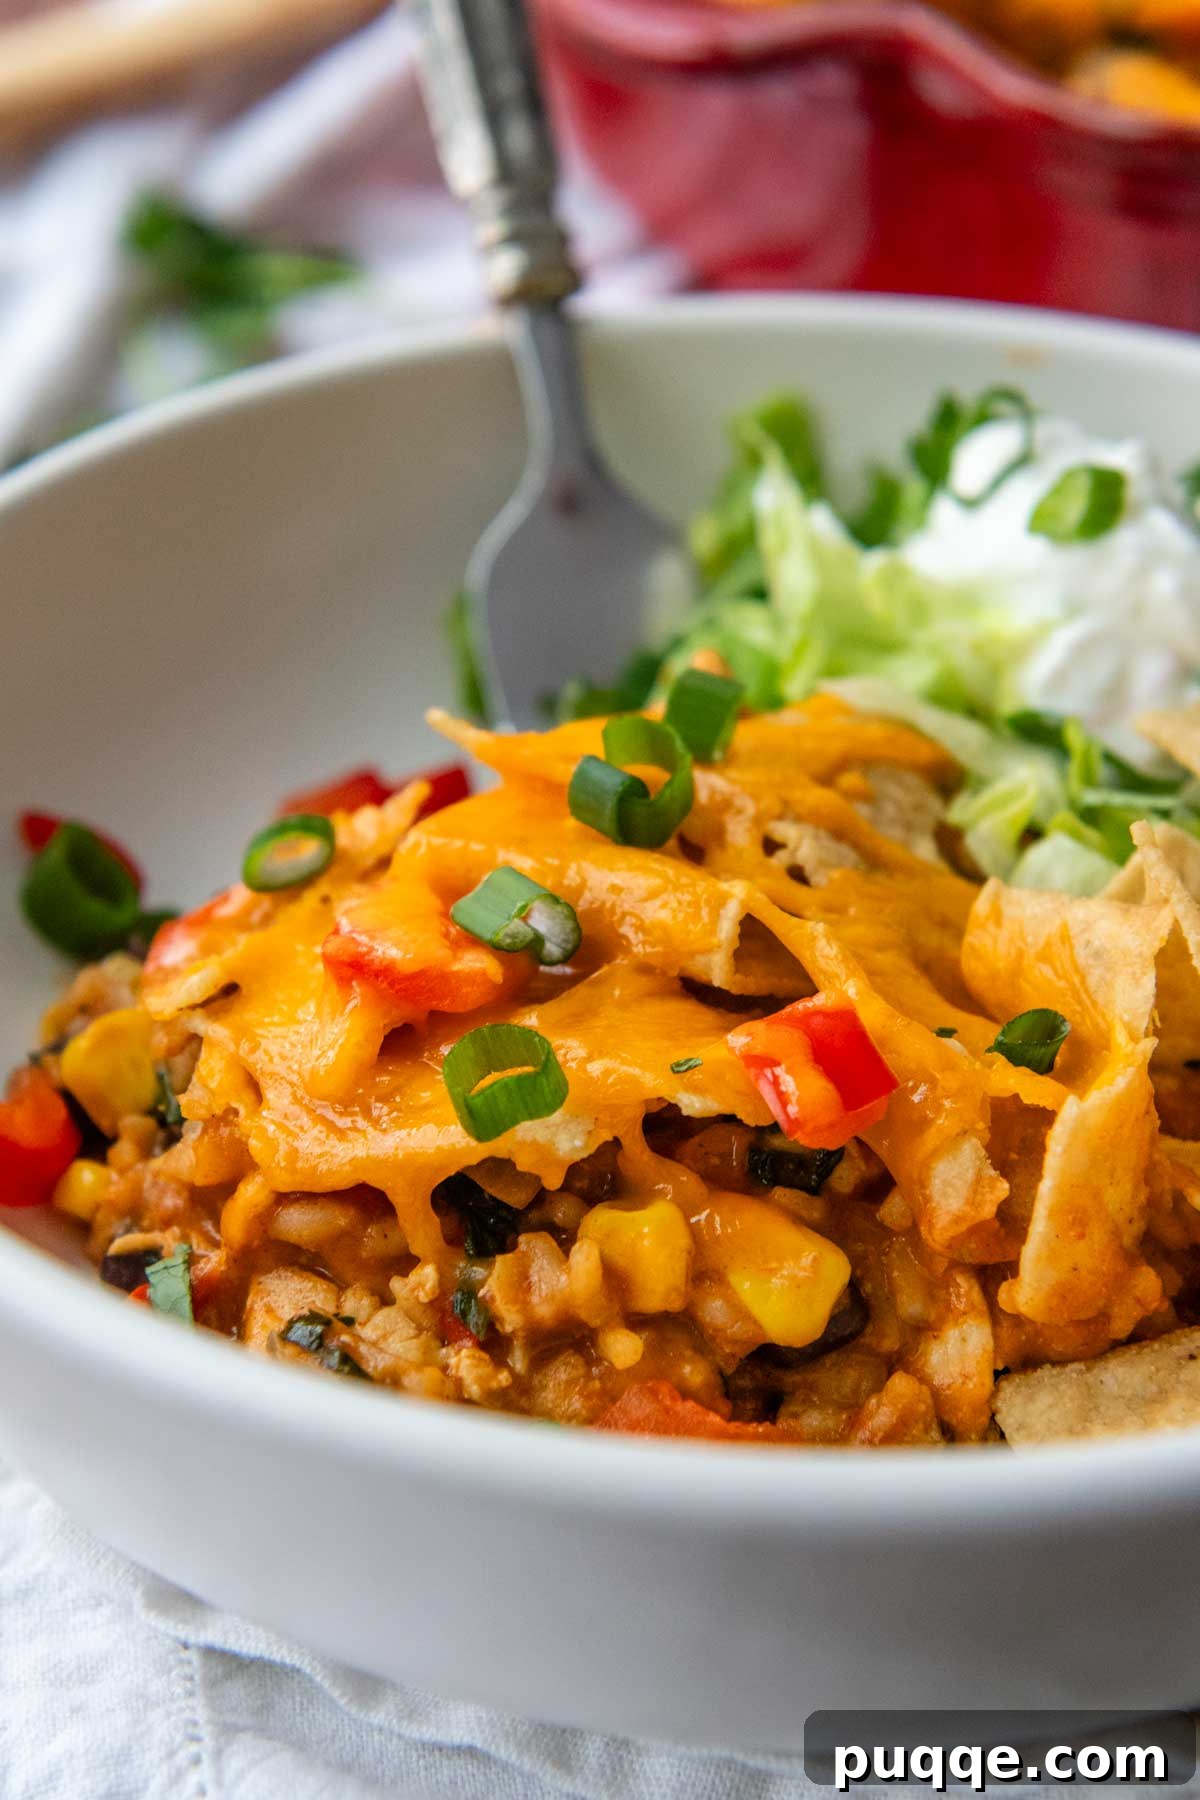
Prepare a 9×13 inch baking dish by lightly greasing it with cooking spray. This will prevent sticking and make for easy serving. Pour half of the flavorful chicken and rice mixture into the bottom of the prepared dish, spreading it evenly. Next, take your lightly crushed tortilla chips or Doritos and sprinkle half of them over the chicken and rice layer. Follow this with half of your shredded cheese, creating a delightful cheesy crust. Repeat these layers: add the remaining chicken and rice mixture, followed by the rest of the crushed chips, and finally, generously sprinkle the remaining shredded cheese over the top. Bake the casserole in your preheated oven for 20-25 minutes, or until the cheese is beautifully melted and bubbly, and the casserole is heated through. For the ultimate taco night experience, serve hot with your favorite toppings like shredded lettuce, diced tomatoes, extra salsa, or a dollop of fresh guacamole!
Customization & Variations: Make It Truly Your Own
While our Mexican Chicken and Rice Casserole is fantastic as written, its true charm lies in its incredible adaptability. This recipe is a blank canvas for your culinary creativity, allowing you to easily adjust it to different tastes, dietary needs, or whatever ingredients you have on hand. Here are some yummy recipe ideas to inspire you:
- Meat Substitutions: For a more traditional taco flavor profile, substitute one pound of lean ground beef or ground turkey for the chicken. Cook and crumble the ground meat with the onions and peppers, draining any excess fat before adding the seasoning.
- Sauce Alternatives: If you’re a fan of the rich, savory depth of enchiladas, stir in an equal amount of your favorite enchilada sauce instead of salsa. Any leftover enchilada sauce can even be drizzled over the top layers of chips and cheese before baking for an extra burst of flavor.
- Chip Choices Beyond Tortillas: Feel free to experiment with your favorite flavor of Doritos chips for a unique twist and added zest. Just be mindful of gluten-free requirements, as while many Doritos flavors do not contain gluten ingredients, they are often not certified or labeled gluten-free due to potential cross-contamination. Always check packaging carefully for specific dietary needs.
- Fresh Tortilla Layers: For a softer, more integrated layer, cut up fresh flour or corn tortillas into strips or triangles to replace the crushed chips. They’ll absorb the flavors of the casserole beautifully.
- Vegetarian Delight: Easily transform this into a satisfying vegetarian bake by omitting the chicken. Instead, use an additional bell pepper (perhaps a different color for visual appeal) and an extra cup of corn. You could also add canned diced tomatoes (drained) or a can of drained and rinsed chickpeas for more texture and protein.
- Kick Up the Spice: If you prefer a bolder, spicier casserole, there are several ways to turn up the heat. Add a can of diced green chiles (mild or hot) to the rice filling, a dash of your favorite hot sauce, or a pinch of crushed red pepper flakes. For an intense heat, finely dice a jalapeño or serrano pepper and sauté it with the onions and peppers.
- Extra Veggies: Boost the nutritional content and flavor by stirring in other vegetables like canned or frozen corn (as mentioned in the steps), diced zucchini, or finely chopped spinach into the chicken and rice mixture.
- Cheese Varieties: Don’t limit yourself to cheddar or Colby Jack! Try Monterey Jack, Pepper Jack for a spicy kick, or even a blend of Mexican cheeses for a more complex flavor.
Meal Prep & Storage Tips for Busy Cooks
For those who love to get ahead in the kitchen, this Mexican Chicken and Rice Casserole is an excellent candidate for meal prepping. You can prepare it in stages or assemble it entirely as a make-ahead meal, making busy weeknights a breeze.
Make-Ahead Instructions:
The skillet portion of this recipe – the chicken and rice filling – can be prepared up to two days in advance. Once cooked, allow it to cool completely before transferring it to an airtight container and refrigerating. When you’re ready to assemble and bake, for the best results, let the chicken rice filling sit at room temperature for about 30 minutes, or gently warm it slightly on the stove before layering. This ensures more even baking and prevents the casserole from drying out.
Once the filling is slightly warmed or at room temperature, proceed with layering the casserole as instructed, adding the chips and cheese. Depending on the initial temperature of your filling, you might need to extend the baking time by an additional 10-15 minutes to ensure it’s heated through and the cheese is perfectly melted and bubbly.
Storing and Reheating Leftovers:
Any leftover Mexican Chicken and Rice Casserole can be stored in an airtight container in the refrigerator for up to 3 days. To enjoy the best texture, especially to bring back the crispiness of the chips, we highly recommend reheating it in the oven. Loosely cover the casserole with foil and bake in an oven-safe dish at 300°F (150°C) until thoroughly heated through.
While you can certainly microwave single-serving portions for convenience, be aware that the tortilla chips may lose some of their crunch and become a little soft. For a quick microwave reheat that still offers some crispiness, warm your portion in the microwave, then sprinkle a little extra cheese on top, and transfer it to an oven or toaster oven to broil for a few minutes until the cheese melts and the chips crisp up.
Frequently Asked Questions (FAQ)
We know you might have a few questions as you prepare this delicious casserole. Here are some common queries and our helpful answers to ensure your success:
Can I use brown rice instead of white rice?
Yes, you can absolutely use brown rice! Keep in mind that brown rice requires a longer cooking time and typically more liquid. If substituting, you will likely need to increase the chicken broth by about ½ to 1 cup and simmer the mixture for 35-45 minutes, or until the brown rice is tender, before proceeding with the rest of the recipe. Adjust liquid as needed, adding more broth if the rice is still firm and the pan is dry.
What are the best toppings for Mexican Chicken Casserole?
The beauty of this casserole is how well it pairs with a variety of fresh toppings, allowing everyone to customize their plate. Popular choices include shredded lettuce, diced fresh tomatoes or pico de gallo, a dollop of sour cream or Greek yogurt, creamy sliced avocado or guacamole, thinly sliced green onions, and extra fresh cilantro. A squeeze of lime juice can also add a bright, zesty finish.
Is this casserole freezer-friendly?
While the cooked chicken and rice filling can be frozen successfully for up to 2-3 months in an airtight container, the assembled casserole with tortilla chips does not freeze well. The chips will become soggy and lose their appealing texture upon thawing and reheating. If you plan to freeze, only freeze the cooked filling. Thaw the filling overnight in the refrigerator, then proceed with layering in the baking dish with fresh chips and cheese before baking.
Save This Recipe for Later!
Let’s be friends on Pinterest! I’m always sharing great recipes!
Did you make this recipe? We love hearing from you! Leave a star rating and comment below this recipe section. Your feedback helps others discover and enjoy our recipes, and we truly appreciate hearing from our community! -Melissa

Simple Mexican Chicken Casserole with Rice
 Melissa Erdelac
Enjoy the best parts of taco night with easy Mexican chicken rice casserole recipe. The whole family will love this hearty, flavorful dish combining tender chicken, rice, cheese, black beans, and tortilla chips (or swap out some zesty Doritos). If that is not reason enough to dive in, the simple required ingredients makes this a gluten-free Mexican casserole all can enjoy!
Pin Recipe
Rate Recipe
Remove Ads
Ingredients
- 1 tablespoon olive oil
- 1 red pepper, chopped
- 1 small onion, diced
- 2 cloves garlic, minced
- 1 ½ pounds skinless boneless chicken breasts, cut in bite-sized pieces
- 1 ounce packet taco seasoning (read label for gluten-free)
- 1 cup salsa
- 1 cup chicken broth (read label for gluten-free)
- ½ cup white rice, uncooked
- 15 ounce can black beans, drained and rinsed
- ½ cup sour cream
- ½ cup chopped fresh cilantro
- 3 cups lightly crushed tortilla chips or Doritos (about 6 ounces) – read label for gluten-free
- 2 cups shredded cheddar or Colby jack cheese, divided
- For serving: (optional) shredded lettuce, tomatoes, salsa, green onion, avocado, sour cream, cilantro
Equipment
-
9X13 Baking Dish
-
Stainless Steel Skillet
-
Cheese Grater
Instructions
- In a large skillet, heat 1 tablespoon olive oil over medium-high heat. Add the chopped red pepper and diced small onion, sautéing until almost tender, about 3 minutes. Stir in the 2 cloves minced garlic and sauté for 30 seconds longer until fragrant.
- Add the 1 ½ pounds bite-sized chicken pieces to the skillet and cook for 4-5 minutes, or until the chicken is no longer pink on the outside (it will finish cooking through later). Stir in the 1 ounce packet taco seasoning, ensuring the chicken and vegetables are well coated.
- Pour in the 1 cup salsa, 1 cup chicken broth, and ½ cup uncooked white rice to the skillet. Bring the mixture to a boil, then reduce the heat to low, cover the skillet, and simmer for 22 minutes, or until the rice is tender and has absorbed most of the liquid. Meanwhile, preheat your oven to 350ºF (175°C).
- Remove the lid from the skillet. (There may still be a little liquid on top, but once the mixture is stirred, the extra liquid will be absorbed.) Stir in the 15 ounce can of drained and rinsed black beans, ½ cup sour cream, and ½ cup chopped fresh cilantro, along with ½ cup of the shredded cheese. Mix everything until well combined. Remove the skillet from heat.
- In a 9X13 inch baking pan, greased with cooking spray, spread half of the chicken and rice mixture evenly. Top this layer with half of the 3 cups lightly crushed tortilla chips or Doritos, followed by half of the remaining shredded cheese. Repeat this layering process with the second half of the chicken mixture, chips, and sprinkle the remaining cheese over the top. Bake for 20-25 minutes, or until the cheese is melted, bubbly, and the casserole is hot throughout. Serve immediately with your desired toppings.
Notes
Make-Ahead Notes
Prepare the skillet portion (the chicken and rice filling) up to two days ahead and refrigerate in an airtight container. When ready to serve, for best results, let the chicken rice filling sit at room temperature or warm slightly on the stove before using.
Layer casserole as instructed with slightly warmed or room temp filling. Depending on the temperature of the filling you may have to bake for 10-15 minutes longer than the recipe calls for.
Storing and Reheating
Store leftovers in an airtight container in the refrigerator for up to 3 days. For the best reheating, especially to regain the crunch of the chips, we recommend using an oven. Loosely cover with foil and bake in an oven-safe dish in a 300ºF (150°C) oven until heated through.
You may also microwave single-serving portions, but be aware that the chips will become a little soggy. For a shortcut that provides some crispness, rewarm in the microwave, sprinkle on a little more cheese, and then transfer to an oven or toaster oven to broil briefly until the cheese melts and crisps.
Nutrition Facts
Per serving (approximate): Calories: 592kcal, Carbohydrates: 60g, Protein: 35g, Fat: 25g, Saturated Fat: 8g, Polyunsaturated Fat: 6g, Monounsaturated Fat: 7g, Trans Fat: 0.04g, Cholesterol: 88mg, Sodium: 1048mg, Potassium: 796mg, Fiber: 9g, Sugar: 4g, Vitamin A: 1383IU, Vitamin C: 24mg, Calcium: 304mg, Iron: 3mg.