
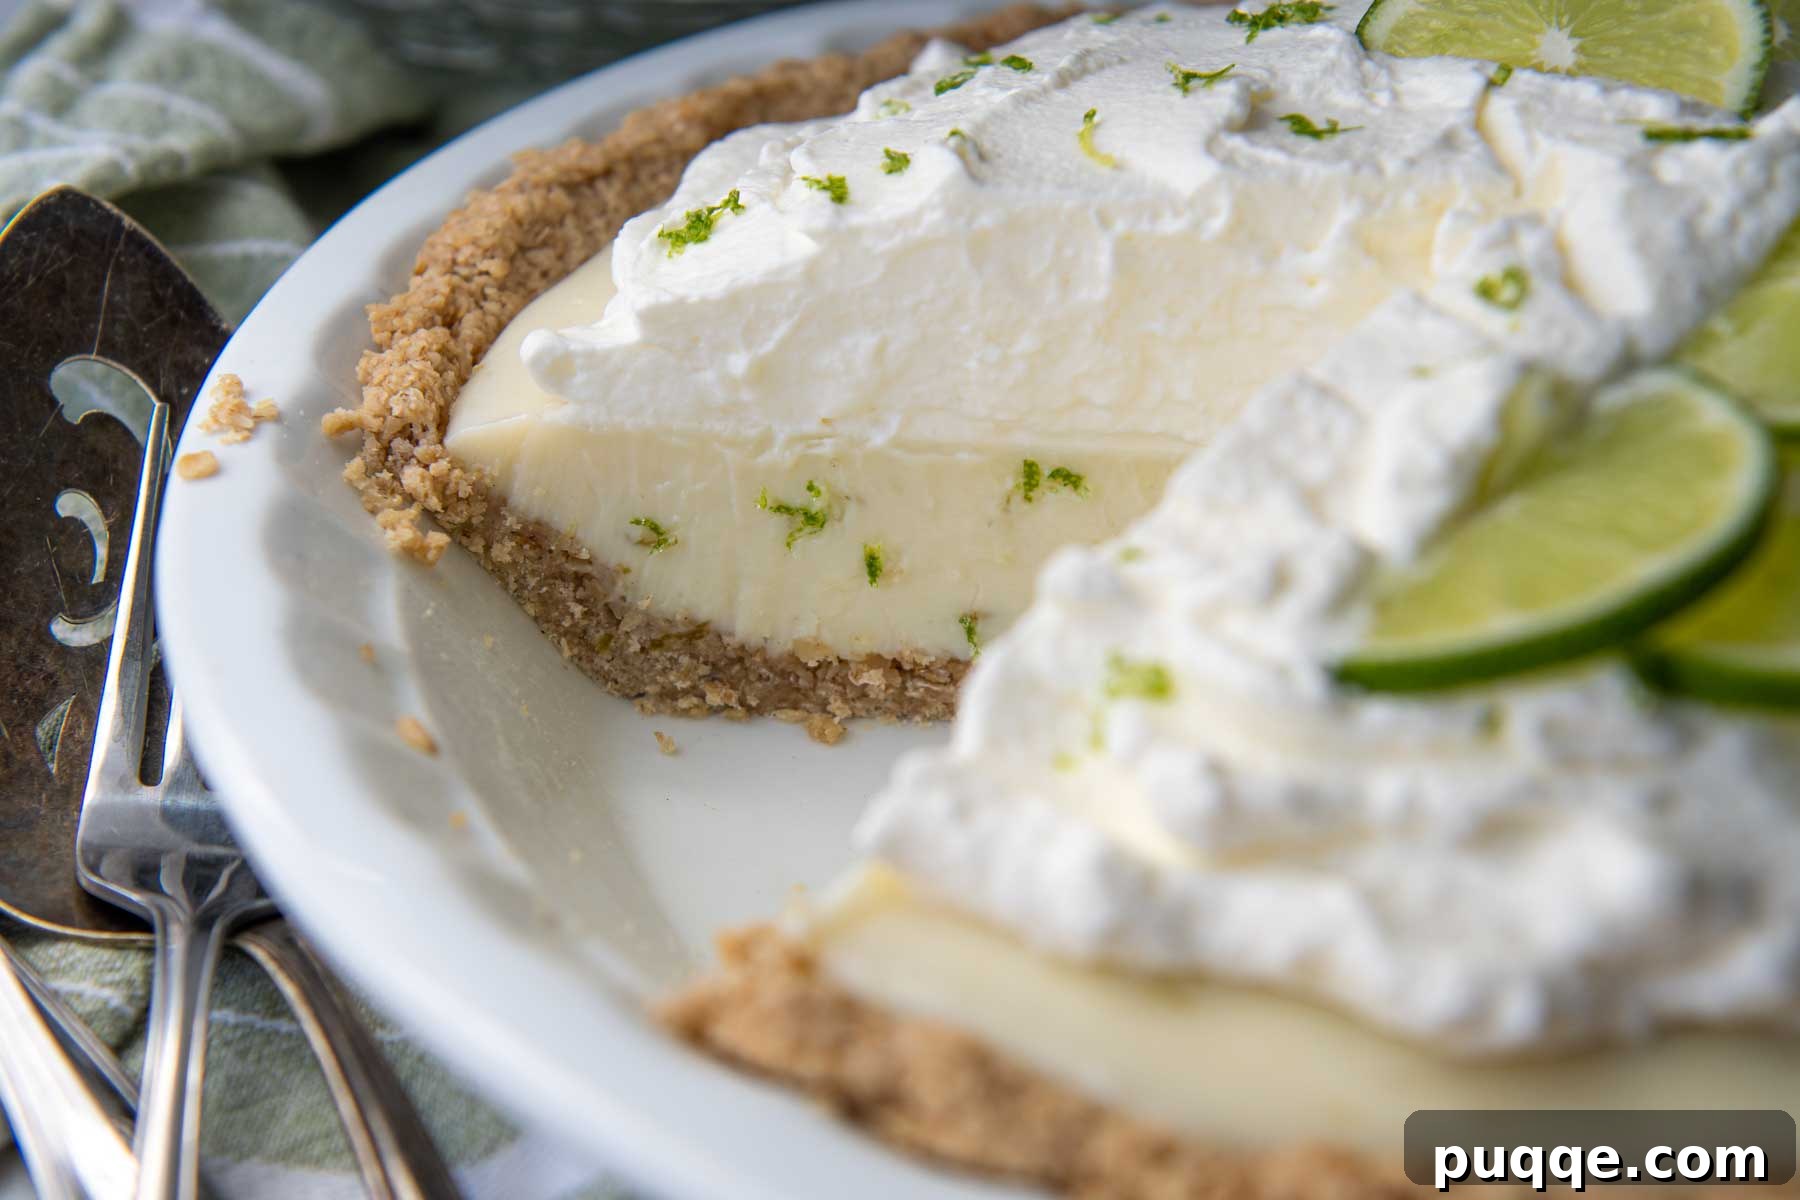
The Ultimate Gluten-Free Key Lime Pie: A Taste of Key West, Made Effortlessly
Experience the vibrant, tangy flavor of Key West right in your kitchen with this unparalleled gluten-free key lime pie recipe. We believe it stands above all others, not just for its exquisite taste, but also for its affordability and remarkable ease of preparation. This recipe promises a perfectly set, ultra-creamy, and refreshingly tangy lime pie every single time, complete with a delightful, easy-to-make gluten-free crust that rivals any traditional graham cracker base. Prepare to be transported to the sunny shores of Florida with each delicious bite of this homemade masterpiece.
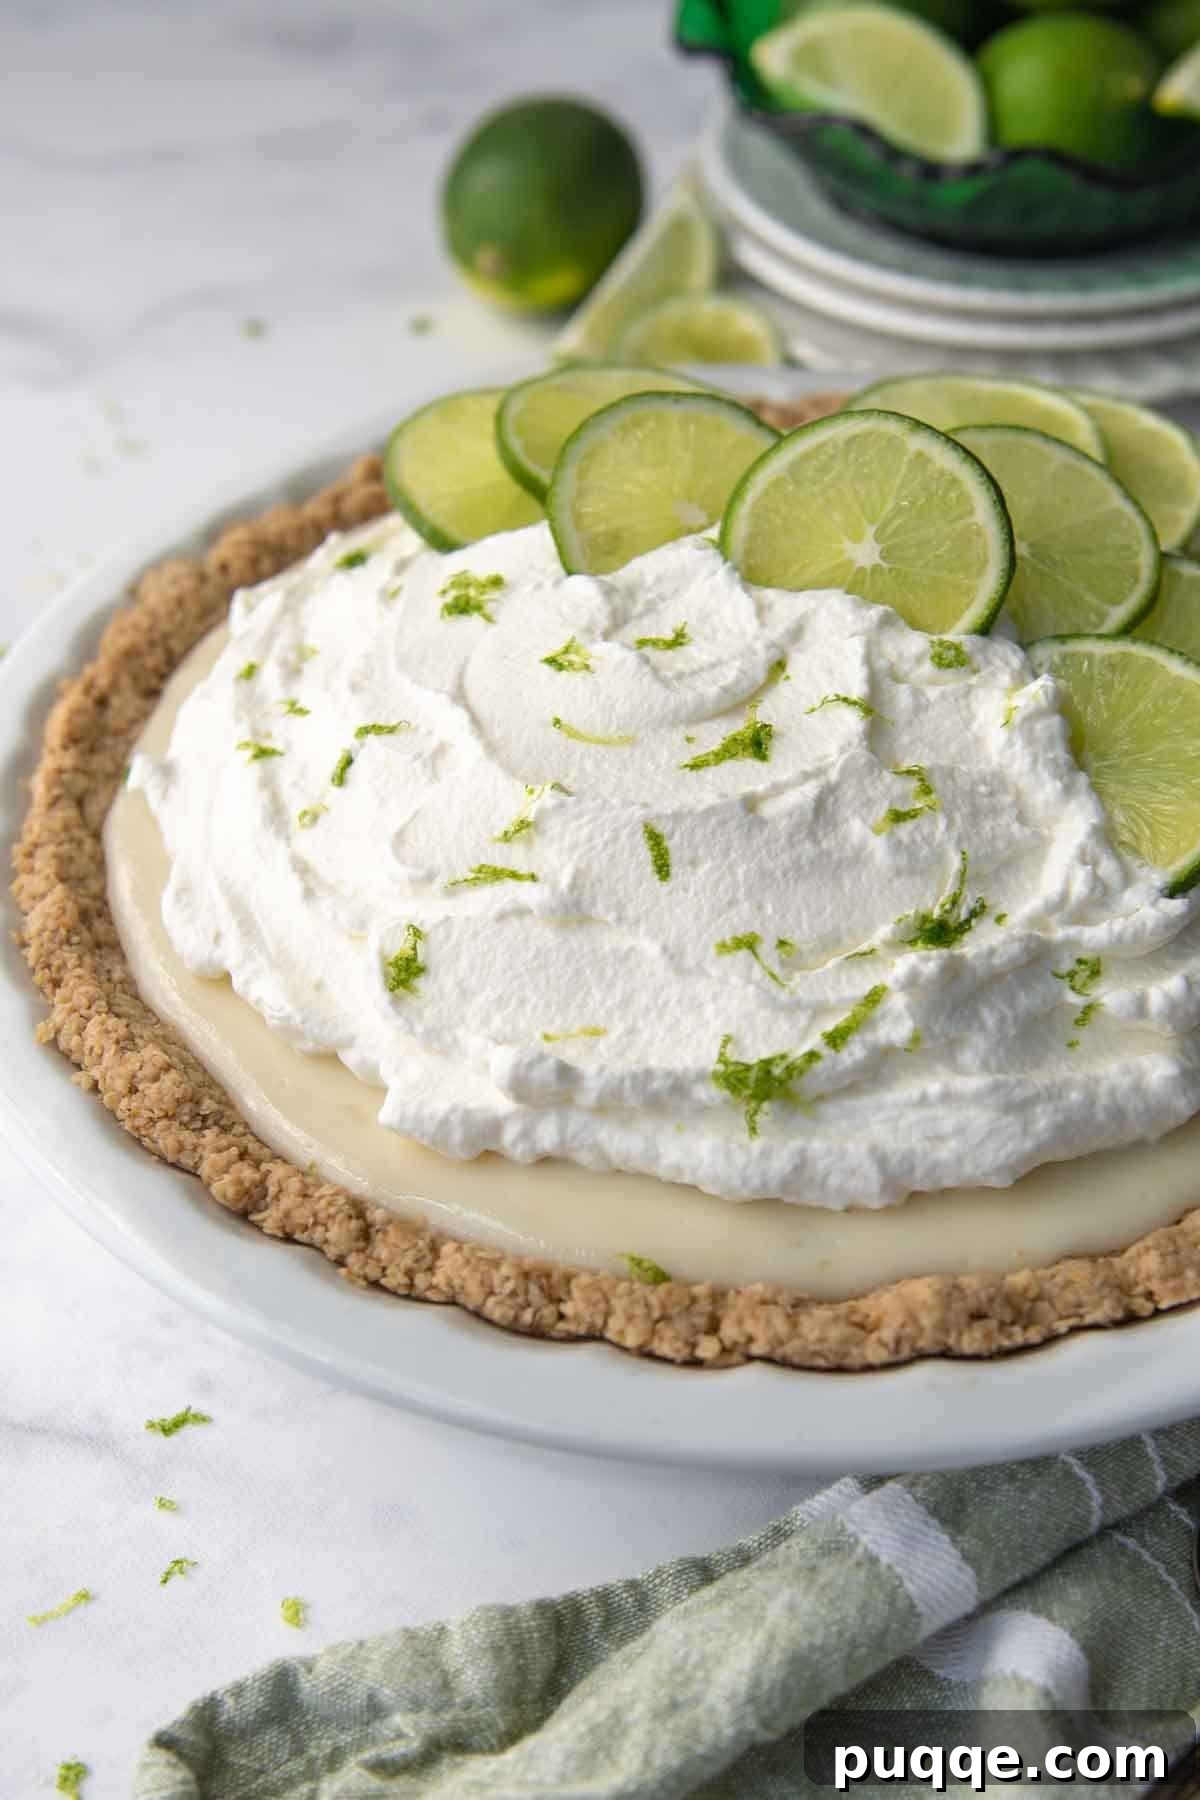
Crafting the Best Gluten-Free Key Lime Pie Recipe
The culinary world is filled with various interpretations of the “classic” key lime pie. Should it contain egg yolks or none at all? Is it baked or no-bake? Which combination of sweetened condensed milk and sour cream achieves the ideal balance? After extensive baking experiments and meticulous taste tests, we are thrilled to unveil the winning gluten-free recipe for key lime pie that truly delivers.
Our philosophy, often highlighted in our gluten-free cookbooks, centers on creating accessible and affordable gluten-free dessert recipes without ever compromising on flavor or texture. This particular pie recipe embodies that principle perfectly. It’s designed to be simple, satisfying, and utterly delicious for everyone, whether they follow a gluten-free diet or not.
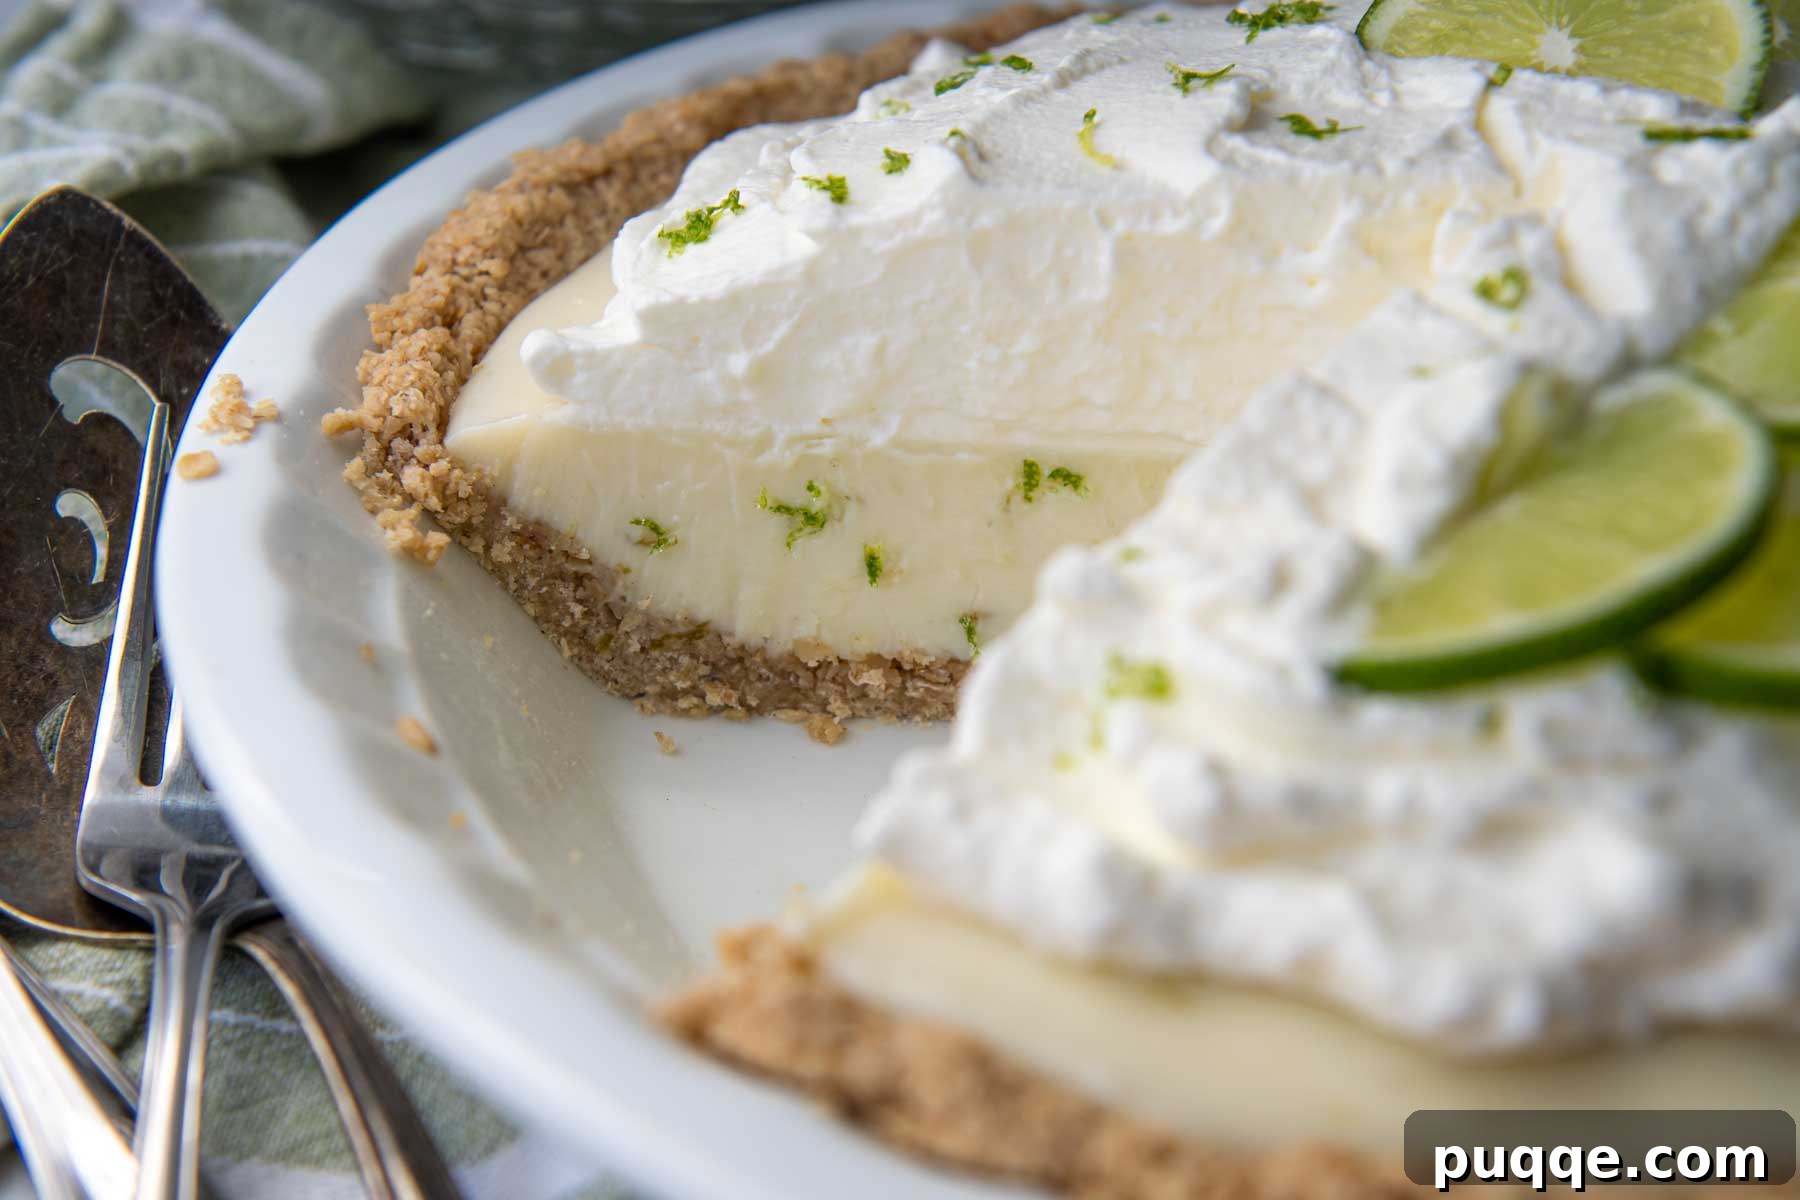
What truly distinguishes this key lime pie is its extra-creamy filling. It boasts a perfectly balanced flavor profile, where the sweetness of condensed milk harmonizes beautifully with the bright, citrusy tang of lime, mellowed by a touch of sour cream. The best part? This luscious filling sets flawlessly without the need for eggs as a binder, making the process even simpler and foolproof. You’ll achieve a smooth, rich texture that holds its shape beautifully when sliced, ensuring a delightful presentation every time.
During the development of this recipe, particularly with a gluten-free crust, we discovered a brilliant technique to ensure a perfect pie: leaving it in the oven after baking as it cools. This gradual cooling process is a game-changer. It not only prevents the dreaded cracked top that can sometimes plague custard pies but also eliminates any guesswork about whether the pie is adequately baked. This simple trick guarantees a beautiful, intact surface and a perfectly set interior.
Furthermore, this recipe offers a delicious and budget-friendly alternative to a traditional gluten-free graham cracker crust. Our easy, press-in gluten-free oatmeal crust holds together exceptionally well, providing a wonderful texture and a hint of warmth that complements the zesty filling. It’s incredibly simple to prepare, requiring just a few ingredients and minimal effort, making it an excellent choice for busy bakers.
However, we understand that some may prefer the classic graham cracker experience. For the traditionalists, we also conducted rigorous taste tests of top gluten-free graham cracker brands and developed a method to create a gluten-free graham cracker crust that is sturdy, flavorful, and can be seamlessly swapped for the oat crust in this recipe. Whichever crust you choose, you’re guaranteed a fantastic foundation for your key lime pie.
Essential Ingredients for Your Gluten-Free Key Lime Pie
Creating this irresistible gluten-free key lime pie requires a thoughtful selection of ingredients for both the crust and the filling. Here’s a closer look at what you’ll need and why each component is crucial for achieving that perfect Key West flavor.
For the Irresistible Oatmeal Crust:
- Quick-Cooking Oats: Two cups of quick-cooking oats form the base of our unique crust. Be sure to use certified gluten-free oats to ensure the pie is safe for those with gluten sensitivities. These oats bind together beautifully with the other ingredients, creating a firm yet tender crust.
- Unsalted Butter: Half a cup of melted unsalted butter adds richness and helps to bind the crust ingredients, providing a perfect press-in consistency.
- Powdered Sugar: Half a cup of powdered sugar (confectioners’ sugar) contributes subtle sweetness and a finer texture to the crust, making it less grainy than granulated sugar.
- Cinnamon: A quarter teaspoon of cinnamon infuses the crust with a warm, inviting aroma and a hint of spice that beautifully complements the zesty lime filling.
- Salt: A quarter teaspoon of salt balances the sweetness and enhances all the flavors in the crust.
For the Creamy Key Lime Pie Filling:
- Sweetened Condensed Milk: 28 ounces of canned sweetened condensed milk is the heart of this pie filling. It provides the essential sweetness and contributes significantly to the pie’s luxurious, creamy texture. This ingredient eliminates the need for granulated sugar, simplifying the recipe.
- Key Lime Juice: ¾ cup of key lime juice delivers the iconic tangy flavor. While fresh key limes offer the most authentic taste, suitable substitutions are available (see “Key Limes Versus Regular Limes” section below).
- Sour Cream: Half a cup of sour cream is our secret ingredient for achieving an extra-creamy texture and balancing the intense sweetness and tartness of the other ingredients. It adds a subtle tang and richness that makes the pie exceptionally smooth and decadent.
- Lime Zest: Two teaspoons of fresh lime zest amplify the citrus aroma and flavor, adding a bright, fragrant note that elevates the entire pie.
For the Dreamy Whipped Cream Topping:
- Heavy Cream: One cup of cold heavy cream is whipped to light, airy perfection, providing a classic topping that beautifully contrasts the rich pie.
- Powdered Sugar: Three tablespoons of powdered sugar sweeten the whipped cream without adding a grainy texture.
- Vanilla Extract: One teaspoon of vanilla extract adds a delicate aroma and flavor to the topping, enhancing its overall appeal.
Step-by-Step Guide: Let’s Bake This Together!
Making this gluten-free key lime pie is a straightforward process, designed for success even for novice bakers. Follow these detailed instructions to create a dessert that will impress everyone.
- Prepare the Oatmeal Pie Crust: Preheat your oven to 350°F (175°C). In a food processor, combine the quick-cooking oats, melted unsalted butter, powdered sugar, cinnamon, and salt. Process for about 20-30 seconds, or until the mixture is well combined and the oats begin to clump together. This indicates the perfect consistency for pressing.
- Form and Bake the Crust: Transfer the crust mixture into a 9-inch pie dish. Press it firmly and evenly onto the bottom and up the sides of the dish. A useful tip for ensuring the crust extends all the way up the sides is to press evenly from the center outwards, working the excess crust upwards. Bake for 18 minutes, or until the oats are set and lightly golden. If the crust puffs up during baking, gently flatten it with the back of a measuring cup immediately after removing it from the oven. Allow the crust to cool completely on a wire rack before proceeding to the filling. This step is crucial for preventing a soggy crust.
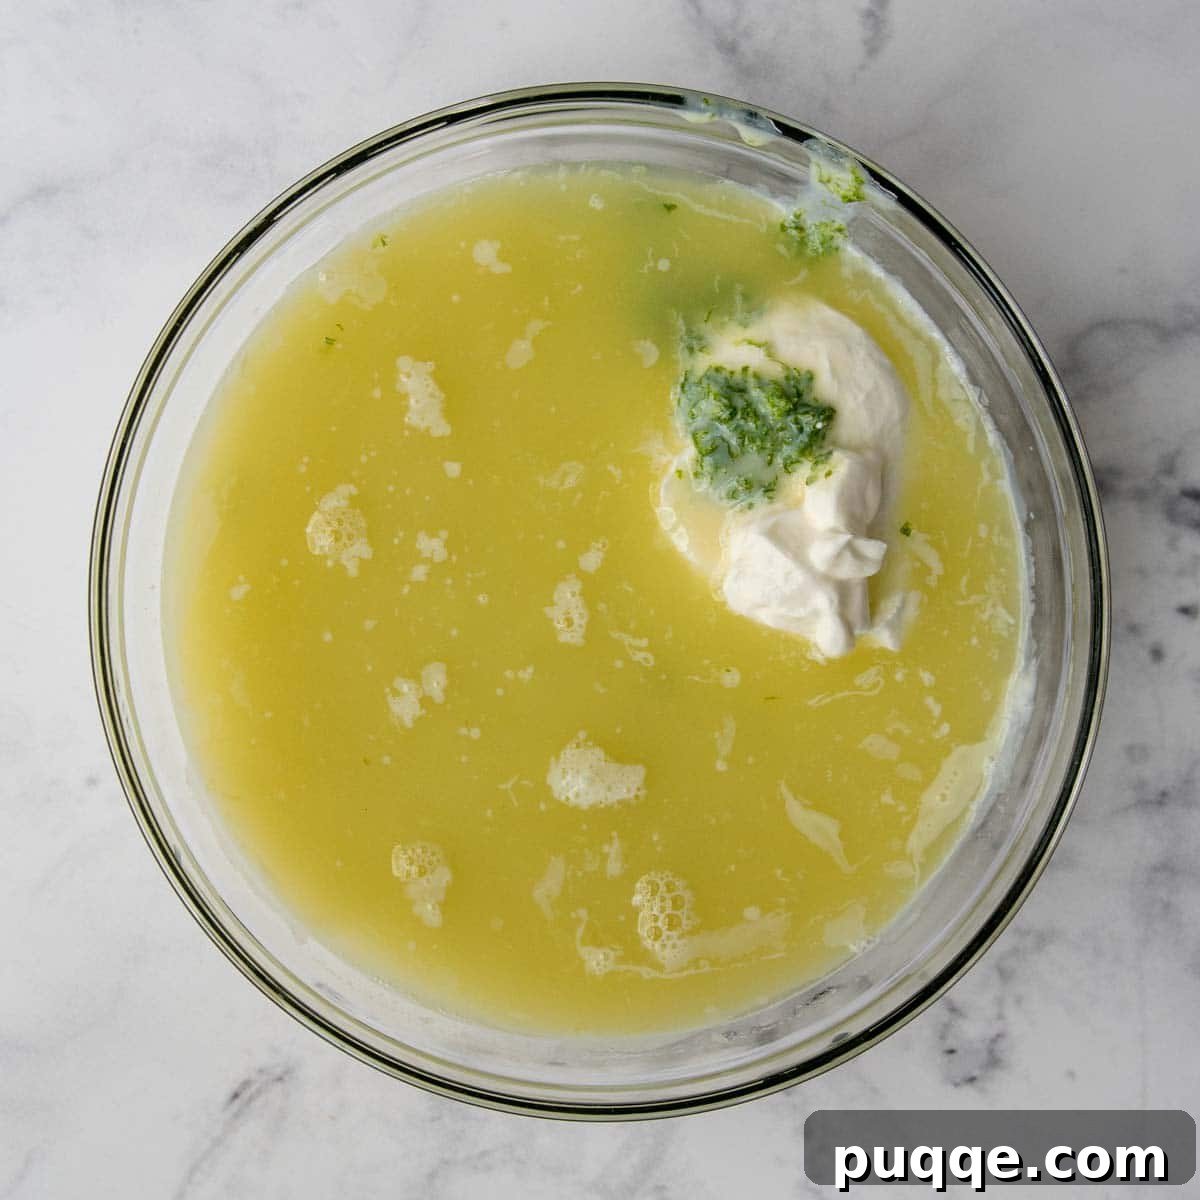
- Prepare the Key Lime Filling: While your crust cools, prepare the luscious key lime filling. In a medium bowl, whisk together the sweetened condensed milk, key lime juice, sour cream, and lime zest until the mixture is smooth and thoroughly combined. The mixture will thicken slightly as you whisk.
- Fill and Bake the Pie: Carefully pour the prepared key lime filling into the completely cooled pie crust. Ensure an even layer. Bake the pie at 350°F (175°C) for precisely 10 minutes. This short baking period is key to setting the filling without overcooking it.
- The No-Crack Cooling Method: After 10 minutes, turn off the oven, but leave the pie inside for an additional 30 minutes. Do not open the oven door during this time. This gradual cooling process is the secret to a perfectly set pie with a beautiful, uncracked surface.
- Chill the Pie: Remove the pie from the oven and let it cool completely to room temperature on a wire rack. Once at room temperature, transfer the pie to the refrigerator and chill for at least 6 hours, or preferably overnight. Chilling allows the filling to fully set and enhances the flavors.
- Prepare the Whipped Cream Topping: Just before serving, prepare the homemade whipped cream. In a large mixing bowl, using either a hand-held mixer or a stand mixer fitted with a whisk attachment, beat together the cold heavy cream, powdered sugar, and vanilla extract on medium-low speed. Continue beating until the mixture begins to thicken.
- Whip to Stiff Peaks: Increase the mixer speed to high and continue whipping until stable, firm peaks form, typically another 1-2 minutes. Be careful not to over-whip, as it can turn into butter.
- Serve and Enjoy: Spread the freshly whipped cream evenly over the thoroughly chilled pie. Serve cold, perhaps garnished with a few thin slices of fresh lime or extra lime zest for an elegant presentation.
Key Limes Versus Regular Limes: Understanding the Difference
The distinction between Key limes and “regular” limes (also known as Persian limes) is a common point of discussion for any key lime pie enthusiast. While Persian limes are readily available year-round in virtually any grocery store, Key limes can be more elusive, often appearing only during specific seasons. When you do spot them, it’s a perfect opportunity to stock up and indulge in an authentic key lime pie!
But what exactly sets these two citrus fruits apart, and can they truly be used interchangeably in a recipe like this?
Appearance: Key limes are noticeably smaller than Persian limes, typically about the size of a golf ball. They also tend to have a slightly more yellowish hue when ripe, and their skin is thinner and often mottled. Persian limes, in contrast, are larger, bright green, and have a thicker, smoother skin.
Flavor Profile: This is where the most significant difference lies. Key limes are renowned for their unique flavor – intensely aromatic, floral, and slightly less tart than Persian limes. They possess a complex sweetness that gives them a distinct edge, often described as having a smoother, more pleasing flavor profile. Persian limes, while wonderfully zesty, are more overtly tart and lack the delicate, perfumed undertones of their smaller counterparts.
Juice Yield and Seeds: Key limes yield less juice per fruit and are notoriously seedy, making juicing a bit more laborious. Persian limes are typically seedless or have very few seeds, and provide a generous amount of juice. To extract the most juice from Key limes, consider using a citrus juicer or even a garlic press for smaller pieces.
Interchangeability: If you were to conduct a side-by-side taste test, a pie made with genuine Key limes would likely exhibit a more nuanced, sophisticated flavor. However, don’t despair if Key limes are unavailable! Using regular Persian limes is absolutely acceptable for this recipe. When combined with the rich sweetness of sweetened condensed milk and the tangy depth of sour cream, the differences in lime flavor become much less pronounced. Most people will not be able to tell the difference, especially when presented with such a delicious, creamy pie. The core tangy-sweet balance will still shine through, ensuring a delightful dessert.
Substituting Key Lime Juice for Optimal Flavor
While fresh Key lime juice offers the most authentic taste for your pie, it’s not always practical or possible to obtain. Thankfully, there are excellent alternatives that will still result in a fantastic gluten-free key lime pie.
It’s crucial to understand that not all lime juice is created equal. **Do not** use regular lime juice concentrate often found in the freezer aisle. These concentrates typically contain additives and lack the fresh, vibrant flavor necessary for a superior key lime pie.
Instead, if fresh Key limes are out of reach, your best substitute is bottled Key lime juice. We highly recommend Nellie & Joe’s Key West Lime Juice. This brand is widely celebrated for its quality, closely mirroring the taste of fresh Key lime juice, and it is also certified gluten-free, aligning perfectly with our recipe’s requirements.
If neither fresh Key limes nor Nellie & Joe’s Key Lime Juice is available, then regular fresh Persian lime juice may be used as a last resort. While the flavor will be slightly different – more sharply tart and less aromatic – the combination with sweetened condensed milk and sour cream will still create a very enjoyable and refreshing pie. For optimal results, use about 1 to 1 ½ pounds of fresh Key limes (roughly 22-30 small limes) or 8-10 regular limes to yield the ¾ cup of juice required for the recipe. Always zest your limes before juicing them to maximize flavor and minimize effort!
Tips for Success and Storage
To ensure your gluten-free key lime pie is nothing short of perfection, keep these additional tips in mind:
Prepping Limes:
- Always zest your limes before you juice them. It’s much easier to zest a whole, firm lime than a juiced one.
- Roll limes on the counter with a little pressure before cutting and juicing. This helps to break down the membranes inside and yields more juice.
- For maximum juice extraction, a good citrus juicer is indispensable. For Key limes, a garlic press can also work wonders for squeezing out every last drop.
Achieving the Perfect Set:
- Don’t skip the oven-cooling step. Leaving the pie in the turned-off oven allows it to cool gradually, preventing cracks and ensuring a smooth, beautifully set filling.
- The chilling time in the refrigerator is non-negotiable. Allow at least 6 hours, but ideally overnight, for the pie to fully firm up and for the flavors to meld. A well-chilled pie will slice cleanly and taste much better.
Storing Your Key Lime Pie:
- Serving: This pie is best served cold. The refreshing chill enhances the tangy lime flavor and the creamy texture.
- Making Ahead: You can prepare the pie (without the whipped cream topping) up to two days in advance. Store it covered in the refrigerator. Add the fresh whipped cream just before serving for the best texture and appearance.
- Leftovers: Any leftover pie should be stored in an airtight container in the refrigerator for up to three days. While the crust might soften slightly over time, the filling will remain delicious.
Frequently Asked Questions (FAQs)
Here are some common questions about making gluten-free key lime pie:
Q: Can I use a pre-made gluten-free pie crust?
A: Yes, you can! If you opt for a store-bought gluten-free pie crust, ensure it is fully baked or par-baked according to package directions before adding the filling. Our homemade oatmeal crust is easy and delicious, but convenience is sometimes key.
Q: My pie filling seems too runny after chilling. What went wrong?
A: A runny filling often indicates that the pie wasn’t chilled long enough. Ensure you’ve allowed at least 6 hours, or preferably overnight, in the refrigerator. The baking step followed by oven cooling also plays a crucial role in the initial setting, so make sure those steps were followed precisely.
Q: Can I freeze key lime pie?
A: Yes, key lime pie freezes surprisingly well! You can freeze the pie (without the whipped cream topping) for up to one month. Wrap it tightly in plastic wrap, then in foil, before freezing. Thaw in the refrigerator overnight before serving and adding fresh whipped cream.
Q: What are some fun garnish ideas?
A: Beyond traditional lime slices and zest, consider a sprinkle of toasted coconut flakes, fresh raspberries, or even a few thin curls of white chocolate for an elegant touch.
We are confident that this comprehensive guide will help you create the best gluten-free key lime pie you’ve ever tasted. It’s a dessert that truly captures the essence of a tropical escape, bringing bright flavors and a touch of sunshine to any occasion. Enjoy the process of baking and the joy of sharing this wonderful creation!
Did you make this recipe? We love hearing from you! Please leave a comment and a star rating below the recipe card. Your feedback helps others discover and enjoy our recipes, and we always appreciate hearing about your culinary successes! -Melissa

Gluten Free Key Lime Pie with Easy Crust Option
 Melissa Erdelac
Pin
Rate
Remove Ads
Ingredients
Oatmeal Crust:
- 2 cups quick-cooking oats, use certified gluten free for gluten free crust
- ½ cup unsalted butter
- ½ cup powdered sugar
- ¼ teaspoon cinnamon
- ¼ teaspoon salt
Key Lime Pie Filling:
- 28 ounces canned sweetened condensed milk
- ¾ cup key lime juice, see recipe notes for substitutions
- ½ cup sour cream
- 2 tsp lime zest
Whipped Cream Topping:
- 1 cup heavy cream
- 3 tablespoons powdered sugar
- 1 teaspoon vanilla extract
Equipment
- Pie Plate
- Citrus Juicer
- Zester
Instructions
- Preheat the oven to 350ºF. Place the oats, melted butter, powdered sugar, cinnamon, and salt in a food processor. Blend until well combined and the oats clump together, about 20-30 seconds.
- Press firmly on the bottom and up the sides of a 9-inch pie dish. Tip: To make the crust come all the way up the sides, press evenly on the bottom to work the excess crust up the sides. Bake for 18 minutes, or until oats are set. If the crust puffs up during baking, use a measuring cup to flatten gently immediately when it comes out of the oven. Cool completely before filling.
- While the crust is cooling, prepare the filling. Whisk together the sweetened condensed milk, lime juice, sour cream, and zest. Pour into the cooled crust.
- Bake at 350ºF for 10 minutes. Turn the oven off, but leave the pie in for 30 minutes. Remove the pie from the oven and let cool to room temperature. Transfer the pie to the refrigerator to chill for at least 6 hours or overnight.
- To make the whipped cream, use a large mixing bowl with hand held mixer or stand mixer fitted with whisk whip. Beat together heavy cream, powdered sugar, and vanilla extract on medium-low speed until the mixture starts to thicken.
- Increase speed to high and whip until stable peaks form, about 1-2 minutes longer. Spread on the chilled pie and serve cold.
Notes
Lime Juice
If you use key limes you will need about 1 to 1 1/2 pounds, depending on how fresh they are. This is about 22-30 key limes. To substitute regular limes, you will need about 8-10.
To juice the limes use a citrus juicer or garlic presses get out a lot of juice!
Do not use regular lime juice concentrate. Instead, substitute Nellie and Joe’s Key Lime Juice.
If you can’t find fresh key limes or Nellie and Joe’s key lime juice, then regular lime juice may be substituted.
Storing
Serve cold. You may make the pie up to two days ahead of time and refrigerate leftovers up to three days.
Recipe adapted from Allrecipes