
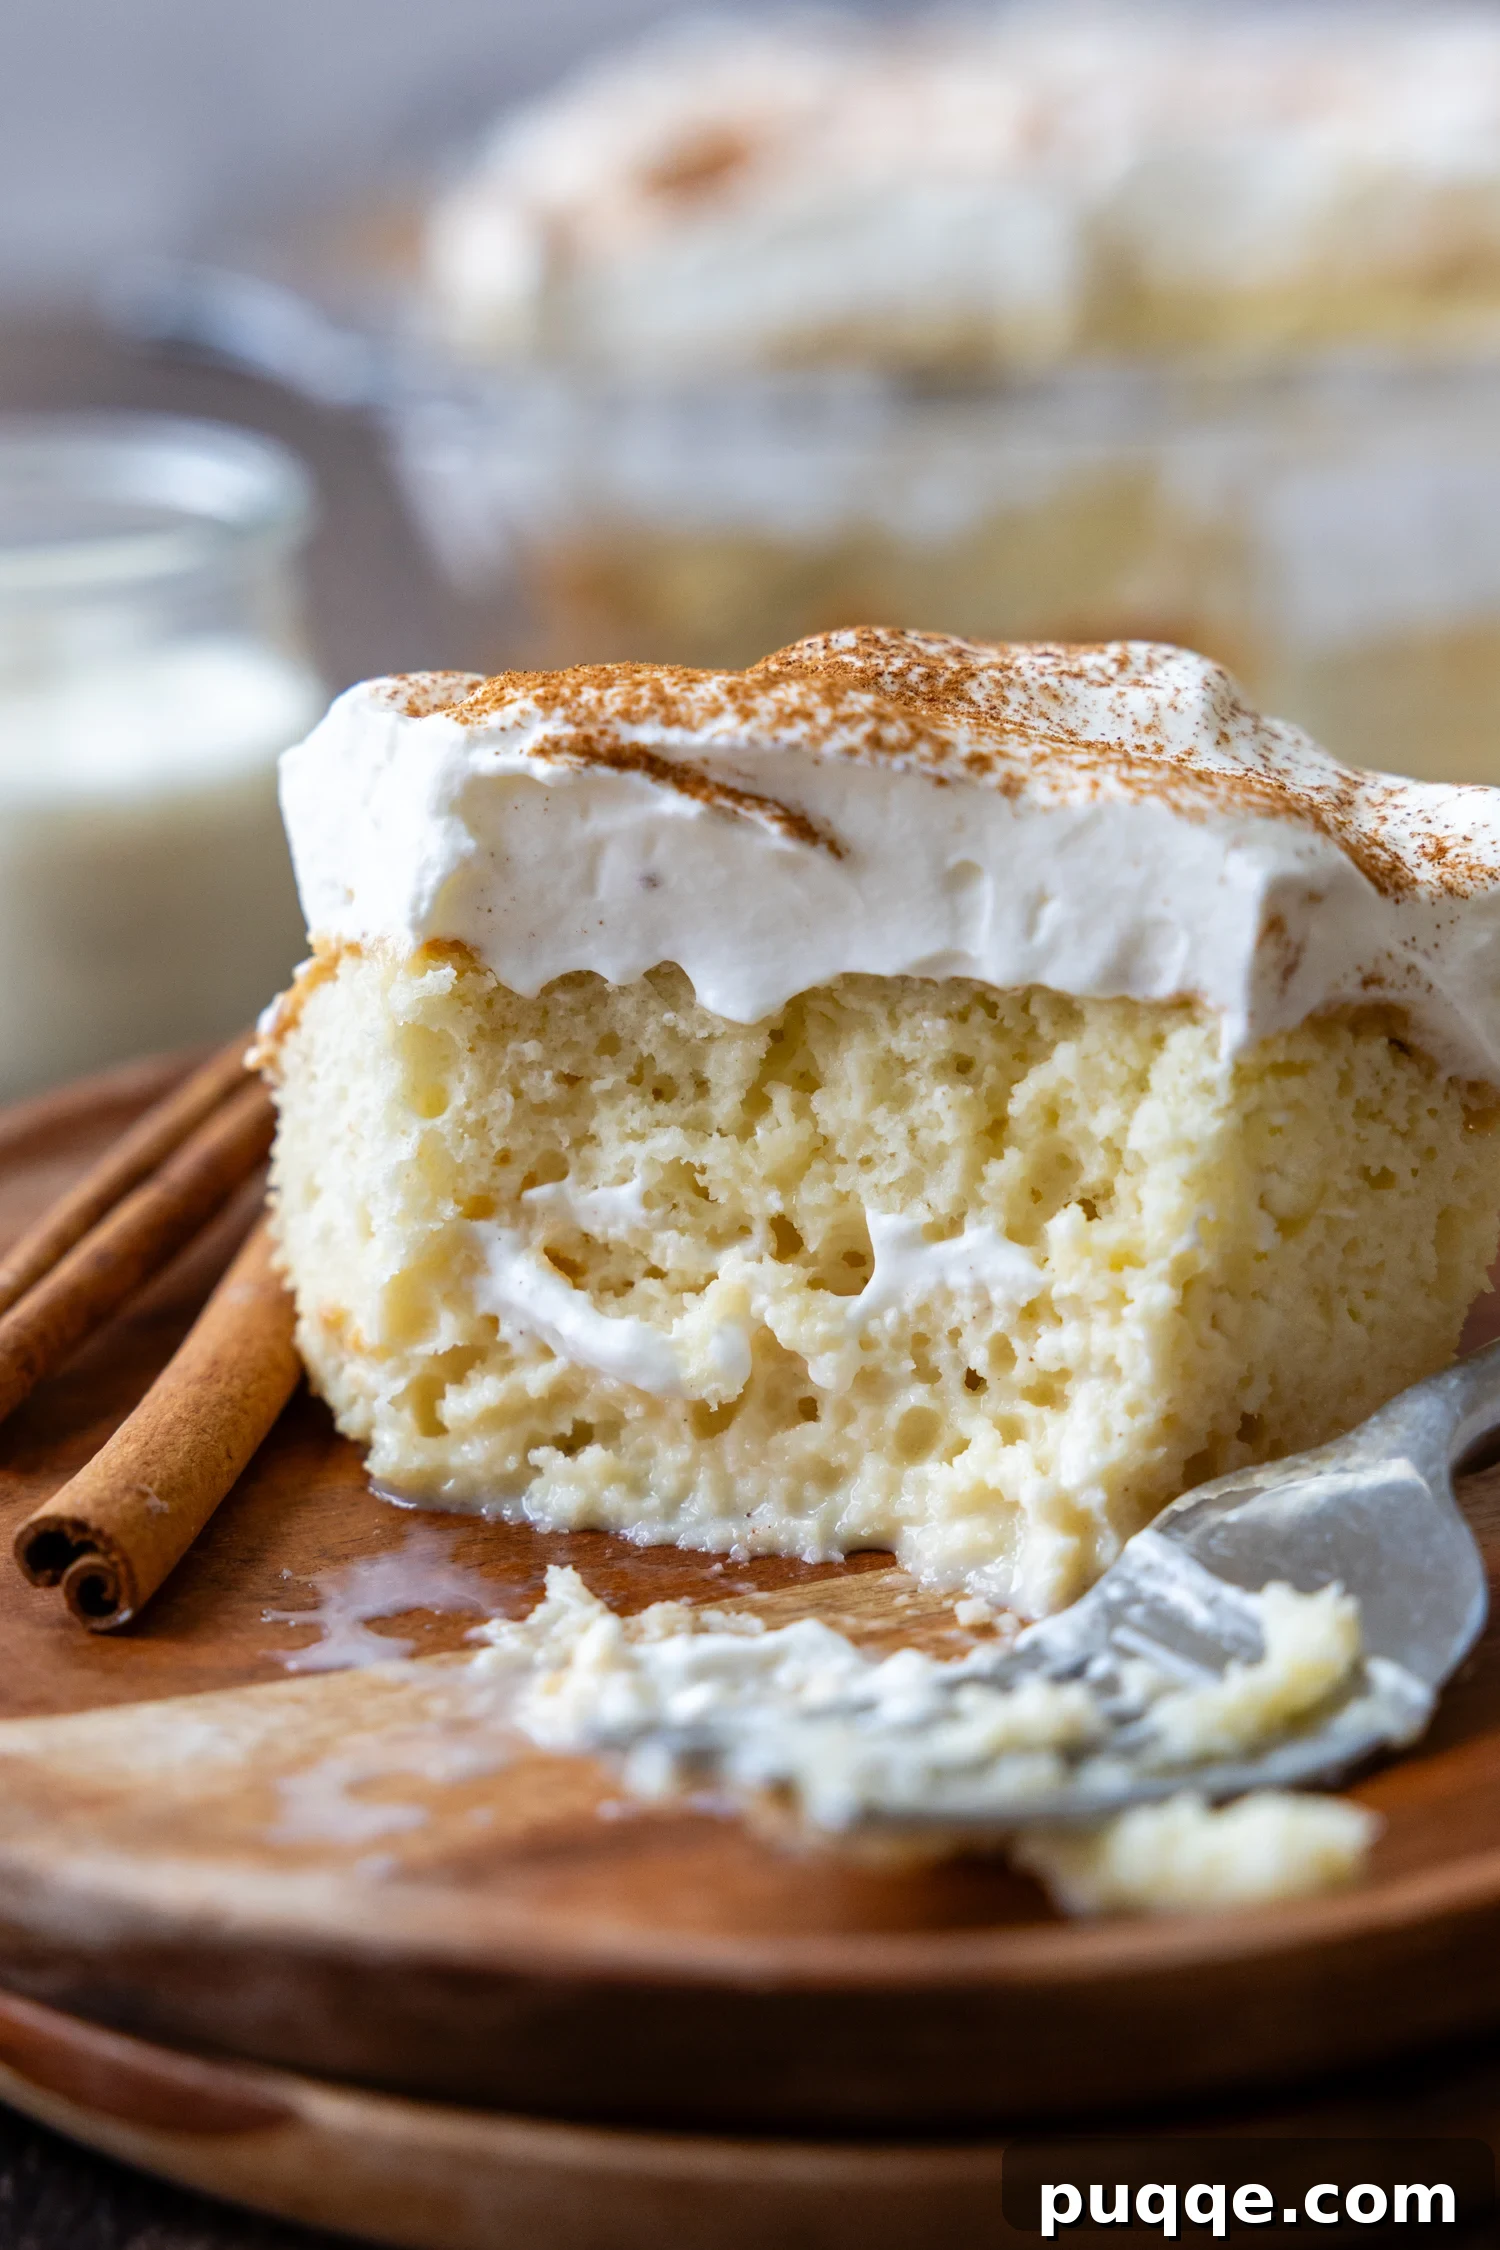
Imagine a dessert so moist it melts in your mouth, so light it feels like a cloud, yet sturdy enough to hold its shape perfectly. This isn’t just a dream – it’s an authentic, luxuriously moist, and utterly gluten-free Tres Leches cake, and it’s surprisingly easy to make with this foolproof recipe. What sets this GF milk cake apart from all the rest? The secret lies in a simple yet revolutionary trick that ensures the light, airy cake rises to a tall, impressive structure without a hint of dense or compressed crumb. Each slice absorbs the dreamy three-milk soak flawlessly, resulting in a cake that is perfectly moist, never mushy, and crowned with a luscious whipped cream frosting.
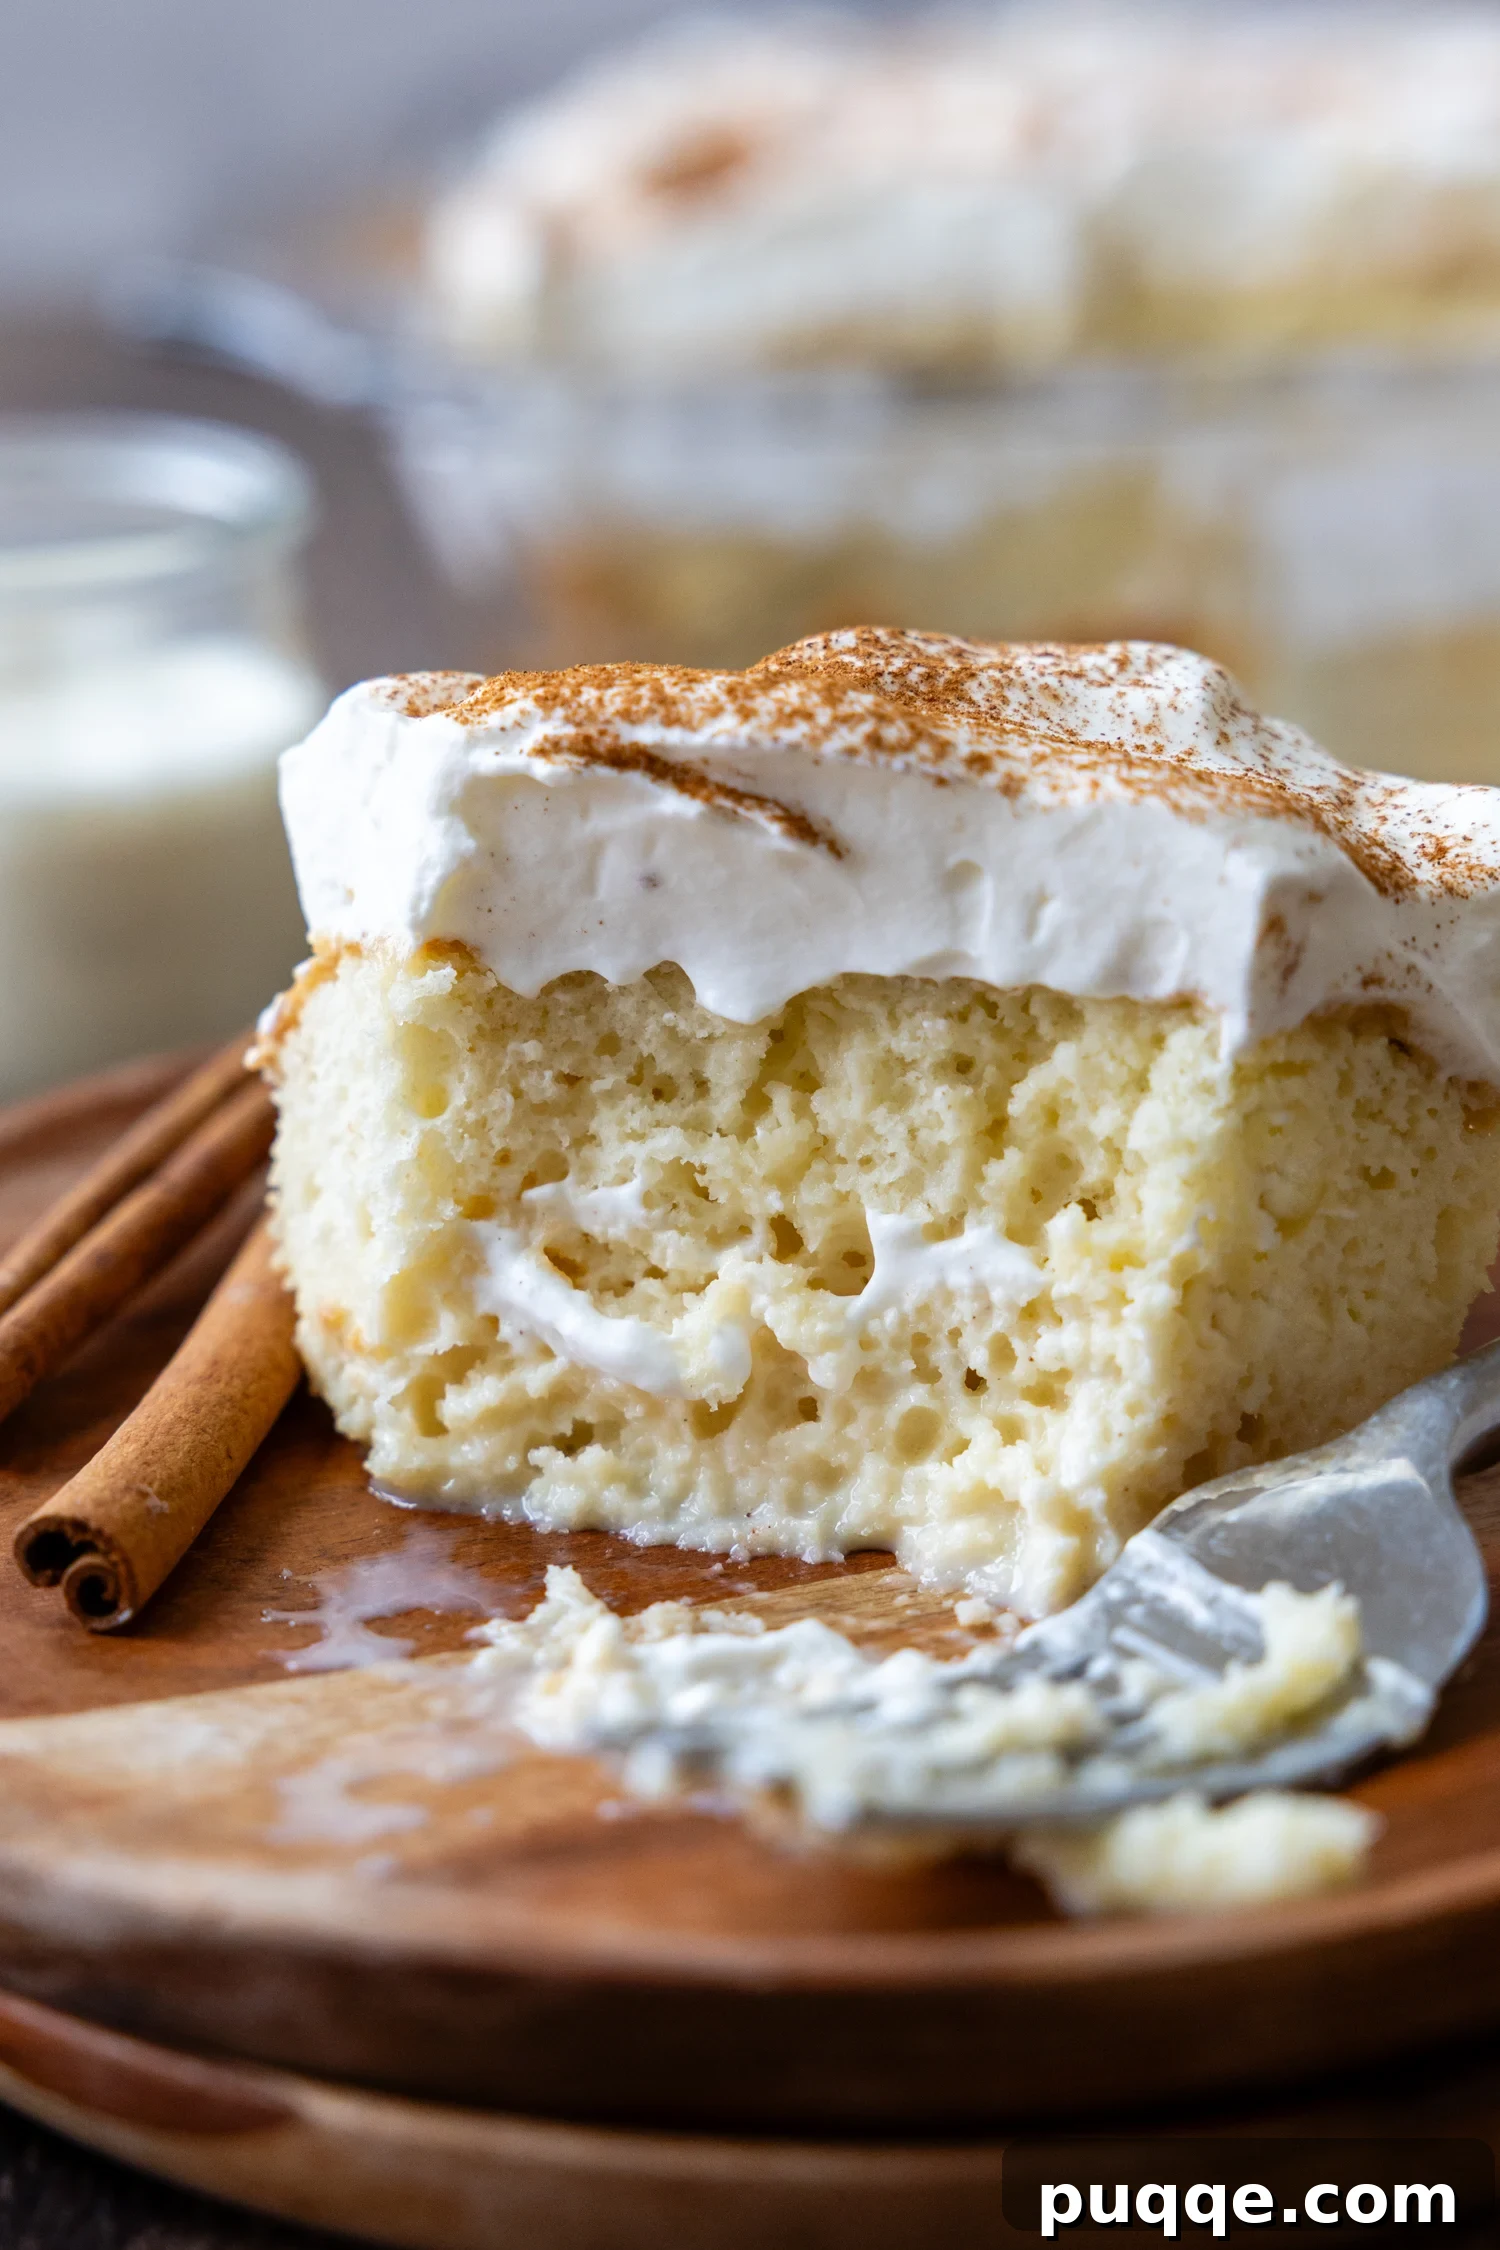
Unlocking the Secret to the Best Gluten-Free Tres Leches Cake (Three Milk Cake)
When I first embarked on the journey to create a truly exceptional gluten-free Tres Leches cake recipe, my initial thought was to simply adapt my already popular light and airy gluten-free white cake recipe. I envisioned pouring over a rich milk soak and finishing with a dollop of whipped cream. However, after extensive research into authentic Tres Leches preparations and several tests, it became clear that a different approach was needed. Traditional Tres Leches cakes rely on a specific crumb structure to absorb the considerable amount of liquid without falling apart, and replicating this perfectly in a gluten-free format required a dedicated solution.
The challenge with making a Tres Leches cake using gluten-free flour lies in crafting a crumb that is robust enough to endure an overnight saturation in the three-milk mixture, yet remains wonderfully light and tender. You certainly don’t want to end up with a gloopy, unsliceable mess after all that effort! This realization led me to workshop a new addition to my homemade gluten-free cake collection: a specialized GF sponge cake. Unlike typical butter-based cakes, a sponge cake is primarily built upon the structure of beaten eggs and sugar, with the addition of flour. This egg-centric foundation makes it an ideal candidate for gluten-free adaptation.
Similar to a pillowy, soft gluten-free angel food cake, our Tres Leches sponge is made without butter or oil. This is a significant advantage when working with gluten-free flours. Fats can sometimes interfere with the absorption of liquids into gluten-free starches, making it challenging to achieve the perfect balance of moisture without resulting in a cake that’s either dense and oily or disappointingly dry and crumbly. By omitting these fats, we simplify the process and allow the gluten-free flour to shine in its capacity to absorb the luxurious milk soak.
Therefore, when compared to a traditional Tres Leches cake, not many fundamental adjustments were required for the core ingredients. However, I did incorporate a small but powerful trick to counteract a very common and frustrating problem encountered with many gluten-free cake recipes: cakes expanding beautifully in the oven only to shrink and become dense and shrunken upon cooling. This issue is particularly problematic for a Tres Leches, where a lofty, open crumb is essential for soaking up the milks.
The solution to this vexing problem was remarkably simple and entirely hands-off: allowing the cake batter to rest for 15 minutes before baking. Since gluten-free flours lack the elastic gluten network found in traditional wheat flour, they can struggle to fully hydrate and develop structure quickly. This brief resting period gives the starches in the gluten-free flour time to absorb moisture, saturate, and plump up, which in turn solidifies the cake’s delicate structure. The result? Your gluten-free Tres Leches cake will maintain its impressive height, retain its airy loft, and be perfectly primed to absorb every last drop of that gloriously creamy, dreamy milk soak without any sinking or shrinking. This vital step is what truly elevates this recipe to a “no-fail” status, ensuring an authentic and delightful experience every time.
Crafting Your Cloud-Like Gluten-Free Tres Leches Cake: A Detailed Guide
Let’s walk through the baking process together. The following steps provide detailed instructions to ensure your gluten-free Tres Leches cake is a resounding success. For the complete list of ingredients and precise measurements, please refer to the comprehensive recipe card below.
The Art of Separating and Beating Eggs for an Airy Sponge
The foundation of a truly spongy, airy crumb lies in expertly beaten egg whites, which are gently folded into the cake batter. To achieve the best results, remember this key tip: eggs separate most easily when they are cold. However, egg whites whip up into the most stable and voluminous peaks when they are at room temperature. Begin by taking your eggs directly from the refrigerator, carefully separating the whites into one large, clean bowl and the yolks into another. Allow both bowls to sit at room temperature for approximately 45 minutes. This small wait makes a big difference!
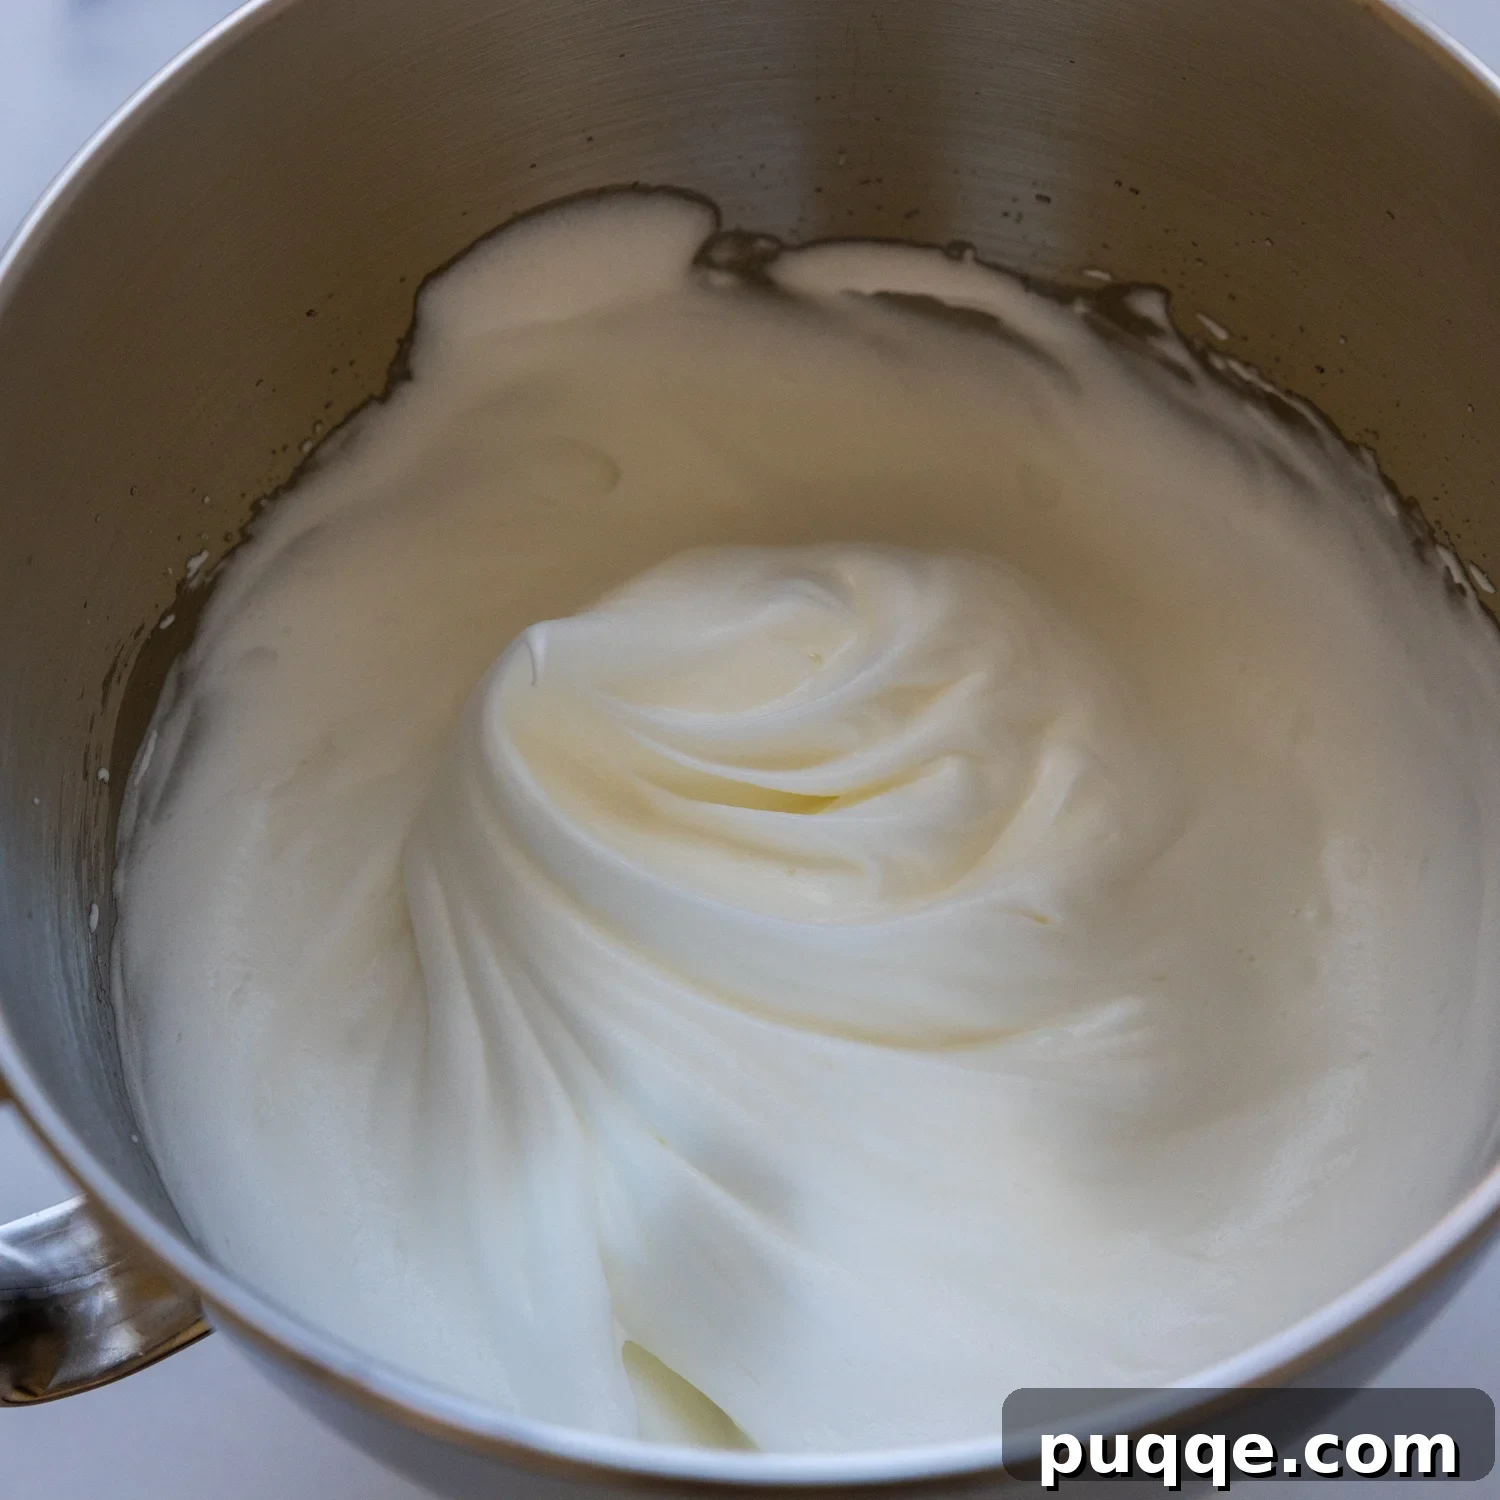
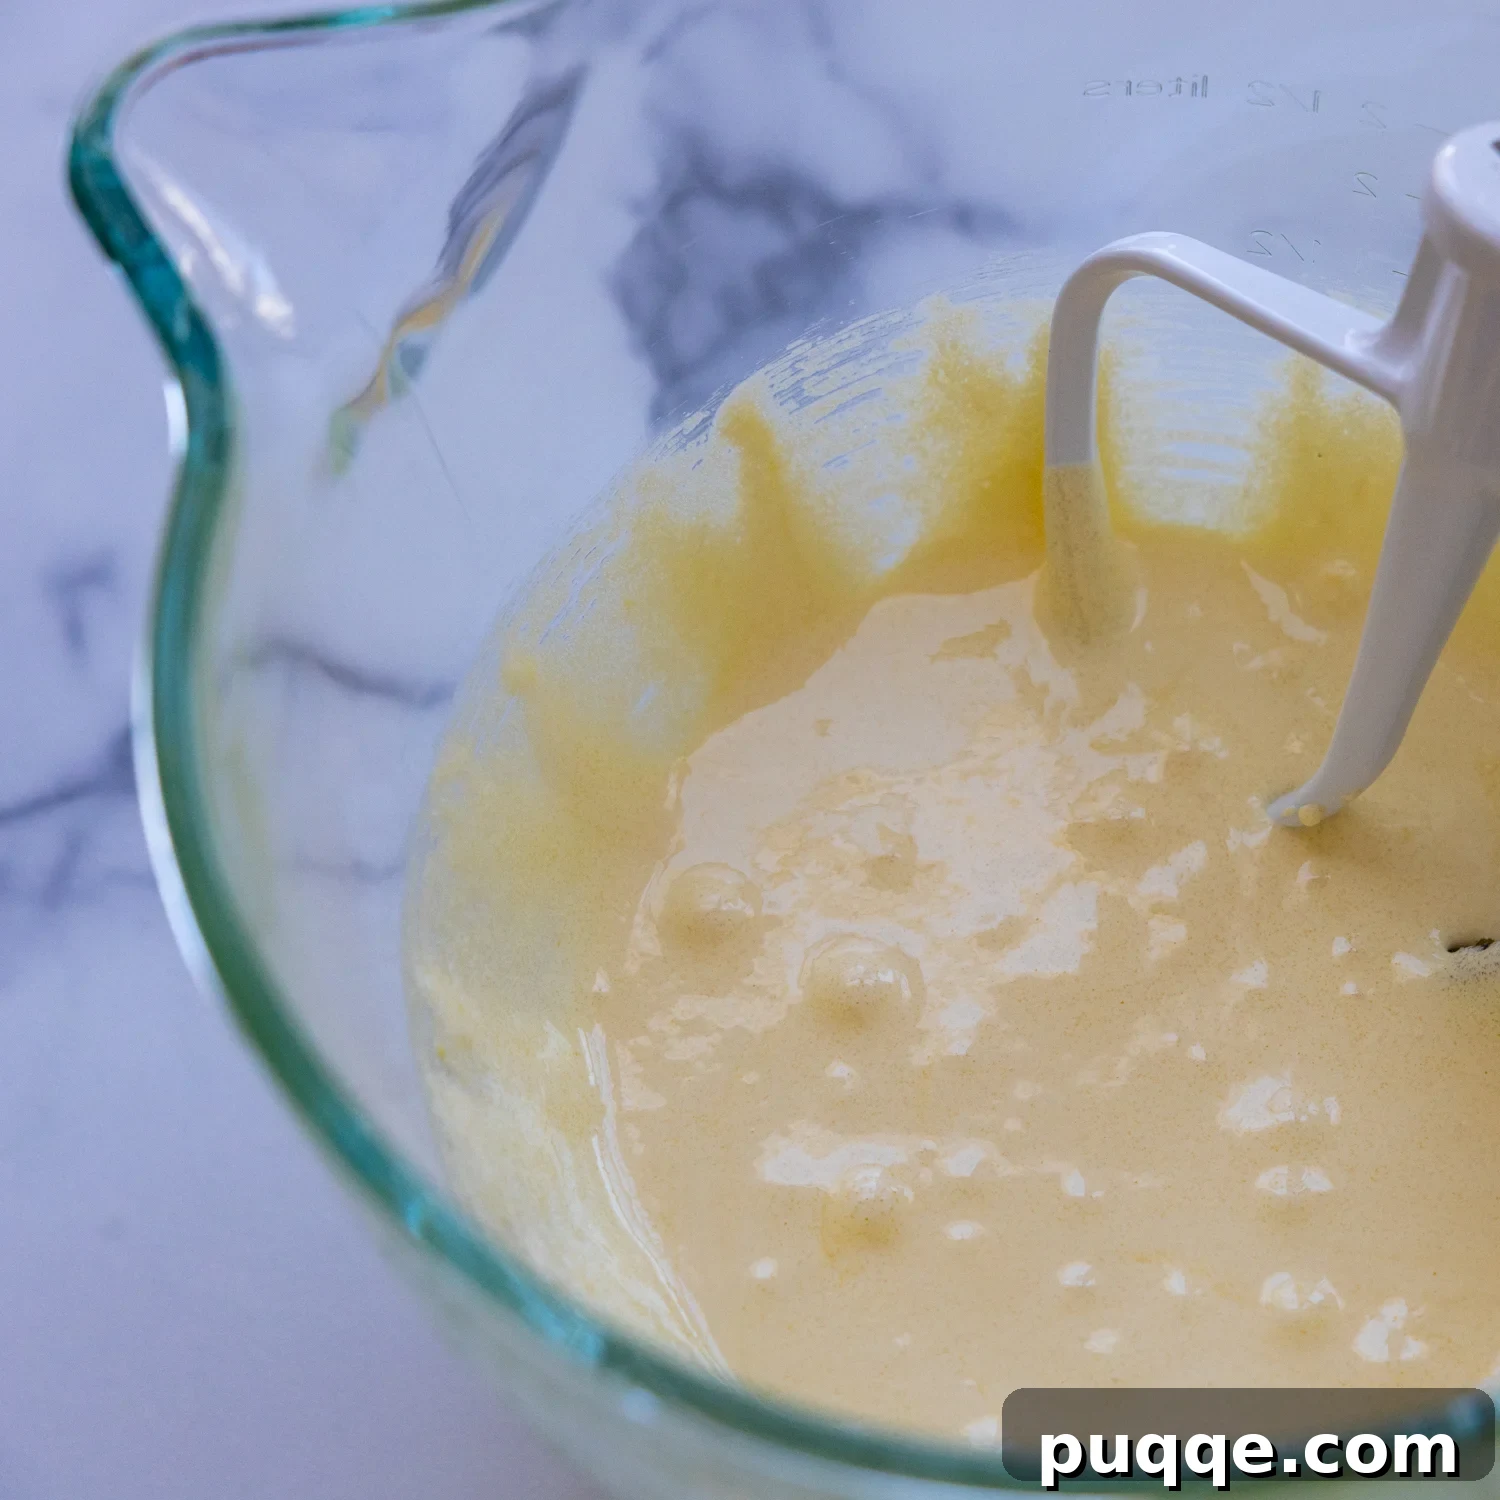
Once the egg whites have reached room temperature, beat them using a stand mixer with a whisk attachment or a hand mixer until they become foamy and light. Gradually, while continuing to beat, add about 1/4 cup of the granulated sugar. Continue beating until you achieve stiff, glossy peaks. These peaks should hold their shape firmly when the whisk is lifted, indicating perfect aeration. In a separate bowl, beat the egg yolks with the remaining granulated sugar until the mixture transforms into a very pale yellow color and significantly increases in volume, becoming thick and ribbons will form when the beaters are lifted. This ensures maximum fluffiness and structure for your cake.
Skillfully Combining the Batters for a Homogeneous Blend
Now, it’s time to bring our two beautifully prepared egg mixtures together with the remaining dry ingredients. To the pale and voluminous egg yolk batter, incorporate the whole milk and vanilla extract. Mix these until just combined. Next, add the dry ingredients: the gluten-free all-purpose flour, baking powder, and salt. Mix gently until just incorporated. At this stage, your batter will appear quite thick and dense – don’t be alarmed! This is completely normal and expected, as it will loosen considerably once the airy egg whites are carefully folded back in. For gluten-free flour, I highly recommend using a high-quality blend like Cup4Cup, which is known for its excellent performance in cake recipes.
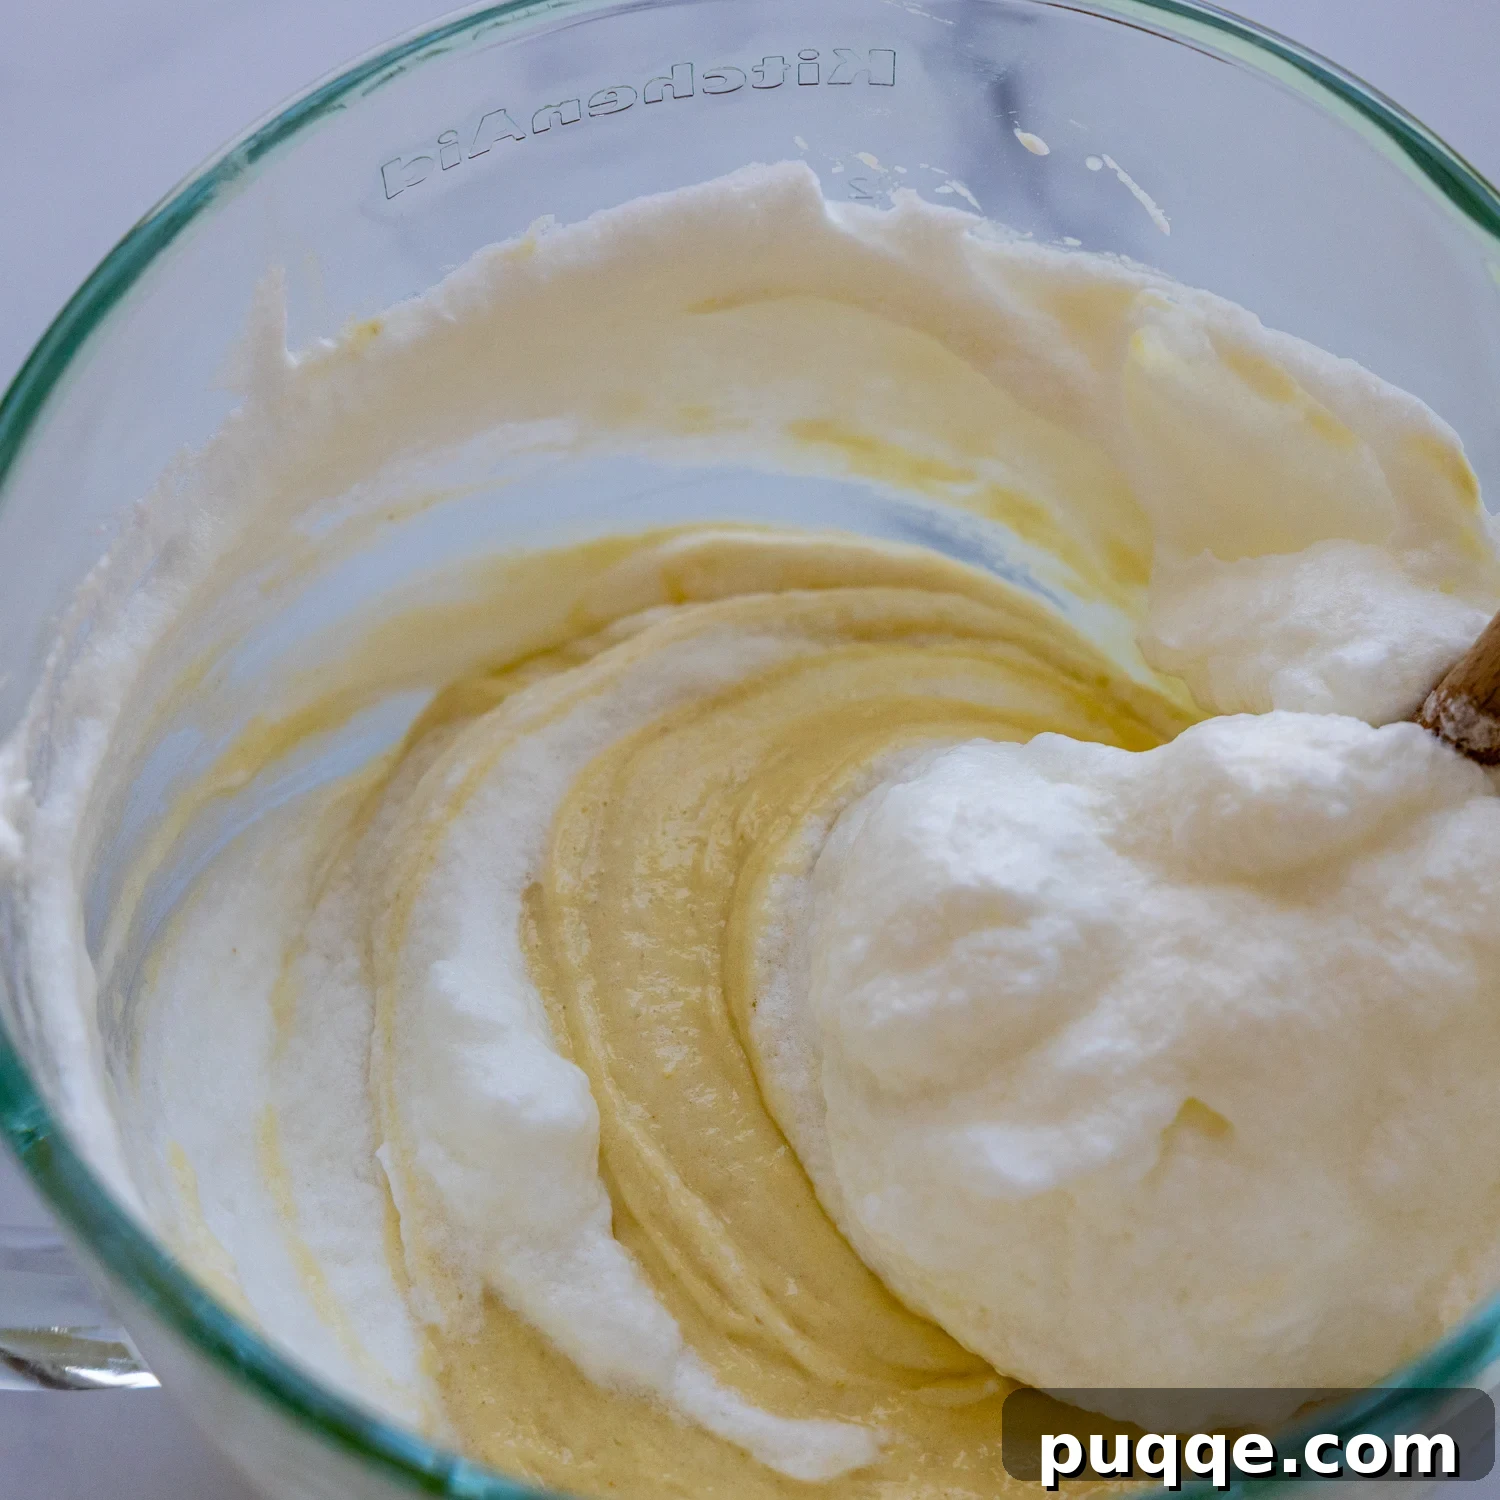
Begin by taking approximately half of the meticulously beaten egg whites and gently fold them into the thick yolk mixture. Use a spatula and a light, cutting, and folding motion to incorporate them as gently as possible, preserving all that precious air. Once the first half is mostly combined, fold in the remaining egg whites. Continue to fold until no white streaks remain and the batter is homogeneous and light. The key here is patience and a gentle hand; overmixing will deflate the whites and result in a less airy cake. Your cake batter is now complete and ready for the crucial resting phase.
The Crucial Wait, Perfect Bake, and Luxurious Milk Pour
This stage involves a simple yet incredibly effective hands-off technique that guarantees a perfectly structured gluten-free sponge. First, prepare your baking pan. Lightly butter *only* the bottom of your 9×13 inch pan, leaving a small 1/4-inch border ungreased around the edges. Crucially, do not butter the sides of the pan. This ingenious trick allows the cake batter to “climb” up the sides of the pan as it bakes, creating a taller, more expansive cake. Spread your meticulously prepared batter evenly into the pan. Now comes the vital step: let the batter rest in the pan for 15 minutes before placing it into the preheated oven. As discussed, this resting period is paramount for hydrating the gluten-free starches, strengthening the cake’s internal structure, and preventing it from sinking back down after cooling.
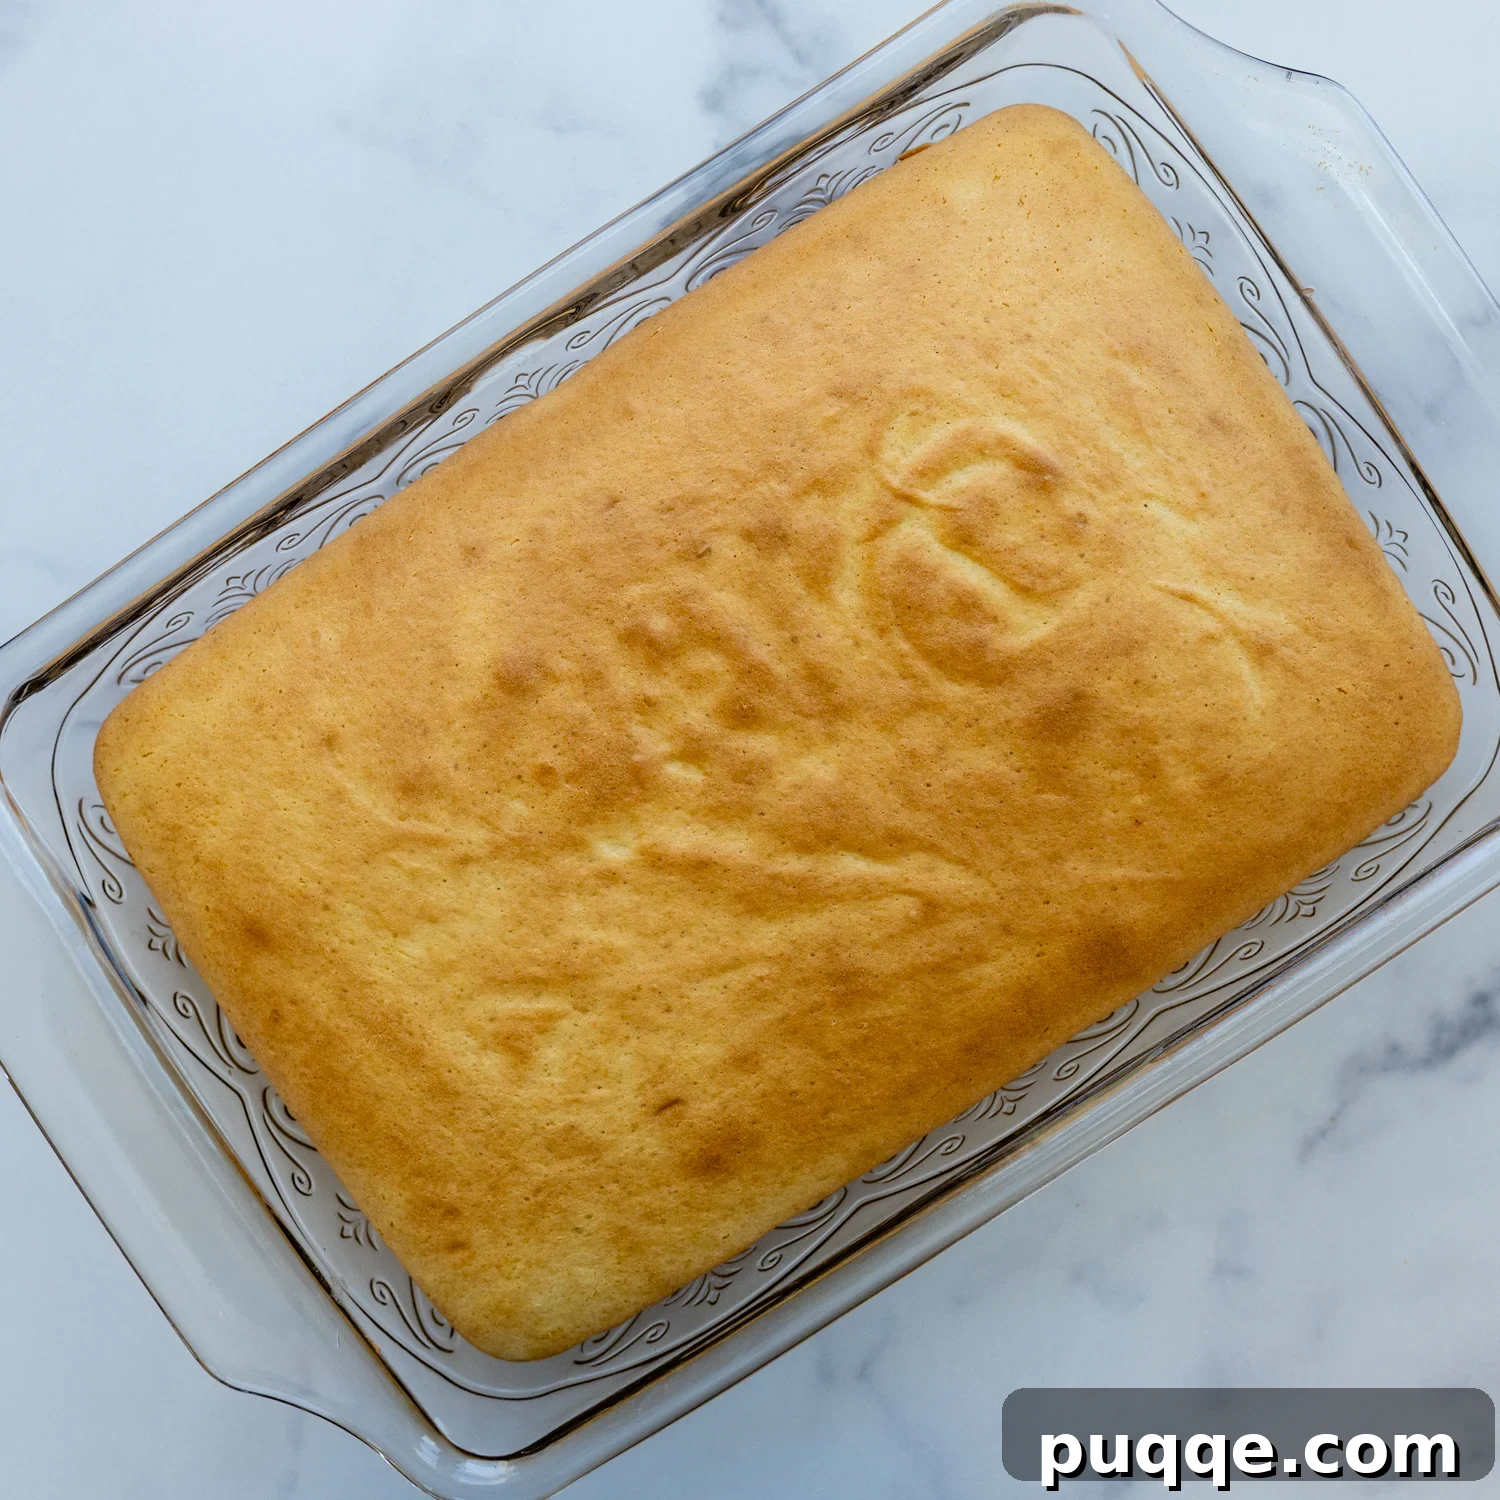
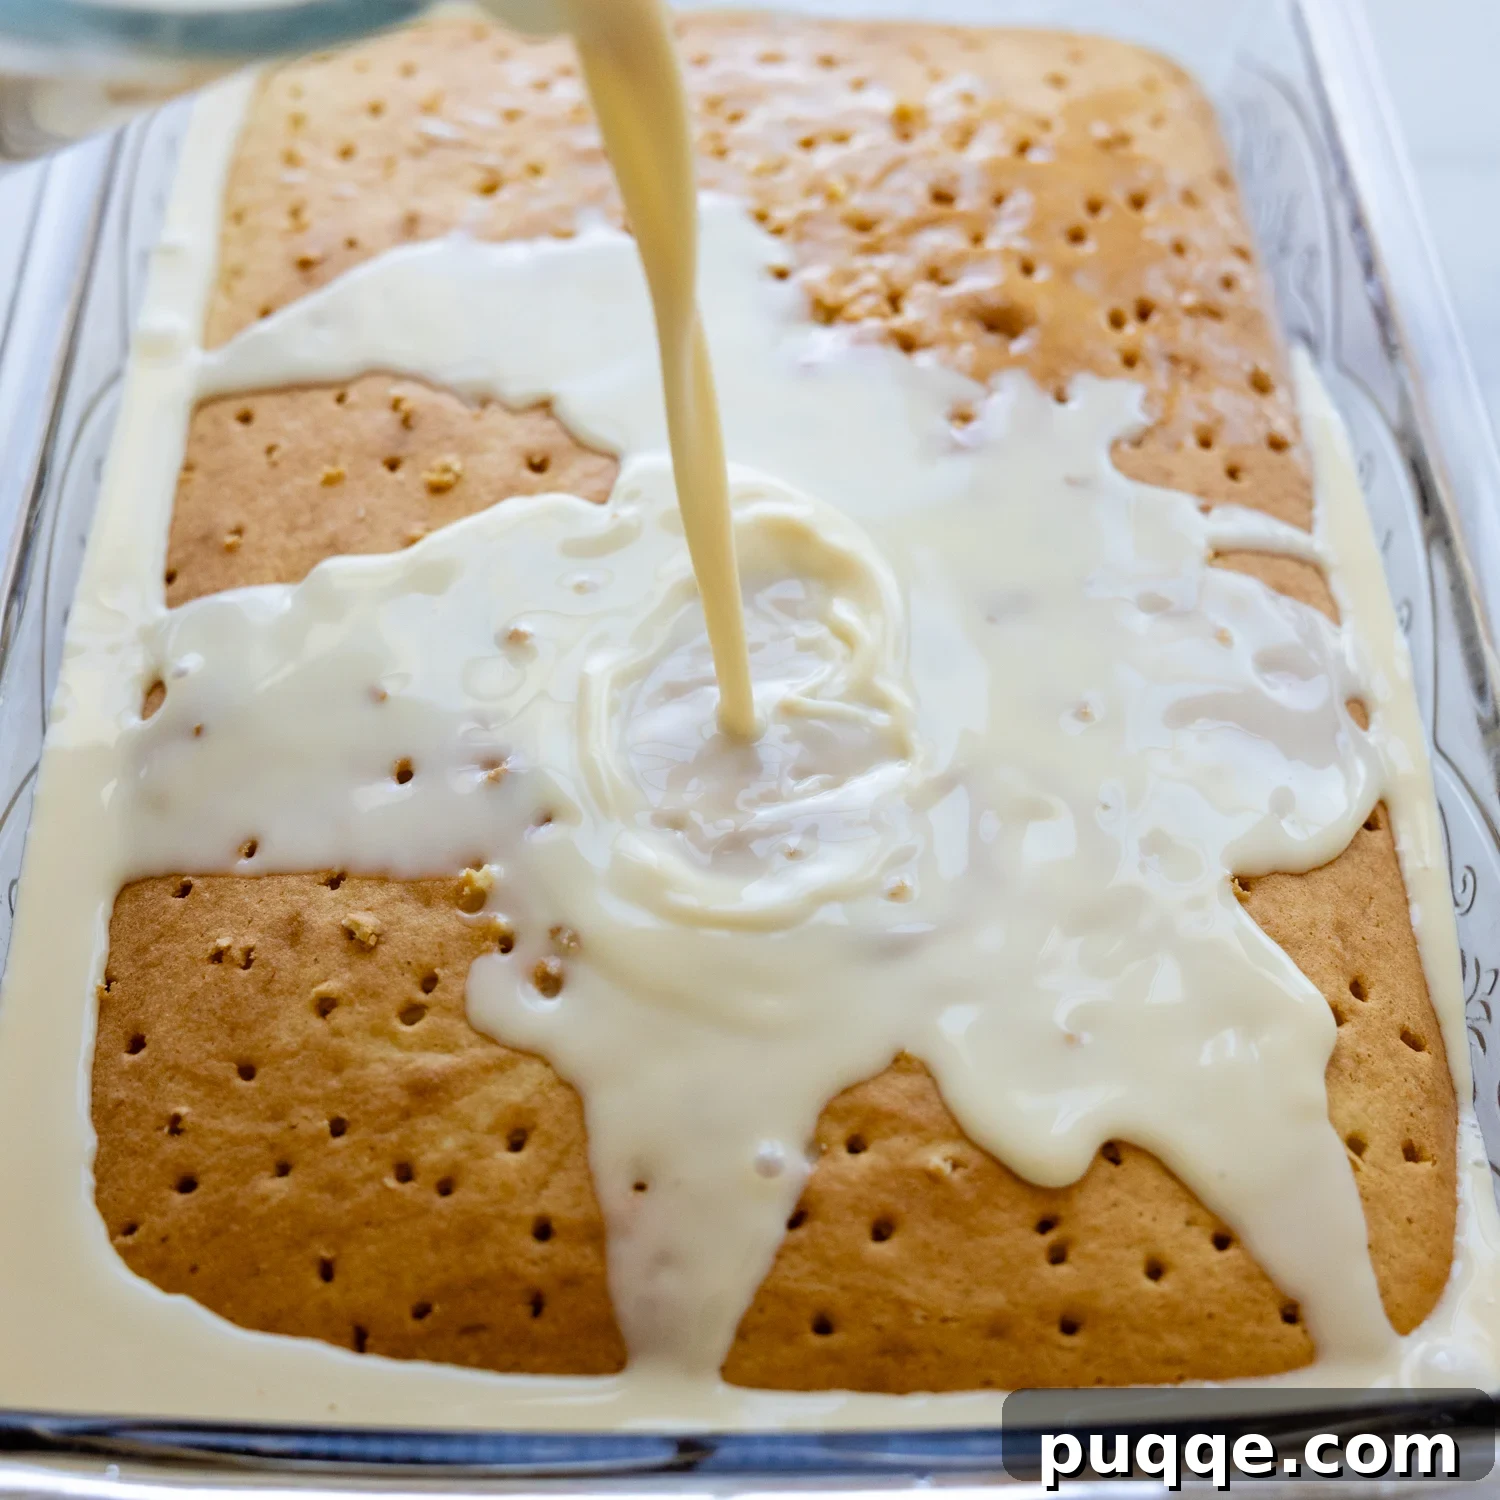
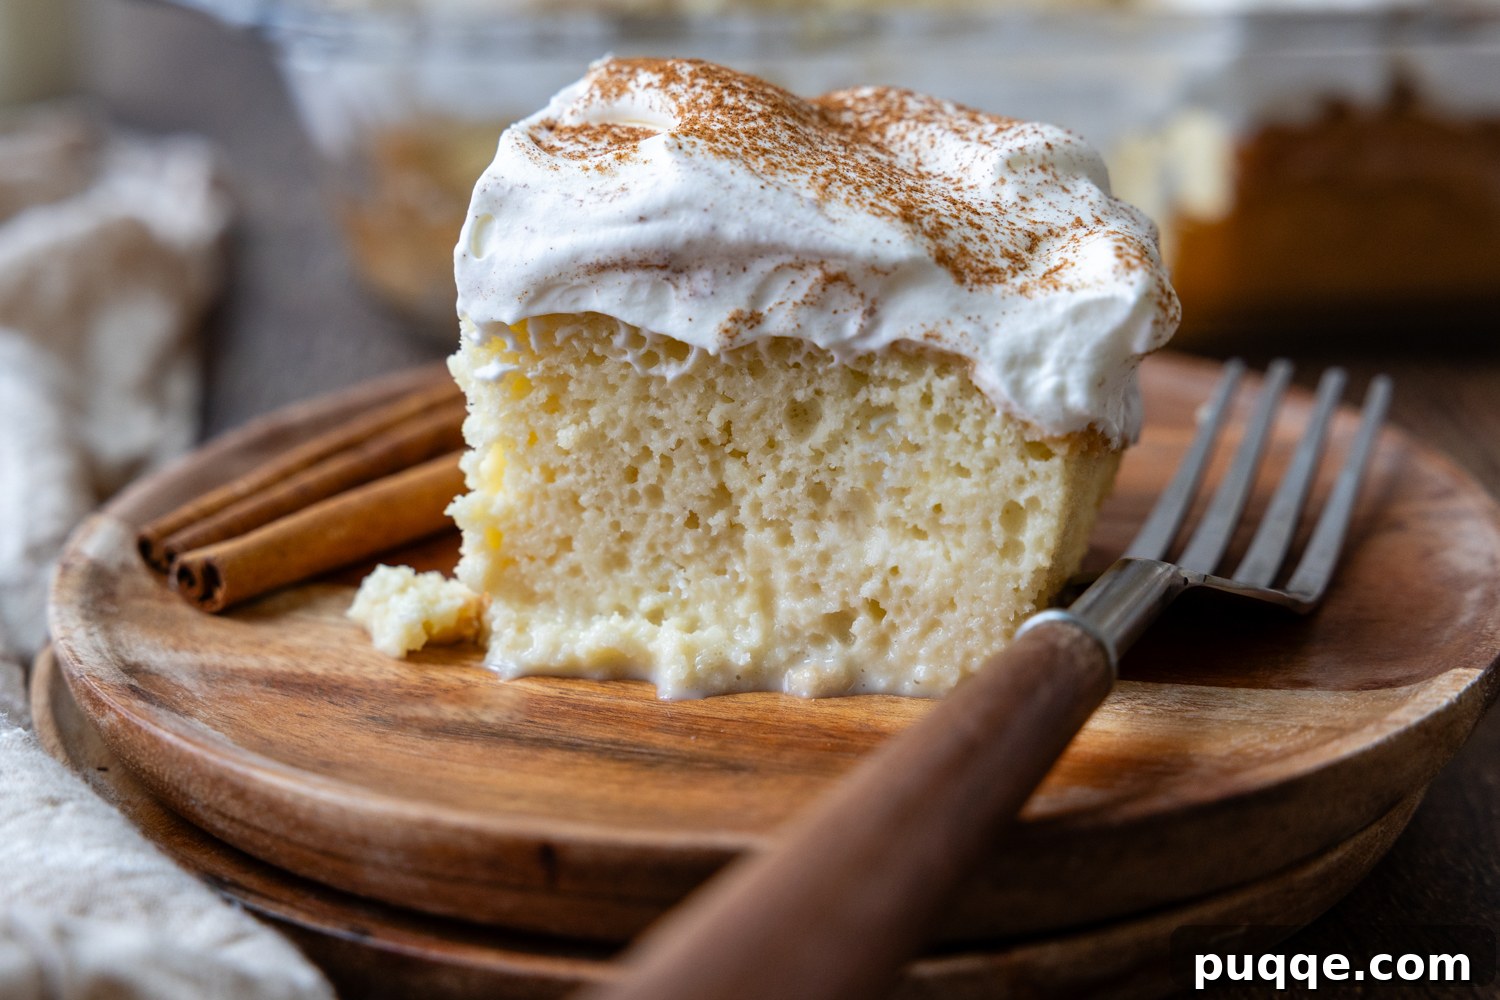
Once rested, bake the cake for approximately 30 minutes, or until a cake tester or toothpick inserted into the center comes out clean. A cake tester is often preferred over a toothpick due to its larger surface area, providing a more reliable indication of doneness. After baking, allow the cake to cool in the pan for about 30-45 minutes until it’s slightly warm. This cooling time allows the cake to set fully before the milk soak is introduced. While it cools, prepare your milk mixture. In a separate bowl, whisk together the three milks – sweetened condensed milk, evaporated milk, and whole milk – along with an additional teaspoon of vanilla extract. Once the cake has cooled sufficiently, use your cake tester or a fork to poke holes all over the cake’s surface, making sure to reach the bottom. Then, slowly and evenly pour the entire dreamy milk soak over the cake. Don’t worry if it seems to pool at the sides initially; the cake will gradually absorb all the moisture. Cover the pan and refrigerate the cake for at least 4 hours, though an overnight soak is truly ideal for the deepest flavor and most luxurious texture.
The Crowning Glory: Fluffy Whipped Cream Frosting
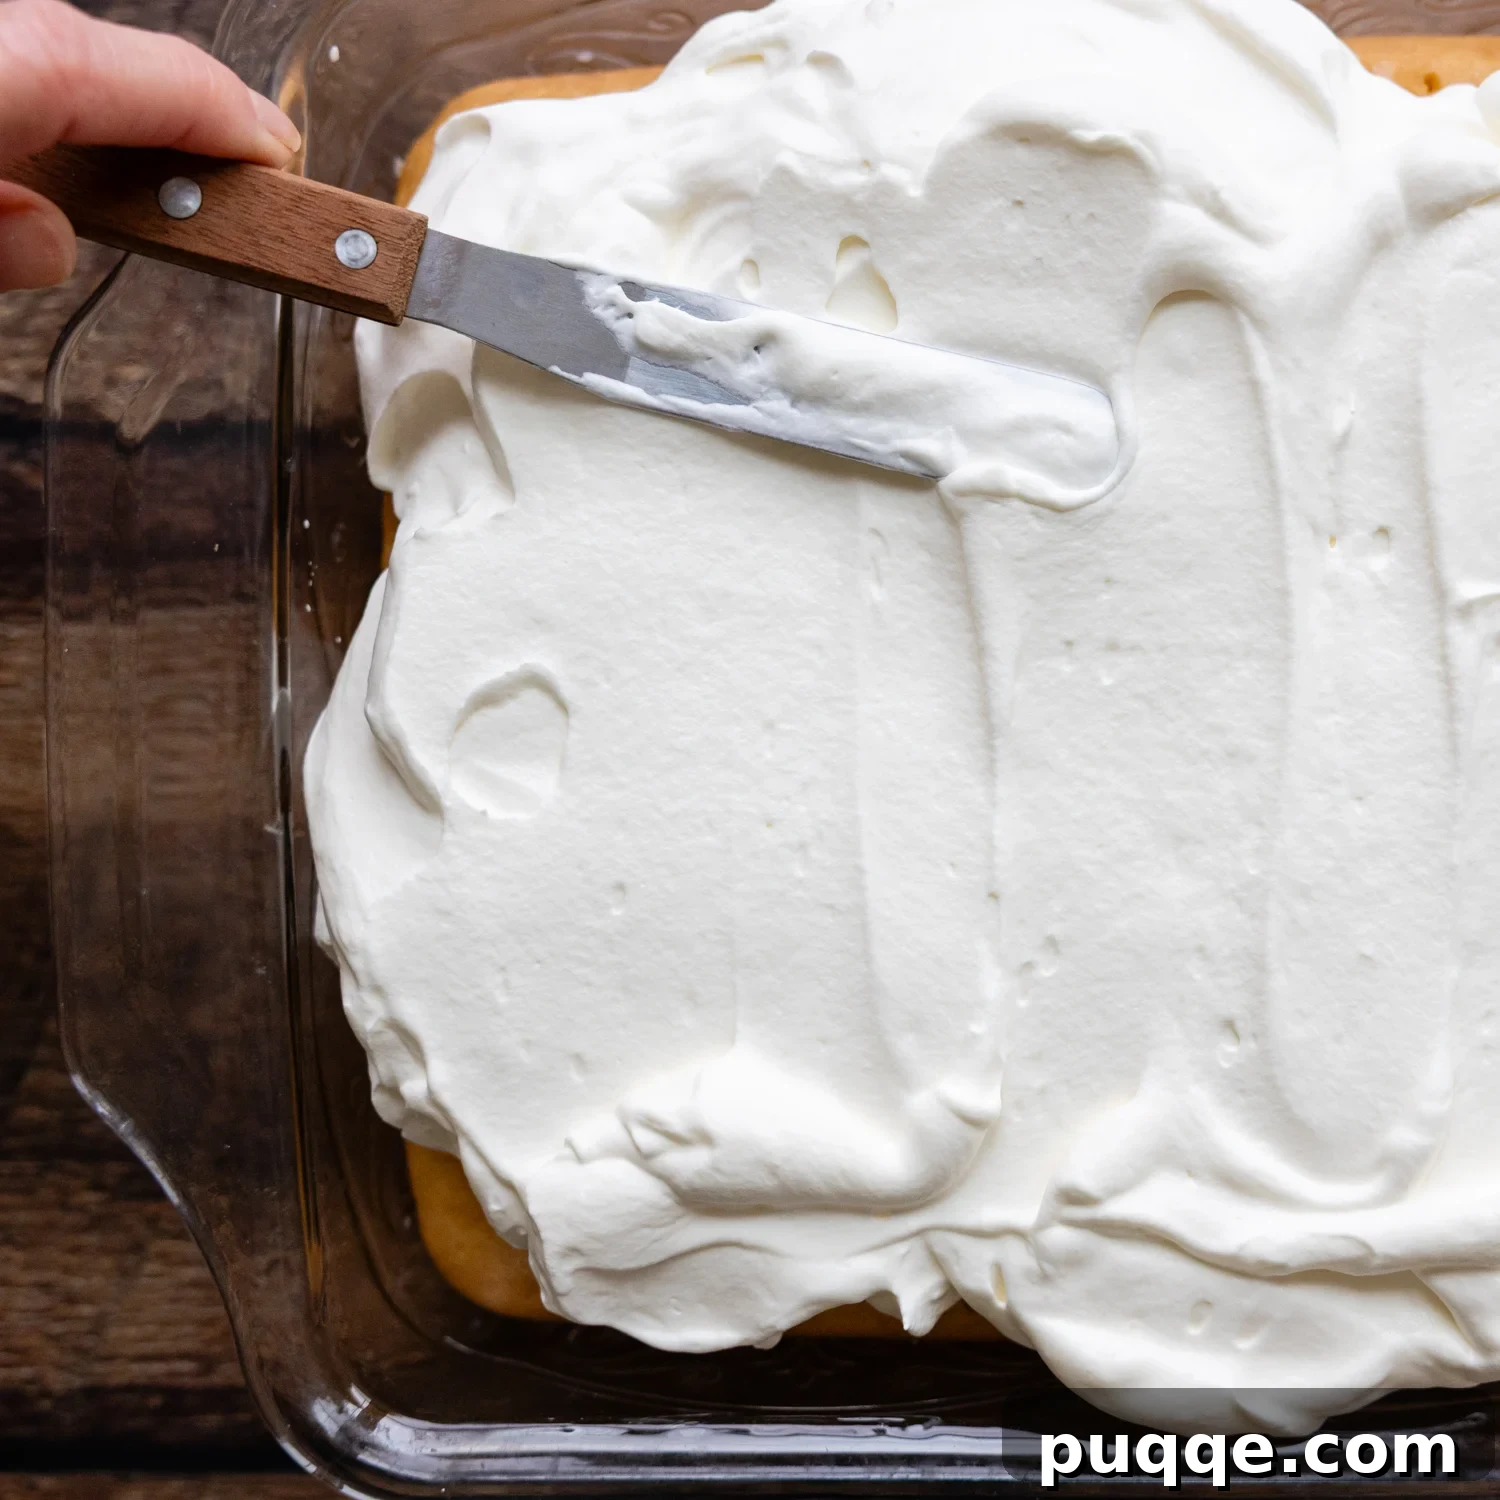
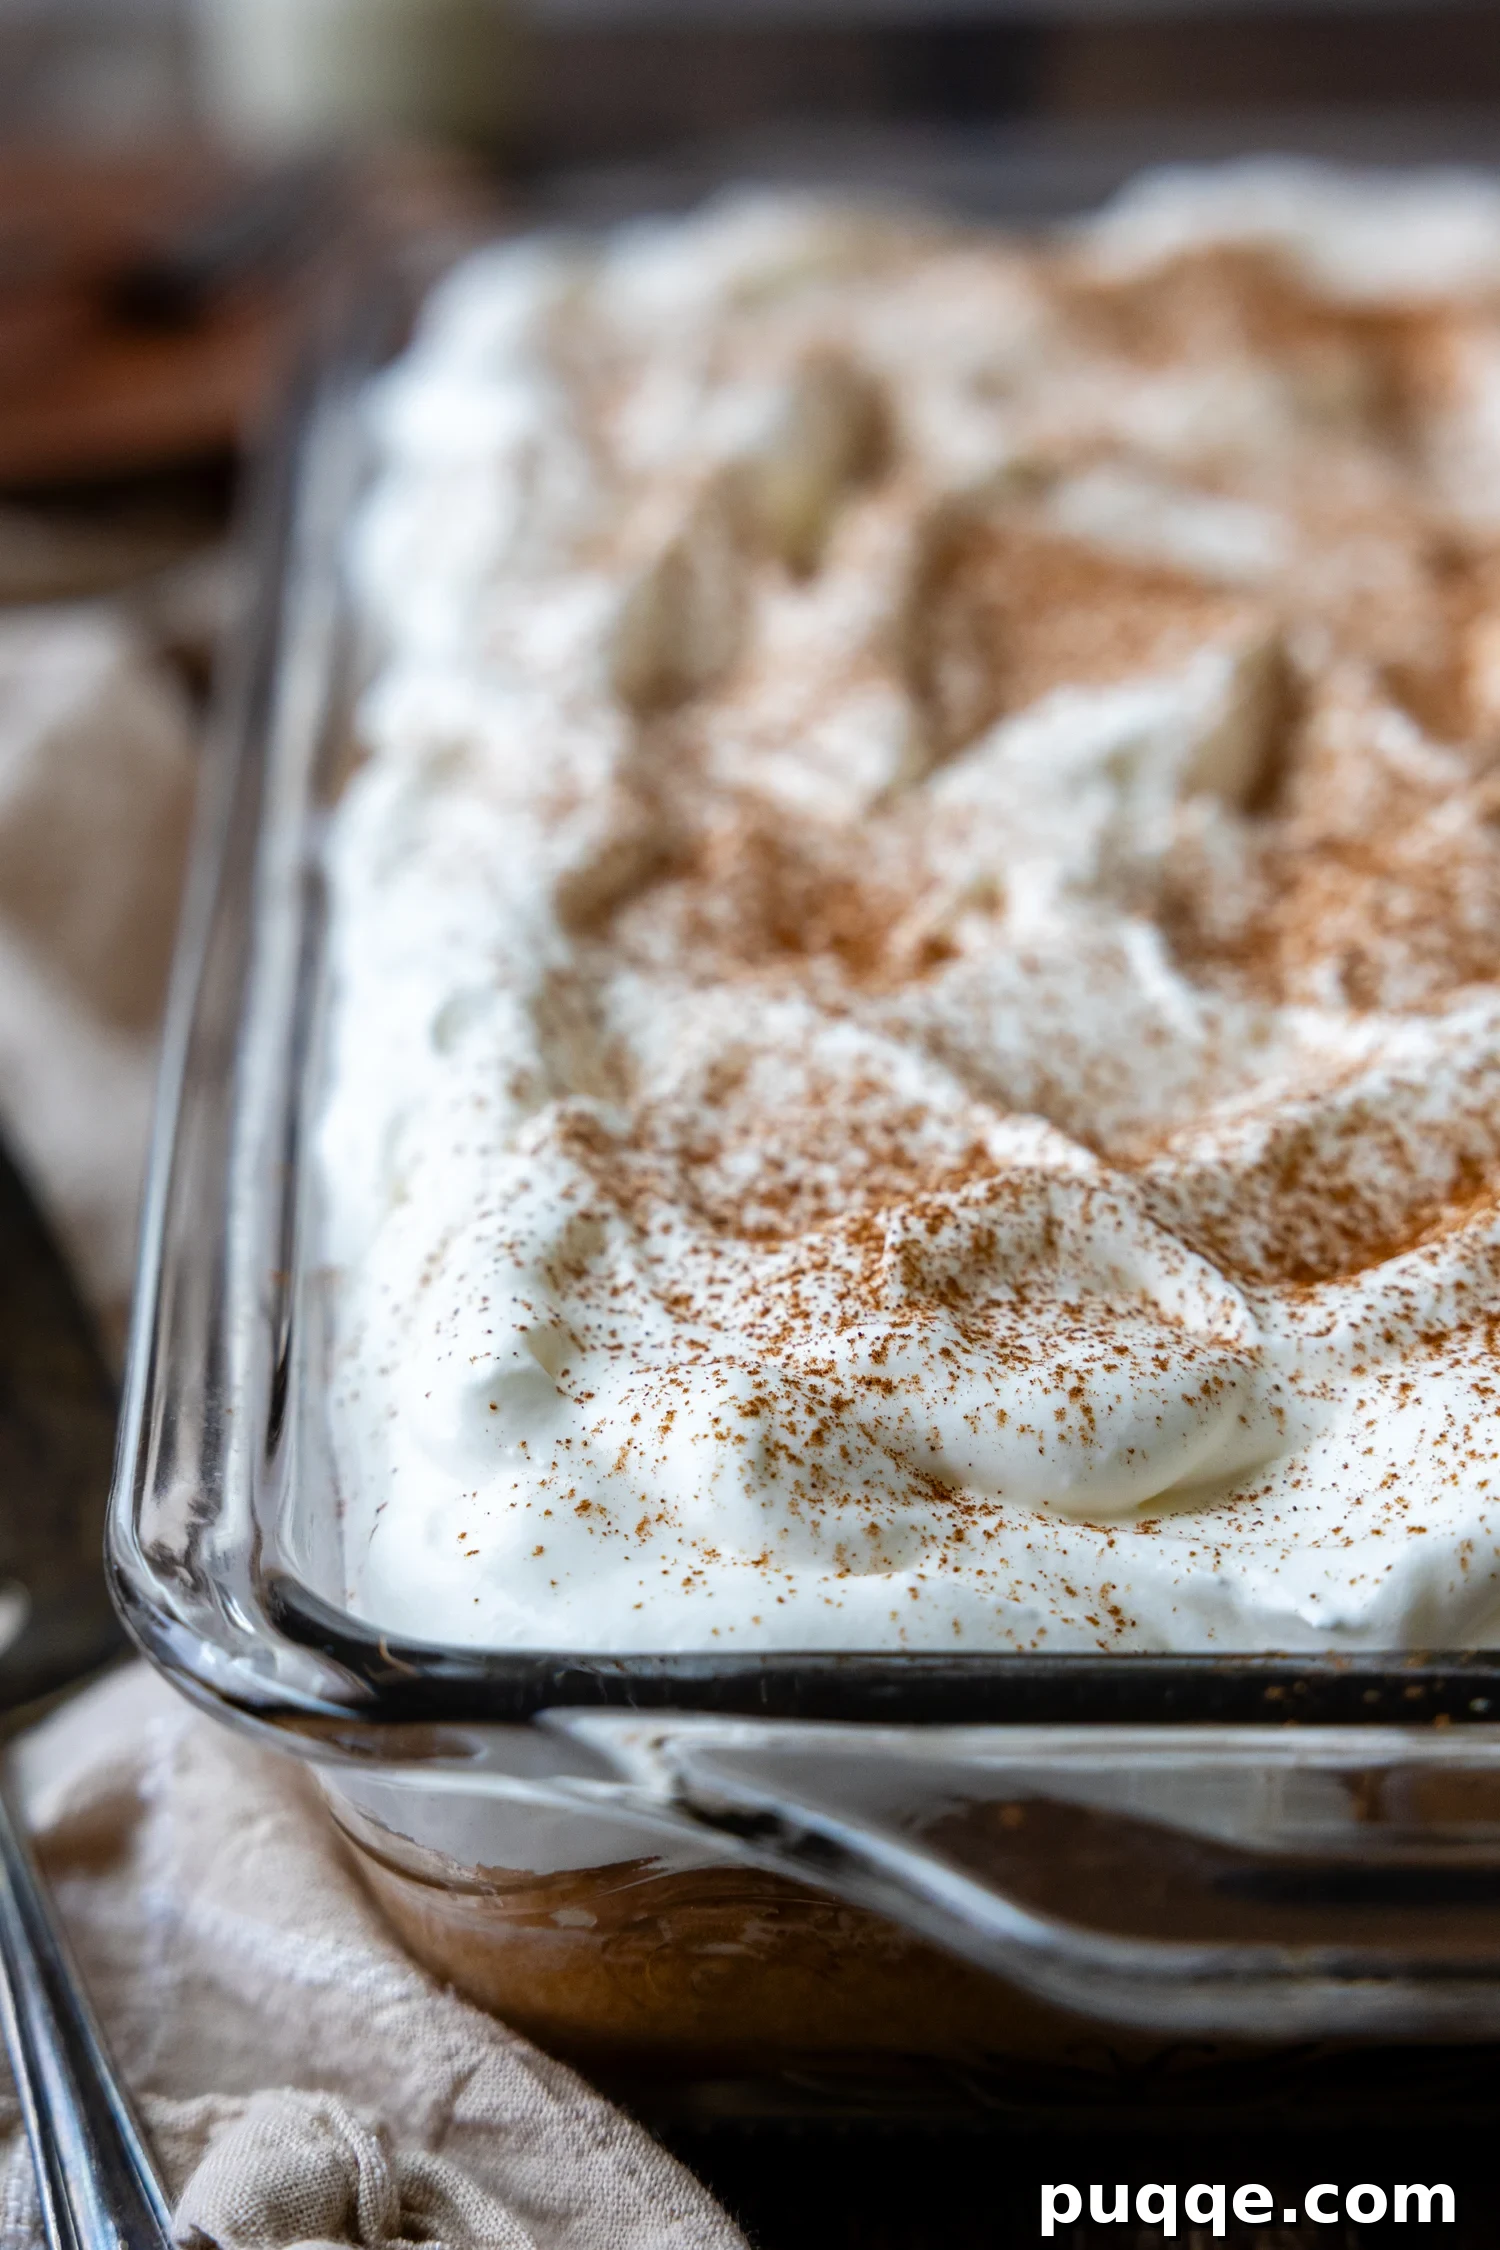
While traditionally known as a “three milk cake,” with the addition of our glorious whipped cream frosting, one might playfully argue this becomes a “four milk cake”! Regardless of its numerical classification, this frosting is the perfect final touch. When you’re ready to serve, or at least on the same day you plan to enjoy the cake, prepare your whipped cream. In a large mixing bowl, combine chilled heavy cream and powdered sugar. Using a stand mixer with a whisk attachment or a hand mixer, beat on medium-high speed until nice, soft peaks form. The cream should be thick and hold its shape but still be light and airy.
Gently spread this irresistible whipped cream frosting all over your thoroughly Tres Leches-soaked cake. For an authentic Mexican flair, consider adding a light dusting of ground cinnamon over the top just before serving. The warm, aromatic notes of cinnamon beautifully complement the rich, creamy vanilla flavors layered throughout this indulgent dessert. Slice, serve, and savor every luxuriously moist bite!
Achieving the Perfect Milk-Soaked Crumb: Essential Tips
For an ideal milk-soaked cake crumb that is uniformly moist without being waterlogged, a couple of key factors need to be absolutely spot on. Firstly, the ratio and quantity of the milk mixture are paramount. Too little milk, and your cake will remain dry and underwhelming. Too much, and the excess liquid will pool around the cake, making it incredibly difficult to slice cleanly and serve elegantly. The precise ingredient amounts shared in our recipe below have been carefully calibrated to achieve that perfect, coveted balance – a fully saturated cake that retains its structural integrity.
Secondly, the technique of pouring the milk over the baked cake is more important than you might think. We recommend pouring the milk mixture as slowly and evenly as possible across the entire surface of the cake. Due to the natural shape of the baking pan and the cake’s edges, some of the liquid may initially run off and collect at the sides. Do not stress over this! This is a normal part of the process. As the cake rests and chills, it will continue to draw in all that delightful moisture, eventually resulting in a perfectly and uniformly soaked crumb. Patience is a virtue here; letting the cake soak for a longer duration, ideally at least 12 hours or even overnight, is the ultimate secret to ensuring the job gets done thoroughly, yielding a Tres Leches cake that is truly transcendent.
One of the many joys of this homemade Tres Leches is its adaptability for make-ahead convenience. I am a firm believer in saving time and making life easier, especially when it comes to desserts that impress. A homemade Tres Leches cake is the epitome of an ideal make-ahead dessert; it absolutely requires time to sit and soak, making it perfect for preparing a day or two in advance. While traditional wisdom sometimes suggests Tres Leches doesn’t freeze well, I’ve found this to be happily untrue. I’ve successfully frozen slices and even entire cakes, thawing them overnight in the refrigerator, and they emerged perfectly moist and delicious, ready to be enjoyed as if freshly made. This makes it an excellent option for entertaining or simply having a delightful treat on hand!
Don’t Forget to Pin This Irresistible Recipe!
Let’s connect on Pinterest! I’m always sharing delicious recipes that you’ll love.
Have you baked this recipe? Your feedback is invaluable! Leave a star rating and comment below the recipe card. It helps fellow bakers find and enjoy this recipe, and I truly appreciate hearing from our community. I always read and respond to your comments! -Melissa
⭐️
⭐️
⭐️
⭐️
Tender, Moist Gluten-Free Tres Leches Cake (No Fail)

Melissa Erdelac
12
30 mins
30 mins
5 hrs
30 mins
Pin Recipe
Rate This Recipe
Ingredients
- 6 large eggs, separate cold into two bowls, then let come to room temp
- 1 ¼ cups (250 g) granulated sugar, divided
- ½ cup (123 g) whole milk
- 1 teaspoon vanilla extract
- 2 cups (292 g) gluten-free all-purpose flour, I highly recommend Cup4Cup gluten-free flour blend
- 2 teaspoons baking powder
- ½ teaspoon salt
Milk Soak
- 14 ounces (397 g) can sweetened condensed milk
- 12 ounces (340 g) can evaporated milk
- ⅔ cup (163 g) whole milk
- 1 teaspoon vanilla extract
Whipped Cream Frosting
- 2 cups (480 g) heavy whipping cream
- 3 tablespoons powdered sugar
- cinnamon, for topping
Equipment
-
9X13 Baking Dish
-
Cake Tester
-
Stand Mixer
Instructions
-
Preheat the oven to 350°F (175°C). Lightly butter only the bottom of a 13-by-9-inch baking pan, leaving a ¼-inch border ungreased around the sides. This ensures the cake can “climb” up the sides of the pan as it bakes, creating a taller, more expansive cake.
-
Add the room temperature egg whites to a large, clean mixing bowl. Using the whisk attachment on a stand mixer or hand mixer beaters, beat on high speed until they become foamy and have doubled in size, which usually takes about 1 minute. Continue to beat while slowly pouring in ¼ cup of the granulated sugar. Beat until stiff, glossy peaks form, typically around 3 minutes. Set these aside carefully.6 large eggs, ¼ cup granulated sugar
-
In a separate large mixing bowl, combine the egg yolks and the remaining 1 cup of granulated sugar. Beat on medium speed, using a paddle attachment or hand mixer, until the mixture is very pale yellow, thick, and fluffy, which takes about 2-3 minutes. Beat in the milk and vanilla extract until just combined. Next, add the dry ingredients: the gluten-free all-purpose flour, baking powder, and salt. Beat thoroughly for about 1 minute. The batter will be quite thick at this point.½ cup whole milk, 1 teaspoon vanilla extract, 2 cups gluten-free all-purpose flour, 2 teaspoons baking powder, ½ teaspoon salt, 1 cup granulated sugar
-
Using a spatula, gently fold half of the beaten egg whites into the thick flour mixture. Use a light, cutting, and folding motion to incorporate them as gently as possible. Once partially combined, fold in the remaining egg whites until no white streaks remain. It might be challenging at first, but the batter will gradually loosen up as the whites are incorporated. Spread the batter evenly into the prepared cake pan and let it rest for 15 minutes. This crucial resting period allows the moisture to soften the gluten-free starches and helps build a strong cake structure, preventing it from sinking after baking.
-
Bake for 30 minutes, or until a toothpick or cake tester inserted into the center comes out clean. Let the cake cool in the pan until it is slightly warm to the touch, which typically takes about 30-45 minutes.
Milk Soak and Frosting
-
While the cake is cooling, prepare the milk soak. In a medium bowl, whisk together the sweetened condensed milk, evaporated milk, whole milk, and an additional teaspoon of vanilla extract until well combined. Once the cake has cooled slightly, use a fork or a wooden skewer to poke holes all over the cake’s surface, reaching all the way to the bottom of the pan. Slowly and evenly pour the milk mixture over the entire cake. It may not absorb completely at first and might pool at the sides, but it will eventually soak in. Cover the cake pan tightly with plastic wrap and refrigerate for at least 4 hours, though letting it chill and soak overnight yields the best results.14 ounces can sweetened condensed milk, 12 ounces can evaporated milk, ⅔ cup whole milk, 1 teaspoon vanilla extract
-
Prepare the whipped cream frosting on the day you plan to serve the cake. In a large mixing bowl, combine the chilled heavy whipping cream and powdered sugar. Using the whisk attachment on a stand mixer or hand mixer beaters, mix on medium-high speed until medium peaks form. The cream should be fluffy and hold its shape.2 cups heavy whipping cream, 3 tablespoons powdered sugar, cinnamon
-
Spread the prepared whipped cream frosting evenly over the soaked cake. For an authentic touch, dust lightly with ground cinnamon before serving. Keep the finished cake refrigerated for up to 2 days for optimal freshness and texture.
Calories:
482kcal
,
Carbohydrates:
61g
,
Protein:
11g
,
Fat:
23g
,
Saturated Fat:
13g
,
Polyunsaturated Fat:
1g
,
Monounsaturated Fat:
6g
,
Trans Fat:
0.01g
,
Cholesterol:
149mg
,
Sodium:
221mg
,
Potassium:
381mg
,
Fiber:
2g
,
Sugar:
47g
,
Vitamin A:
896IU
,
Vitamin C:
2mg
,
Calcium:
278mg
,
Iron:
1mg
Did you make this recipe?
Please leave a star rating and review below. It helps others when searching for recipes and I LOVE feedback!