
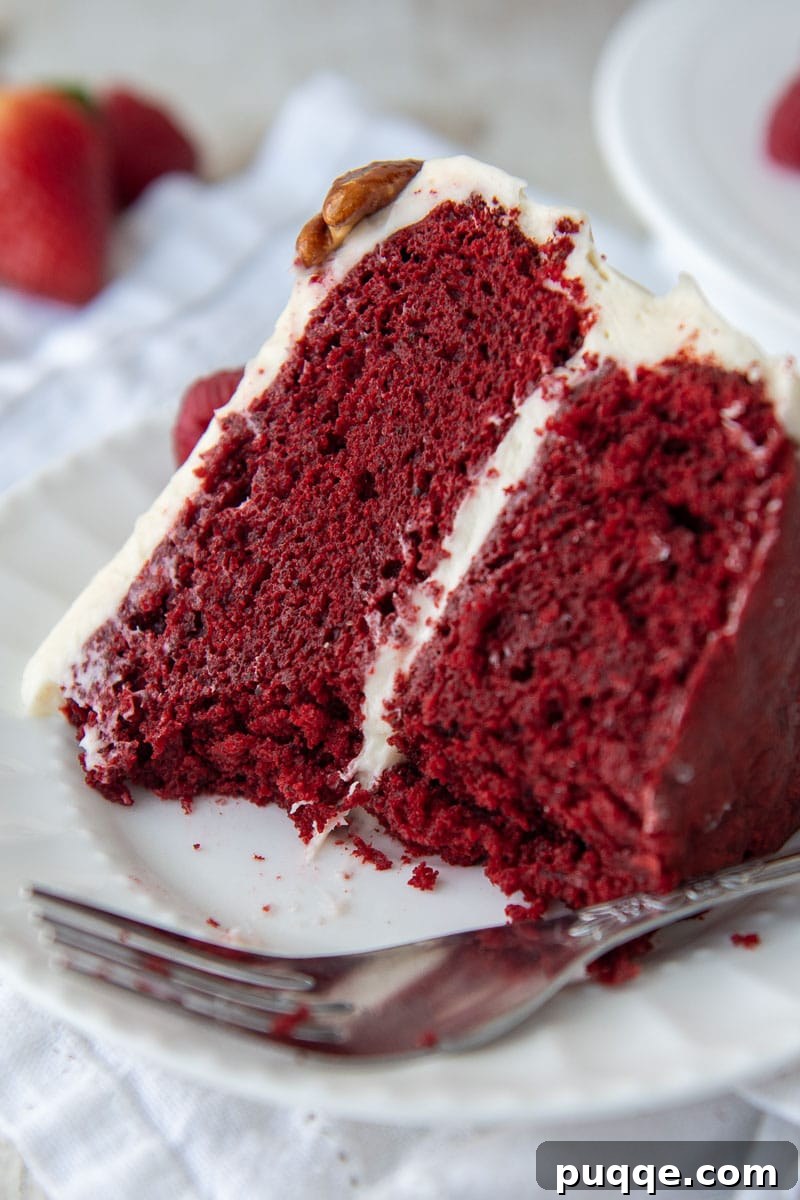
Welcome to the ultimate guide for mastering a truly exceptional dessert: the **Ultra-Moist Gluten-Free Red Velvet Cake**. Forget everything you thought you knew about the complexities of gluten-free baking. This isn’t just another recipe; it’s a culinary revelation designed to bring you a cake that is astonishingly tender, incredibly moist, and wonderfully fluffy, all without a hint of gluten. Crafted with a meticulously balanced gluten-free flour blend and a secret ingredient – sour cream – for unparalleled richness, this cake defies expectations. Say goodbye to dense, dry, or crumbly gluten-free attempts. This recipe ensures a perfect crumb every single time, making it an absolute winner for any occasion.
The best part? You don’t need obscure ingredients or complicated techniques. We’re keeping it simple, focusing on the authentic, beloved red velvet flavor that captivates every palate. And what’s red velvet without its iconic companion? A generous, luscious swoop of our signature cream cheese frosting crowns this masterpiece, completing a dessert that tastes straight out of a Southern bakery. You’ll be delighted to know that the cake batter comes together incredibly fast, allowing you to create this show-stopping dessert with ease. Get ready to impress your friends and family with a gluten-free cake that everyone will adore, whether they follow a gluten-free diet or not!
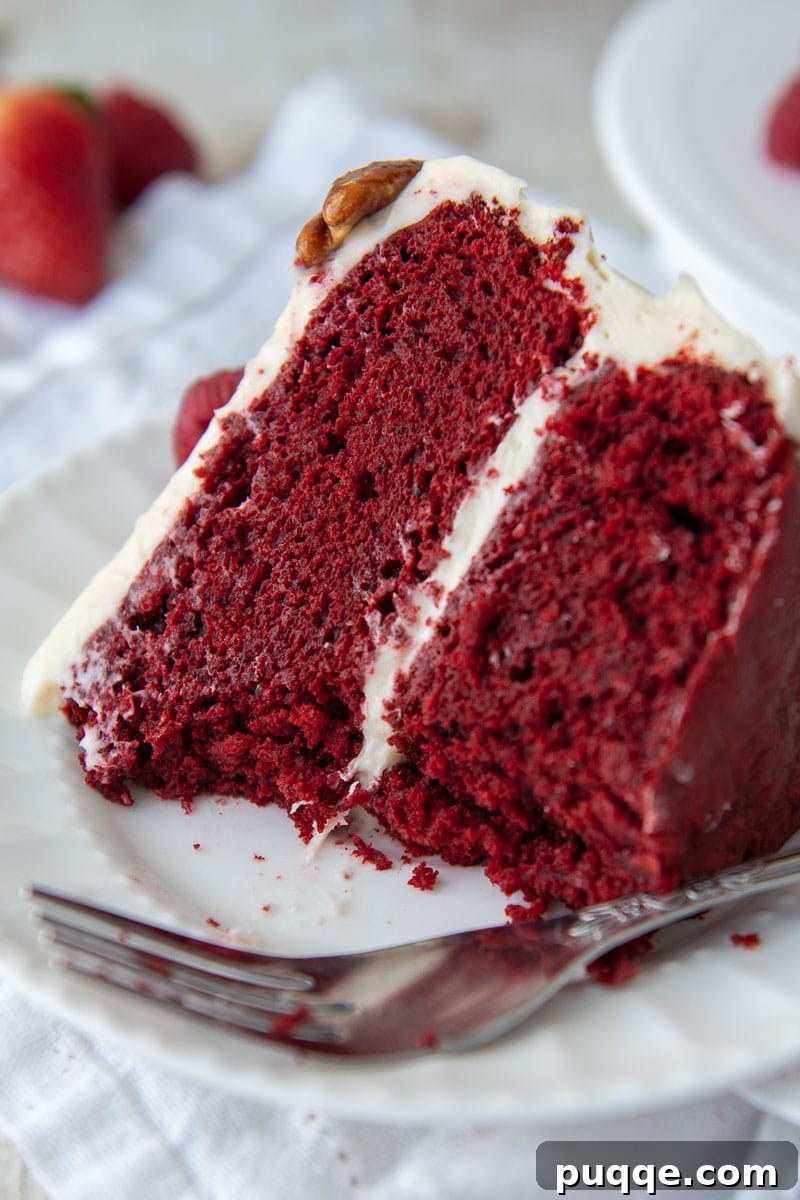
Red Velvet Gluten-Free Cake: A Recipe That Truly Delivers!
Are you ready for a truly vintage cake experience, a copycat of the classic Southern charm, without the usual gluten-free compromise? Look no further! Baking delectable gluten-free cakes absolutely doesn’t have to be a daunting task. This incredibly easy recipe for gluten-free red velvet cake simplifies the process, allowing you to whip up a batch in just one bowl, saving you time and effort in the kitchen. What makes this recipe stand out is its innovative use of both oil and sour cream, a dynamic duo that guarantees an exceptionally moist and tender crumb. The result? A cake so perfectly textured and flavored, you’d never guess it’s gluten-free.
Many home bakers struggle with gluten-free cakes, often encountering disappointing results like dense, crumbly, or gummy textures. This usually stems from an unbalanced ratio of dry to wet ingredients, a common pitfall in gluten-free baking where the absence of gluten structure changes how flour absorbs liquid. Just like our famously ultra-moist gluten-free chocolate cake, the secret to success lies in achieving that magical balance. Gluten-free flours tend to absorb liquids differently than wheat flour, and adding too much moisture without proper fat and stabilizers can lead to a heavy, undesirable gummy texture.
For this exceptional homemade red velvet cake, we’ve deliberately veered from the traditional buttermilk, opting instead for a powerful combination of sour cream and vegetable oil. The oil plays a crucial role by providing essential fat, which coats the starches in the gluten-free flour, ensuring a tender and rich mouthfeel. Meanwhile, the sour cream isn’t just for added moisture; it also contributes to a more stable and finely structured crumb compared to what buttermilk alone might offer. This thoughtful balance allows the cake to bake up incredibly light, airy, and fluffy, without being weighed down by excessive liquid. It’s the key to achieving that signature red velvet melt-in-your-mouth texture.
And, of course, no Southern red velvet cake would be complete without its crowning glory: a rich, tangy, and utterly decadent cream cheese frosting! Our recipe features a delightful whipped heavy cream addition, which infuses the frosting with an irresistible airiness and lightness, making it truly heavenly. If you lean towards a more traditional, dense cream cheese frosting, we highly recommend trying the frosting recipe from our homemade gluten-free hummingbird cake recipe. Whichever style you choose, this frosting is the perfect complement to the vibrant red velvet layers.
Mastering Gluten-Free Red Velvet: Your Essential Guide
Creating this spectacular gluten-free red velvet cake is a rewarding experience, especially when you understand the role each ingredient plays. This section will walk you through key notes and tips for the main components of both the cake and its luxurious frosting, ensuring your baking journey is as smooth and successful as possible.
Understanding Your Gluten-Free Flour Blend
The foundation of any great gluten-free cake is the flour. For this recipe, we strongly recommend a high-quality, cup-for-cup gluten-free all-purpose flour blend, such as Cup4Cup. These blends are specifically formulated with a mix of different gluten-free flours (like rice flour, tapioca starch, potato starch) and often contain xanthan gum, which acts as a binder, mimicking gluten’s elasticity. Using a reliable blend is crucial for achieving the desired texture and moisture, preventing a dry or crumbly result. Avoid single-ingredient gluten-free flours unless specifically stated, as they lack the complex structure needed for cake baking.
The Power of Sour Cream and Oil
As mentioned, our recipe deviates from traditional buttermilk, which is common in many red velvet recipes. We use sour cream for a reason! Sour cream is thicker and has a higher fat content than buttermilk, providing a richer, more stable emulsion in the batter. This results in a cake that is exceptionally moist and tender, and it helps prevent the gummy texture sometimes associated with too much liquid in gluten-free baking. The vegetable oil further enhances moisture and richness, ensuring the starches in the gluten-free flour are properly coated, leading to that desirable “melt-in-your-mouth” quality.
Achieving the Iconic Red Hue
For that classic, vibrant red velvet color, a high-quality gel food coloring is your best friend. Gel colors are highly concentrated, meaning you need less to achieve a deep, rich hue, avoiding excessive liquid that could alter the batter’s consistency. Liquid food coloring can be used, but you’ll need 2-3 tablespoons to get a comparable intensity, which might slightly affect the overall moisture. For a natural alternative, consider using beet root powder, though the color may be a more muted, earthy red rather than the brilliant crimson often desired.
Key to the Fluffy Cream Cheese Frosting
Our frosting stands out by incorporating whipped heavy cream, which adds an incredible lightness and dreaminess. Ensure your cream cheese is softened to room temperature for a smooth, lump-free frosting. Powdered sugar is essential for a silky texture, and a touch of sour cream in the frosting base adds an extra layer of tangy richness that beautifully complements the cake. The heavy cream should be beaten to stiff peaks separately before gently folding it into the cream cheese mixture, ensuring an airy, not dense, frosting.
Let’s Make This Together!
Embark on the journey of baking this stunning gluten-free red velvet cake with confidence. Our step-by-step guide is designed to make the process enjoyable and straightforward, culminating in a dessert that’s as delightful to make as it is to eat. (Below provides detailed instructions. For the complete list of ingredients and precise measurements, please refer to the recipe card further down the page.)
One Bowl Wonder: Easy Cake Batter
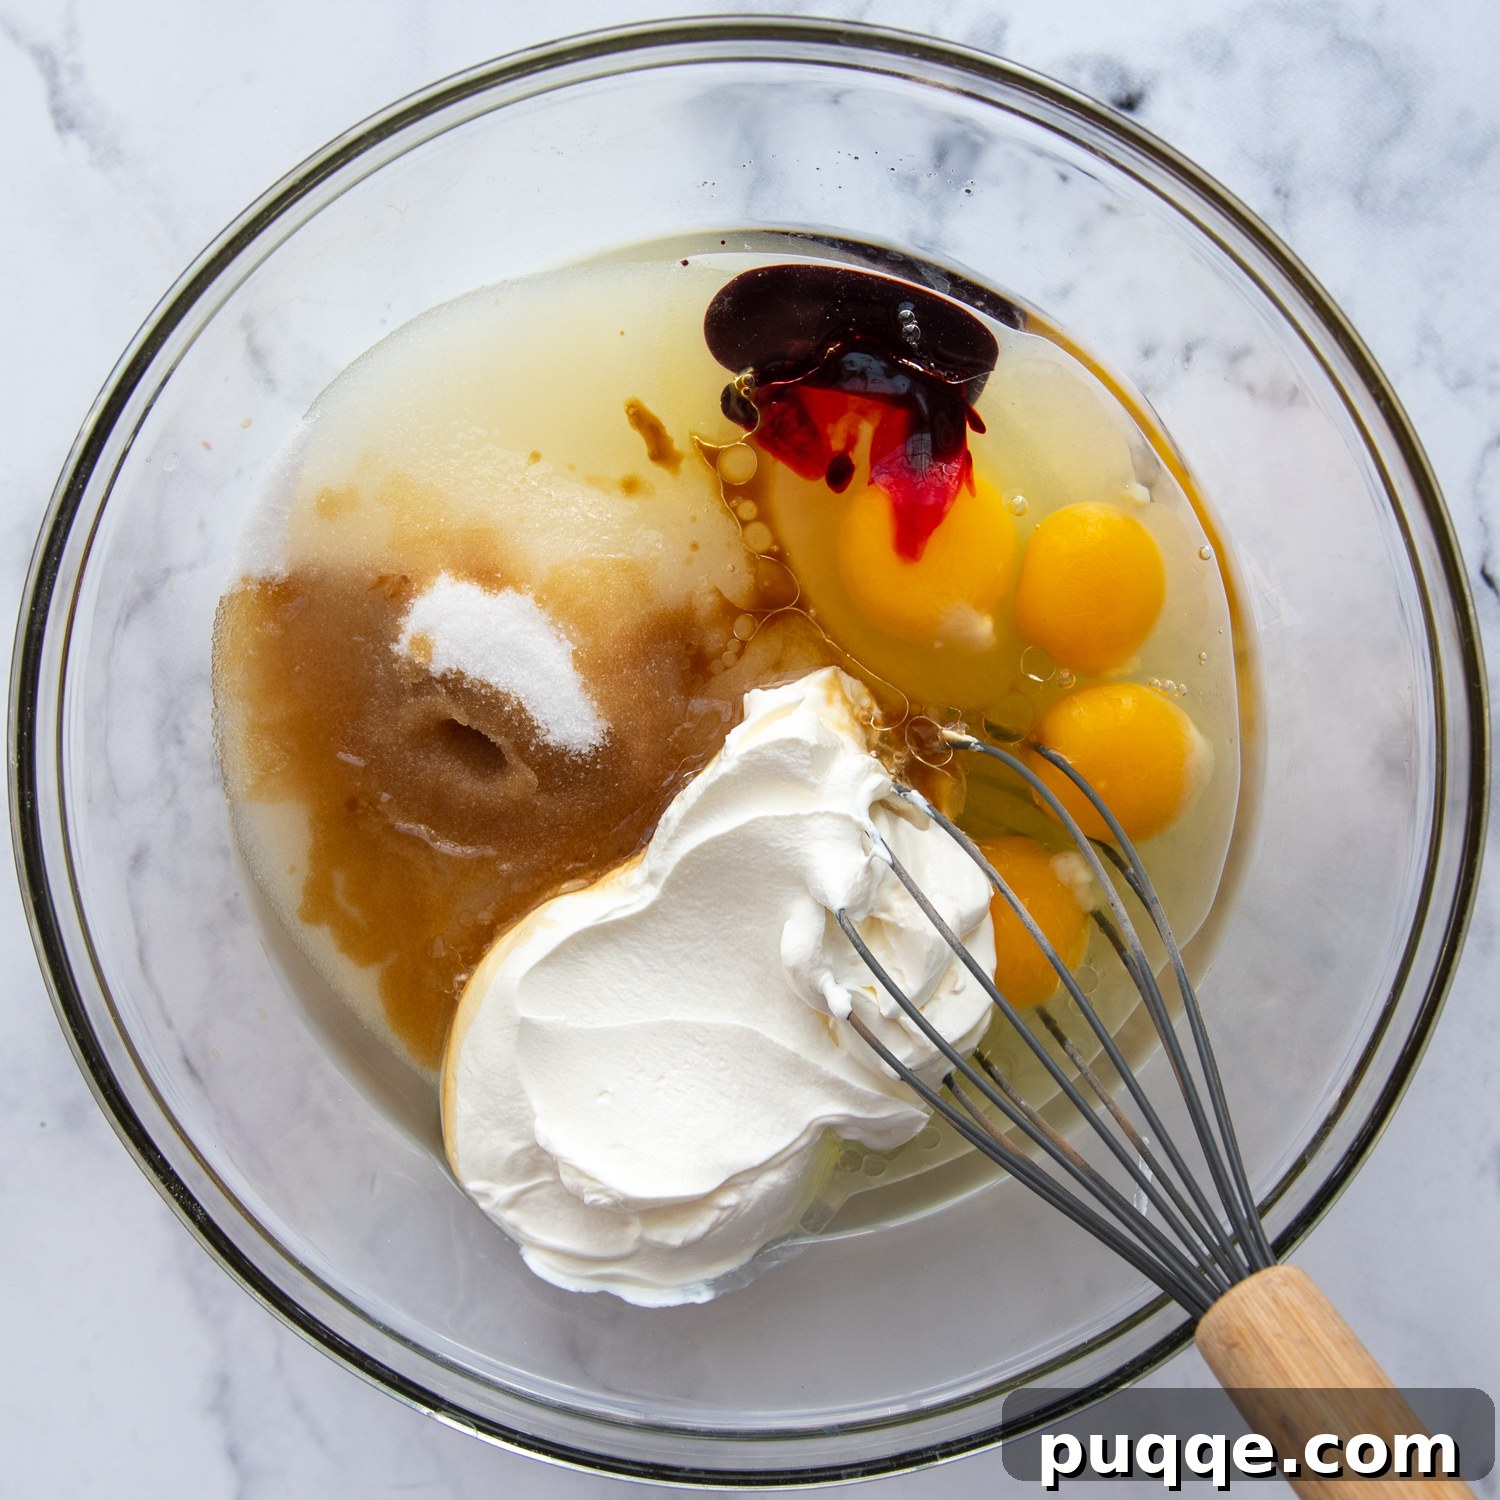
Creating the batter for this cake is remarkably simple, requiring just one bowl and no electric mixer if you prefer! Begin by combining all your wet ingredients in a large mixing bowl: granulated sugar, large eggs, sour cream, vegetable oil, vanilla extract, and your chosen red food coloring. For that iconic, deep red velvet hue, a gel food coloring is highly recommended due to its concentrated pigment. Whisk everything vigorously until the mixture is smooth, well-combined, and beautifully vibrant. This initial step lays the foundation for a perfectly moist cake.
Folding in the Dry Ingredients for Perfection
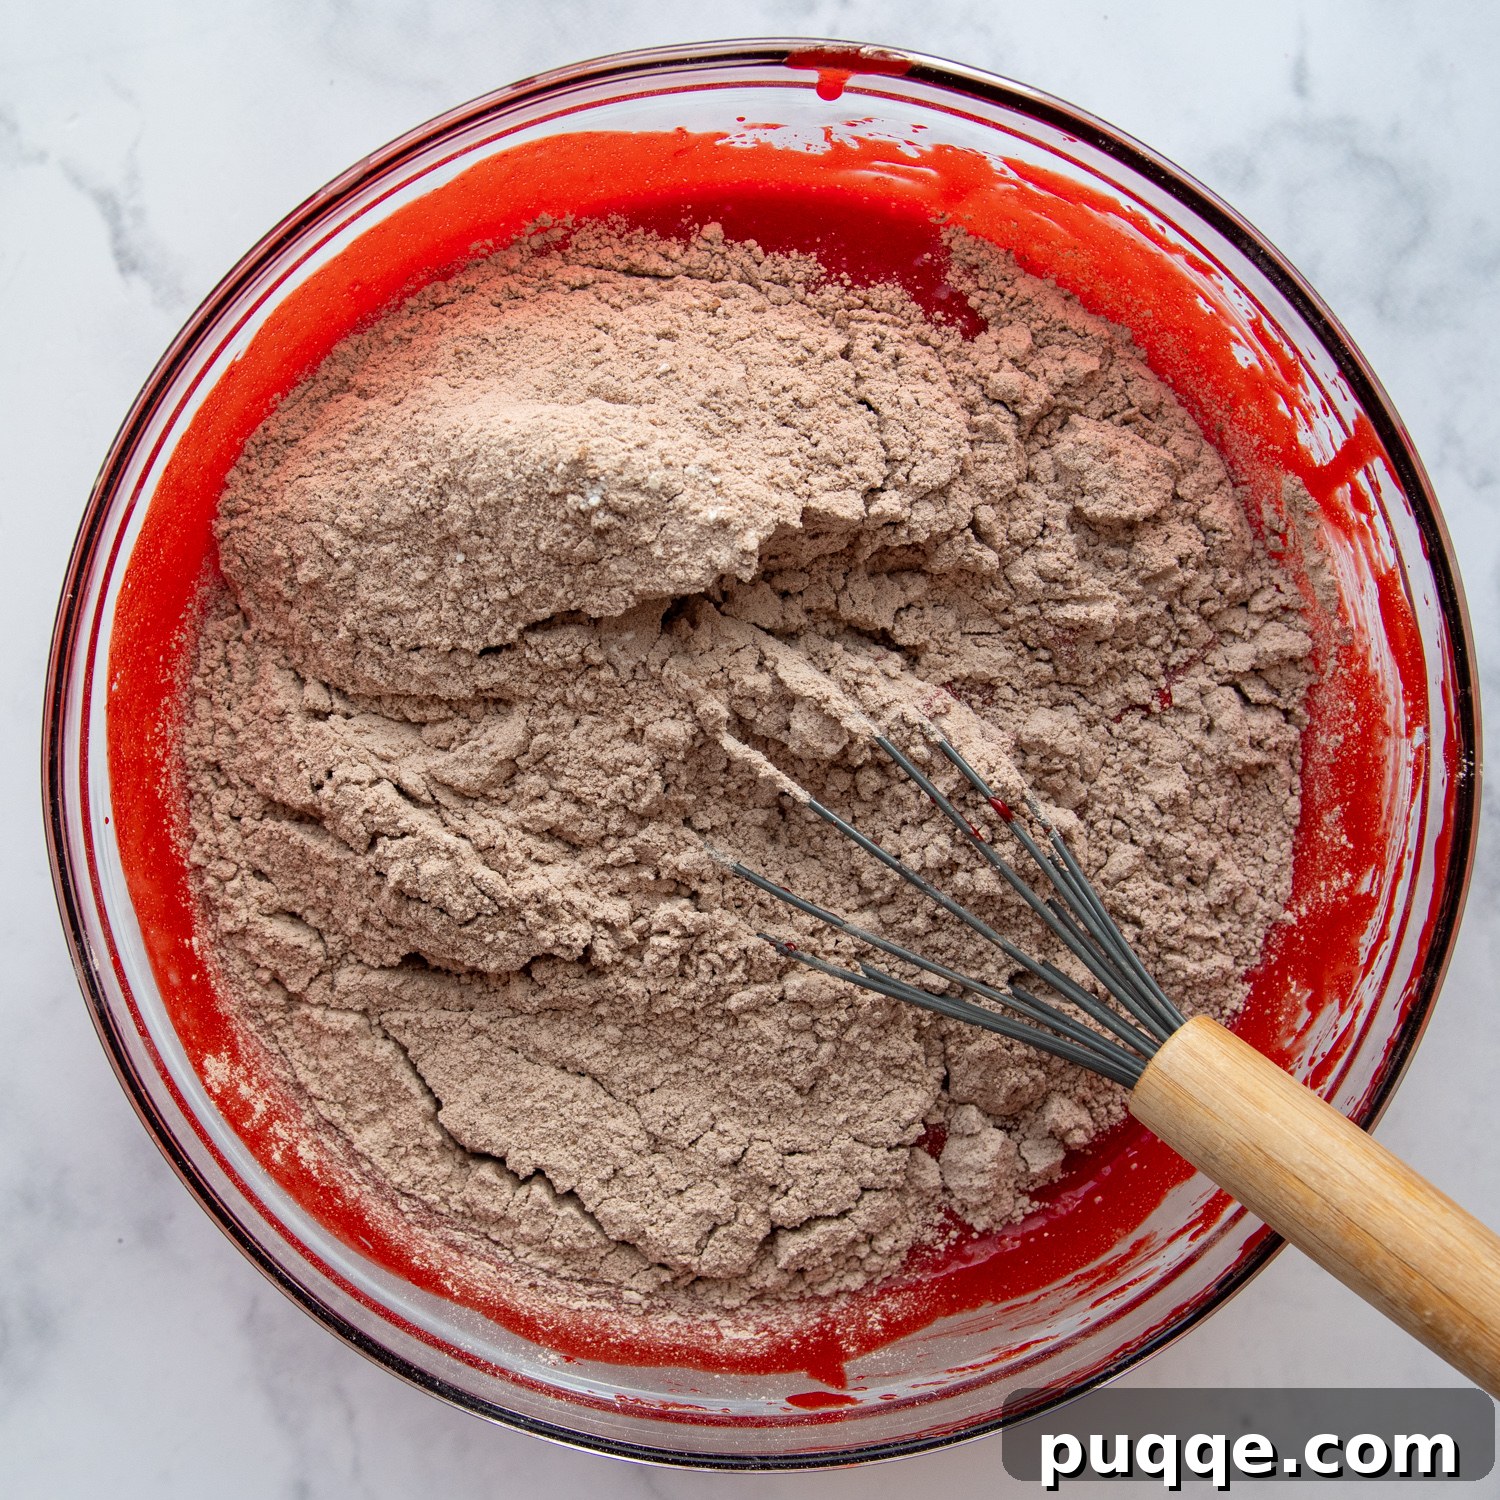
Once your wet ingredients are perfectly blended, it’s time to incorporate the dry components. Add the gluten-free all-purpose flour, unsweetened cocoa powder (Dutch-processed cocoa works beautifully too for a darker cake), baking powder, baking soda, and salt directly into the same bowl. Whisk or stir these ingredients into the wet mixture, ensuring everything is thoroughly combined. Continue to whisk until the batter is smooth and homogeneous, with no pockets of dry flour remaining. Avoid overmixing, but ensure the ingredients are fully incorporated for an even texture.
Pour, Bake, and Cool to Perfection
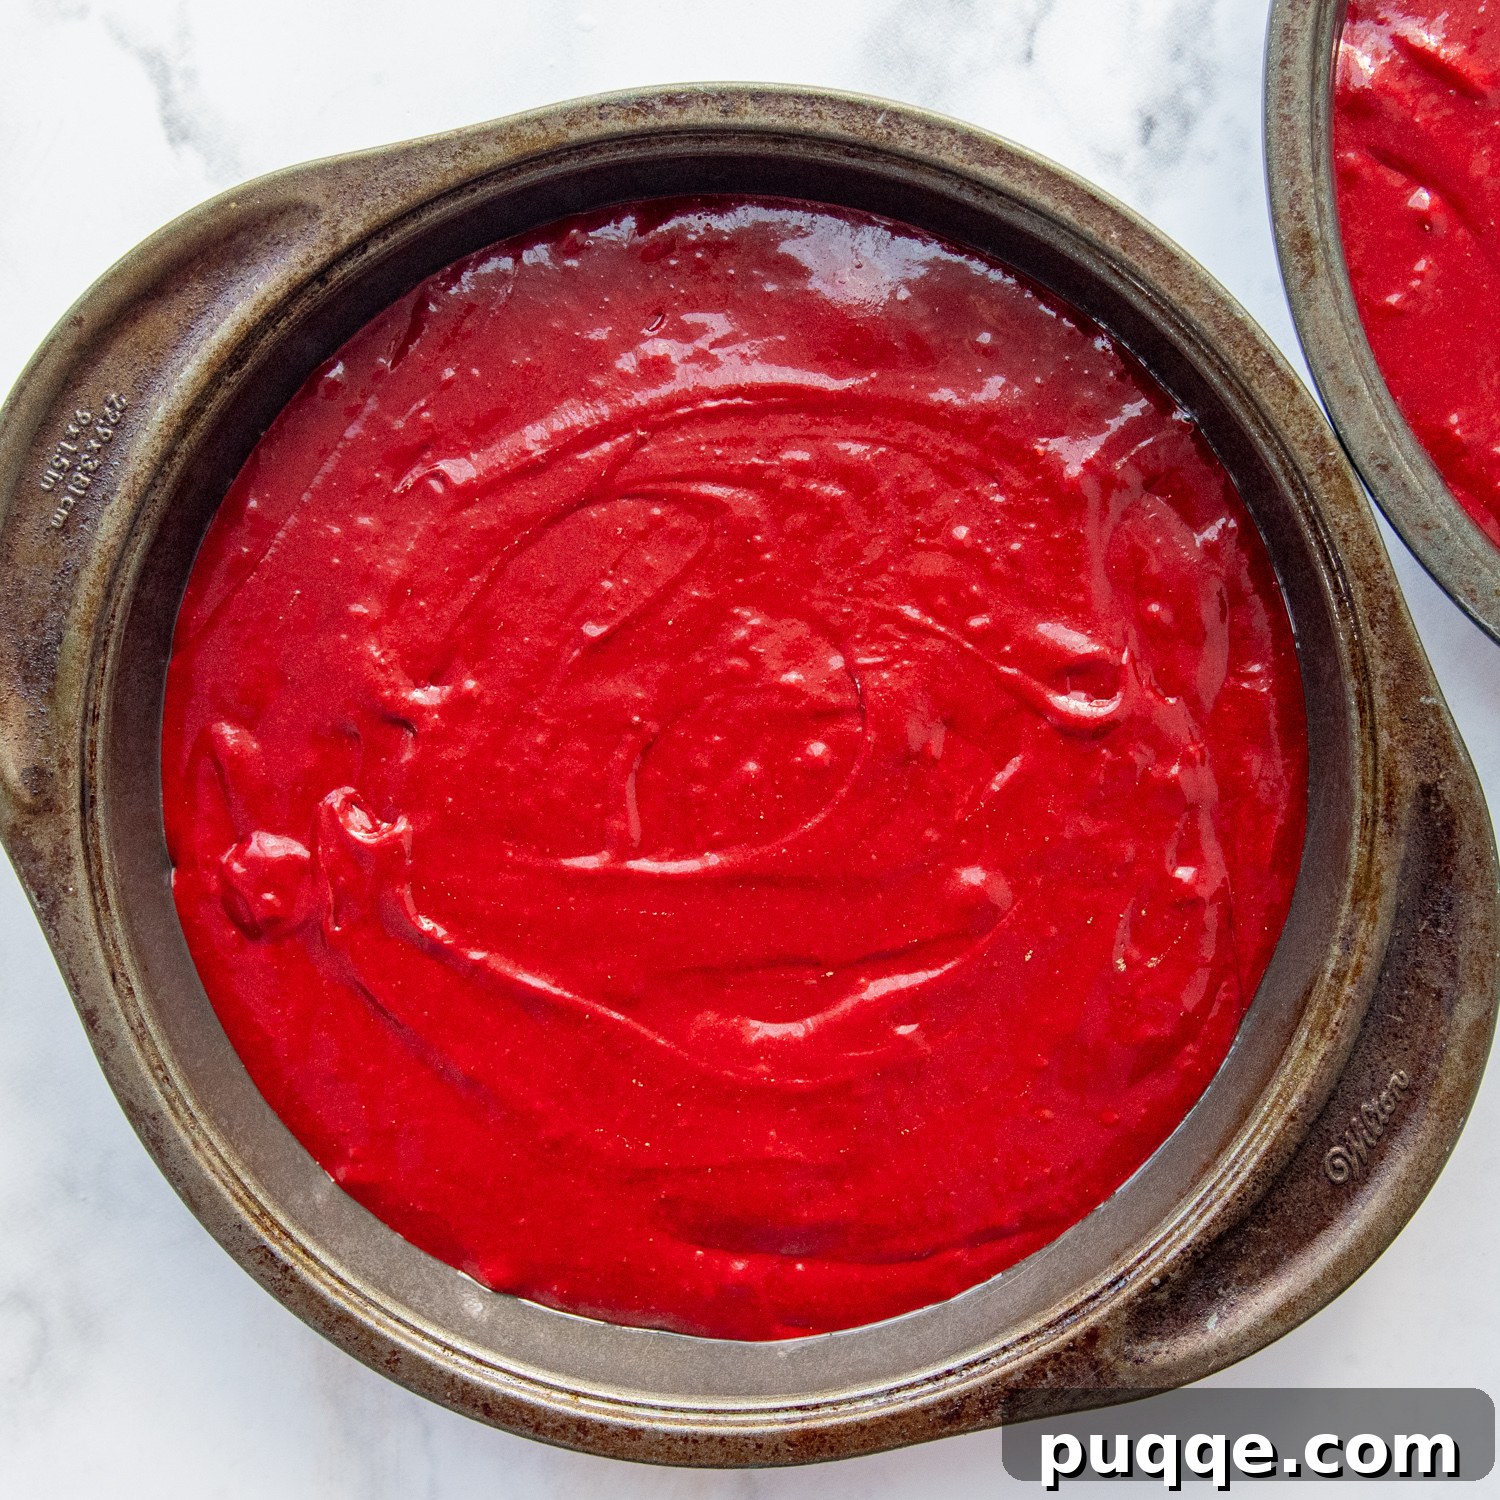
Now for the exciting part – baking! To create a classic layer cake, evenly divide the vibrantly colored batter into two greased 9-inch cake pans. If you prefer, this recipe is also wonderfully adaptable for cupcakes; instructions are provided in the full recipe card below. Bake the layers for approximately 25-30 minutes, or until a cake tester inserted into the center comes out clean. Be vigilant to avoid overbaking, as this can lead to a dry cake. Once baked, remove the pans from the oven and allow the cake layers to cool in the pans for about 5 minutes before carefully inverting them onto wire racks to cool completely. Patience during cooling is key before you apply that luscious frosting!
Elevate Your Presentation: Decorate Like a Pro
While a simple swirl of cream cheese frosting is always a classic and beautiful choice, adding a few thoughtful garnishes can truly elevate your gluten-free red velvet cake, transforming it into a stunning centerpiece. Here are some inspiring ideas to help you decorate like a professional, infusing your cake with both visual appeal and delightful texture:
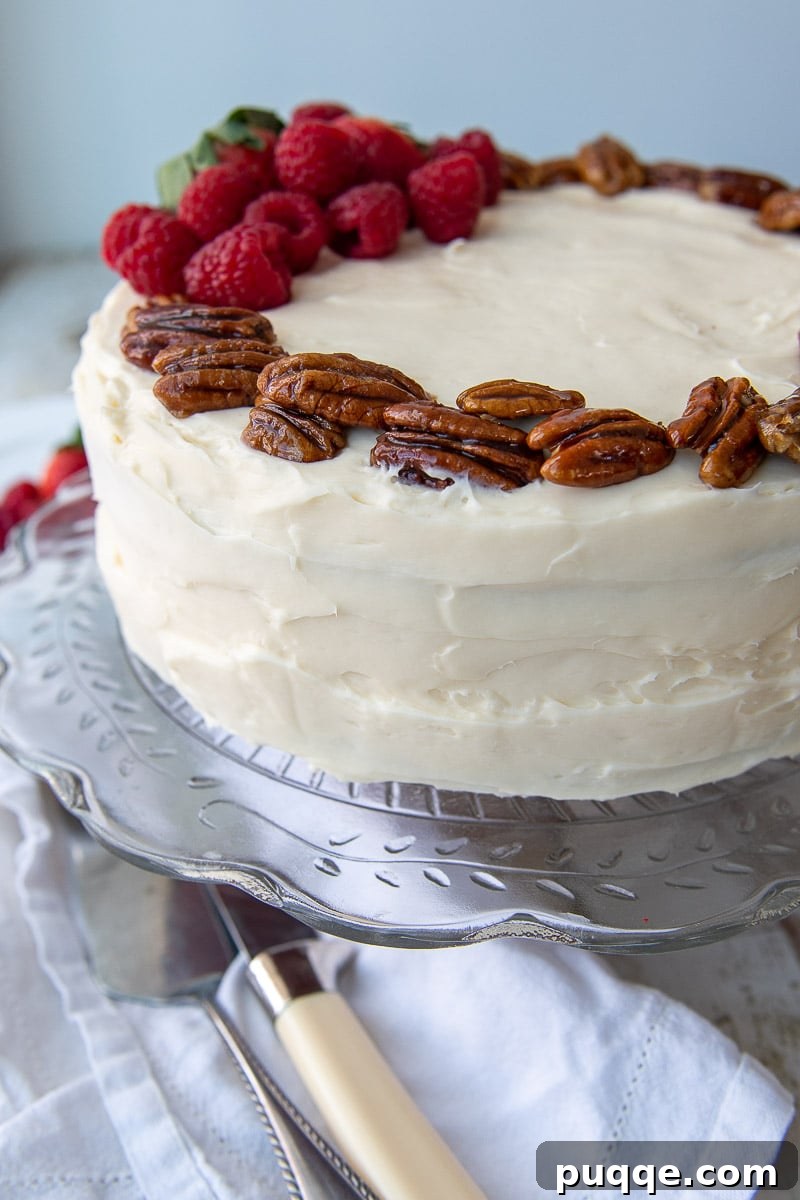
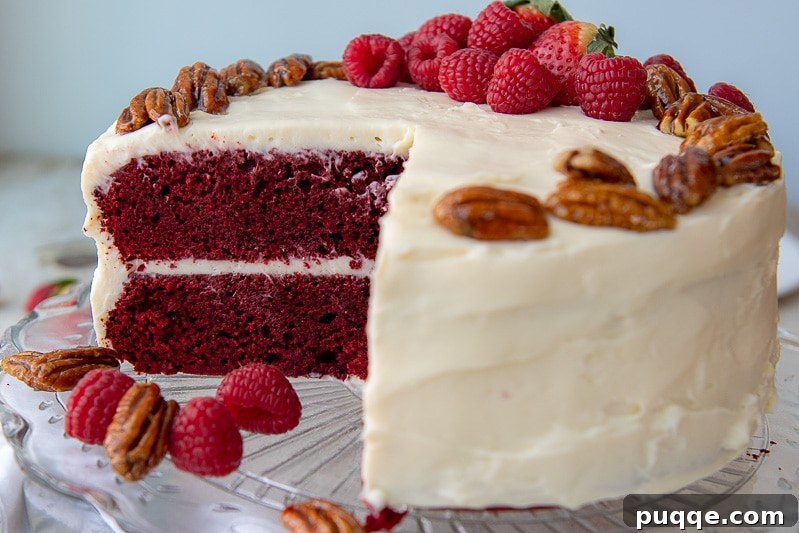
- Quick Candied Pecans: As pictured, candied pecans bring a delightful crunch and a distinctly Southern charm to your red velvet cake. Their sweet, nutty flavor perfectly complements the rich cake and tangy frosting. Make them ahead for quick assembly!
- Fresh Berries: Bright, juicy fresh berries like strawberries, raspberries, or even a mix of summer berries, add a burst of freshness and a beautiful color contrast against the deep red cake and white frosting. Arrange them artfully on top or around the base.
- Shredded or Toasted Coconut: For a subtle tropical twist and added texture, sprinkle finely shredded or lightly toasted coconut flakes over the frosting. The delicate sweetness of coconut pairs surprisingly well with red velvet.
- Elegant Frosting Rosettes: For a more refined look, use a piping bag fitted with a star tip to create intricate rosettes or decorative swirls with your cream cheese frosting. This adds a sophisticated touch that’s surprisingly easy to achieve.
- Cake Crumbs: A classic red velvet decoration involves using some of the cake itself. After your layers have cooled, carefully trim a very thin layer off the top of one cake to create a flat surface. Crumble this trimmed portion finely. After frosting your cake, gently press these vibrant red crumbs onto the sides or sprinkle them over the top for an authentic bakery-style finish.
- Chocolate Shavings or Curls: A sprinkle of dark or white chocolate shavings can add a touch of elegance and extra indulgence. The slight bitterness of dark chocolate can create a wonderful contrast with the sweet frosting.
- Edible Flowers: For a truly show-stopping cake, adorn it with a few edible fresh flowers. Choose small, delicate blooms that complement the cake’s vibrant color, adding a natural and artistic flair.
Since red velvet cake features a cream cheese frosting, proper storage is essential. Always store your cake in the refrigerator to maintain the frosting’s integrity and freshness. However, for the absolute best taste and texture, we highly recommend serving gluten-free cakes at room temperature. When cold, the cake’s crumb tends to stiffen and seize up. Allowing it to warm up for 30-60 minutes before serving will soften the crumb beautifully, restoring its tender and moist quality, ensuring every bite is pure perfection.
Storage Tips for Lasting Freshness
To ensure your gluten-free red velvet cake remains as delectable as possible, follow these storage guidelines:
- Refrigeration: Due to the cream cheese frosting, the cake must be stored in an airtight container in the refrigerator. This prevents the frosting from spoiling and helps maintain the cake’s freshness.
- Shelf Life: Properly stored, your cake will stay fresh in the refrigerator for up to 3-4 days.
- Freezing: For longer storage, slices or even whole unfrosted layers can be frozen. Wrap individual slices tightly in plastic wrap, then aluminum foil, and store in a freezer-safe bag for up to 2-3 months. Thaw in the refrigerator overnight before bringing to room temperature and frosting (if unfrosted).
- Serving Temperature: Always remember to bring the cake to room temperature (about 30-60 minutes out of the fridge) before serving. This allows the crumb to relax and become soft and moist, offering the best eating experience.
Craving More? Save This Recipe to Your Pinterest Board!
Let’s be friends on Pinterest! I’m always sharing great recipes and gluten-free baking tips!
Did you make this unforgettable recipe? We adore hearing from you! Your feedback helps our community of bakers discover new favorites. Please leave a star rating and comment below the recipe card, sharing your experience. We truly appreciate your input and always strive to respond! -Melissa
Ultra-Moist Gluten Free Red Velvet Cake Recipe

Melissa Erdelac
14
5 minutes
25 minutes
30 minutes
Pin
Rate
Remove Ads
Ingredients
-
2 cups (400 g) granulated sugar -
4 large eggs -
1 ⅓ cup (324 g) sour cream -
¾ cup (160 g) vegetable oil, or any preferred -
1 tablespoon vanilla extract -
2 teaspoons red gel food coloring, (or 2-3 tbsp. red food coloring for less vibrant color) -
2 ⅔ cup (411 g) gluten free all purpose flour, I use and recommend Cup4Cup gluten free flour -
½ cup (50 g) unsweetened cocoa powder -
2 teaspoons baking powder -
¼ teaspoon baking soda -
¾ teaspoon salt
Fluffy Cream Cheese Frosting
-
16 ounces (448 g) cream cheese, softened -
1 cup (120 g) powdered sugar -
2 tablespoons sour cream -
1 teaspoon vanilla extract -
1 cup (240 g) heavy cream
Equipment
-
9 inch Cake Pans
-
Cake Tester
-
Cup4Cup Gluten Free Flour
Instructions
Gluten-Free Red Velvet Cake
-
Prepare Pans & Preheat Oven: Preheat your oven to 325ºF (160ºC). Prepare two 9-inch round cake pans by generously spraying them with cooking spray. Line the bottoms of the pans with cut-to-size parchment or wax paper circles, then spray the paper as well. This double-layer of preparation ensures easy release of your cake layers. Set the prepared pans aside.
-
Combine Wet Ingredients: In a large mixing bowl, whisk together the granulated sugar, large eggs, sour cream, vegetable oil, vanilla extract, and red gel food coloring. Whisk thoroughly until the mixture is smooth, evenly colored, and well-combined. Ensure there are no lumps of sugar remaining.2 cups (400 g) granulated sugar,
4 large eggs,
1 ⅓ cup (324 g) sour cream,
¾ cup (160 g) vegetable oil,
1 tablespoon vanilla extract,
2 teaspoons red gel food coloring -
Add Dry Ingredients: To the wet mixture in the bowl, add the gluten-free all-purpose flour, unsweetened cocoa powder, baking powder, baking soda, and salt. Vigorously whisk or stir all the ingredients together until the batter is smooth, fully combined, and lump-free. Be careful not to overmix, as this can affect the texture of gluten-free cakes.2 ⅔ cup (411 g) gluten free all purpose flour,
½ cup (50 g) unsweetened cocoa powder,
2 teaspoons baking powder,
¼ teaspoon baking soda,
¾ teaspoon salt -
Bake & Cool: Divide the cake batter evenly between the two prepared cake pans. Bake in the preheated oven for 25-30 minutes, or until a cake tester (or toothpick) inserted into the center of the cakes comes out clean. It’s crucial to avoid overbaking, as gluten-free cakes can dry out quickly. Remove the pans from the oven and let the cakes cool in the pans for about 5 minutes. Then, carefully invert the cakes onto wire racks to cool completely before frosting. This ensures they firm up properly and are easy to handle.
Fluffy Cream Cheese Frosting
-
Prepare Cream Cheese Base: In a medium-sized bowl, using an electric mixer or whisk, beat together the softened cream cheese, powdered sugar, sour cream, and vanilla extract until the mixture is smooth, creamy, and lump-free. Set this cream cheese mixture aside.16 ounces (448 g) cream cheese,
1 cup (120 g) powdered sugar,
2 tablespoons sour cream,
1 teaspoon vanilla extract -
Whip Heavy Cream: Pour the cold heavy cream into a separate, clean large bowl. Using an electric mixer on high speed, beat the heavy cream until it holds its shape and firm peaks form, resembling whipped cream. Be careful not to overbeat, or it may turn grainy.1 cup (240 g) heavy cream
-
Combine Frosting: Gently fold the whipped cream into the prepared cream cheese mixture using a spatula. Fold carefully until no streaks of whipped cream remain and the frosting is light, fluffy, and uniformly combined. Avoid overmixing, which can deflate the whipped cream.
-
Assembly: Once the cake layers are completely cooled, place the first cake layer on your chosen cake stand or serving plate. Evenly spread a generous amount of frosting over the top. Carefully place the second cake layer on top, then spread the remaining frosting evenly over the top and sides of the entire cake, creating a beautiful, smooth finish. For optimal taste and texture, serve the cake at room temperature. Any leftovers should be stored promptly in the refrigerator in an airtight container.
Notes
Suggested Food Coloring
I highly recommend using red gel food coloring because it is highly concentrated, requiring less liquid to achieve a vibrant color, which helps maintain the cake’s batter consistency. If you prefer to use regular liquid food coloring, please note you will likely need 2-3 tablespoons to attain a bright red hue. Alternatively, for a natural approach, you can omit food coloring entirely or use natural colorings such as beetroot powder, which will result in a more subdued, earthy red color.
Gluten-Free Red Velvet Cupcakes
This recipe is perfectly adaptable for making cupcakes. You can keep the cake and cream cheese frosting ingredients as is to yield approximately 24 standard-sized cupcakes. If you only need a smaller batch, simply halve all the cake and frosting ingredients for about 12 cupcakes.
- Line a muffin tin with paper liners and fill each liner about two-thirds full with batter.
- Bake in a 325ºF (160ºC) oven for 18-20 minutes. For even baking, rotate the muffin tin halfway through the baking time.
- Once baked, remove the cupcakes from the tin and transfer them to a wire rack to cool completely before applying the frosting.
Recipe adapted from America’s Test Kitchen
Carbohydrates: 54g,
Protein: 7g,
Fat: 27g,
Saturated Fat: 18g,
Trans Fat: 1g,
Cholesterol: 95mg,
Sodium: 338mg,
Potassium: 264mg,
Fiber: 2g,
Sugar: 40g,
Vitamin A: 568IU,
Vitamin C: 1mg,
Calcium: 136mg,
Iron: 1mg
Did you make this recipe?
Please leave a star rating and review below. It helps others when searching for recipes and I LOVE feedback!