
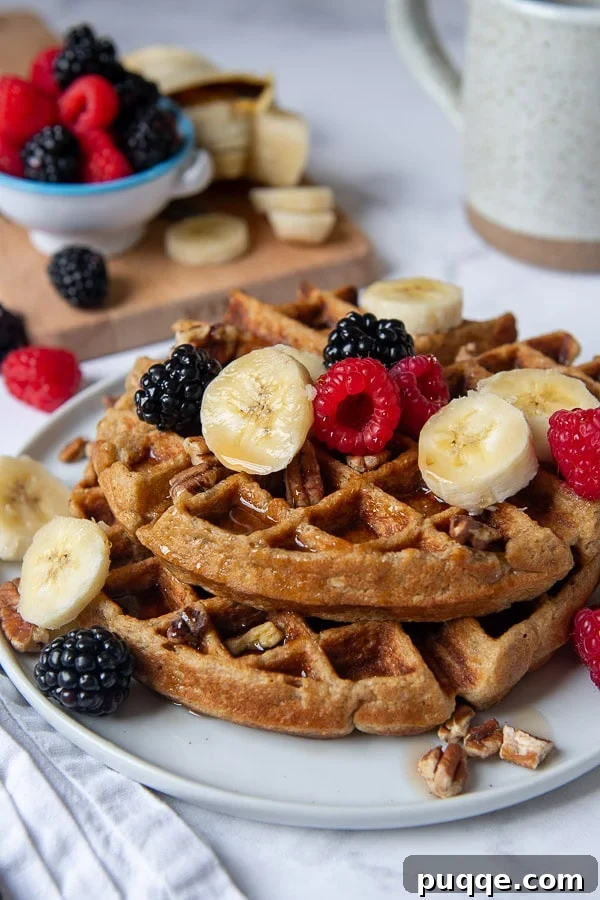
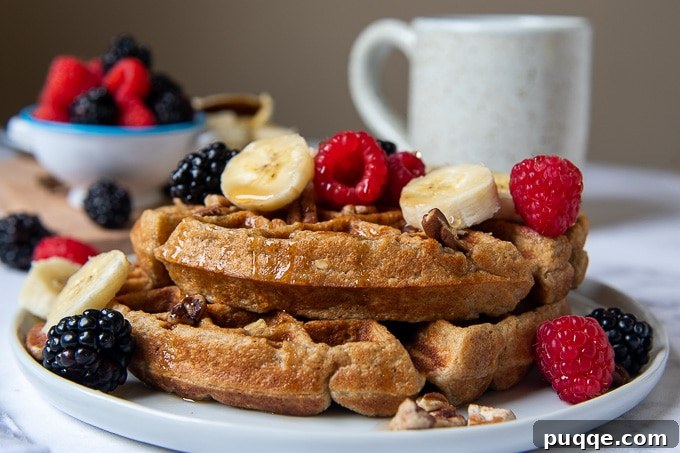
Welcome to your new favorite breakfast obsession: incredibly delicious, effortlessly made gluten-free banana waffles! Forget the complex flour blends and lengthy prep times. This revolutionary recipe simplifies the art of waffle-making by harnessing the power of your blender, transforming humble ingredients like wholesome oats and ripe bananas into golden, fluffy masterpieces. In just minutes, you’ll be savoring light and airy flourless gluten-free waffles that are not only a dream for those with dietary restrictions but a delightful treat for everyone at the table.
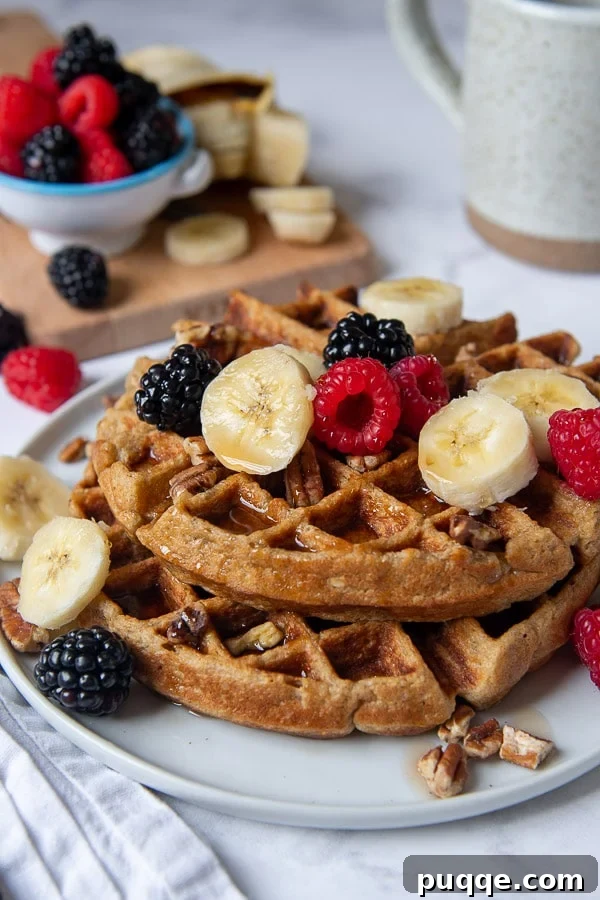
The Ultimate Blender Recipe: Easy Gluten-Free Banana Waffles with Oatmeal
There’s nothing quite like a warm stack of waffles to kickstart a weekend morning or elevate a special occasion. But for those navigating a gluten-free lifestyle, finding truly satisfying and straightforward breakfast recipes can sometimes be a challenge. That’s where these gluten-free banana oat waffles come in. Designed for both convenience and culinary delight, they promise to make your mornings more special without any of the fuss typically associated with gluten-free baking.
The true genius of this recipe lies in its simplicity. All the magic happens in a single blender. You don’t need to sift dry ingredients, nor do you require any specialized flours. If you have a bag of certified gluten-free oats and a couple of beautifully ripe bananas on hand, you’re already halfway to creating a batch of irresistibly fluffy waffles. This recipe is a testament to the idea that healthy, delicious, and diet-friendly food can also be incredibly easy to prepare. It’s perfect for busy weekdays or leisurely brunches where you want maximum flavor with minimal effort.
Why Choose Gluten-Free Banana Oatmeal Waffles?
Beyond being incredibly tasty, these waffles offer a host of benefits:
- Naturally Gluten-Free: By using oats as the base, we eliminate wheat flour entirely, making these suitable for celiac diets or those avoiding gluten. Always opt for certified gluten-free oats to prevent cross-contamination.
- Wholesome Goodness: Oats are a fantastic source of fiber, providing sustained energy and supporting digestive health. Bananas add natural sweetness, essential vitamins, and potassium.
- Quick & Convenient: The blender does all the work! No complex mixing or multiple bowls to wash. This means more time enjoying your breakfast and less time cleaning up.
- Nutrient-Rich: Packed with ingredients that contribute to a balanced start to your day, these waffles are a healthier alternative to many traditional recipes.
- Versatile: Easily adaptable to various dietary needs, including dairy-free and vegan, ensuring everyone can enjoy a delicious waffle.
Ingredient Notes and Smart Substitutions
As with all my recipes, simplicity and accessibility are key. I focus on readily available and affordable ingredients to ensure you can whip up delicious meals without a trip to a specialty store. Here are the core components for these amazing waffles, along with handy substitution tips:
- Oats: You can use either old-fashioned rolled oats or quick-cooking oatmeal. For a truly gluten-free experience, ensure your oats are certified gluten-free to avoid any potential cross-contamination during processing. The blender will break them down into a fine “flour.”
- Ripe Bananas: The riper your bananas, the better! Brown spots indicate higher natural sugar content, which contributes to a sweeter flavor and helps them pulverize smoothly into the batter. If you’re looking for a gluten-free waffle recipe without bananas, consider exploring oat flour waffles as an alternative.
- Sweetener (Honey): Honey adds a lovely depth of flavor and sweetness. You can substitute an equal amount of pure maple syrup or brown sugar. For a less sweet option, you can even omit the added sweetener entirely and rely solely on the natural sweetness of the ripe bananas.
- Fat (Coconut Oil or Vegetable Oil): A touch of oil is crucial for achieving that classic waffle crispness and rich texture. Coconut oil adds a subtle flavor, but any neutral-flavored vegetable oil (like canola or avocado oil) works perfectly. This fat content is what transforms a flourless pancake recipe into delightful waffles.
- Eggs: Eggs act as a binder and contribute to the overall structure and fluffiness of the waffles. For an egg-free or vegan version, you can simply omit them. While the texture might be slightly more delicate, the fantastic taste will remain intact.
- Milk: Use any milk you prefer. For delicious dairy-free waffles, simply swap in your favorite non-dairy milk alternative such as almond milk, soy milk, or oat milk.
- Baking Powder: This leavening agent is essential for giving the waffles their rise and fluffy texture. Don’t skip it!
- Vanilla Extract & Ground Cinnamon: These flavor enhancers add warmth and depth, complementing the banana and oat flavors beautifully. Feel free to adjust the amounts to your preference or add other spices like nutmeg or a pinch of cardamom.
- Salt: A small amount of salt balances the sweetness and brings out the full range of flavors.
Step-by-Step: How to Make Gluten-Free Banana Waffles
Preparing a batch of these glorious gluten-free waffles is astonishingly easy. Follow these simple steps for perfect results every time:
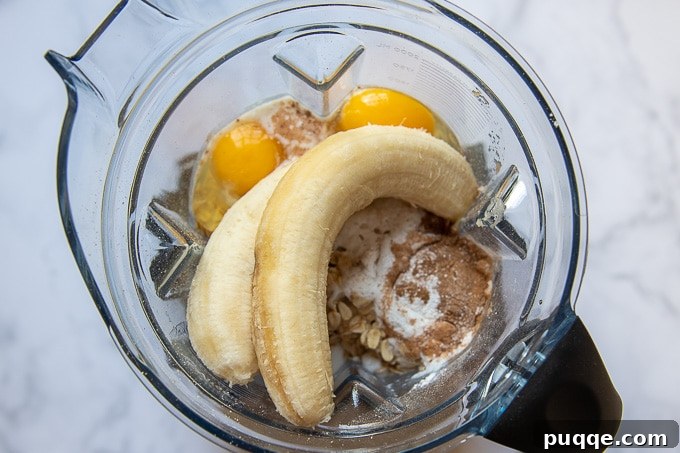
- Combine All Ingredients: Gather all your ingredients and place them directly into your blender, food processor, or a large bowl if you’re using an immersion blender. There’s no need to combine wet and dry ingredients separately – the blender handles it all!
- Blend Until Smooth: Process the mixture until the oats are finely ground and the bananas are completely smooth. Aim for a consistent, lump-free batter. This usually takes about 1 minute, depending on your blender’s power.
- Rest the Batter: This is a crucial step for achieving light and fluffy waffles. Cover the blender carafe or bowl and let the batter rest at room temperature for 20-30 minutes. This allows the oats to fully hydrate and soften, which is key to preventing a dense, rustic texture. Towards the end of the resting time, begin preheating your waffle iron.
- Cook the Waffles: Lightly spray your preheated waffle iron with non-stick cooking spray. Pour enough batter into the center to almost fill the tray – be careful not to overfill. Close the lid and cook until the waffles are golden brown and crisp, typically 3-5 minutes depending on your waffle iron model.
- Keep Warm and Serve: As each waffle finishes cooking, transfer it to a wire rack or a baking sheet in a 200°F (95°C) oven to keep warm while you cook the remaining batter. Serve immediately with your favorite toppings!
Tips for Achieving Extra Fluffy Waffles
While this recipe naturally yields delightful waffles, there are a couple of expert tricks to make your flourless gluten-free waffles exceptionally fluffy and light:
- The Essential Batter Rest: As mentioned in the instructions, allowing the batter to rest for 20-30 minutes is paramount. Skipping this step means the oats won’t have sufficient time to absorb moisture and soften, resulting in a denser, more rustic waffle. A well-rested batter leads to a noticeably lighter and more tender crumb.
- The Egg White Separation Method: For the ultimate light and airy texture, consider this extra step. Separate the egg whites from the yolks. Blend the egg yolks with all the other ingredients as usual. In a separate, clean bowl, beat the egg whites until they form stiff peaks. Once your blended banana oatmeal batter is ready, gently fold in the beaten egg whites. This incorporates more air into the batter, producing incredibly fluffy waffles that truly melt in your mouth. Yes, it involves an extra bowl, but the results are truly mind-blowing!
- Don’t Overmix: After the initial blending, avoid excessive stirring or mixing once the batter has rested, especially if you’ve folded in egg whites. Overmixing can deflate the air pockets and lead to tougher waffles.
- Hot Waffle Iron: Ensure your waffle iron is fully preheated before pouring the batter. A hot iron immediately sets the exterior, creating a crisp crust and allowing the interior to steam and expand.
Customizing Your Waffles: Dairy-Free, Egg-Free, Vegan, and More!
These gluten-free banana waffles are wonderfully adaptable to various dietary preferences and flavor profiles. Here’s how you can customize them:
- Dairy-Free Waffles: To easily make these waffles dairy-free, simply use your preferred non-dairy milk alternative, such as almond, soy, oat, or coconut milk, in place of regular milk. The recipe will work seamlessly.
- Egg-Free & Vegan Waffles: For a completely vegan or egg-free version, omit the eggs from the recipe. While the waffles may be slightly more delicate in texture, they will still be incredibly flavorful and satisfying. The binding power of the oats and bananas helps hold them together.
- Add-Ins: Elevate your waffles by stirring in some delicious mix-ins after blending the batter. Consider chocolate chips (dairy-free if needed), chopped nuts like pecans or walnuts, shredded coconut, or a handful of fresh berries (blueberries work wonderfully).
- Spice Variations: Experiment with different spices beyond cinnamon. A pinch of nutmeg, cardamom, or even a touch of pumpkin pie spice can add a unique twist.
Recommended Equipment for Your Waffle Journey
The beauty of this recipe is its reliance on just a few key pieces of kitchen equipment:
- Blender: A powerful blender is your best friend for this recipe, as it transforms whole oats into a fine flour and ensures a silky-smooth batter. I personally use a Vitamix blender for its efficiency, but any standard blender or even an immersion blender will get the job done effectively. A food processor can also be used if you don’t have a blender.
- Waffle Iron: Of course, a waffle iron is essential! Any size or model will work perfectly, whether it’s a classic Belgian waffle maker or a standard plate style. This recipe yields approximately 7-8 large waffles, or more if you’re making smaller ones. Remember to always grease your waffle iron for easy release.
Freezing and Storing Tips: Enjoy Waffles Anytime!
These gluten-free banana waffles are fantastic for meal prepping or having on hand for quick breakfasts. Here’s how to store and reheat them:
- Keeping Warm While Cooking: As you cook batches of waffles, you can keep the finished ones warm by transferring them to a baking sheet in a 200ºF (95°C) oven. This keeps them toasty and slightly crisp until you’re ready to serve.
- Refrigerator Storage: Allow any leftover waffles to cool completely before storing them in an airtight container in the refrigerator for up to one week.
- Freezing for Longer: For longer storage, flash freeze cooled waffles on a baking sheet until solid (about 1-2 hours). Then, transfer them to a freezer-safe bag or container, separating layers with parchment paper to prevent sticking. They will keep well in the freezer for up to 3 months.
- Reheating from Refrigerator: Place chilled waffles on a baking sheet and heat in a 350ºF (175°C) oven for about 5-10 minutes, or until warmed through and crisp.
- Reheating from Frozen: You can reheat frozen waffles directly in a toaster, toaster oven, or conventional oven. For the oven method, place them on a baking sheet at 350ºF (175°C) for 10-15 minutes, or until heated through and crisp. They can also be quickly defrosted and re-warmed in the microwave, though they may lose some crispness.
Serving Suggestions: Elevate Your Waffle Experience
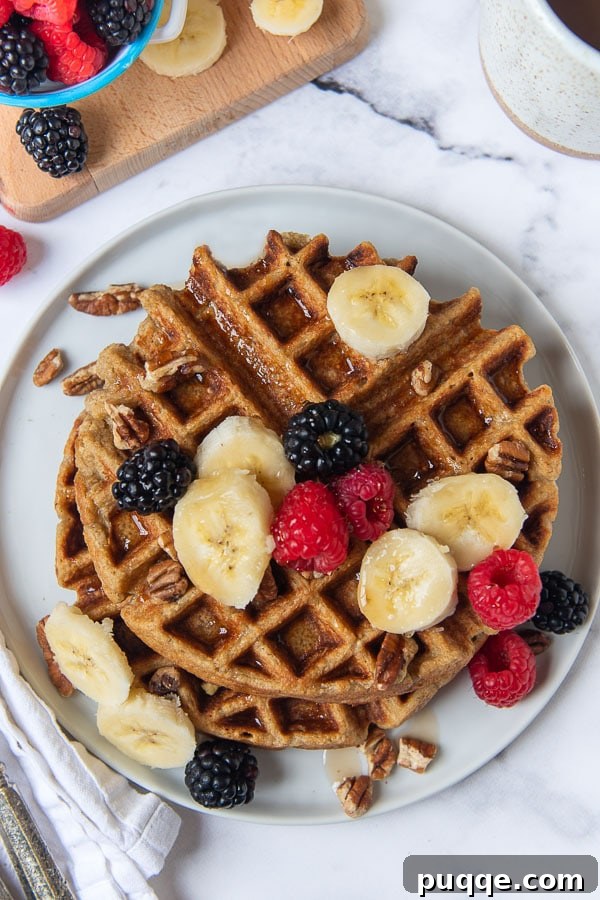
Just like classic pancakes or crepes, these gluten-free oatmeal waffles are a blank canvas for an array of delectable toppings. Get creative and make your waffle experience truly memorable!
- Classic Toppings: A generous drizzle of pure maple syrup or a gluten-free syrup is always a winner. You might even consider making a quick and easy homemade blueberry syrup for an extra special touch.
- Fresh Fruits: Piled high with sliced fresh bananas, juicy berries (strawberries, blueberries, raspberries), or a mix of seasonal fruits.
- Nuts & Seeds: Add a delightful crunch with chopped pecans, walnuts, slivered almonds, or a sprinkle of toasted coconut flakes. For added protein, a spoonful of your favorite gluten-free granola is fantastic.
- Creamy Delights: A dollop of whipped cream (dairy or non-dairy), Greek yogurt, or a scoop of vanilla ice cream turns these into a decadent dessert.
- Sweet Spreads: Slather with peanut butter, almond butter, hazelnut spread (like Nutella), or even a fruit compote.
- Grab-and-Go: For a quick and nutritious breakfast on the run, spread a waffle with peanut butter, top with banana slices, and perhaps a sprinkle of nuts or dried fruits. Fold it up and enjoy!
No matter how you choose to top them, these fluffy gluten-free banana waffles are guaranteed to bring a smile to your face and a delicious start to your day.
Click here to see thestep-by-step web story instructions for this recipe!
SAVE THIS recipe for Gluten Free banana WafflesTO YOUR PINTEREST BOARD!
Let’s be friends on Pinterest! I’m always sharing great recipes!

Fluffy Gluten Free Banana Waffles with Oatmeal
 Melissa Erdelac
Pin
Ingredients
- 4 cups old fashioned or quick cooking oats (use certified gluten free for GF)
- 2 cups milk (or non-dairy milk)
- 2 large ripe bananas
- 2 large eggs
- 4 tablespoons coconut oil or vegetable oil
- 4 tablespoons honey (or pure maple syrup)
- 3 teaspoons baking powder
- 2 teaspoons vanilla extract
- 1 teaspoon ground cinnamon
- ½ teaspoon salt
Equipment
-
Vitamix or other high-speed Blender
-
Food Processor (optional alternative)
-
Immersion Blender (optional alternative)
-
Waffle Iron
Instructions
-
Place all ingredients (oats, milk, bananas, eggs, coconut oil, honey, baking powder, vanilla extract, cinnamon, and salt) in a blender, food processor, or large bowl if using an immersion blender. Blend until the oats are finely ground and there are no chunks of bananas, about 1 minute.
-
Cover the batter and let it rest at room temperature for 20-30 minutes. This essential step allows the oats to hydrate and soften, which is key for light and fluffy waffles. Towards the end of the resting time, preheat your waffle iron.
-
Lightly spray the hot waffle iron with non-stick cooking spray. Pour enough batter into the waffle iron to almost fill the tray (do not overfill). Cook until golden brown and crispy, then carefully transfer the cooked waffle to a cooling rack or a 200°F (95°C) oven to keep warm. Serve warm with maple syrup or homemade blueberry syrup, and your favorite toppings.
Notes
Making Waffles Extra Fluffy
For an exceptionally fluffy result, separate the egg whites from the yolks. Blend the yolks with all other ingredients, then beat the egg whites separately until stiff peaks form. Gently fold the beaten egg whites into the blended batter before cooking. This adds more air, creating a lighter texture.
How to Store and Freeze
To keep waffles warm while cooking, place finished waffles on a baking sheet in a 200ºF oven. Store cooled leftovers in the refrigerator for up to one week in an airtight container. For longer storage, freeze waffles for up to 3 months.
Rewarm refrigerated waffles on a baking sheet in a 350ºF oven for 5-10 minutes. Frozen waffles can be reheated in a toaster, toaster oven, or conventional oven (350ºF for 10-15 minutes) until crisp and heated through.
Egg-Free, Dairy-Free, or Vegan Modifications
To make these gluten-free waffles dairy-free, simply use any non-dairy milk alternative. To make them fully vegan and egg-free, omit the eggs from the recipe. The waffles will still be delicious but may have a slightly more delicate texture.
This post contains affiliate links. My opinions are always my own. If you purchase a product through an affiliate link, I make a small commission – at no cost to you. Read full disclosure policy here.