
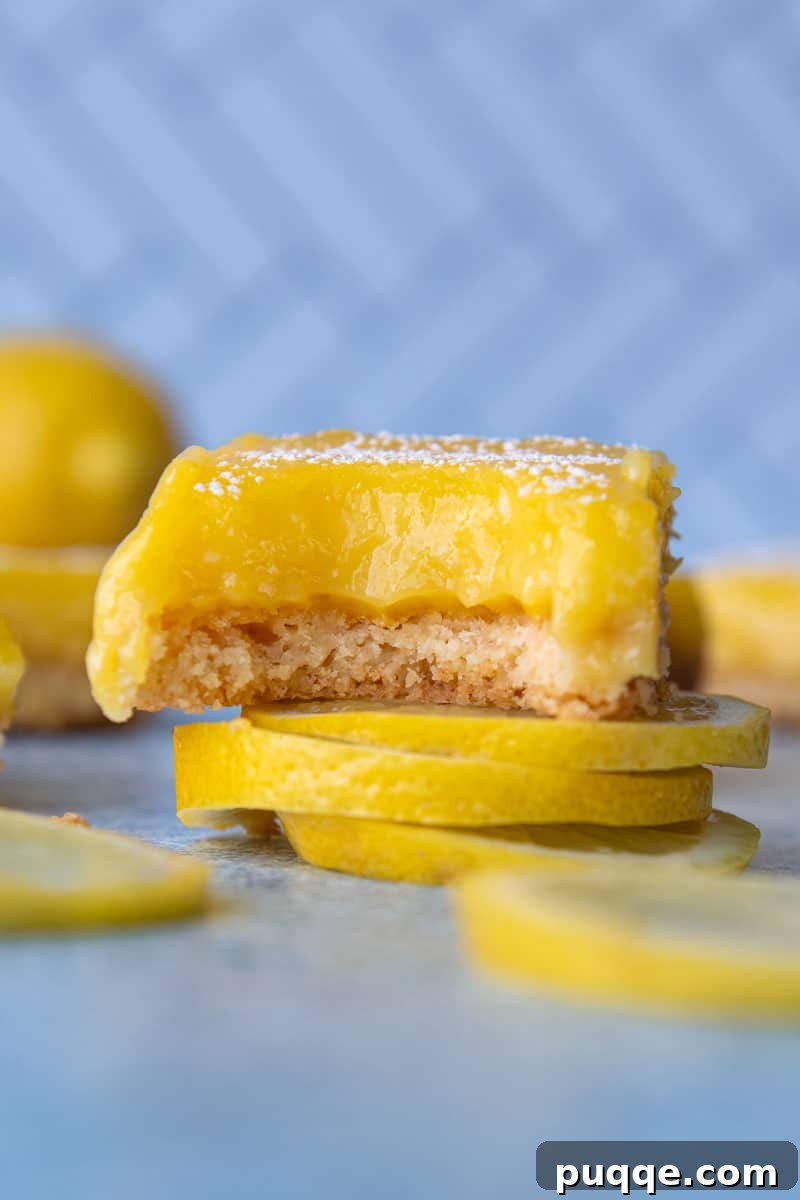
Craving the classic taste of sunshine in a dessert, but need it to be gluten-free? Look no further! This comprehensive guide reveals the secrets to crafting the absolute best gluten-free lemon bars at home. Forget dry, crumbly crusts and runny fillings; this no-fail recipe ensures tender, flaky shortbread perfectly paired with a vibrant, tangy lemon custard. We’ll walk you through every step, offering expert gluten-free baking tips to achieve that ideal balance of sweet and tart, all in a delightful square that’s sure to impress.
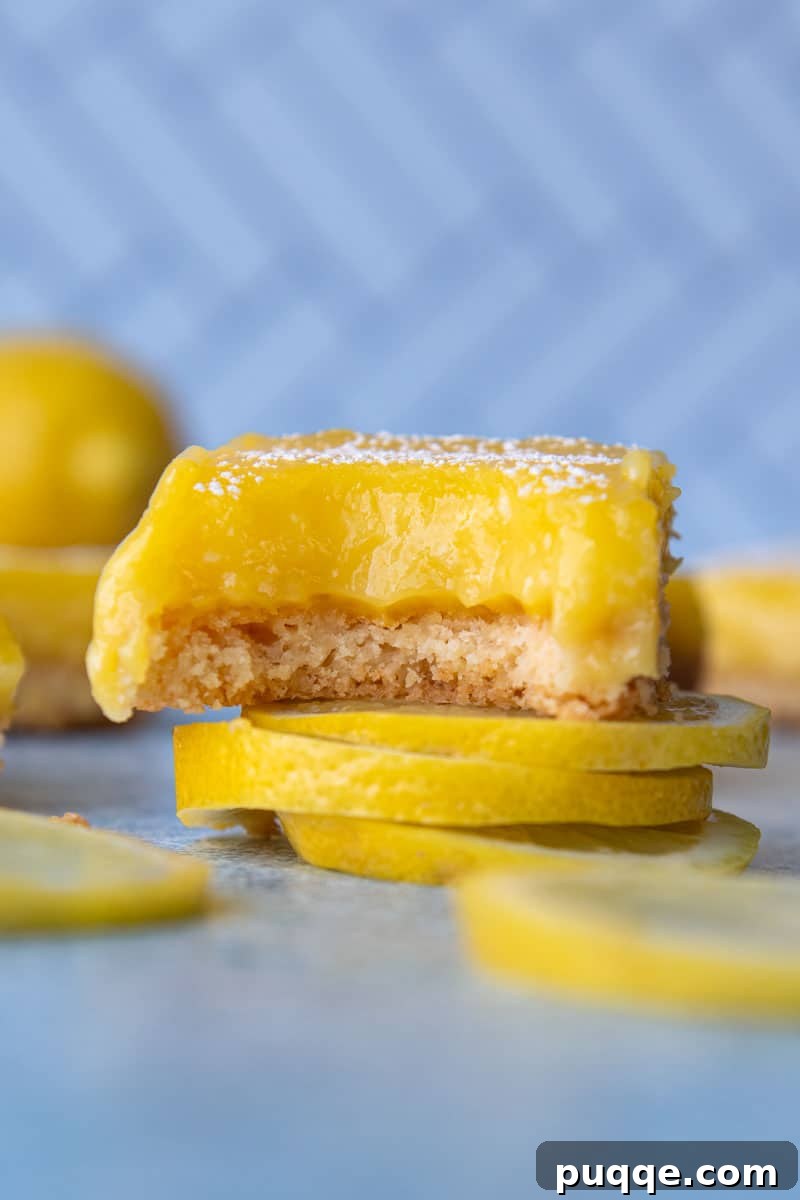
Mastering Gluten-Free Lemon Bars: A Recipe for Success
Rejoice, lemon bar enthusiasts! You can once again savor the irresistible flavor of classic lemon squares, and dare we say, even better than the traditional ones you remember. This meticulously developed gluten-free lemon bars recipe employs a unique, foolproof technique that guarantees a perfectly set lemon topping – slightly jiggly and delightfully gooey, yet firm enough to slice cleanly into individual squares for serving. Achieving this delicate balance in gluten-free baking can be a challenge, but with our method, success is assured.
Through extensive testing, it became clear that simply baking the lemon topping along with the crust from the start wouldn’t yield the optimal results for a gluten-free dessert. Gluten-free flours often require a slightly longer baking time to fully absorb fats and moisture, and an extended bake for the delicate lemon custard would risk overcooking it, resulting in a rubbery texture. To counteract this common gluten-free baking hurdle, we’ve innovated the process.
Our solution involves a two-stage baking approach. The creamy lemon custard is first brought together and gently thickened on the stovetop, initiating the cooking process and ensuring a robust filling. Simultaneously, the gluten-free shortbread crust undergoes a crucial partial bake before the lemon filling is spread over it. This careful timing allows both layers to achieve their desired textures: a crisp, buttery, and flaky crust that perfectly complements the soft, gooey, and utterly delicious lemon custard. The result is a homemade lemon square experience that perfectly marries contrasting textures for pure bliss.
Developing the exquisite flavor of any lemon dessert, whether it’s a homemade gluten-free lemon bundt cake or a fresh lemon blueberry sheet cake, hinges on striking the perfect balance between vibrant citrus tartness and just the right amount of sweetness. For these exceptional gluten-free dessert bars, we harness the power of four fresh lemons, utilizing both their juice and zest to amplify the natural, bright citrus taste, creating a truly unforgettable flavor profile.
To ensure a solid yet beautifully flaky shortbread crust, we incorporate another essential baking trick. By gradually blending softened butter into the dry ingredients, whether using a food processor or a stand mixer, we facilitate a thorough and even incorporation of fat with the gluten-free flour. This technique is paramount for preventing a dry or crumbly texture, instead yielding a crisp, tender, and perfectly buttery foundation that stands up to the rich lemon topping. Continue reading to discover how to make this easy gluten-free lemon bar recipe, step-by-step. We’ve included detailed ingredient notes, substitution ideas, a dairy-free modification, and even instructions for making gluten-free lemon squares with an alternative almond flour crust.
Essential Ingredients for Your Perfect Gluten-Free Lemon Bars
The magic of these gluten-free lemon bars lies in the quality and balance of their ingredients. For the intensely creamy lemon filling, plan to use approximately four fresh lemons for their juice and zest. While this recipe hasn’t been tested with sugar substitutes, rest assured that a high-quality dairy-free butter alternative, such as Earth Balance, should work beautifully for a dairy-free version of the crust and filling. Let’s delve into the specifics of each key component:
- Gluten-Free Flour Blend: The foundation of our tender shortbread crust. I consistently use and highly recommend Cup4Cup Gluten Free Flour for its superior performance. The inclusion of cornstarch in this blend is particularly beneficial as it helps eliminate any potential grittiness often associated with gluten-free baking, resulting in a wonderfully smooth texture. When crafting a simple crust like this or homemade gluten-free shortbread cookies, a reliable, quality all-purpose GF flour is absolutely crucial due to the minimal number of ingredients in the recipe.
- Unsalted Butter: This ingredient plays a dual role in our lemon bars. In the crust, it contributes to that desirable crisp and flaky texture, imparting a rich, buttery flavor. In the lemon custard, when combined with egg yolks, butter enhances the filling’s luxurious richness and smooth consistency. Using unsalted butter allows you to control the exact amount of salt in the recipe.
- Eggs: You’ll need a combination of three whole large eggs plus three additional egg yolks for this recipe. This specific ratio is key for achieving a thick, substantial layer of lemon filling. The eggs act as a binding agent, crucial for setting the custard to the perfect consistency, preventing it from being too runny or too firm.
- Lemons: For the most authentic and vibrant lemon flavor, always use freshly squeezed lemon juice. Concentrated lemon juice is not recommended as it can introduce an undesirable bitterness and lacks the bright, fresh notes of real lemons. Similar to our delightful fresh gluten-free lemon poppy seed muffins, both the juice and the finely grated zest are essential. The zest contains aromatic oils that significantly boost the overall lemon flavor without adding excess liquid.
- Cream of Tartar: This often-overlooked ingredient is a true secret weapon in our lemon squares, serving two vital purposes. Firstly, it enhances and intensifies the natural tanginess of the lemons, elevating the citrus profile. Secondly, it acts as a stabilizer for the eggs in the custard, contributing to a more robust and perfectly structured filling that sets beautifully.
- Granulated Sugar & Salt: These pantry staples are crucial for balancing the intense tartness of the lemons and enhancing all the other flavors, ensuring a harmonious sweet and tangy experience.
- Powdered Sugar (for dusting): An optional but highly recommended finishing touch that adds a delicate sweetness and a beautiful visual appeal to the finished lemon bars.
How to Bake the Best Gluten-Free Lemon Bars: Step-by-Step
Creating these easy gluten-free lemon bars is a truly rewarding experience. We begin by preparing the crust, allowing it to cool slightly while the luscious lemon filling is made. The unique technique of thickening the lemon custard on the stovetop before its final bake in the oven ensures that your bars will set perfectly every single time, eliminating guesswork and guaranteeing a flawless dessert.
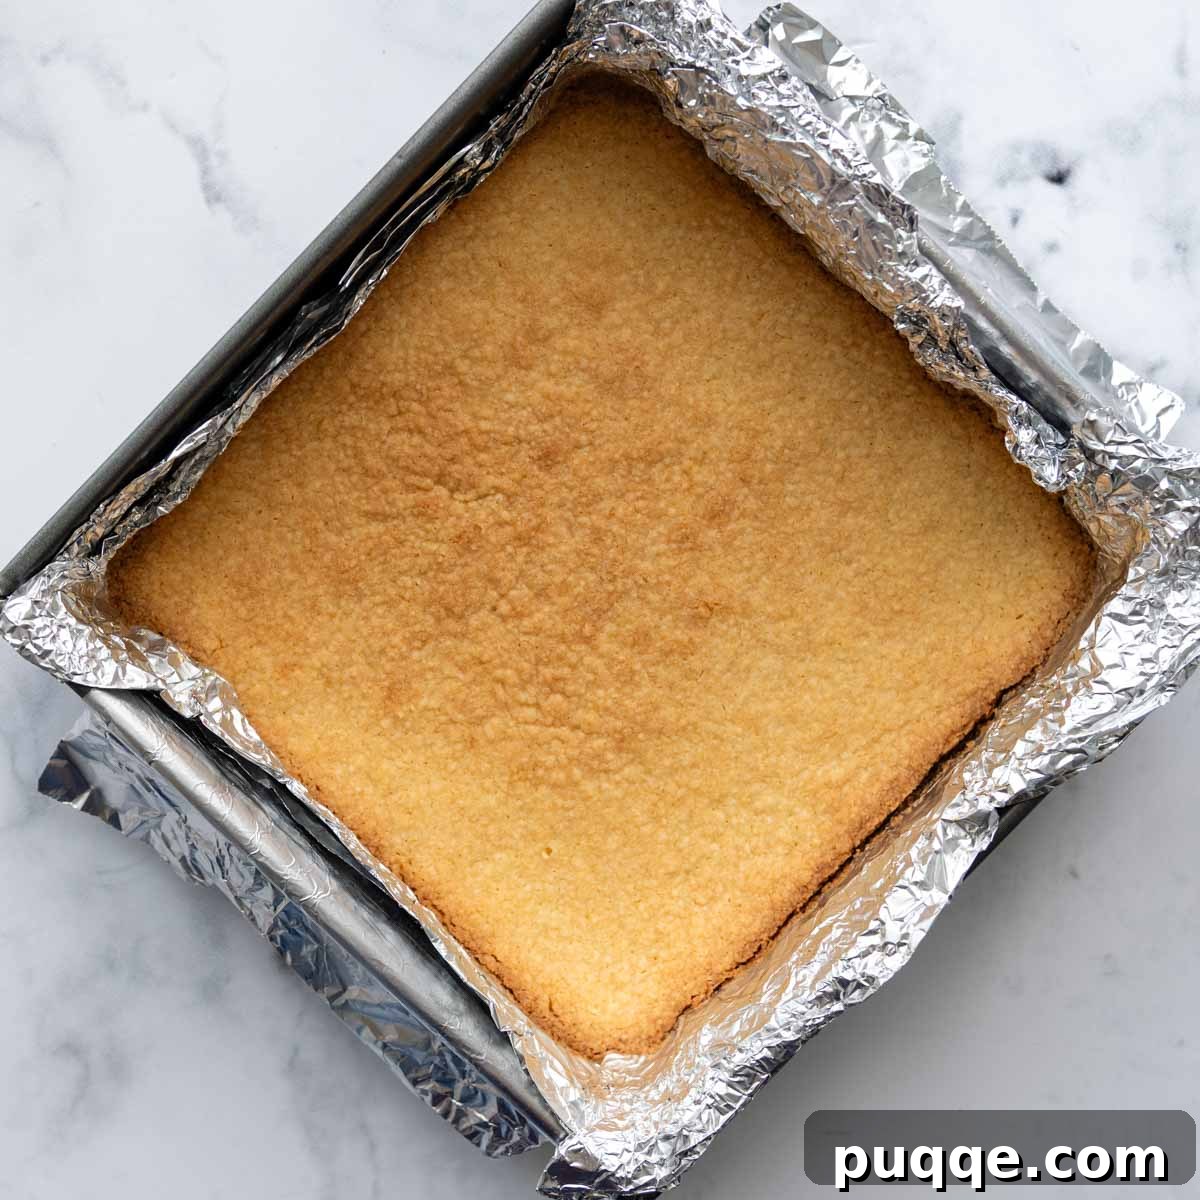
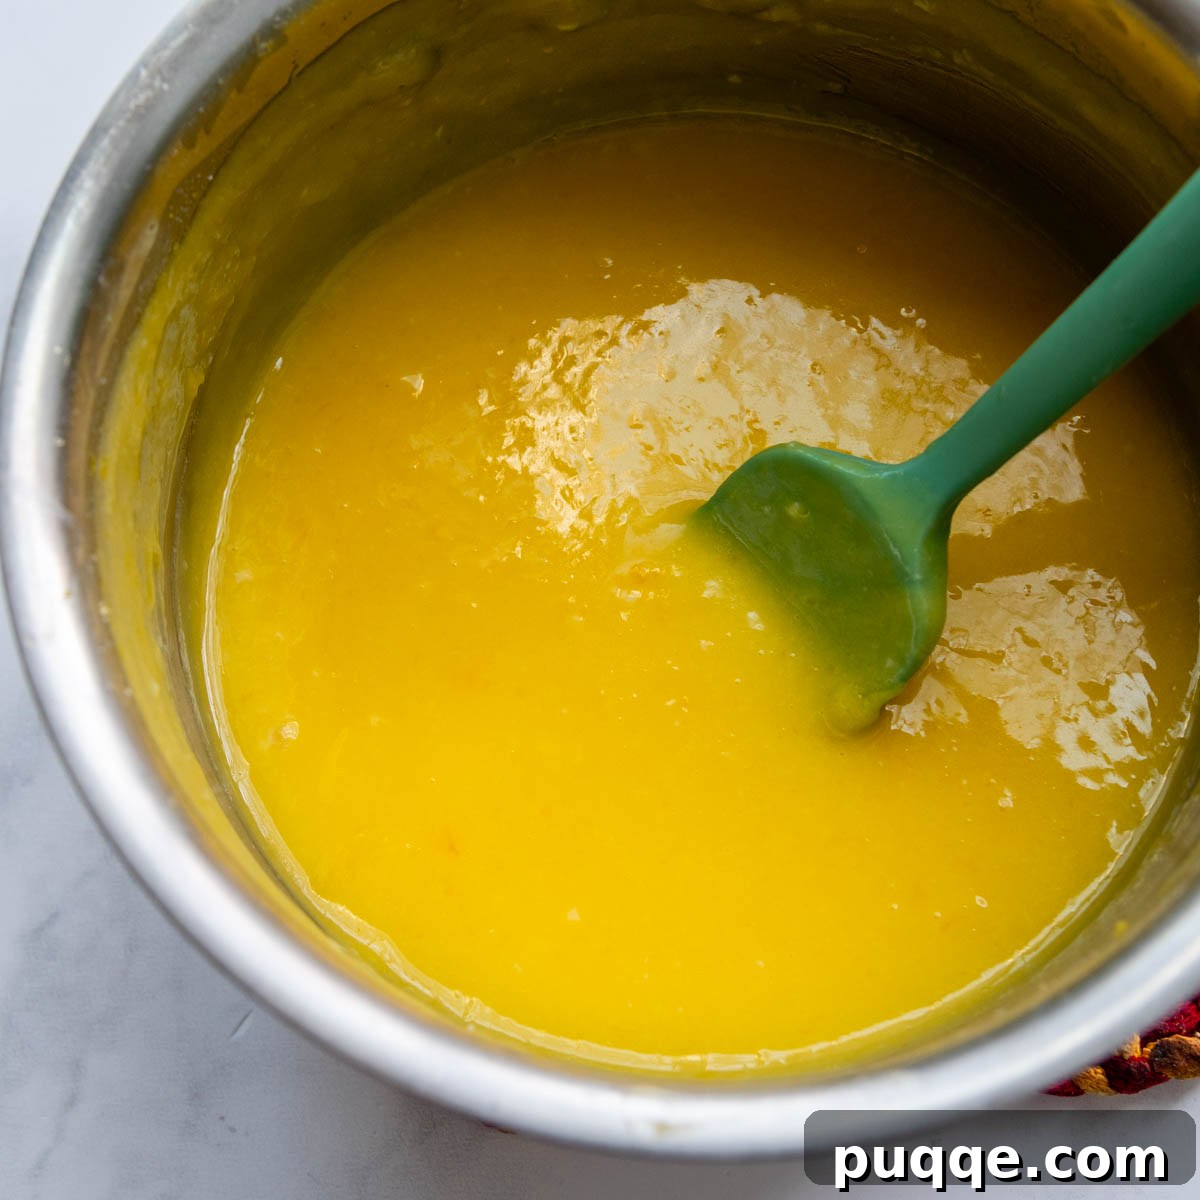
(Note: This section provides a step-by-step tutorial with pictures to guide you through the process. For precise ingredient amounts and detailed instructions, please refer to the complete recipe card located at the bottom of this post.)
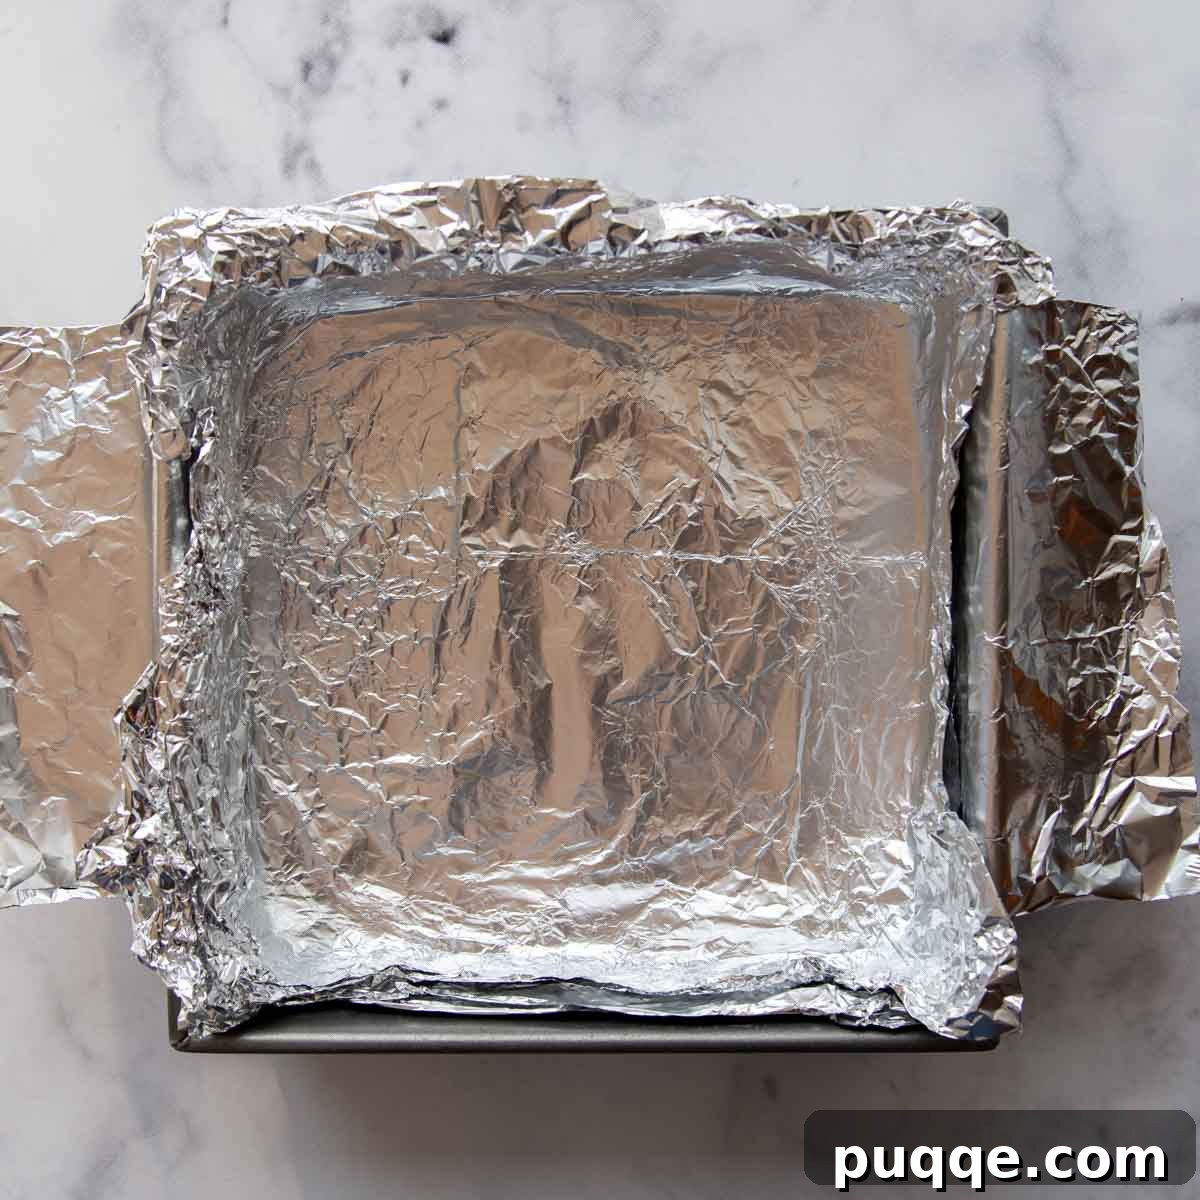
- Prepare Your Pan and Oven: Preheat your oven to 350ºF (175ºC). Line an 8×8-inch baking pan with a large piece of aluminum foil, pressing it firmly into the bottom and up the sides. Ensure there’s enough overhang on two opposite sides to create a “sling,” which will allow you to easily lift the bars out after baking and cooling. Set the prepared pan aside.
- Assemble the Crust Ingredients: For the gluten-free shortbread crust, you’ll use either a stand mixer fitted with a paddle attachment or a food processor. This equipment is key to fully incorporating the butter, preventing the crust from becoming dry and crumbly. In the large bowl of your mixer or food processor, combine the gluten-free flour blend, granulated sugar, and salt. Blend these dry ingredients on low speed until just combined.
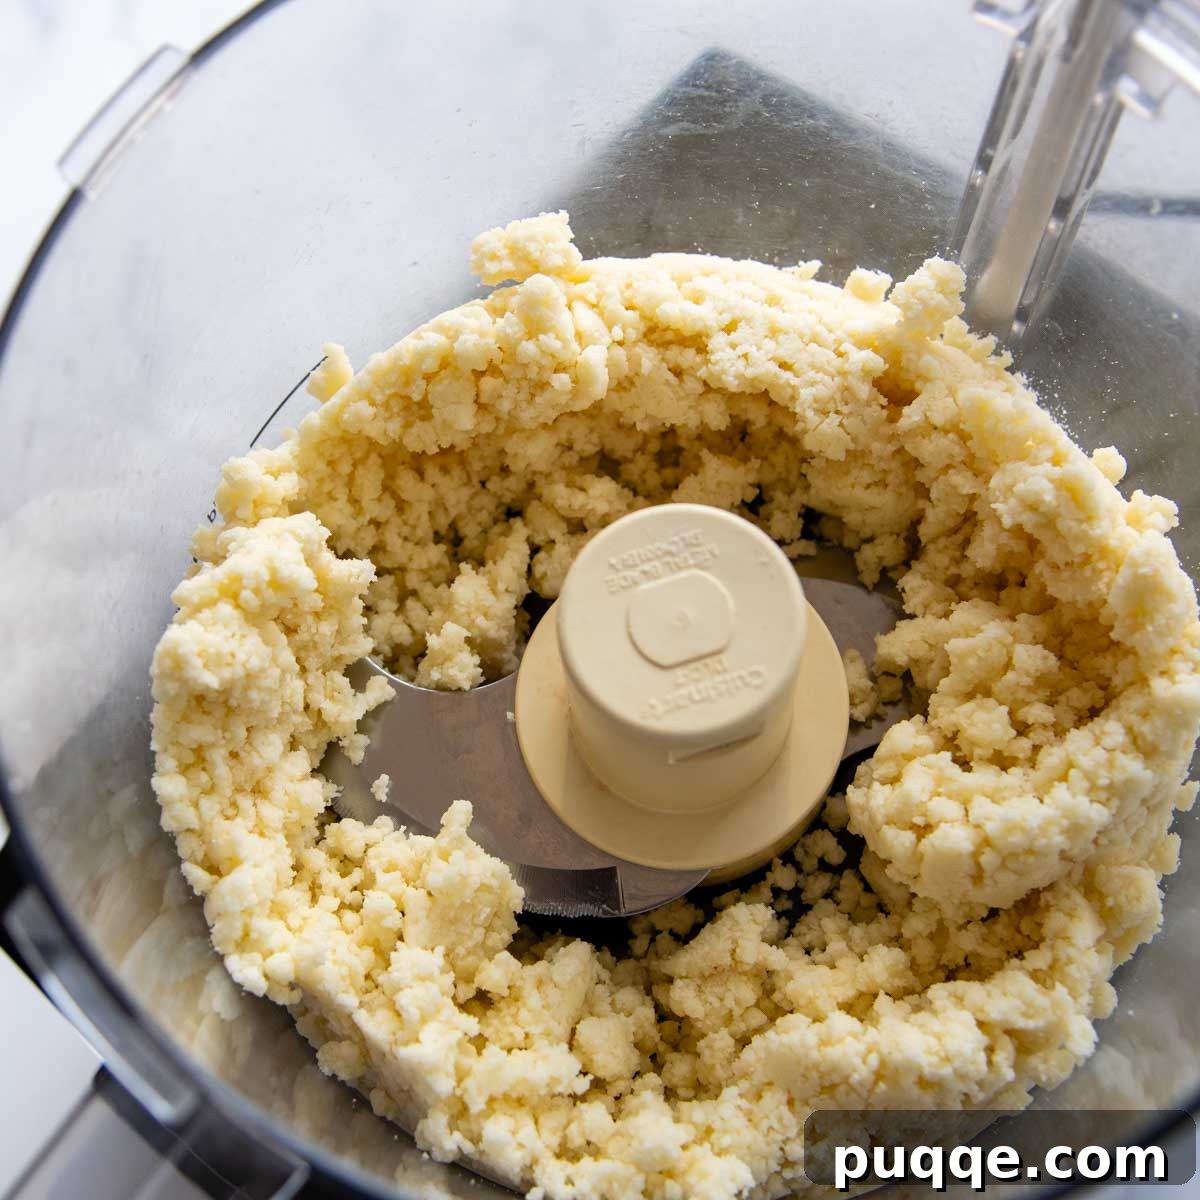
- Incorporate the Butter: With the mixer or food processor running on low speed, gradually add the softened unsalted butter, one tablespoon at a time. It’s crucial to allow each piece of butter to blend completely before adding the next. Continue blending until the dough comes together and pulls away from the sides of the bowl, forming a cohesive mixture without any dry crumbs.
- Press and Bake the Crust: Transfer the shortbread dough into your prepared 8×8-inch baking pan. Using your fingertips or the flat bottom of a glass, press the dough firmly and evenly into a single layer across the bottom of the pan. Bake in the preheated 350ºF (175ºC) oven for 20-25 minutes, or until the edges are lightly golden brown. Remove the crust from the oven, but leave the oven on as it will be needed for the final bake. Allow the crust to cool slightly while you prepare the lemon filling.
- Prepare the Lemon Filling: In a medium-sized saucepan, whisk together the dry ingredients for the filling: granulated sugar, gluten-free flour, cream of tartar, and salt. Once combined, add the wet ingredients: the three whole large eggs, the three additional egg yolks, fresh lemon zest, and freshly squeezed lemon juice. Whisk vigorously until all ingredients are thoroughly combined and smooth.
- Thicken the Custard on the Stove: Place the saucepan over medium-low heat. Cook the lemon mixture, whisking constantly, for approximately 5-7 minutes. Continue whisking until the mixture visibly thickens and reaches a temperature of 160ºF (71ºC). Using an instant-read thermometer is highly recommended for accuracy. The constant whisking is essential to prevent scorching and ensure a silky-smooth custard.
- Finish the Filling and Bake: Remove the saucepan from the heat and immediately stir in the cold unsalted butter until it is completely melted and incorporated, adding a final touch of richness. Carefully pour the hot lemon filling evenly over the partially baked crust in the pan. Return the pan to the preheated oven and bake for another 10-12 minutes, or until the edges of the filling are slightly raised and the center barely jiggles when the pan is gently shaken.
- Cool and Chill: Once baked, remove the pan from the oven and allow the lemon bars to cool completely to room temperature on a wire rack. This is a crucial step for proper setting. Once at room temperature, transfer the pan to the refrigerator and chill for at least 2 hours. Chilling allows the lemon custard to fully set, making it easy to slice. After chilling, use the foil sling to lift the entire slab of lemon bars out of the pan. Dust generously with powdered sugar just before serving. Slice into squares using a sharp knife. Store any leftover lemon bars in an airtight container in the refrigerator.
Variations and Dietary Adaptations: Almond Flour & Dairy-Free Options
While our classic gluten-free shortbread crust is a dream, there are excellent alternative options for those seeking a grain-free dessert or wanting to explore different flavor profiles. You can easily replace the gluten-free shortbread crust with either an almond flour pie crust or a savory pecan crust, adapting existing recipes to fit these delightful lemon bars.
For optimal results when using an almond flour or nut-based crust, we recommend using a 9×9-inch pan instead of an 8×8-inch pan. This slight increase in size provides a better proportion of crust to filling, especially since nut-based crusts can be a bit more delicate. Additionally, when using an alternative crust, line the pan with a large piece of parchment paper instead of foil. Parchment paper is often easier to work with for lifting out more fragile crusts after the filling has cooled and set.
It’s important to bake your chosen alternative crust completely according to its specific recipe instructions before pouring on the lemon curd filling. For the lemon filling itself, if you’re replacing the small amount of gluten-free flour used for thickening, you can substitute it with an equal amount of cornstarch or arrowroot starch. These starches are excellent grain-free thickeners that will provide the same desired consistency. While an almond flour crust or other nut crust may not be as traditionally solid as a shortbread crust, it will offer a distinct, rich flavor and a wonderfully tasty way to enjoy a grain-free dessert with all the classic lemon bar appeal!
For those needing a **dairy-free** version, simply substitute the unsalted butter in both the crust and the filling with a high-quality dairy-free butter alternative, such as Earth Balance sticks. Ensure your chosen brand measures cup-for-cup like traditional butter for best results. This simple swap allows everyone to enjoy these delightful lemon bars without compromising on flavor or texture.
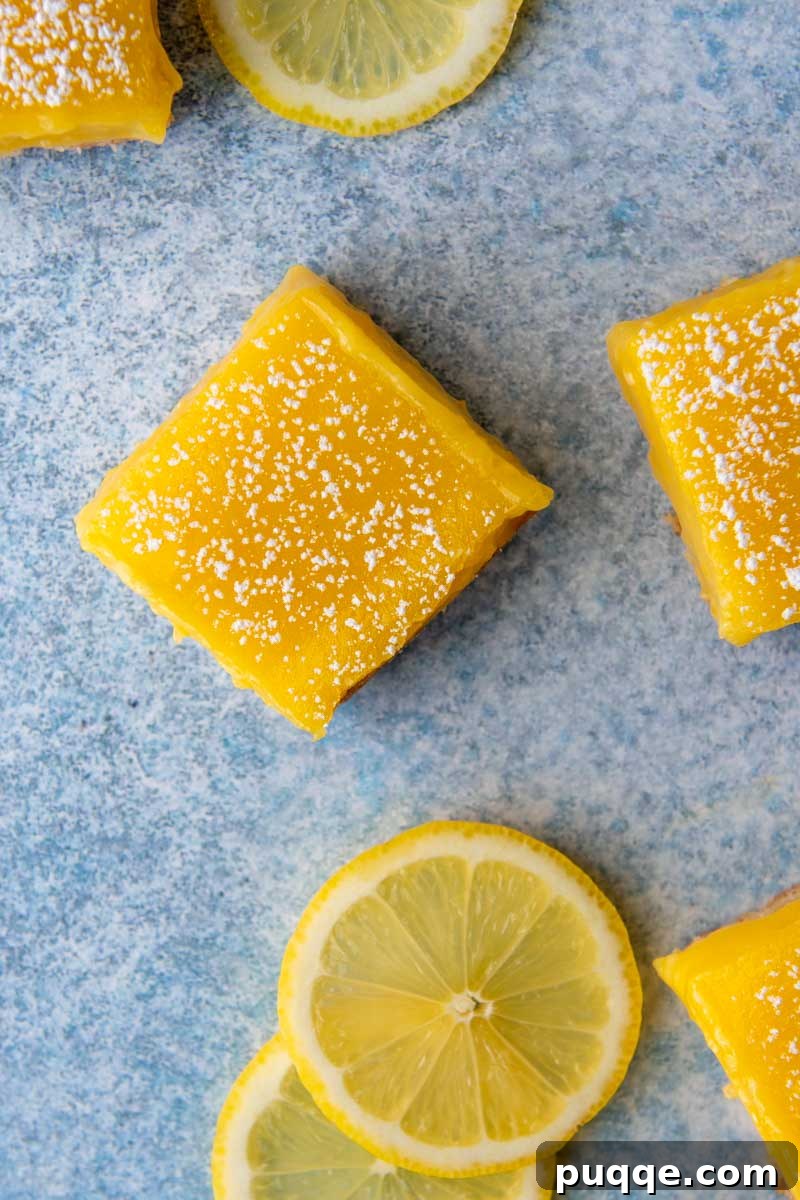
Substituting Limes for Lemons: Zesty Lime Bars
If you’re in the mood for a different citrus twist, these bars are incredibly versatile! To create refreshing gluten-free lime bars, simply replace the fresh lemon juice and lemon zest with equal amounts of freshly squeezed lime juice and grated lime zest. Just like with lemons, using fresh limes is paramount for the brightest, most aromatic flavor profile. The slight difference in tartness and floral notes from limes will give these bars a wonderfully distinct and equally delightful character.
Knowing When Your Lemon Bars Are Perfectly Baked
Thanks to our innovative method of pre-cooking the custard on the stovetop, the final baking time for these lemon bars is significantly shortened, taking much of the guesswork out of achieving perfection. However, it’s still helpful to know the key indicators that your lemon squares are done.
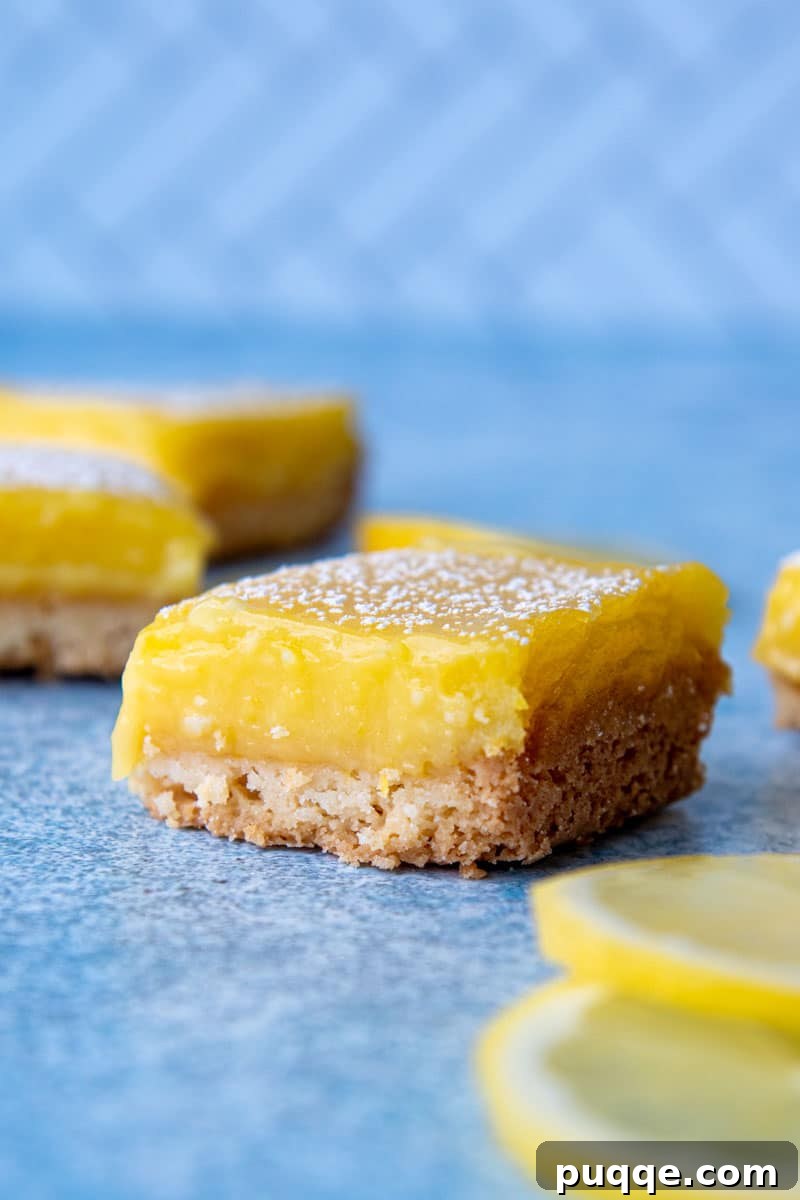
Visually, the edges of the lemon filling should appear slightly raised and set. The very center of the bars should still have a subtle jiggle when the pan is gently nudged, but it should not slosh like liquid. This gentle movement indicates that the custard is cooked through but remains tender and moist. Overbaking can lead to a tough or rubbery texture, so pay close attention during this final stage.
For the absolute best results and a clean slice, it is imperative to cool the bars completely. Allow them to cool at room temperature on a wire rack, then transfer them to the refrigerator to chill for at least 2 hours, or even better, overnight. This chilling period allows the custard to fully firm up and makes for impeccable presentation.
Storing and Serving Your Delicious Lemon Bars
Once your gluten-free lemon bars have completely cooled to room temperature, they require a minimum of 2 hours of chilling in the refrigerator to achieve their optimal set texture. This firming-up period is essential for clean slices and the best eating experience. After serving, any leftover lemon bars should be stored in an airtight container in the refrigerator to maintain their freshness and prevent drying out. Properly stored, they will remain delicious for 3-4 days.
One common characteristic of lemon bars is that powdered sugar, when dusted on top, tends to absorb into the filling over time. For the prettiest presentation, you may wish to dust the bars with an additional sprinkle of powdered sugar just before serving any leftovers. This adds a fresh, appealing touch.
When it comes to slicing the bars, the sticky nature of the lemon filling can sometimes make clean cuts challenging. For professional-looking slices, a simple trick is to run a sharp knife under hot water between each cut. Carefully wipe the knife clean with a damp, clean dish towel after each slice to prevent sticking and ensure perfectly defined squares. Serve chilled or at room temperature for a delightful treat.
Save This Recipe to Your Pinterest Board!
Let’s be friends on Pinterest! I’m always sharing great recipes!
Did you make this recipe? I love hearing from you! Leave a star rating and comment below the recipe card. Your feedback helps other bakers in our community find and enjoy these recipes, and I always respond! -Melissa

Fresh Gluten-Free Lemon Bars with Shortbread

Melissa Erdelac
16
15 mins
40 mins
55 mins
Learn the best gluten-free baking tips for making homemade lemon squares with a tender, flaky crust. This no-fail gluten-free lemon bars recipe uses a simple technique for a perfectly-set lemon custard on a crisp, buttery base, all baked to perfection. The ideal sweet and tangy citrus topping sits on a classic shortbread crust, which can be quickly blended together in a food processor or mixer.
Pin
Rate
Remove Ads
Ingredients
Gluten-Free Shortbread Crust
- 1 ⅓ cup gluten-free all-purpose flour (I use and recommend Cup4Cup)
- ⅓ cup granulated sugar
- ¼ teaspoon salt
- 8 tablespoons unsalted butter, softened and cut into 8 pieces
Lemon Filling
- 1 cup granulated sugar
- 2 tablespoons gluten-free all-purpose flour (I use and recommend Cup4Cup)
- 2 teaspoons cream of tartar
- ¼ teaspoon salt
- 3 large eggs + 3 egg yolks
- 2 teaspoons grated lemon zest
- ⅔ cup fresh lemon juice (about 4 lemons)
- 4 tablespoons unsalted butter, cut into 4 pieces
- powdered sugar, for serving
Equipment
- Citrus Juicer
- Zester
- Food Processor (or Stand Mixer with paddle attachment)
Instructions
- Preheat the oven to 350ºF (175ºC). Line an 8×8-inch pan with a large piece of foil, pressing it firmly to the bottom and sides with enough overhang to easily lift the bars out after baking. Set aside.
- For the crust, use a food processor or stand mixer fitted with a paddle attachment. On low speed, combine the gluten-free flour, sugar, and salt.
- Add the softened butter to the dry ingredients, one tablespoon at a time, blending completely between each addition. The dough should pull away from the sides of the bowl and come together without any dry crumbs.
- Pour the dough into the prepared baking pan, pressing firmly into an even layer. Bake for 20-25 minutes, rotating halfway through, until lightly golden brown. Remove from the oven, leaving the oven on, while the filling is prepared.
- For the filling, use a medium saucepan to whisk together the sugar, flour, cream of tartar, and salt. Add the eggs, egg yolks, lemon zest, and lemon juice. Whisk thoroughly to combine.
- Cook over medium-low heat, stirring constantly, until the mixture thickens and reaches a temperature of 160ºF (71ºC), about 5-7 minutes. (Use an instant-read thermometer to check quickly.)
- Remove from the heat and stir in the cold butter until fully incorporated. Pour the hot filling over the baked crust.
- Return to the oven for 10-12 minutes, or until the edges are raised and the filling barely jiggles when the pan is gently shaken. Cool the bars completely to room temperature, then chill for 2 hours in the pan. Lift the bars out of the pan by the foil handles and cut into squares. Dust the tops with powdered sugar and serve. Refrigerate leftovers in an airtight container.
Notes
How to tell when lemon bars are done baking
The bars should have raised edges and the middle should be set. It will still jiggle a little when the pan is gently shaken, but it shouldn’t slosh around. For best results, cool the bars completely on a wire rack and then chill for at least 2 hours before cutting and serving.
Storing
Store cut lemon bars in the refrigerator in an airtight container. Upon sitting, the powdered sugar will seep into the filling, so you may want to dust them again upon serving.
Crust recipe adapted from The How Can it Be Gluten Free Cookbook and filling adapted from Cook’s Illustrated.
Nutrition Information (Approximate Per Serving)
- Calories: 199kcal
- Carbohydrates: 26g
- Protein: 3g
- Fat: 10g
- Saturated Fat: 6g
- Trans Fat: 1g
- Cholesterol: 74mg
- Sodium: 168mg
- Potassium: 95mg
- Fiber: 1g
- Sugar: 17g
- Vitamin A: 337IU
- Vitamin C: 4mg
- Calcium: 19mg
- Iron: 1mg
Did you make this recipe?
Please leave a star rating and review below. It helps others when searching for recipes and I LOVE feedback!
This post contains affiliate links. My opinions are always my own. If you purchase a product through an affiliate link, I make a small commission – at no cost to you. Read full disclosure policy here.