
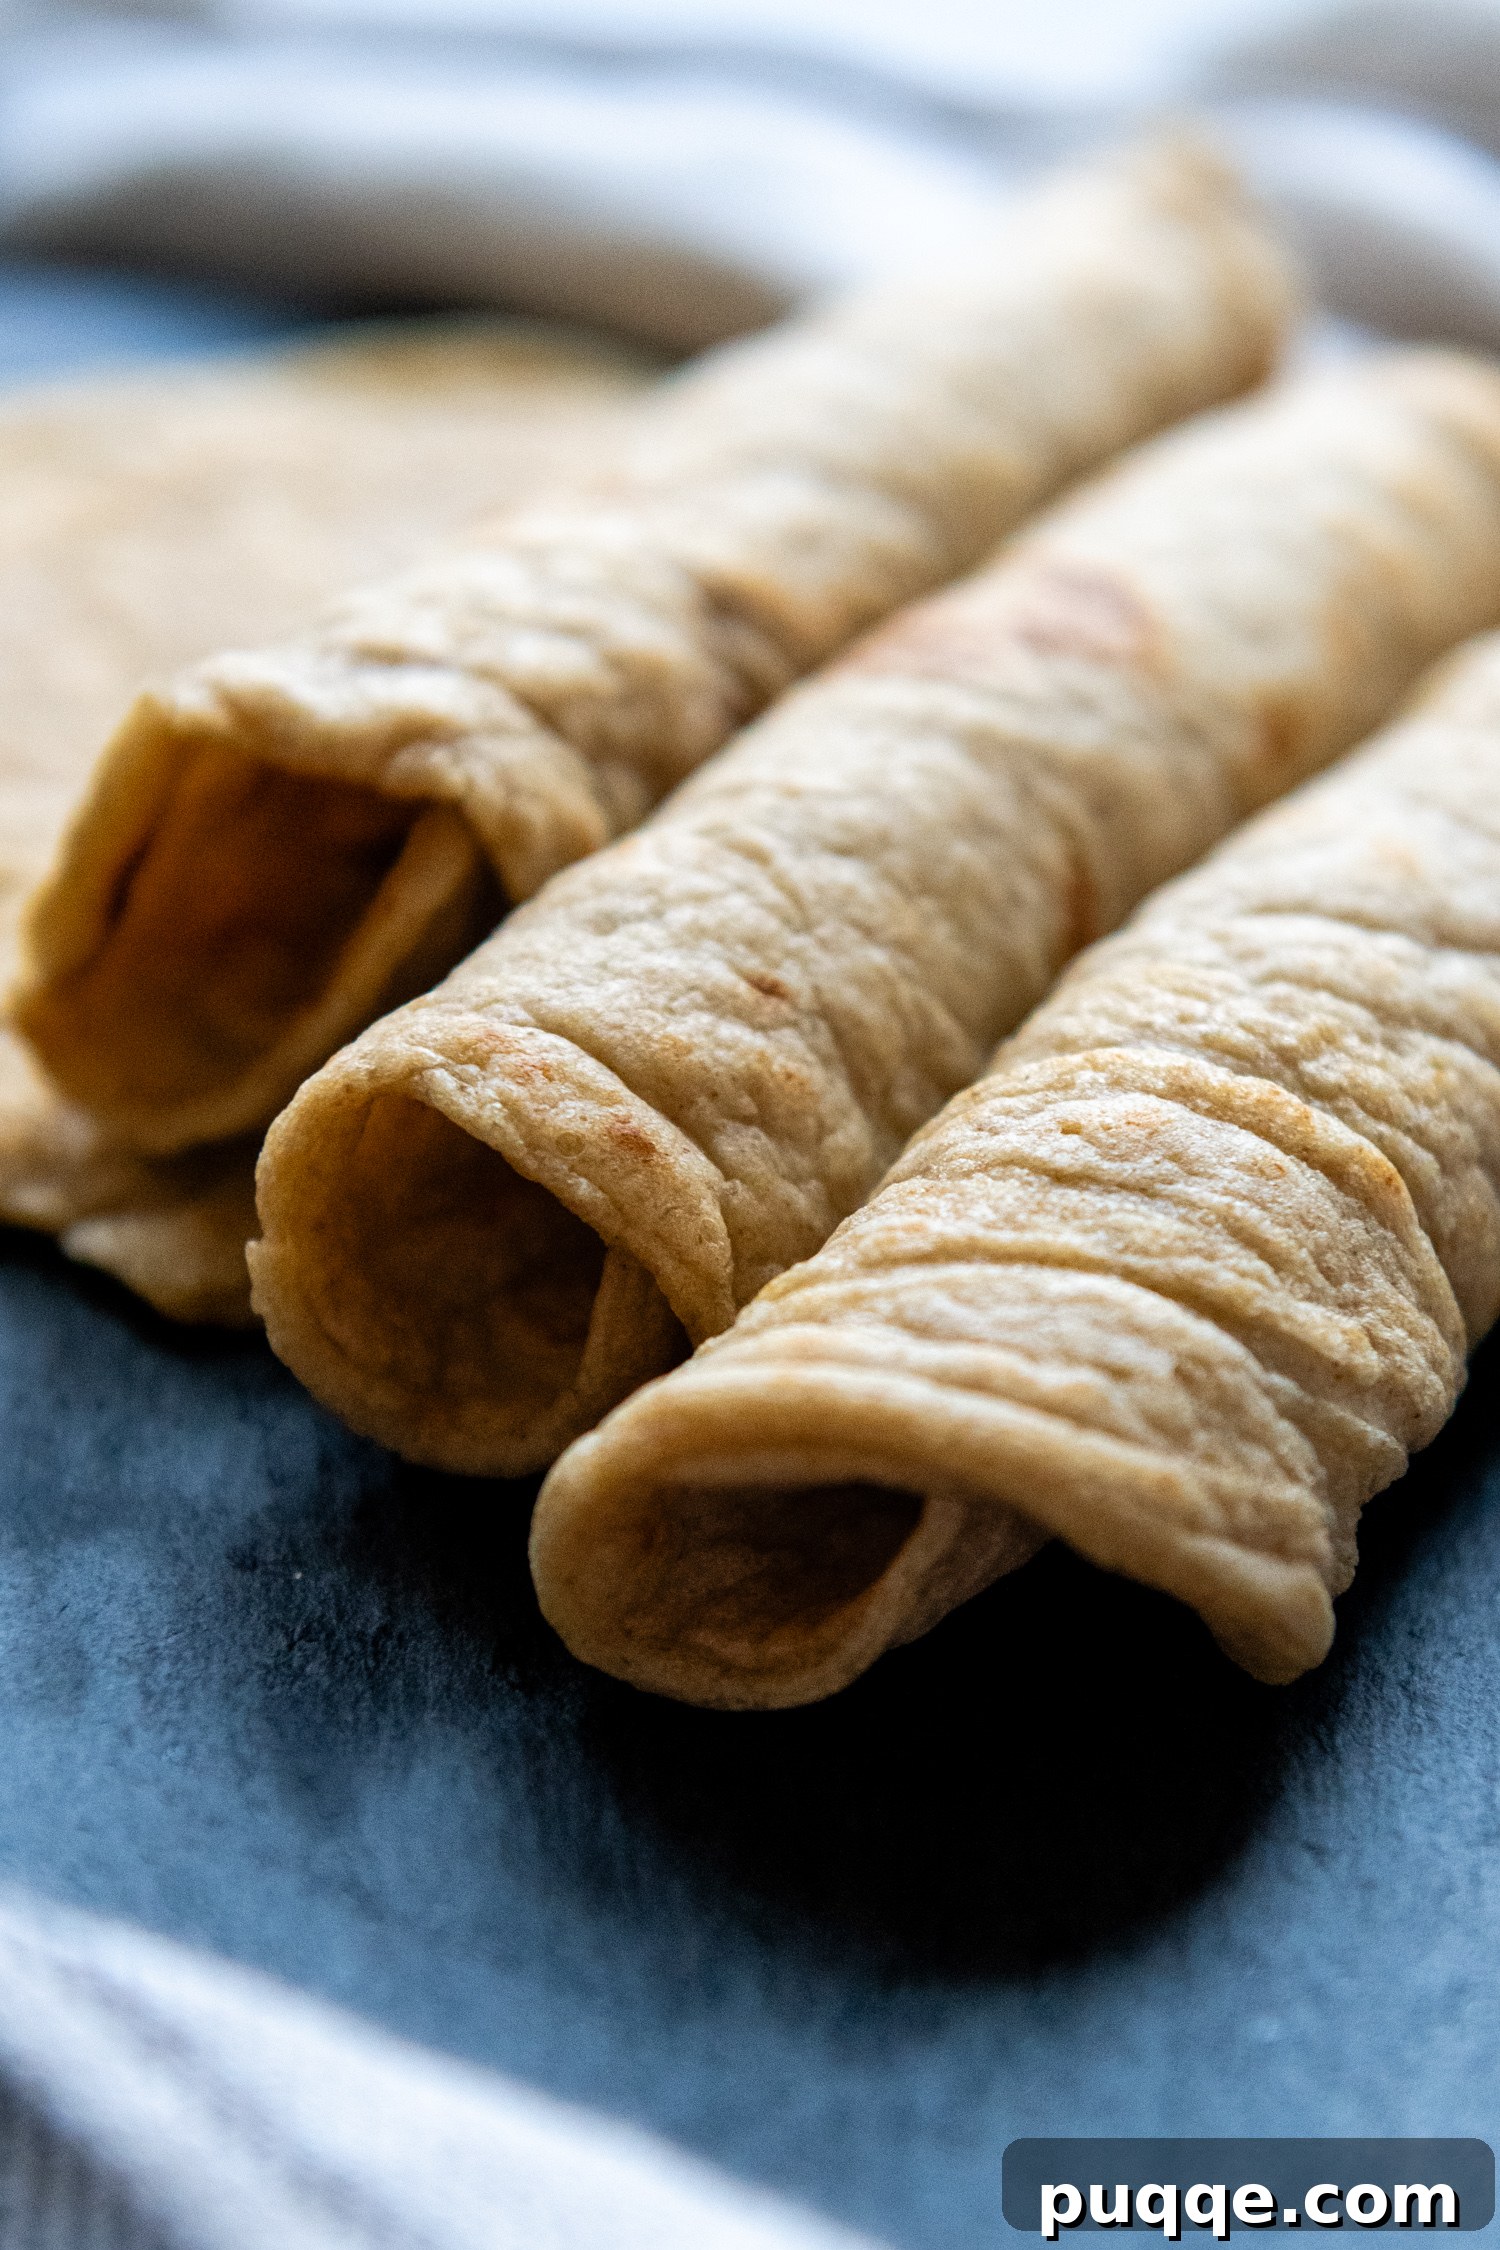
Unlock the secret to incredibly soft, flexible, and utterly delicious gluten-free wraps with this revolutionary oat tortilla recipe. Say goodbye to brittle, store-bought alternatives and embrace the joy of homemade tortillas that bend and fold without a single tear. Crafted with just a handful of pantry staples—oat flour (or rolled oats you can easily mill at home), water, and a touch of olive oil—this recipe promises a seamless culinary experience from start to finish. Whether you’re navigating a gluten-free lifestyle, seeking healthier alternatives, or simply love the wholesome goodness of oats, these tortillas are set to become your new kitchen essential. Get ready to transform your meals with wraps that are not only easy to make but also packed with fiber and natural goodness.
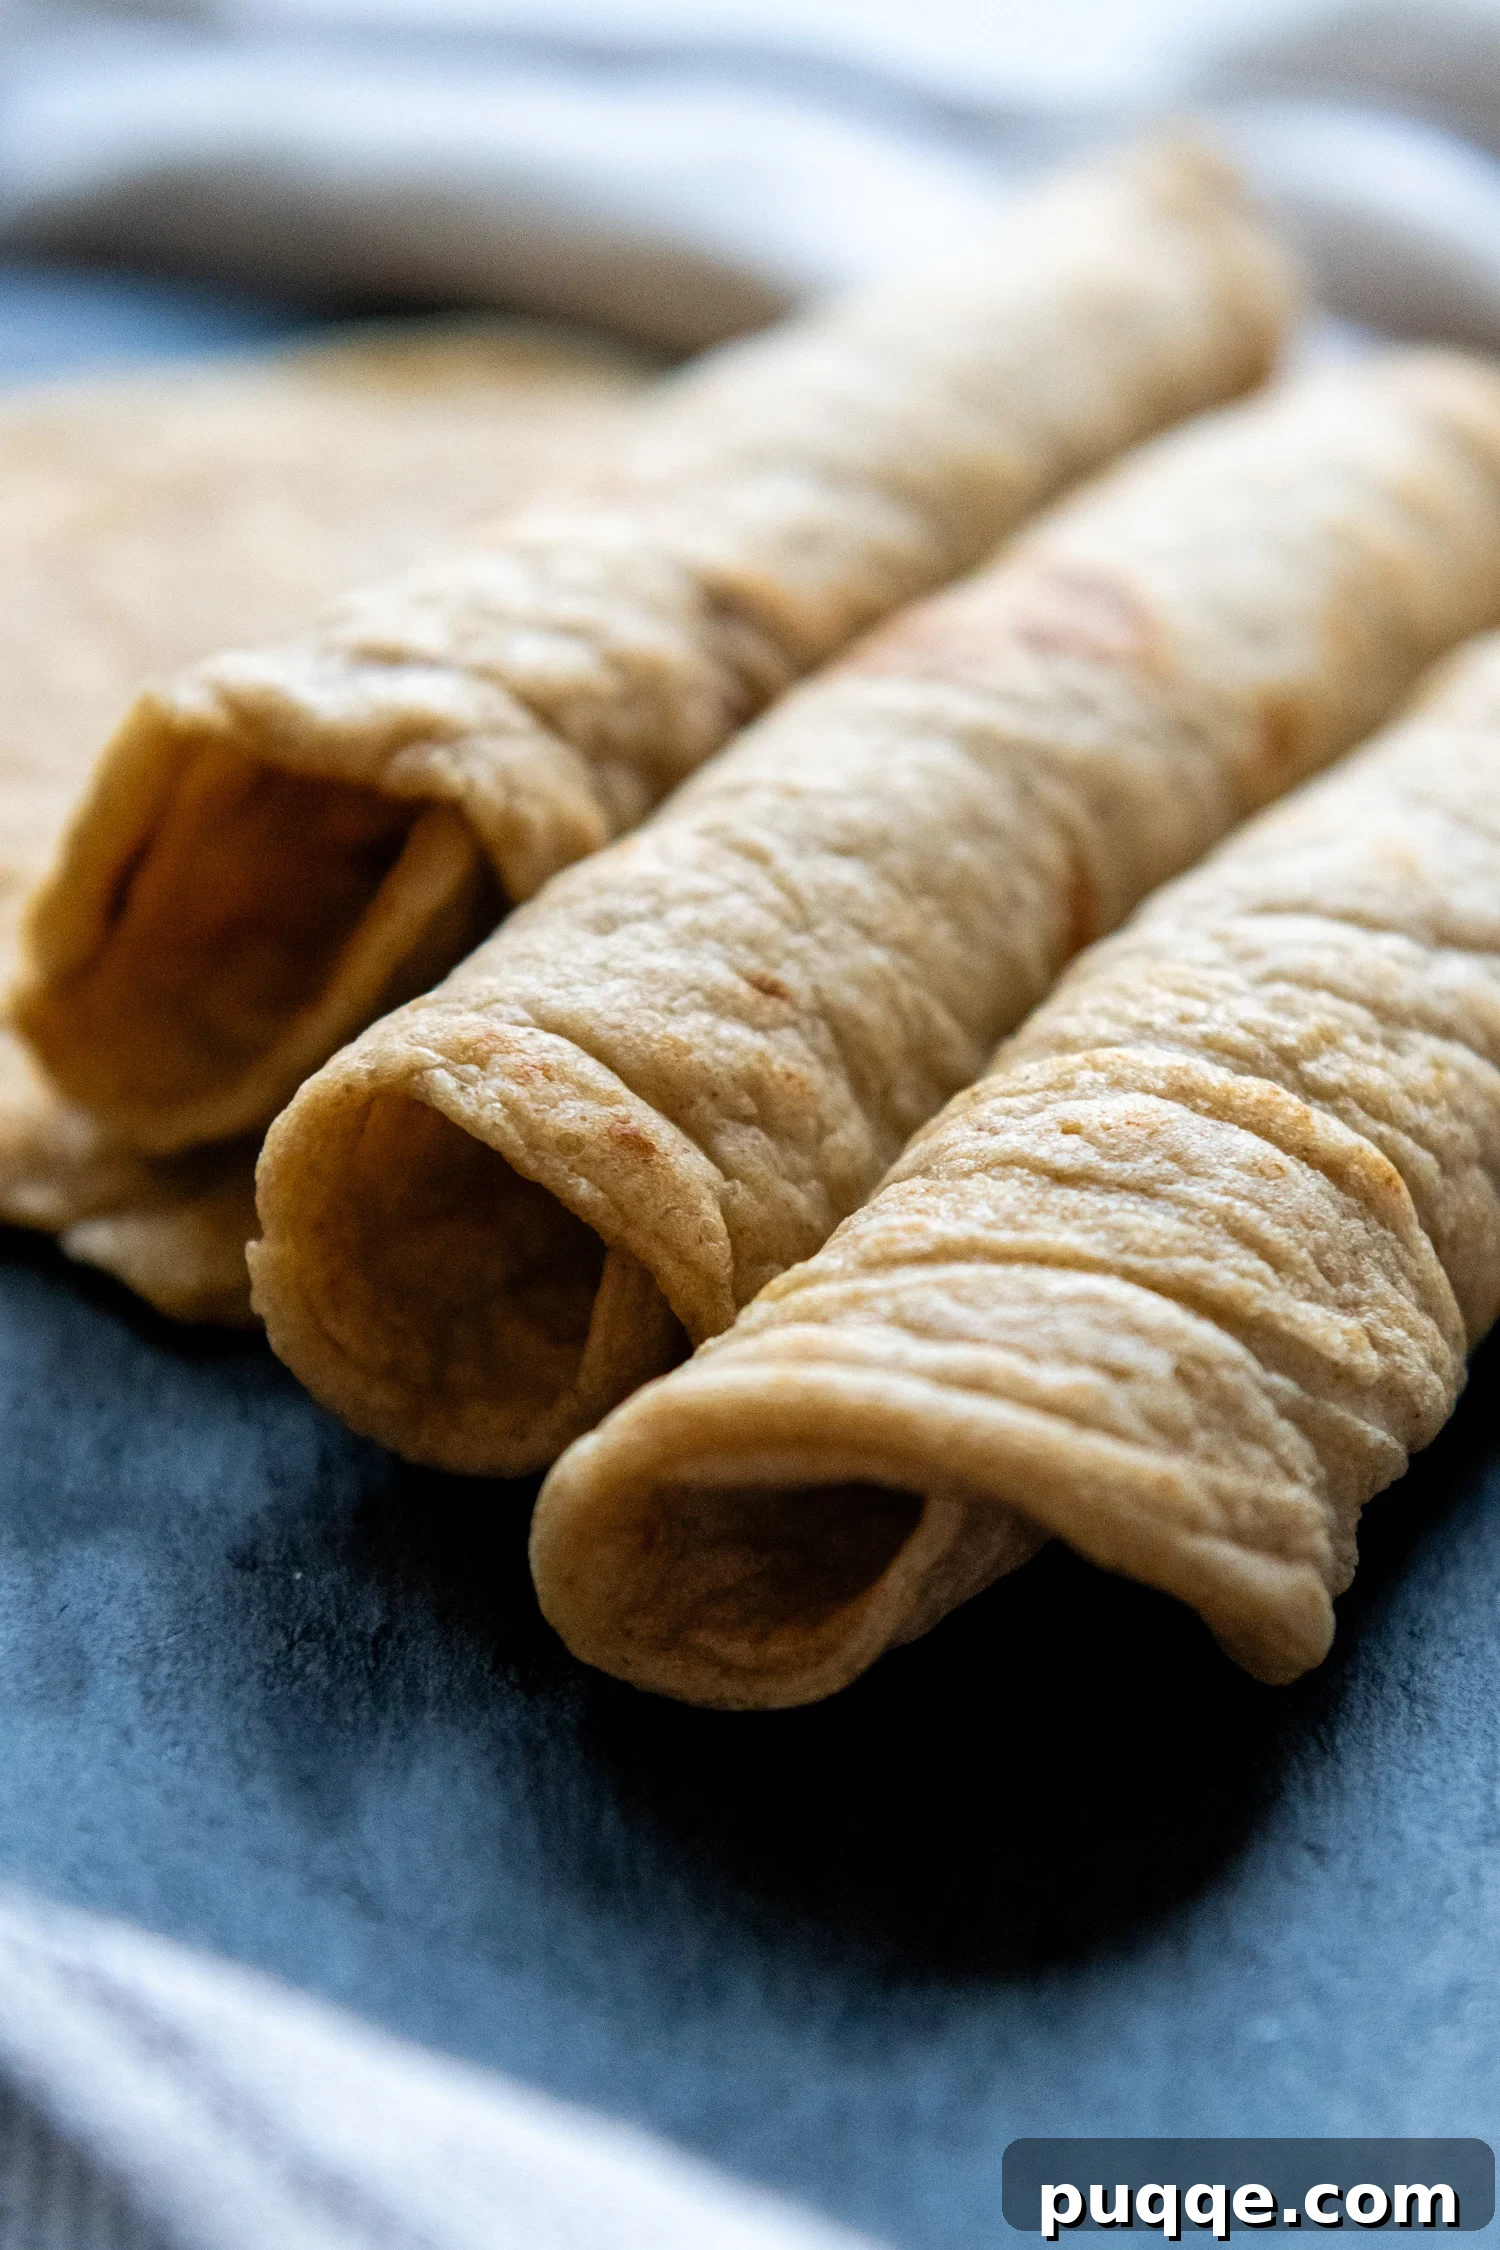
Why Oat Tortillas Are a Game Changer for Gluten-Free Living
For those of us entrenched in the gluten-free community, the quest for the perfect wrap can often feel like an endless journey. Many gluten-free bread and tortilla options fall short, lacking the desired pliability, flavor, or texture. This is where the magic of oat flour steps in, offering an unparalleled solution that is both naturally gluten-free and incredibly versatile. My enthusiasm for using oats in baking and cooking stems from their ability to create delightful, affordable, and easy recipes without demanding a pantry full of specialty ingredients.
These homemade oat flour tortillas are a testament to that versatility. They provide a satisfyingly soft and flexible base for any meal, from vibrant lunch wraps to savory dinner tacos. Unlike many commercial gluten-free products that can be dense, crumbly, or require complex ingredient lists, these oat tortillas celebrate simplicity. They offer a wholesome, clean-eating option that doesn’t compromise on taste or texture, proving that healthy and delicious can indeed go hand-in-hand. Embrace the ease and enjoy the exceptional quality of a wrap made with pure, simple oats.
The Journey to Perfection: Crafting the Ideal Oat Tortilla Recipe
My culinary adventures often begin with an intriguing concept. When I first encountered rudimentary 2-ingredient oat tortilla recipes, my curiosity was piqued. Knowing the incredible binding capabilities of oat flour from successes like oat flour bread, I was hopeful but also cautiously optimistic. Could something so simple truly yield the soft, flexible wraps I craved? Experience told me that achieving true pliability and delicious flavor often required a bit more finesse than just two ingredients.
Indeed, my initial experiments confirmed this. While the basic concept was sound, the texture of a mere two-ingredient tortilla often lacked the desired softness and was prone to tearing. This led to a series of tests, meticulously tweaking ratios and additions. The breakthrough came with the incorporation of a small amount of olive oil. This seemingly minor addition made a significant difference, not only enriching the flavor but, more importantly, enhancing the texture. The olive oil lent the tortillas an incredible pliability, allowing them to be rolled, folded, and filled without cracking, offering a truly superior eating experience.
Beyond the texture, mastering the oat flour to water ratio proved to be another critical hurdle. Oat flour has a notorious reputation for absorbing liquids at an astonishing rate, much faster than traditional flours. Adding too much water initially resulted in disappointingly gummy tortillas once cooked, while too little made the batter impossibly thick and difficult to spread into thin, even circles. Through numerous batches and relentless experimentation (and yes, a great many oat wraps!), I finally pinpointed the perfect balance that delivers consistently soft, flexible, and perfectly cooked oat tortillas every time. This perfected recipe has now firmly secured its place as a cherished favorite in my extensive gluten-free oat flour recipe collection.
Ingredients Spotlight: The Simple Essentials
The beauty of these oat tortillas lies in their simplicity, utilizing core ingredients you likely already have on hand. Each component plays a vital role in achieving the desired taste and texture:
- Oat Flour: The star of our recipe, oat flour provides a naturally gluten-free base that is rich in fiber and offers a mild, slightly nutty flavor. It’s the key to the tortillas’ unique texture and wholesome profile.
- Water: Specifically hot water, this ingredient is crucial for hydrating the oat flour properly and achieving a smooth, pourable batter. The heat helps the oats absorb the liquid more efficiently, preventing a grainy texture.
- Olive Oil: More than just a flavor enhancer, olive oil is essential for adding richness and elasticity to the dough. It contributes to the tortillas’ signature softness and flexibility, making them incredibly pliable and less prone to cracking when folded.
- Salt: A pinch of salt elevates all the other flavors, balancing the natural sweetness of the oats and ensuring a well-rounded taste in your finished tortillas.
Homemade Oat Flour vs. Store-Bought: What You Need to Know
One of the beauties of this recipe is its adaptability, whether you prefer the convenience of store-bought oat flour or the freshness of milling your own. Many of my oat flour recipes, from a fluffy oat flour cake to crispy oat flour waffles, benefit from freshly blended oats, and these tortillas are no exception.
If you opt to make your own oat flour, simply use quick-cooking or rolled oats. For consistent results, especially when working with gluten-free recipes, weighing your ingredients is highly recommended. You will need precisely 93 grams of oats, which is approximately 2 tablespoons shy of a standard 1-cup measure. Blend these oats in a high-speed blender for about 30 seconds, or until they achieve a very fine, powdery consistency resembling traditional flour. This homemade approach not only ensures you have the freshest oat flour but can also be more economical.
Alternatively, if you’re using pre-packaged oat flour, simply measure out 1 cup according to the recipe card. Both methods work wonderfully, just ensure your flour is finely milled to achieve the smooth, consistent batter required for flexible tortillas.
Step-by-Step: Mastering Your Oat Tortillas
Creating these delightful oat tortillas is a straightforward process when you follow these key steps. The visual guide below, paired with detailed instructions, will ensure your success. For precise ingredient amounts, please refer to the complete recipe card further down this page.
Prepare Your Oat Flour (or Use Pre-Made)
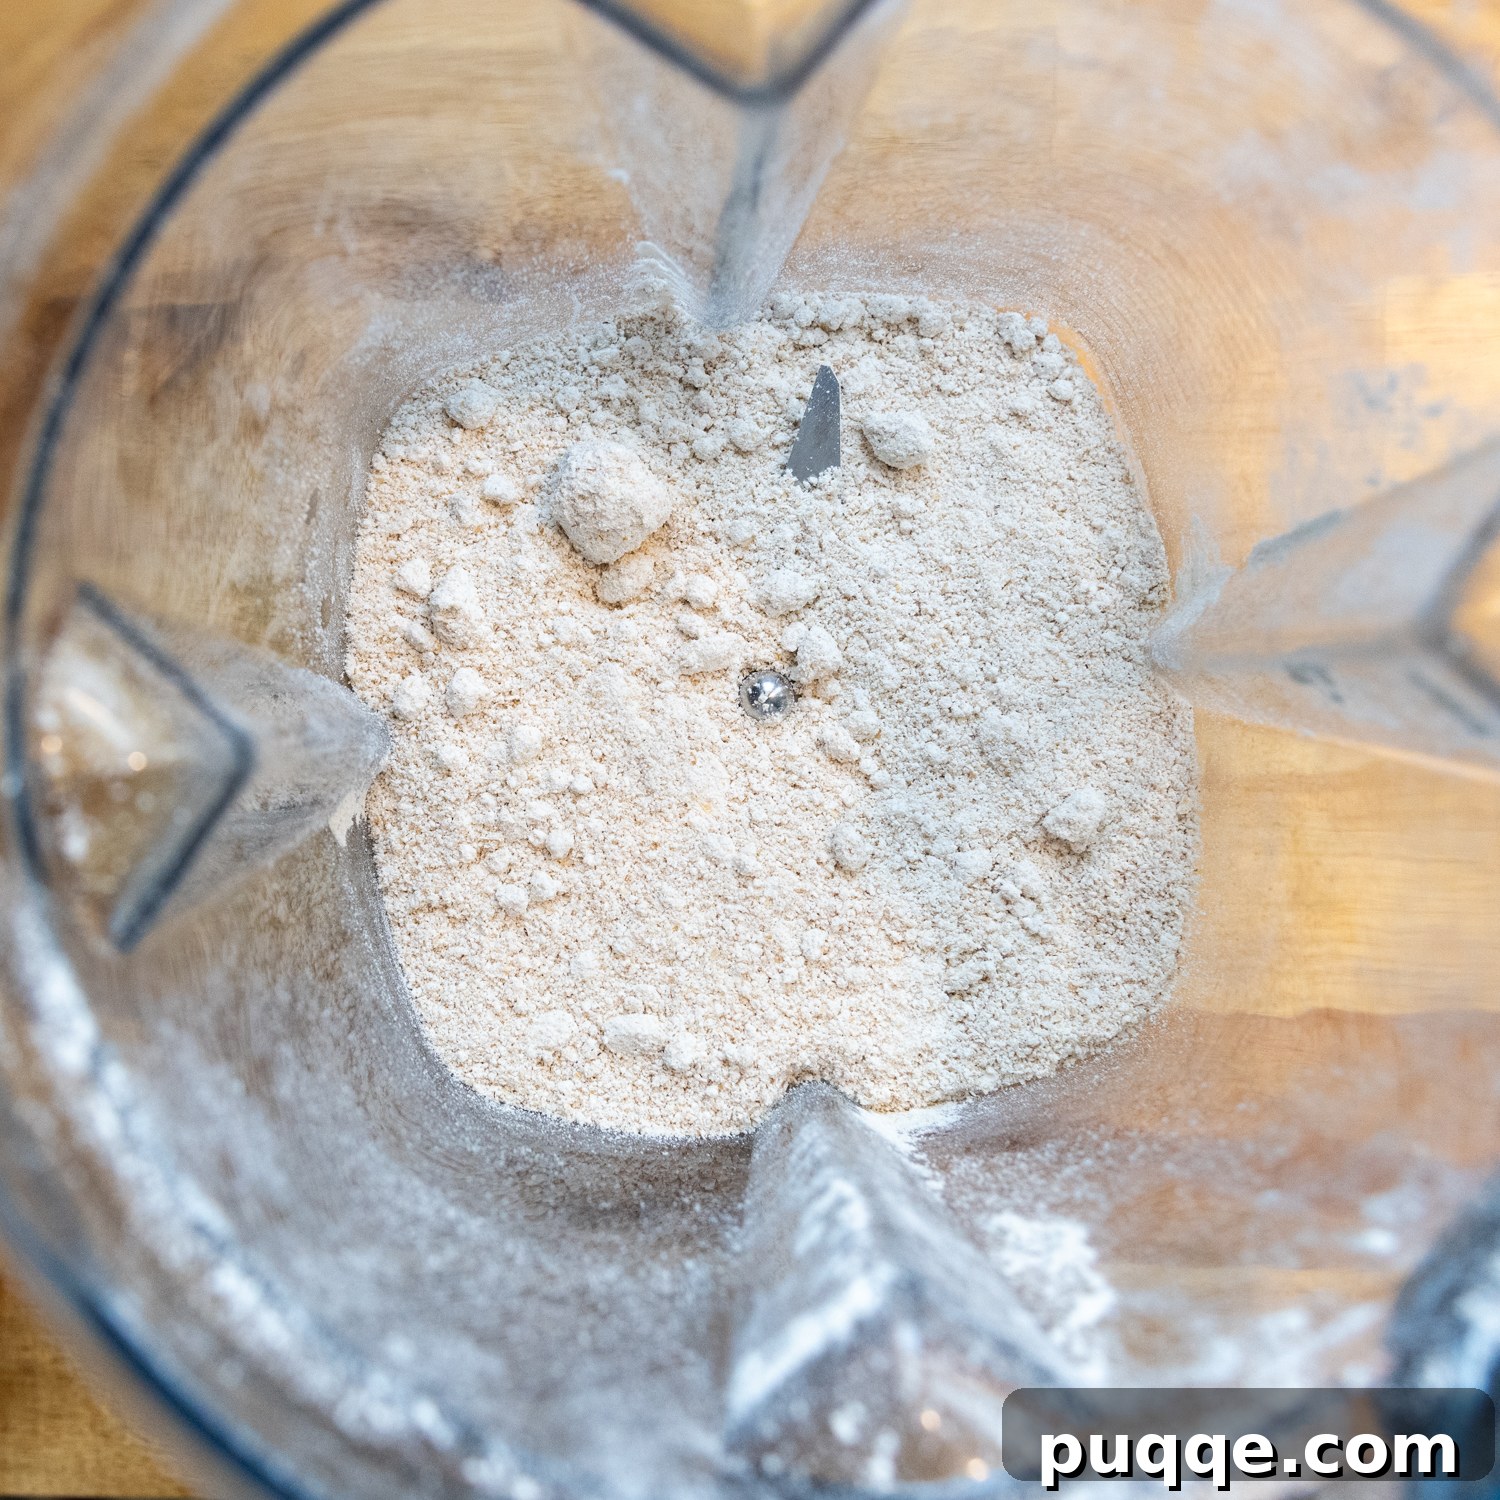
Your journey to perfect oat tortillas begins with the flour. If you’re making your own, measure 93 grams of quick-cooking or rolled oats (about 2 tablespoons less than 1 cup) into a blender. Blend for approximately 30 seconds until the oats are transformed into a very fine, powdery flour. If using store-bought oat flour, simply measure out 1 cup.
Blend the Batter to Perfection
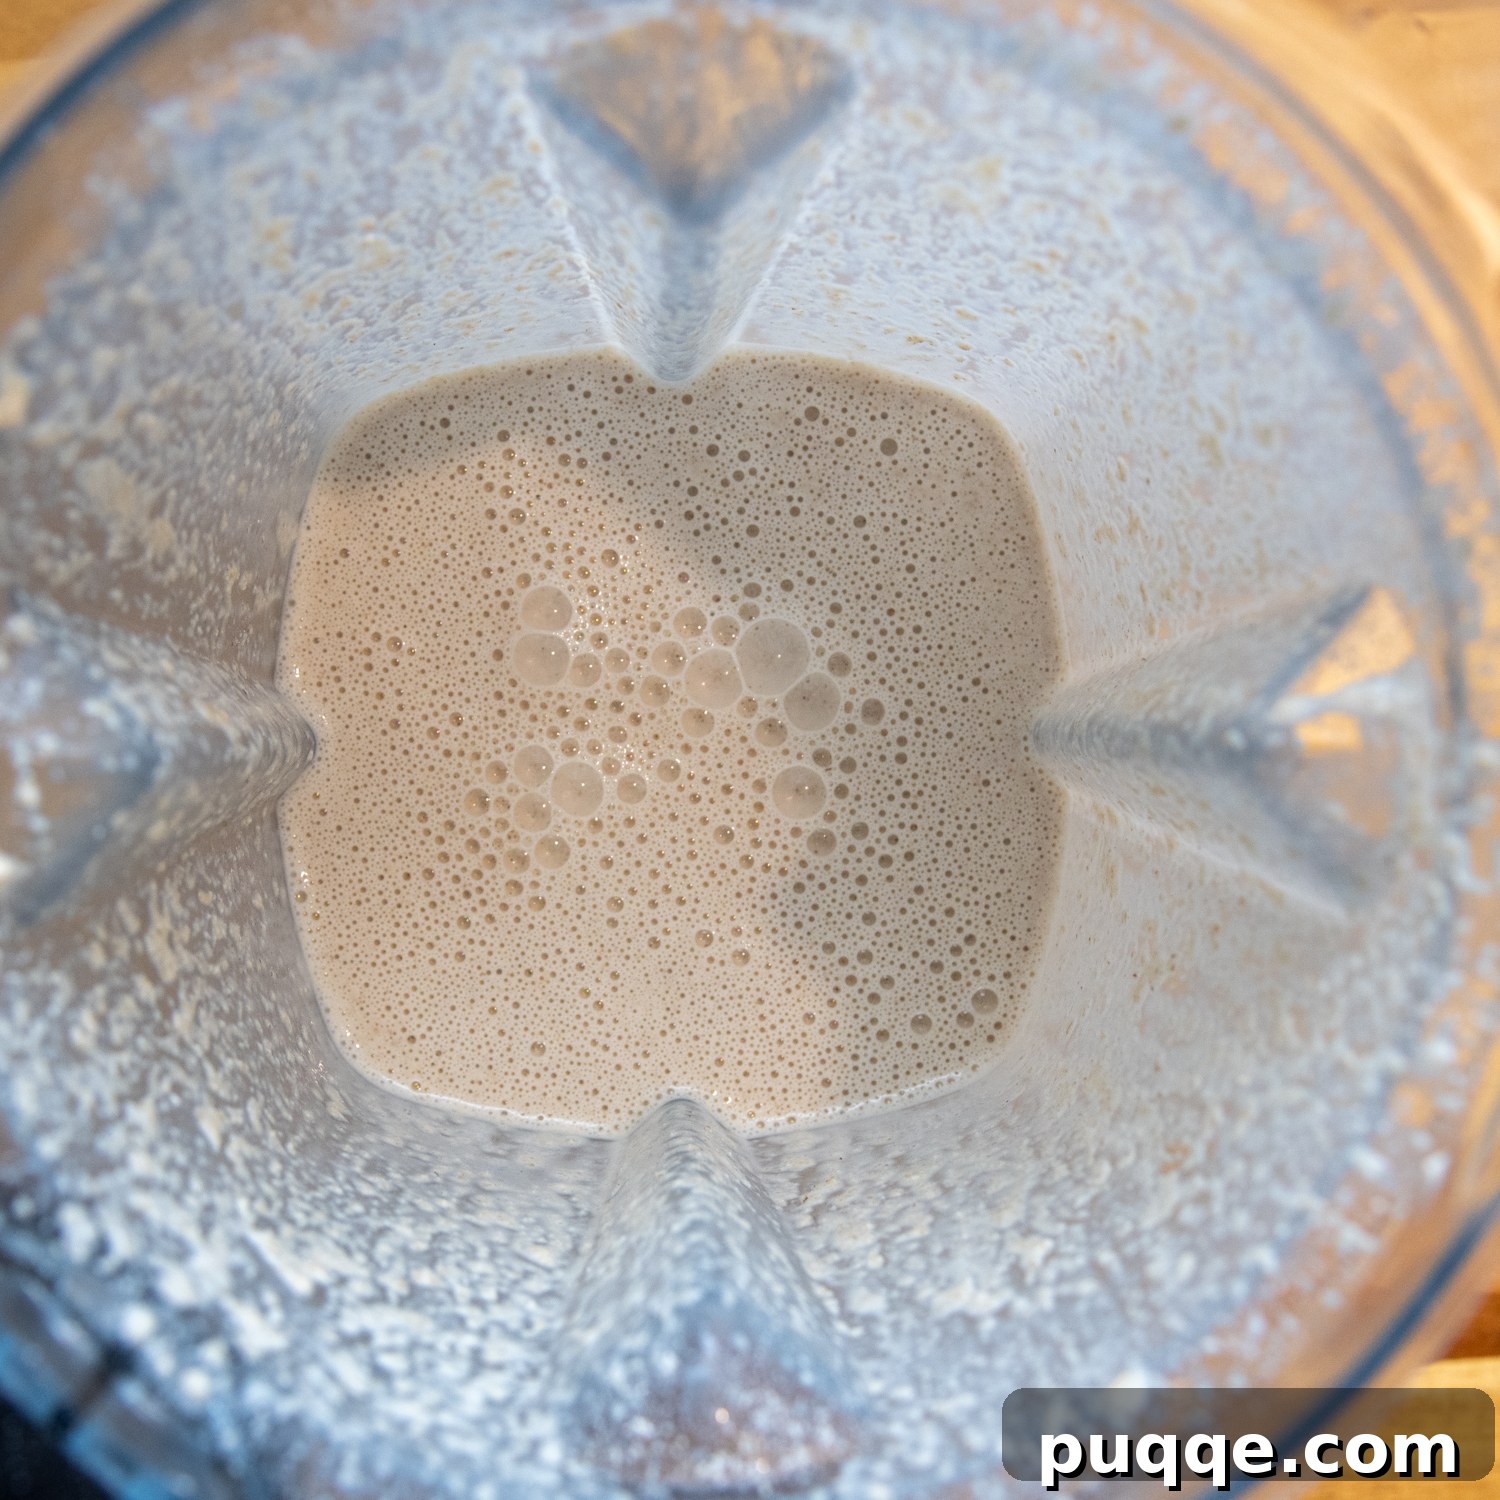
Add the water, olive oil, and salt to the oat flour in the blender. Blend again until the mixture is completely smooth and free of lumps. Alternatively, if using store-bought flour, you can whisk all ingredients together in a bowl. At this stage, the batter will be surprisingly thin and liquidy—this is exactly what we want! The oat flour will quickly begin to absorb the liquid. To ensure optimal cooking, I strongly recommend preheating your griddle or skillet *before* adding the liquids to the oat flour. This way, you can start cooking immediately, preventing the batter from thickening too much before you even begin.
The Smart Way to Cook Your Oat Wraps
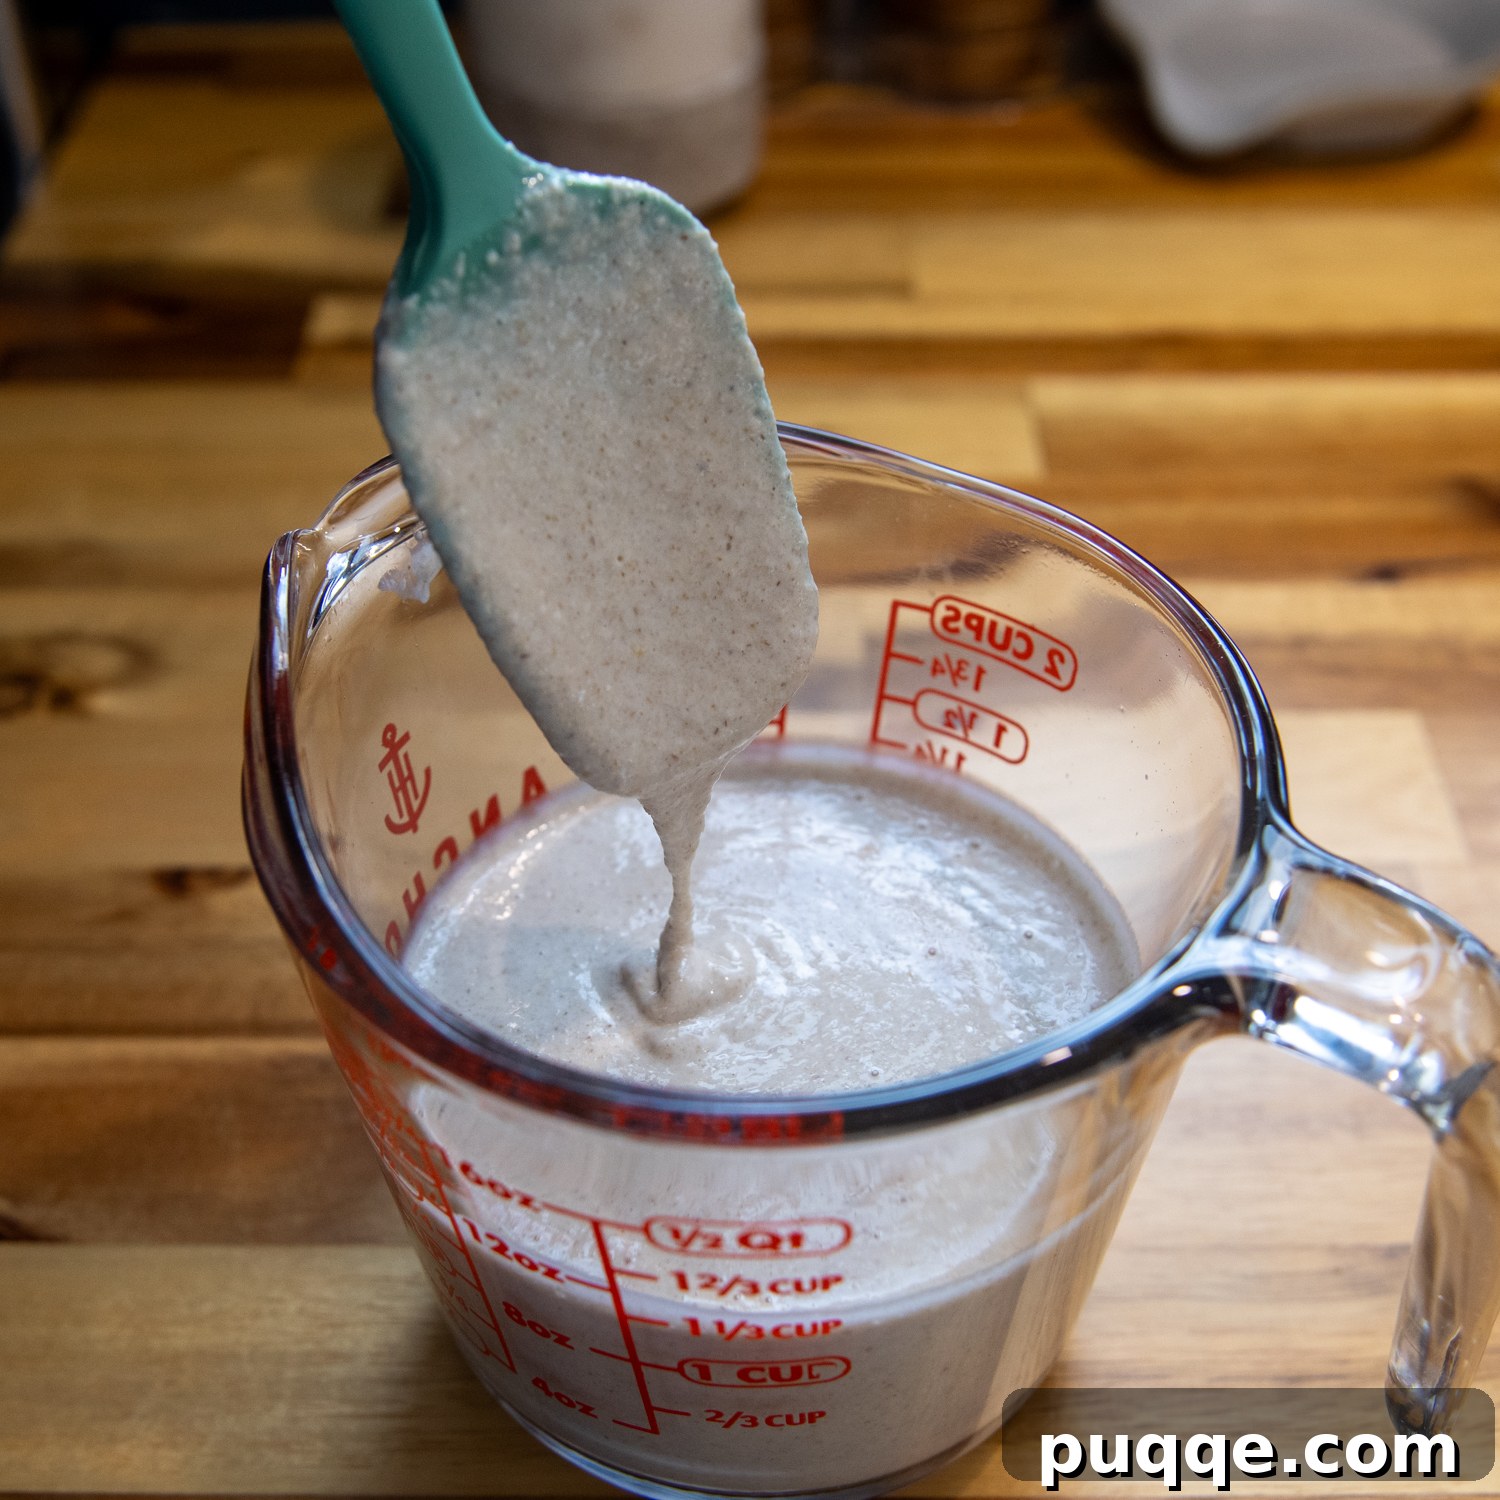
Because the oat batter thickens rapidly as it sits, efficiency is key. I find the best strategy is to transfer the freshly blended batter to a liquid measuring cup. This makes pouring and spreading much easier and allows for batch cooking on a large griddle. As you can see in the image below, even a few minutes can significantly alter the batter’s consistency. If you’re cooking one tortilla at a time in a smaller skillet, you’ll almost certainly need to periodically stir in a tablespoon or two of hot water to maintain the thin, spreadable consistency.
The Art of Cooking and Flipping (The Secret to Softness)
Achieving that desirable soft, flexible texture in oat tortillas requires a specific cooking technique involving multiple flips. This method is crucial for cooking out the ample moisture in the batter, which is key to preventing a gummy result. Here’s my perfected technique:
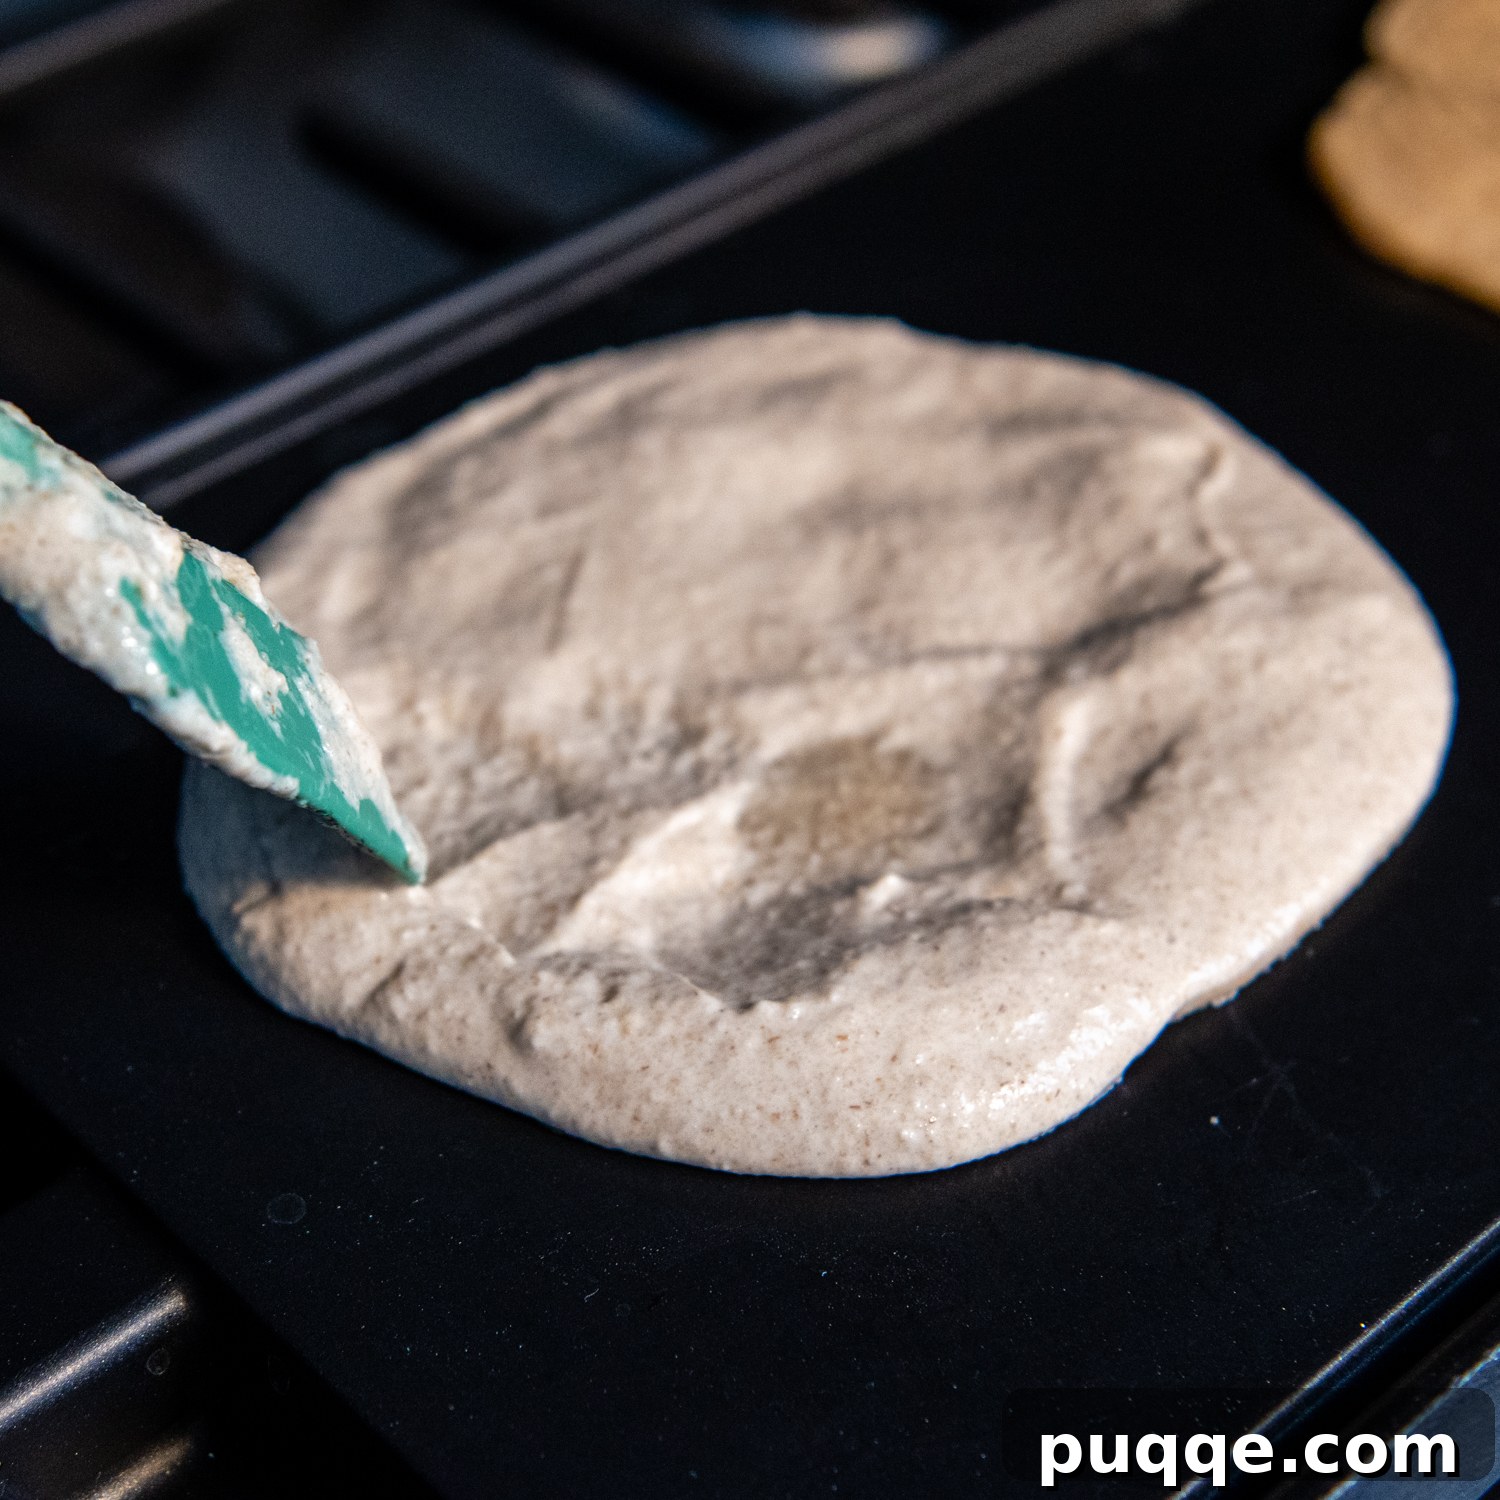
- Initial Pour and Spread: Pour about 1/4 cup of batter onto a nonstick griddle heated to medium. Immediately use a silicone spoon or spatula to quickly and evenly spread the batter into a very thin, round circle. Don’t be shy about scraping all the “wet” batter to the edges to create a uniform wrap. (Refer to Image 1 for visual guidance.)
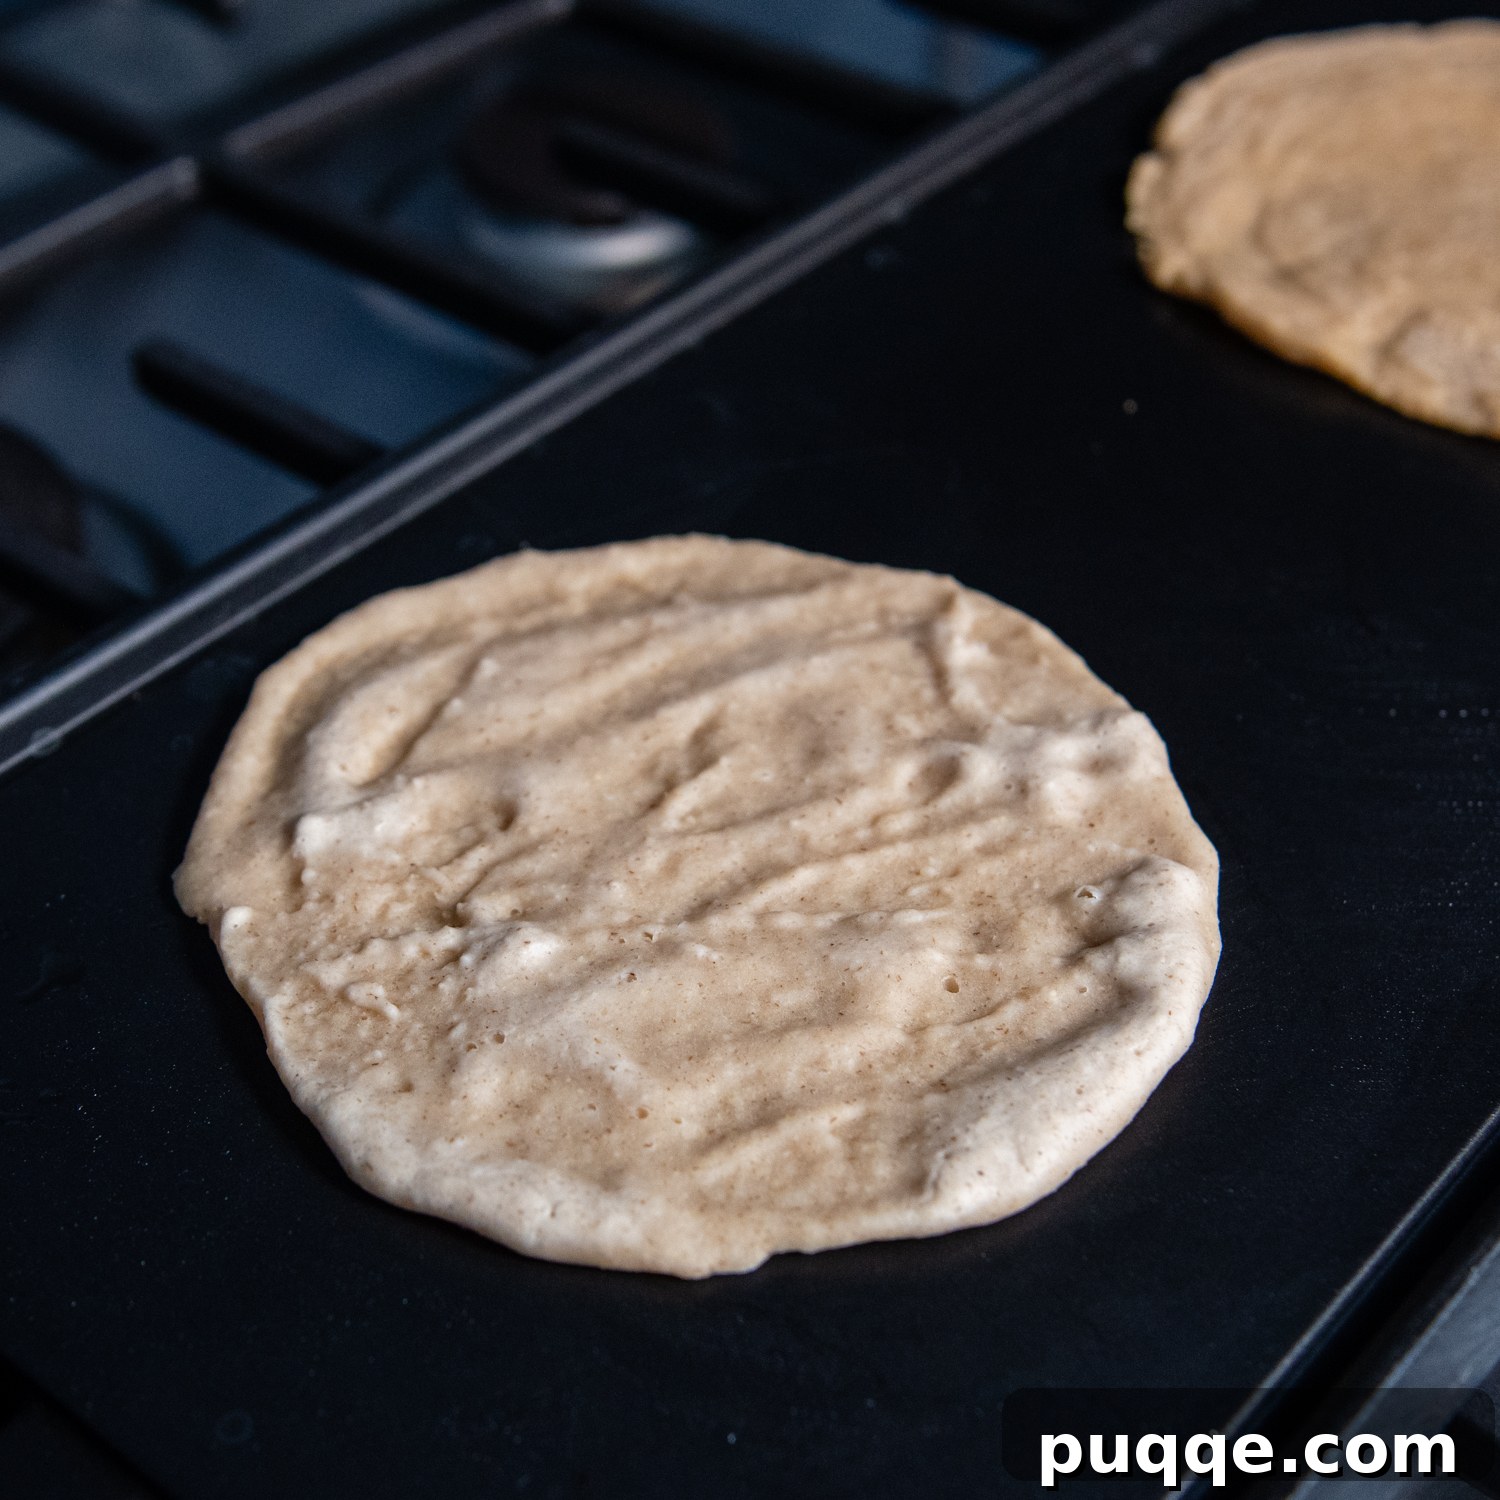
- First Cook: Allow the tortilla to cook undisturbed for approximately 2 minutes. During this time, the surface will transition from wet to almost dry and opaque. (See Image 2 for the appearance at this stage.)
- First Flip: Carefully flip the tortilla and let it cook for another 2 minutes on the second side. While it might appear “done” at this point, we’re not quite finished.
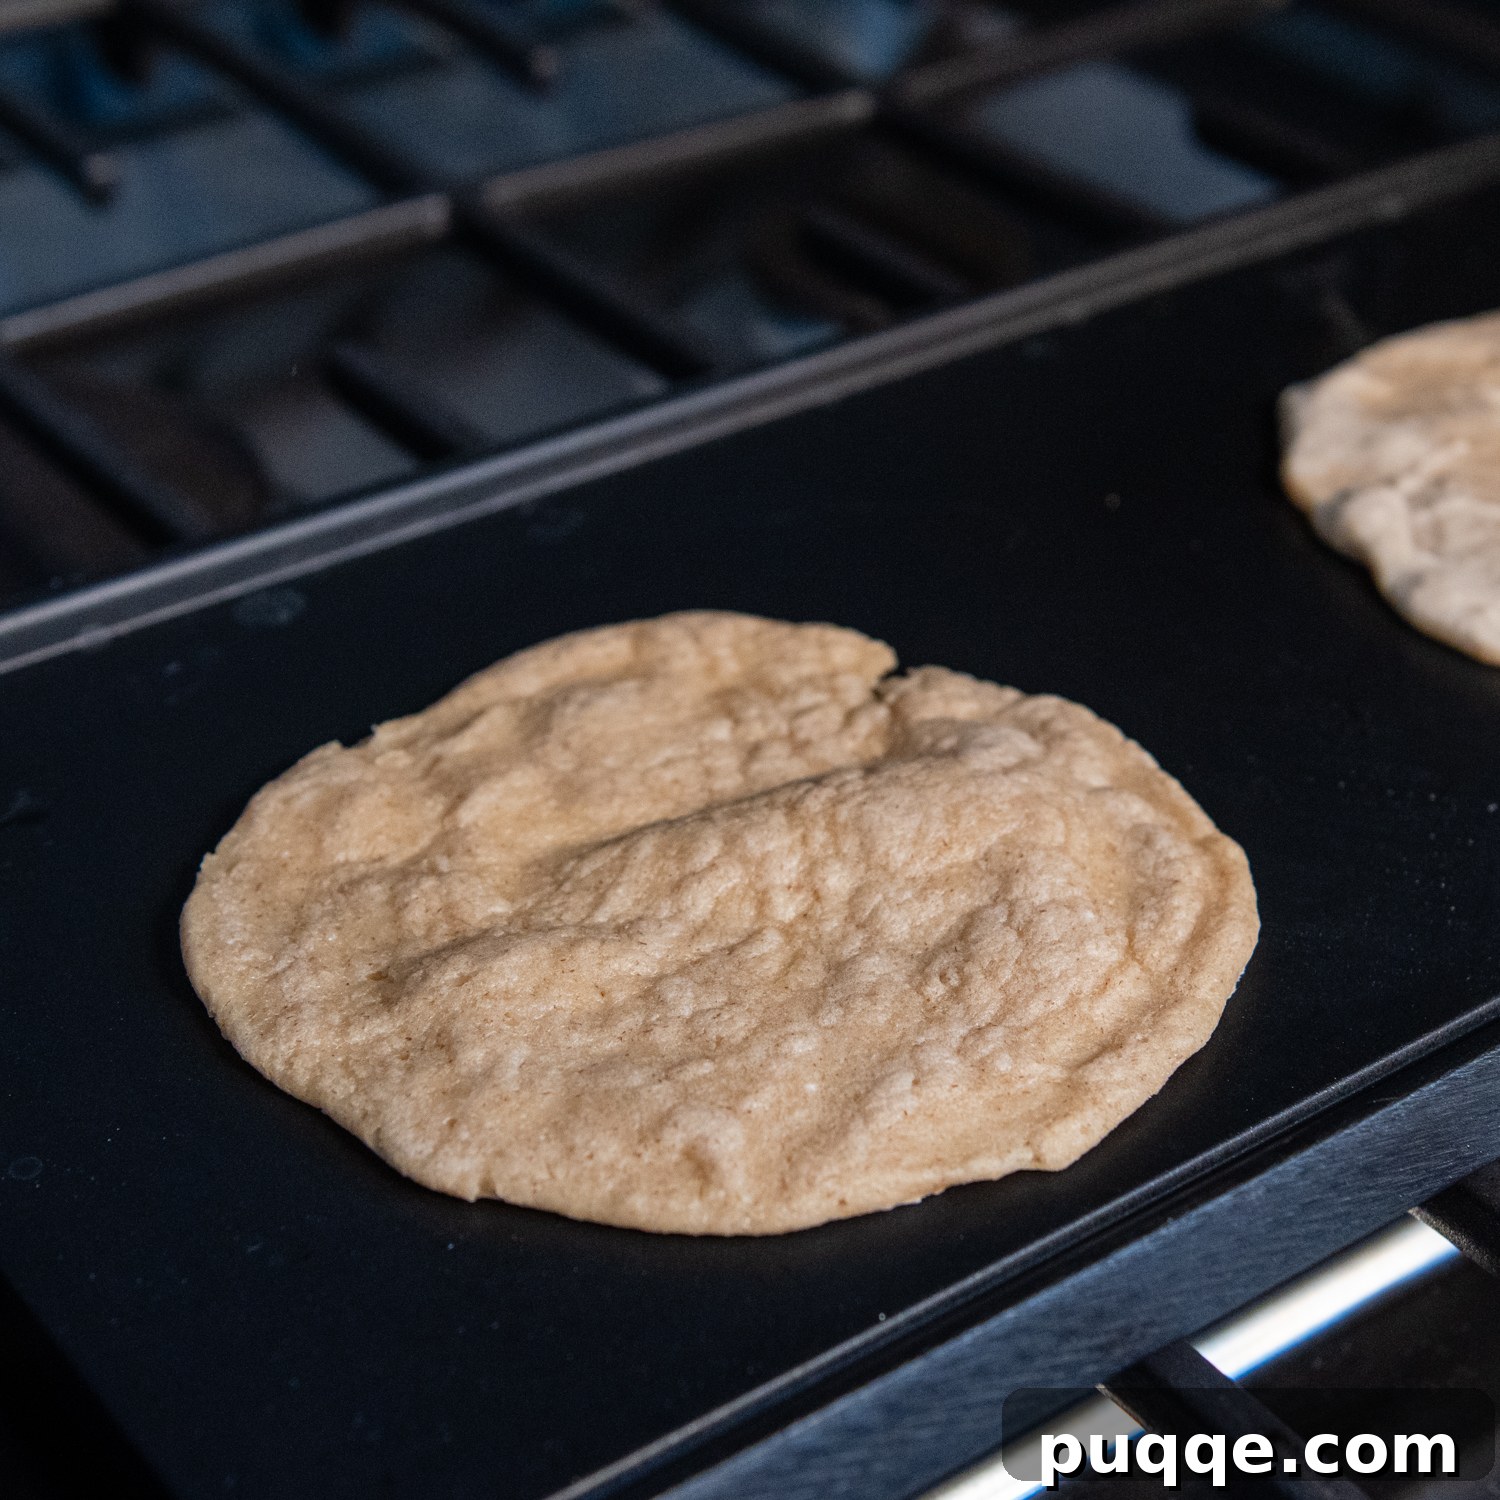
- Second & Third Flips for Perfection: Flip the tortilla again and cook for 1 minute. Then, give it one final flip and cook for another minute. During these last two minutes, you’ll often notice the tortilla starting to puff up slightly (as shown in Image 3). This puffing is an excellent indicator that sufficient moisture has cooked off, leaving you with a perfectly soft, pliable, and delicious oat tortilla!
Top Cooking Tips and Tricks for Perfect Oat Tortillas
Achieving consistently soft and flexible oat tortillas is a skill easily mastered with these expert tips:
- Act Fast with the Batter: Oat flour is incredibly absorbent. To prevent your batter from becoming too thick and difficult to spread, avoid letting it sit for extended periods before cooking. I always recommend heating your griddle or skillet *before* you even start mixing the wet ingredients into the oat flour.
- Maximize Your Cooking Surface: A large griddle is your best friend for this recipe. It allows you to cook multiple tortillas simultaneously, significantly reducing the overall cooking time. This also minimizes the time the batter sits, helping to maintain its ideal consistency.
- Spread Thin for Flexibility: The thinner you can spread the batter, the more flexible and authentic your tortillas will be. A silicone spoon or spatula is perfect for quickly and evenly spreading the liquid batter to the edges of your cooking surface.
- Maintain Medium Heat: Keep your griddle or skillet at a consistent medium heat. If the pan gets too hot, the tortillas will cook too quickly, becoming crispy and stiff instead of soft and pliable. Too low, and they might become soggy.
- Adjust Batter Consistency as Needed: It’s common for the batter to thicken slightly as you work through the batch. If it becomes too thick to spread thinly, simply whisk in about 1 tablespoon of hot water at a time until you reach the desired pourable consistency. Be mindful not to add too much water, as this can lead to gummy tortillas.
- Don’t Skimp on Flipping: As detailed in the step-by-step guide, the multiple flips are crucial. This technique ensures that all the moisture cooks off properly, preventing gumminess and promoting that desirable soft texture.
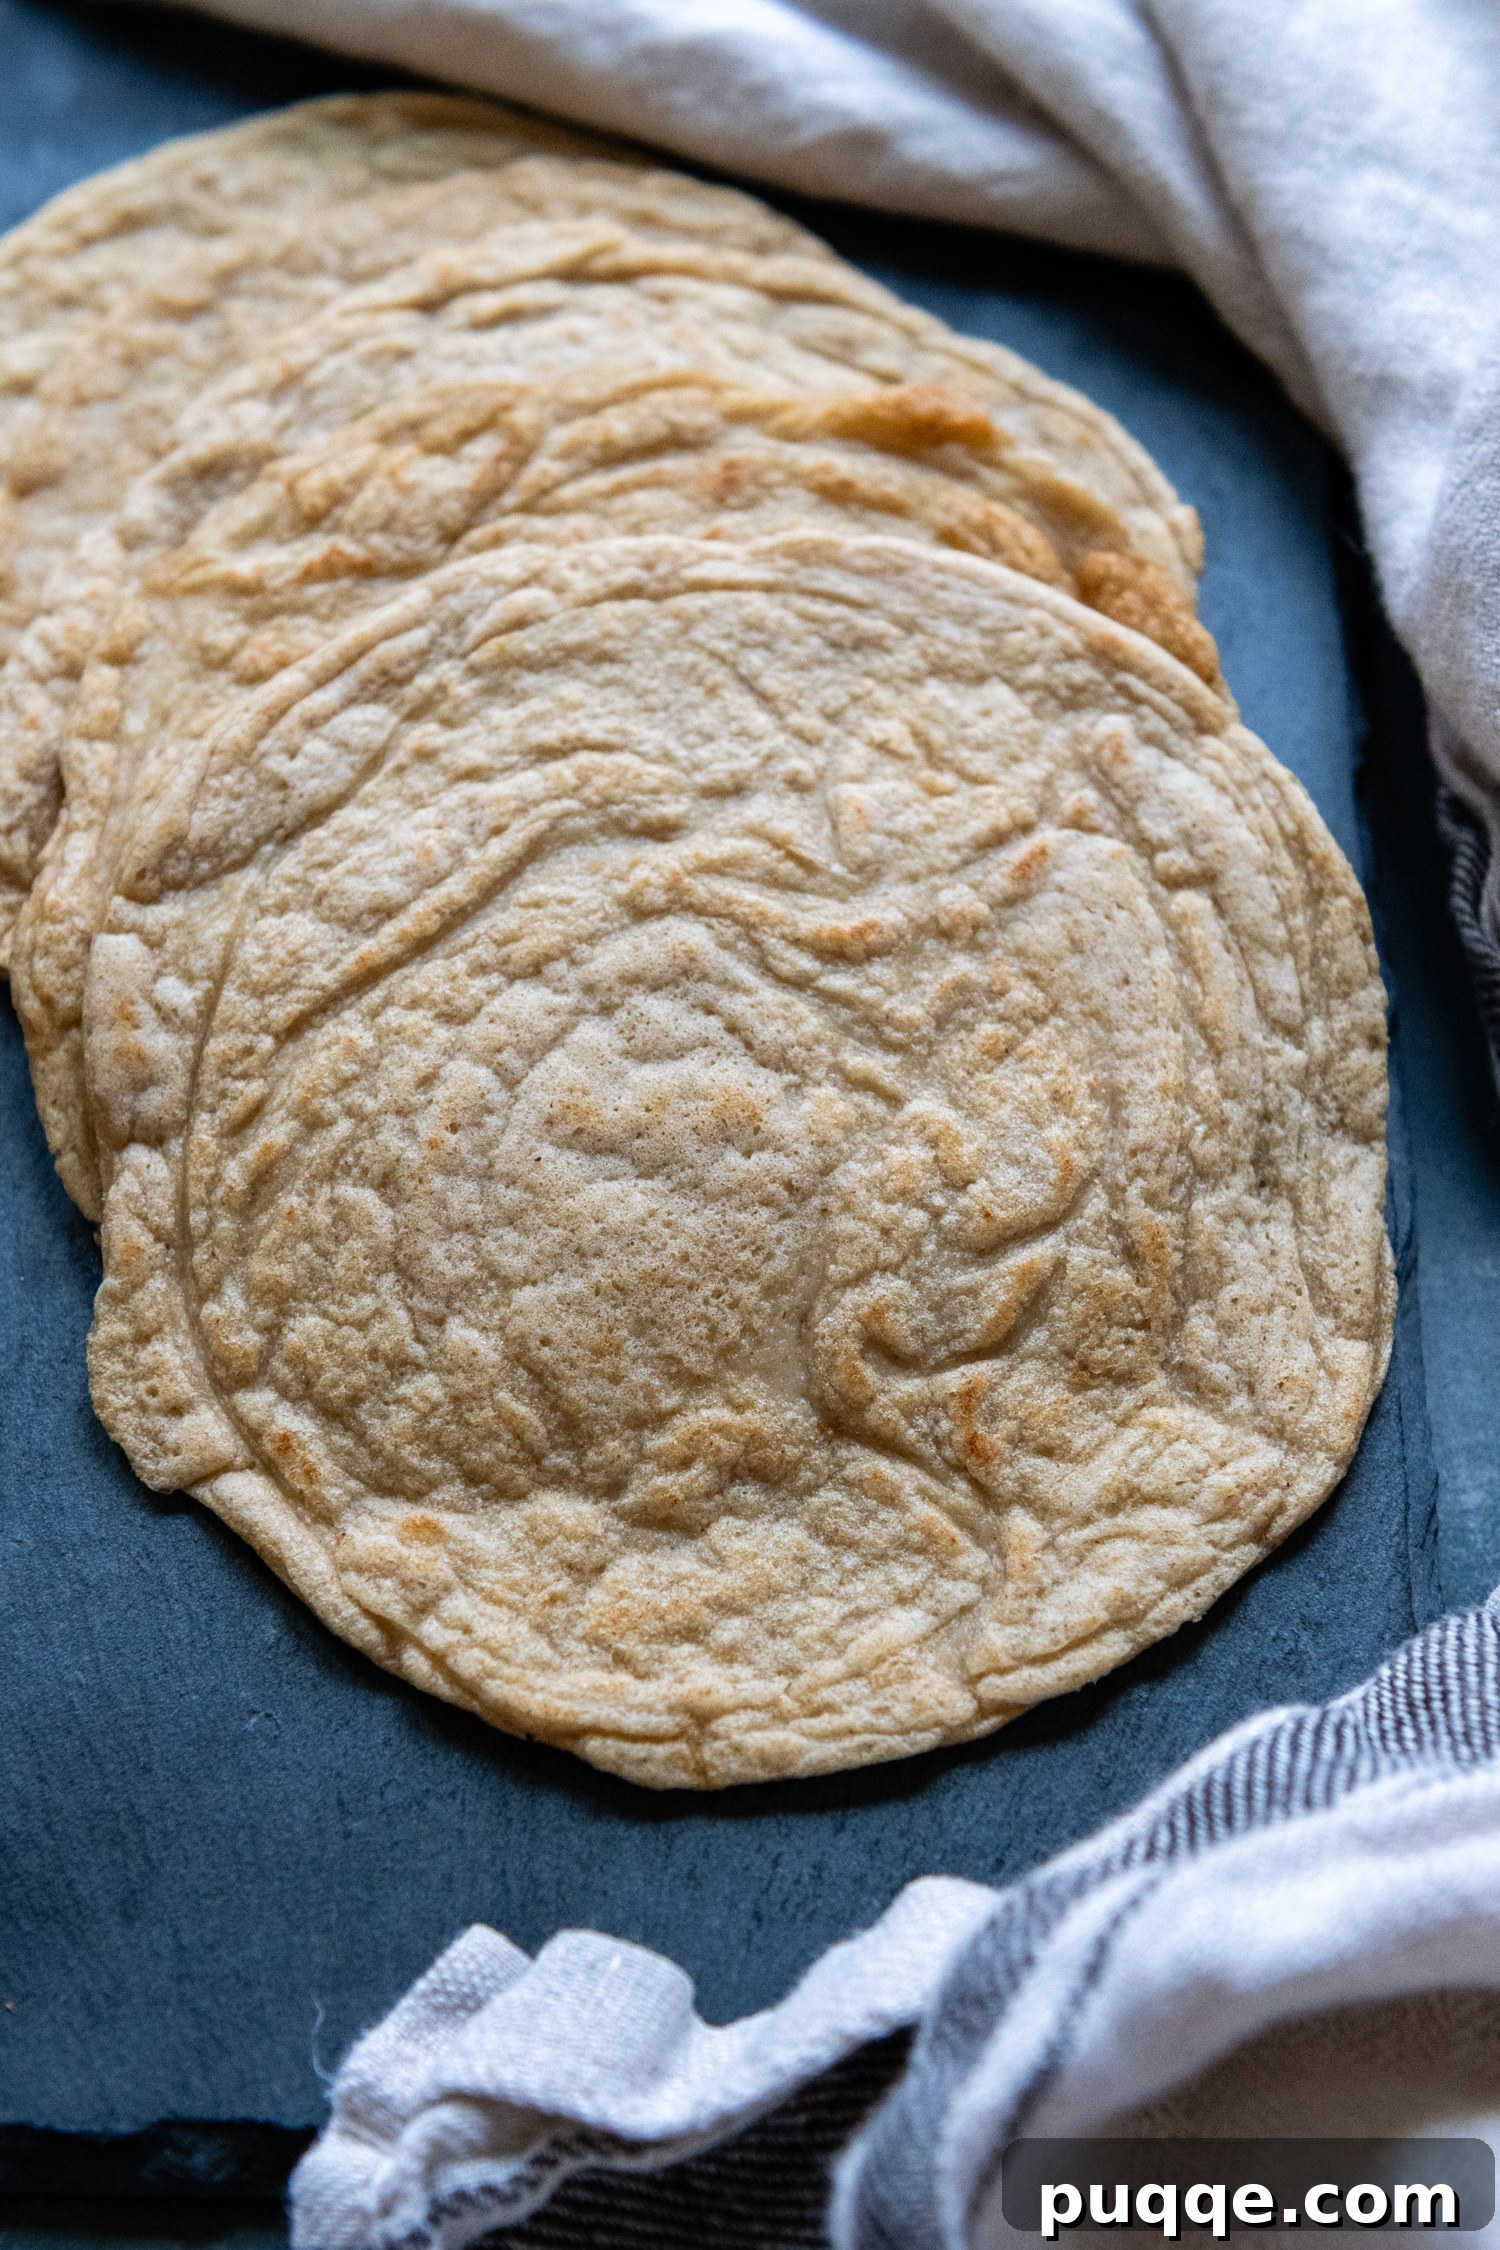
Versatile Serving Ideas for Your Oat Tortillas
The neutral, wholesome flavor of these oat tortillas makes them incredibly versatile, ready to complement a wide array of dishes and cuisines. Their impressive flexibility makes them ideal for both savory and sweet applications. Here are some of my favorite ways to enjoy them:
- Classic Lunch Wraps: Fill them with your favorite deli meats, cheeses, crisp lettuce, juicy tomatoes, and a smear of hummus or mustard for a quick, satisfying lunch. They hold up beautifully to all your preferred fixings.
- Taco Nights Transformed: Elevate your taco experience with these gluten-free wraps. Perfect for everything from classic ground beef or chicken tacos to vibrant vegetarian options loaded with black beans, corn, and salsa.
- Burritos and Quesadillas: For heartier meals, simply make a slightly larger tortilla to accommodate burrito fillings like rice, beans, and grilled vegetables. They also make exceptional quesadillas, achieving a lovely crisp exterior and gooey interior when cheese is melted within.
- Breakfast Staples: Start your day deliciously! Use them for breakfast tacos with scrambled eggs, avocado, and hot sauce, or craft savory breakfast burritos.
- Open-Faced Flatbreads: Get creative by using them as a base for open-faced flatbreads. Top with melted cheese, a fried egg, fresh herbs, or even some pesto and vegetables for a quick snack or light meal.
- Sweet Treats: Don’t limit yourself to savory! Spread with nut butter, sliced bananas, and a drizzle of honey for a wholesome, sweet snack or dessert wrap.
From quick weeknight dinners to easy meal prep, these oat tortillas offer a healthy and delicious foundation for endless culinary creativity.
Elevate Your Flavor: Customization Ideas
While delicious on their own, the neutral profile of oat tortillas makes them a perfect canvas for additional flavors. Experiment with these mix-ins to tailor them to your specific meal or craving:
- Savory Enhancements: Mix in ½-1 teaspoon of garlic powder, onion powder, or a blend of Italian seasoning for a Mediterranean twist. Dried herbs like crushed rosemary, oregano, or basil also add fantastic depth. For a cheesy, umami kick, nutritional yeast or grated parmesan cheese can be folded into the batter.
- Spicy Kicks: If you’re using them for tacos or burritos, consider adding chili powder or paprika to the batter for a subtle warmth and color. A pinch of cayenne pepper can provide a bolder heat.
- Fresh Herbs: For a vibrant touch, finely chopped fresh herbs like cilantro, chives, or parsley can be added directly to the batter.
These simple additions can transform your oat tortillas, making them even more integral to your culinary repertoire.
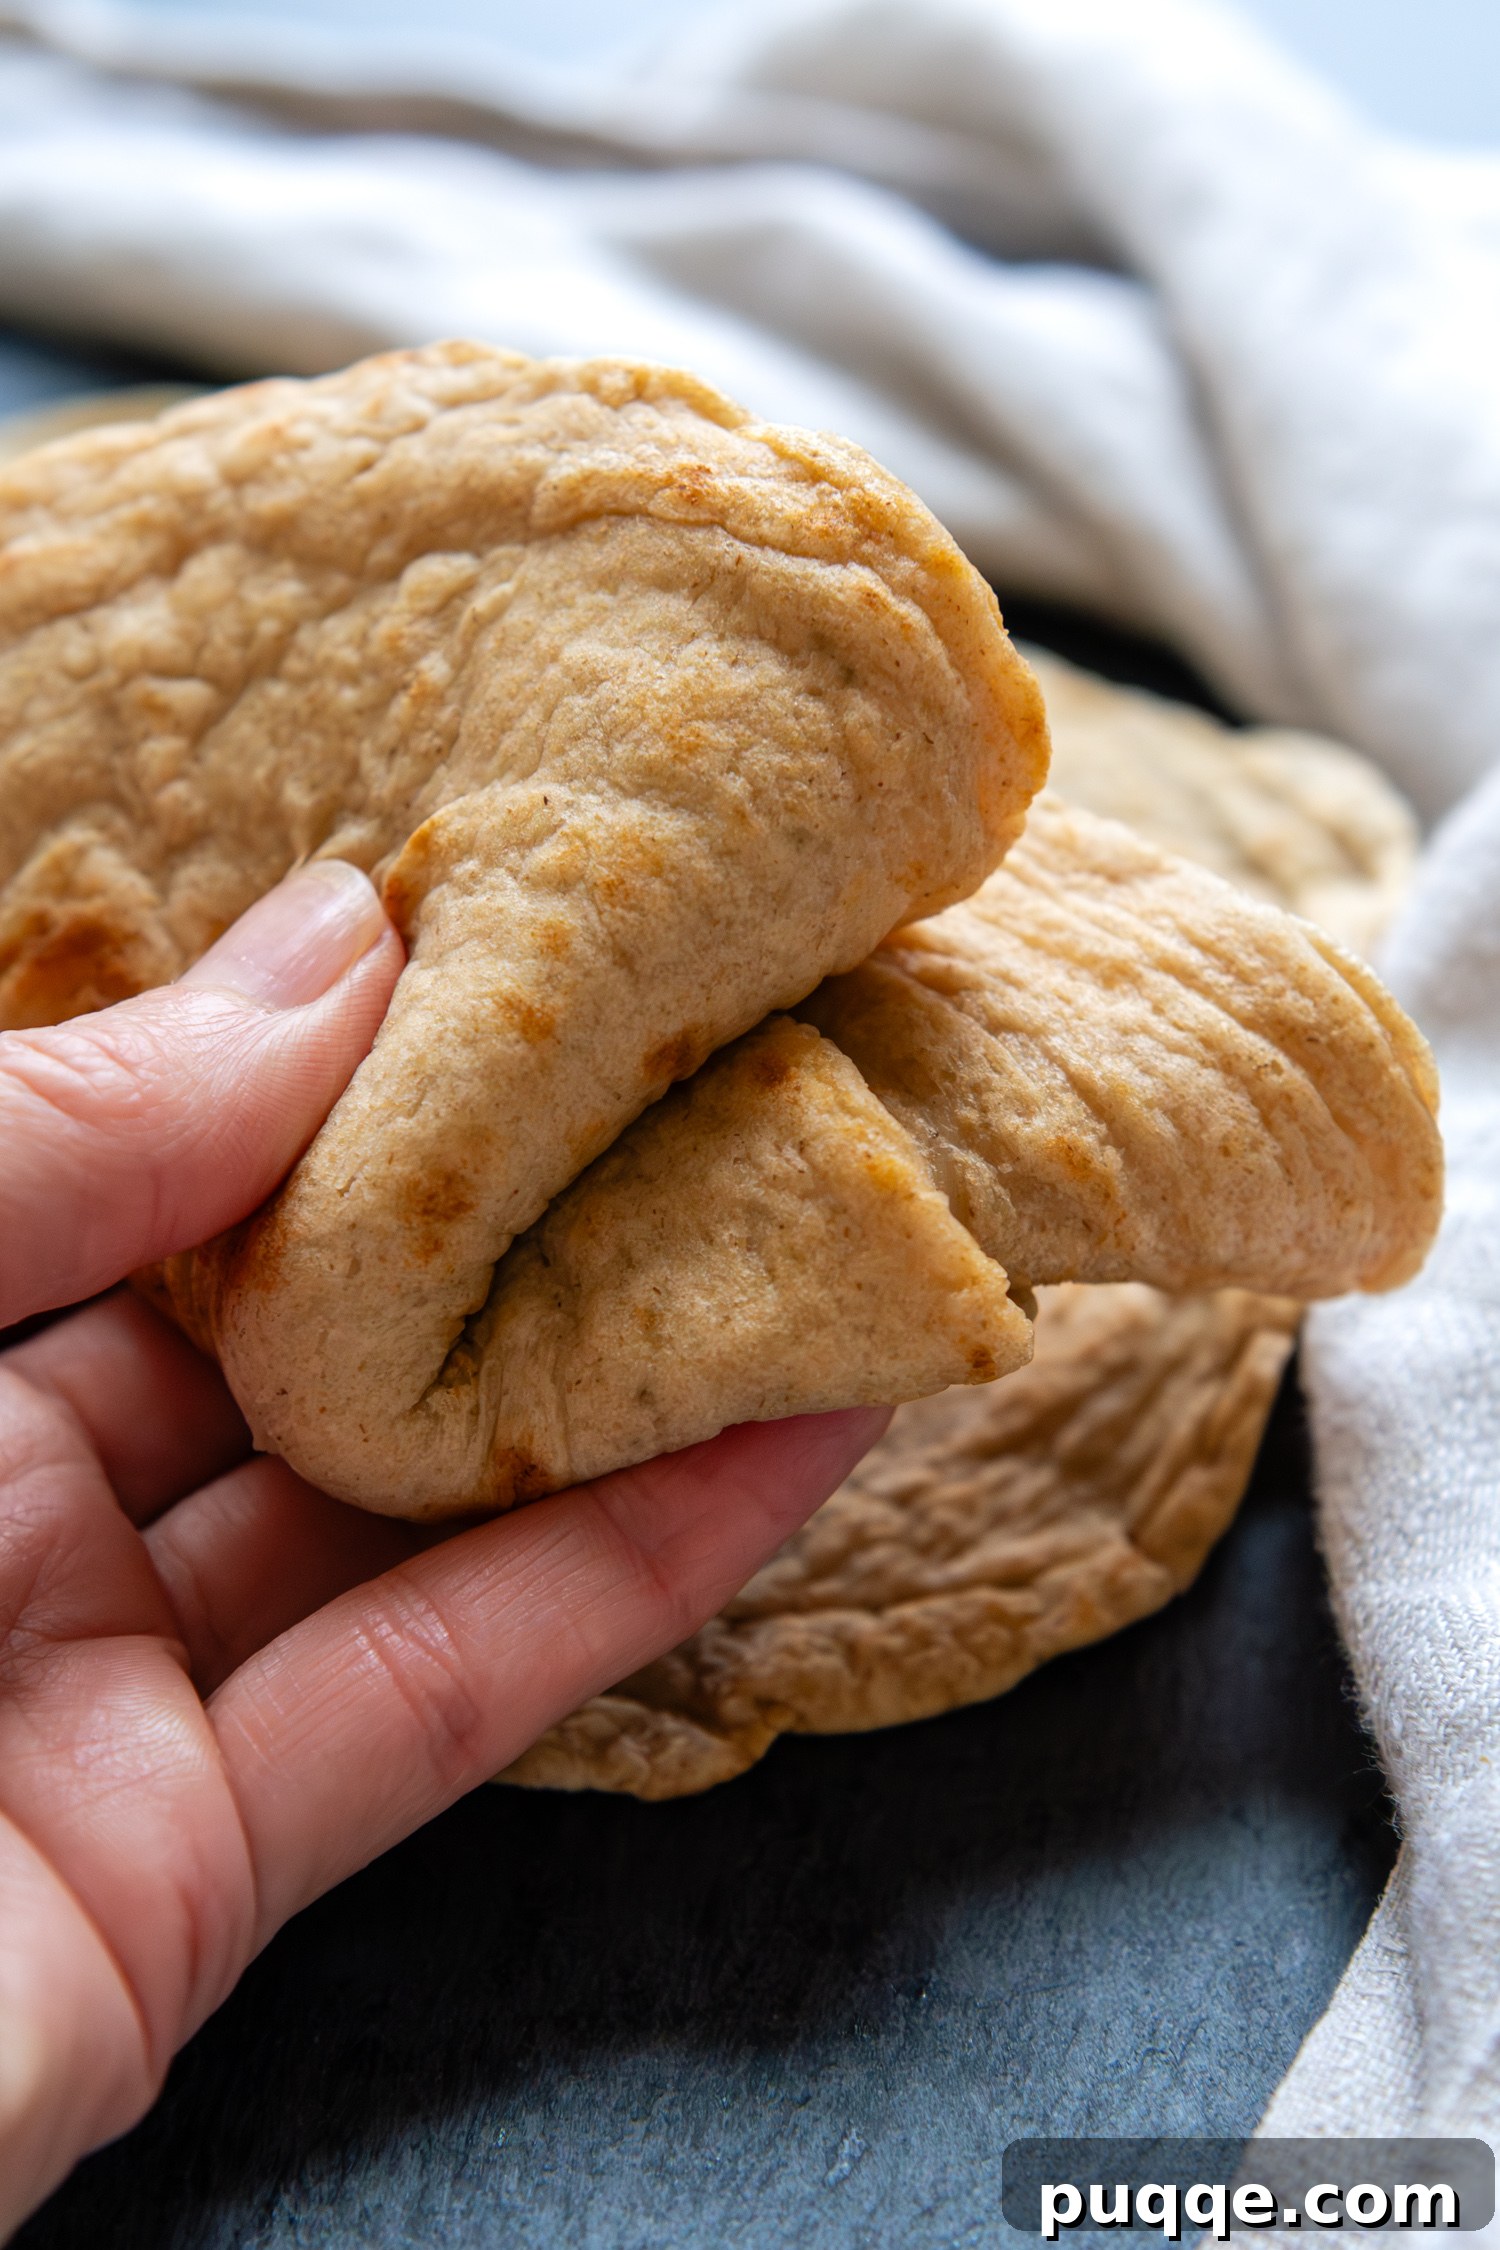
Don’t Forget to Pin This Recipe!
Join our community and become friends on Pinterest! We’re always sharing delicious and inspiring recipes!
Have you tried this recipe? Your feedback means the world to us! We encourage you to leave a star rating and comment below the recipe card. Your reviews help others discover and enjoy our recipes, and we genuinely appreciate hearing about your experiences. I always make sure to respond to every comment! -Melissa
Extra Soft, Flexible Oat Tortillas (Quick & Easy)
 Melissa Erdelac
Pin
Rate
Remove Ads
Ingredients
- 1 cup oat flour, see recipe notes for using oatmeal
- 1 cup hot water
- 1 tablespoon olive oil
- ½ teaspoon salt
Equipment
-
Griddle
-
Blender
-
Silicone Spoon
Instructions
- Note: For best results, use a griddle to cook more at one time. Otherwise, the batter thickens upon sitting and may have to be thinned out with an additional hot water as the tortillas cook.
- Heat a nonstick griddle or large skillet over medium heat. Meanwhile, combine all tortilla ingredients (1 cup oat flour, 1 cup hot water, 1 tablespoon olive oil, ½ teaspoon salt) in a blender, or whisk together in a large bowl, until smooth. The batter will be very thin once it’s blended, but will thicken during cooking.
- If your cooking surface isn’t very nonstick, spread a small amount of oil on the cooking surface and carefully wipe away excess with a dry paper towel.
- Pour about 1/4 cup batter portions onto the hot griddle. Use a silicone spoon to spread the batter into an even circles, as thin as possible. Cook for 2 minutes, or until the top is opaque and almost dry on top (see image in post). Flip and cook for 2 minutes. Flip again and cook 1 minute, then flip one final time to cook for 1 minute. Note: Even if the tortillas look “done” before this, continue with the cooking pattern to allow enough time for the moisture to cook off, otherwise they will be gummy.
- Transfer to a wire rack and continue cooking the remaining batter. If the batter becomes too thick as it sits mix in a small amount of hot water to thin the batter slightly, about ½-1 tablespoon.
Notes
Using Oatmeal
You may use quick-cooking oatmeal or rolled oats to make oat flour in a blender before beginning. You will need 93 grams of oats. This is about 2 tablespoons shy of 1 cup. When blended it will make 1 cup oat flour.
Cooking Tips and Tricks
- Don’t let the batter sit long before cooking or it will become very thick. I like to start preheating the griddle before adding the liquids to the oat flour.
- A large griddle works best because you will spend less time cooking each individually, and the batter won’t sit as long and thicken.
- Spread the batter as thin as possible, using a silicone spoon to scrape the wet batter to the edges.
- Keep the heat at medium. If the skillet becomes too hot, the tortillas will become crispy instead of soft.
Storing and Reheating
Store cooled tortillas stacked with squares of wax paper or parchment in between and placed in an airtight container or ziplock bag. Refrigerate up to 5 days or freeze up to 2 months.
When ready to use, warm in a dry skillet or the microwave for about 15 seconds. Frozen tortillas can be defrosted in the microwave or left to thaw at room temperature.