
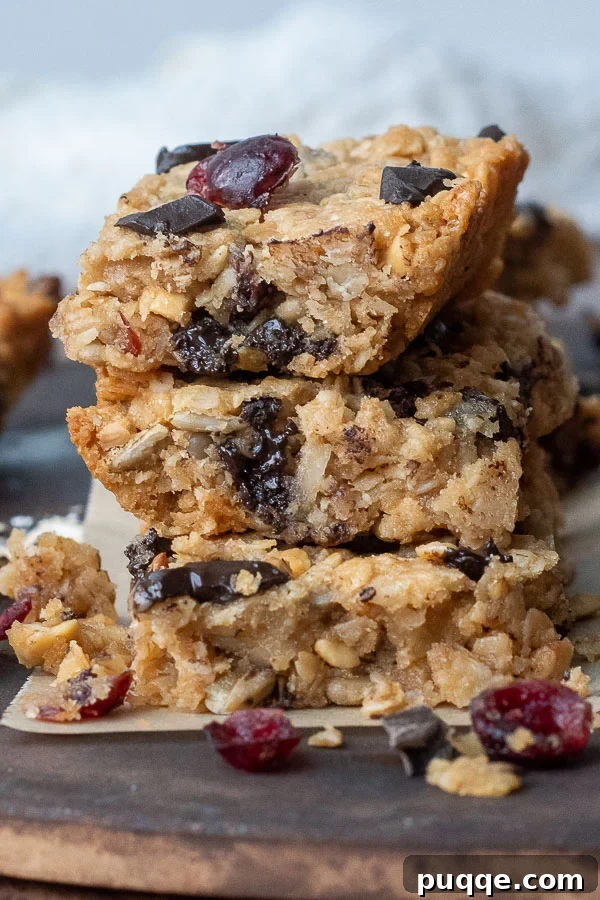
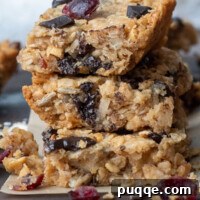
Homemade gluten-free granola bars are more than just a snack; they are a wholesome, chewy delight perfect for quick breakfasts or a satisfying grab-and-go treat. Imagine biting into a perfectly balanced bar, rich with the irresistible combination of certified gluten-free oats, pockets of gooey chocolate, fragrant coconut flakes, crunchy nuts, and sweet dried fruit. These bars are lovingly baked to achieve that coveted sweet and salty flavor profile, along with an extra-chewy texture, all thanks to the magic of creamy peanut butter and golden honey. Forget bland, expensive store-bought alternatives; crafting your own offers unparalleled flavor, freshness, and the satisfaction of knowing exactly what goes into every delicious bite.
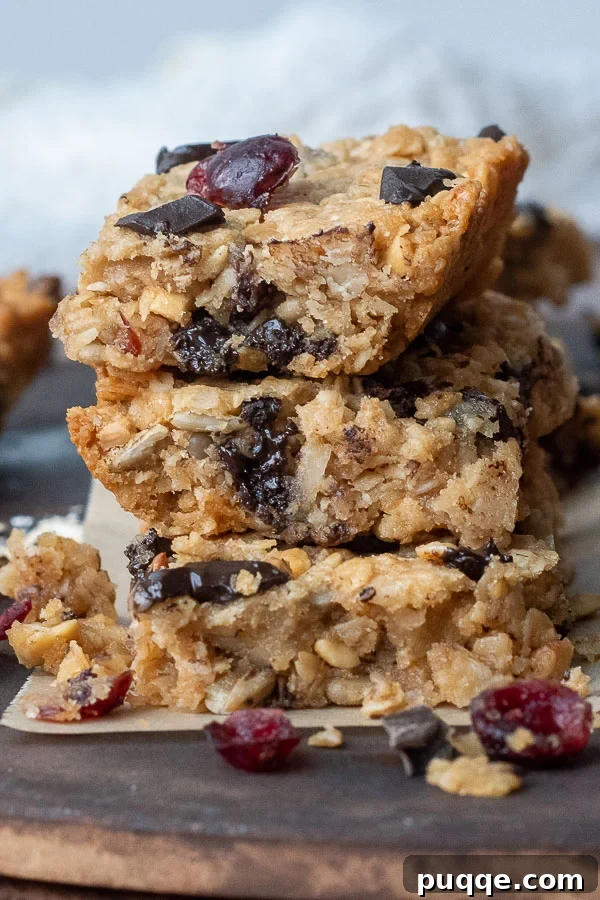
Homemade Gluten-Free Granola Bars: Your Search Ends Here
If you’ve ever felt underwhelmed by the taste or texture of commercial gluten-free granola bars, or perhaps found yourself wincing at their often exorbitant prices, then this recipe for soft and chewy chocolate chip granola bars is about to change your snack game forever. This isn’t just another recipe; it’s a culinary journey refined over years, promising to deliver the ultimate gluten-free breakfast or snack bar experience you’ve been dreaming of.
The inspiration for these perfect homemade treats came from a treasured King Arthur granola bar recipe, shared with me years ago by my sister who enthusiastically declared, “I finally found the perfect homemade granola bar recipe!” That proclamation marked the end of a long quest for an ideal chewy, flavorful bar. Since then, I’ve meticulously adapted and refined that original recipe to make it truly gluten-free, maintaining all the wonderful chewiness and the beloved sweet-and-salty balance, while also reducing sugar content and perfecting the technique to ensure they hold together beautifully without crumbling when sliced or enjoyed.
What makes these stand out as the absolute best homemade gluten-free granola bars? Firstly, their incredible flexibility. This recipe invites customization, allowing you to incorporate any combination of your favorite add-ins. Whether you prefer classic chocolate chips (or dairy-free alternatives), tangy cranberries, nutritious pepitas, wholesome sunflower seeds, or shredded coconut, the possibilities are vast. We’ll explore a comprehensive list of granola bar add-in options below, catering to various tastes and dietary preferences, making each batch uniquely yours.
Secondly, achieving that soft and chewy texture has always been a top priority for homemade baked goods. Much like my highly-rated gluten-free chocolate chip cookies—which are pure perfection—these gluten-free snack bars are designed to feel like a decadent indulgence while providing wholesome, tasty fuel. They strike that delicate balance between treat and nourishment, making them a guilt-free pleasure.
Lastly, similar to my beloved homemade gluten-free granola recipe, this bar recipe employs clever baking tricks to ensure all the ingredients bind together harmoniously, resulting in a soft yet stable texture. This stability is largely attributed to the delightful binding power of honey, creamy peanut butter, and butter, which work in concert to create an unforgettably chewy bar.
This generous recipe yields a 9×13-inch pan of bars, which can be cut into approximately 12 traditional-sized bars or 24 smaller squares, ideal for portion control or for little hands. Once cooled completely, I recommend wrapping them individually. This not only keeps them fresh but also makes them incredibly convenient for grab-and-go moments. Store them in an airtight container at room temperature or freeze them for an effortless, make-ahead gluten-free breakfast idea or a healthy office snack, perfect for busy mornings or afternoon slumps.
Essential Ingredients for Perfect GF Granola Bars
Crafting delicious chewy gluten-free chocolate chip granola bars requires attention to a few key ingredients, particularly concerning their gluten-free certification. When sourcing your supplies, pay special heed to the crisp rice cereal and oats. Below, we delve into the specifics to ensure your bars are both safe and delectable:
- Certified Gluten-Free Quick Oats: This is a non-negotiable ingredient for truly gluten-free bars. Always opt for oats that are specifically certified gluten-free, meaning they have been processed and packaged in facilities free from cross-contamination with wheat or other gluten-containing grains. Quick oats are preferred over old-fashioned rolled oats in this recipe because their smaller, finer texture helps bind the ingredients more effectively, contributing to the bars’ cohesive structure.
- Oat Flour: A fantastic binder, oat flour plays a crucial role in holding these bars together. You can easily make your own homemade oat flour by simply processing quick oats in a blender until finely ground, a process that takes mere seconds. Alternatively, you can substitute an equal amount of almond flour or coconut flour. While I haven’t personally tested gluten-free all-purpose flour, it would likely work as well without issues.
- Gluten-Free Crisp Puffed Rice Cereal: This ingredient adds a wonderful lightness and subtle crunch to the granola bars. It is absolutely essential to read ingredient labels carefully and select a brand explicitly marked gluten-free. Many affordable options are available (I often use Aldi’s brand, and you can find more suggestions in my gluten-free rice krispie bars recipe). Be vigilant: ensure the ingredient list does not contain “malt flavor” or “barley,” as these are common sources of hidden gluten.
- Syrups (Honey & Corn Syrup): Honey is integral for achieving the signature chewy texture and contributes a rich, natural sweetness. Pure maple syrup can be substituted if preferred, though the texture might vary slightly. A small amount of light corn syrup is also included. This serves a dual purpose: it aids in achieving the perfect pliable texture and enhances the overall sweetness, ensuring the bars remain soft and don’t become brittle.
- Peanut Butter: For the best results and a consistently smooth, creamy texture, a classic creamy peanut butter (like Skippy or Jif) is highly recommended over natural nut butters, which can sometimes be too oily or separated. However, feel free to substitute with any other creamy nut butter of your choice if you have dietary restrictions or simply prefer a different flavor profile.
- Butter: Rich, unsalted butter adds depth of flavor and contributes to the moistness and chewiness of the bars. For those following a dairy-free diet, melted coconut oil makes an excellent, equally effective replacement.
- Chocolate Chips: Miniature-sized chocolate chips are ideal for this recipe. Their smaller size ensures even distribution throughout the dry ingredients, meaning every bite offers a delightful burst of chocolate. If you’re preparing dairy-free granola bars, simply substitute with your preferred brand of non-dairy baking chips.
Let’s Make These Chewy Granola Bars Together!
Ready to create your own batch of irresistible gluten-free granola bars? Follow these easy step-by-step instructions. (For exact ingredient amounts and the complete recipe card, please scroll further down. These photos and simplified steps guide you through the process.)
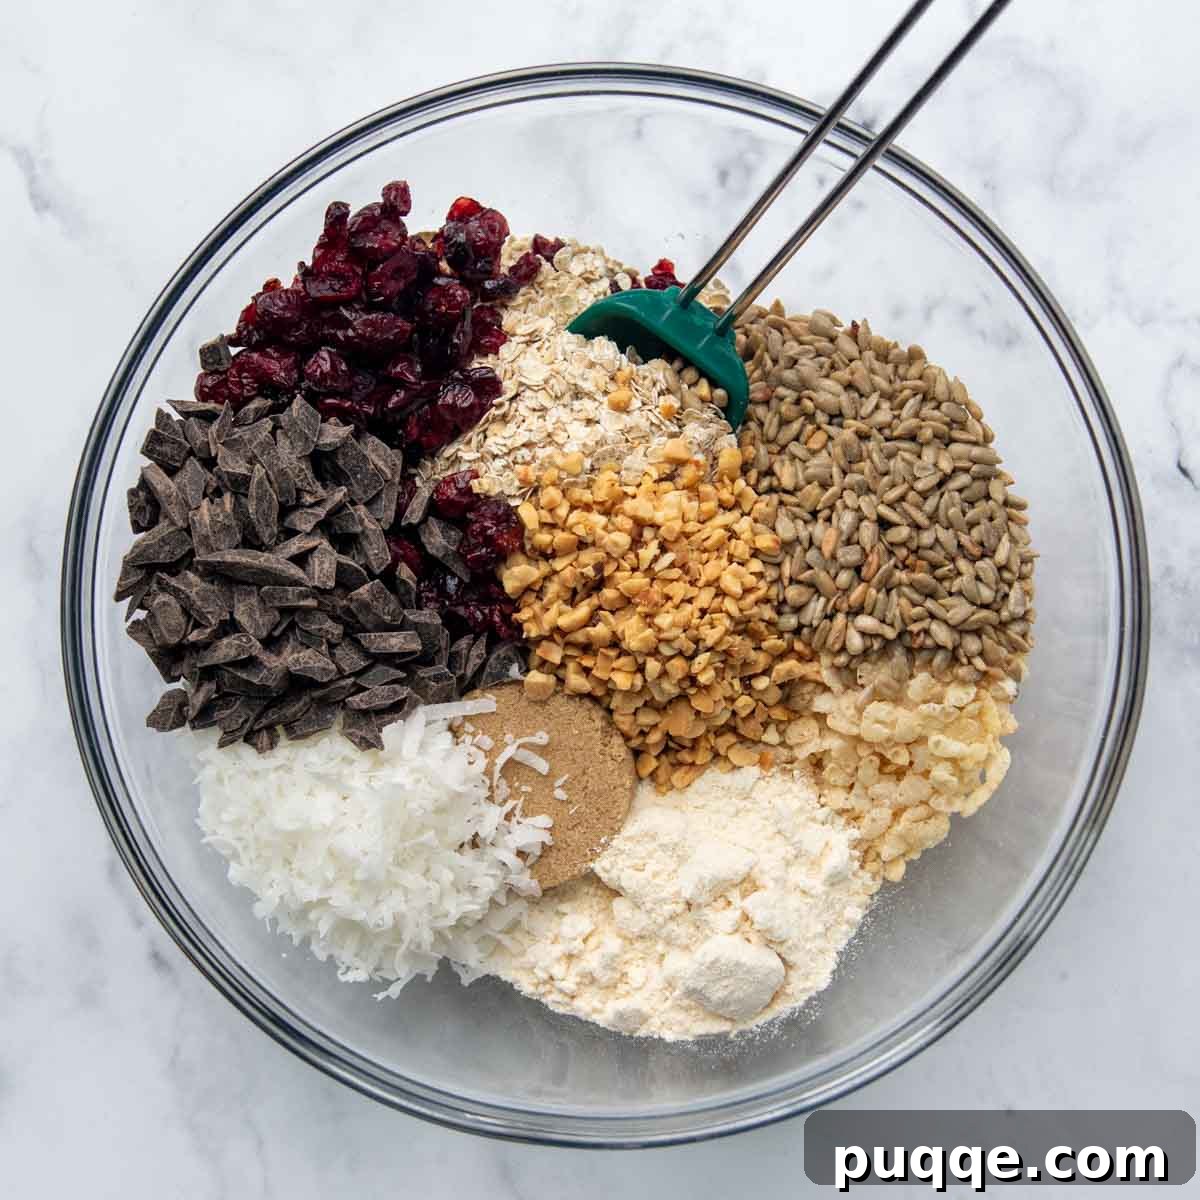
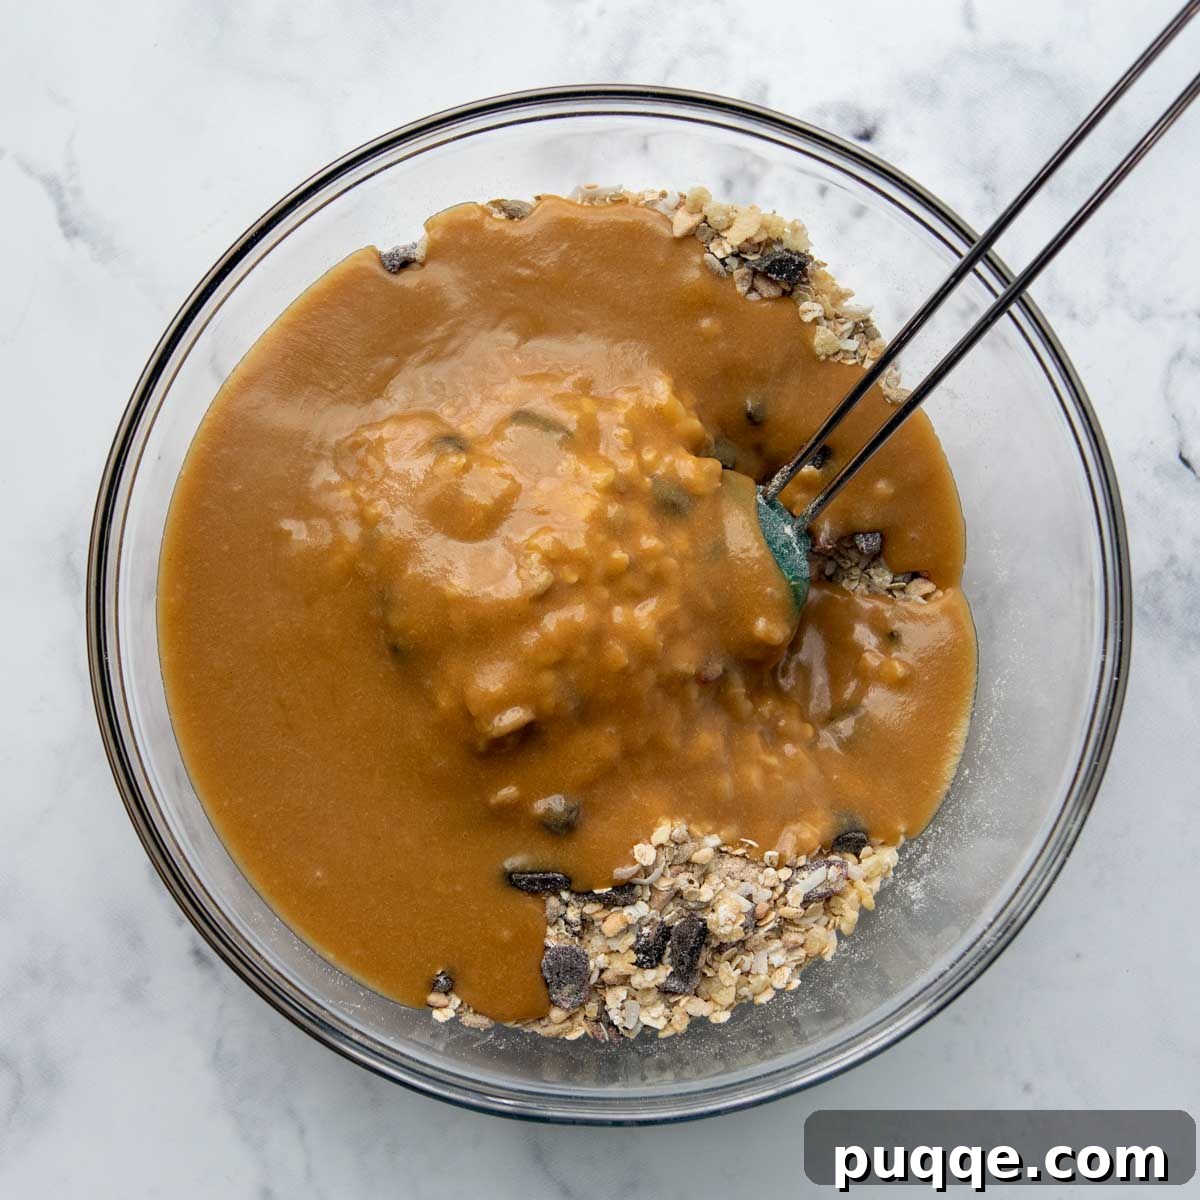
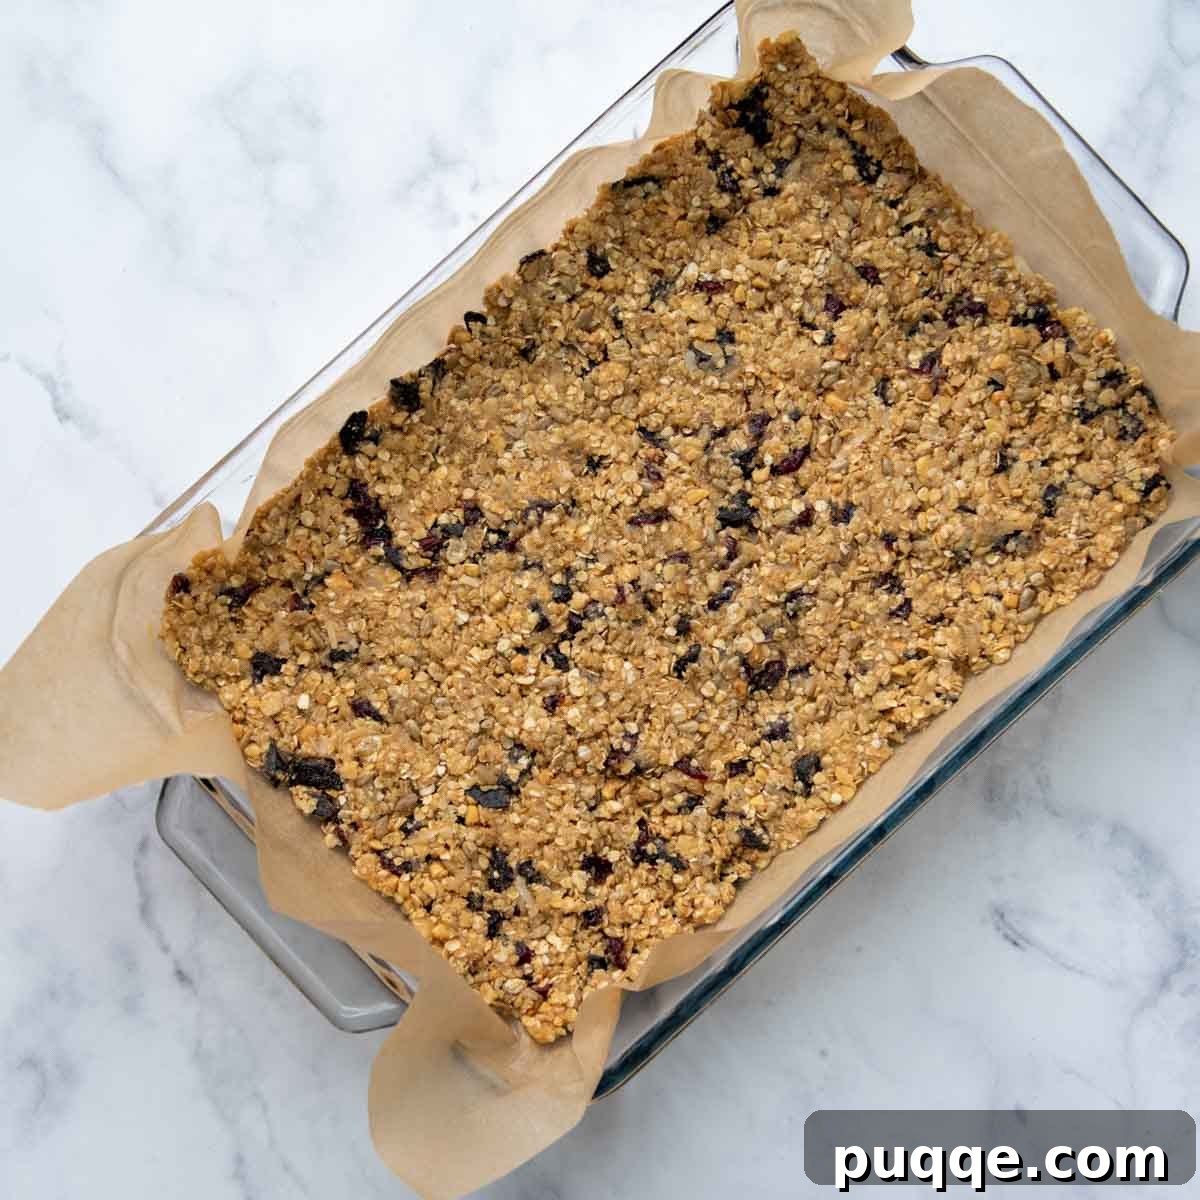
- Preheat your oven to 350ºF (175ºC). Line a 9×13-inch baking pan with a large piece of foil or parchment paper, ensuring there’s enough overhang on the sides to easily lift the finished bars out of the pan. Lightly grease the foil or parchment paper with cooking spray.
- In a large mixing bowl, combine all your dry ingredients: the certified gluten-free quick-cooking oats, gluten-free crisp rice cereal, packed brown sugar, oat flour, salt, chopped nuts, shredded coconut, dried cranberries, and miniature chocolate chips. Stir them together until well distributed.
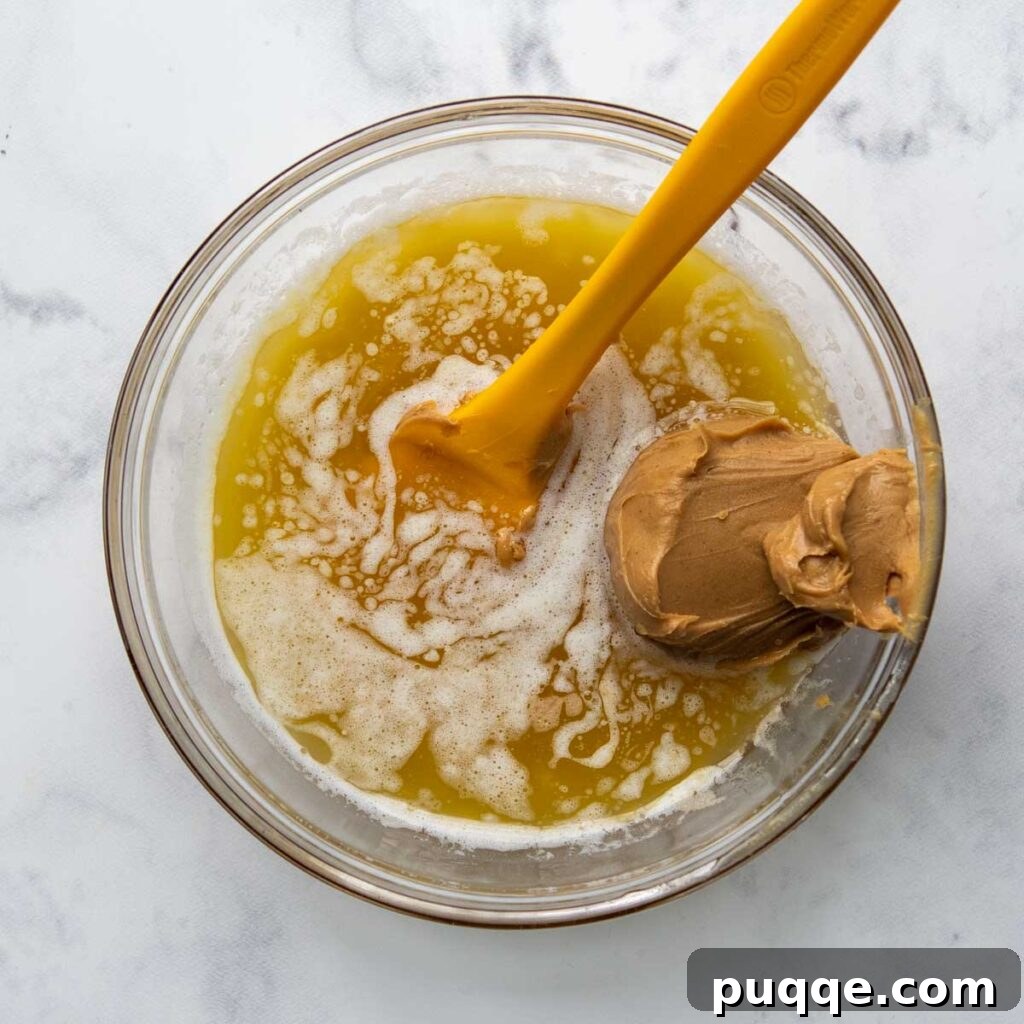
- In a separate microwave-safe bowl (or a small saucepan on the stovetop), melt the unsalted butter. Once the butter is fully melted, add the creamy peanut butter, vanilla extract, light corn syrup, honey, and water. Stir these wet ingredients together until the mixture is completely smooth and cohesive.
- Pour the smooth wet mixture over the dry ingredients in the large bowl. Stir everything thoroughly until all the dry ingredients are evenly moistened and coated. Transfer this granola mixture to your prepared baking pan. For best results, cover the pan with a large piece of plastic wrap and use your hands to press down FIRMLY and evenly across the entire surface, ensuring the mixture extends all the way to the edges. This firm pressing is key to bars that hold their shape. Remove the plastic wrap before baking.
- Bake the bars for 25-30 minutes, or until the edges are lightly golden brown and the center appears set. Once baked, remove the pan from the oven and allow the bars to cool completely in the pan on a wire rack. This step is crucial for their structure.
The Secret to Granola Bars That Stick Together
One common frustration with homemade granola bars, especially gluten-free versions, is their tendency to crumble or fall apart once cut. However, this recipe incorporates a few easy yet effective tricks to ensure your bars remain perfectly cohesive and delightfully chewy:
Ingredient Synergy: The right combination of wet ingredients acts as the “glue” that binds the oats and various add-ins together. In this recipe, honey, light corn syrup, creamy peanut butter, and butter are the heroes of adhesion. While you have the freedom to customize the dry ingredients and add-ins to your heart’s content, the proportions of these crucial wet binders should remain consistent. Altering them significantly could compromise the structural integrity of your granola bars, making them less robust and not nearly as transportable as a reliable snack.
The Power of Pressing: After all the ingredients are thoroughly mixed, don’t just gently pat them into the pan. This step requires a bit of muscle! Transfer the mixture to the prepared pan, then cover the pan with a large piece of plastic wrap. Using your hands, press down very FIRMLY and evenly across the entire surface of the bars, pushing all the way to the edges. This compacts the mixture, forcing the ingredients to meld closely together, which is vital for preventing crumbling once baked.
Patient Cooling and Refrigeration: Once your deliciously baked bars emerge from the oven, resist the urge to cut into them immediately. Allow them to cool down completely in the pan at room temperature first. This allows the binders to fully set. After reaching room temperature, take an extra step: transfer the pan to the refrigerator for at least 30 minutes (or even longer, up to an hour). This final chilling process helps to further solidify the bars, making them much easier to lift from the pan and cut into neat, sturdy portions. Only after this complete cooling and chilling process should you lift the slab of bars from the pan using the parchment paper overhang and slice them. Once cut, they can then be stored at room temperature, maintaining their perfect chewy texture.
Endless Customization: Granola Bar Add-In Options
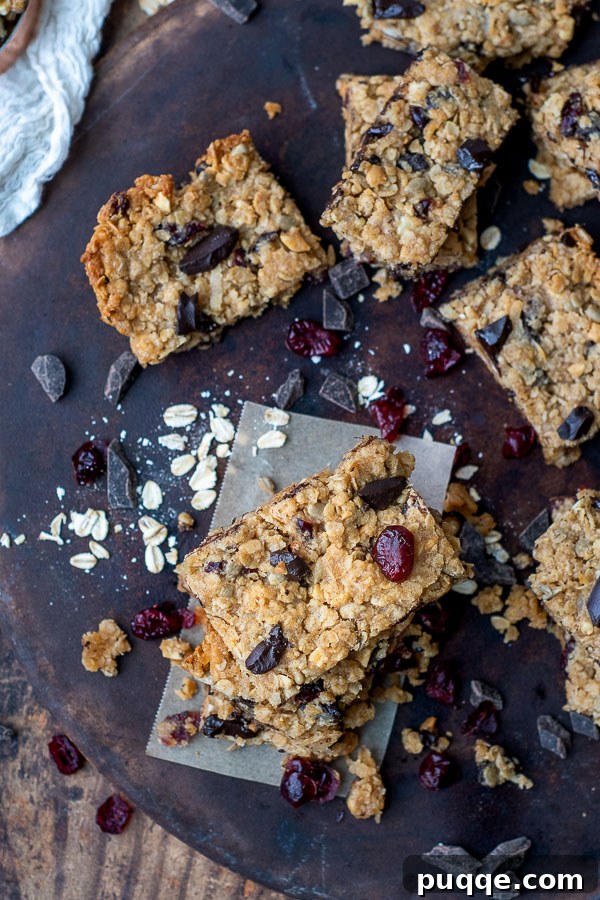
One of the most exciting aspects of this homemade gluten-free granola bar recipe is the freedom it offers for personalization! You can truly make these bars your own by experimenting with different add-ins. While I’ve listed my typical favorites in the recipe card, remember this golden rule: feel free to swap out ingredients and adjust quantities, as long as your total amount of dry add-ins (excluding oats, cereal, and flour) comes to approximately 2 ⅓ cups. This ensures the balance of wet to dry ingredients remains optimal for that perfect chewy texture.
Here are some fantastic add-in options to inspire your next batch:
- Chopped Nuts: Almonds, walnuts, pecans, cashews, or peanuts – any kind you love will add a delightful crunch and healthy fats.
- Dried Fruits: Elevate the sweetness and chewiness with dried cranberries, plump raisins, finely diced apricots, tart dried cherries, or soft, chewy diced dates.
- Seeds: Boost nutrition and texture with sunflower seeds, nutrient-rich chia seeds, or earthy flax seeds. Pepitas (pumpkin seeds) are also a fantastic choice for a slightly savory note.
- Coconut: Shredded coconut, either sweetened or unsweetened, adds a tropical flavor and a lovely chew. Sweetened coconut will also contribute a little extra moisture and sweetness to the bars.
- Baking Chips: Beyond classic chocolate chips (miniature ones are best for even distribution!), consider white chocolate chips, peanut butter chips, or butterscotch chips. Always double-check labels to ensure they are gluten-free, especially for flavored chips.
- Gluten-Free Puffed Rice Cereal: For an extra airy crunch, you can increase the amount of puffed rice cereal or add other gluten-free puffed grains.
- Candy Bits: For a fun, kid-friendly treat, a handful of M&Ms or mini M&Ms can be a delightful addition (check for GF certification if needed).
Mixing and matching these options allows for endless flavor combinations. Imagine cranberry-pecan bars, tropical coconut-pineapple bars, or triple chocolate indulgence! The possibilities are truly limited only by your imagination.
More Pro Baking Tips for Granola Bar Success
Achieving the perfect homemade granola bar is a craft, and a few expert tips can make all the difference in elevating your baking from good to truly exceptional:
- Decadent Chocolate Dipped Bottoms: For an extra touch of gourmet indulgence, once your bars are completely cooled, dip their bottoms in melted chocolate. Place them on wax paper or parchment paper and allow the chocolate to harden completely before storing. This creates a delightful contrast in texture and flavor.
- Peanut Butter Lover’s Dream: If you’re a true peanut butter enthusiast, enhance your bars by using chopped peanuts within the mixture. For an irresistible finish, melt about ¼ cup of peanut butter chips and drizzle them generously over the top of the cooled bars.
- Patience with Cooling is Key: As emphasized earlier, always leave the baked bars in the pan until they have cooled completely to room temperature. This crucial step allows the binding agents to set properly. For ultimate stability and clean cuts, transfer the cooled pan to the refrigerator for at least 30 minutes before attempting to slice them. This prevents crumbling and ensures beautifully formed bars.
- Oat Type Matters: This recipe specifically calls for quick-cooking oats because their finer texture helps bind the ingredients more effectively. While old-fashioned rolled oats can be substituted, be aware that they might result in a slightly looser bar that is more prone to breaking apart.
- Flour Alternatives: If oat flour isn’t readily available or you prefer an alternative, both almond flour and coconut flour can be used as direct substitutes in equal measure. Each will impart a slightly different flavor profile and texture, so feel free to experiment to find your favorite.
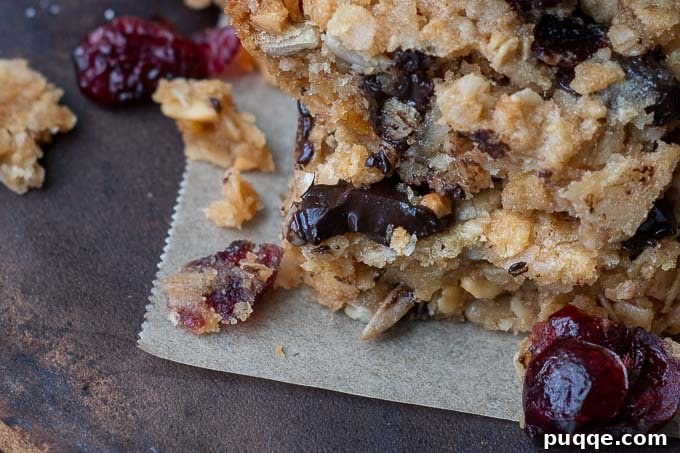
Save this recipe to your Pinterest board!
Let’s be friends on Pinterest! I’m always sharing great recipes!
Did you make this recipe? I love hearing from you! Leave a star rating and comment below the recipe card. It helps others when searching for recipes and I appreciate feedback from our community. You will always hear back from me! -Melissa
Average: 4.91 stars (21 ratings)
Gluten-Free Chewy Chocolate Chip Granola Bars

Melissa Erdelac
24 bars
10 mins
25 mins
35 mins
Pin Recipe
Rate & Review
Ingredients
Dry Ingredients:
- 1 ⅔ cup gluten-free quick cooking oats
- ⅔ cup gluten-free puffed rice cereal
- ½ cup chopped nuts*
- ½ cup shredded coconut*
- ½ cup dried cranberries*
- ½ cup miniature chocolate chips*
- ⅓ cup packed brown sugar, packed
- ⅓ cup oat flour, (or substitute coconut flour or almond flour)
- ⅓ cup sunflower seeds*
- ½ teaspoon salt
Wet ingredients:
- 6 tablespoons unsalted butter
- ⅓ cup peanut butter
- ¼ cup honey
- 2 tablespoons light corn syrup
- 1 tablespoon water
- 1 teaspoon vanilla extract
Equipment
-
9X13 Baking Dish
-
Silicone Spoon
-
Large Mixing Bowl
Instructions
-
Preheat oven to 350ºF (175ºC). Line an 9X13″ pan with a large piece of foil or parchment paper, ensuring enough overhang to lift the bars out. Lightly grease with cooking spray.
-
In a large bowl, mix all dry ingredients: 1 ⅔ cup gluten-free quick cooking oats, ⅔ cup gluten-free puffed rice cereal, ⅓ cup packed brown sugar, ⅓ cup oat flour, ½ teaspoon salt, ½ cup chopped nuts*, ½ cup shredded coconut*, ½ cup dried cranberries*, ⅓ cup sunflower seeds*, and ½ cup miniature chocolate chips*. Stir until well combined.
-
In another microwave-safe bowl (or small saucepan), melt 6 tablespoons unsalted butter. Once melted, stir in ⅓ cup peanut butter, ¼ cup honey, 2 tablespoons light corn syrup, 1 tablespoon water, and 1 teaspoon vanilla extract. Stir until smooth.
-
Add the wet ingredients to the dry ingredient bowl and stir thoroughly to combine. Transfer the mixture to the prepared pan. Use a large piece of plastic wrap to press down FIRMLY on top of the bars, all the way to the edges, before removing the wrap and baking.
-
Bake the bars for 25 minutes, or until the edges are golden brown. Cool completely in the pan on a wire rack.
-
After cooling to room temperature, transfer the pan to the fridge for at least 30 minutes. Then, lift the bars from the pan using the parchment paper overhang and cut into desired sizes. At this point, they may be stored at room temperature. The initial refrigeration just helps further solidify the bars before cutting.
-
Wrap bars individually in plastic wrap and place in an airtight container. Store at room temperature for up to one week, refrigerated for up to two weeks, or freeze for up to three months for an easy, make-ahead snack.
Notes
Oat Flour
Make your own oat flour by processing ⅓ cup quick-cooking oats in a blender until finely ground.
**Add-Ins
Add your preferred add-ins and quantities, as long as the total amount adds up to approximately 2 ⅓ cups.
Storage Tips
These bars last about 1 week when wrapped individually with plastic wrap and stored in an airtight container at room temperature.
To extend their longevity, they may also be stored in the refrigerator for up to 2 weeks. For best results, still wrap individually with plastic wrap first to prevent them from drying out.
These bars may also be frozen for longer storage. Place individually wrapped bars in an airtight container or freezer bag and freeze for up to 3 months.
Recipe adapted from King Arthur Flour
Carbohydrates: 20g,
Protein: 3g,
Fat: 10g,
Saturated Fat: 4g,
Polyunsaturated Fat: 2g,
Monounsaturated Fat: 4g,
Trans Fat: 0.1g,
Cholesterol: 8mg,
Sodium: 95mg,
Potassium: 120mg,
Fiber: 2g,
Sugar: 12g,
Vitamin A: 91IU,
Vitamin C: 0.1mg,
Calcium: 16mg,
Iron: 1mg
Did you make this recipe?
Please leave a star rating and review below. It helps others when searching for recipes and I LOVE feedback!