
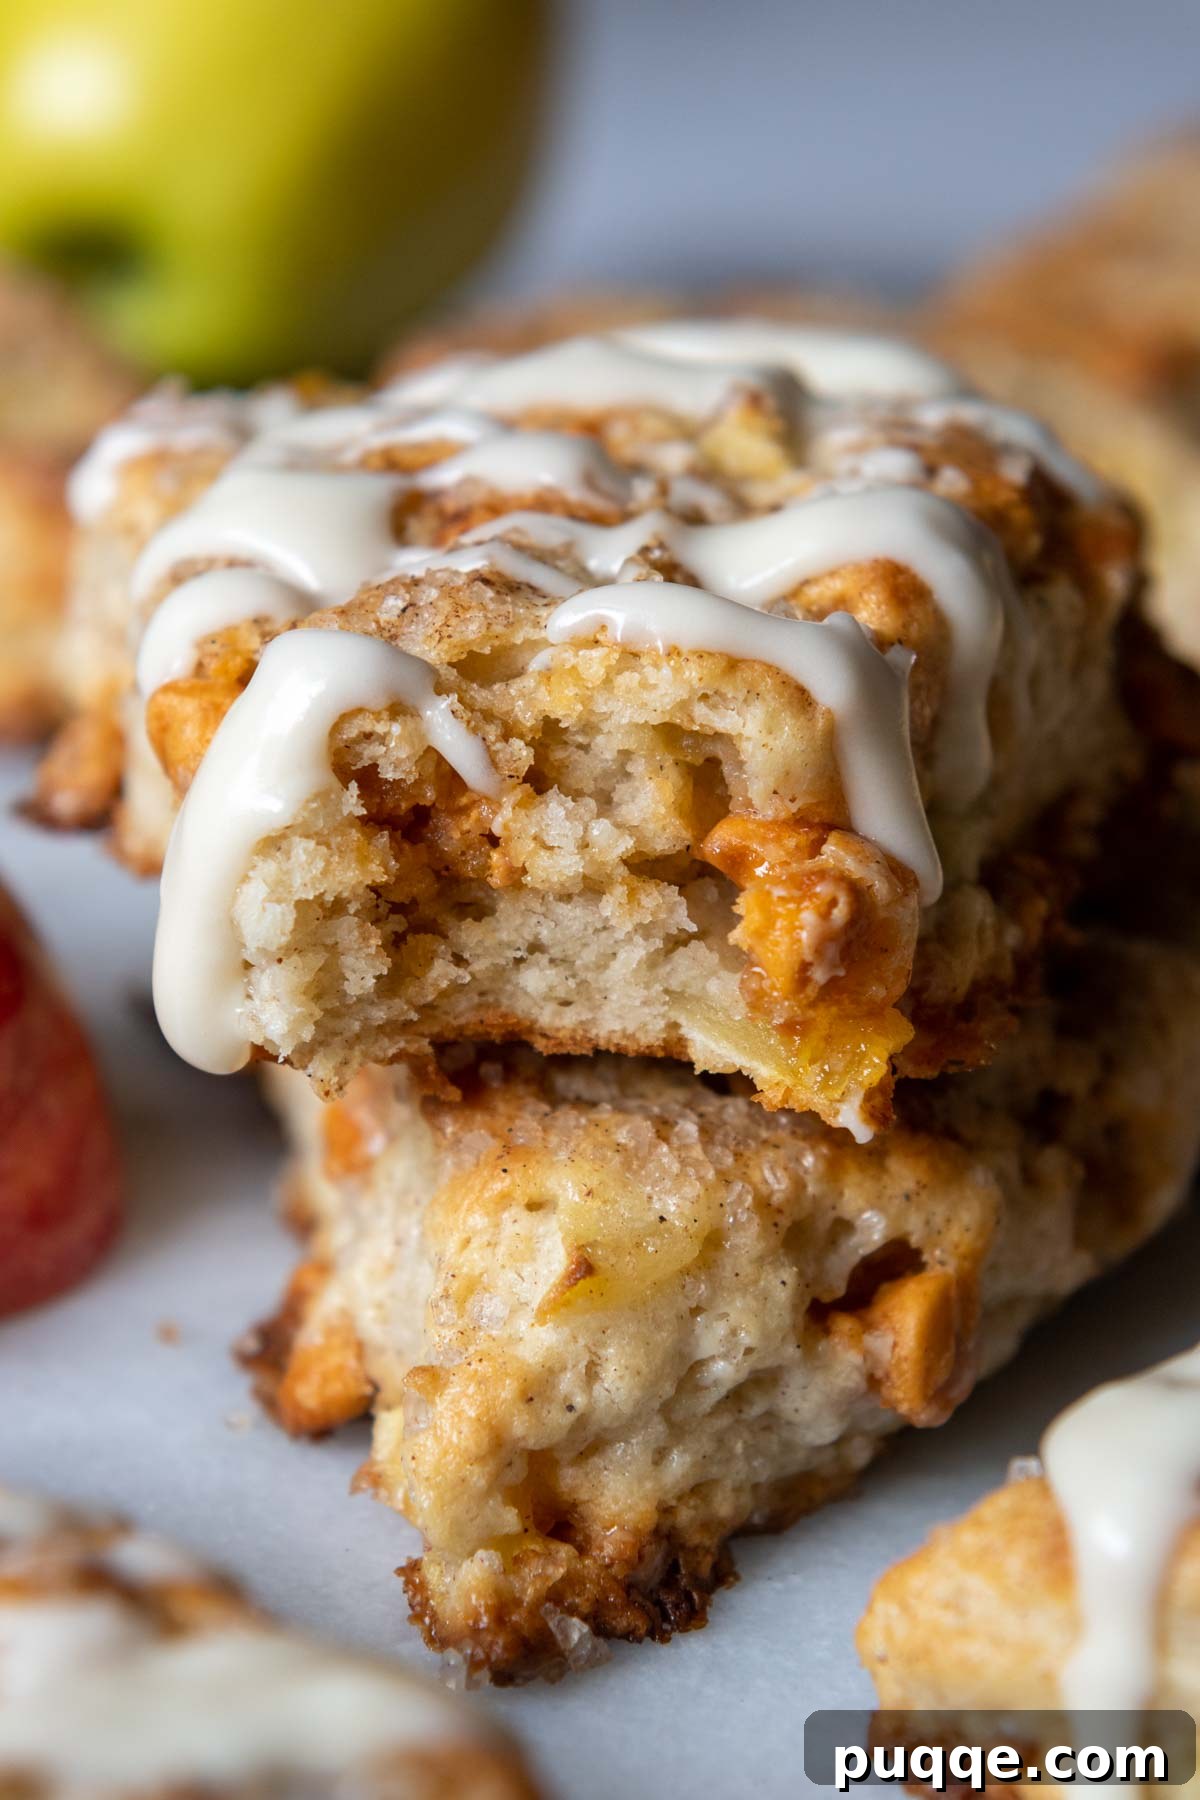
Imagine biting into a scone that is perfectly tender, wonderfully fluffy, and bursting with flavor, yet entirely gluten-free. Our exquisite gluten-free apple scones with butterscotch deliver just that – a bakery-quality treat that’s surprisingly simple for even a novice baker to master. The secret to their unparalleled texture lies in the strategic use of sour cream, which expertly coats gluten-free starches, ensuring a moist, tender crumb without any dryness. Each scone is generously studded with juicy apple chunks, creating a delightful contrast with the comforting warmth of cinnamon spice and the rich, gooey sweetness of butterscotch chips. This recipe isn’t just a guide; it’s an invitation to experience the ultimate autumn indulgence, whether for a cozy morning breakfast or a sophisticated brunch.
Mastering the Best Gluten-Free Apple Cinnamon Scones
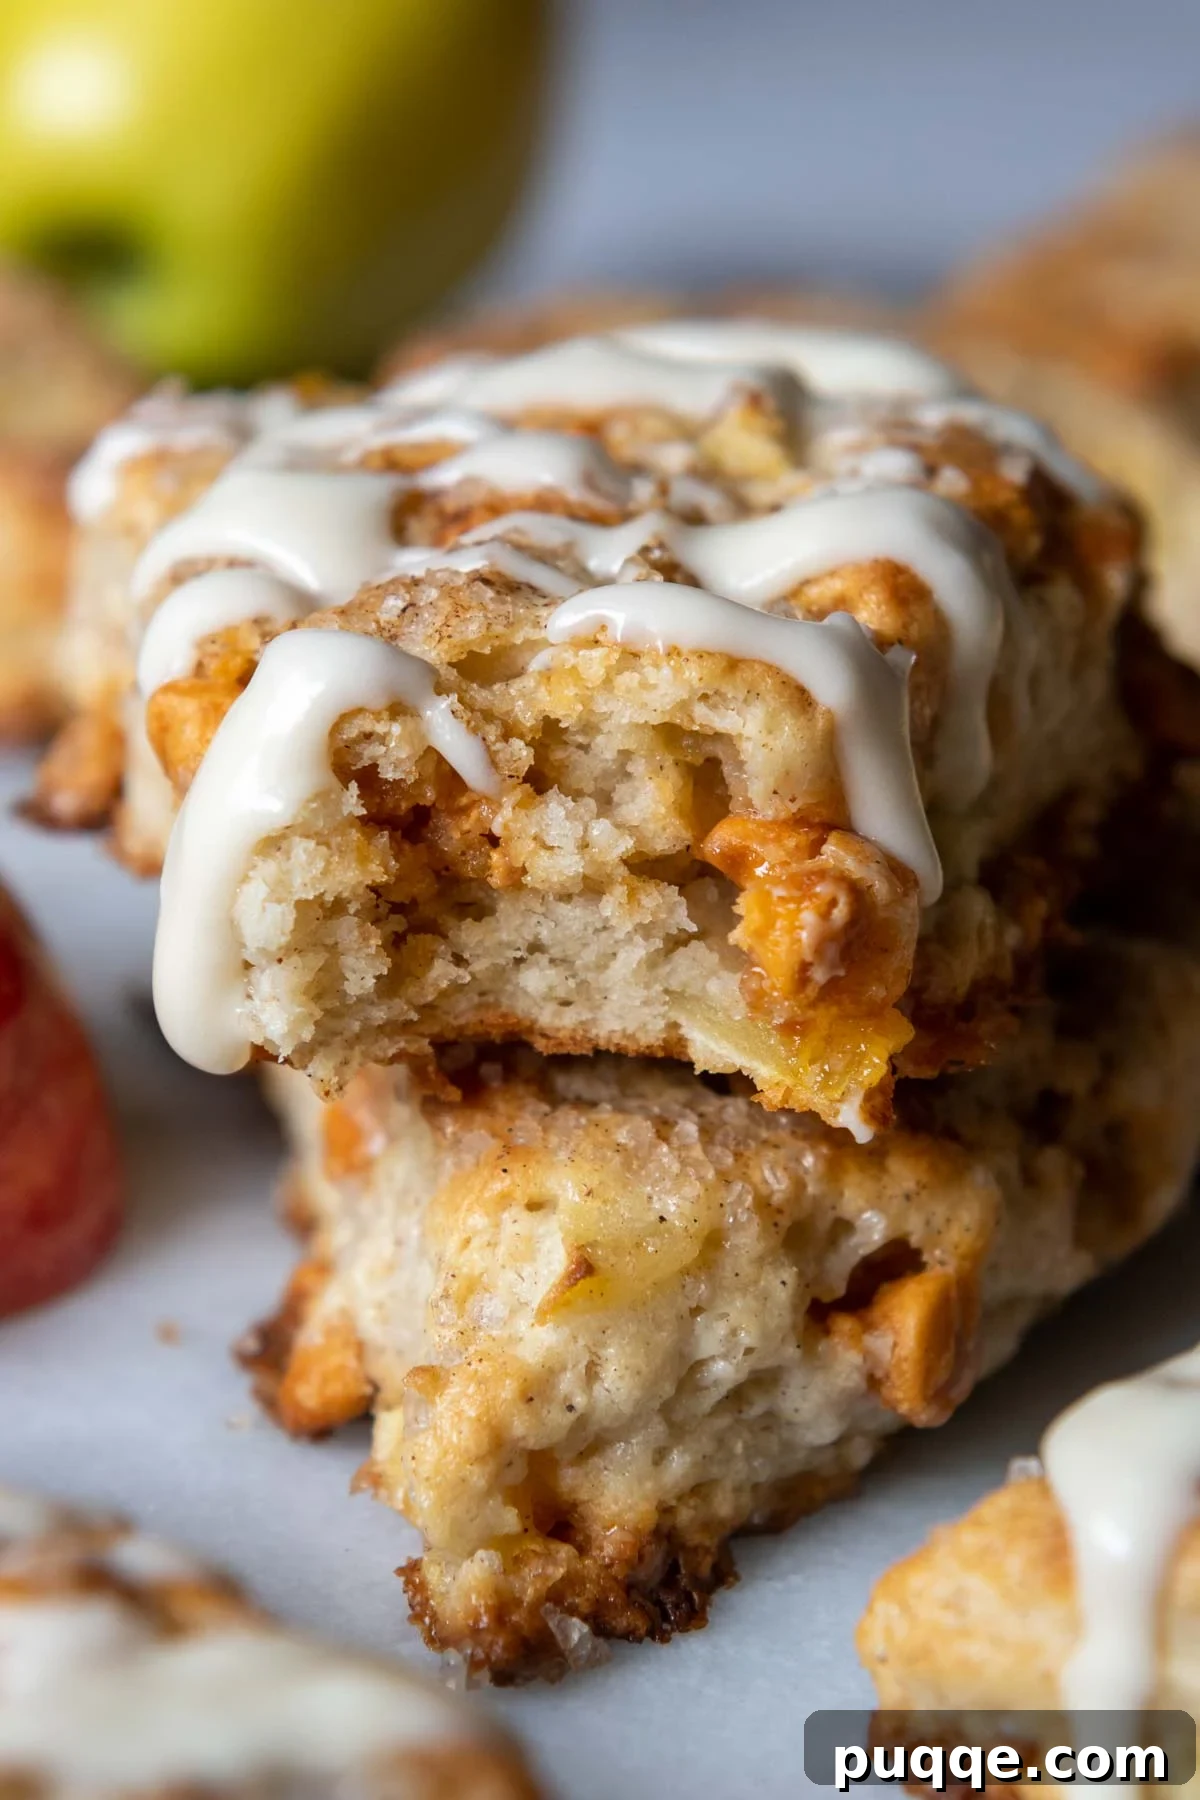
Crafting the perfect gluten-free apple cinnamon scone demands both precision and a deep understanding of gluten-free baking dynamics. Our recipe is a culmination of successful techniques, drawing inspiration from robust savory GF cheese scones and the acclaimed tenderness of our popular berry scones. The core innovation lies in the inclusion of sour cream. Unlike traditional recipes that often rely on buttermilk, sour cream provides consistent moisture and a desirable tang, ensuring the gluten-free starches are fully hydrated and coated. This crucial step prevents the common pitfalls of dry or gritty textures often associated with gluten-free baked goods, yielding a crumb that is exceptionally tender and airy. You can even substitute plain yogurt for similar fantastic results, offering flexibility without compromising quality.
Beyond texture, the flavor profile of these scones is carefully balanced to highlight the seasonal best. We’ve refined the rich, spiced undertones found in our beloved gluten-free apple cinnamon bread to perfectly complement the bright, juicy notes of fresh apples. While cinnamon is an obvious and cherished partner for apples, the real game-changer here is a generous scattering of butterscotch chips. These sweet, buttery morsels melt into pockets of pure delight, elevating the classic apple-cinnamon duo into an irresistible autumn symphony. For a crowning finish, a sprinkle of coarse sugar adds a delicate crunch and a touch of sparkle, or for an extra layer of decadence, a quick, luscious glaze transforms these scones into an even more luxurious treat. We’ll guide you through each step with detailed photos and expert tips, empowering you to personalize this recipe with additional mix-ins, making it truly your own. These scones are perfect enjoyed warm from the oven, or they can be frozen to provide a convenient, gourmet gluten-free breakfast ideal for special occasions or entertaining guests.
Essential Ingredients for Fluffy Gluten-Free Apple Scones
The success of these scones hinges on selecting the right ingredients. Here’s a detailed look at what you’ll need and how to best use them, along with practical substitutions. Should you have any further questions about modifications, please don’t hesitate to ask.
- Gluten-Free Flour: The foundation of exceptional gluten-free scones is a high-quality flour blend. Through extensive baking trials, we’ve consistently found Cup4Cup to be superior. Its unique blend, particularly the cornstarch content, plays a vital role in absorbing moisture effectively and contributing to the light, fluffy texture that defines these scones. For best results, we strongly advise against substituting with single-ingredient flours like almond flour or oat flour, or other specialized GF starches, as they behave very differently in scone recipes.
- Butter: For achieving that characteristic flakiness and ensuring the dough is manageable, it is absolutely crucial that your butter is well-chilled. Cold butter creates pockets of steam during baking, which results in a wonderfully layered and tender interior.
- Sour Cream (or Yogurt): This ingredient is a cornerstone of our scone recipe. It provides the tangy depth typically associated with buttermilk, but its thicker consistency contributes to a sturdier dough. This added structure is particularly beneficial for gluten-free baking, where doughs can sometimes be less predictable. If sour cream isn’t available, plain full-fat yogurt can be substituted with equally excellent results, maintaining both moisture and tang.
- Egg Yolk: Gluten-free flours absorb liquids differently than traditional wheat flours. By using just the egg yolk, we introduce richness and an effective binding agent without adding excess liquid that could make the dough too wet or compromise its delicate crumb structure. The yolk contributes to a beautiful golden hue and helps create a tender, cohesive scone.
- Apples: The choice of apple variety is important for texture. You need an apple that will hold its shape and retain some firmness during baking, rather than breaking down into mush or becoming mealy. Our top recommendation is Golden Delicious, known for its sweet flavor and sturdy texture. Refer to our “Recommended Apples For Baking” section below for a comprehensive list of suitable alternatives.
- Butterscotch Chips: These chips are essential for the distinctive autumn flavor of these scones. Always make sure to carefully check labels to ensure your butterscotch chips are certified gluten-free, as some brands may contain hidden gluten ingredients. Reputable gluten-free brands include Great Value (Walmart), Baker’s Corner (Aldi), Hershey’s, and Guittard.
- Cinnamon: A warm, aromatic spice that perfectly complements the sweetness of apples and butterscotch, adding depth and coziness to every bite.
- Sugar: Granulated sugar sweetens the dough, balancing the tartness of the apples and the richness of other ingredients.
- Baking Powder & Salt: These are critical leavening agents and flavor enhancers, ensuring a proper rise and bringing out the best in all the other ingredients.
- Vanilla Extract: Adds a layer of subtle aromatic sweetness that rounds out the overall flavor profile.
Crafting Your Gluten-Free Apple Scones: A Step-by-Step Guide
Making these gluten-free apple scones is a straightforward process, designed for success. The key to achieving their signature tender texture, rather than a dense or hard result, lies in ensuring your butter and sour cream (or yogurt) are thoroughly chilled. Additionally, allowing the dough to rest in the refrigerator is a crucial step that should not be skipped, as it gives the gluten-free starches time to fully hydrate and relax, preventing a gritty texture.
- Combine Dry Ingredients: In a large mixing bowl, thoroughly whisk together your gluten-free flour blend, granulated sugar, baking powder, ground cinnamon, and salt. Ensure there are no lumps and the ingredients are well-distributed.
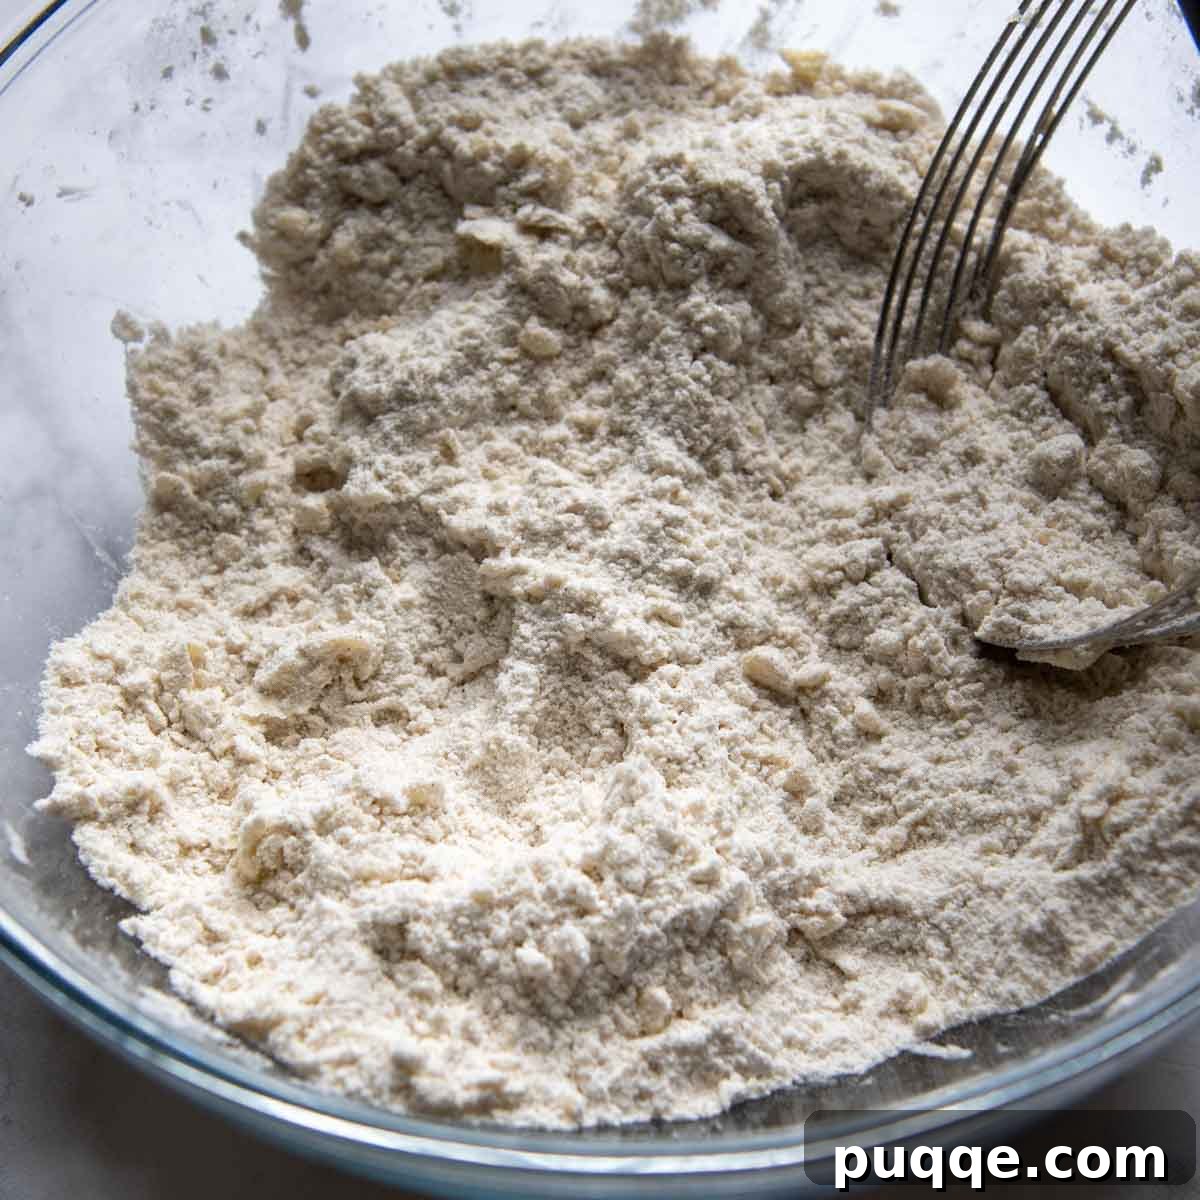
- Cut in Cold Butter: Add the cold, chopped unsalted butter to the dry ingredients. Using a pastry blender, a fork, or even your fingertips, work the butter into the flour mixture until it resembles small, uniform crumbs. The goal is to keep the butter as cold as possible to ensure flaky scones.
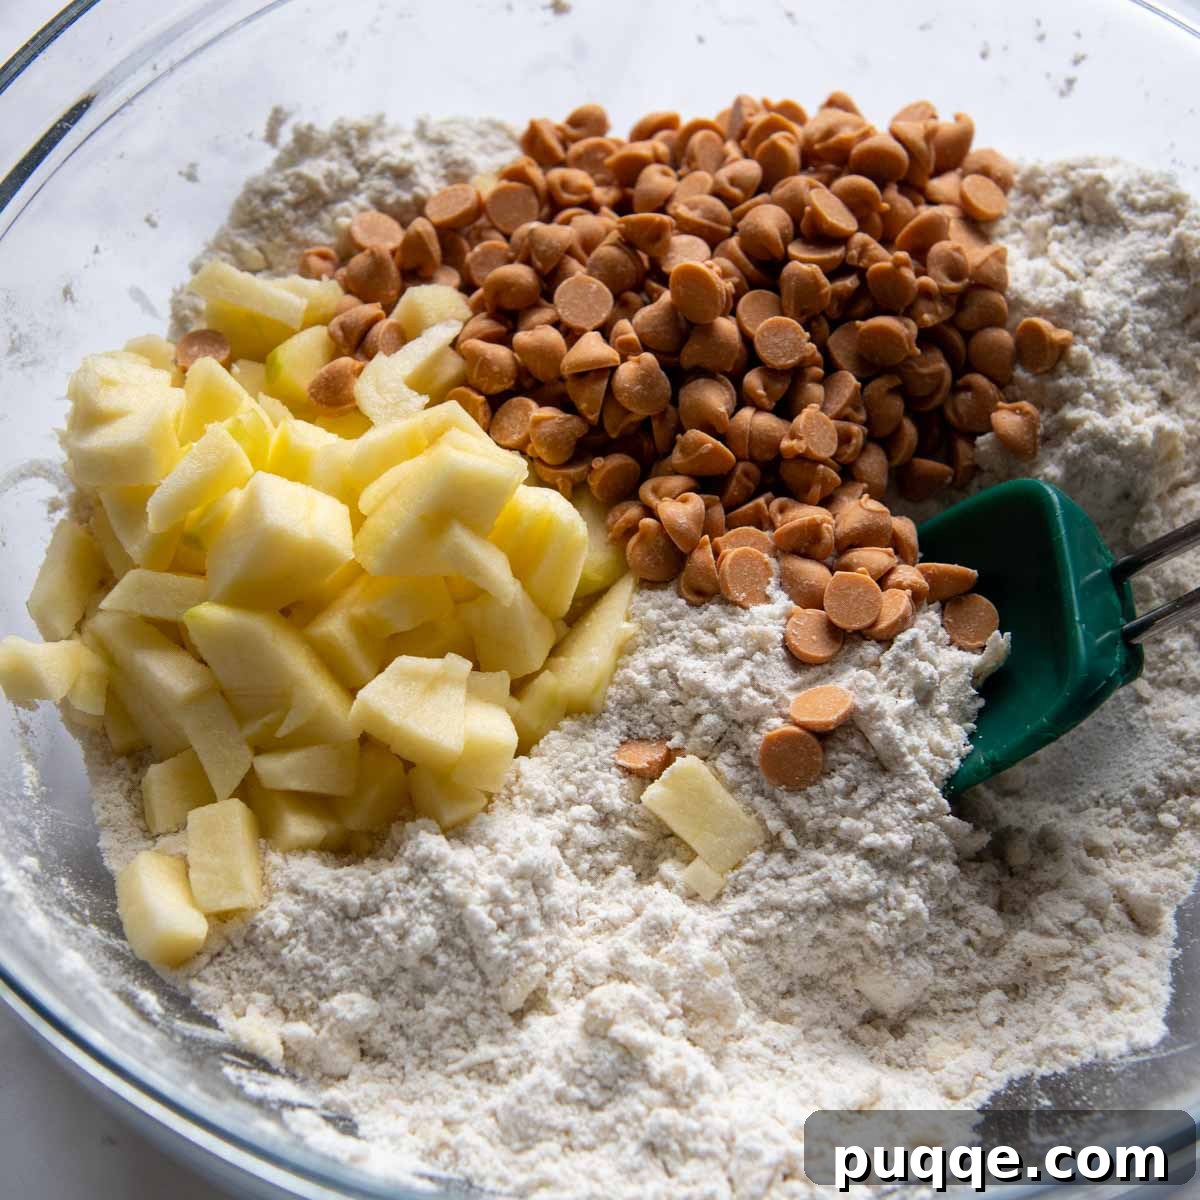
- Add Apples and Butterscotch Chips: At this stage, gently fold in the peeled and diced apples and the gluten-free butterscotch chips. Incorporating them now, before the wet ingredients, helps prevent overmixing the dough later, which can lead to tough scones.
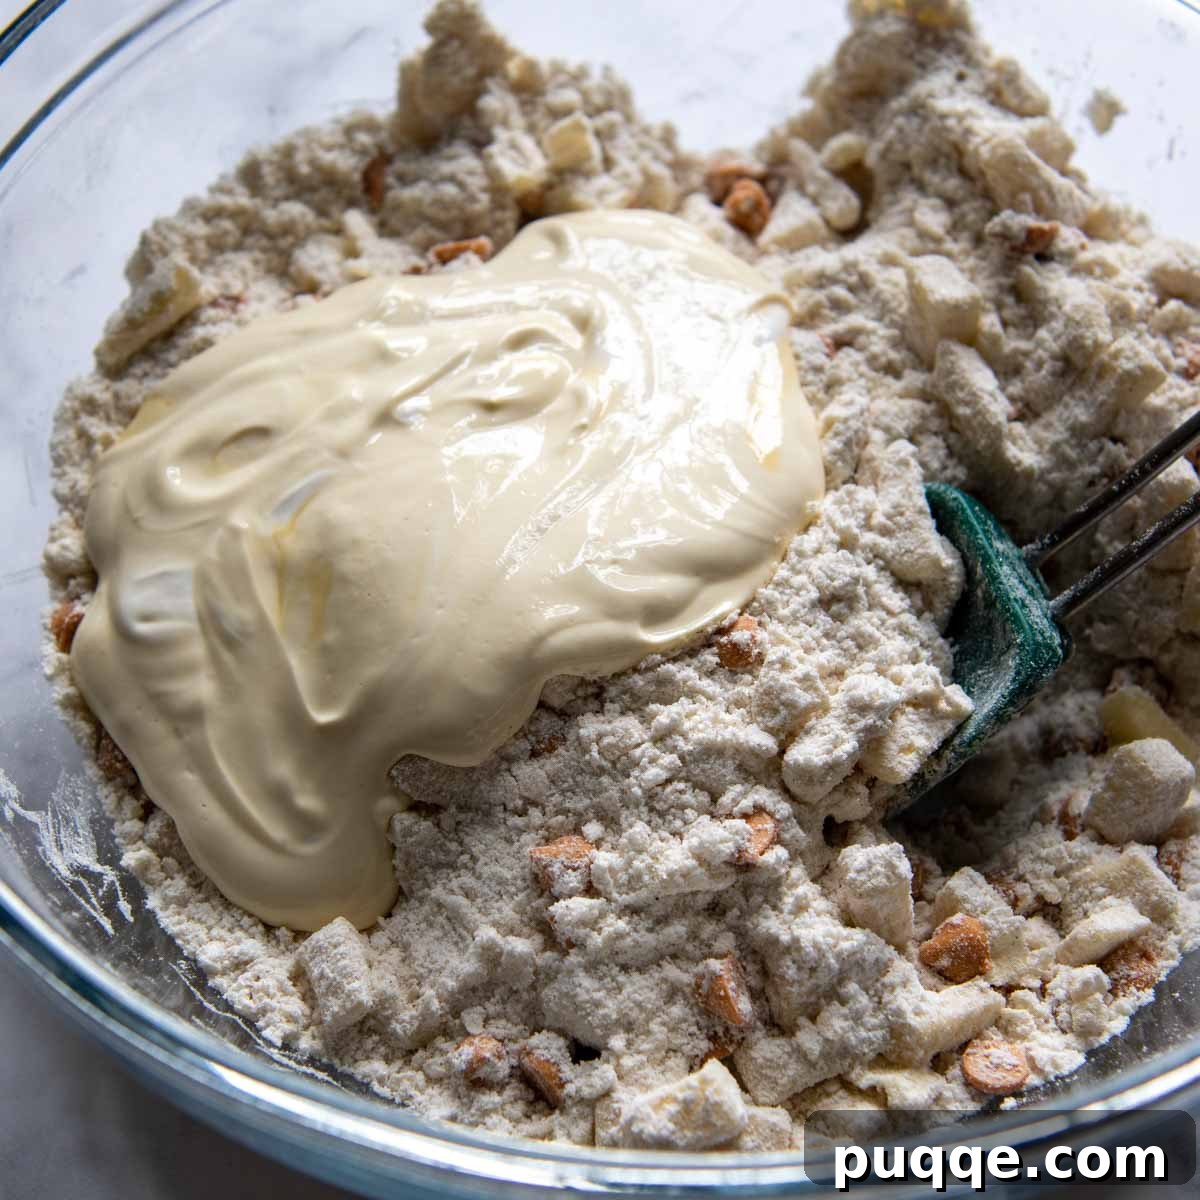
- Prepare Wet Ingredients: In a separate small bowl, whisk together the sour cream (or yogurt), egg yolk, and vanilla extract until smooth.
- Combine Wet and Dry: Pour the wet ingredient mixture into the flour and apple mixture. Using a spatula or a wooden spoon, gently stir until just combined. Be careful not to overmix; a few streaks of flour are acceptable. The dough will be quite thick.
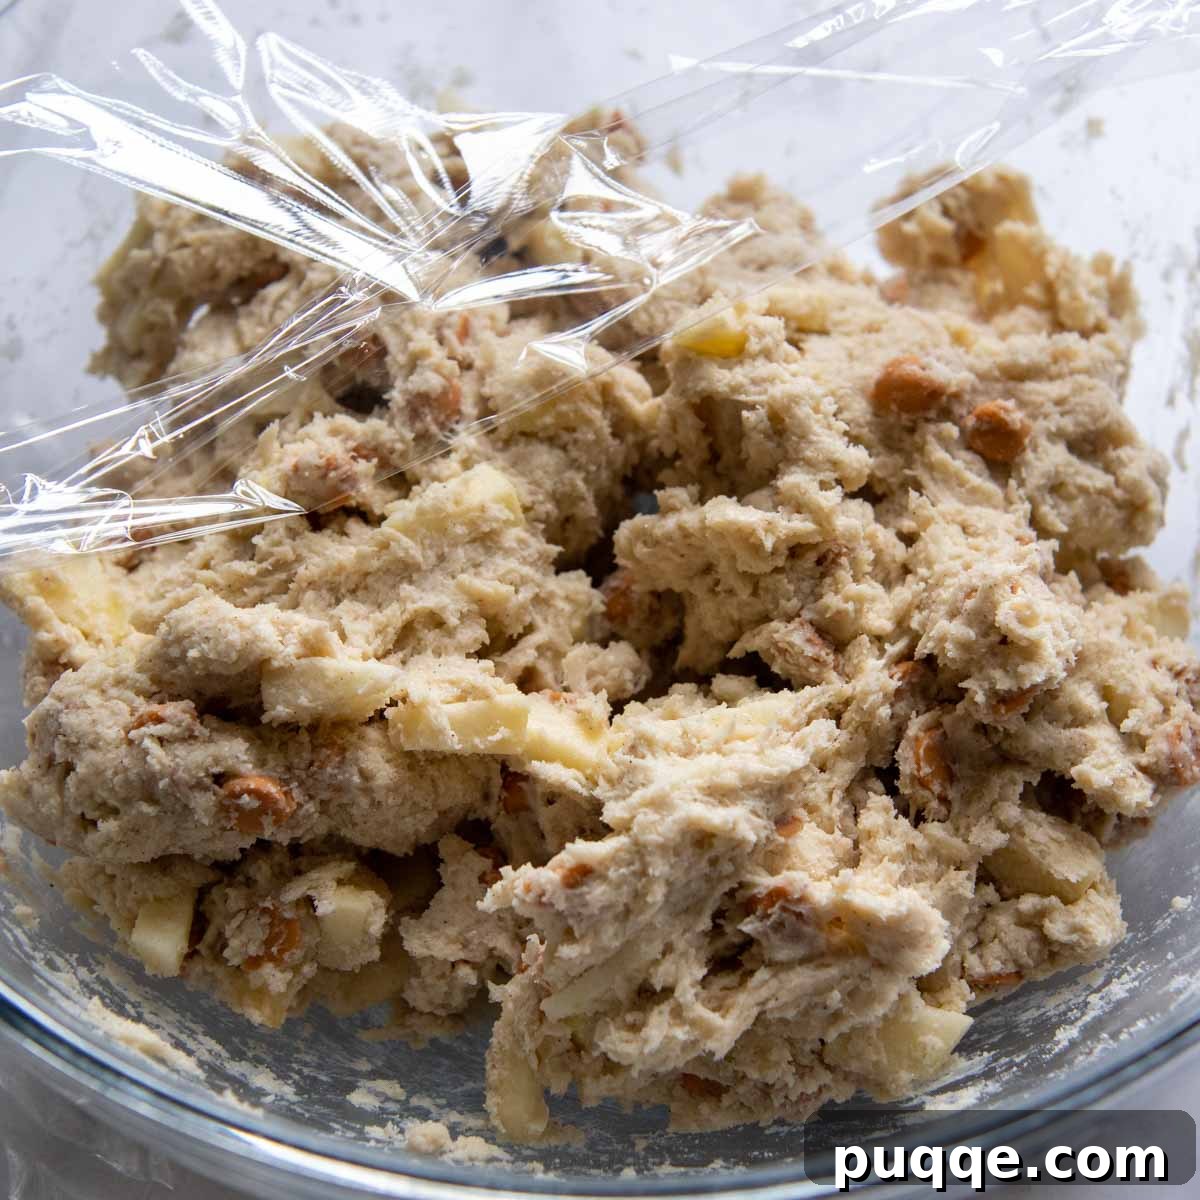
- Chill the Dough: Cover the bowl with plastic wrap and refrigerate the dough for a minimum of 30 minutes. This chilling period is crucial for gluten-free baking as it allows the flours to fully hydrate and prevents a gritty texture while also firming up the butter. Preheat your oven to 450°F (230°C) during this time.
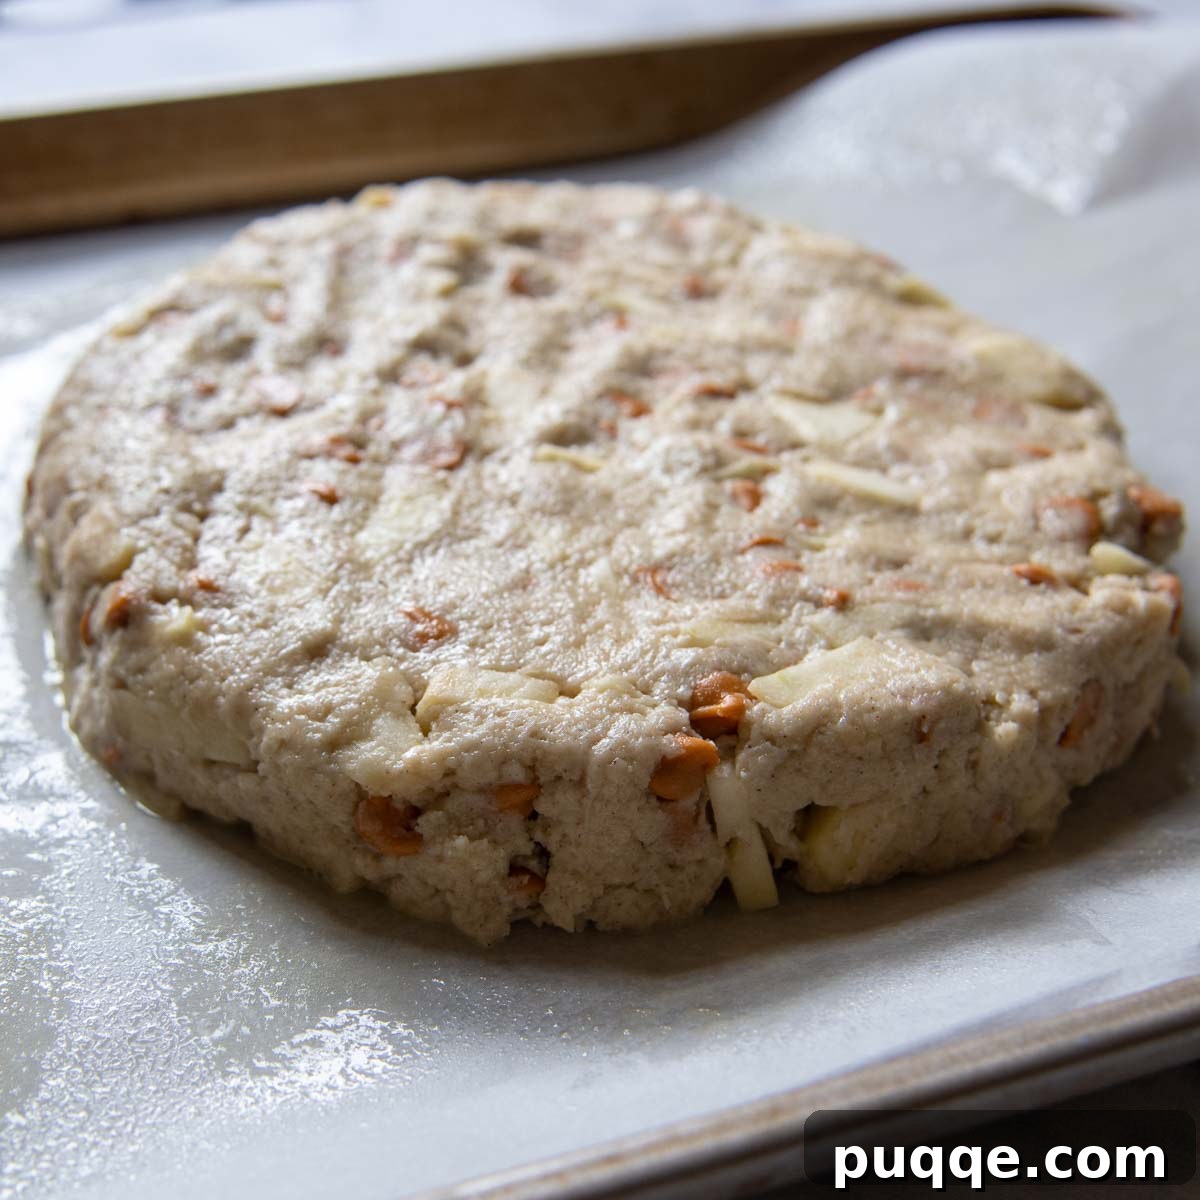
- Shape the Scones: Line a baking tray with greased parchment paper. Transfer the chilled dough to the center of the prepared baking sheet and gently pat it into a large, even 7-inch (18 cm) disc, approximately 1 inch (2.5 cm) thick. If the dough feels sticky, lightly grease your fingers with cooking spray. Use a sharp knife to cut the disc into 8 equal triangles.
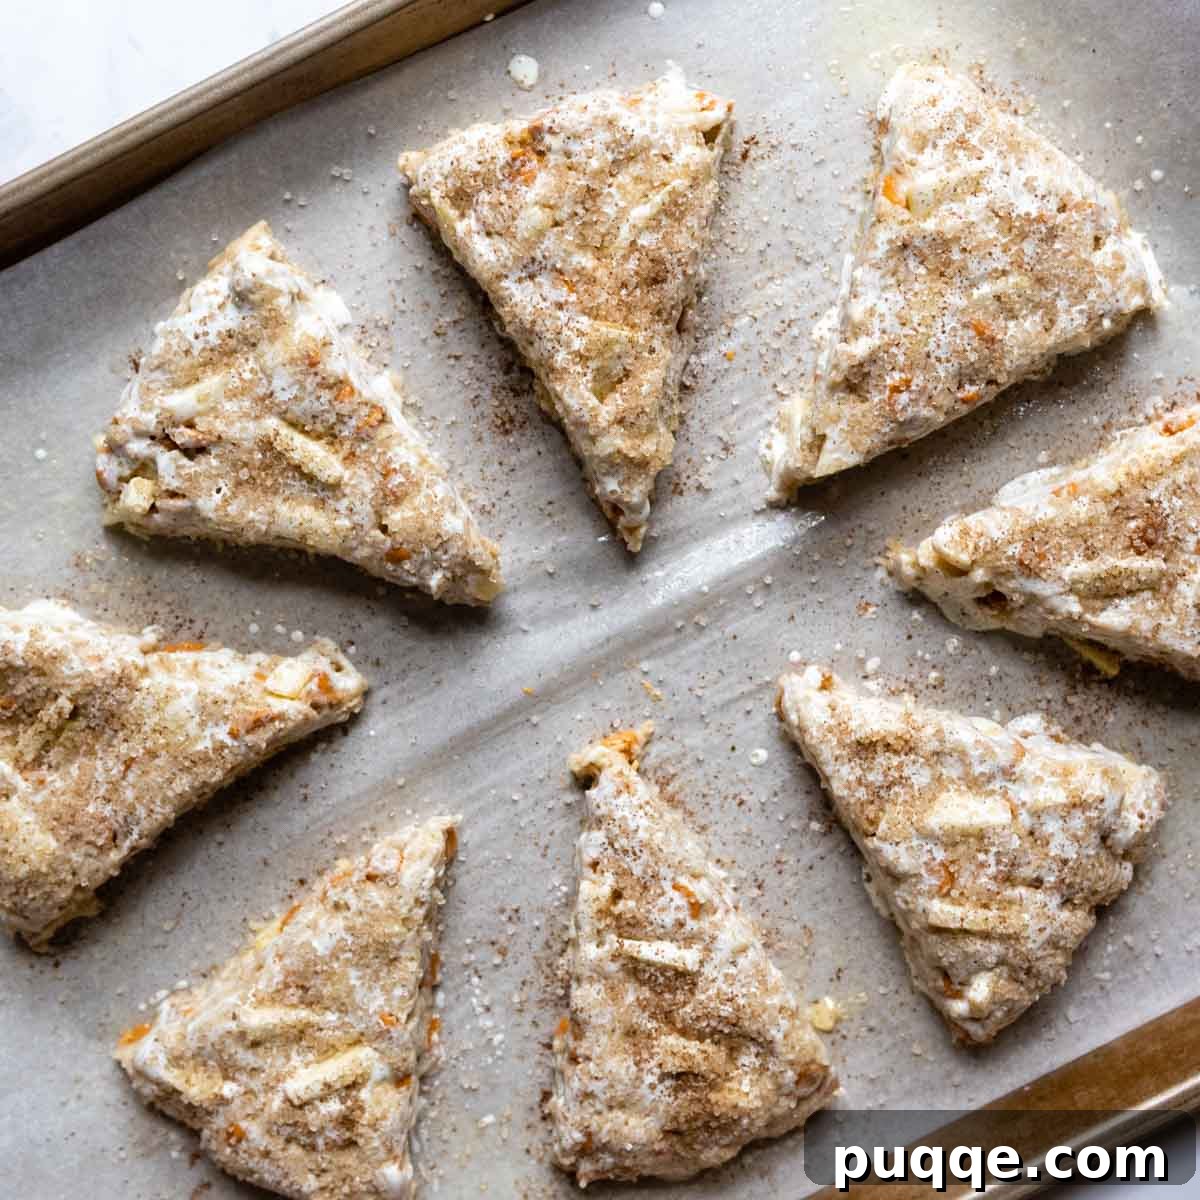
- Prepare for Baking: Carefully spread the cut scone triangles apart on the baking sheet, ensuring they are about 2 inches (5 cm) apart for even baking. For an optional topping, lightly brush the tops of the scones with milk or cream and generously sprinkle with coarse turbinado sugar for a delightful crunchy finish.
- Bake to Golden Perfection: Place the baking sheet on the lower middle rack of your preheated oven. Bake for 16-18 minutes, rotating the pan halfway through the baking time, until the tops and bottoms are beautifully golden brown.
- Cool and Glaze: Once baked, remove the scones from the oven and let them cool on the baking sheet for 5 minutes before carefully transferring them to a wire rack to cool completely. If you choose to add a glaze (recipe below), prepare it while the scones are cooling. Drizzle the glaze over the cooled scones using a small spoon. Allow the glaze to set and harden before stacking or storing.
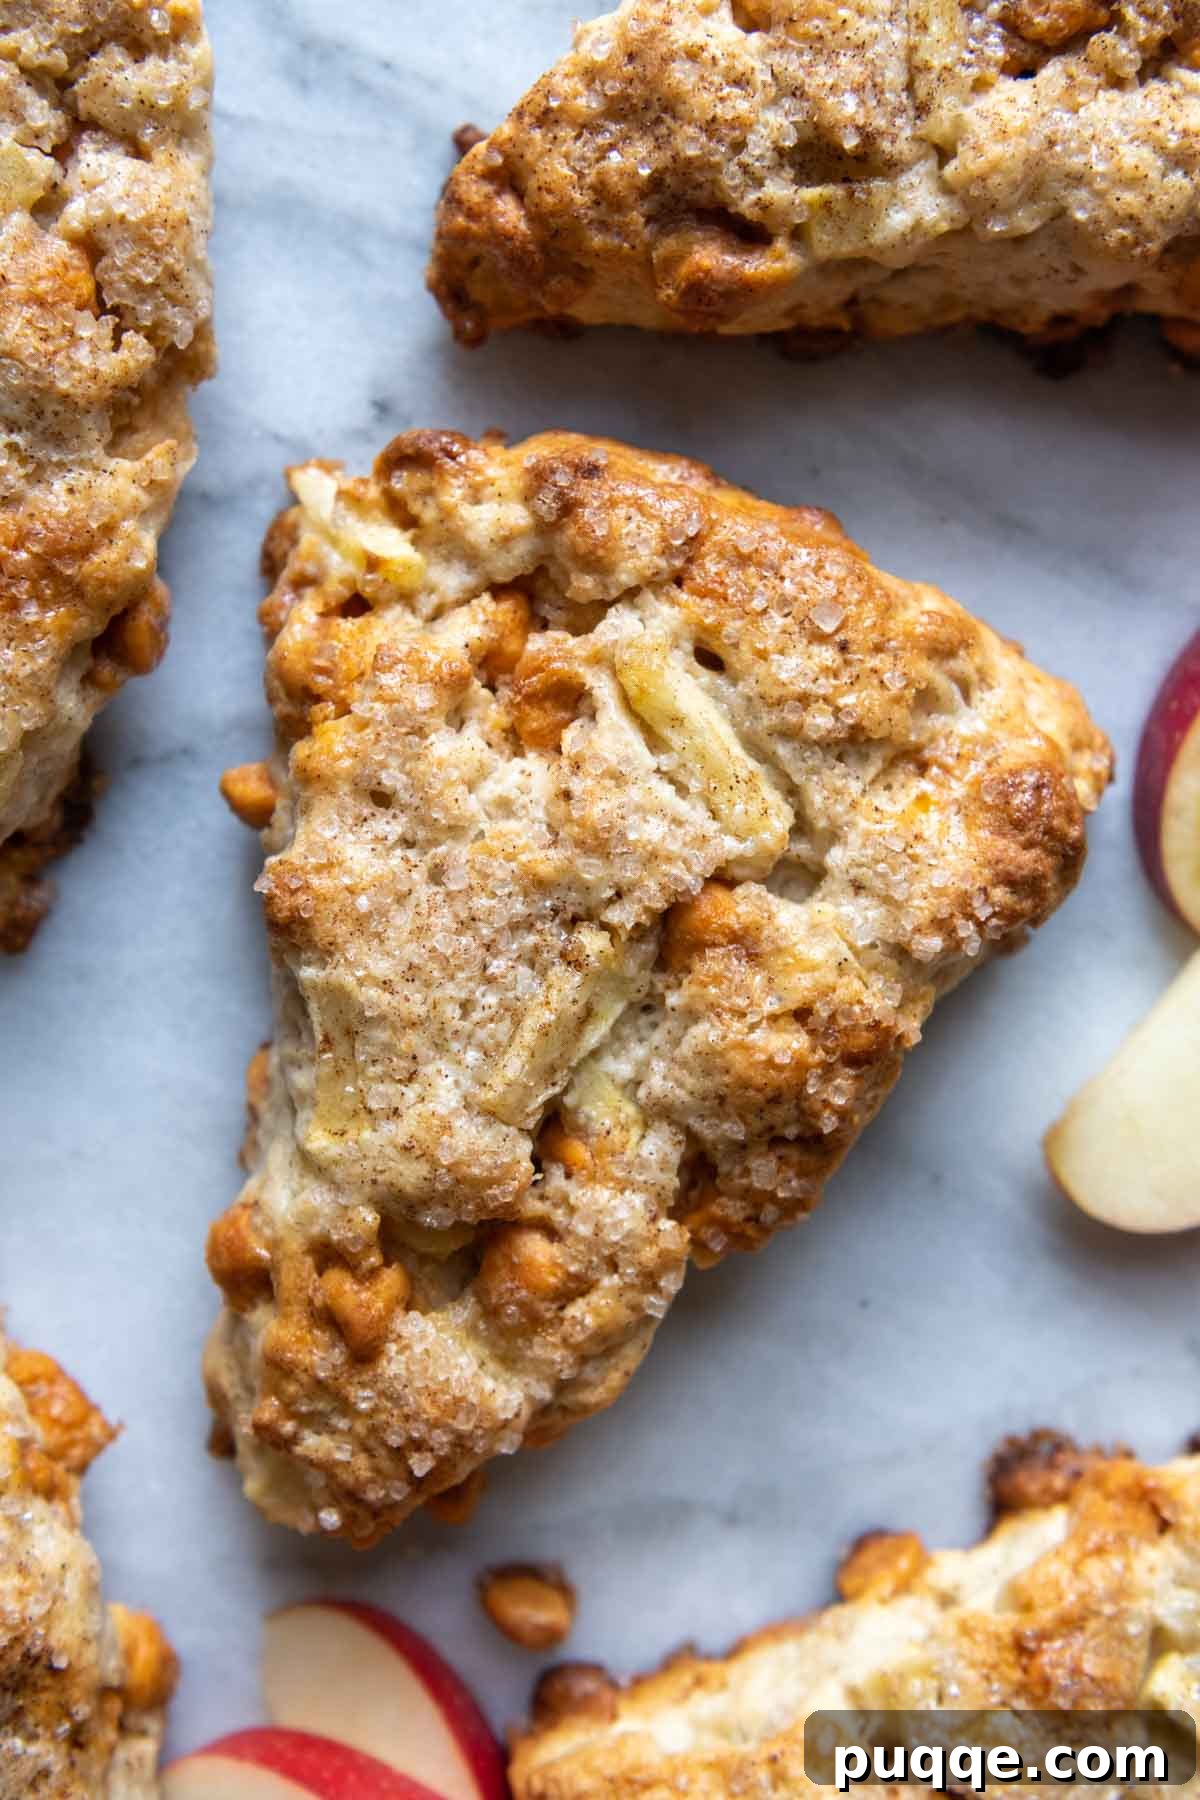
Choosing the Best Apples for Baking Scones
When preparing gluten-free apple recipes, the type of apple you select significantly impacts the final texture and flavor. It’s crucial to choose varieties that maintain their structure and firmness when baked, preventing them from turning mushy or mealy. Here are some of our top recommendations for optimal baking performance, along with a brief note on their characteristics:
- Honeycrisp: A popular choice known for its crisp texture and perfectly balanced sweet-tart flavor, making it excellent for baking as it holds its shape beautifully.
- Granny Smith: These apples are wonderfully tart and firm, which prevents them from disintegrating during baking. Their tartness can add a refreshing contrast to sweeter scone components, though you might want to pair them with slightly more sugar or sweet mix-ins.
- Jonagold: Offering a delightful blend of tartness and sweetness, Jonagold apples soften nicely without losing their form, contributing a complex flavor to your scones.
- Braeburn: With a crisp texture and a sweet-tart flavor profile, Braeburn apples are robust enough to withstand baking temperatures and add a lovely tang.
- Pink Lady (Cripps Pink): These apples are sweet, tangy, and known for their crispness. They hold up very well in heat and add a beautiful flavor.
- Golden Delicious: Our preferred choice, Golden Delicious apples are sweet and tender, yet firm enough to hold their shape. They soften beautifully in the oven and impart a mild, pleasant sweetness to the scones.
Elevate Your Scones: Optional Toppings
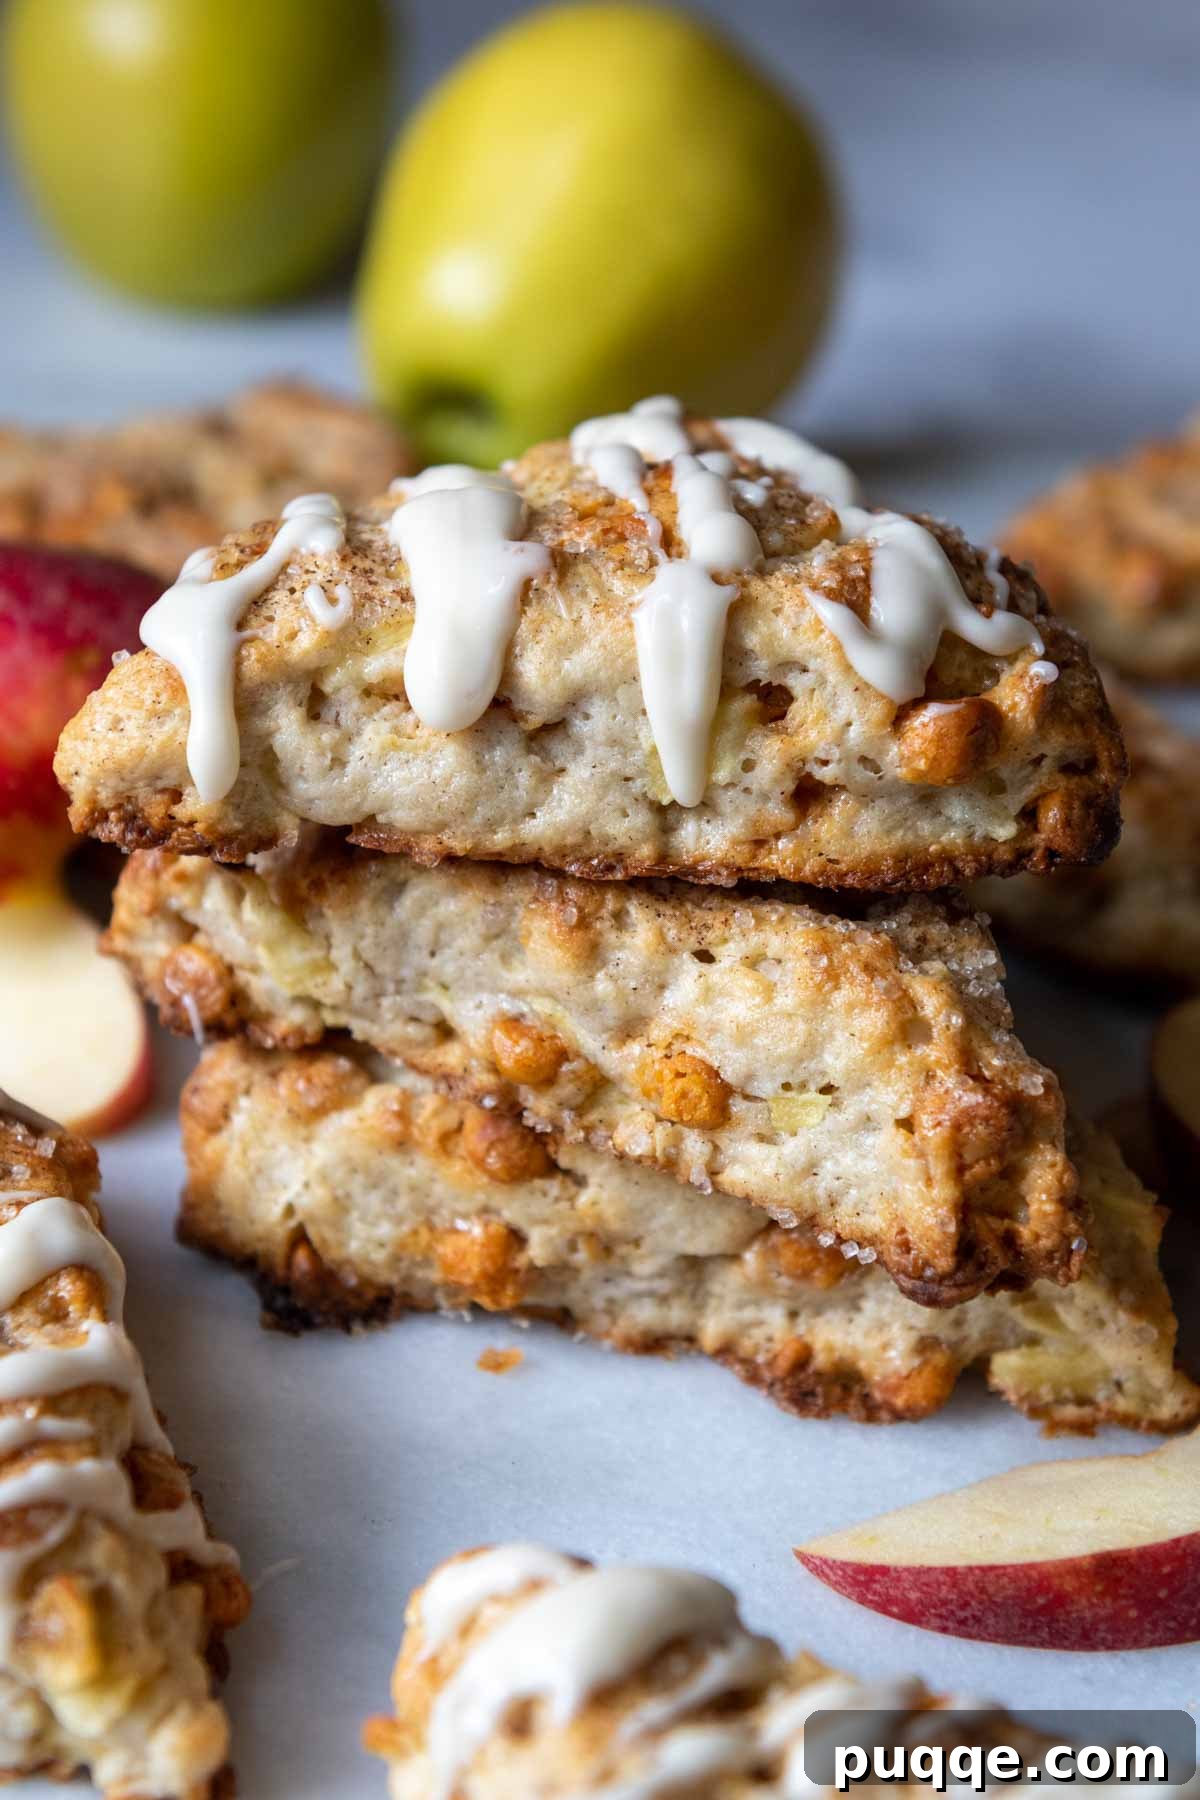
While these gluten-free apple scones are truly delicious on their own, a simple topping can take them from great to extraordinary. You can serve them plain, or for a subtle sheen and a touch of elegance, simply brush them with a little cream or milk after baking.
For those who appreciate a textural contrast and an added layer of sweetness, brushing the scones with cream and then sprinkling them generously with coarse turbinado sugar is a fantastic option. The sugar caramelizes slightly in the oven, creating a delightful crunchy exterior. To amplify the autumnal spice, consider mixing a pinch of extra cinnamon with the coarse sugar before sprinkling.
For ultimate indulgence, a simple glaze adds a touch of bakery sophistication. A basic glaze can be made by mixing powdered sugar with a small amount of milk or cream and a splash of vanilla extract until it reaches a drizzly consistency. For an elevated flavor, replace the milk with pure maple syrup to infuse a rich, woodsy sweetness that complements the apple and butterscotch notes. A hint of cinnamon can also be stirred into the glaze for an extra aromatic kick. Drizzle generously over warm or cooled scones for a truly decadent finish.
Creative Mix-in Ideas for Your Apple Cinnamon Scones
Our apple cinnamon scones are already bursting with flavor, but there’s always room to get creative and personalize your batch! When adding extra mix-ins, maintain the optimal dough-to-inclusion ratio by aiming for a total of 1 ¾ cups of additional ingredients. Adjust the amount of apples or butterscotch chips accordingly to accommodate new additions.
- Chopped Nuts: Introduce a delightful crunch and nutty flavor with finely chopped walnuts, pecans, pistachios, or almonds. Toasting them lightly beforehand can enhance their aroma and taste.
- Dried Fruit: Add chewy texture and concentrated sweetness with dried fruits like raisins, cranberries, cherries, figs, or currants. These pair wonderfully with apples and cinnamon.
- Savory Twist (Apple Cheese Scones): For a unique savory experience, omit the cinnamon from the dry ingredients and instead, fold in ¾ cup of freshly grated sharp cheddar cheese. The combination of sweet apples and savory cheese is surprisingly delicious.
- Additional Spices: Deepen the flavor profile by incorporating other warm spices such as ground cloves, ginger, or nutmeg alongside the cinnamon. A pinch of cardamom can also add an exotic touch.
- Caramel Swirl: Replace the butterscotch chips entirely with caramel baking bits (always check labels for gluten-free certification) for an even richer, more complex caramel apple flavor.
- White Chocolate Chips: For a different kind of sweetness, white chocolate chips can provide a creamy, vanilla-infused contrast to the spiced apples.
Storing, Freezing, and Make-Ahead Tips for Your Scones
Proper storage is key to enjoying your delicious gluten-free apple scones at their best. Here are some essential tips for keeping them fresh, freezing them for later, and preparing them in advance:
Storing Baked Scones:
To maintain their optimal taste and texture, freshly baked scones should be stored in an airtight container at room temperature. They are best enjoyed within two days of baking. Refrigerating gluten-free scones is generally not recommended as the cold air tends to dry them out quickly, compromising their tender crumb. If you find them a little dry the next day, a quick 10-second zap in the microwave can revive their softness.
Freezing Baked Scones:
If you don’t plan to enjoy all your scones on the same day they are baked, freezing them is an excellent option for long-term freshness. Ensure the scones have cooled completely before freezing (this usually takes at least 3 hours). Once cool, individually wrap each scone tightly in plastic wrap, then place them in a freezer-safe ziplock bag. They can be stored in the freezer for up to three months.
To thaw, simply place a frozen scone on the kitchen counter for about an hour. For a quick grab-and-go breakfast, unwrap a frozen scone and defrost it in the microwave until warmed through and soft.
Make-Ahead Unbaked Scones (Freezing Dough):
For ultimate convenience, you can prepare the scone dough in advance and freeze it unbaked, allowing you to bake fresh scones whenever the craving strikes or company arrives. After shaping the dough into triangles (step 7 in the instructions), arrange them on a baking tray and place the tray in the freezer until the scones are completely solid. Once frozen solid, wrap each unbaked scone tightly in plastic wrap, then transfer them to a freezer-safe ziplock bag. They can be frozen for up to three months.
To bake from frozen, simply place the unwrapped, frozen scones directly onto a parchment-lined baking sheet. Preheat your oven to 425ºF (220ºC). Bake the frozen scones, extending the baking time by a few minutes (usually an additional 5-7 minutes) compared to the fresh baking time, until they are golden brown and cooked through. This method ensures you always have warm, fresh scones on hand with minimal effort.
The Best Ways to Serve Your Gluten-Free Apple Scones
These exquisite gluten-free apple scones are versatile and can be served in many delightful ways. While they are delicious at room temperature, gluten-free baked goods often benefit from being slightly warmed. For the best taste and texture, we highly recommend microwaving your scone for about 10 seconds before serving, which restores its tender, fluffy quality.
If you’re hosting guests for breakfast, brunch, or an afternoon tea, consider offering a selection of complementary toppings to elevate the experience:
- Butter: Classic options include unsalted butter, or for a richer flavor, a high-quality European butter like Kerrygold. For an extra touch, whip up some flavored butter such as cinnamon butter or honey butter.
- Clotted Cream: The quintessential scone accompaniment, clotted cream adds a luxurious, velvety richness that is simply irresistible.
- Jams, Jellies, or Marmalades: A dollop of your favorite fruit preserve, such as apricot jam, orange marmalade, or even a spiced apple butter, perfectly complements the scone’s flavor.
- Whipped Cream: Lightly sweetened whipped cream adds a delicate, airy topping that balances the scone’s richness.
SAVE THIS RECIPE FOR GLUTEN-FREE APPLE SCONES TO YOUR PINTEREST BOARD!
Looking for more delicious gluten-free recipes? Be sure to follow us on Pinterest for endless culinary inspiration and baking tips! You can also save this specific Gluten-Free Apple Scones recipe to your Pinterest board to easily find it later.

Fluffy Gluten-Free Apple Scones with Butterscotch (No Fail)

Melissa Erdelac
8
10 mins
17 mins
Pin Recipe
Rate this recipe
Remove Ads
Ingredients
Gluten Free Scones
- 1 ¾ cup (245 g) gluten-free all purpose flour (I use and recommend Cup4Cup brand)
- ⅓ cup (67 g) sugar
- 1 tablespoon (14 g) baking powder
- 1 teaspoon (2.5 g) ground cinnamon
- ¼ teaspoon salt
- 6 tablespoons (85 g) unsalted butter, chopped into ½” pieces and chilled
- 1 cup (125 g) peeled and diced apples, (see recipe notes for recommended varieties)
- ¾ cup (120 g) gluten-free butterscotch chips
- ⅔ cup (153 g) sour cream, (may substitute yogurt)
- 1 egg yolk
- 1 teaspoon (5 ml) vanilla extract
Optional Topping
- 1 tablespoon (15 ml) milk or cream
- 1 tablespoon turbinado (coarse) sugar
Optional Glaze
- ½ cup (60 g) powdered sugar
- ½ – 1 tablespoon (15 ml) milk or cream
- ½ teaspoon (2.5 ml) vanilla extract
Equipment
- Baking Sheets
- Pastry Cutter
- Silicone Spoon
Instructions
- In a large bowl, whisk together the gluten-free flour, sugar, baking powder, cinnamon, and salt. Use a pastry blender or fork to cut in chopped butter until the butter is uniformly mixed with the flour in very small, crumbly pieces.
- In a small bowl, whisk together the sour cream, egg yolk, and vanilla extract. First, gently stir in the apples and butterscotch chips into the flour mixture. Then, pour in sour cream mixture and gently combine until no flour pockets remain. The dough will be quite thick. Cover bowl with plastic wrap and refrigerate for 30 minutes while the oven preheats.
- Preheat the oven to 450°F (230°C). Line a baking sheet with parchment paper and spray with nonstick cooking spray.
- Place the dough in the center of the prepared baking sheet and shape it into a ball. Flatten the dough with your hands into a 7-inch (18 cm) disc, 1-inch (2.5-cm)–thick. If the dough is sticking, spray your fingers with cooking spray to shape. Cut the disc into 8 triangles, using a sharp knife. Use a small spatula to spread the cut scones around the baking sheet so they are about 2 inches (5-cm) apart.
- If topping with sugar, brush on milk or cream and sprinkle tops with sugar. Bake on the LOWER MIDDLE rack for 16-18 minutes, rotating halfway through, until the tops and bottoms start to turn golden brown. Cool on the baking sheet for 5 minutes, then transfer to a wire rack to cool.
- For glaze, mix together powdered sugar, milk or cream, and vanilla extract. The glaze should be thin enough to drizzle on, but thick enough it stays on the scone. Place a piece of waxed paper under the cooling rack and then use a small spoon to drizzle glaze over the tops. Allow glaze to harden before stacking or storing.
- DID YOU MAKE THIS RECIPE?? Don’t forget to leave feedback and rate below!
Notes
Recommended Apples
When making gluten-free apple recipes, certain varieties work better than others for desserts or baking. Use one of the suggested types listed below so the apples don’t break down or become mealy during baking.
- Honeycrisp
- Granny smith apples (these apples are tarter so may want to pair with something else)
- Jonagold
- Braeburn
- Pink Lady
- Golden Delicious
Storing, freezing, and make-ahead tips
Storing: They may be kept in an airtight container at room temperature up to 2 days, but will lose optimal taste and texture quickly. Refrigerating will dry out the scones, and is not recommended.
Freezing: If not enjoying the same day, individually wrap the scones after they have completely cooled (at least 3 hours). Transfer to a ziplock freezer bag and freeze up to 3 months.
Thaw on the counter for 1 hour or, for a grab-and-go breakfast, unwrap and defrost in the microwave.
Make-Ahead: To bake the scones right before serving, shape the dough in triangles and place the baking tray in the freezer until they are solid. Wrap the unbaked scones in plastic wrap and transfer to a ziplock freezer bag. Freeze up to 3 months.
To bake, place unwrapped, frozen scones on a parchment-lined baking sheet. Bake at 425ºF (220ºC), extending the baking time by a few minutes.
Nutrition Facts (per serving)
Calories: 296kcal, Carbohydrates: 42g, Protein: 4g, Fat: 14g, Saturated Fat: 8g, Polyunsaturated Fat: 1g, Monounsaturated Fat: 4g, Trans Fat: 0.3g, Cholesterol: 59mg, Sodium: 242mg, Potassium: 57mg, Fiber: 3g, Sugar: 22g, Vitamin A: 435IU, Vitamin C: 3mg, Calcium: 138mg, Iron: 1mg
Please leave a star rating and review below. It helps others when searching for recipes and I LOVE feedback!
Tender, Fluffy Gluten-Free Berry Scones

Melissa Erdelac
8
10 mins
17 mins
Pin Recipe
Rate this recipe
Remove Ads
Ingredients
Gluten Free Scones
- 1 ¾ cup (253 g) gluten-free all purpose flour, (I use and recommend Cup4Cup brand)
- ⅓ cup (67 g) sugar
- 1 tablespoon (14 g) baking powder
- ¼ teaspoon salt
- 6 tablespoons (85 g) unsalted butter, chopped into ½” pieces and chilled
- 1 ½ cups (222 g) blueberries or other chopped berries
- ⅔ cup (153 g) sour cream, (may substitute yogurt)
- 1 egg yolk
- 1 teaspoon vanilla extract
Optional Topping
- 1 tablespoon milk or cream
- 1 tablespoon turbinado (coarse) sugar
Optional Glaze
- ½ cup (60 g) powdered sugar
- ½ – 1 tablespoon milk or cream
- ½ teaspoon vanilla extract
Equipment
- Baking Sheets
- Pastry Cutter
- Silicone Spoon
Instructions
- In a large bowl, whisk together the gluten-free flour, sugar, baking powder, and salt. Use a pastry blender or fork to cut in chopped butter until the butter is uniformly mixed with the flour in very small, crumbly pieces.
- In a small bowl, whisk together the sour cream, egg yolk, and vanilla extract. First, gently stir in the berries into the flour mixture. Then, pour in sour cream mixture and gently combine until no flour pockets remain. The dough will be quite thick. Cover bowl with plastic wrap and refrigerate for 30 minutes while the oven preheats.
- Preheat the oven to 425°F (230°C). Line a baking sheet with parchment paper and spray with nonstick cooking spray.
- Place the dough in the center of the prepared baking sheet and shape it into a ball. Flatten the dough with your hands into a 7-inch (18 cm) disc, 1-inch (2.5-cm)–thick. If the dough is sticking, spray your fingers with cooking spray to shape. Cut the disc into 8 triangles, using a sharp knife. Use a small spatula to spread the cut scones around the baking sheet so they are about 2 inches (5-cm) apart.
- If topping with sugar, brush on milk or cream and sprinkle tops with sugar. Bake on the LOWER MIDDLE rack for 16-18 minutes, rotating halfway through, until the tops and bottoms start to turn golden brown. Cool on the baking sheet for 5 minutes, then transfer to a wire rack to cool.
- For glaze, mix together powdered sugar, milk or cream, and vanilla extract. The glaze should be thin enough to drizzle on, but thick enough it stays on the scone. Place a piece of waxed paper under the cooling rack and then use a small spoon to drizzle glaze over the tops. Allow glaze to harden before stacking or storing.
Notes
Storing, freezing, and make-ahead tips
Storing: They may be kept in an airtight container at room temperature up to 2 days, but will lose optimal taste and texture quickly. Refrigerating will dry out the scones, and is not recommended.
Freezing: If not enjoying the same day, individually wrap the scones after they have completely cooled (at least 3 hours). Transfer to a ziplock freezer bag and freeze up to 3 months.
Thaw on the counter for 1 hour or, for a grab-and-go breakfast, unwrap and defrost in the microwave.
Make-Ahead: To bake the scones right before serving, shape the dough in triangles and place the baking tray in the freezer until they are solid. Wrap the unbaked scones in plastic wrap and transfer to a ziplock freezer bag. Freeze up to 3 months.
To bake, place unwrapped, frozen scones on a parchment-lined baking sheet. Bake at 425ºF (220ºC), extending the baking time by a few minutes.
Nutrition Facts (per serving)
Calories: 296kcal, Carbohydrates: 42g, Protein: 4g, Fat: 14g, Saturated Fat: 8g, Polyunsaturated Fat: 1g, Monounsaturated Fat: 4g, Trans Fat: 0.3g, Cholesterol: 59mg, Sodium: 242mg, Potassium: 57mg, Fiber: 3g, Sugar: 22g, Vitamin A: 435IU, Vitamin C: 3mg, Calcium: 138mg, Iron: 1mg
Please leave a star rating and review below. It helps others when searching for recipes and I LOVE feedback!
This post contains affiliate links. My opinions are always my own. If you purchase a product through an affiliate link, I make a small commission – at no cost to you. Read full disclosure policy here.