
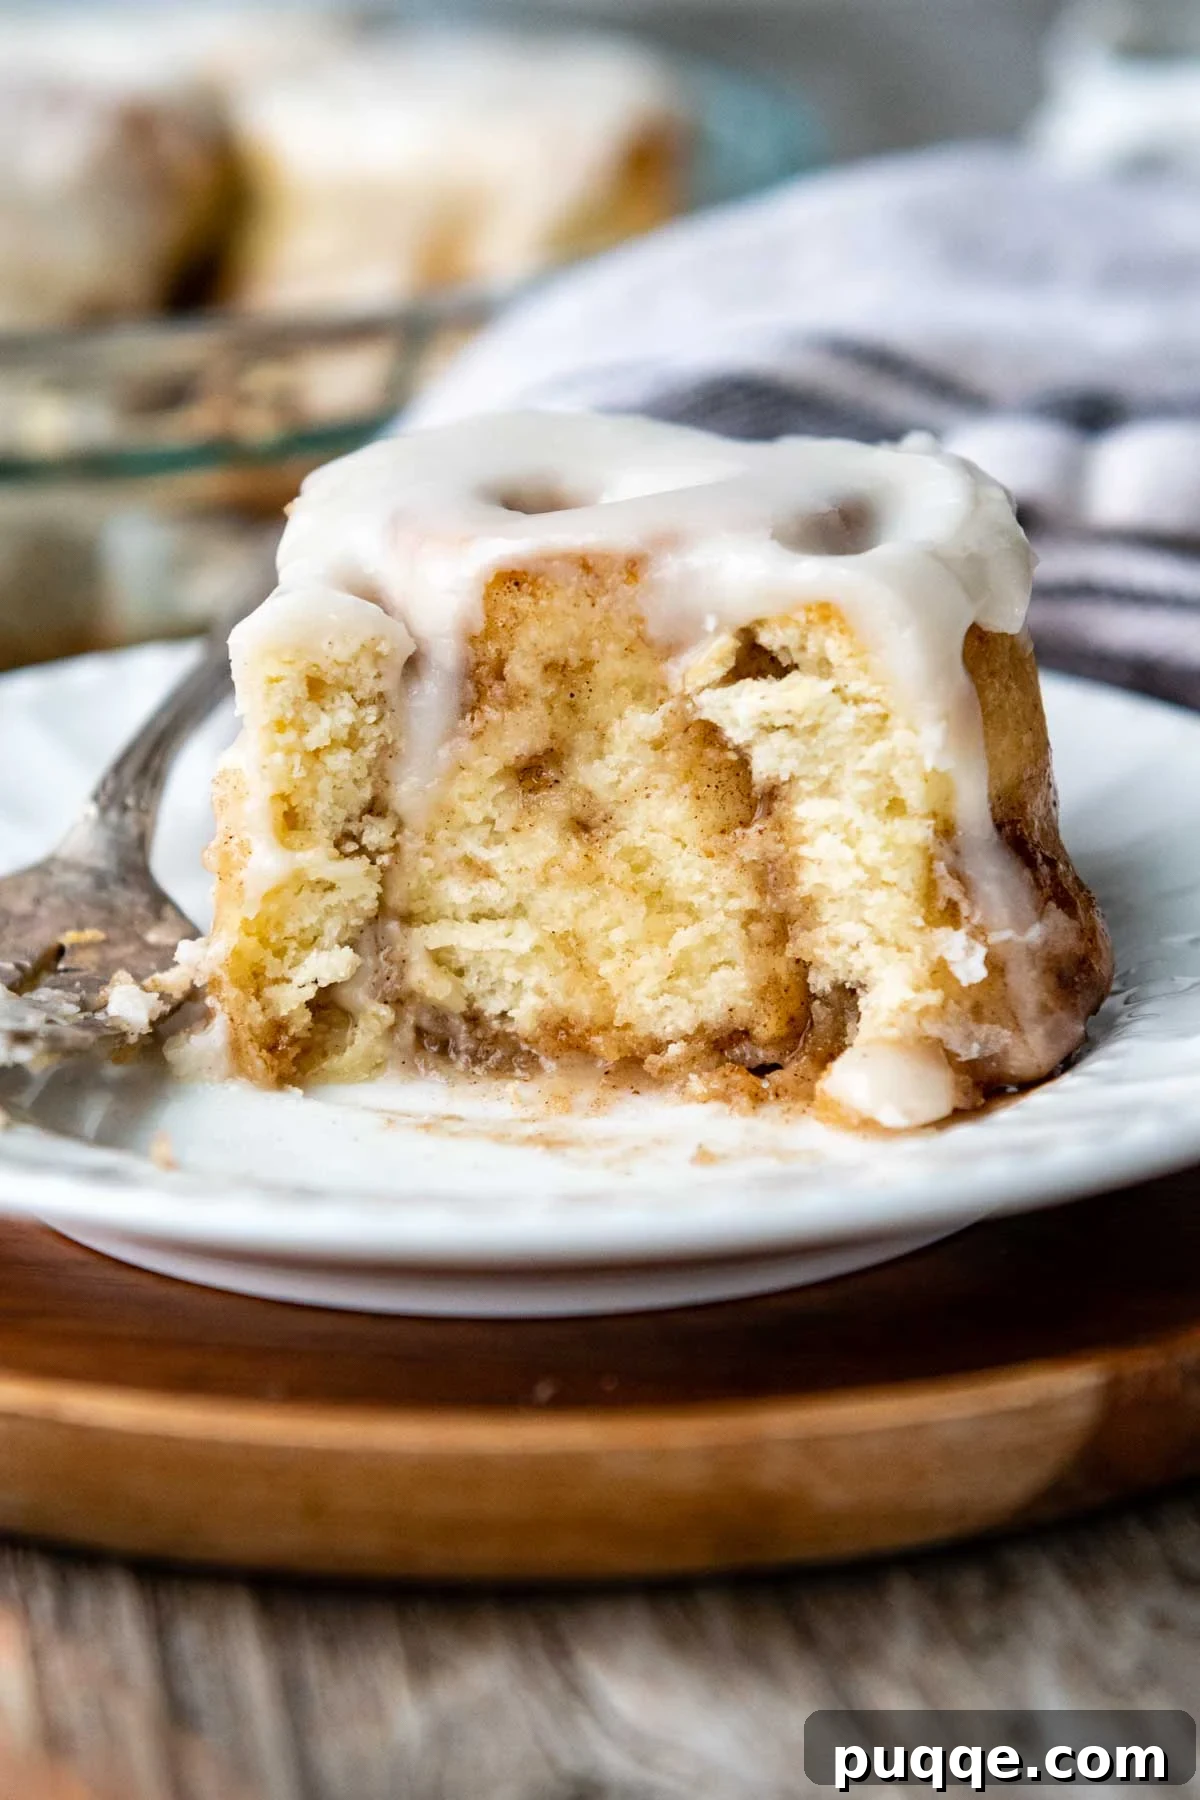
Embark on a culinary adventure to create the **best gluten-free cinnamon rolls** you’ve ever tasted! Imagine indulging in a luxuriously soft, incredibly fluffy cinnamon bun, generously swirled with a rich, gooey filling that perfectly mimics your favorite Cinnabon classic. This isn’t just another recipe; it’s a game-changer for anyone seeking a delightful gluten-free treat without compromise. Our easy-to-follow, homemade recipe eliminates the need for extensive baking experience, long proofing times, or tiresome kneading. With just one short rise, you’ll be on your way to enjoying warm, aromatic **Cinnabon-style gluten-free cinnamon rolls** that will impress even the most discerning palates.
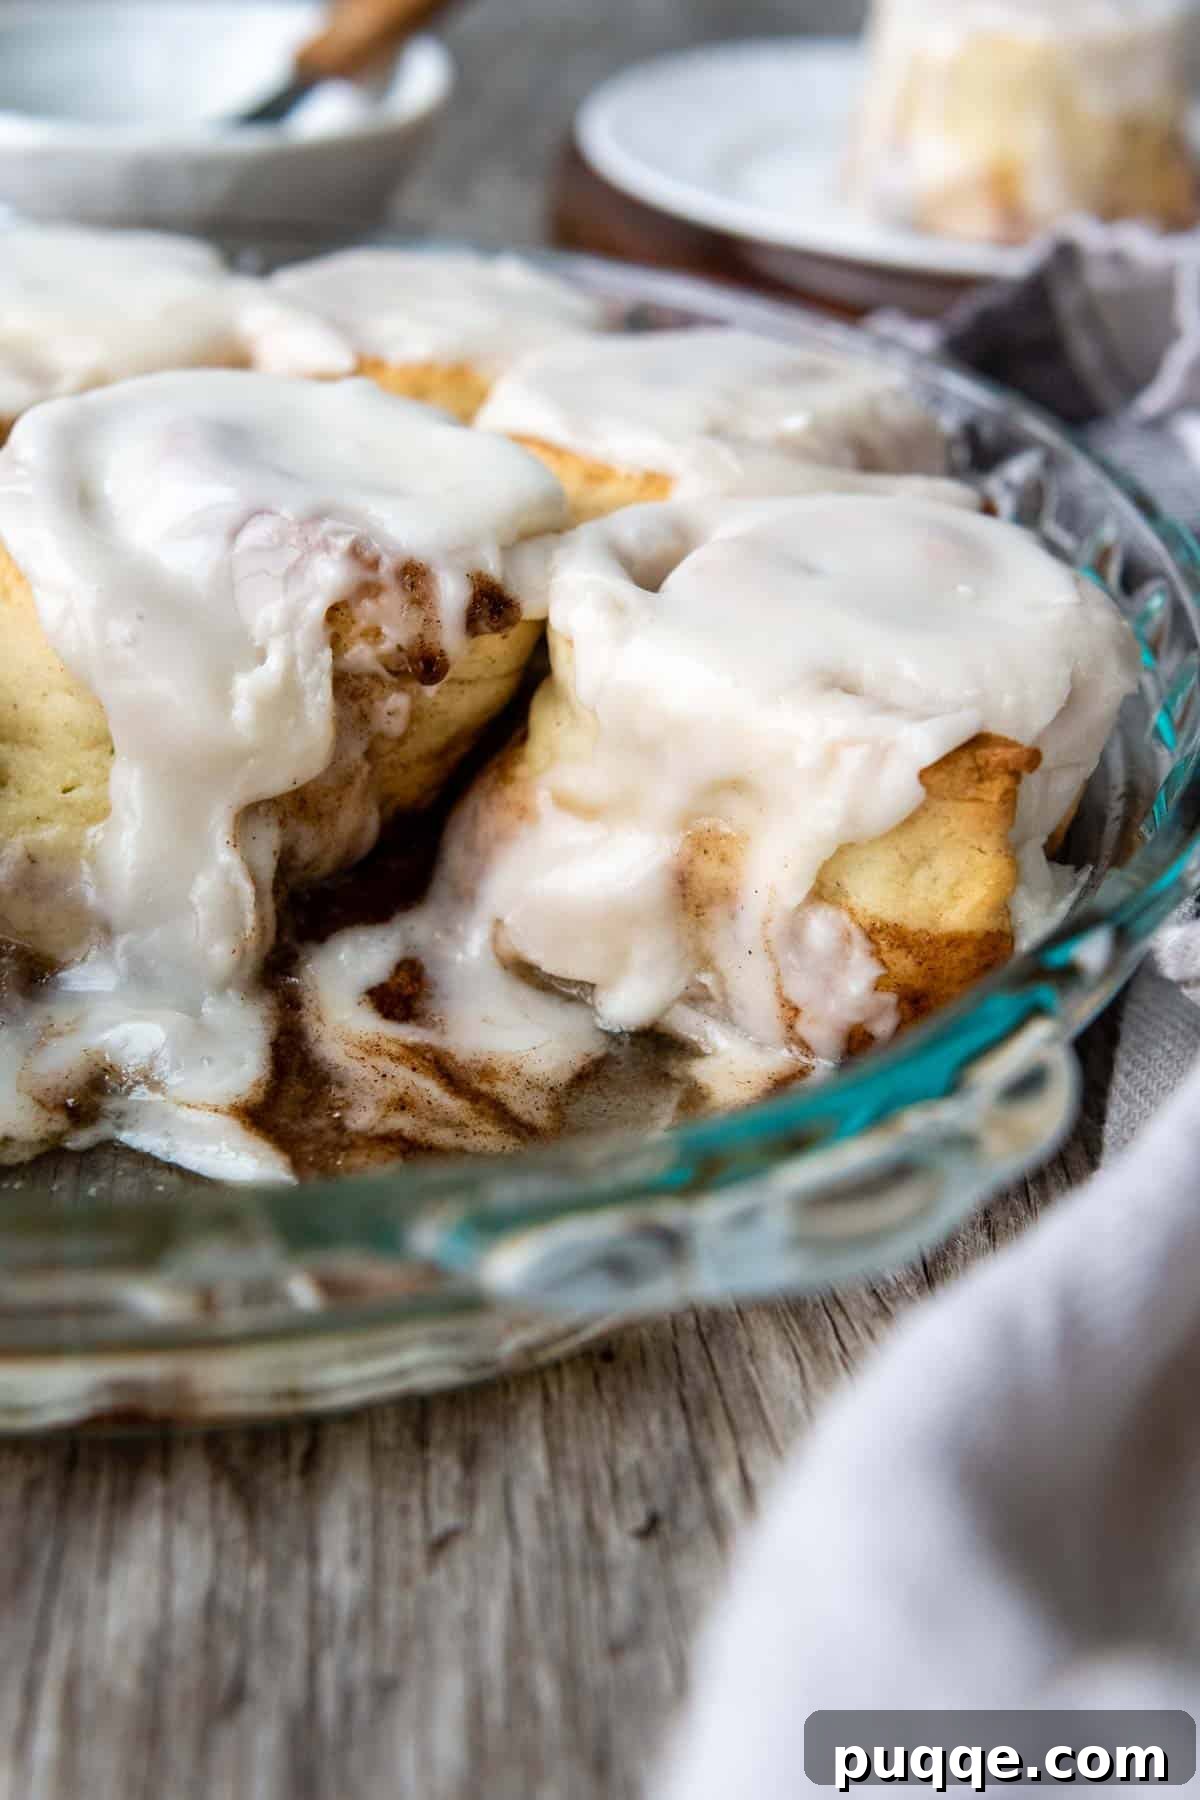
Discover the Secret to Truly Irresistible Gluten-Free Cinnamon Rolls (Better Than Cinnabon!)
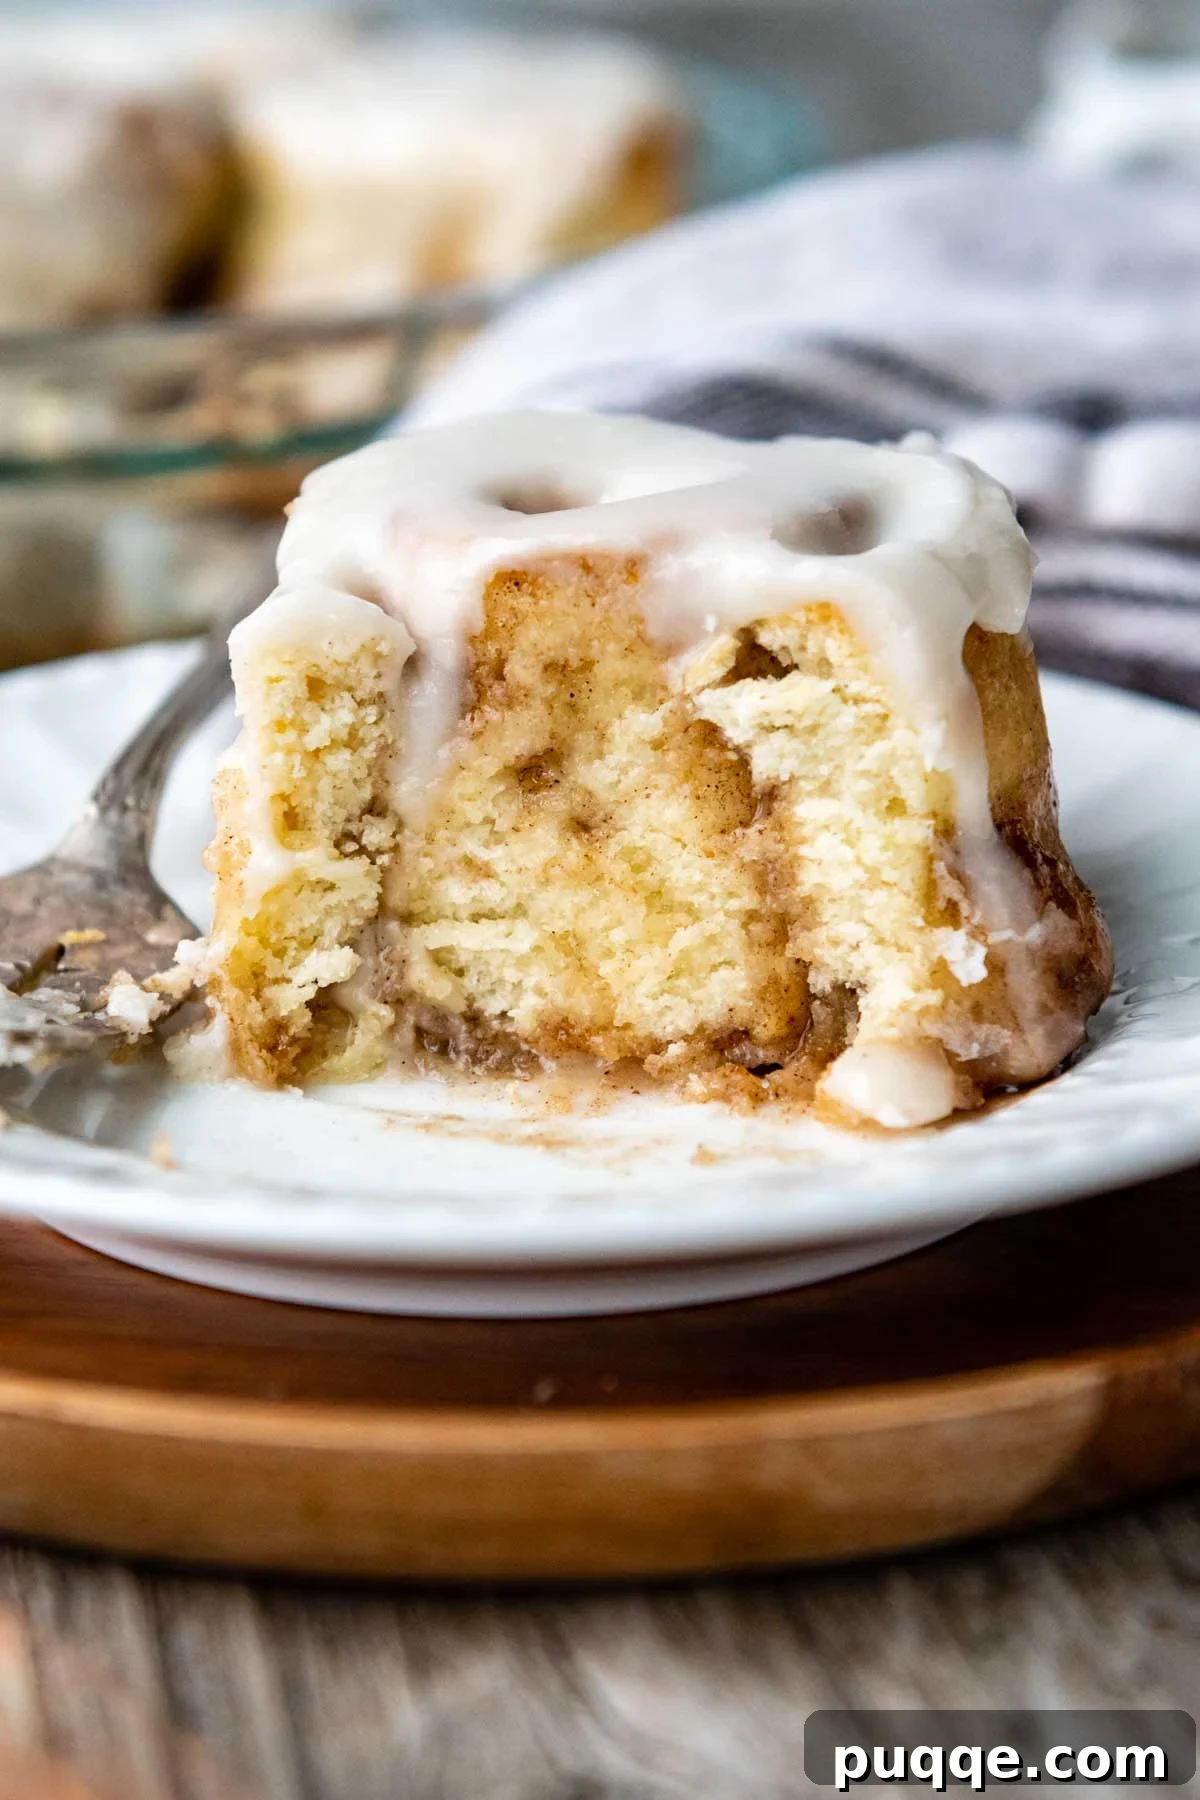
There’s nothing quite like the comforting aroma of freshly baked cinnamon rolls filling your home, especially during festive occasions like Christmas morning, a cozy Sunday brunch, or when hosting cherished overnight guests. These **homemade gluten-free cinnamon rolls** are more than just a sweet treat; they’re a warmly welcomed indulgence. What makes them truly special is their unbelievably soft, doughy texture and an abundance of gooey, cinnamon-sugar filling – so good, in fact, that no one will ever suspect they’re completely gluten-free.
My journey to perfecting these **Cinnabon-style gluten-free cinnamon buns** began with a recipe from my gluten-free cookbook. However, driven by a passion for continuous improvement, I’ve spent countless hours refining and enhancing them. Drawing upon innovative techniques discovered through my extensive gluten-free bread recipe collection, I’ve managed to elevate these rolls to an unprecedented level of softness and tenderness.
While my initial recipe offered a straightforward approach, I was eager to integrate advanced gluten-free baking strategies to achieve an even superior result. This refined version incorporates three transformative tricks that promise exceptional flavor and texture:
- **The Roux Method (Tangzhong):** This ancient technique, also known as Tangzhong, involves cooking a small amount of flour with liquid (water and milk) to form a thick, satiny paste. The roux effectively pre-saturates the gluten-free flour, allowing it to absorb and retain significantly more liquid during the dough-making process. The result is a remarkably moist, elastic dough that bakes into an exquisitely soft, pillowy texture, closely mimicking the desirable characteristics of traditional wheat-based baked goods. If you’ve doubted its power, just look at the incredible texture it brings to this gluten-free monkey bread!
- **The Magic of Psyllium Husk Powder:** A cornerstone in modern gluten-free baking, psyllium husk powder acts as a natural binder and elasticity enhancer. It effectively mimics the role of gluten, providing crucial structure and flexibility to the dough, which is often lacking in gluten-free flours. By requiring less additional gluten-free flour, psyllium husk ensures a soft, tender crumb that resists crumbling. Its efficacy is proven by the hundreds of 5-star reviews garnered by my go-to classic gluten-free bread recipe, and it works similar wonders for these cinnamon rolls.
- **The Addition of Milk Powder:** Given recent changes in popular gluten-free flour blends like Cup4Cup, I’ve found that incorporating milk powder into the dough is crucial. It contributes to a richer, more nuanced flavor, improves the overall texture, and most importantly, helps to maintain moisture, ensuring a consistently soft and fresh roll that stays delicious for longer.
These combined techniques are what elevate this recipe to truly the **best gluten-free cinnamon roll recipe** out there, delivering a bakery-quality experience right in your own kitchen.
Essential Ingredients for Your Gluten-Free Cinnamon Roll Success
Crafting perfect gluten-free cinnamon rolls requires careful attention to ingredients. Here’s a breakdown of the key components and why they matter:
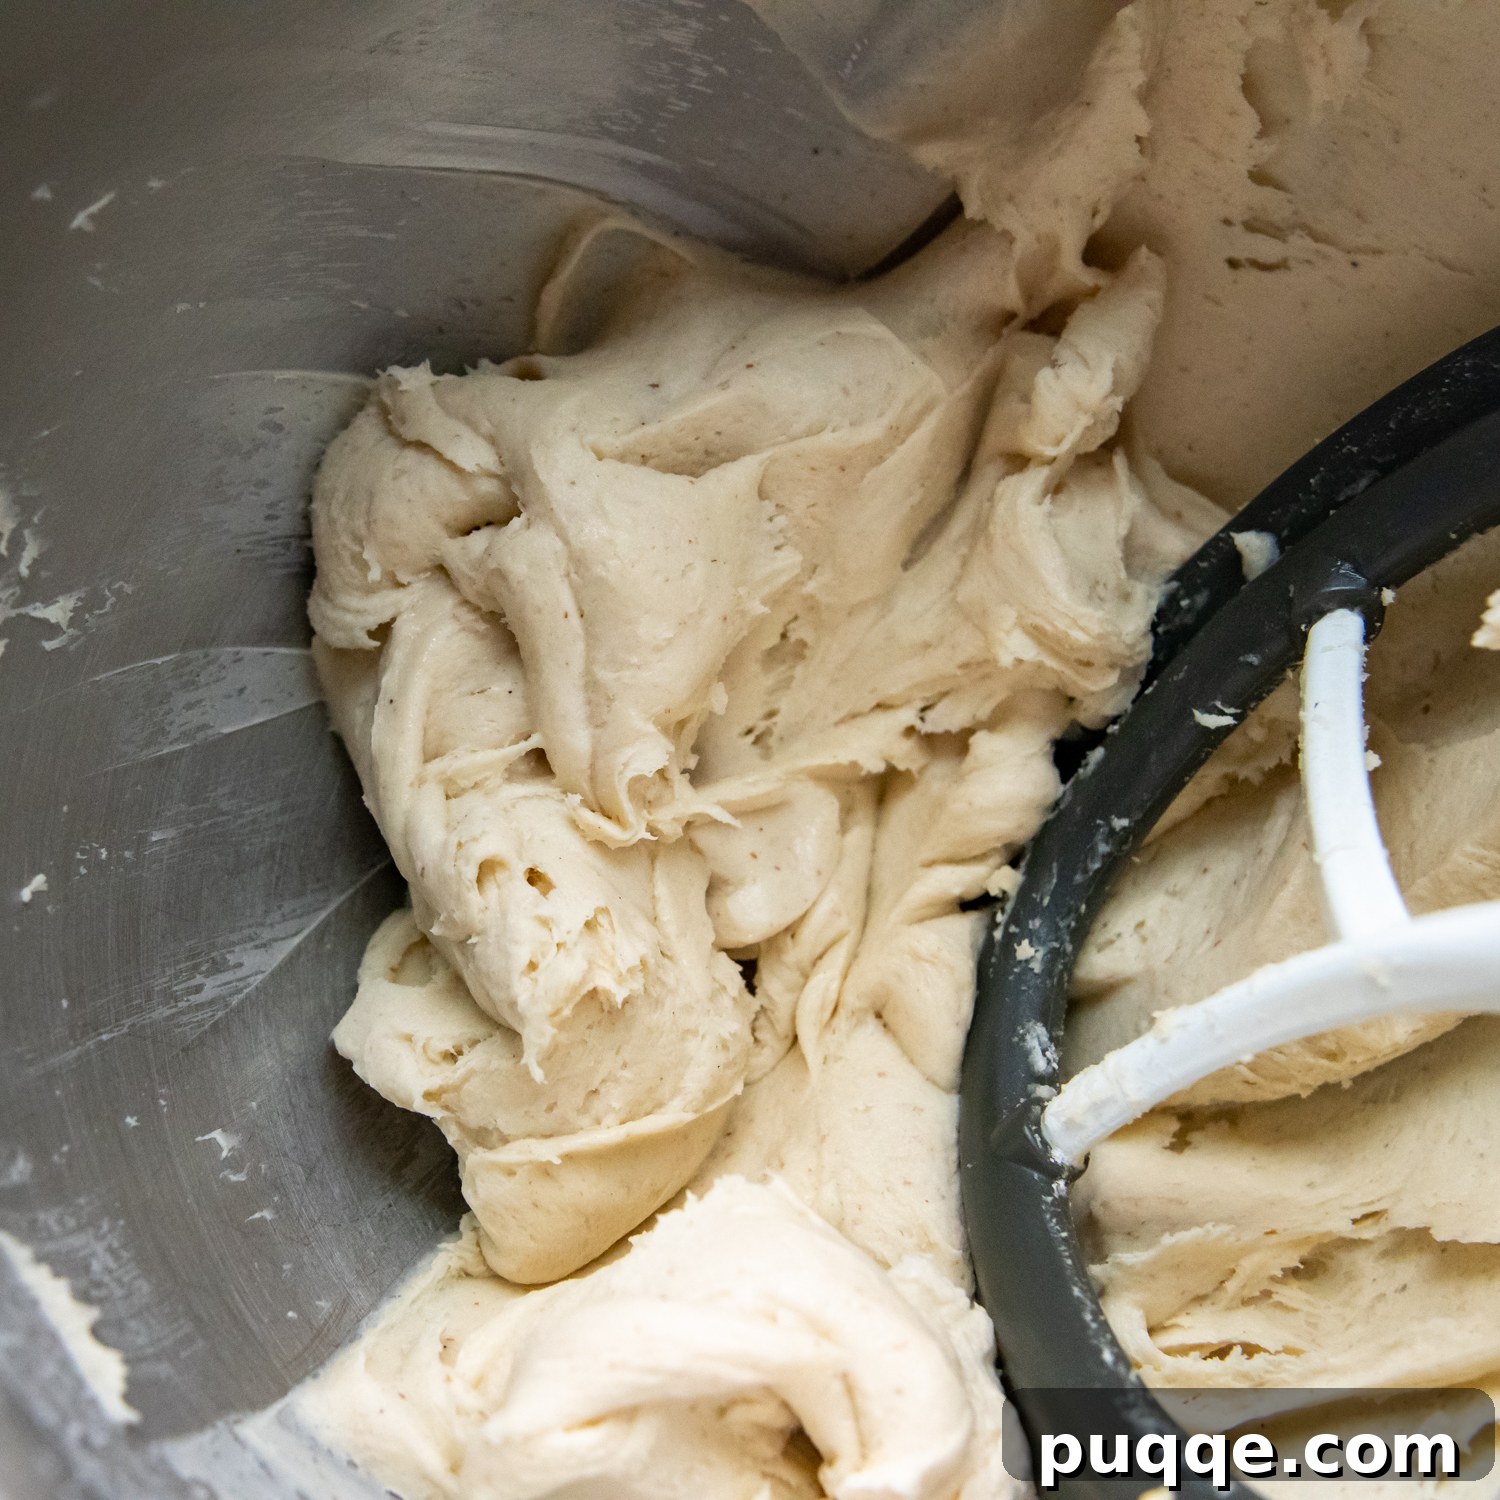
- High-Quality Gluten-Free Flour Blend: The foundation of any excellent gluten-free baked good lies in its flour. I unequivocally recommend Cup4Cup gluten-free flour, which I consistently use for all my baking endeavors due to its superior performance and blend of starches that closely resemble wheat flour. Be aware that different gluten-free flour blends absorb moisture uniquely. If you opt for another brand, observe the dough photos in the step-by-step guide below and strive to achieve a similar, pliable, and slightly sticky consistency.
- Psyllium Husk Powder: This remarkable ingredient is a secret weapon in gluten-free baking. It’s instrumental in retaining moisture, preventing the rolls from becoming dry or crumbly, a common issue with GF doughs. More importantly, psyllium husk mimics the elastic properties of gluten, providing crucial structure and flexibility to the dough, allowing it to be shaped and rolled without tearing. This is a crucial factor for beautifully formed cinnamon rolls and other GF breads. For a deeper dive into this ingredient, including recommended brands and potential substitutes, refer to my comprehensive psyllium husk GF baking guide.
- Baking Powder (the Booster): While active dry yeast provides the primary leavening for a bread-like texture, I strategically couple baking powder with yeast. This dynamic duo works in synergy to boost the rise and contribute to an exceptionally light and airy texture – a desirable characteristic that can often be challenging to achieve in traditional gluten-free bread doughs. It helps prevent a dense crumb.
- Whole Milk (for Richness and Moisture): Using whole milk significantly enhances the flavor profile of these cinnamon rolls, especially when it mingles with butter and sugar. The higher fat content in whole milk also plays a clever trick by coating the gluten-free starches, which helps to maintain moisture and tenderness in the final baked product. This technique is also employed in my homemade GF apple fritters for an equally moist result. Remember to warm the milk to precisely 110ºF before adding the yeast to ensure proper activation; too hot will kill it, too cold won’t activate it.
- Active Dry Yeast: Essential for that classic bread-like texture and rise. Ensure your yeast is fresh and properly activated in warm milk with a pinch of sugar. This process proves the yeast is alive and ready to leaven your dough, giving you light and airy rolls.
- Granulated Sugar & Brown Sugar: Granulated sugar in the dough provides sweetness and aids yeast activation, contributing to the dough’s tender structure. Brown sugar in the filling, on the other hand, creates that signature deep, caramel-like flavor and contributes significantly to the irresistibly gooey texture that we love in **Cinnabon-style cinnamon rolls**.
- Unsalted Butter: Used generously in both the dough and the filling, butter provides richness, flavor, and helps achieve a tender crumb. Using slightly melted butter in the filling (rather than fully liquid) is a key trick to prevent it from oozing out during baking, keeping it perfectly contained within the swirl.
- Large Egg: The egg acts as a crucial binder, adds moisture, and contributes to the overall richness and structural integrity of the dough. Ensuring it’s at room temperature allows for optimal emulsification and incorporation into the other ingredients.
- Ground Cinnamon: The undeniable star of the show! High-quality ground cinnamon is crucial for that warm, inviting aroma and classic, comforting cinnamon roll flavor. Don’t skimp on fresh, fragrant cinnamon for the best results.
- Salt: A small amount of salt is vital to balance the sweetness, enhance all the other flavors, and importantly, regulate yeast activity, preventing the dough from over-rising or tasting bland.
Watch the Recipe: Gluten-Free Cinnamon Rolls Tutorial
Let’s Bake Together: Step-by-Step Gluten-Free Cinnamon Rolls
Ready to create these irresistible treats? Follow along with these detailed instructions and accompanying photos. For precise ingredient measurements and the full printable recipe, please refer to the comprehensive recipe card located at the end of this article.
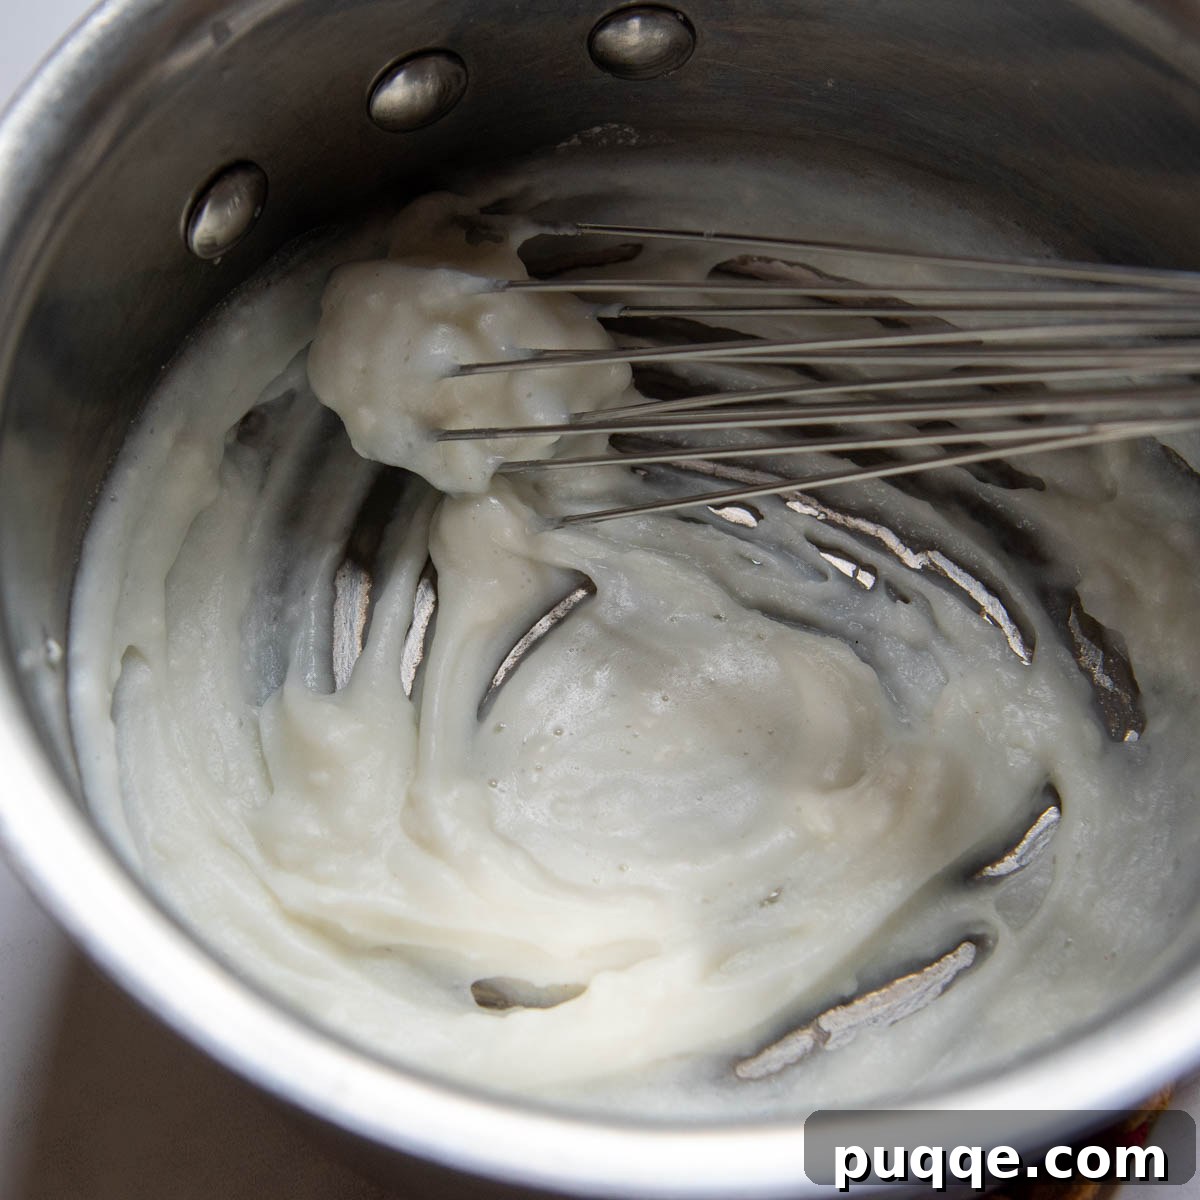
1. Begin with the Roux (Tangzhong Method)
While the term “roux” or “tangzhong” might sound intimidating, this initial step is surprisingly simple and incredibly impactful. It involves gently cooking a small portion of your gluten-free flour with water and milk until it forms a thick, smooth paste. This quick, additional step is your secret weapon for achieving unparalleled softness and moisture in your gluten-free cinnamon rolls.
The science behind the roux is fascinating and crucial for gluten-free baking. Gluten-free flours inherently struggle to absorb and retain liquids as effectively as wheat flour. By pre-saturating a portion of the flour in the roux, we significantly improve the dough’s hydration capacity. This process locks in moisture, ensuring your rolls emerge from the oven with an exquisitely soft, fluffy texture, completely free from the common pitfalls of dense or gummy gluten-free baked goods.
Furthermore, the roux helps develop a more pliable and elastic dough, reducing the need to add excess flour during shaping. Minimizing additional flour is vital for keeping yeast breads light, airy, and truly delectable.
2. Prepare and Mix the Gluten-Free Dough
Begin by gently activating your yeast. In a small bowl or liquid measuring cup, combine the warm milk (ensure it’s around 110°F), a teaspoon of granulated sugar, and the active dry yeast. Give it a gentle stir and let it rest for approximately 5 minutes until it becomes foamy, indicating the yeast is active and ready to work its magic. While the yeast is blooming, gather your dry ingredients.
In the large bowl of a stand mixer fitted with a paddle attachment, thoroughly combine your gluten-free flour blend, the remaining granulated sugar, psyllium husk powder, optional milk powder, baking powder, and salt. Mix on low speed until everything is uniformly distributed. Next, pour in the activated yeast mixture, the slightly cooled melted butter, the room-temperature egg, and the prepared roux. Mix on low speed until all ingredients are just incorporated. Then, increase the mixer speed to medium and beat for a full 5 minutes, scraping down the sides of the bowl once or twice to ensure everything is well combined.
The resulting dough should be stiff enough to hold its shape but will still be noticeably sticky – this is perfectly normal for gluten-free yeast dough. If you find the dough is too stiff to move freely around the mixer bowl, add a very small splash (about a teaspoon at a time) of additional warmed milk until it achieves the desired consistency.
3. Expert Shaping for Fluffy Gluten-Free Rolls
Shaping gluten-free cinnamon roll dough can sometimes be tricky, as there’s a delicate balance to strike. The goal is to make the dough pliable enough to shape beautifully without adding so much flour that it compromises the final fluffy, airy texture. Our method ensures a tender crumb by using less additional flour than many other gluten-free recipes, focusing on moisture and pliability.
Instead of relying on excessive flour dusting, we harness the power of nonstick cooking spray to facilitate shaping the dough. This clever technique prevents sticking and allows for easy manipulation, much like how it’s successfully employed in my popular gluten-free yeast rolls recipe. This ensures your **GF cinnamon buns** remain soft and light, avoiding a dry or tough texture.
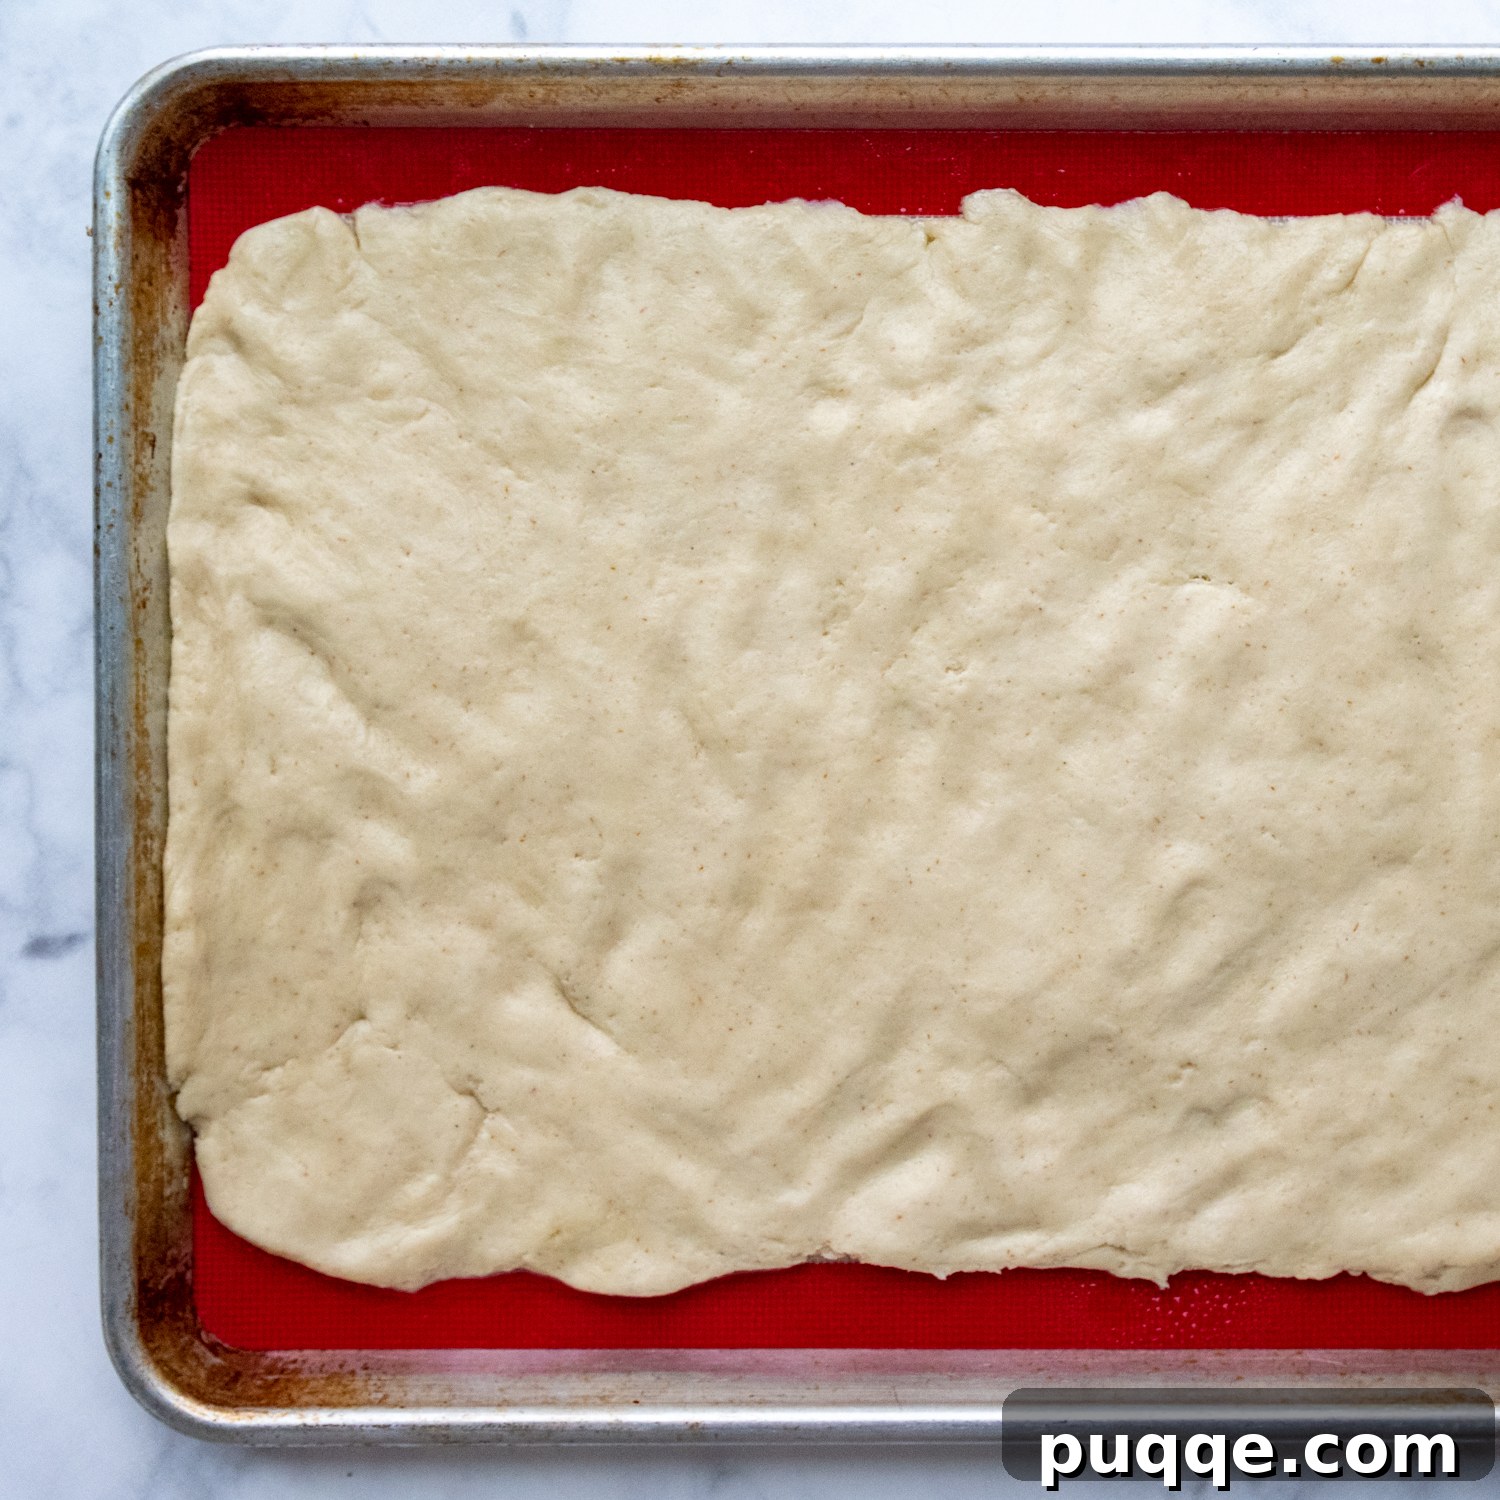
Prepare your workspace by laying a large piece of greased parchment paper or a greased silicone baking mat on your counter. Transfer the sticky dough onto this prepared surface. Lightly grease your hands with nonstick spray and gently pat the dough out into an approximate 11×18-inch rectangle. No rolling pin is even required for this step, making the process even simpler and less messy!
4. Fill, Roll, and Perfectly Slice Your Cinnamon Rolls
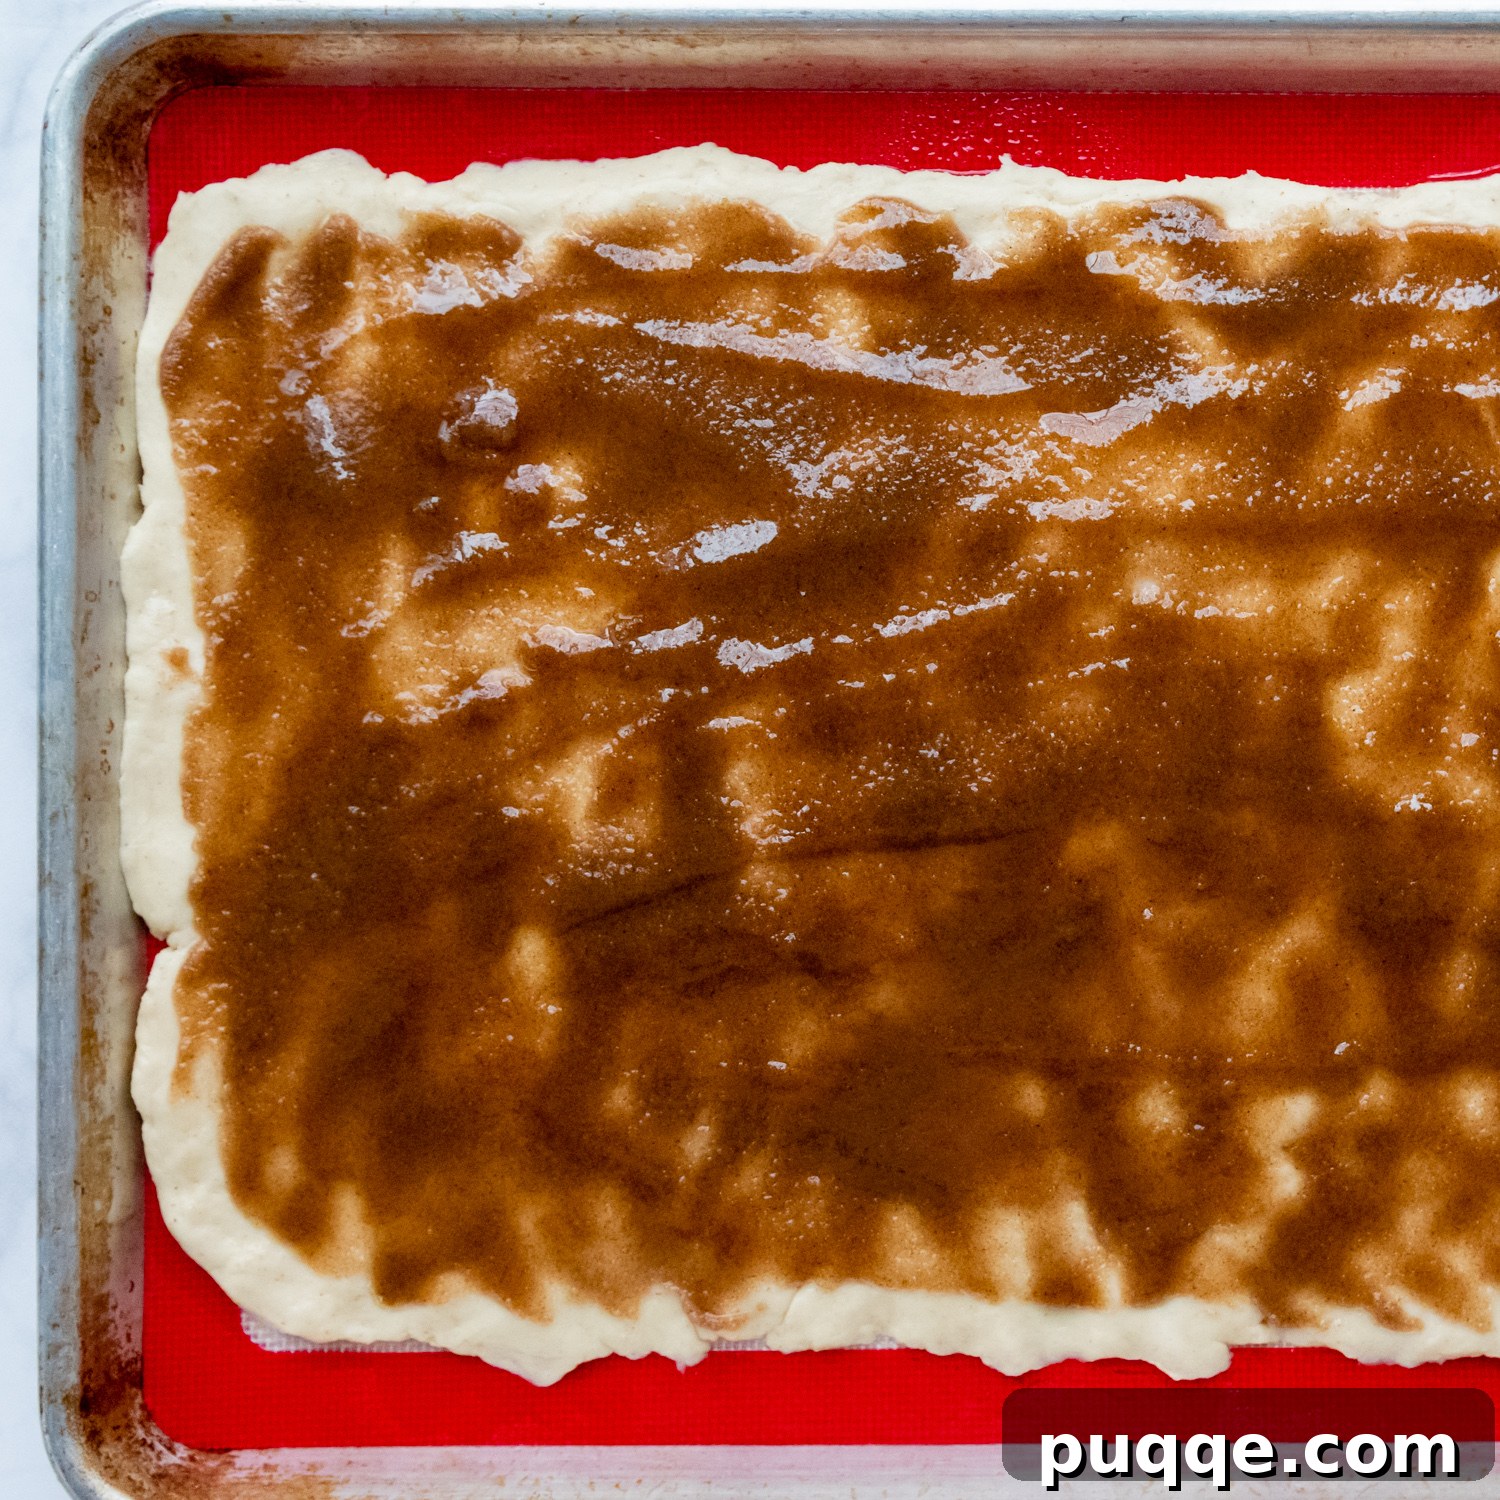
In a separate small bowl, combine the slightly melted butter, rich brown sugar, and aromatic ground cinnamon until well mixed. This forms your luscious **gooey cinnamon roll filling**. Evenly spread this mixture over the entire surface of your patted-out dough rectangle, extending it right to the edges to ensure every bite is packed with flavor.
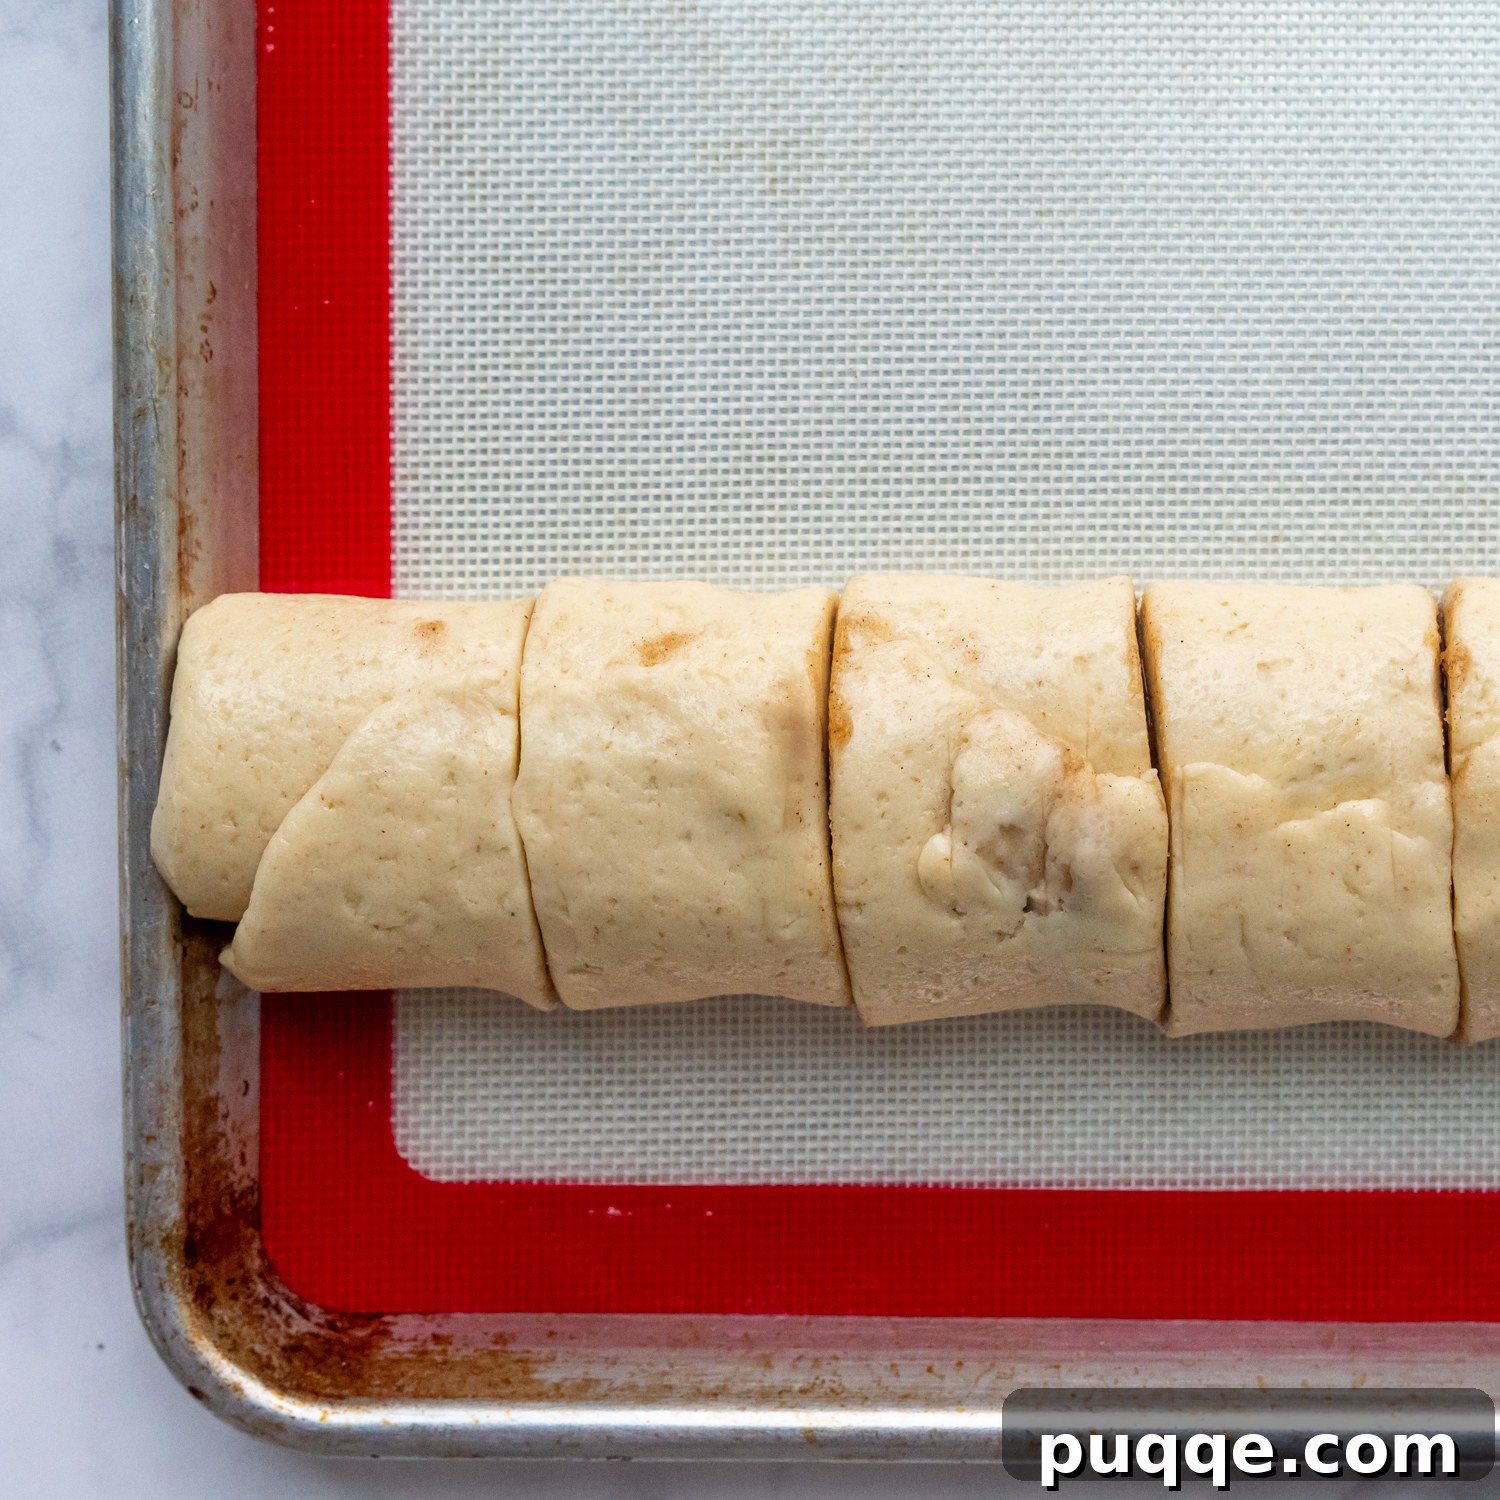
To roll the dough, start from the long edge furthest away from you. Begin rolling the dough tightly towards you, creating a snug log. Continue until you have about a 2-inch unrolled strip remaining on the side closest to you. Bring this unrolled strip up to meet the rolled log, carefully pinching the seams together to seal the log securely. Then, gently smooth the seam with your fingers to ensure a tight seal.
Using a sharp, serrated knife, gently score the log into nine approximately 2-inch sections. When cutting, employ a gentle sawing motion rather than pressing straight down. This technique is crucial for maintaining the beautiful round shape of your **gluten-free cinnamon rolls** and preventing them from becoming squished or misshapen, which can affect both appearance and baking consistency. Precision here contributes to uniform baking and presentation.
(For a visual demonstration of this precise rolling and slicing technique, be sure to watch the helpful video tutorial provided in the recipe card below!)
5. The Perfect Rise and Bake for Ultimate Gooeyness
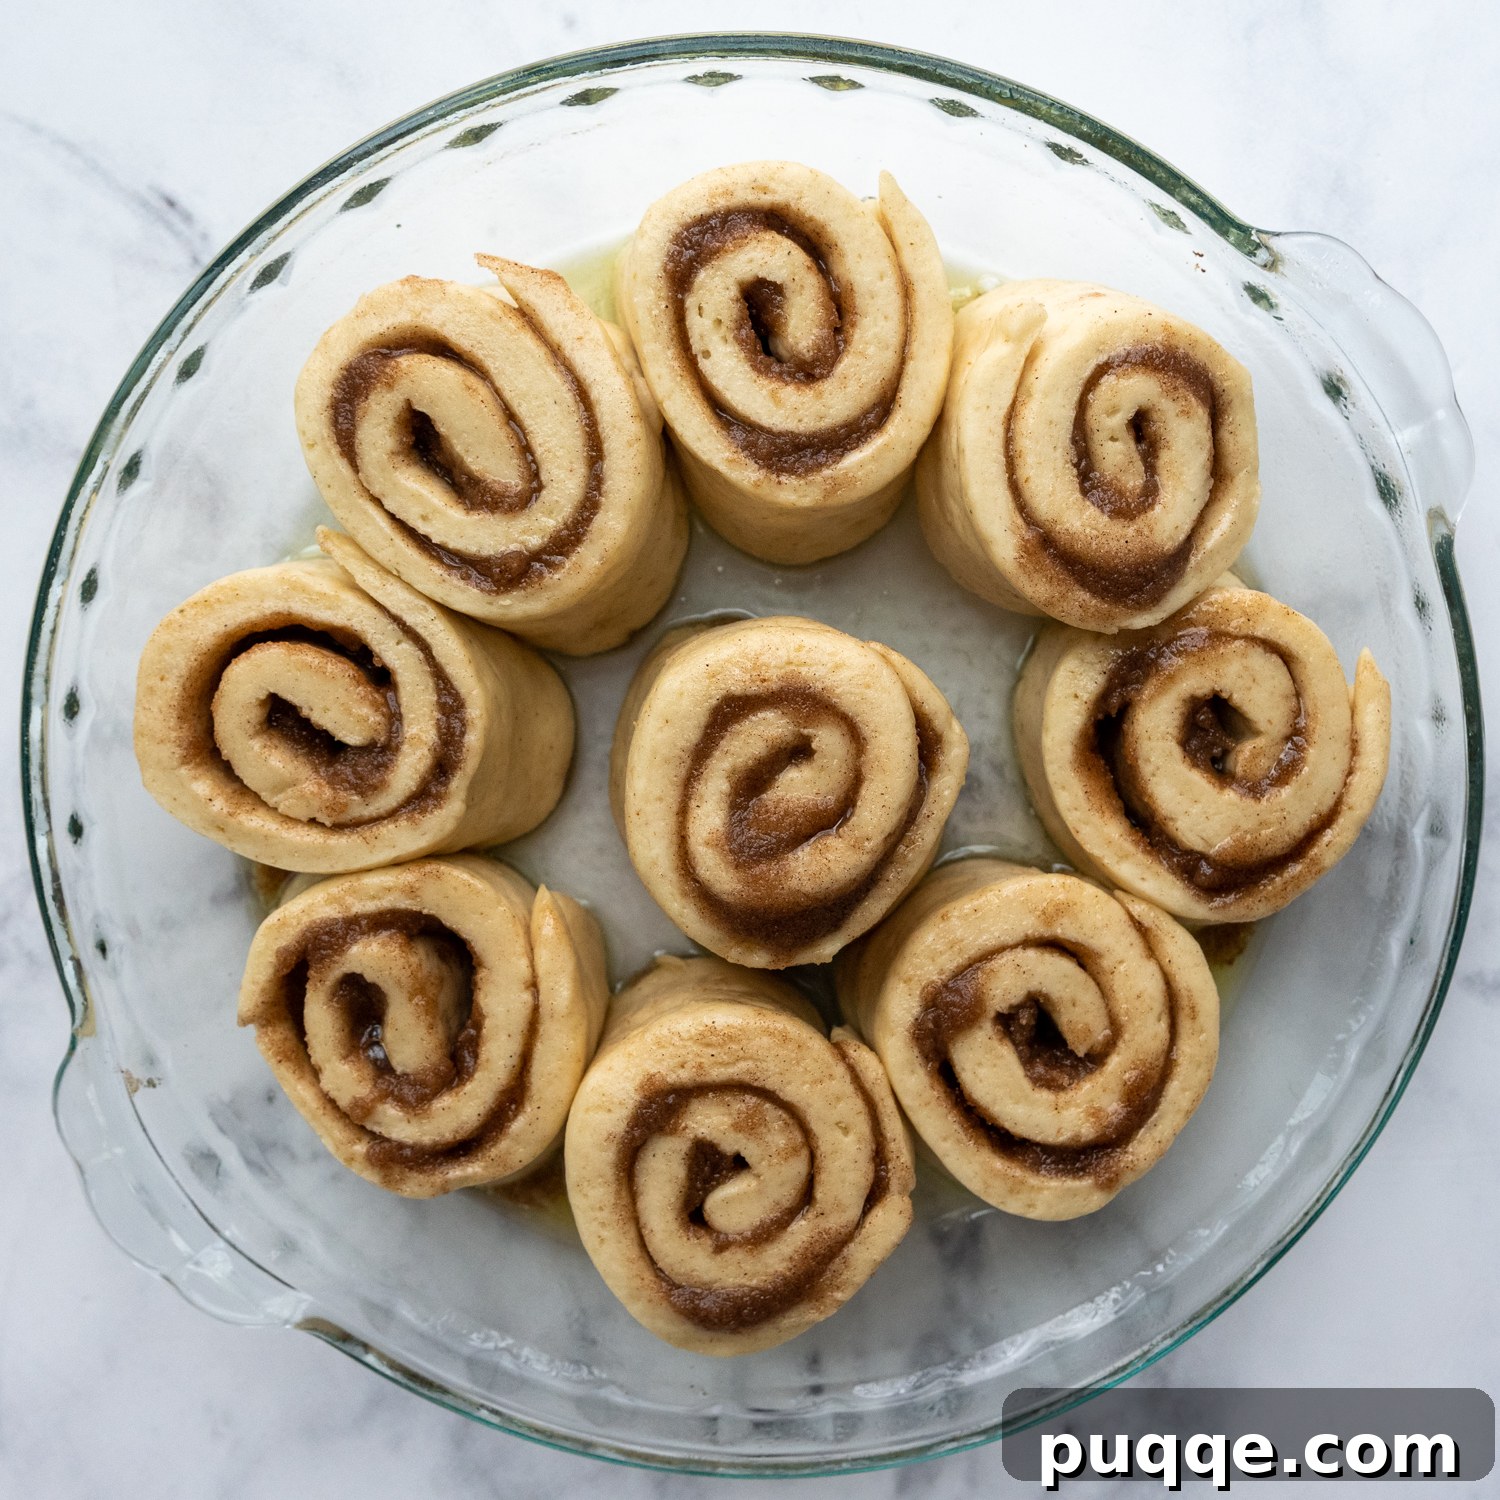
Carefully transfer your precisely cut **gluten-free cinnamon rolls** into a greased baking pan. I typically use either a standard pie plate or an 8×8-inch baking pan, with metal preferred for better heat conduction and more even baking. Once arranged, cover the pan loosely with a clean, lint-free dish towel. For the initial, crucial rise, place the covered pan in a slightly warmed (but turned off) oven for 10 minutes. This creates a cozy, optimal environment for the yeast to activate quickly and efficiently. After this initial period, remove the rolls from the oven and let them continue to rise at room temperature for an additional 20-30 minutes while your oven preheats to 350°F.
Just before baking, for that truly **Cinnabon-style gooey filling**, generously pour room temperature heavy cream evenly over the top of the risen rolls. This step is a game-changer, as the cream penetrates the dough and filling, transforming the cinnamon-sugar mixture into an incredibly rich and luscious glaze as it bakes, rather than allowing it to dry out.
Bake your cinnamon rolls for 30-35 minutes. Keep a close eye on them; the tops should turn a beautiful golden brown. To prevent over-browning while ensuring the interior cooks thoroughly, you can loosely tent the pan with aluminum foil during the last 10-15 minutes of baking. For absolute perfection and to guarantee the interior is fully cooked without being dry, I highly recommend using an instant-read thermometer. The internal temperature of the rolls should register 190°F when they are ready to be removed from the oven, ensuring they are cooked through yet incredibly tender and soft. Once baked, remove them from the oven and allow them to cool slightly in the pan while you prepare your decadent frosting.
Crafting the Ultimate Gooey Cinnamon Roll Filling
The heart of any truly exceptional cinnamon roll lies in its filling, and I’ve dedicated considerable effort to perfecting this crucial element. Through countless trials, I’ve encountered common pitfalls: fillings that seep out during baking, become overly dry and crunchy, or are too runny to manage. Achieving that iconic **gooey, Cinnabon-style filling** requires a strategic approach, and I’m excited to share my top three secrets with you.
Here’s how to ensure your filling is nothing short of spectacular:
- Embrace Brown Sugar: Unlike granulated sugar, brown sugar possesses a denser texture and higher moisture content. This makes it far more robust, significantly reducing the likelihood of the delicious filling oozing out of your **gluten-free cinnamon buns** during the baking process. Its rich, molasses notes also deepen the flavor profile, contributing to that signature caramelized taste.
- The Power of Slightly Melted Butter: When preparing the filling mixture, using butter that is just slightly melted (not fully liquid) is key. This semi-solid consistency helps to bind the brown sugar and cinnamon together effectively, creating a stable filling that stays perfectly in place as you roll and bake the dough. It prevents the filling from becoming too liquidy and escaping the confines of the roll.
- The Heavy Cream Secret: This is arguably the most transformative step for achieving that signature ultra-gooey texture reminiscent of classic Cinnabon rolls. Just before baking, gently pour room temperature heavy cream evenly over the top of your risen rolls. As the rolls bake, this cream wonderfully combines with the butter, sugar, and cinnamon mixture, thickening into an irresistible, rich, and deeply luscious glaze that blankets every inch of your **soft gluten-free cinnamon rolls**, ensuring every bite is moist and decadent.
By following these steps, you’ll create a cinnamon filling that is not only incredibly flavorful but also perfectly gooey, ensuring a memorable bite every single time.
Decadent Frosting: Two Irresistible Options
No **gluten-free cinnamon roll** is complete without a generous slathering of delicious frosting! I offer two equally delightful options, ensuring there’s a perfect topping for every preference. Both recipes are infused with a generous dose of pure vanilla extract, elevating their flavor to new heights. Rest assured, each frosting recipe yields an ample amount, because in my opinion, an abundance of rich, creamy frosting is absolutely essential for a truly exceptional cinnamon roll experience!
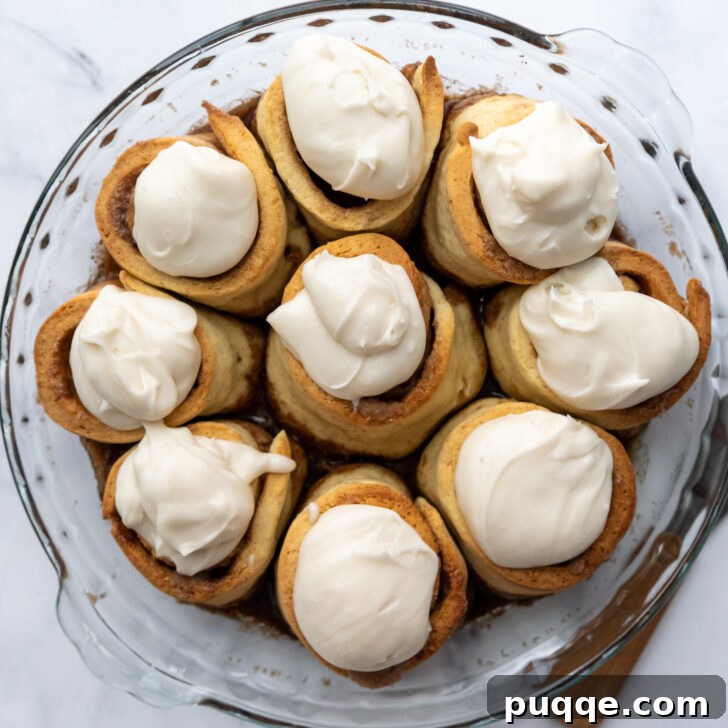
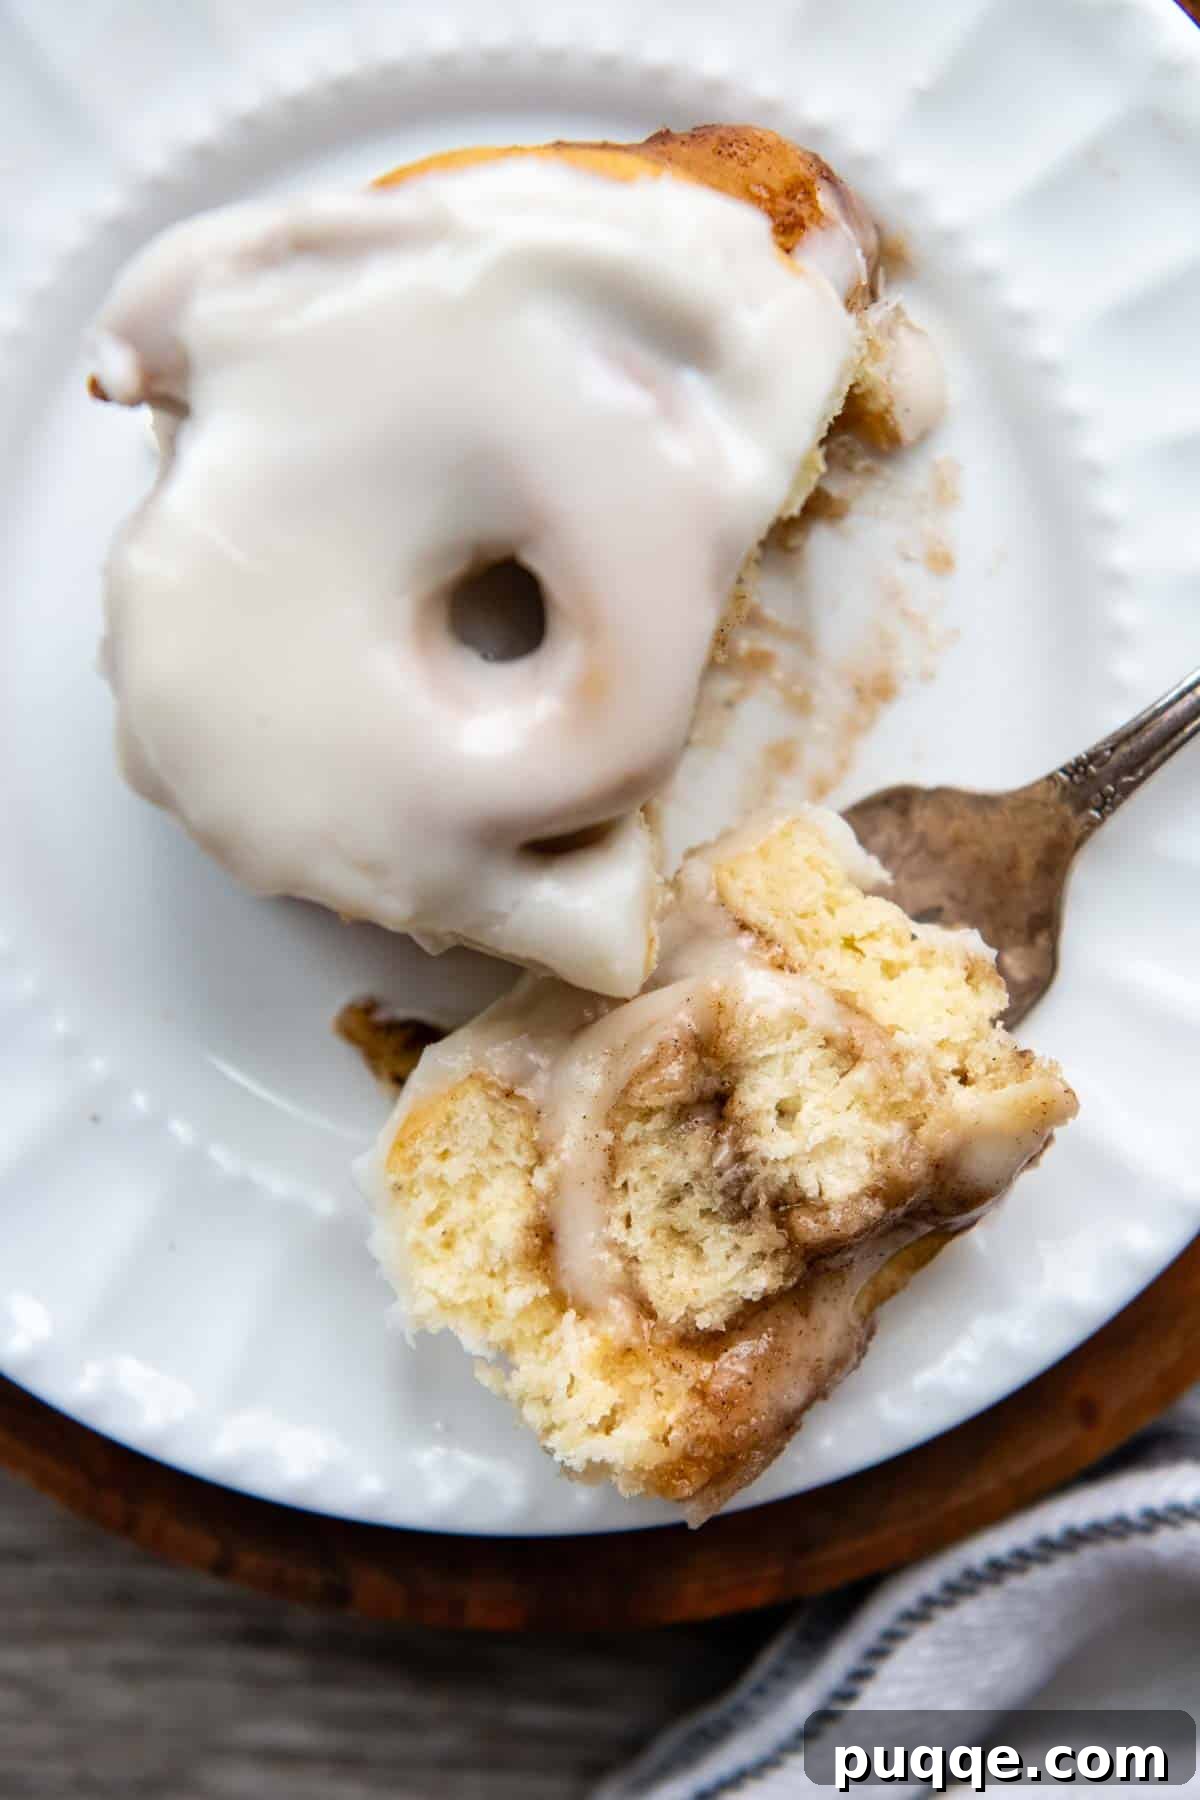
You can choose between a classic, thick powdered sugar glaze or a luxurious cream cheese frosting. Both complement the warm, spicy notes of the cinnamon rolls beautifully. For the best melting and seeping effect, spread your chosen frosting over the buns while they are still warm, typically about 10 minutes after they’ve come out of the oven. I find it helpful to dollop the frosting onto each roll first, allowing it to gently warm and melt slightly for a minute. Then, you can easily spread it evenly across the tops, letting some seep into the delicious crevices for maximum flavor. If you prefer, you can reserve a portion of the frosting to add an extra fresh layer right before serving for maximum visual appeal and taste.
Pro Tips for Gluten-Free Cinnamon Roll Perfection
Unlock even greater success with your **homemade gluten-free cinnamon rolls** by keeping these expert tips in mind:
- Invest in a Stand Mixer: For optimal results and ease of preparation, I highly recommend using a stand mixer equipped with a paddle attachment. The dough for these rolls, while perfectly pliable, can become quite stiff during the mixing process, making a hand-held mixer less effective for achieving the ideal consistency and proper gluten-free dough development.
- Room Temperature Eggs: Ensuring your egg is at room temperature allows it to incorporate more evenly into the dough, leading to a smoother mixture and better overall texture in your baked goods. If you forget to take your egg out in advance, a quick trick is to place the whole egg (still in its shell) into a bowl of warm tap water for about 5 minutes; it will quickly come to temperature.
- Scaling the Recipe: Planning a larger batch for a crowd or meal prep? To double this recipe, simply multiply all ingredient quantities by two. For baking, you’ll need a larger 9×13-inch baking pan to comfortably accommodate the increased volume of rolls during both the rise and bake cycles, ensuring they have enough space to expand.
- The Precision of an Instant-Read Thermometer: Take the guesswork out of baking! An instant-read thermometer is invaluable for two key stages: first, ensuring your milk is at the perfect 110°F for yeast activation (anything too hot or cold can compromise the rise), and second, confirming your rolls are perfectly baked. The interior of the cinnamon rolls should register between 195-200°F when they are ready to be removed from the oven, guaranteeing they are cooked through yet incredibly tender.
- Optimizing Your GF Flour Blend: For the most consistent and delicious outcome, I strongly advocate for using Cup4Cup gluten-free flour mix. Please note that since the Cup4Cup formula has undergone changes, I’ve found that substituting 2 tablespoons of the measured flour with 2 tablespoons of milk powder significantly contributes to a softer, more desirable roll texture and improved moisture retention.
- Nonstick Surface for Shaping: A greased piece of parchment paper or a silicone baking mat is a game-changer when it comes to shaping the dough. It prevents sticking and allows you to easily pat out and roll your dough without added frustration or the need for excessive flour dusting, which can lead to dry rolls.
- Baking Pan Choice Matters: While a glass pan certainly works, I now prefer baking these **soft gluten-free cinnamon rolls** in a metal baking pan. Metal pans offer faster and more even heat retention and distribution, leading to quicker baking times and a consistently golden-brown finish on your rolls.
- Make-Ahead & Overnight Options: For ultimate convenience, you can prepare the rolls up to the shaping stage. After placing them in the greased baking pan, cover them tightly with plastic wrap and refrigerate overnight (for up to 12 hours). In the morning, allow them to come to room temperature and rise for 30-45 minutes before baking as directed. This is a perfect strategy for hassle-free holiday mornings or special brunches!
Pin This Recipe for Later!
Don’t lose track of this incredible recipe! Save these **Cinnabon-style gluten-free cinnamon rolls** to your favorite Pinterest board so you can easily find it whenever a craving strikes for a perfectly soft and gooey treat.
For more delicious gluten-free recipes and baking inspiration, be sure to connect with us on Pinterest! We’re always sharing new and exciting ways to enjoy gluten-free living.
Made these amazing gluten-free cinnamon rolls? Your feedback is incredibly valuable! I absolutely love hearing from you. Please take a moment to leave a star rating and a comment below the recipe card. Your reviews not only help others discover and enjoy these recipes but also provide wonderful insights for our community. I personally read and respond to every comment! -Melissa

Doughy Soft Gluten-Free Cinnamon Rolls (Better Than Cinnabon!)
 Melissa Erdelac
Pin Recipe
Rate & Review
Remove Ads
Ingredients
Roux
- 2 tablespoons (18 g) gluten free all purpose flour, I recommend Cup4Cup brand
- 3 tablespoons (45 g) milk
- 3 tablespoons (45 g) water
Gluten Free Dough
- ¾ cup (180 g) milk, heated to 110ºF
- 1 teaspoon granulated sugar
- 1 package (2 ¼ tsp, 7 g) active dry yeast
- 2 cups + 2 tablespoons (310 g) gluten free all purpose flour, I recommend Cup4Cup brand
- 2 tablespoons (optional) milk powder, see recipe notes
- ⅓ cup (67 g) granulated sugar
- 1 ½ tablespoons (17 g) psyllium husk powder, (what is psyllium husk?)
- 1 ½ teaspoons baking powder
- ½ teaspoon salt
- 4 tablespoons (57 g) melted butter, cooled slightly
- 1 large egg, room temperature
Cinnamon Filling
- 4 tablespoons (57 g) slightly melted butter
- ½ cup (59 g) light brown sugar
- 1 tablespoon (8 g ) ground cinnamon
- ¼ cup (60 g) room temperature heavy cream, (for pouring over risen rolls)
Option 1: Powdered Sugar Frosting
- 2 cups (240 g) powdered sugar
- 2 tablespoons (28 g) melted butter
- 2 teaspoons vanilla extract
- 2-3 tablespoons (30-45 g) milk
Option 2: Cream Cheese Frosting
- 5 ounces (140 g) cream cheese, softened
- 3 tablespoons (42 g) butter, softened
- 1 ¼ cup (150 g) powdered sugar
- 1 ½ teaspoon vanilla extract
Equipment
-
Stand Mixer
-
Silicone Baking Mats
-
Cup4Cup Gluten Free Flour
Instructions
-
Before you begin making the roux, preheat your oven to 250ºF briefly, then turn it off once it reaches temperature. This creates a warm, cozy spot for the rolls to begin their initial rise. Lightly grease a metal 8×8-inch baking pan (metal is preferred for optimal baking). Set this aside.
-
As the oven gently warms, prepare the roux. In a small saucepan, combine 2 tablespoons of gluten-free all-purpose flour with water and milk. Whisk continuously over medium heat until the mixture thickens into a paste and a trail becomes visible at the bottom of the pan as you stir. Remove from heat and set aside to cool slightly.2 tablespoons (18 g) gluten free all purpose flour, 3 tablespoons (45 g) milk, 3 tablespoons (45 g) water
-
In a liquid measuring cup or small bowl, combine the ¾ cup of milk (warmed to 110ºF, about 45 seconds in the microwave), 1 teaspoon of granulated sugar, and the active dry yeast. Stir gently and allow it to sit for 5 minutes until frothy, indicating yeast activation.¾ cup (180 g) milk, 1 teaspoon granulated sugar, 1 package (2 ¼ tsp, 7 g) active dry yeast
-
In the large mixing bowl of a stand mixer, combine the 2 cups + 2 tablespoons of gluten-free flour, ⅓ cup granulated sugar, optional milk powder, psyllium husk powder, baking powder, and salt. Mix on low speed with a paddle attachment until thoroughly combined.2 cups + 2 tablespoons (310 g) gluten free all purpose flour, ⅓ cup (67 g) granulated sugar, 1 ½ tablespoons (17 g) psyllium husk powder, 1 ½ teaspoons baking powder, ½ teaspoon salt, 2 tablespoons (optional) milk powder
-
Add the warm milk/yeast mixture, slightly cooled melted butter, room temperature egg, and the prepared roux to the dry ingredients. Combine on low speed until everything is well blended. Increase the speed to medium and beat for 5 minutes, stopping once or twice to scrape down the sides of the bowl. The dough will be stiff but should still feel slightly sticky. If it’s too stiff and not moving well in the bowl, add a very small splash of warmed milk until it loosens slightly to the desired consistency.4 tablespoons (57 g) melted butter, 1 large egg
-
While the dough is mixing, prepare your cinnamon filling. In a small bowl, stir together the 4 tablespoons of slightly melted butter, ½ cup of light brown sugar, and 1 tablespoon of ground cinnamon until a cohesive mixture forms.4 tablespoons (57 g) slightly melted butter, ½ cup (59 g) light brown sugar, 1 tablespoon (8 g ) ground cinnamon
-
Spray a silicone baking mat or a large piece of parchment paper generously with nonstick cooking spray. Scrape the dough onto the greased surface. Lightly grease your hands with more nonstick spray and gently pat the cinnamon roll dough out into an even 10×18-inch rectangle.
-
Using a silicone spatula, evenly spread the prepared cinnamon filling across the entire dough rectangle, reaching all the way to the edges. Begin with the long edge furthest from you and carefully roll the dough into a tight log towards you. Stop rolling when you have about a 2-inch unrolled strip remaining. Bring this unrolled strip up to meet the log, then firmly pinch the seams together and smooth them with your fingers to seal.
-
Using a sharp serrated knife, score the log into nine approximately 2-inch sections. To cut, use a gentle sawing motion rather than pressing straight down. This technique prevents the cinnamon buns from being squished and helps maintain their perfect shape.
-
Transfer the cut rolls into your greased 8×8-inch baking pan. Cover the pan loosely with a lint-free dish towel and place it in the pre-warmed (and now off) oven for 10 minutes for an initial rise. After 10 minutes, remove the rolls from the oven and let them continue to rise at room temperature for an additional 20-30 minutes while the oven preheats to 350ºF.
-
If your heavy cream isn’t at room temperature, warm it briefly in the microwave until it’s no longer cold, but not hot. Just before baking, pour the room temperature heavy cream evenly over the top of the risen rolls. This step is key for an extra gooey filling.¼ cup (60 g) room temperature heavy cream
-
Bake for 30-35 minutes. If the tops start to brown too quickly, loosely tent the pan with aluminum foil for the last 10-15 minutes. The rolls are done when the tops are golden brown and the interior is no longer wet dough. For the most accurate results, use an instant-read thermometer, aiming for an internal temperature of 190ºF. Allow the rolls to cool slightly in the pan while you prepare your chosen frosting.
Option 1: Powdered Sugar Frosting
-
In a medium bowl, whisk together the powdered sugar, melted butter, vanilla extract, and 2-3 tablespoons of milk until completely smooth and lump-free. Dollop the frosting generously on top of each warm cinnamon roll. After it’s divided, spread the frosting evenly over the tops, allowing it to melt slightly into the warm rolls.2 cups (240 g) powdered sugar, 2 tablespoons (28 g) melted butter, 2 teaspoons vanilla extract, 2-3 tablespoons (30-45 g) milk
Option 2: Cream Cheese Frosting
-
In a medium bowl, beat together the softened cream cheese, softened butter, powdered sugar, and vanilla extract until the mixture is light, fluffy, and completely smooth. Dollop this rich frosting on top of each warm cinnamon roll. Once distributed, spread it evenly over the tops, letting it soften and seep into the warm buns for maximum indulgence.5 ounces (140 g) cream cheese, 3 tablespoons (42 g) butter, 1 ¼ cup (150 g) powdered sugar, 1 ½ teaspoon vanilla extract
Notes
Milk Powder Substitution
Due to recent changes in the Cup4Cup flour formula, I’ve discovered that removing 2 tablespoons of the specified flour amount and replacing it with 2 tablespoons of milk powder (ensure it’s a gluten-free safe brand by checking the label) significantly enhances moisture incorporation and contributes to a wonderfully softer roll. If you prefer not to use milk powder, you can simply omit it; however, you may need to add an extra 1-2 tablespoons of gluten-free flour to achieve a dough consistency that is stiff yet still slightly sticky.
Dairy-Free Modifications for GF Cinnamon Rolls
To make these delectable **gluten-free cinnamon rolls** completely dairy-free, you can easily substitute non-dairy milk (such as almond or soy milk) for the regular milk called for in the recipe. For the butter, opt for a high-quality plant-based vegan butter, ensuring it’s suitable for baking.
Instead of pouring heavy cream over the risen rolls before baking, use a dairy-free alternative like full-fat coconut milk or another non-dairy milk. For the best gooey results, I strongly recommend full-fat coconut milk due to its higher fat content, which will best replicate the rich glaze and signature gooey texture.
Freezing Baked Gluten-Free Cinnamon Rolls
If you plan to prepare these rolls in advance or have leftovers, freezing them is a great option to extend their freshness. For best results, allow the unfrosted rolls to cool completely to room temperature. Then, wrap the entire pan securely in multiple layers of plastic wrap, followed by a layer of aluminum foil, creating an airtight seal. They can be frozen for up to 2 months without loss of quality.
To enjoy, thaw the frozen rolls at room temperature for approximately 1 hour. Recover the pan with foil to prevent drying and warm them in a 350ºF oven for about 10 minutes until heated through. While they’re warming, prepare your frosting. Remove from the oven and spread generously with frosting before serving for a fresh-baked experience.
Reheating Leftover Frosted Rolls
Should you have any frosted leftover rolls, they can also be frozen for later enjoyment. Wrap each cooled bun individually in plastic wrap, then transfer them to a freezer-safe ziplock bag to prevent freezer burn. Freeze for up to 2 months.
To reheat, thaw at room temperature for 1 hour. Gently warm in the microwave at 50% power for 30-60 seconds until heated through and soft, being careful not to overcook as this can dry them out.
Did you make this recipe?Please leave a star rating and review below. It helps others when searching for recipes and I LOVE feedback!