
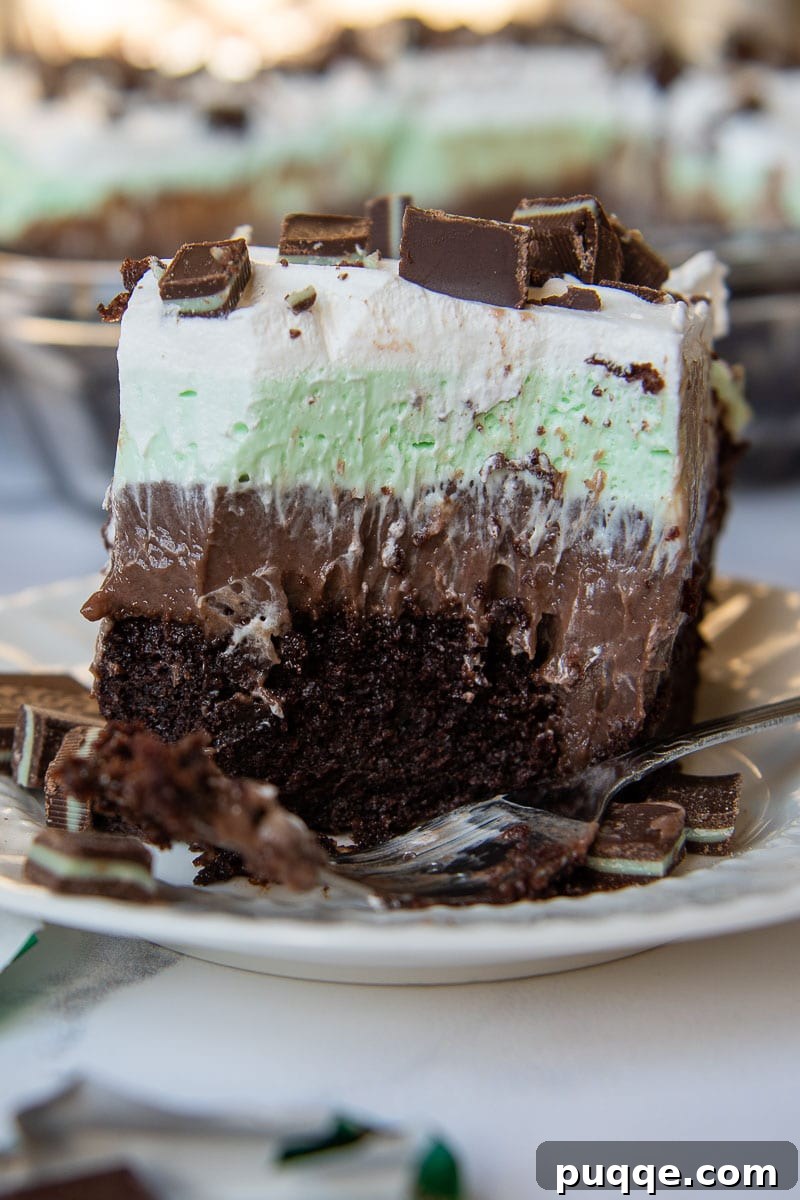
Indulge in the refreshing fusion of rich chocolate and cool mint with our sensational **Andes Mint Chocolate Pudding Poke Cake**. This extraordinary dessert features a supremely moist chocolate cake, generously infused with warm, luscious chocolate pudding, and crowned with a thick, ethereal layer of mint-infused whipped topping. Perfect for any celebration, from birthdays and special gatherings to festive holidays like St. Patrick’s Day, this Andes mint cake promises a delightful experience that will captivate every palate.
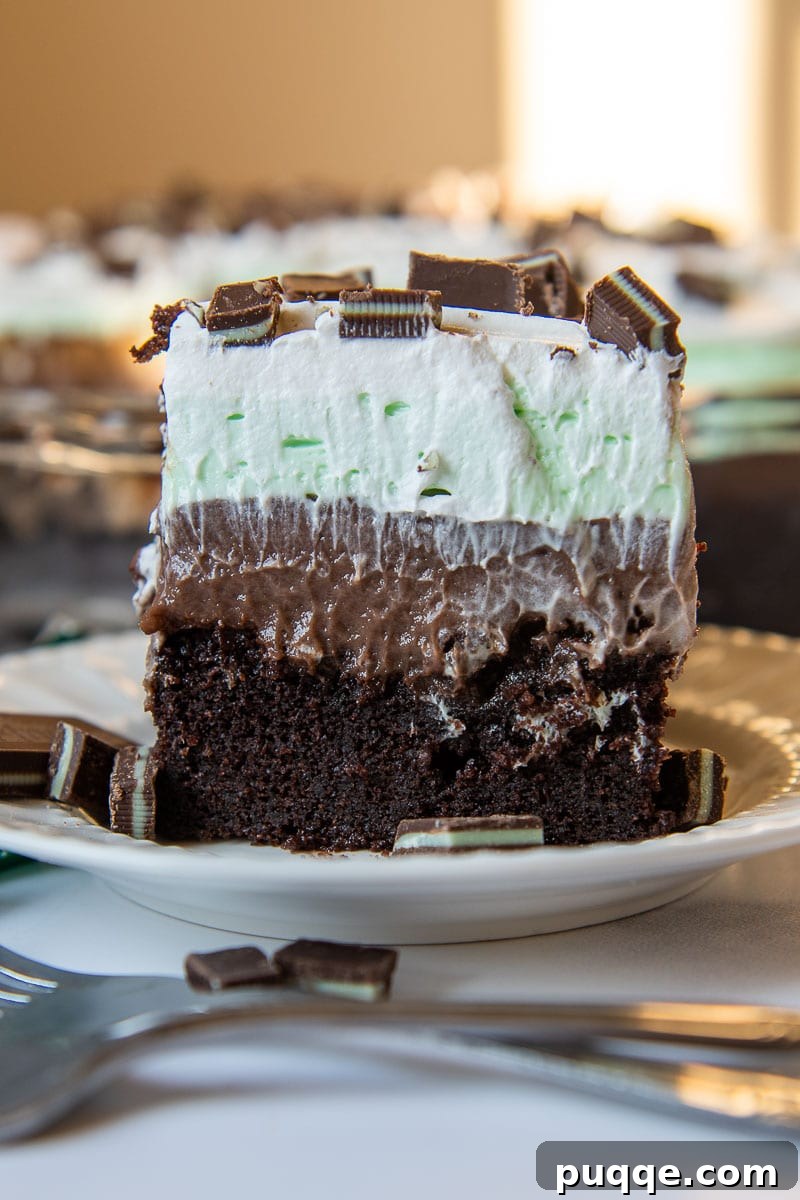
The Allure of Andes Mint: Why This Cake is a Must-Try
The timeless appeal of mint and chocolate comes alive in this unique dessert. Inspired by a beloved family recipe—a colossal Punch Bowl Cake—this version captures all the exquisite mint chocolate flavors in a more accessible and elegant presentation. Imagine the classic pairing of cool mint and decadent chocolate, but elevated into a moist, multi-layered cake that’s surprisingly easy to create. This Andes Mint Chocolate Pudding Poke Cake isn’t just a dessert; it’s a nostalgic journey with a fresh twist, offering a sophisticated taste while retaining its comforting homemade charm.
The secret to its unparalleled texture lies in the “poke cake” method, where warm, rich chocolate pudding seeps into every crevice of the freshly baked cake, transforming it into an incredibly moist and flavorful foundation. This luxurious chocolate base is then perfectly complemented by layers of cool, airy mint Cool Whip topping and a generous sprinkle of crushed Andes chocolate candies, adding both texture and an irresistible burst of minty goodness. We’ve also incorporated a touch of cream cheese into the mint topping, lending an extra boost of creamy tanginess and a delightful variance in texture that truly sets this cake apart.
What is a Poke Cake? The Secret to Ultimate Moistness
For those new to the concept, a poke cake is a dessert marvel renowned for its incredible moisture and flavor infusion. The process involves baking a cake, then, while it’s still warm, poking numerous holes into its surface. A liquid mixture—in this case, warm chocolate pudding—is then poured over the cake, allowing it to seep deep into these holes. This ingenious technique ensures that every bite is saturated with flavor and moisture, creating a dessert that is far from dry or bland. In our Andes Mint Chocolate Pudding Poke Cake, this method ensures the rich chocolate pudding permeates the cake, creating an intensely chocolatey and tender base that perfectly contrasts with the vibrant mint layers above.
The beauty of a poke cake, especially one featuring pudding, is its ability to absorb and hold moisture, resulting in a delightfully soft and tender crumb that stays fresh longer. The warm pudding, when poured over the cake, melts slightly and fully penetrates, becoming an integral part of the cake’s structure rather than just a separate layer. This creates a harmonious blend of flavors and textures, making each forkful a truly decadent experience. It’s a simple technique that yields profoundly delicious results, making it a favorite among home bakers.
Decoding the Layers: A Symphony of Flavors and Textures
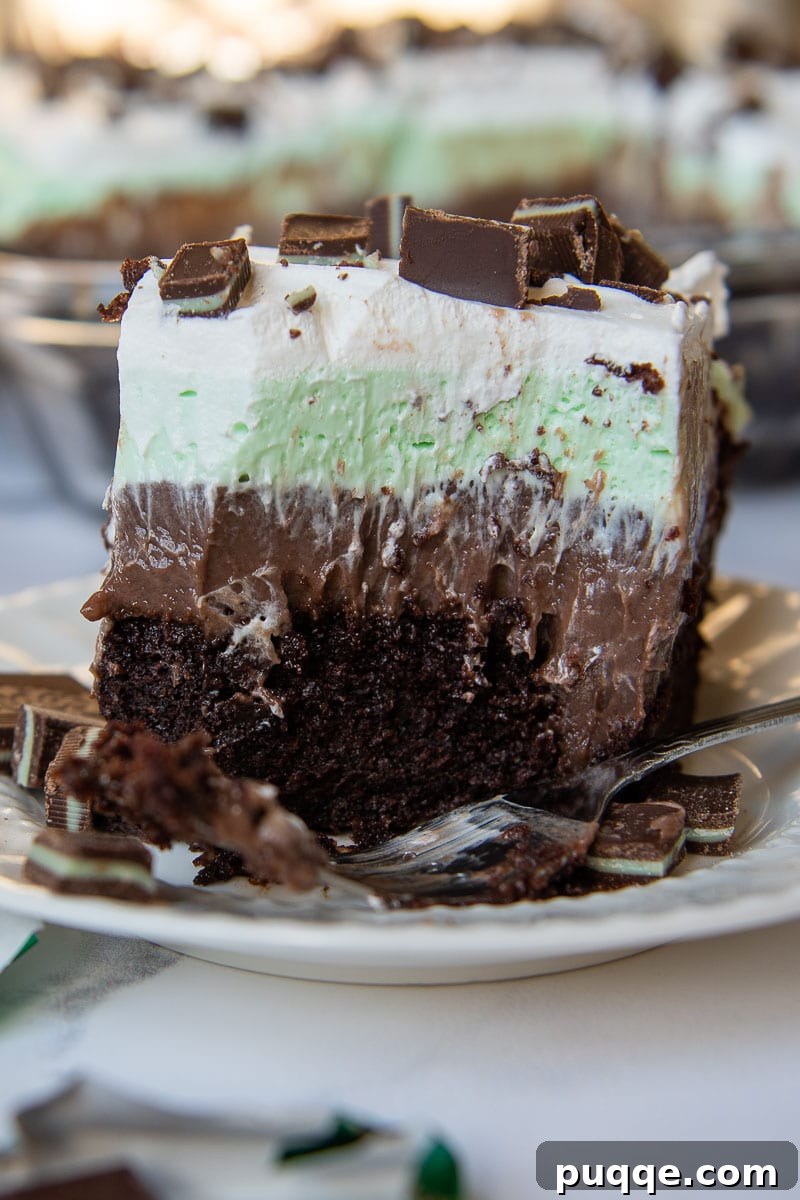
This Andes Mint Chocolate Pudding Poke Cake is a true masterpiece of layered indulgence, offering a harmonious blend of textures and tastes in every bite. Each component plays a crucial role in creating this irresistible dessert:
- The Moist Chocolate Cake Base: Whether you choose a convenient boxed mix or a homemade recipe, the chocolate cake serves as the perfect foundation. Its deep chocolate flavor and tender crumb are the ideal canvas for the layers to come, soaking up the pudding to achieve an exceptional level of moisture.
- Rich Chocolate Pudding Infusion: This is where the magic happens. Warm, cooked chocolate pudding is generously poured over the poked cake, seeping into every nook and cranny. This not only adds intense chocolate flavor but also makes the cake incredibly moist and tender, ensuring a pudding-like consistency throughout.
- Tangy Mint Cream Cheese Layer: A unique addition to this poke cake, our mint cream cheese layer introduces a delightful tang and an additional creamy texture. Made with softened cream cheese, powdered sugar, heavy cream, and a hint of mint extract, this layer provides a refreshing counterpoint to the rich chocolate, elevating the overall flavor profile. Its airy, whipped consistency adds a luxurious mouthfeel.
- Light & Fluffy Mint Cool Whip Topping: The final grand flourish is a generous layer of mint-flavored Cool Whip. Light, airy, and delicately flavored with mint extract, this topping brings a cloud-like texture and a refreshing coolness that perfectly balances the density of the cake and pudding.
- Crunchy Andes Mint Crumbles: To complete this culinary delight, a scattering of crushed Andes Mints adorns the top. These iconic chocolate mint candies not only provide an extra punch of mint-chocolate flavor but also add a satisfying crunch, making each slice a multi-sensory experience.
Together, these layers create a dessert that is visually stunning, incredibly flavorful, and texturally complex, ensuring that every bite is a delightful journey through creamy, moist, and crunchy sensations.
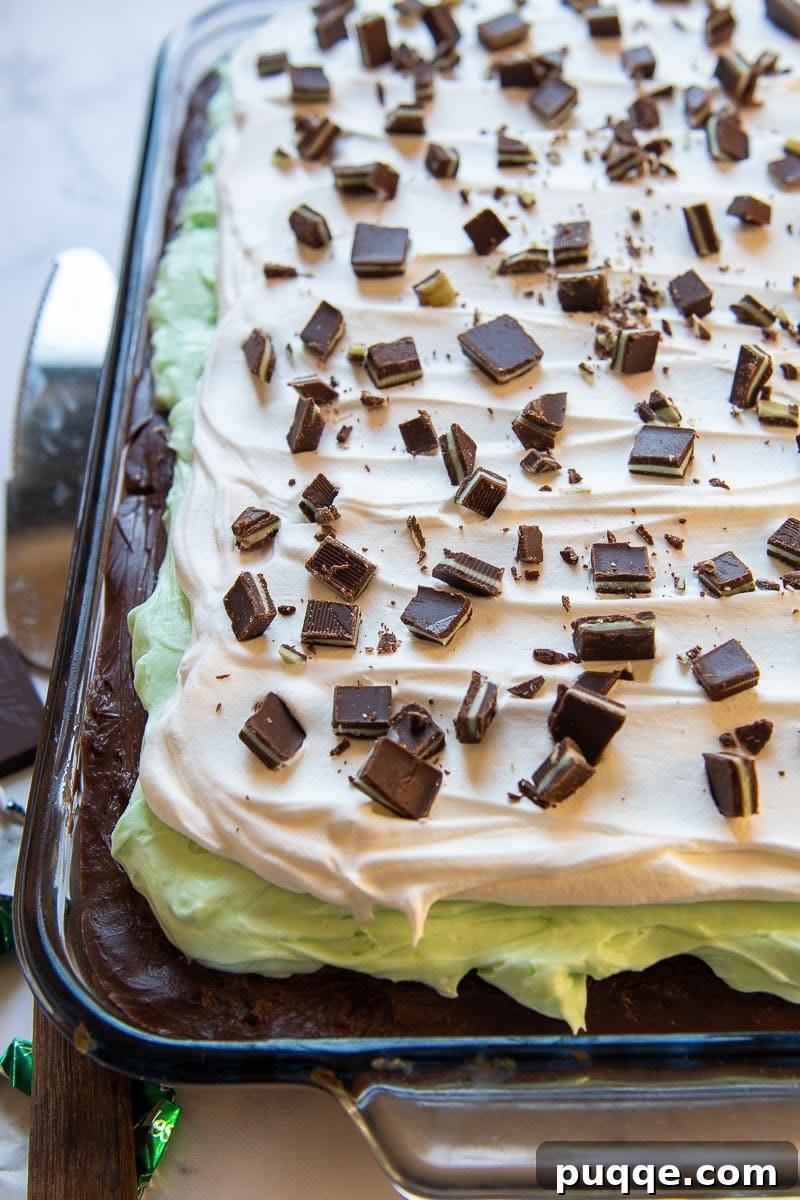
Gathering Your Ingredients: Pantry Staples and Minty Essentials
Creating this stunning Andes Mint Chocolate Pudding Poke Cake begins with assembling the right ingredients. Many of these are likely already in your pantry, making this a convenient and delightful baking project. For the best results, ensure your ingredients are fresh and at the recommended temperature (e.g., softened cream cheese).
- Chocolate Cake: You have several excellent options here. A standard 9×13 inch box cake mix offers convenience and consistent results. For those who prefer baking from scratch, a homemade chocolate cake recipe will add an extra layer of richness and depth. If you’re adapting for dietary needs, a moist gluten-free chocolate cake recipe works wonderfully; we highly recommend Cup 4 Cup gluten-free flour for its excellent texture and flavor.
- Chocolate Pudding: This recipe specifically calls for “cook and serve” chocolate pudding, typically found in small 3.4 oz boxes. The key here is that it needs to be warm when poured over the cake to properly seep into the holes and create that signature moist texture. While instant pudding might seem easier, it uses cold milk and won’t absorb into the cake as effectively. You can also substitute with a homemade, from-scratch pudding if you prefer.
- Cool Whip: This ready-made whipped topping provides a light, airy, and stable base for our mint layer. Ensure it’s thawed before use.
- Mint Extract: This is crucial for infusing that refreshing mint flavor into the topping. Peppermint extract is generally preferred for its bolder, cooler taste, characteristic of Andes Mints. Adjust the amount to your desired intensity.
- Powdered Sugar: Also known as confectioners’ sugar, it sweetens the cream cheese layer and contributes to its smooth, creamy texture.
- Cream Cheese: Use regular or light cream cheese, ensuring it is softened to room temperature before mixing. This allows it to blend smoothly without lumps, creating a silky cream layer.
- Milk: Essential for both the chocolate cake (if making from scratch) and the chocolate pudding preparation.
- Green Food Coloring (Optional): A few drops of green food coloring will give your mint layer that characteristic vibrant hue, enhancing the visual appeal of the cake, especially for occasions like St. Patrick’s Day.
- Heavy Cream: This is whipped with the cream cheese to create a richer, more stable and luxurious mint cream layer.
- Andes Chocolate Mints: These iconic candies are the star of the show for decorating and boosting that unmistakable mint chocolate flavor. Crush them roughly for a pleasant textural contrast on top of the cake. If Andes Mints are unavailable, crushed mint Oreos or other mint chocolate candies make excellent substitutes.
Having all your ingredients prepped and ready will ensure a smooth and enjoyable baking process, leading to a truly spectacular dessert!
Step-by-Step Guide: Crafting Your Andes Mint Poke Cake
Preparing this Andes Mint Chocolate Pudding Poke Cake is a rewarding process, yielding a dessert that is as impressive to look at as it is delicious to eat. Plan ahead to allow ample time for the pudding to seep into the cake and for the cake to cool thoroughly, ideally overnight, for the best texture and flavor. If you’re making this for a party, preparing it the day before is highly recommended.
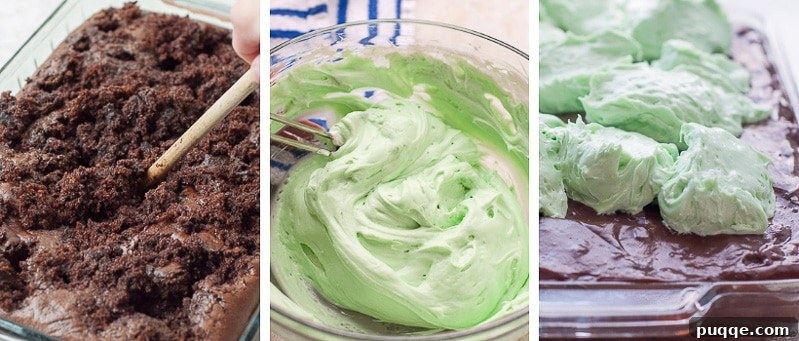
- Prepare the Chocolate Cake: Preheat your oven to 350°F (175°C). Lightly grease and flour a 9×13 inch baking dish. If using a cake mix, follow the package directions. For a homemade chocolate cake (like the one in our detailed recipe card below) or a gluten-free chocolate cake, combine dry ingredients in a large bowl, then add wet ingredients and boiling water, mixing until smooth. Pour the batter into the prepared dish and bake for 45-50 minutes, or until a toothpick inserted into the center comes out clean. Allow the cake to cool slightly for 15-20 minutes in the pan.
- Make the Chocolate Pudding: While the cake is cooling, prepare your “cook and serve” chocolate pudding according to the package directions (using the specified 6 cups of milk for 3 small boxes). It’s crucial for the pudding to be warm when it meets the cake. If you’re not pouring it immediately, press plastic wrap directly onto the surface of the pudding to prevent a skin from forming.
- Poke the Cake: Once the cake has cooled slightly (15-20 minutes), use the handle of a wooden spoon (or a similar blunt object) to poke holes evenly across the entire surface of the cake, about one inch apart. Don’t be afraid to make substantial holes; the goal is for the pudding to penetrate deep into the cake. It might look a bit “destroyed,” but trust the process – it will all be beautifully covered!
- Infuse and Chill: Carefully pour the warm chocolate pudding over the warm, poked cake, ensuring it flows into all the holes. Use an offset spatula or the back of a spoon to gently spread the pudding evenly. Once covered, securely press a large piece of plastic wrap directly onto the surface of the pudding (this prevents a skin from forming and keeps moisture in). Refrigerate for at least 3 hours, or ideally, overnight, to allow the pudding to fully set and seep into the cake, and for the cake to cool completely. This chilling time is essential for the cake’s moist texture and structural integrity.
- Prepare the Mint Cream Layer: In a large mixing bowl (or the bowl of a stand mixer), beat together the softened cream cheese, powdered sugar, heavy cream, mint extract, and a few drops of green food coloring (if desired) until the mixture is very light, fluffy, and well combined. This typically takes about 3 minutes of high-speed mixing. Gently fold in 1 cup of thawed Cool Whip topping until just combined. This creates a delicate and airy mint cream.
- Assemble and Decorate: Once the pudding-infused cake is thoroughly chilled, spread the mint cream cheese layer evenly over the cooled pudding. Next, spread the remaining thawed Cool Whip on top of the mint cream layer, creating a smooth, fluffy finish. Finally, generously sprinkle chopped Andes Mints over the entire surface of the cake for decoration and an added burst of mint chocolate flavor.
- Serve and Store: Your Andes Mint Chocolate Pudding Poke Cake is now ready to be enjoyed! Slice and serve cold. Cover any leftovers tightly with plastic wrap and refrigerate. This cake tastes even better the next day as the flavors continue to meld.
Expert Tips for the Perfect Andes Mint Poke Cake
To ensure your Andes Mint Chocolate Pudding Poke Cake turns out perfectly every time, keep these expert tips in mind:
- Choose the Right Pudding: Always opt for “cook and serve” pudding over instant. The warm, cooked pudding is crucial for proper absorption into the cake, creating that signature moist texture. Instant pudding, mixed with cold milk, tends to sit on top rather than truly soak in.
- Pudding Temperature Matters: For the best results, prepare your pudding as the cake cools slightly. Pouring warm pudding over a warm cake ensures maximum seepage. However, if you’ve baked your cake ahead of time, it’s perfectly fine to pour warm pudding over a cooled cake; it just might not saturate quite as deeply, but the taste will still be fantastic.
- Poke Generously: Don’t be shy when poking holes in the cake. Use the blunt end of a wooden spoon or a similar tool to create deep, evenly spaced holes. The more pathways for the pudding, the moister your cake will be.
- Whip the Mint Cream Layer Thoroughly: When preparing the mint cream cheese layer, beat the mixture for a full 3 minutes at high speed. This longer mixing time incorporates air into the heavy cream and cream cheese, resulting in a lighter, fluffier, and more voluminous topping.
- Adjust Layer Thickness: This recipe creates three thick, decadent layers: cake, pudding, and mint cream topping. If you prefer a slightly less rich or “gregarious” dessert, you can easily cut back on the amount of pudding used (perhaps two boxes instead of three) or halve the amount of cream cheese and whipped topping for a lighter top layer.
- Boost Mint Flavor: For an extra kick of mint, consider adding an additional 1/2 teaspoon of mint extract to the remaining Cool Whip (the part spread on top after the cream cheese layer) before spreading it. This intensifies the refreshing mint notes.
- Chill Time is Key: While 3 hours of refrigeration is the minimum, allowing the cake to chill overnight truly makes a difference. This extended chilling period allows the pudding to fully set, the flavors to meld, and the cake to become incredibly moist and cohesive, making for easier slicing and a more enjoyable texture.
- Garnish Creatively: Beyond chopped Andes Mints, consider drizzling melted chocolate over the top, adding chocolate curls, or even a few fresh mint leaves for an elegant presentation.
Delicious Variations and Substitutions
One of the joys of baking is the ability to customize recipes to your taste or dietary needs. This Andes Mint Chocolate Pudding Poke Cake offers several avenues for creative variations:
- Gluten-Free Adaptation: As mentioned, you can easily make this cake gluten-free by using a high-quality gluten-free all-purpose flour blend for the cake base. Brands like Cup 4 Cup are excellent for cakes, ensuring a moist and tender result that rivals traditional flour.
- Pudding Flavor Swap: While chocolate pudding is classic, feel free to experiment with other flavors. A vanilla pudding base with mint extract could create a lighter, more refreshing contrast. Alternatively, white chocolate pudding could provide a creamy, sweet backdrop.
- Different Mint Candies: If Andes Mints aren’t readily available, crushed peppermint patties, thin mint cookies, or even other brands of chocolate-covered mint candies can be used for the topping. Each will lend a slightly different texture and mint intensity.
- Homemade Whipped Cream: For a truly decadent experience, replace the Cool Whip with freshly made whipped cream. Whip heavy cream with a touch of powdered sugar and mint extract until stiff peaks form. This will offer a richer, less processed flavor.
- Intensify Chocolate: For ultimate chocolate lovers, consider adding a chocolate ganache drizzle over the mint layers before adding the crushed Andes Mints. Or, use a darker cocoa powder in your cake batter for a deeper chocolate flavor.
- Dairy-Free Options: With the increasing availability of plant-based products, you can adapt this cake to be dairy-free. Use plant-based milk for the cake and pudding, dairy-free cream cheese alternatives, and a dairy-free whipped topping. Ensure all other ingredients, like chocolate chips or candies, are also dairy-free.
Storing Your Andes Mint Masterpiece
Proper storage is essential to keep your Andes Mint Chocolate Pudding Poke Cake fresh and delicious:
- Refrigeration is Key: Due to the dairy components (pudding, cream cheese, Cool Whip), this cake must be stored in the refrigerator.
- Airtight Container: Cover the cake tightly with plastic wrap or place it in an airtight container. This prevents it from drying out and absorbing odors from other foods in the refrigerator.
- Shelf Life: When stored correctly, the cake will remain fresh and delightful for 3-5 days in the refrigerator. The flavors often deepen and meld even more on the second day, making it an excellent make-ahead dessert.
- Freezing: While possible, freezing a poke cake with pudding and whipped toppings can sometimes alter the texture of the creamy layers upon thawing. If you choose to freeze, wrap individual slices or the entire cake (without the crushed Andes Mints on top, which can get soggy) tightly in plastic wrap, then in foil. Thaw overnight in the refrigerator. The mints can be added just before serving.
Frequently Asked Questions (FAQs)
Here are answers to some common questions about making and enjoying your Andes Mint Chocolate Pudding Poke Cake:
- Can I use instant pudding instead of cook and serve?
While technically possible, it is not recommended for optimal results. Cook and serve pudding is prepared warm, which allows it to seep deeply into the cake’s holes, creating an incredibly moist texture. Instant pudding is mixed with cold milk and tends to sit on top of the cake rather than penetrating it, resulting in a less integrated and moist dessert. - How far in advance can I make this cake?
This cake is an excellent make-ahead dessert! For the best flavor and texture, prepare it the day before you plan to serve it. This allows ample time for the pudding to fully absorb and for all the flavors to meld beautifully. It will keep well in the refrigerator for 3-5 days. - What if I don’t have Andes Mints?
No problem! You can substitute crushed mint Oreos, chopped peppermint patties, or any other chocolate-covered mint candies. You can also simply drizzle melted chocolate over the top for a different look and flavor. - Can I make my own chocolate pudding from scratch?
Absolutely! A homemade chocolate pudding will elevate the cake even further with its rich, authentic flavor. Just ensure it’s still warm when you pour it over the poked cake. - Is this cake suitable for St. Patrick’s Day?
Yes, definitely! The vibrant green mint layer makes it a fantastic and festive dessert for St. Patrick’s Day celebrations. The colors and flavors are perfectly themed for the occasion. - My cream cheese layer isn’t fluffy, what went wrong?
Ensure your cream cheese was fully softened to room temperature before mixing. Also, make sure you beat the cream cheese, powdered sugar, heavy cream, and mint extract for the full 3 minutes at high speed. This process incorporates air and creates that desired light and fluffy texture.
With these tips and answers, you’re well-equipped to create a truly memorable Andes Mint Chocolate Pudding Poke Cake!
Andes Mint Chocolate Pudding Poke Cake: The Recipe

Andes Mint Chocolate Pudding Poke Cake

Melissa Erdelac
Andes Mint Chocolate Pudding Poke Cake is a cool, creamy dessert with chocolate cake, pudding poured on top, and a thick layer of mint Cool Whip topping. Andes mint cake is perfect for birthdays, special occasions, or St. Patrick’s Day.
Ingredients
Chocolate Cake (or substitute 9X13 box cake mix)
- 2 cups all purpose flour or gluten free all purpose flour, (for GF cake, I highly recommend Cup 4 Cup gluten free flour)
- 2 cups granulated sugar
- ¾ cup unsweetened cocoa powder
- 2 teaspoons baking powder
- 1 ½ teaspoons baking soda
- 1 teaspoon salt
- 1 teaspoon espresso powder, optional
- 1 cup milk
- ½ cup oil, canola, vegetable, or any preferred
- 2 large eggs
- 2 teaspoons vanilla extract
- 1 cup boiling water
Chocolate Pudding
- 3 boxes (small 3.4 oz) Cook and Serve (NOT INSTANT) chocolate pudding, see recipe note
- 6 cups milk
Mint Cream Layer
- 2 – (8) ounce packages cream cheese, softened
- 1 cup powdered sugar
- 1/4 cup heavy cream
- 2 teaspoons peppermint extract
- 6 drops green food coloring
- 8 ounce thawed Cool Whip whipped topping, divided
- Andes Mints, chopped
Equipment
-
9X13 Baking Dish
-
Stand Mixer
-
Offset Spatula
Instructions
- Preheat oven to 350º F. Spray a 9X13 pan with cooking spray.
- Add flour, sugar, cocoa, baking powder, baking soda, salt and (optional) espresso powder to a large bowl or the bowl of a stand mixer. Whisk thoroughly to combine or, using your paddle attachment, stir on low speed until combined well.
- Add milk, vegetable oil, eggs, and vanilla to flour mixture and mix together on medium speed until combined. Reduce speed to low and carefully add boiling water to the cake batter. Once the water is mixed in increase to high speed for 1 minute.
- Pour batter in prepared baking dish and bake for 45-50 minutes or until toothpick inserted in middle comes out clean. Cool slightly while pudding is prepared.
- Make chocolate pudding according to directions on box. If not pouring the pudding on the cake immediately, press a piece of plastic wrap against the top of the pudding to prevent a skin from forming.
- After the cake has cooled 15-20 minutes, poke holes every inch with wooden spoon handle. The cake will look pretty destroyed, but don’t worry it will all be covered up. Pour the warm pudding over the warm cake. Smooth with rubber or offset spatula. Press a large piece of plastic wrap onto the pudding and refrigerate for 3 hours – overnight.
- For the mint cream layer, beat cream cheeses, powdered sugar, heavy cream, mint extract, and food coloring together with a mixer until very light and fluffy, about 3 minutes. Fold in 1 cup of whipped topping. Spread evenly on top of cooled pudding layer.
- Cover mint cream layer with remaining Cool Whip. Sprinkle chopped andes mints on top. Cover and refrigerate leftovers.
Carbohydrates: 49g,
Protein: 6g,
Fat: 14g,
Saturated Fat: 9g,
Cholesterol: 43mg,
Sodium: 443mg,
Potassium: 262mg,
Fiber: 2g,
Sugar: 36g,
Vitamin A: 462IU,
Calcium: 139mg,
Iron: 1mg
Original Family Punch Bowl Cake Recipe: A Classic Inspiration
For those curious about the inspiration behind this Andes Mint Chocolate Pudding Poke Cake, we present the original family recipe for Punch Bowl Cake. This supersized dessert offered a similar flavor profile, designed to feed a crowd!
Ingredients:
- 2 layer chocolate cake (prepared from scratch or mix)
- 2 large (5 oz. boxes) cook and serve chocolate pudding
- 6 cups milk
- 2 (8 oz.) containers whipped topping (Cool Whip), thawed
- Mint extract, to taste
- Green food coloring, optional
- Special equipment: punch bowl or large trifle bowl
Directions:
- Cook pudding according to package directions, then cool completely and refrigerate until thoroughly chilled.
- Bake the chocolate cake according to directions in two standard cake layer pans. Once baked, allow them to cool completely. Carefully cut each cake layer horizontally to create four thinner layers in total. Set aside.
- In a large mixing bowl, gently fold together the thawed whipped topping, mint extract, and green food coloring. Add the mint extract and food coloring incrementally until you achieve your desired level of mint flavor and a pleasing tinted green color.
- Assembly: Begin by placing one cake layer at the bottom of your punch bowl or trifle bowl. Evenly spread one-fourth of the chilled chocolate pudding over the cake layer. Follow with one-fourth of the mint whipped topping. Repeat this layering process three more times, ensuring you end with a top layer of mint whipped topping.
- Garnish: For a decorative finish, you can sprinkle the top with festive sprinkles or elegant chocolate curls.
This post contains affiliate links. My opinions are always my own. If you purchase a product through an affiliate link, I make a small commission – at no cost to you. Read full disclosure policy here.