
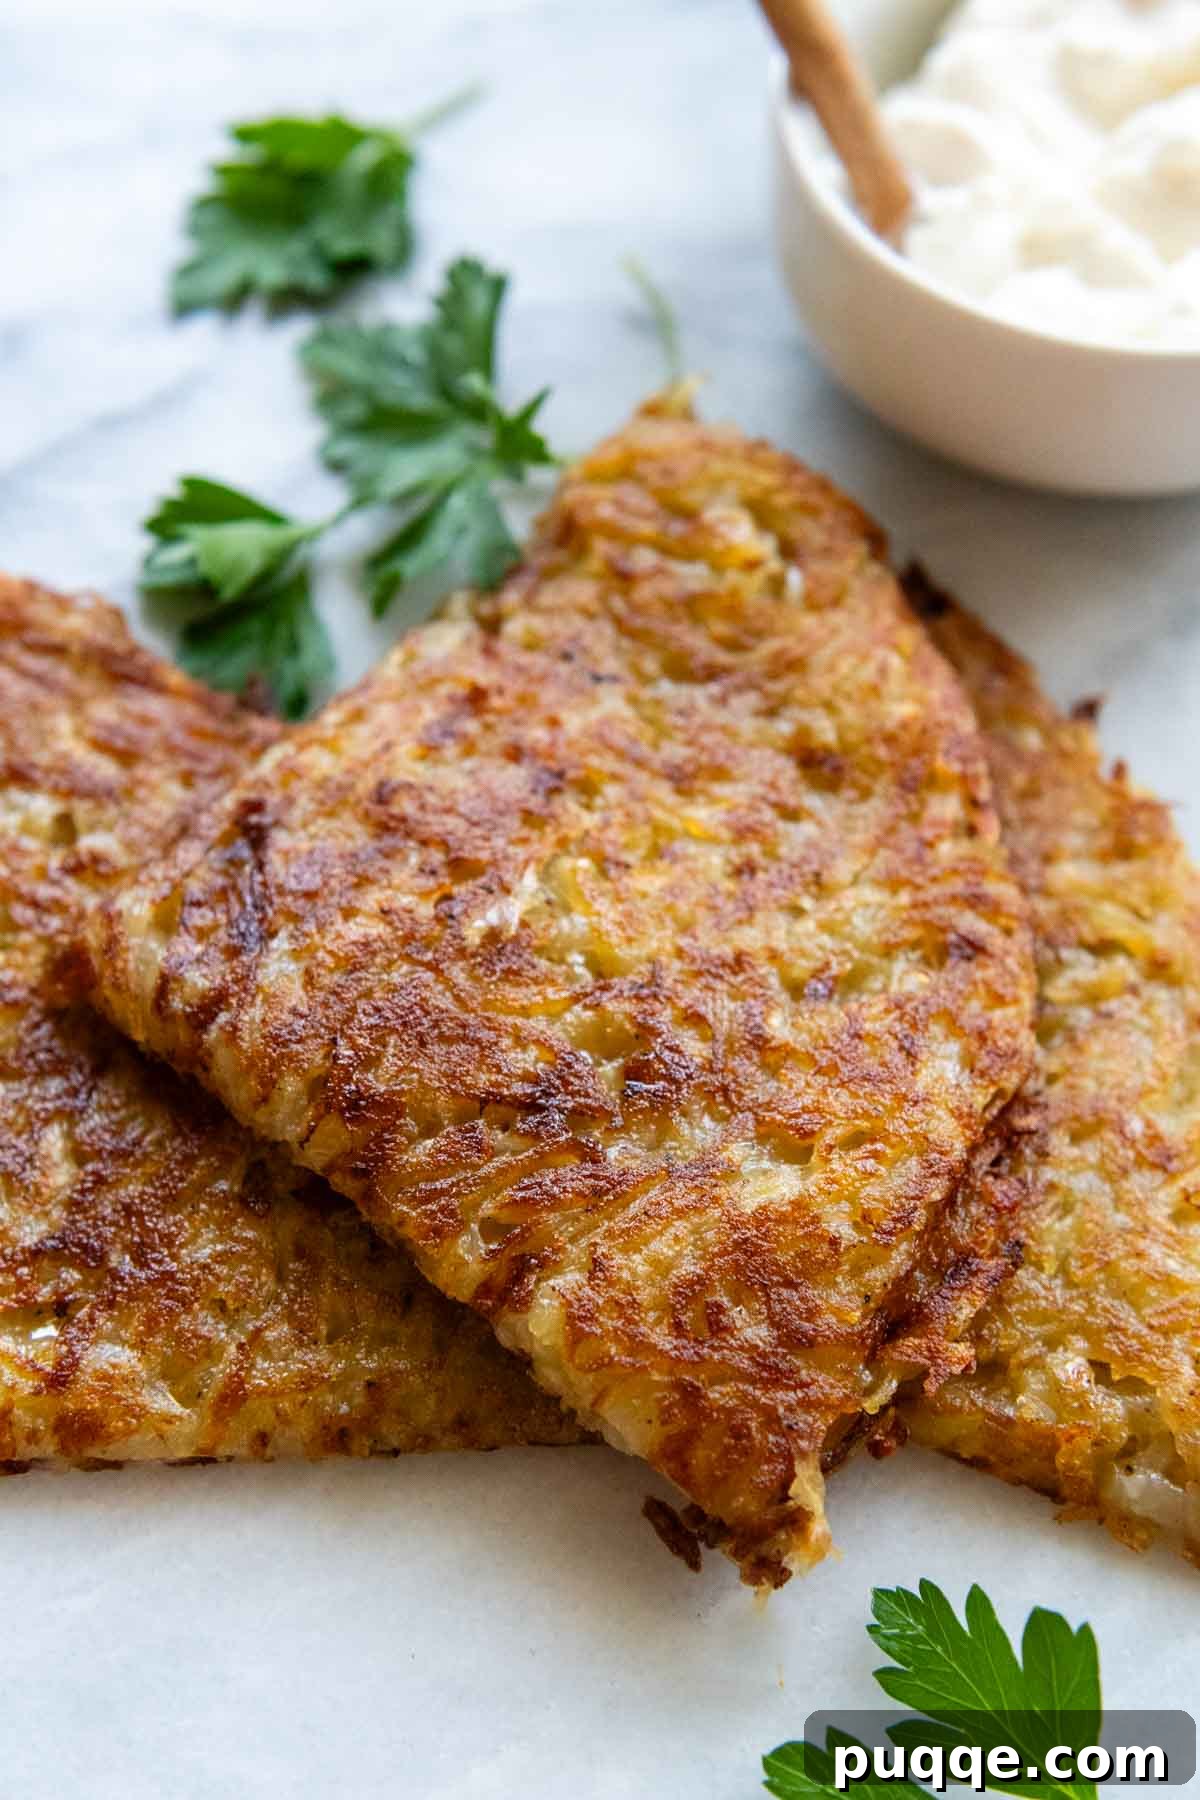
Unlock the secrets to crafting the perfect **Swiss potato rösti** right in your own kitchen! This comprehensive, step-by-step tutorial, packed with expert tips, will guide you to achieve that elusive balance of exquisitely crispy, buttery edges and a wonderfully creamy, tender interior, seasoned to absolute perfection. With incredibly simple, naturally gluten-free ingredients, you’ll create an impressive potato side dish that will captivate everyone at your table.
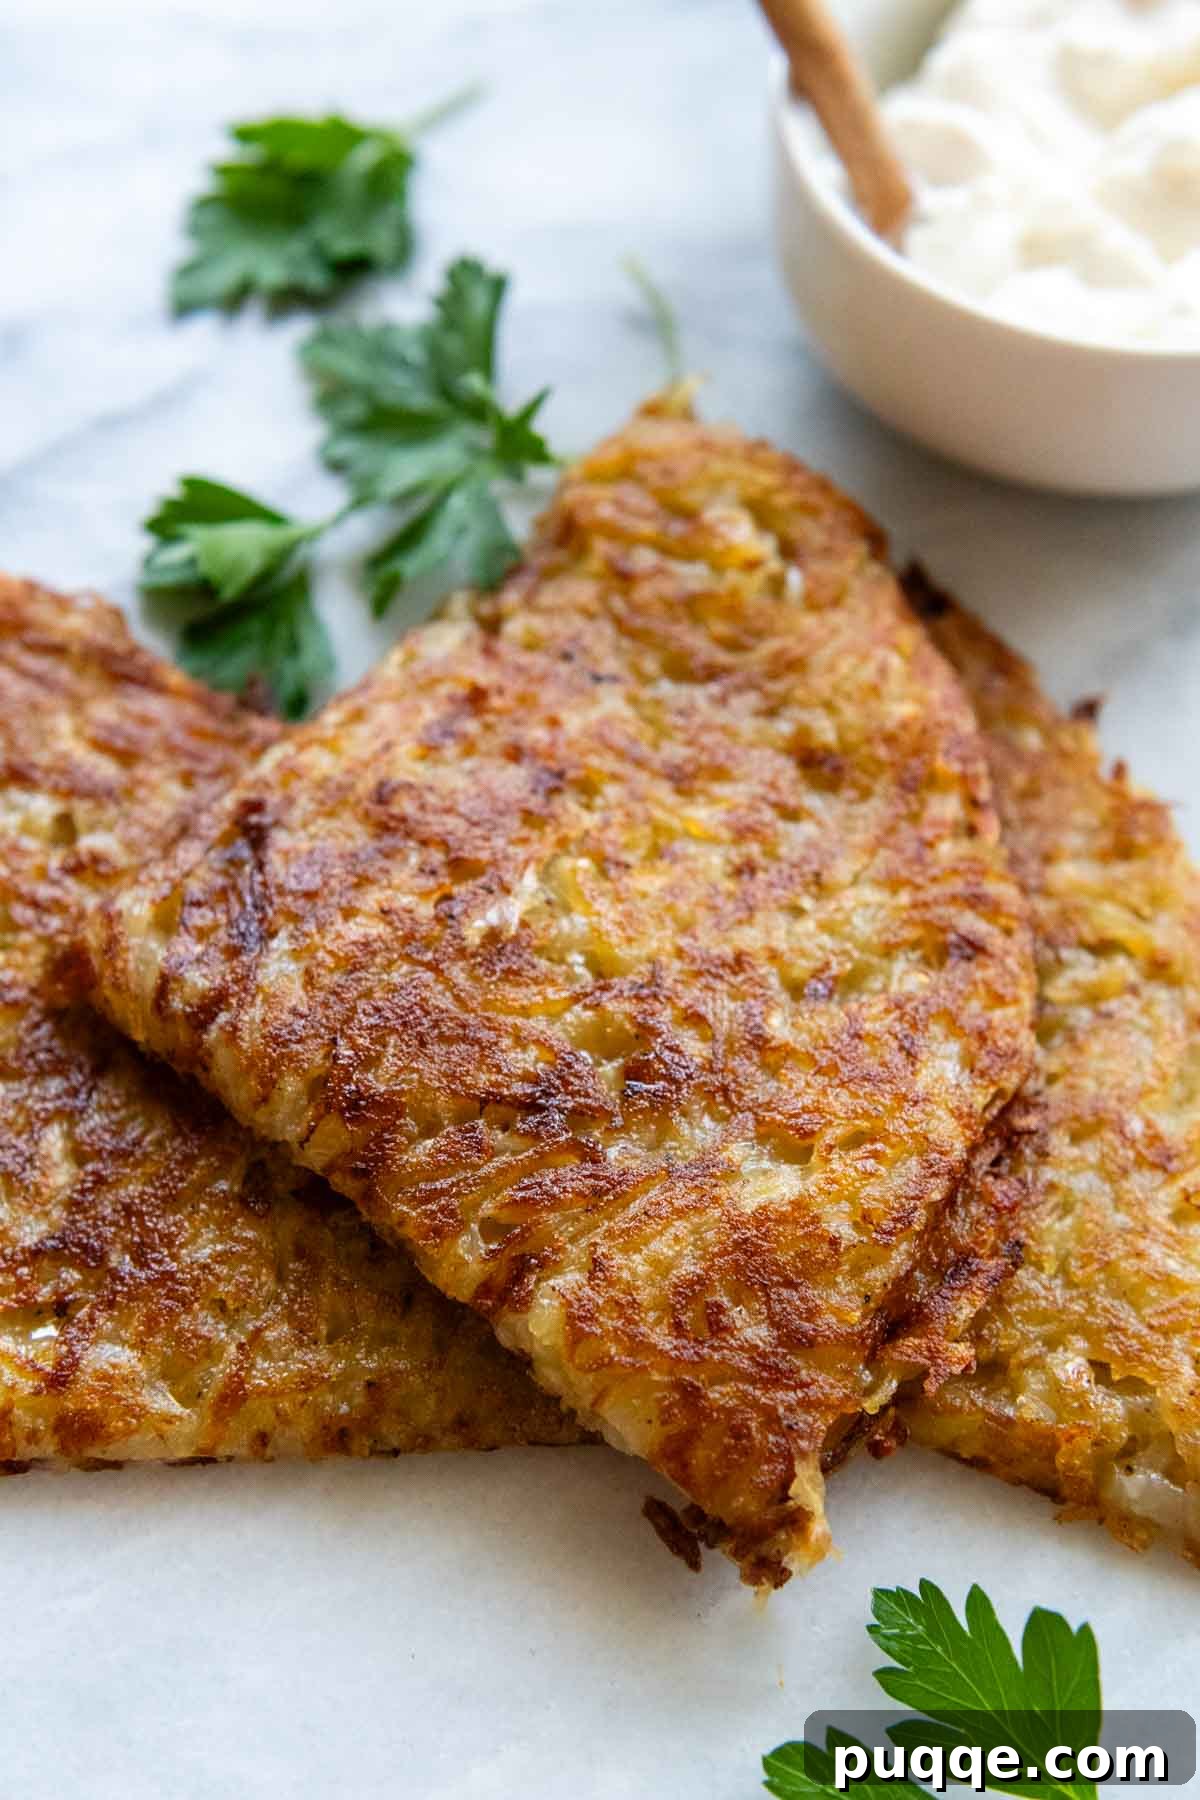
Mastering Swiss Potato Rösti: A Culinary Journey
This past summer, my husband and I embarked on an unforgettable adventure through Switzerland. We marveled at the breathtaking vistas of the Alps, hiked countless miles across stunning landscapes, and, of course, indulged in some of the most extraordinary gluten-free Swiss culinary delights. Among the many dishes that left a lasting impression, Swiss potato rösti stood out as a must-recreate masterpiece.
Much like another regional favorite of ours, gluten-free dumplings and sauerkraut, rösti, despite its unassuming list of ingredients, delivers results that are anything but forgettable. To craft an authentic gluten-free rösti, you only need grated potatoes, a fat (such as butter, oil, or a combination of both), salt, and pepper. I can almost hear your skepticism: “That just sounds like hash browns!” Oh, my friend, I assure you, it is so much more profound and utterly delicious.
My quest to replicate the rösti I savored in Switzerland led me to focus on two key elements: an irresistibly creamy, tender center encased within ultra-golden, intensely crispy edges. Crucially, the entire potato cake needs to bind together perfectly for that essential flip, even when you prepare a potato rösti without an egg, as this recipe demonstrates. It’s a testament to technique over binders.
In the following sections, I will meticulously guide you through the process of making traditional Swiss rösti with ease. We’ll explore how to avoid common pitfalls (I’ve had my share of tragic attempts!), master the art of the flip, discover delightful additions that keep the recipe gluten-free, and, for those fortunate enough to have leftovers, learn the absolute best way to reheat this incredible dish to its original glory.
Essential Ingredients and Equipment for Perfect Rösti
Just as with my beloved easy homemade muesli, you can achieve delightful results with staple ingredients for rösti, or elevate it further with a few flavor boosts. Let’s begin with the foundational components, and towards the end of this guide, I’ll share some fantastic optional additions to consider.
- Potatoes: The Heart of Rösti – The choice of potato is paramount; it forms the absolute backbone of this dish. I enthusiastically recommend Yukon Gold potatoes for their ability to create a harmonious, melded center, especially vital since this recipe omits egg or flour as binders. Yukon Golds are my go-to choice when you desire a potato that breaks down beautifully to form that signature tender interior, whether for rösti or for a truly creamy, thick gluten-free potato soup. Their waxy-starchy balance is ideal.
- Butter and Oil: The Secret to Supreme Crispiness – Some traditional rösti recipes call for all butter, while others opt for all oil. My method combines both, and for good reason. Butter imparts an unparalleled rich flavor that is essential to rösti’s allure. However, butter alone doesn’t always deliver the ultimate crispiness we crave. The addition of oil, with its higher smoke point, ensures that you achieve an extra-crispy, golden-brown outer layer without burning, creating a stunning textural contrast.
- Seasoning: Simplicity is Key – When enjoying rösti in Switzerland, it’s wise to exercise a bit of caution regarding seasoning. Many establishments use Knorr Aromat, a popular seasoning blend, and its gluten-free status can sometimes be ambiguous. Therefore, I typically steer clear. For homemade rösti, a generous portion of salt and freshly ground pepper, when combined with the rich butter, creates a wonderfully balanced and deeply satisfying flavor profile that highlights the potatoes’ natural taste.
- Shallow Non-Stick Skillet: Your Rösti’s Best Friend – If you’re aiming to create one magnificent, large potato rösti, the right pan is indispensable. You’ll need a pan of appropriate size with an exceptional non-stick surface. I highly recommend a 9 or 10-inch skillet; this size ensures the rösti has sufficient thickness to cook through evenly while remaining manageable enough to flip successfully. Even more critical is the pan’s depth: the shallower the pan, the easier and safer it is to execute the all-important flip. This is why I particularly favor my Scanpan, which boasts incredibly even heat distribution, truly non-stick properties, and an ideal design for flipping. It’s also a lifesaver when I make these easy gluten-free crepes!
- Flipping Board: The Unsung Hero – The “flip” is perhaps the most daunting step for many aspiring rösti makers. You’ll require a specific tool to assist in this maneuver. I have quite a bit to say about this, more than can be condensed into a simple bullet point, so please read on for detailed guidance below.
The Flip: Conquering the Rösti Challenge!
The moment of truth in rösti making is undeniably “the flip.” You’ll need a flat, sturdy surface to place over your pan, onto which you’ll invert the partially cooked rösti, before sliding it back into the pan to cook the second side. There are several options for your flipping assistant, some merely get the job done, while others significantly maximize your chances of success.
What’s your ultimate best bet for a flawless flip? A round cutting board with a handle is an excellent choice. Its flat surface is perfect for sliding the rösti smoothly back into the pan. Even better, a board with a handle allows you to grip both the pan handle and the board handle simultaneously, keeping the two surfaces tightly aligned during the inversion. The core principle is to find something you can securely hold together with the pan, enabling you to execute a quick, confident flip.
Another viable option is to use a plate that is slightly larger than your pan. If you choose this route, be sure to protect your hands, as you’ll need to press the pan and plate firmly together to prevent any slippage (trust me, I’ve been there, and it’s not pretty! 😢). Keep in mind that a plate with a pronounced rim might complicate sliding the rösti back into the skillet, so a flatter plate is generally preferred.
A wooden cutting board can also work wonderfully. Since you’ll be placing it directly on top of a hot pan, avoid any cutting boards made from materials that could melt or warp under heat. Opt for a board that is slightly larger than your pan; if it’s too big, it becomes cumbersome to hold both the pan and the board firmly in place, increasing the risk of an unsteady flip.
Pro Tip for a Perfect Flip! I highly recommend “auditioning” a few potential flipping tools before you even begin grating your potatoes. This allows you to practice the motion and choose what feels most manageable and secure for you. Always remember that the key is to hold the pan and your chosen board together tightly so the rösti doesn’t slide out, and always be mindful that the pan will be scorching hot!
Let’s Craft This Swiss Rösti Together!
(The following section provides step-by-step photos and detailed instructions. For the complete recipe, including precise ingredient amounts, please scroll down to the full recipe card.)
Prepare and Grate the Potatoes
Begin by peeling your potatoes. Then, using a box grater, shred them into thin, consistent strips. Transfer these grated potatoes to a thin, lint-free kitchen towel. This is another instance where I find flour sack towels to be absolutely invaluable for their absorbency and non-linting qualities.
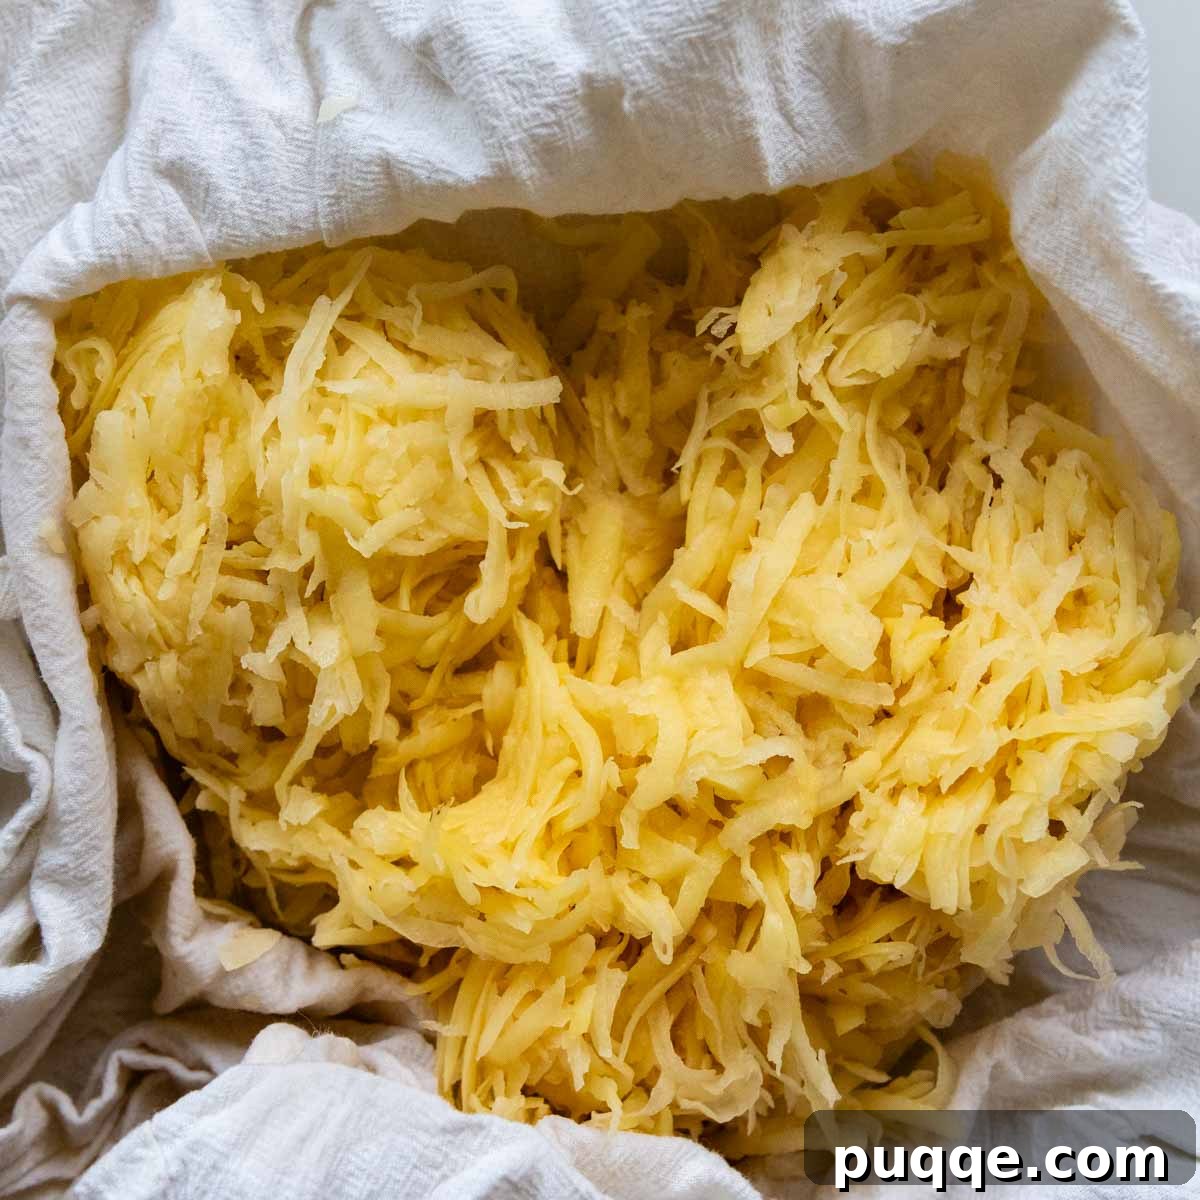
Achieve the Right Moisture Balance
Tightly wrap the grated potatoes in the towel and vigorously squeeze out the excess water. Don’t fret about extracting every single drop; a slight amount of residual moisture is actually beneficial, as it helps the potatoes steam gently and become tender during cooking. However, if too much water remains, the exterior won’t achieve that coveted golden crispness. Once the potatoes are adequately dried, transfer them to a large mixing bowl and toss them with a touch of melted butter, salt, and pepper.
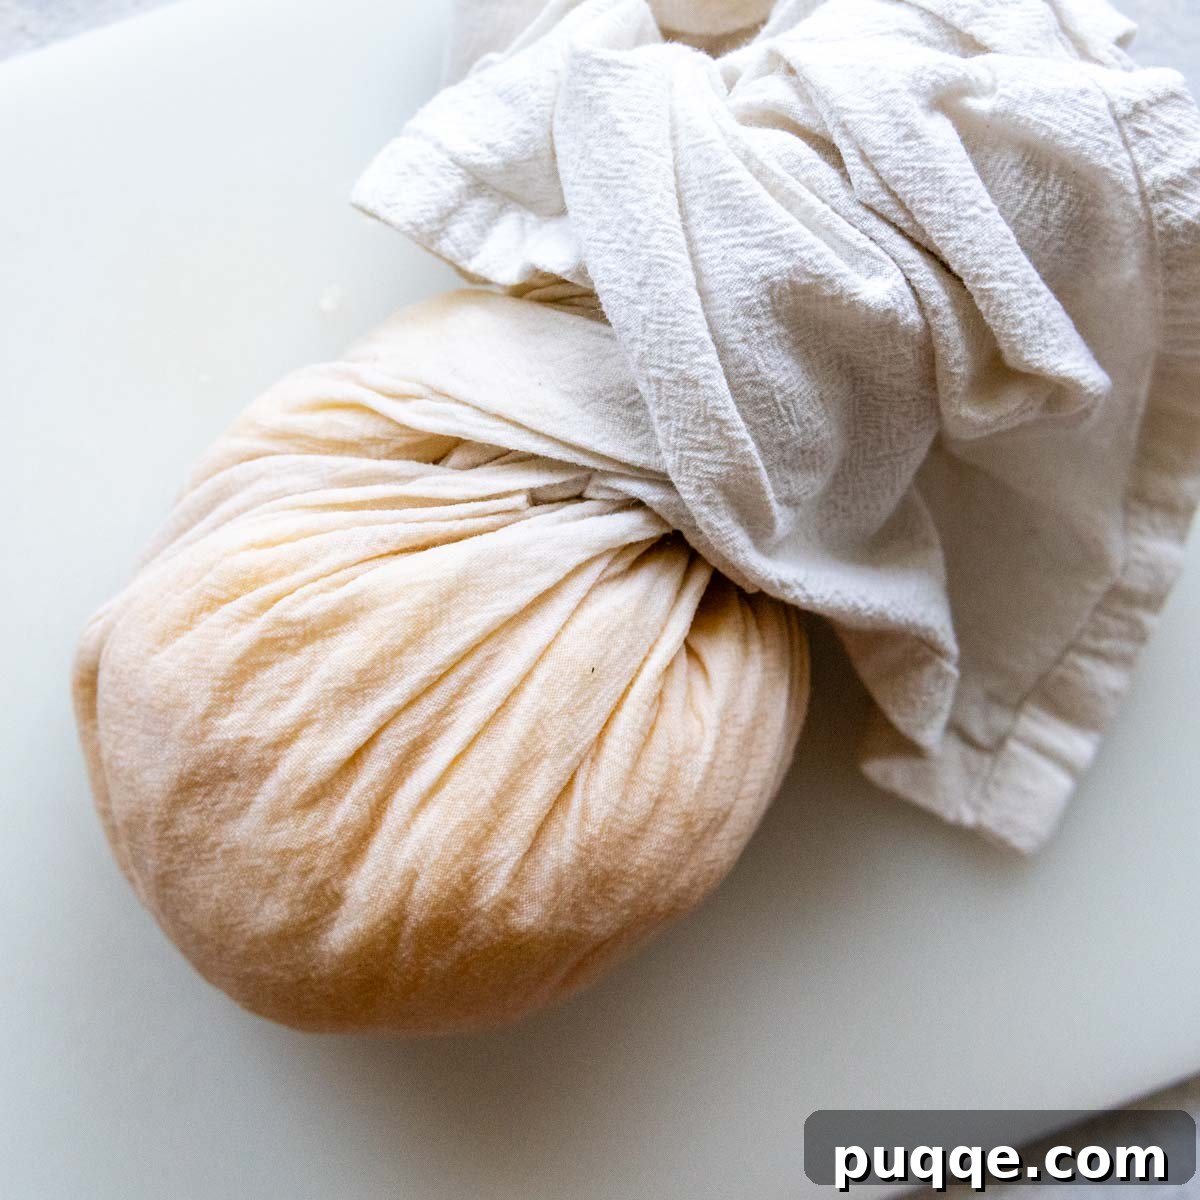
Commence the Cooking Process
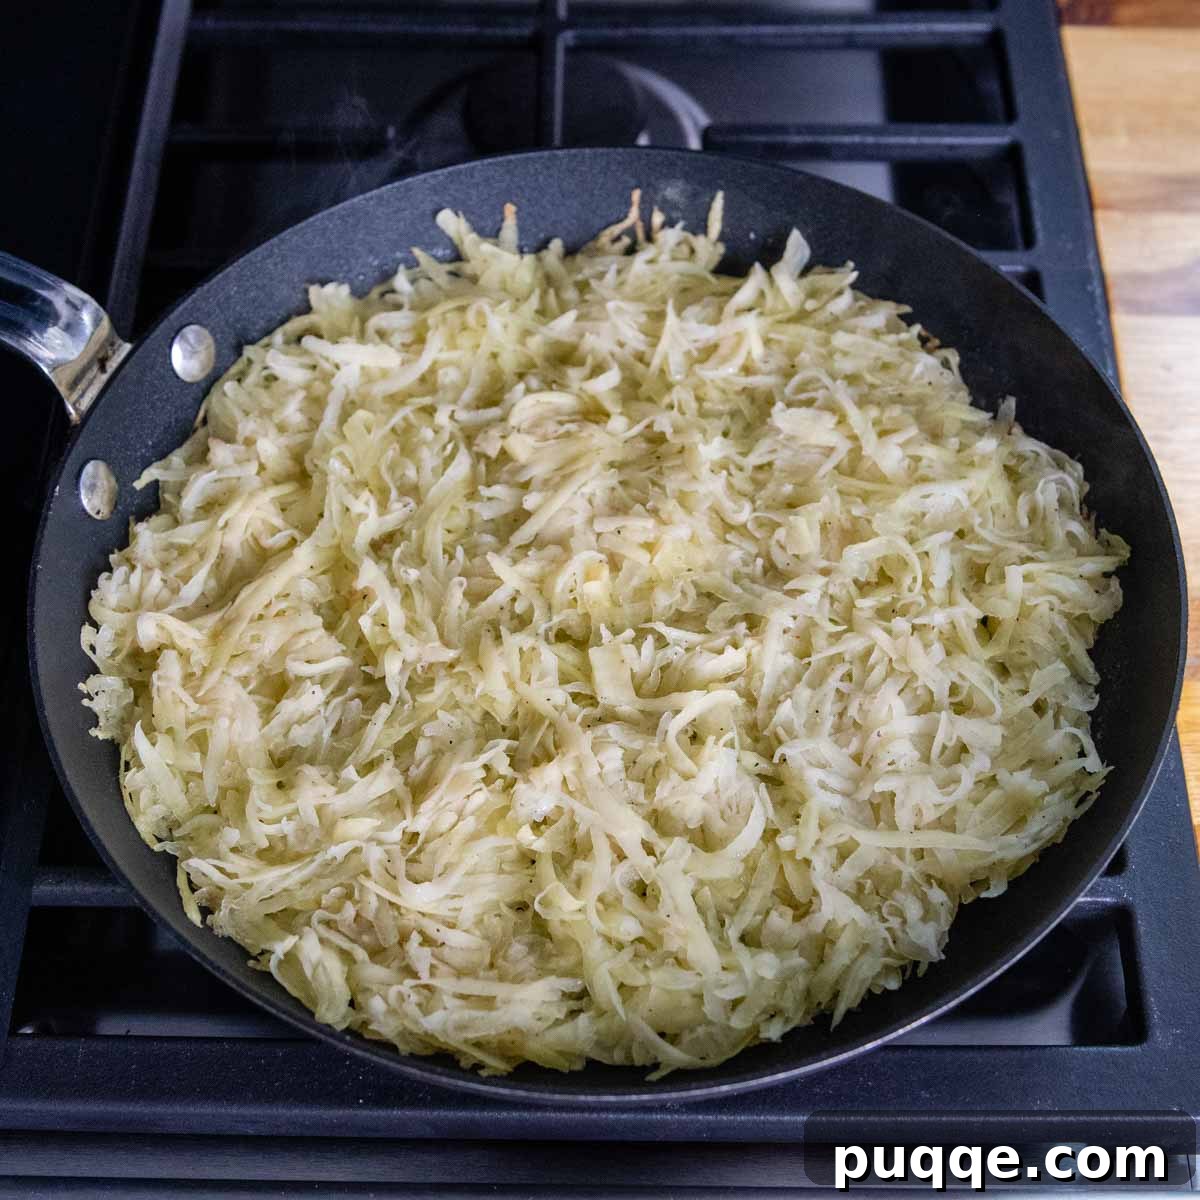
Heat your skillet with the butter and oil over medium-low heat. Once melted and shimmering, transfer the seasoned grated potatoes into the pan. Spread them out evenly to form a flat disk, but resist the urge to pack them down. This loose arrangement allows heat to circulate more effectively through the potatoes, ensuring they cook thoroughly from the inside. Let the rösti cook undisturbed for approximately 9-12 minutes.
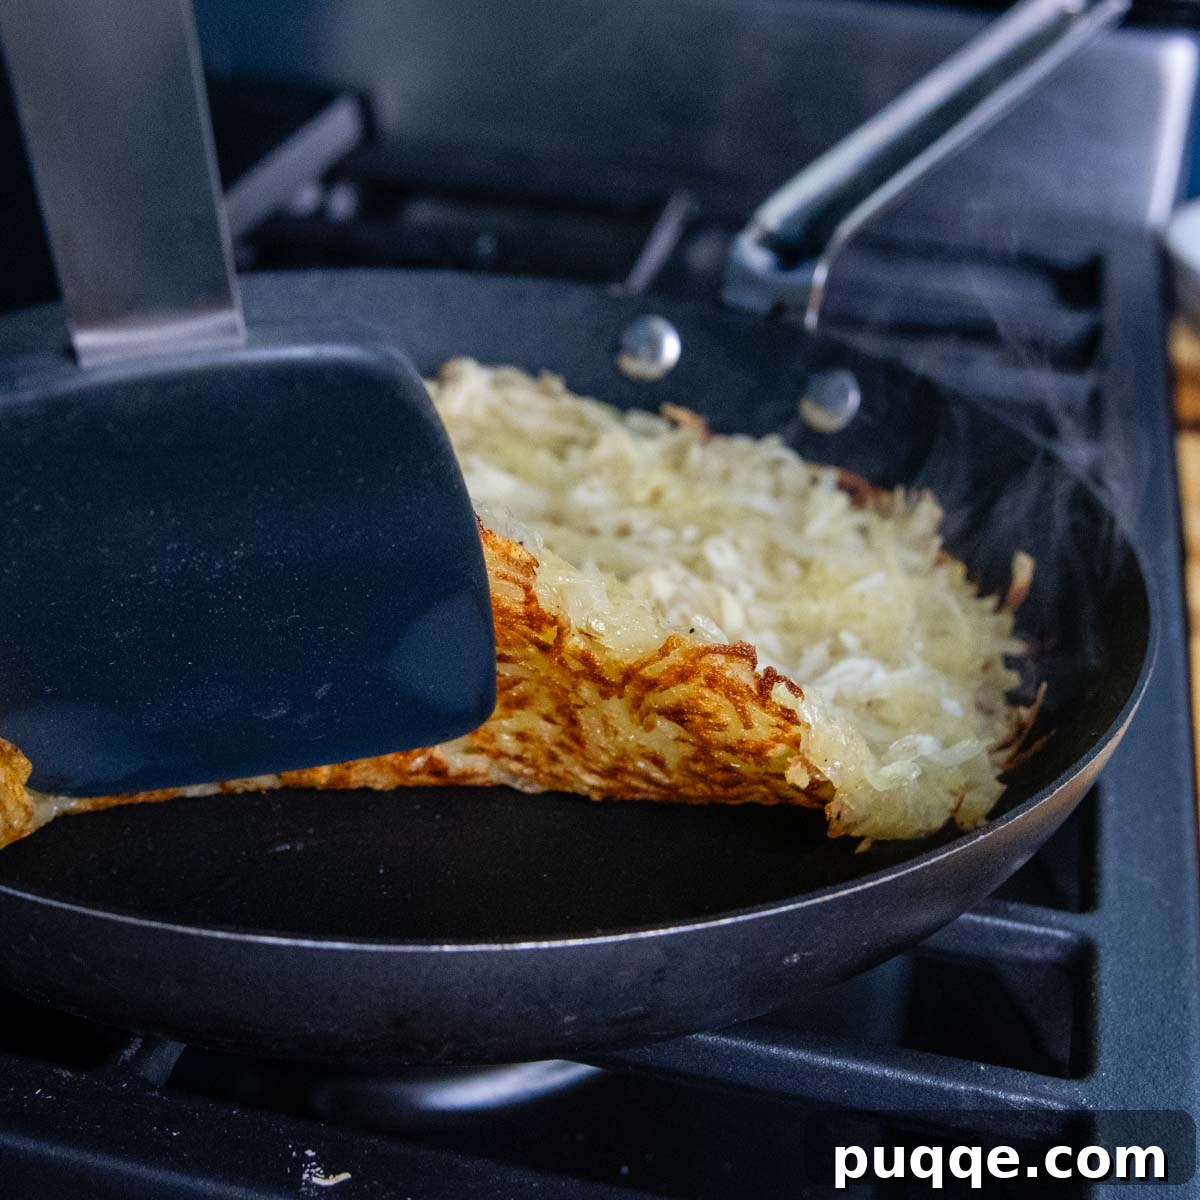
Around the 5-6 minute mark, gently check underneath with a spatula to assess the browning. If it’s cooking too quickly or too slowly, adjust the heat accordingly. Once a beautiful golden crust has formed, carefully work a spatula around the entire perimeter and under the rösti to ensure it’s not sticking to the pan.
Remove the pan from the heat – now it’s time for the flip! Refer to my detailed tips above for choosing the best flipping tool. Most importantly, securely hold the pan and your chosen board or plate together, and execute the flip with confidence and speed!
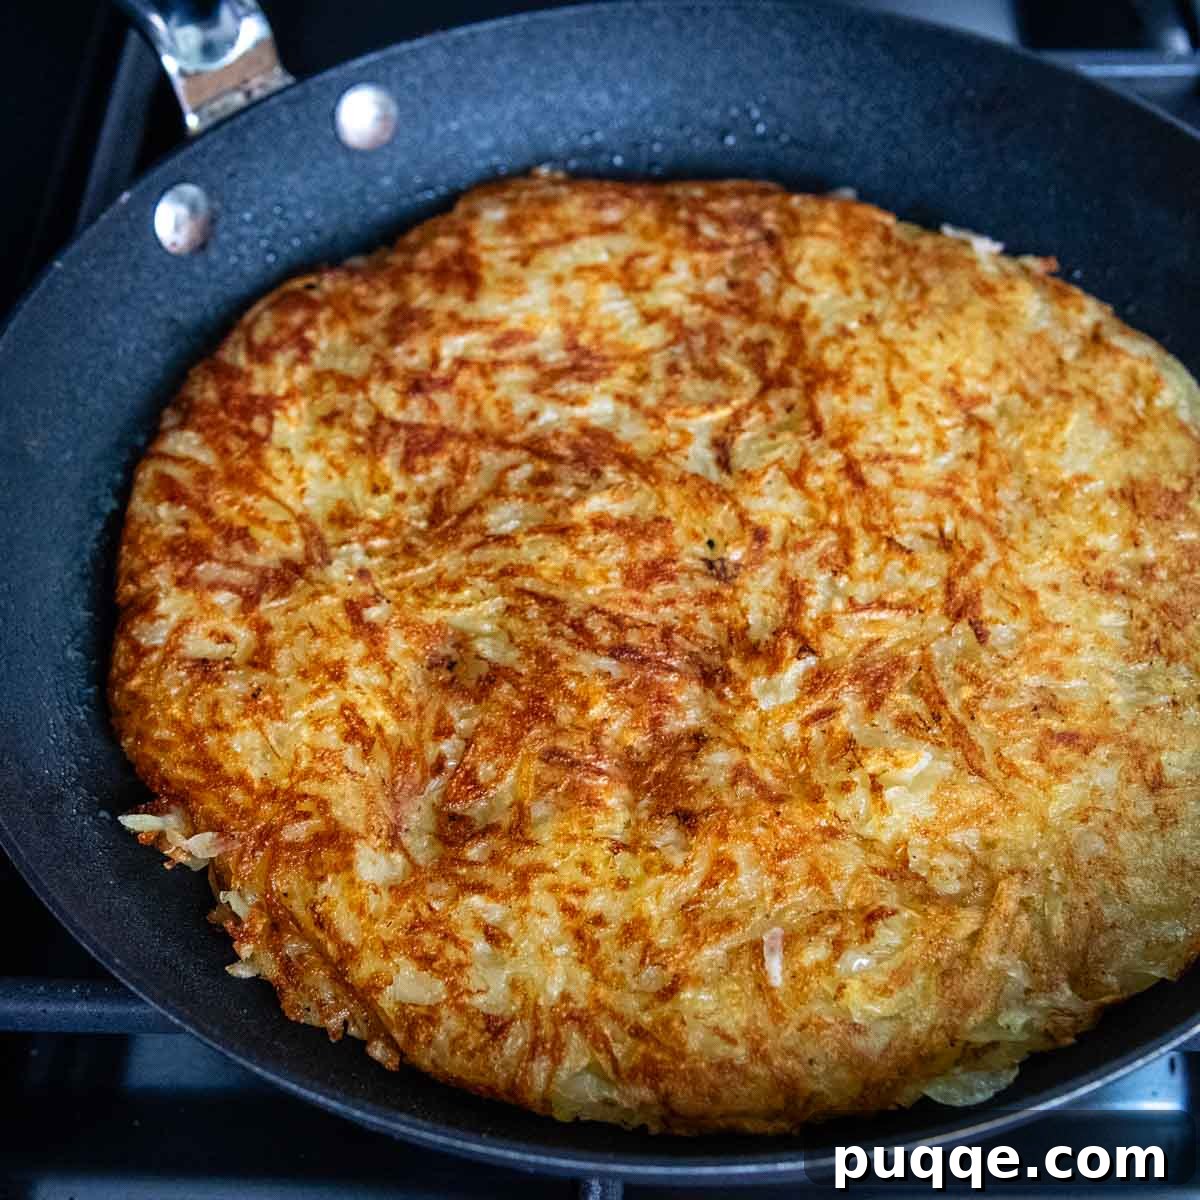
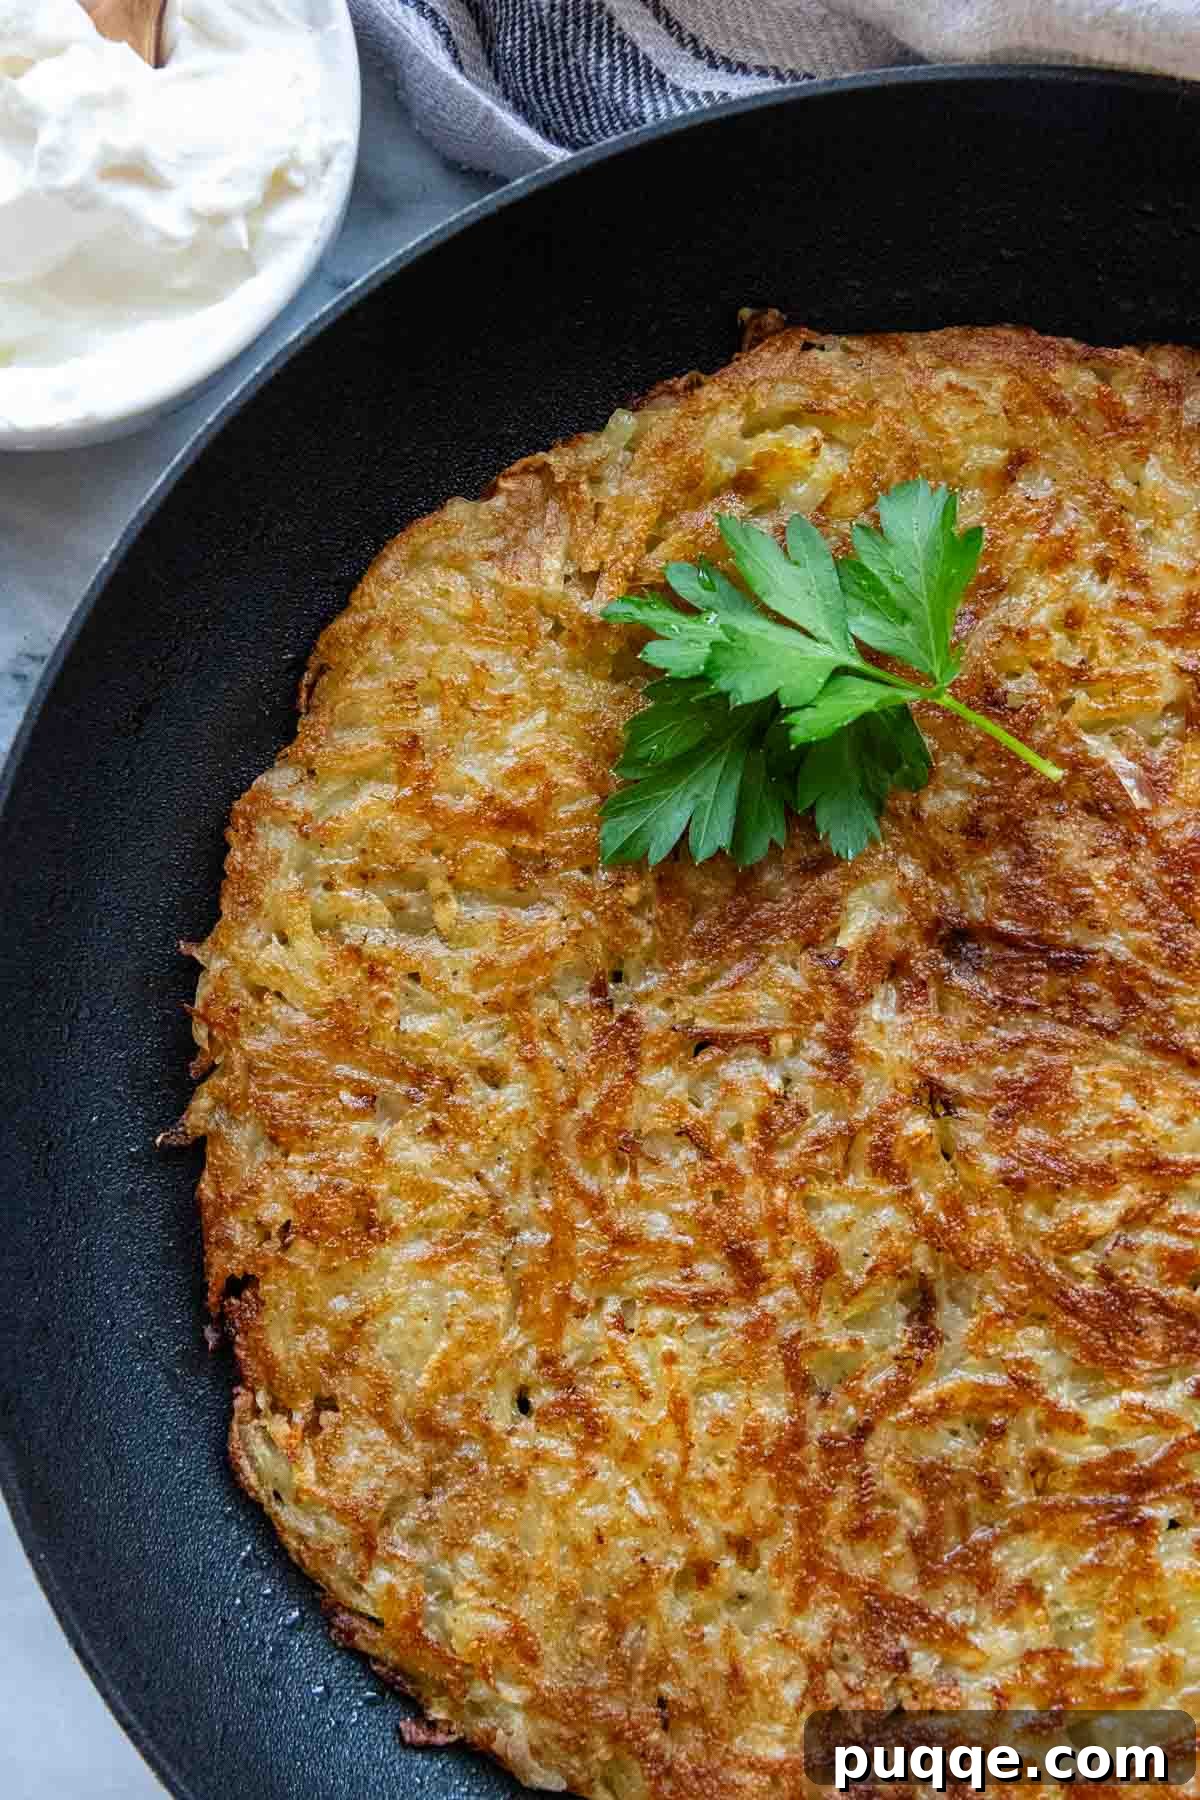
Melt the remaining butter and oil in the pan, swirling to coat. Carefully slide the partially cooked rösti back into the pan, cooked side up, to allow the second side to crisp up for an additional 9-12 minutes. When golden and tender, transfer it to a cutting board, slice it into elegant wedges, serve immediately, and revel in the well-deserved pride of your culinary achievement!
Making Individual Potato Rösti Pancakes
Perhaps the thought of a grand rösti flip fills you with dread, or you simply don’t have a suitable flipping board readily available. Fear not! You can absolutely still enjoy this incredible recipe by making smaller, individual rösti pancakes, much like savory latkes. This method eliminates the need for a single, large flip and offers a charming presentation.
To prepare rösti pancakes, heat half of the butter and oil in your pan. Then, drop the seasoned grated potatoes into 3-4 distinct mounds. Gently spread each mound out slightly to flatten them into disc shapes, but remember, avoid packing them down tightly. This ensures they cook evenly and crisp up beautifully.
When the first side is golden brown and ready to flip, simply use a spatula to transfer each individual pancake onto a cutting board. Add the remaining butter and oil to the pan, then carefully return the pancakes to the skillet, cooked side up, to continue cooking. Cook them on the second side until each potato pancake is tender throughout and achieves a satisfyingly crisp, golden exterior.
Delicious Toppings and Additions for Your Rösti
One of the many joys of potato rösti is its incredible versatility. When preparing a gluten-free potato rösti, always ensure that any seasonings or additional ingredients you incorporate are verified as safe and free from gluten-containing components. Since this particular recipe is naturally flour-free, you won’t need to worry about that aspect, but some seasoning blends might contain hidden wheat.
For savory additions mixed directly into the potatoes, consider grated cheese (like Gruyere or Emmental), finely chopped cooked meats such as crispy bacon or savory ham, or delicately sautéed onions. Remember, rösti has a relatively short cooking time, so any meats or denser vegetables you wish to include should be pre-cooked before being folded into the grated potatoes.
When it comes to serving rösti, the possibilities are practically endless, much like any other beloved potato side dish. For a hearty breakfast or brunch, pair it with perfectly fried eggs, strips of crispy bacon, savory sausage, or a medley of sautéed vegetables like mushrooms, bell peppers, or tender squash. If you happen to have any leftover cheese fondue, a decadent drizzle over warm rösti is an absolute dream!
Other fantastic ideas include serving it alongside traditional schnitzel, succulent sausages, or topped with melted cheese like Raclette, Gruyere, or classic Swiss. For a vibrant side, consider pickled beets or tangy sauerkraut. For an Oktoberfest-inspired meal, I love pairing my rösti with roasted sausage, tender sautéed apples, sauerkraut, and a dollop of spicy mustard. And for a simple yet heavenly touch, a generous dollop of sour cream on top is always a winner!
The Best Method for Reheating Leftover Rösti
If you somehow manage to have any rösti leftovers, first of all, congratulations – I’m genuinely impressed you resisted devouring it all! However, I understand the desire to prepare rösti ahead of time, so I thoroughly tested various reheating methods to ensure the best possible results when you’re ready to serve.
I found that the most effective and fastest way to reheat potato rösti is in an air fryer. Simply spray the air fryer basket lightly with non-stick cooking spray to prevent sticking. Place the rösti in the basket and heat it at 375ºF (190ºC) for about 4 minutes, or until it’s heated through and has regained its delightful crispness. The air fryer works wonders at revitalizing its texture.
If you don’t own an air fryer, don’t worry! You can achieve excellent results by reheating it in a conventional oven. Place the leftover rösti on a lightly greased baking sheet and bake in a preheated oven at 375ºF (190ºC) for approximately 5-6 minutes, or until it’s hot and crispy once more. I strongly advise against reheating rösti in a microwave; this method will inevitably lead to a soggy, unappetizing texture, completely losing its crisp charm.
Save this recipe to your Pinterest board!
Let’s be friends on Pinterest! I’m always sharing great recipes!
Did you make this recipe? I love hearing from you! Leave a star rating and comment below the recipe card. Your feedback helps others discover and enjoy our recipes, and I truly appreciate hearing from our wonderful community. You will always hear back from me! -Melissa

Easy How To: Crispy Potato Rösti Recipe

Melissa Erdelac
4 wedge
10 mins
20 mins
30 mins
Learn how to make a traditional Swiss potato rösti like a boss! Use this easy, step-by-step tutorial, along with pro tips, to make the ideal crispy, buttery edges and creamy tender center, all seasoned to perfection. The ingredients are simple and naturally gluten-free, but makes an impressive potato side dish.
Pin
Rate
Remove Ads
Ingredients
- 1 pound Yukon gold potatoes
- 2 tablespoons melted butter, divided
- 1 tablespoon olive oil, divided
- ½ teaspoon salt
- ⅛ teaspoon pepper
Equipment
-
10-inch shallow, nonstick pan (I love using my Scanpan for this)
-
Flour Sack Towels
-
Box Grater
Instructions
- Peel the potatoes and use a box grater to shred them into fine strips.
- Transfer the grated potatoes to a lint-free towel. Wrap them tightly and squeeze out as much moisture as possible. While you want them dry for crispiness, a little moisture helps them become tender when cooking.
- Place the slightly dried potatoes in a large bowl (slight discoloration is fine). Stir in 1 tablespoon of the melted butter, salt, and pepper until evenly coated.
- Heat a shallow nonstick pan (10 ½-inches is ideal) over medium-low heat. Add ½ tablespoon of butter and ½ tablespoon of oil, swirling to coat the pan. Spread the potatoes evenly in the pan, ensuring there are no large gaps, but do not pack them down.
- Cook for 9-12 minutes without disturbing. Check at the halfway point (around 5-6 minutes) to see if the underside is beginning to turn golden. Adjust the heat slightly if it’s cooking too fast or slow.
- Once the bottom is fully golden and crisp, it’s time to flip. Remove the pan from the heat. First, slide a spatula all around and under the rösti to ensure it’s not sticking. Place a heat-resistant, flat object slightly larger than the pan over the top – a round wooden board, a sturdy cutting board, or a large, flat plate works well. Avoid objects much larger than the pan, as this makes it hard to keep the pan and board together securely during the flip. (See the “The Flip – You Got This!” section above for more specific recommendations).
- Next, using oven mitts or pot holders, securely hold both the pan and the board together. Flip them over quickly and confidently so the rösti lands entirely on the board.
- Melt the remaining ½ tablespoon of butter and ½ tablespoon of oil in the empty pan, swirling to coat. Carefully slide the rösti back into the pan, with the uncooked side down. Cook for another 9-12 minutes, or until the potatoes are tender throughout and the bottom is golden and crispy. Slide the finished rösti onto a cutting board, slice into wedges, and serve immediately.
Nutrition Information (Approximate per serving)
Calories: 169kcal, Carbohydrates: 20g, Protein: 2g, Fat: 9g, Saturated Fat: 4g, Polyunsaturated Fat: 1g, Monounsaturated Fat: 4g, Trans Fat: 0.2g, Cholesterol: 15mg, Sodium: 343mg, Potassium: 480mg, Fiber: 3g, Sugar: 1g, Vitamin A: 178IU, Vitamin C: 22mg, Calcium: 16mg, Iron: 1mg
Did you make this recipe?
Please leave a star rating and review below. It helps others when searching for recipes and I LOVE feedback!