
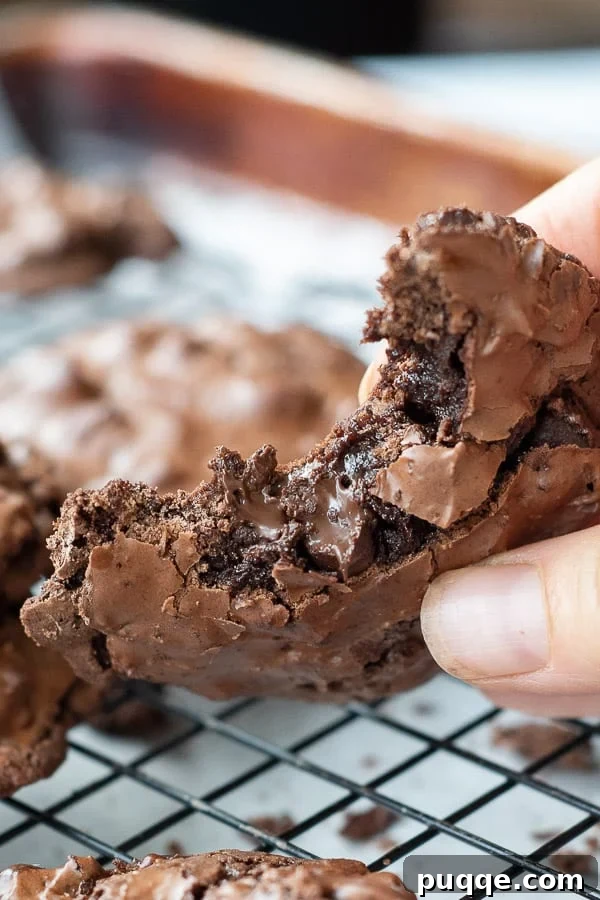
Prepare to embark on a delightful culinary journey with our truly extraordinary flourless chocolate cookies. Forget complex ingredient lists and lengthy baking processes; this recipe simplifies the art of cookie-making, requiring just five simple ingredients to create a batch of the most irresistibly gooey, chewy, and intensely chocolatey treats imaginable. As a naturally gluten-free option, these no-flour chocolate cookies are a game-changer for anyone seeking a decadent dessert that caters to dietary needs without compromising on flavor or texture. In fact, they’re so delicious, you’ll be amazed at how quickly an entire tray vanishes! Whether you’re a seasoned baker or a kitchen novice, these cookies promise a universally loved experience that will have everyone reaching for more.
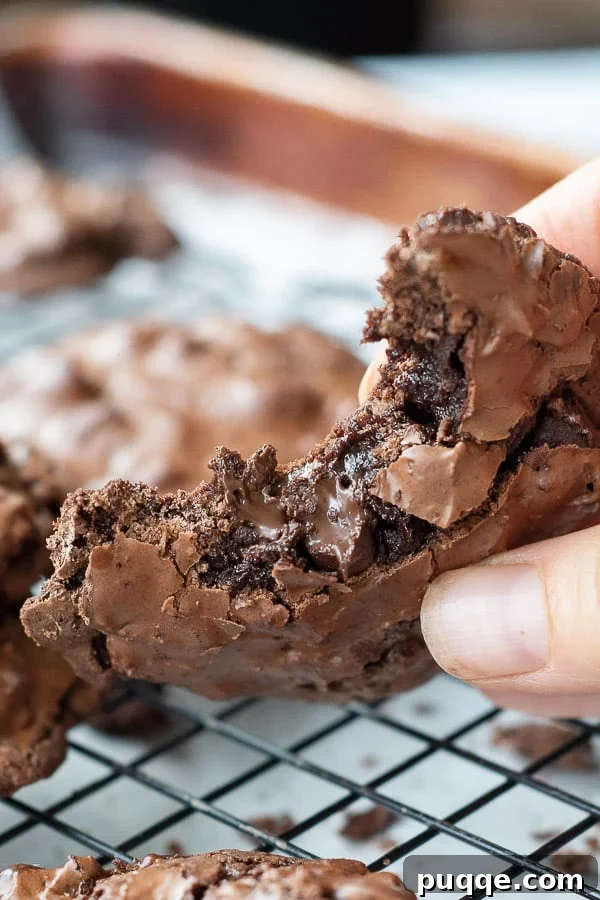
Discover the Magic of 5-Ingredient Flourless Chocolate Cookies
This recipe for chewy, fudgy flourless chocolate cookies serves as a magnificent gateway into the world of gluten-free baking. It’s not just a recipe; it’s a testament to how incredible gluten-free desserts can be, earning its place as an essential gem in any gluten-free cookie collection. One of the greatest advantages of these cookies, much like our beloved homemade chocolate no-bake cookies, is the complete absence of any need for specialized, often costly, gluten-free flour blends. Instead, you’ll utilize common pantry staples, making gourmet-quality baking accessible to everyone.
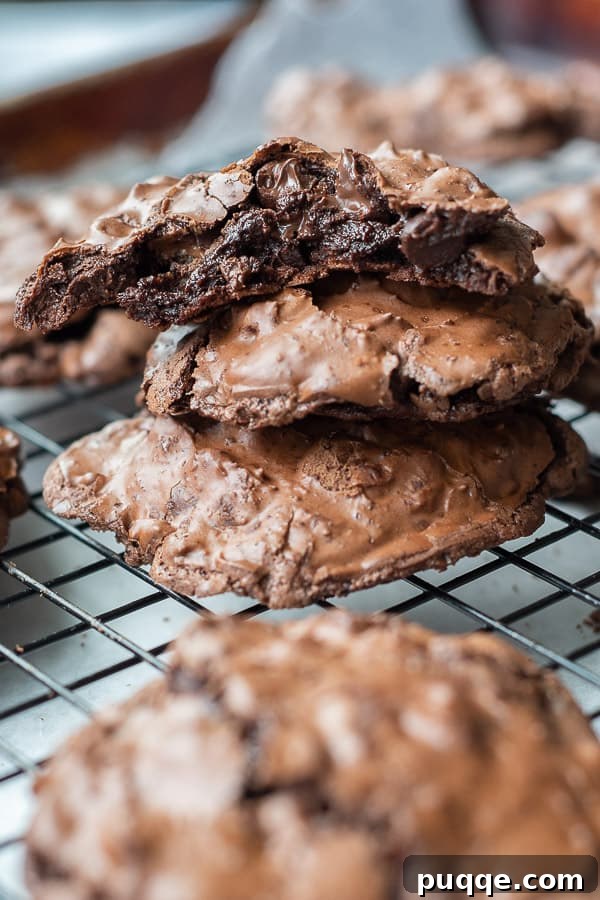
The secret to their unparalleled success lies in their simplicity. These remarkable no-flour cookies are crafted from merely five core ingredients: fresh egg whites, rich cocoa powder, delicate powdered sugar, a pinch of salt, and an abundance of decadent chocolate chips. Yet, from these humble components emerges a treat of extraordinary depth and texture. Each cookie boasts a captivatingly crackly and slightly crunchy exterior, giving way to an interior that is astonishingly gooey, intensely fudgy, and bursting with pure chocolate bliss. This unique texture profile is often compared to highly-praised gluten-free brownie cookies, delivering a truly luxurious mouthfeel.
While this recipe is a godsend for those observing Passover or catering to friends and family with gluten sensitivities, its appeal extends far beyond dietary considerations. Many bakers, initially drawn to its gluten-free nature, are pleasantly surprised to find that these homemade cookies are universally adored. Their rich flavor and remarkable texture make them utterly irresistible, proving that you don’t need flour to create an unforgettable chocolate experience.
The distinctive structure and airy chewiness of these cookies are largely attributed to the egg whites, which form the delicate meringue-like base. This creates a cookie that feels light yet intensely flavorful, almost like rich, chocolatey clouds of heaven. However, be warned: their ethereal taste means they disappear at an alarming rate! So, let’s dive into the simple steps and uncover what makes these cookies the subject of so much buzz and adoration.
And once you’ve savored this gluten-free triumph, don’t stop there! I encourage you to explore our homemade gluten-free chocolate chip cookies recipe to master even more easy tricks for baking with gluten-free flours. You’ll be amazed at the delicious possibilities!
Everyone needs to have this flourless cookie recipe. Super easy to make and they taste very high end. YUM!!
—Karen
Great easy recipe! Everyone I make these for rave about these cookies!
—Olga
Crafting Perfection: Understanding Your Five Essential Ingredients
Before we delve into the step-by-step baking process, let’s take a moment to appreciate the magic behind each of the five simple ingredients that come together to create these divine flourless chocolate cookies. It’s often said that great recipes begin with quality ingredients, and these cookies are no exception. (For precise measurements and the full recipe, please scroll down to the detailed recipe card.)
1. Powdered Sugar (Confectioners’ Sugar)
Unlike granulated sugar, powdered sugar is crucial for achieving the unique, delicate, and crackly exterior of these cookies. Its fine texture dissolves easily and helps to create that signature meringue-like structure without contributing to a gritty texture. It also ensures a smooth, fudgy interior that truly melts in your mouth. Do not attempt to substitute granulated sugar, as it will drastically alter the texture and outcome of your cookies.
2. Unsweetened Cocoa Powder (Dutch Processed Recommended)
This is where the deep, rich chocolate flavor comes from! We highly recommend using Dutch-processed cocoa powder for its darker color and milder, less acidic chocolate flavor, which pairs beautifully with the sweetness of the powdered sugar. However, if natural unsweetened baking cocoa is all you have, it will still yield delicious results, though the cookies might be slightly lighter in color and have a subtly different flavor profile. The key is to use good quality cocoa for the best chocolate intensity.
3. Salt
A small but mighty ingredient, salt plays a critical role in enhancing the overall flavor of these chocolate cookies. It balances the sweetness, deepens the chocolate notes, and prevents the cookies from tasting one-dimensional. Don’t skip it!
4. Large Egg Whites (Unbeaten)
The backbone of our flourless wonders! Egg whites are fundamental to creating the meringue-like texture and structure. When whisked into the dry ingredients, they provide the necessary moisture and help bind everything together, creating that wonderfully chewy and slightly airy crumb. It’s important to use unbeaten egg whites as directed; whipping them beforehand would change the batter consistency too much.
5. Chocolate Chips (Semi-Sweet)
What’s a chocolate cookie without chocolate chips? Semi-sweet chocolate chips are generally preferred for these cookies, providing pockets of molten chocolate that complement the fudgy base. You can experiment with dark chocolate chips for a more intense flavor or even milk chocolate if you prefer a sweeter profile. The quality of your chocolate chips will directly impact the final flavor, so choose wisely!
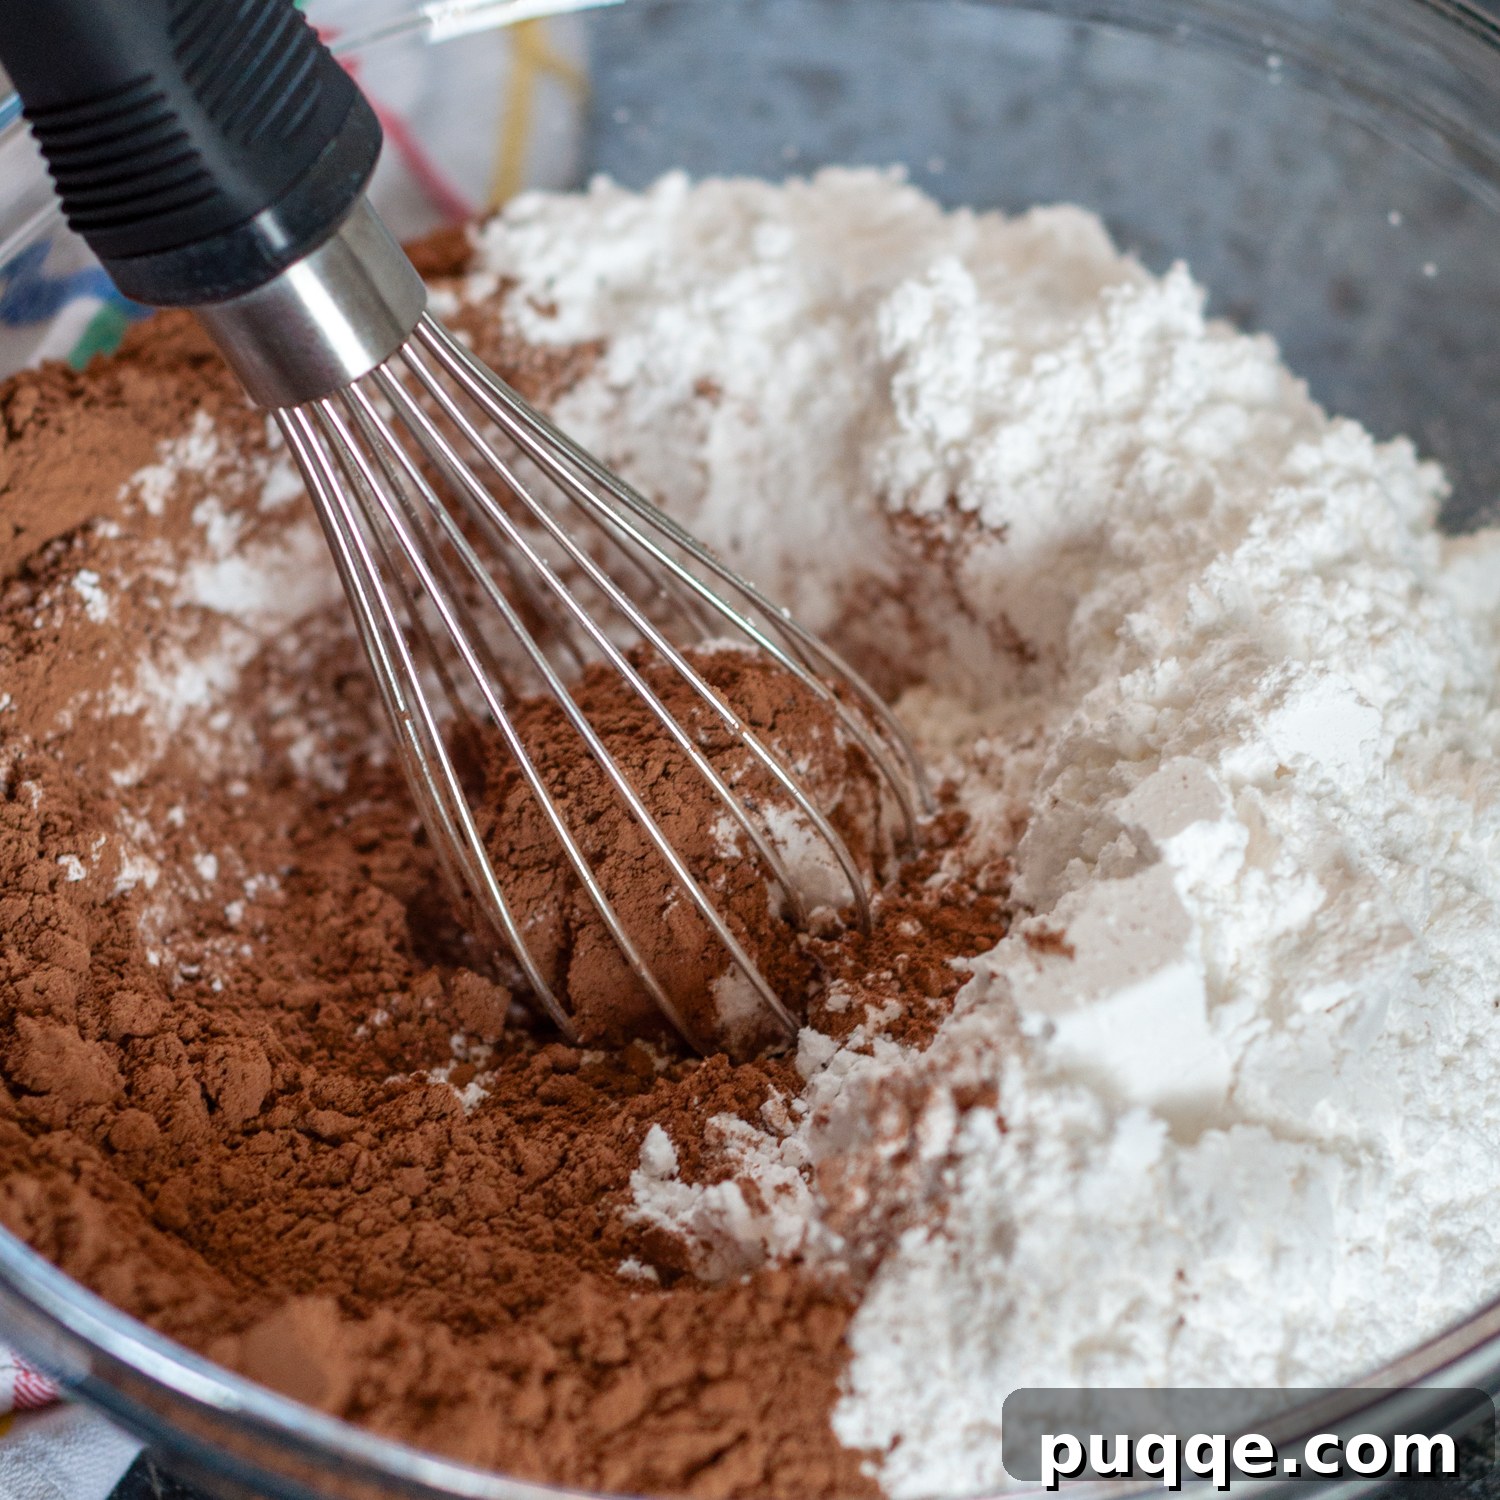
Step 1: The Dry Mix – Whisking to Perfection
Begin by combining your dry ingredients: the powdered sugar, cocoa powder, and salt. In a generously sized mixing bowl, whisk these together thoroughly until they are well integrated and there are no visible lumps of cocoa powder. This initial step is crucial for an even distribution of flavor and texture throughout your cookies. Ensure your bowl is large enough to comfortably accommodate the subsequent addition of egg whites without any powdered sugar escaping, preventing a mess and ensuring all ingredients are properly incorporated.
Step 2: Incorporating Wet Ingredients & Chocolate Chips
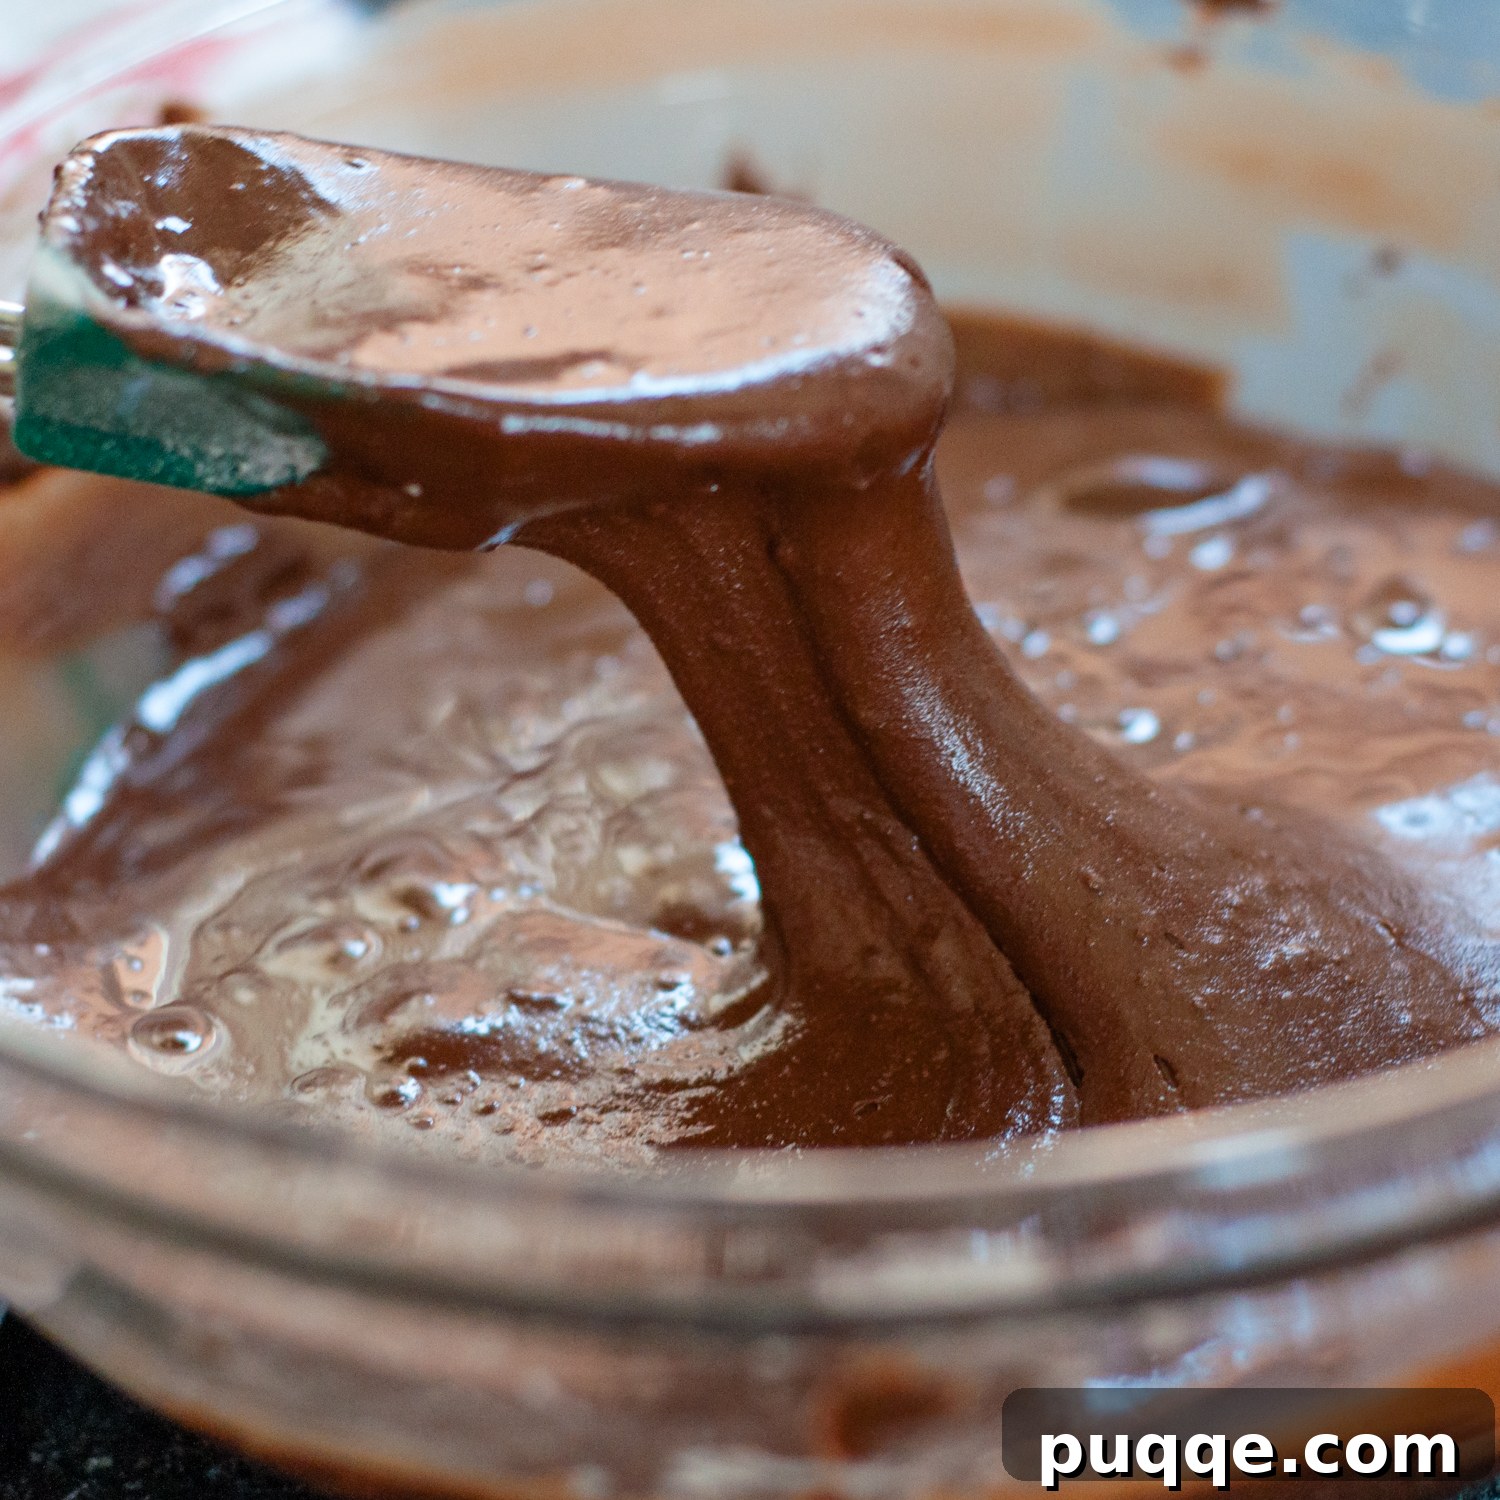
Next, introduce the unbeaten egg whites and the vanilla extract into your dry mixture. This stage will require a bit of effort and ‘oomph’ as the batter rapidly thickens to a very dense consistency. It’s essential to stir vigorously until all the dry ingredients are fully moistened and a thick, cohesive dough forms. PRO TIP: A sturdy silicone spoon or spatula will be your best friend here, allowing you to effectively stir, scrape the sides of the bowl, and fold the ingredients until everything is perfectly combined.
The size of your egg whites can slightly influence the batter’s consistency. If you find the mixture impossibly thick to stir, you can add just a couple of dashes (about ½ to 1 teaspoon) of water, little by little, until it becomes manageable. Be cautious not to add too much liquid, as this can alter the cookie’s final texture. Once the primary ingredients are well mixed, gently fold in your chosen chocolate chips or any other delightful add-ins you’ve selected. (For a fantastic array of yummy ideas, refer to the “Elevate Your Cookies: Irresistible Mix-In Ideas” section below.)
Step 3: Scoop, Rest, and Bake to Perfection
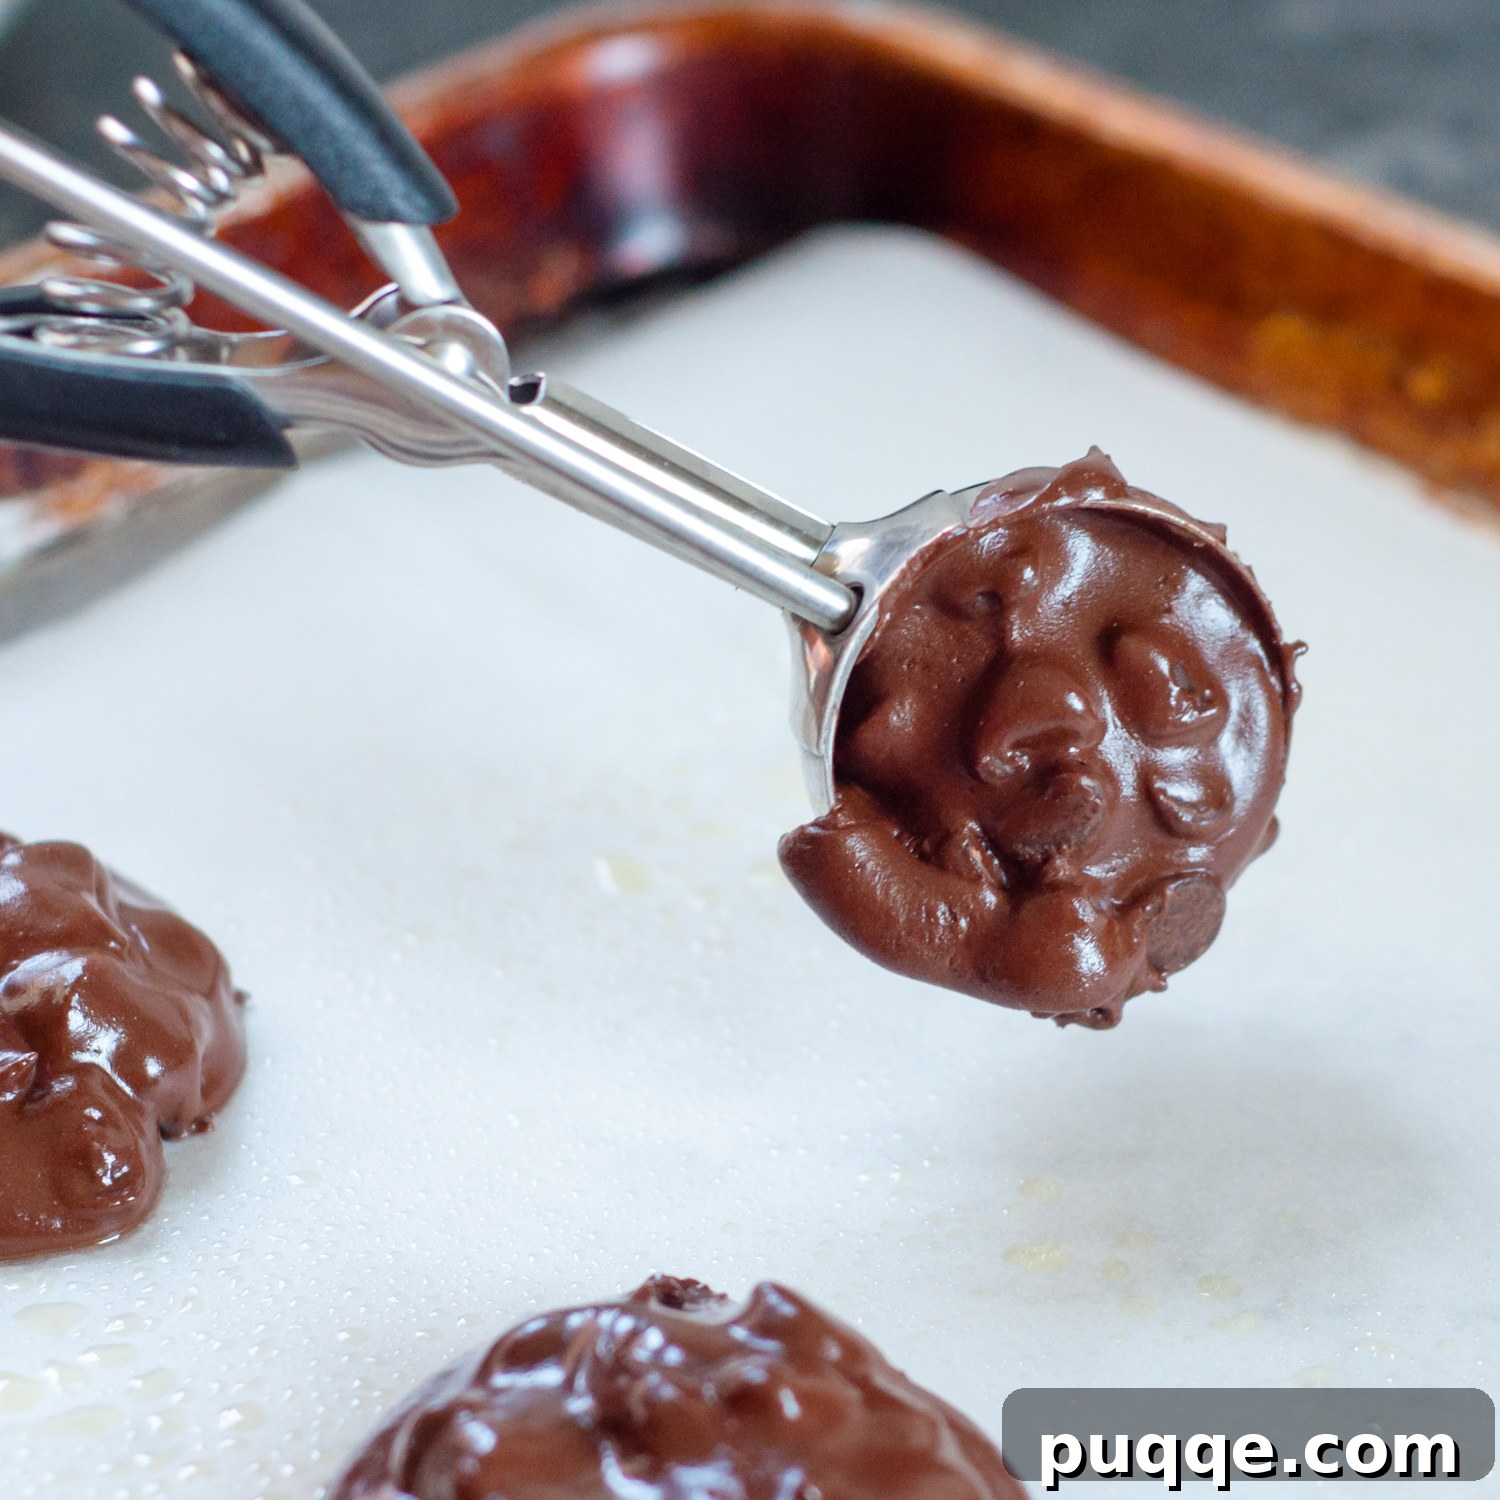
Prepare your baking sheets by lining them with parchment paper and giving them a light spray with nonstick cooking spray – this dual protection is key for preventing sticking. Then, scoop even portions of batter onto the prepared sheets. EXPERT TIP: Utilizing a small cookie scoop is a game-changer for achieving uniformly sized cookies quickly and efficiently. If you’re serious about baking, this tiny tool will truly transform your cookie game!
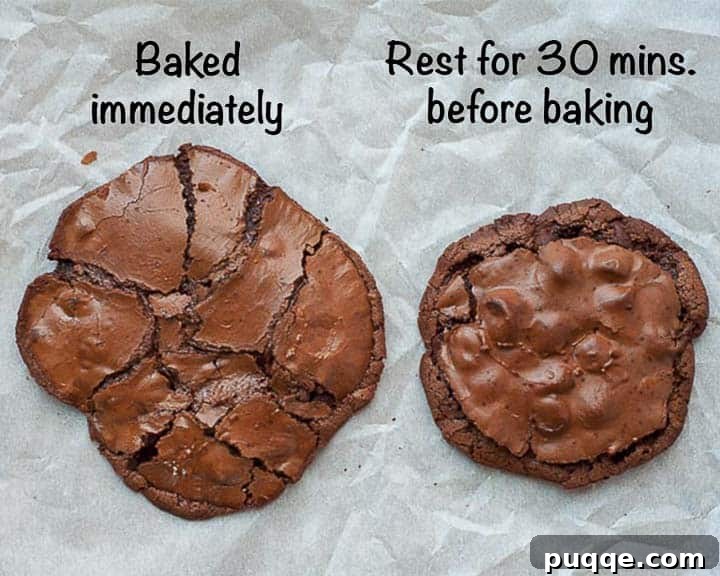
Here’s a step that sets these flourless cookies apart: allow the scooped mounds of batter to rest at room temperature for a full 30 minutes before baking. This seemingly small waiting period is crucial for developing a better-shaped cookie with that desirable crackly top. (You can observe the difference in the comparison image provided below.) While it’s true these irresistible treats will likely be devoured regardless, this resting phase significantly enhances their aesthetic and slightly firmer texture. Meanwhile, preheat your oven to 350°F (175°C).
Bake the cookies for 10-12 minutes, or until their tops appear glossy and show subtle cracks. The edges should be set, while the centers remain delightfully soft and slightly undercooked, ensuring that signature gooeyness. Once baked, resist the urge to move them immediately. Allow the cookies to cool completely on the baking sheet before carefully transferring them to a wire rack. This allows them to firm up without breaking. Consider yourself warned: resisting the temptation to eat every single warm cookie straight from the sheet is nearly impossible!
The Science Behind the Rest: Why 30 Minutes Makes a Difference
You might be tempted to skip the 30-minute resting period, especially when the aroma of chocolate calls your name, but this simple step is a true game-changer for the final appearance and texture of your flourless chocolate cookies. While it’s true that the cookies will still be delicious if baked immediately, allowing the batter to rest at room temperature before baking significantly enhances their structure and overall shape.
When the cookie batter is scooped and immediately placed into a hot oven, the ingredients haven’t had sufficient time to fully hydrate and settle. This often results in cookies that spread more rapidly and thinly across the baking sheet, yielding a flatter, less defined shape. In contrast, a 30-minute rest allows the powdered sugar and cocoa powder to fully absorb the moisture from the egg whites. This hydration process helps the batter to firm up slightly, creating a more stable structure that holds its shape better during baking.
The result of this patient waiting? You’ll be rewarded with cookies that are beautifully round, possess a more pronounced crackly, glossy top, and maintain a satisfyingly chewy center. The visual difference, as you can see in the comparison image below, is quite remarkable. It’s a small investment of time that pays off in a more aesthetically pleasing and texturally superior cookie. Trust the process, and your taste buds (and eyes) will thank you!
Elevate Your Cookies: Irresistible Mix-In Ideas
While these flourless chocolate cookies are absolutely divine on their own, they also serve as a fantastic canvas for creativity. Customizing your batch with delicious mix-ins can introduce exciting new textures and flavor dimensions. Here are some “super yummy” ideas to inspire your next baking adventure:
- Nuts for Crunch: Introduce a delightful textural contrast with chopped walnuts, pecans, pistachios, or peanuts. The earthy notes of nuts beautifully complement the rich chocolate. For an extra touch, sprinkle a few extra pieces on top of each cookie before baking.
- Peanut Butter Bliss: Swirl in some creamy peanut butter chips for a classic chocolate-peanut butter pairing. Always remember to check the label to ensure they are certified gluten-free if catering to specific dietary needs.
- Minty Freshness: For a festive twist, especially around the holidays, fold in crushed peppermint candies. The cool mint offers a refreshing counterpoint to the intense chocolate.
- Vary Your Chocolate: Don’t limit yourself to semi-sweet chips! Experiment with chopped dark chocolate chunks for a more sophisticated, bittersweet flavor, or use white chocolate chips for a sweeter, creamier contrast. You can even combine different types of chocolate for a multi-layered experience.
- Flaky Sea Salt Finish: A sprinkle of flaky sea salt before baking is a chef’s secret weapon. It highlights the chocolate’s depth and provides a subtle, savory crunch that beautifully balances the sweetness.
- White Chocolate Drizzle: Once the cookies have cooled completely, melt some white chocolate and drizzle it artfully over the tops. This adds an elegant finish and another layer of sweetness.
- Citrus Zest & Extract: For a brighter, more aromatic cookie, substitute vanilla extract with orange extract and stir in some fresh orange zest. Chocolate and orange is a pairing that never disappoints.
- Espresso Boost: Enhance the chocolate flavor and add a subtle coffee kick by stirring in 1 teaspoon of espresso powder. It won’t make the cookies taste like coffee, but it will intensify the chocolate notes dramatically.
Feel free to get creative and experiment with your favorite flavors. The beauty of these simple cookies is how well they adapt to various additions!
Save This Recipe to Your Pinterest Board!
Let’s be friends on Pinterest! I’m always sharing great recipes!
Your Feedback Matters! If you’ve tried this delightful recipe, we’d love to hear from you. Please leave a star rating and comment below the recipe card. Your valuable feedback not only helps other home bakers discover wonderful recipes but also strengthens our community. We genuinely appreciate hearing about your experiences, and I always make sure to respond! -Melissa

Chewy, Fudgy Flourless Chocolate Cookies
 Melissa Erdelac
Pin
Rate
Remove Ads
Ingredients
- 3 cups powdered sugar
- ⅔ cup Dutch processed cocoa powder, (or substitute natural unsweetened baking cocoa)
- ½ tsp. salt
- 3 large egg whites, unbeaten
- 1 teaspoon vanilla extract
- 1 ½ cups semi-sweet chocolate chips
- optional flaky sea salt, for sprinkling
Equipment
-
Baking Sheets
-
Small Cookie Scoop
-
Large Mixing Bowl
Instructions
-
Line two baking sheets with parchment paper and SPRAY with nonstick spray.
-
In a large bowl, whisk together powder sugar, cocoa powder, and salt. Stir in egg whites and vanilla extract until the batter is completely moistened. It will be very, very thick. Stir in the chocolate chips.3 cups powdered sugar, ⅔ cup Dutch processed cocoa powder, ½ tsp. salt, 3 large egg whites, 1 teaspoon vanilla extract, 1 ½ cups semi-sweet chocolate chips
-
Spoon the batter on the sprayed parchment lined sheets, about 1 tablespoon per scoop (Using a small cookie scoop makes this very easy!) You will end up with about 12 mounds per sheet. Let the cookie sheets rest for 30 minutes before baking*, meanwhile preheating oven to 350ºF.
-
Bake for 10-12 minutes until tops are glossy and lightly cracked. The edges will be set and the middle slightly undercooked.
-
Let the cookies cool for 10 minutes on the baking sheet before gently transferring them to a cooling rack to finish cooling.
Notes
UPDATE (4/18/22) Some readers have commented the cookies were very sweet. Adding chopped nuts gives the cookies a great salty crunch and really balances the flavors. When adding nuts the cookies will be rounder and might have to bake 1-2 minutes longer.
Best Tips and Troubleshooting
- Substituting a sugar alternative for the powdered sugar is not recommended.
- Line the baking sheet with parchment paper and don’t forget to spray with cooking spray. I often see readers post their cookie “failures” on a baking sheet lined with aluminum foil. Foil is a no no!
- The egg whites should be unbeatened when adding them in.
- Don’t let the batter sit too long before scooping onto the baking sheet. Once the egg whites, powdered sugar, and baking cocoa are mixed, scoop the batter onto the baking sheet.
- Many readers have asked about adding the whole egg. While some have had success with this, I have not. It added too much liquid and the cookies were extremely flat and chewy.
- If the batter is too thick to incorporate the dry ingredients, you can add a couple drops of water just till it comes together. Avoid adding too much extra liquid, though, or the cookies will spread and become thin.