
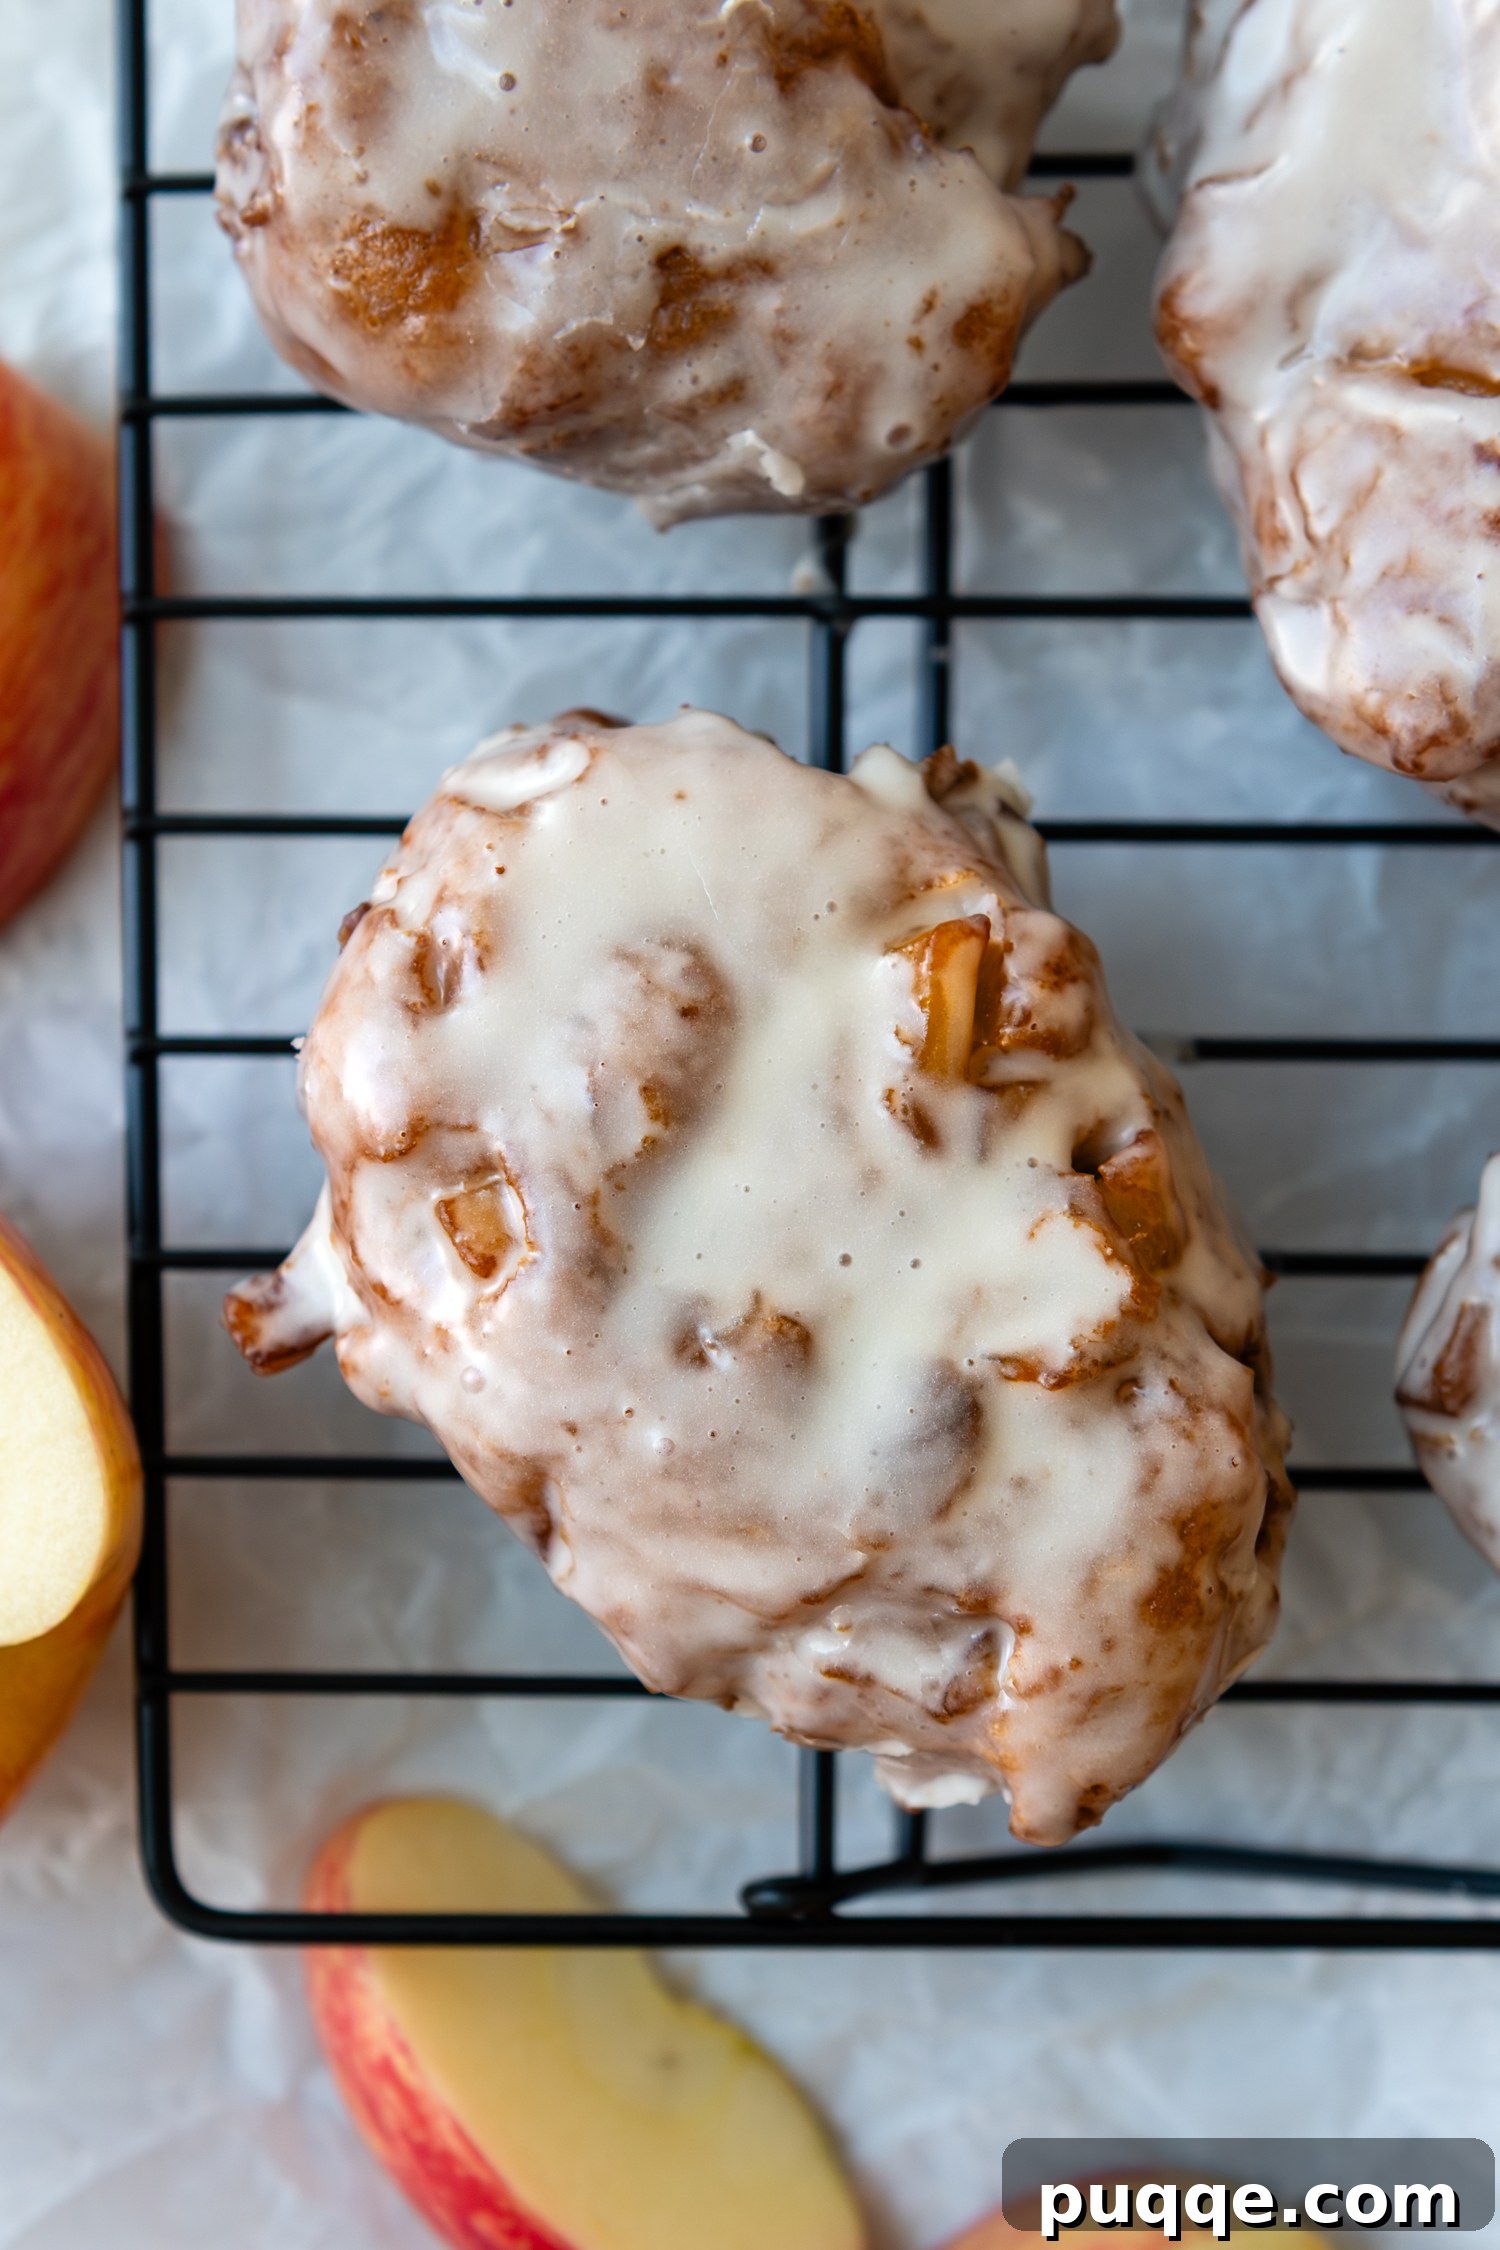
Craving that irresistible, golden-brown apple fritter with a sweet glaze, just like the ones from your favorite donut shop? For those navigating a gluten-free lifestyle, this classic comfort treat often feels out of reach. But what if we told you that identical taste, perfect texture, and homemade goodness are not just possible, but incredibly easy to achieve?
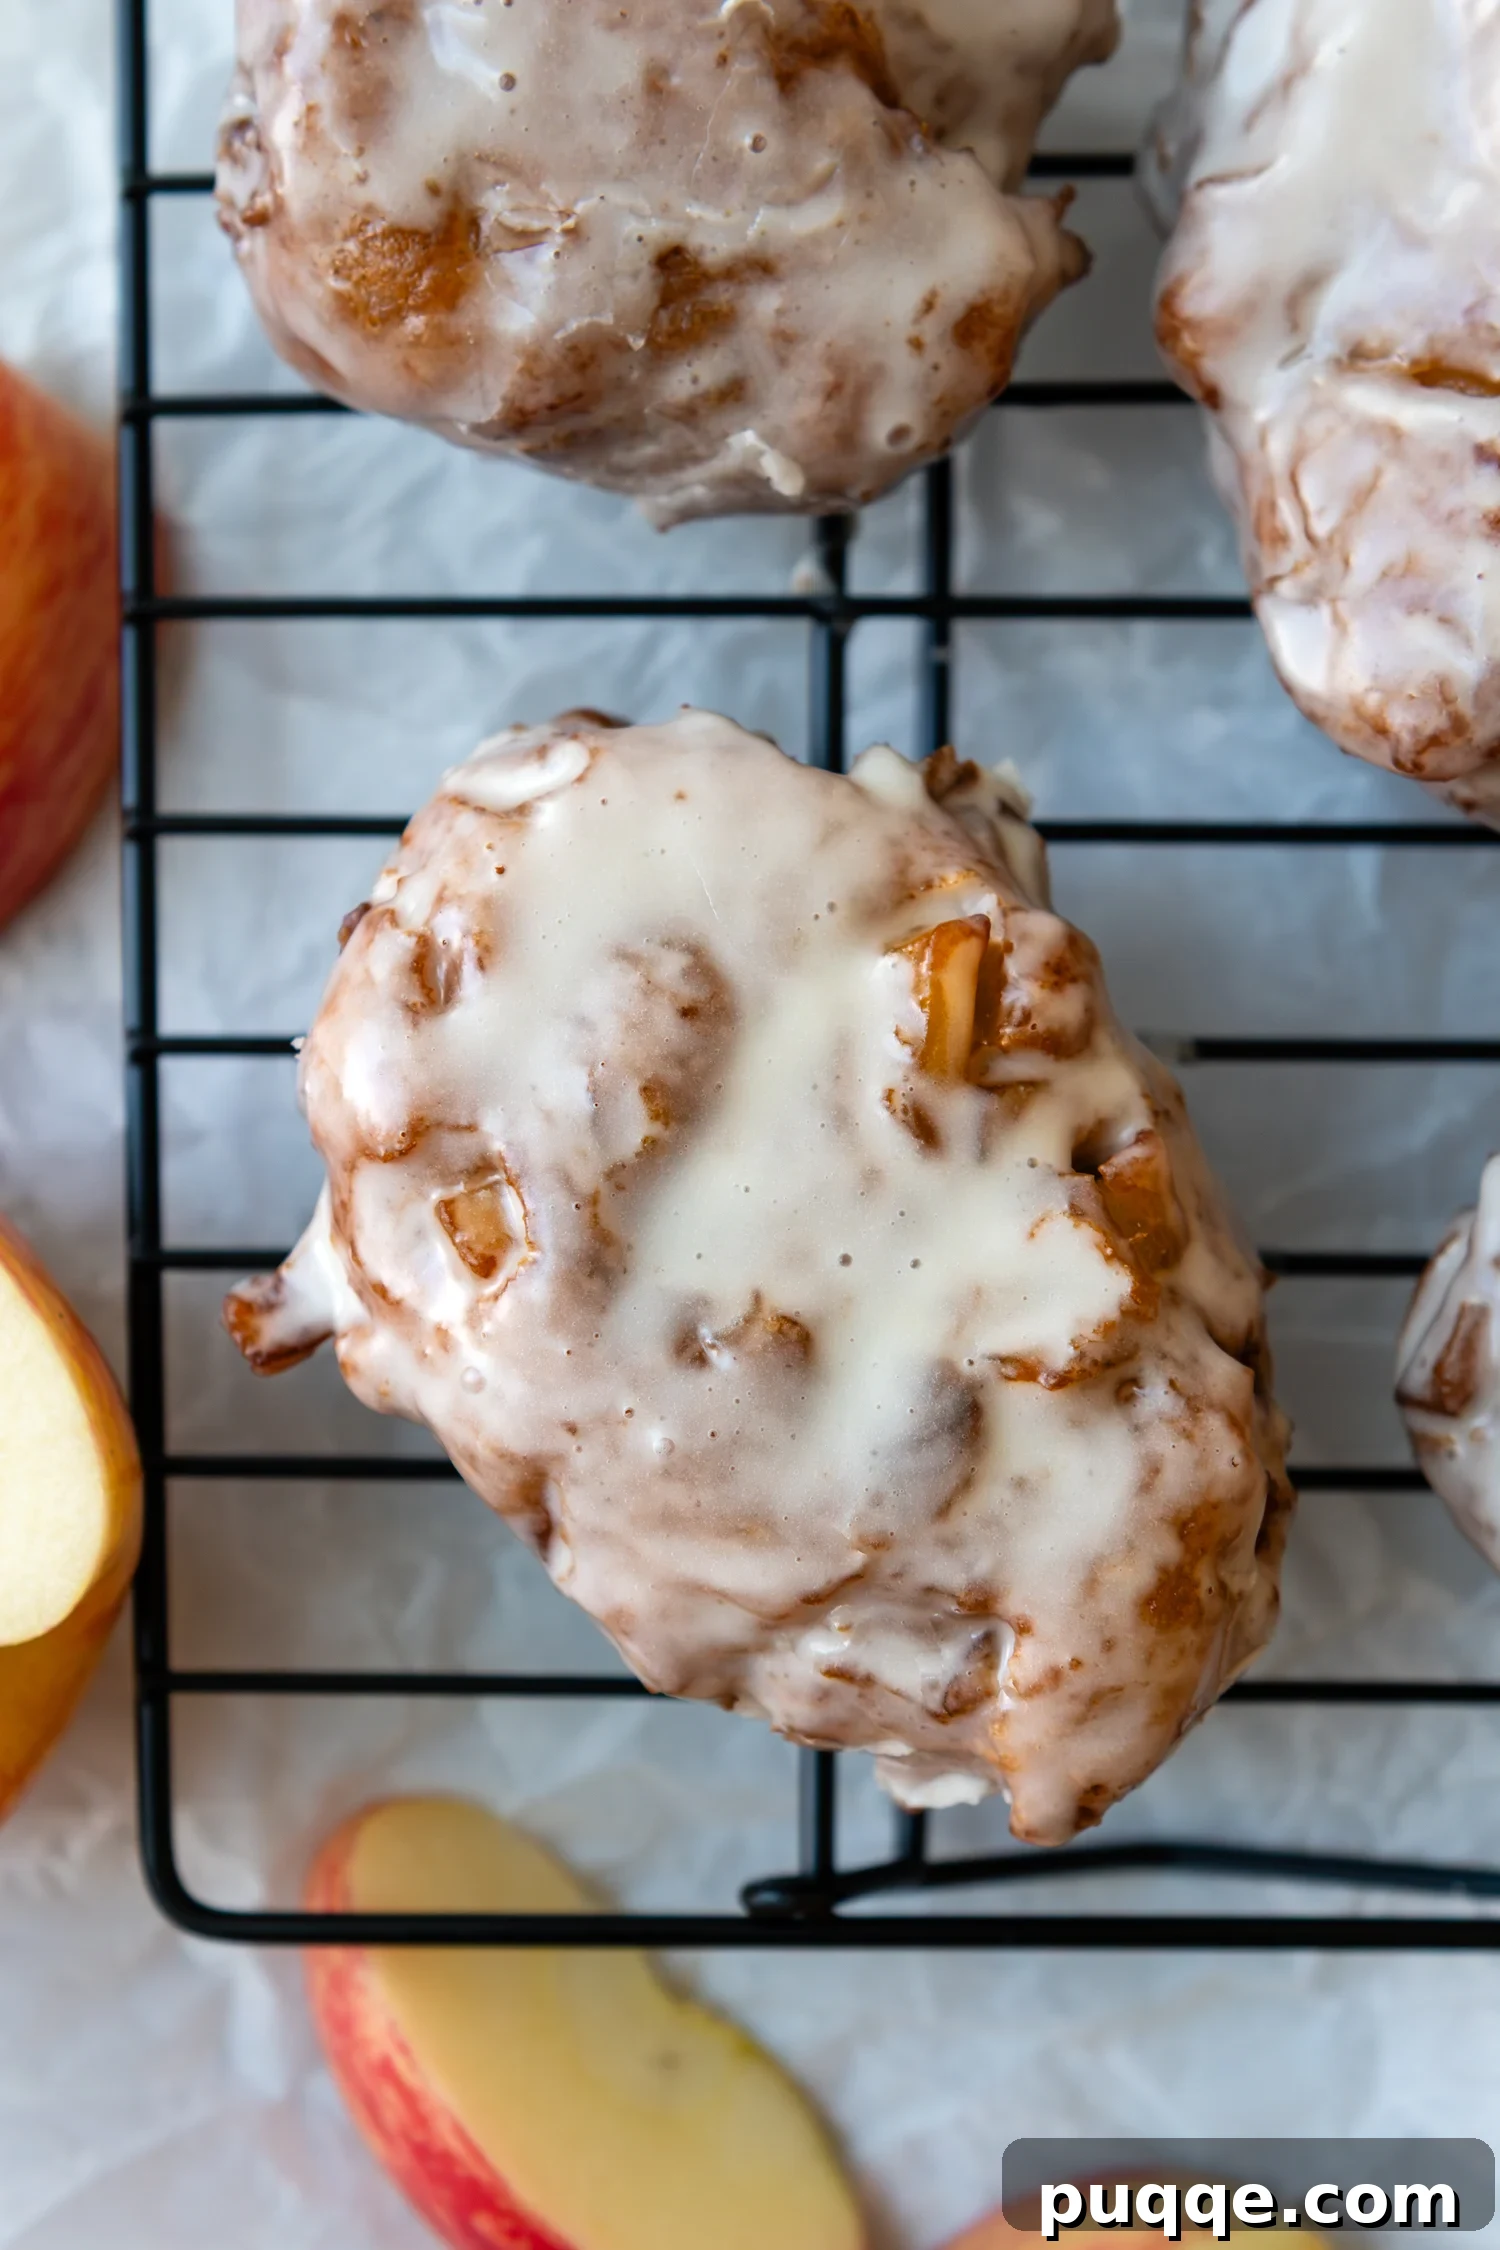
The Ultimate Guide to Easy Gluten-Free Apple Fritters: Donut Shop Perfection at Home
Get ready to rediscover a beloved classic with this foolproof recipe for easy gluten-free apple fritters. Forget complicated steps, yeast, or endless rising times. This recipe is designed for simplicity and maximum flavor, taking less than 45 minutes from start to finish. We’re talking mix, scoop, and drop – creating a treat that’s wonderfully soft on the inside, perfectly crisp on the outside, and bursting with warm apple-cinnamon goodness, all coated in a luscious vanilla glaze. You don’t need any prior donut-making experience to master these irresistible, homemade gluten-free fritters!
Why These Gluten-Free Apple Fritters Are a Game-Changer for Every Craving
Developing a truly legitimate, doughy soft gluten-free treat can often feel like an insurmountable challenge. Many gluten-free baked goods can turn out dense, dry, or gritty, leaving you longing for the traditional versions. When I first set out to create a gluten-free apple fritter recipe, I admit I wondered: how could it possibly be as good as the original?
The secret lies in a carefully balanced batter that skips the usual yeast-based complexities. Unlike some gluten-free apple fritter recipes that demand multiple rises, rolling, and intricate shaping, our approach streamlines the process without compromising on flavor or texture. These extra steps, I’ve found, often add unnecessary complexity without truly enhancing the final product. Why complicate things when you can achieve bakery-style perfection with such ease?
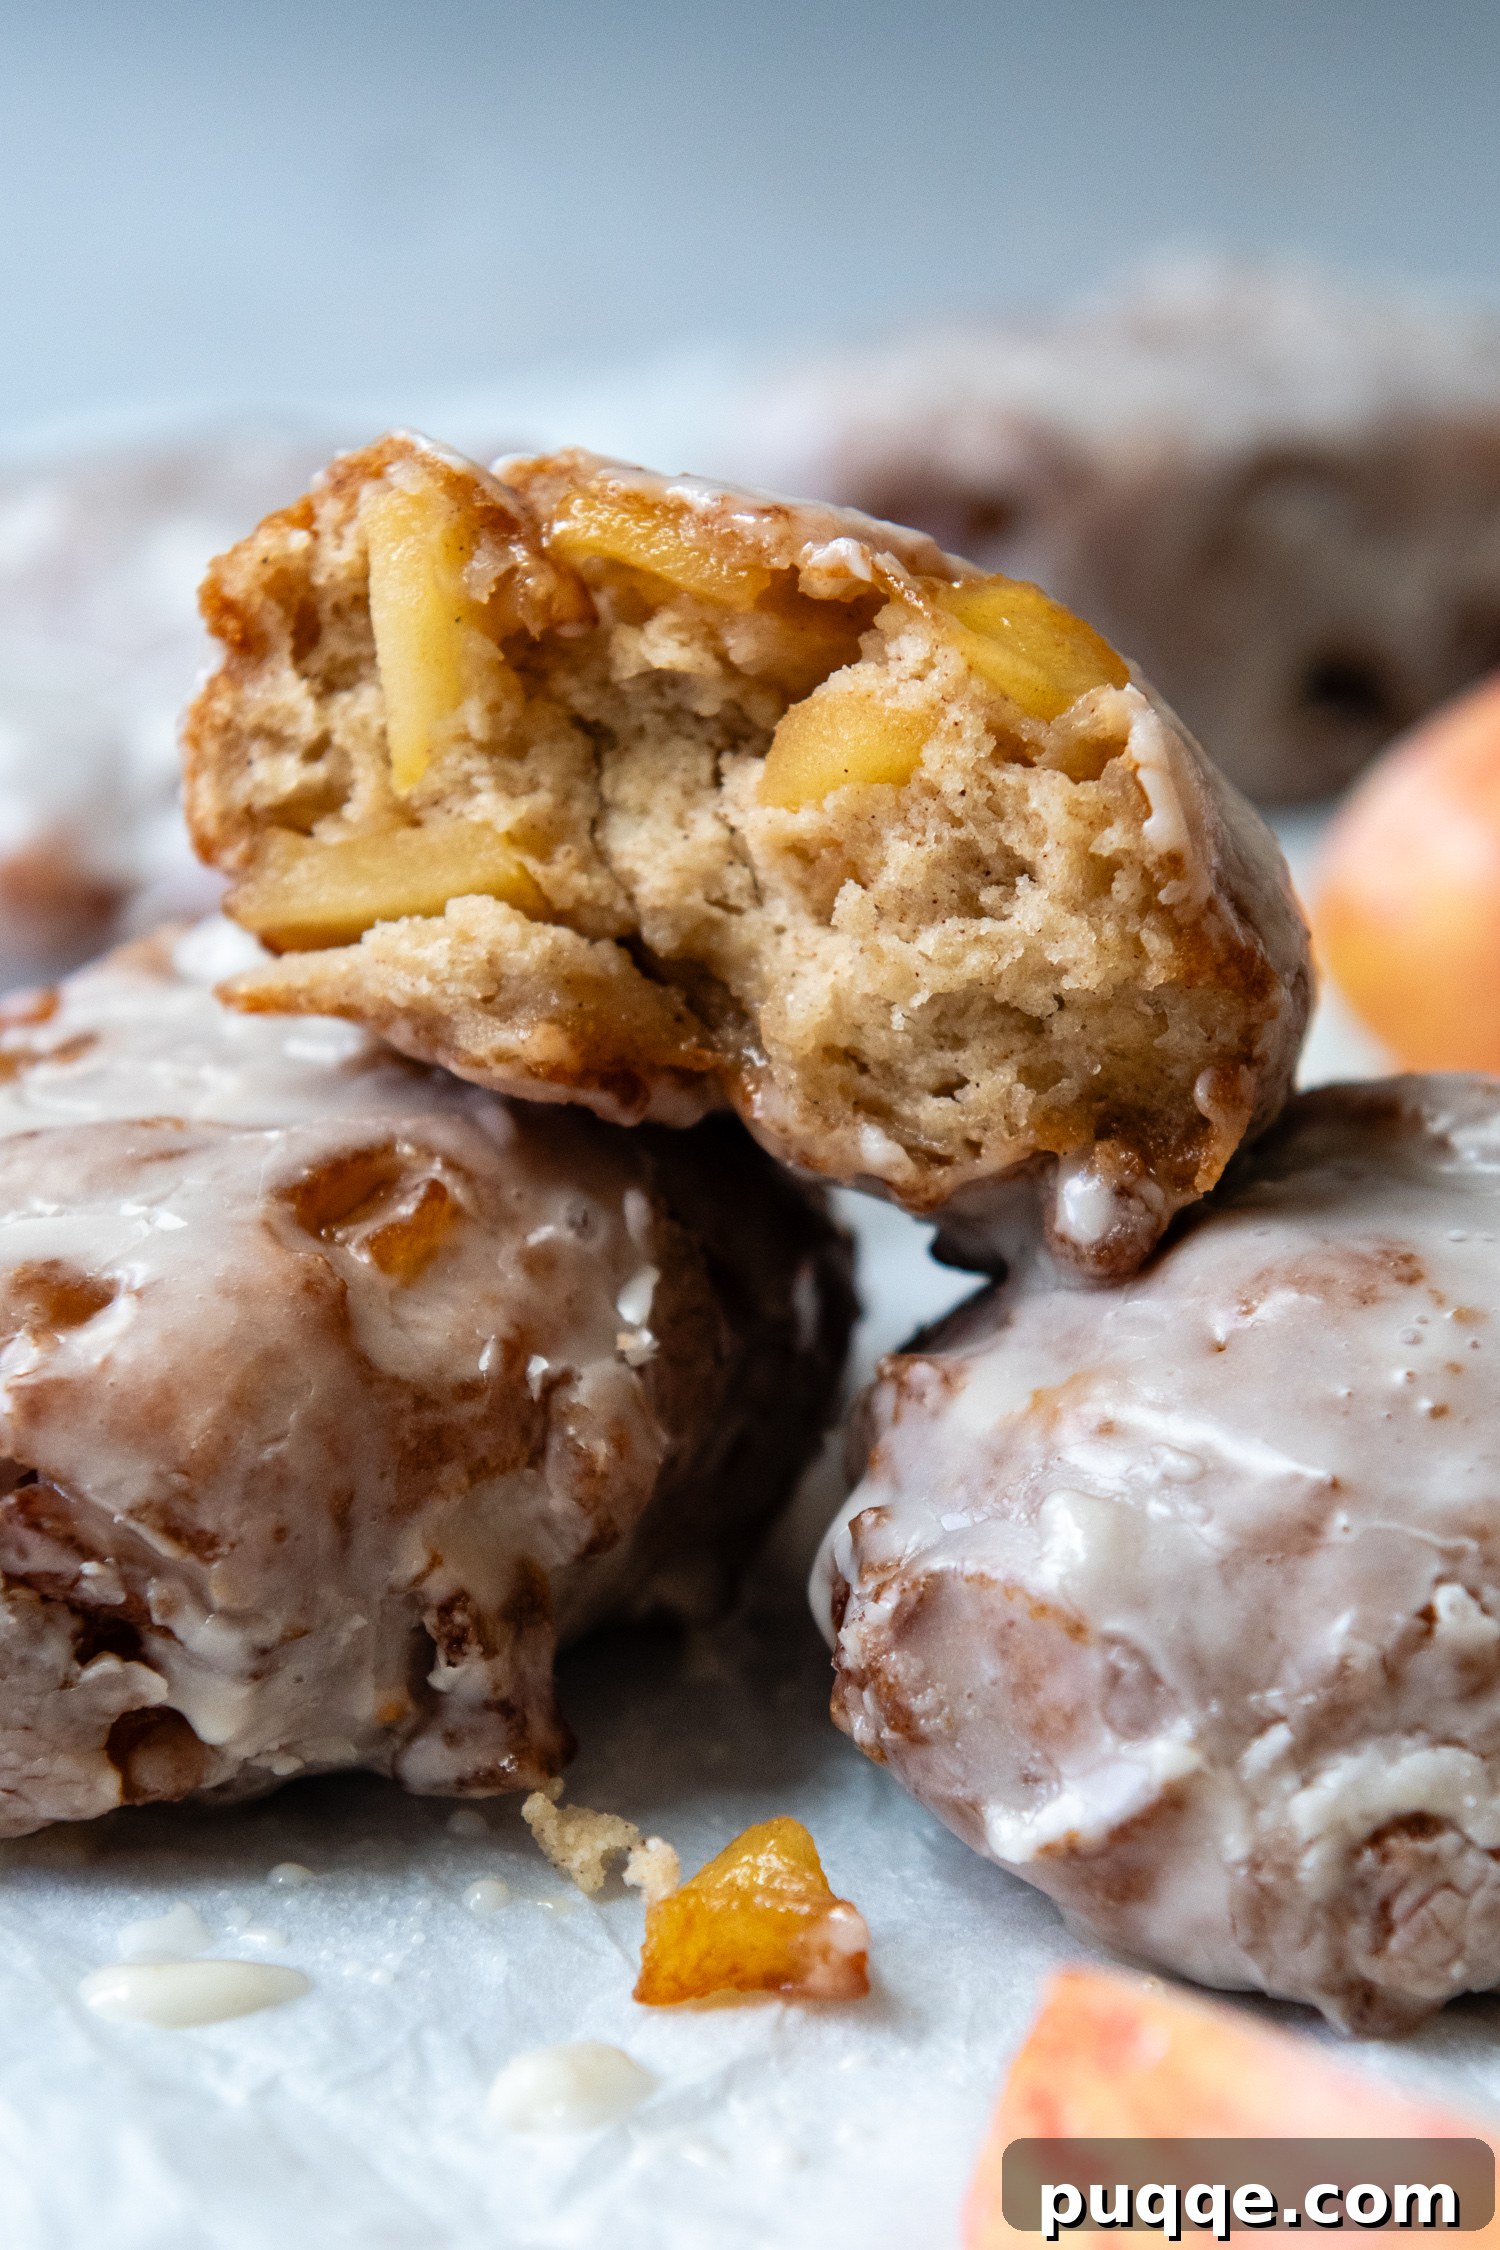
The only “extra” step we wholeheartedly embrace is gently sautéing the apples before incorporating them into the batter. This crucial technique ensures the apples soften beautifully during the fritters’ quick fry time, preventing a crunchy, undercooked texture. Plus, it’s a fantastic excuse to infuse them with extra layers of flavor from rich butter and aromatic brown sugar, creating an apple filling that’s truly irresistible.
Prepare for a joyous culinary revelation! These homemade gluten-free apple fritters don’t just taste as good as you remember; they are ridiculously easy to whip up. The batter is as straightforward as mixing up a gluten-free apple streusel bread – simply combine the ingredients in a bowl by hand, and you’re halfway to a blissful bite.
Ingredient Spotlight: Crafting the Perfect Gluten-Free Fritter
- Apples: The Heart of the Fritter. Selecting the right apple variety is key to achieving that perfect balance of sweetness and tartness. I highly recommend using Honeycrisp or Golden Delicious apples for their excellent baking qualities and sweet-tart profile. If you prefer a tarter fritter, Granny Smith apples are a great choice, but you might want to increase the brown sugar in the apple filling to 3 tablespoons to balance their acidity. Remember to peel, core, and chop them into ½-inch pieces for even softening.
- Whole Milk: For Unrivaled Tenderness. Whole milk plays a vital role in our fritter batter. Its higher fat content helps to coat the gluten-free starches, resulting in a wonderfully moist crumb and eliminating any trace of grittiness often associated with gluten-free baking. If you require a dairy-free option, you can certainly substitute it with a high-fat non-dairy milk (such as full-fat oat milk or cashew milk) and a plant-based butter alternative for the apple filling. The goal is to maintain that crucial fat content for an optimal texture.
- Unsweetened Applesauce: A Double Dose of Apple Bliss. Unsweetened applesauce is a secret weapon in this recipe, offering twofold benefits. Firstly, it adds essential moisture to the batter, contributing to the fritters’ tender interior. Secondly, it provides an additional boost of natural apple flavor, enhancing the overall fruity profile without making the fritters overly sweet.
- Gluten-Free Flour: The Foundation of Success. The choice of gluten-free flour is paramount when aiming for results that rival traditional baked goods. After extensive testing, I confidently recommend Cup4Cup gluten-free all-purpose flour for this recipe, and indeed for my entire collection of gluten-free baking creations. While it may be slightly pricier than some other brands, its unique blend consistently replicates the texture and structure of traditional wheat flour, which is ultimately our goal here. A high-quality blend makes all the difference in preventing a crumbly or gummy outcome.
- Baking Powder: The Leavening Powerhouse. Since this recipe is yeast-free, baking powder is crucial for giving our fritters their delightful lift and airy texture. Ensure your baking powder is fresh for the best results!
- Cinnamon & Vanilla: The Signature Aromas. Both ground cinnamon and vanilla extract are essential for capturing that classic apple fritter essence. The warm spice of cinnamon perfectly complements the apples, while vanilla adds a sweet, comforting aroma that ties all the flavors together, both in the apple filling and the final glaze.
Step-by-Step Guide: Crafting Your Easy Gluten-Free Apple Fritters
(Below, you’ll find detailed step-by-step photos and comprehensive instructions. For the complete recipe, including precise ingredient amounts, please scroll down to the recipe card.)
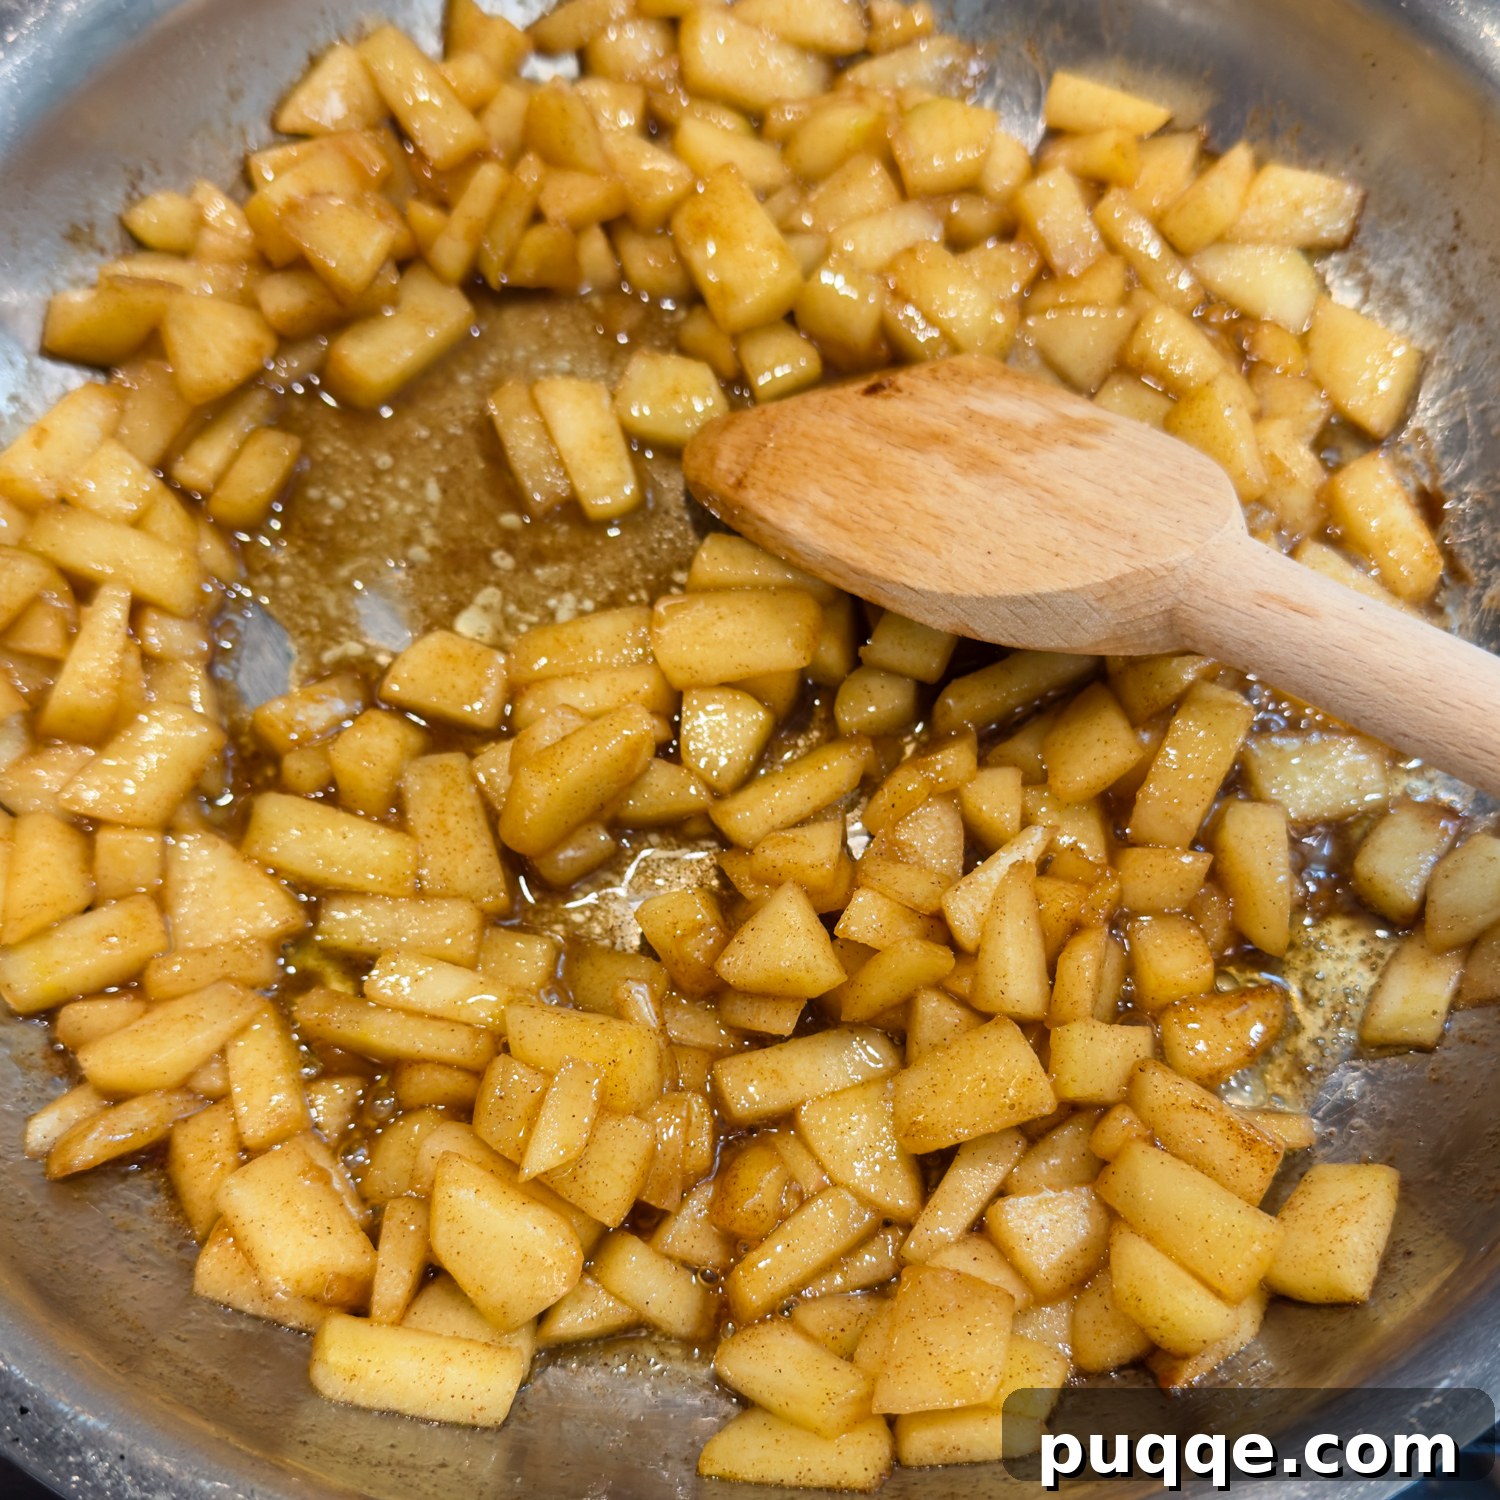
Creating the Irresistible Cinnamon Apple Filling
This single “extra” step is absolutely key to achieving that authentic, copycat bakery-style fritter flavor and texture. Begin by peeling and finely chopping your fresh apples into ½-inch pieces. Sauté these apple pieces for about 5 minutes in a fragrant mixture of melted butter, rich brown sugar, and warm cinnamon. This process not only softens the apples, ensuring they are tender within the quick-frying fritter, but also infuses them with incredible depth of flavor. Once softened and aromatic, set the apple filling aside to cool completely before mixing it into the dough.
Mastering the Frying Process: Setup for Success
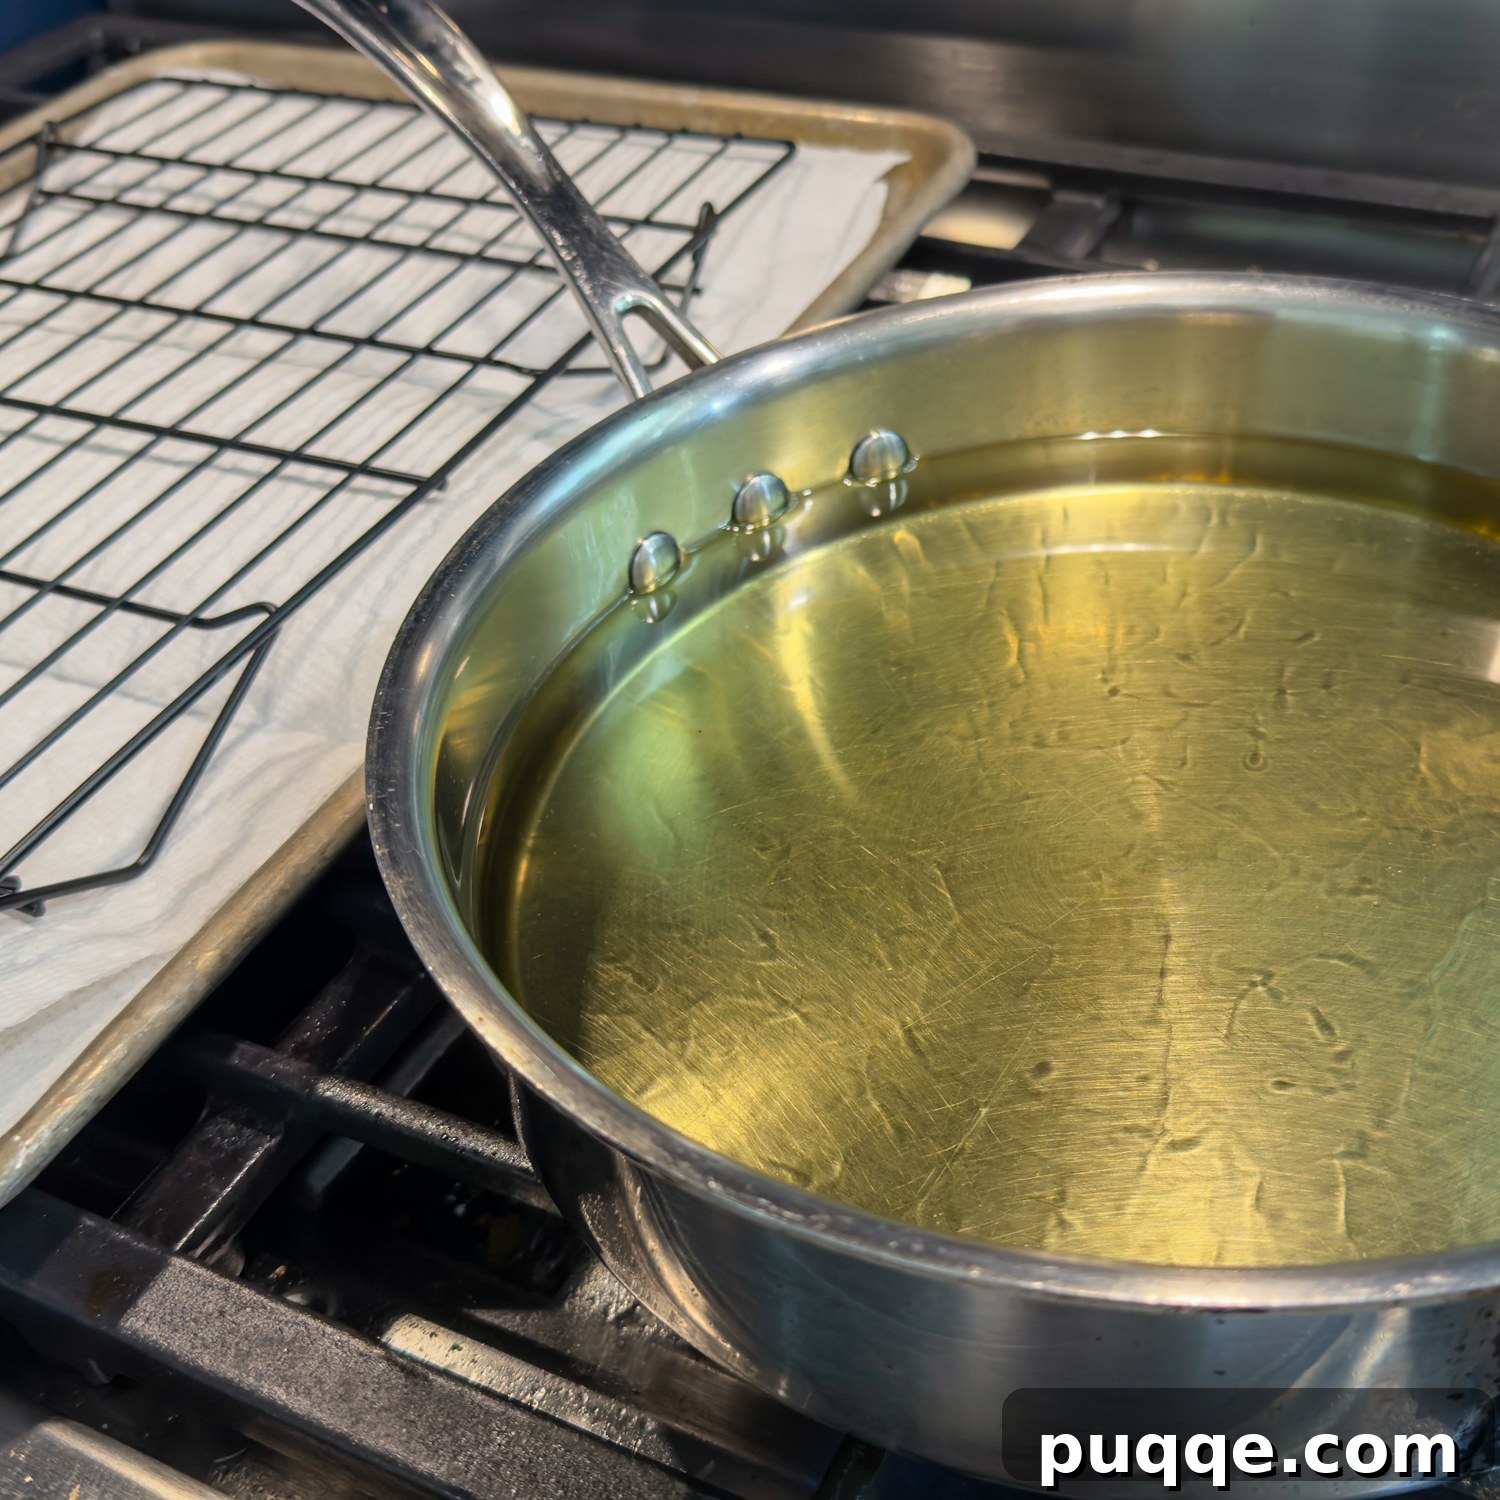
For successful frying, a large, deep, and heavy-bottomed skillet is essential. The “heavy” aspect isn’t just a suggestion; heavy skillets maintain a more consistent heat temperature, which is immensely helpful for achieving even cooking and preventing greasy fritters. Pour approximately 1.5 to 2 inches of oil into the pan. Heat the oil over medium heat until it reaches a precise temperature of 350°F (175°C). To accurately check and maintain this crucial temperature, either place a candy thermometer in the oil or use an instant-read thermometer intermittently.
I recommend starting this oil heating process before you even begin mixing the fritter batter, as it can take about 10-15 minutes for the oil to reach the optimal temperature. Simultaneously, prepare your drainage station: line a baking sheet with several layers of paper towels and place a wire rack directly on top. This setup is where your perfectly cooked fritters will be transferred to allow any excess oil to drain off, keeping them wonderfully crisp.
Mixing the No-Fuss Gluten-Free Fritter Dough – No Yeast, No Rolling!
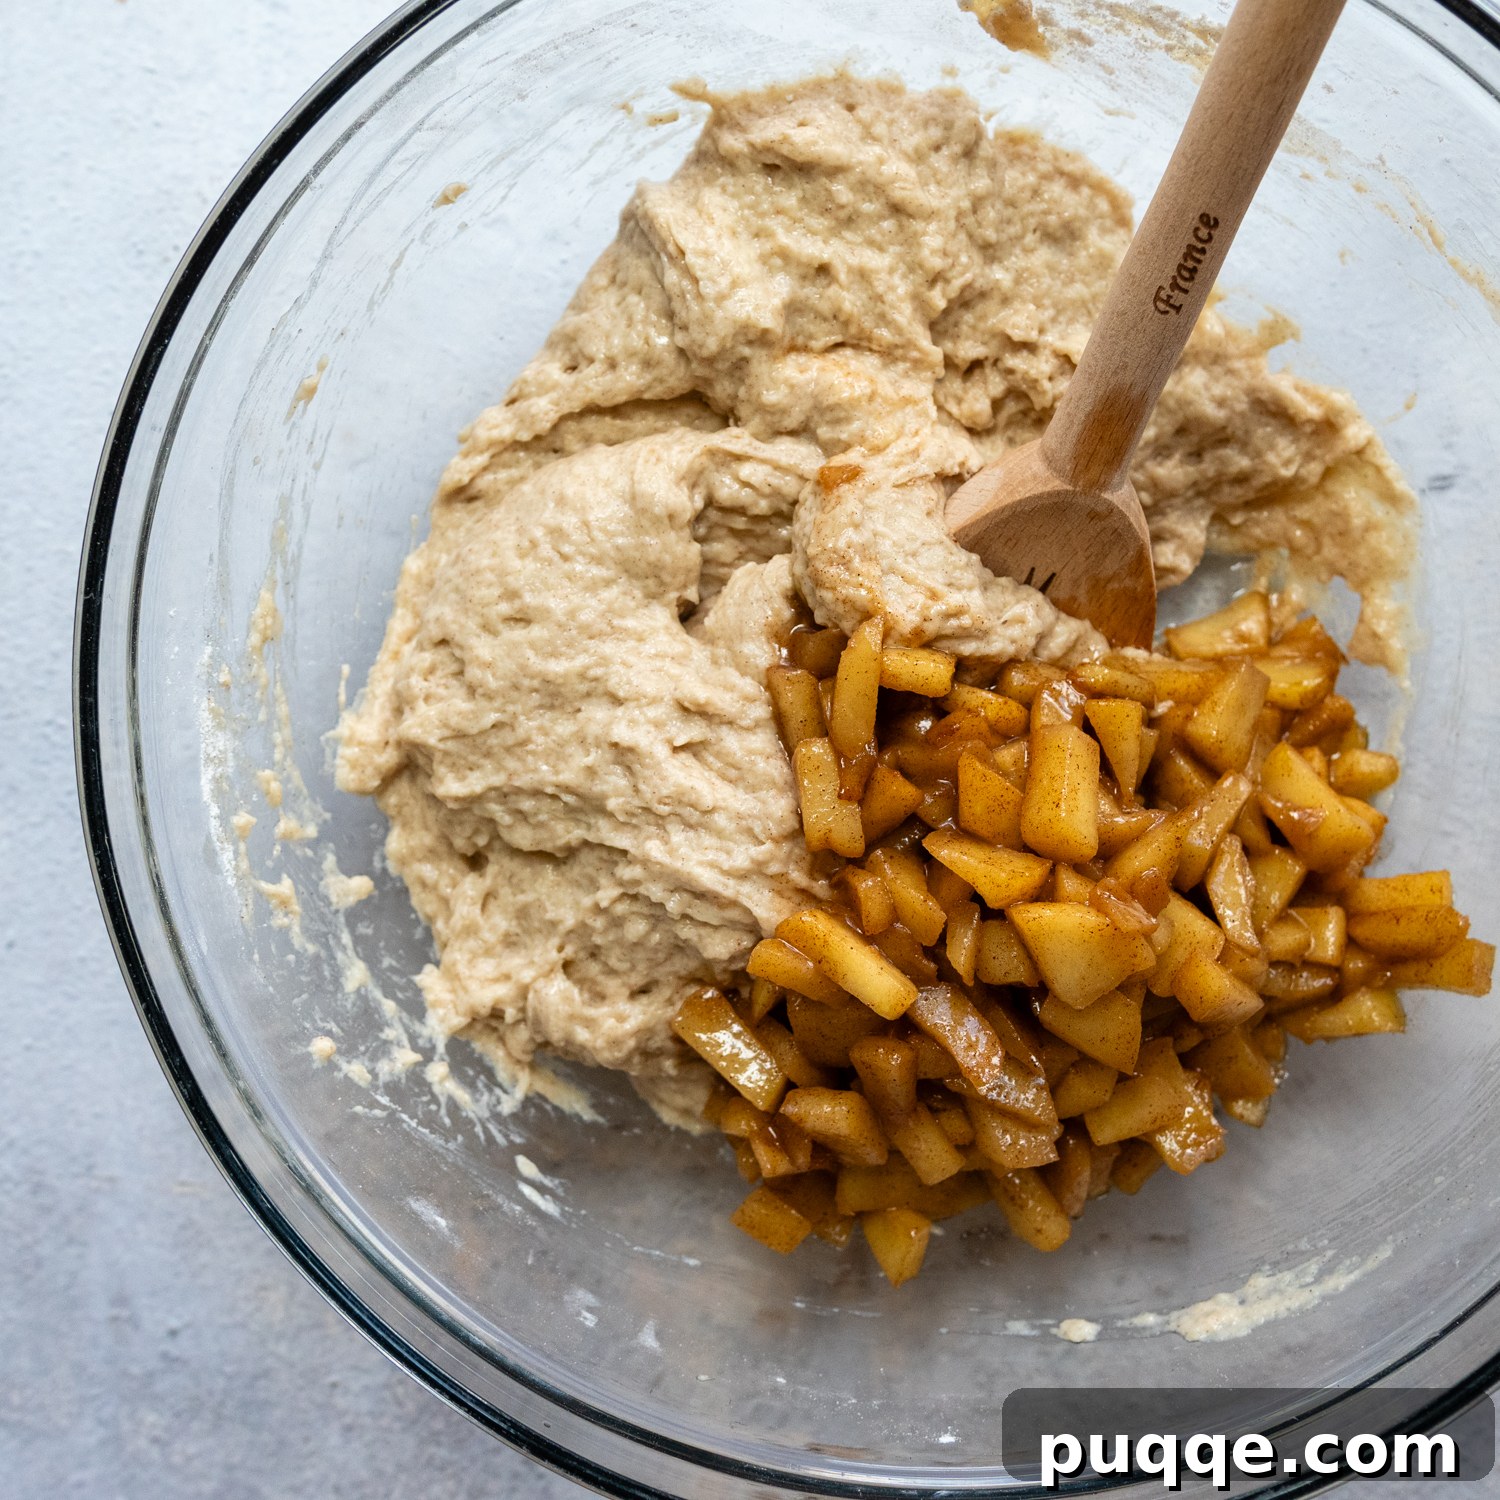
Ready for the sheer simplicity of this dough? It truly couldn’t be easier. In a large bowl, whisk together all the dry ingredients until well combined. Then, pour in the wet ingredients: the egg, milk, and applesauce. Stir gently until just combined, being careful not to overmix, which can toughen gluten-free dough. Finally, fold in the cooled sautéed apples until they are evenly distributed throughout the batter. That’s it! No yeast, no waiting for a rise, no complicated rolling or shaping required. This simple scoop-and-drop method ensures perfect fritters every time. 🤯
Frying Your Easy Gluten-Free Apple Fritters to Golden Perfection
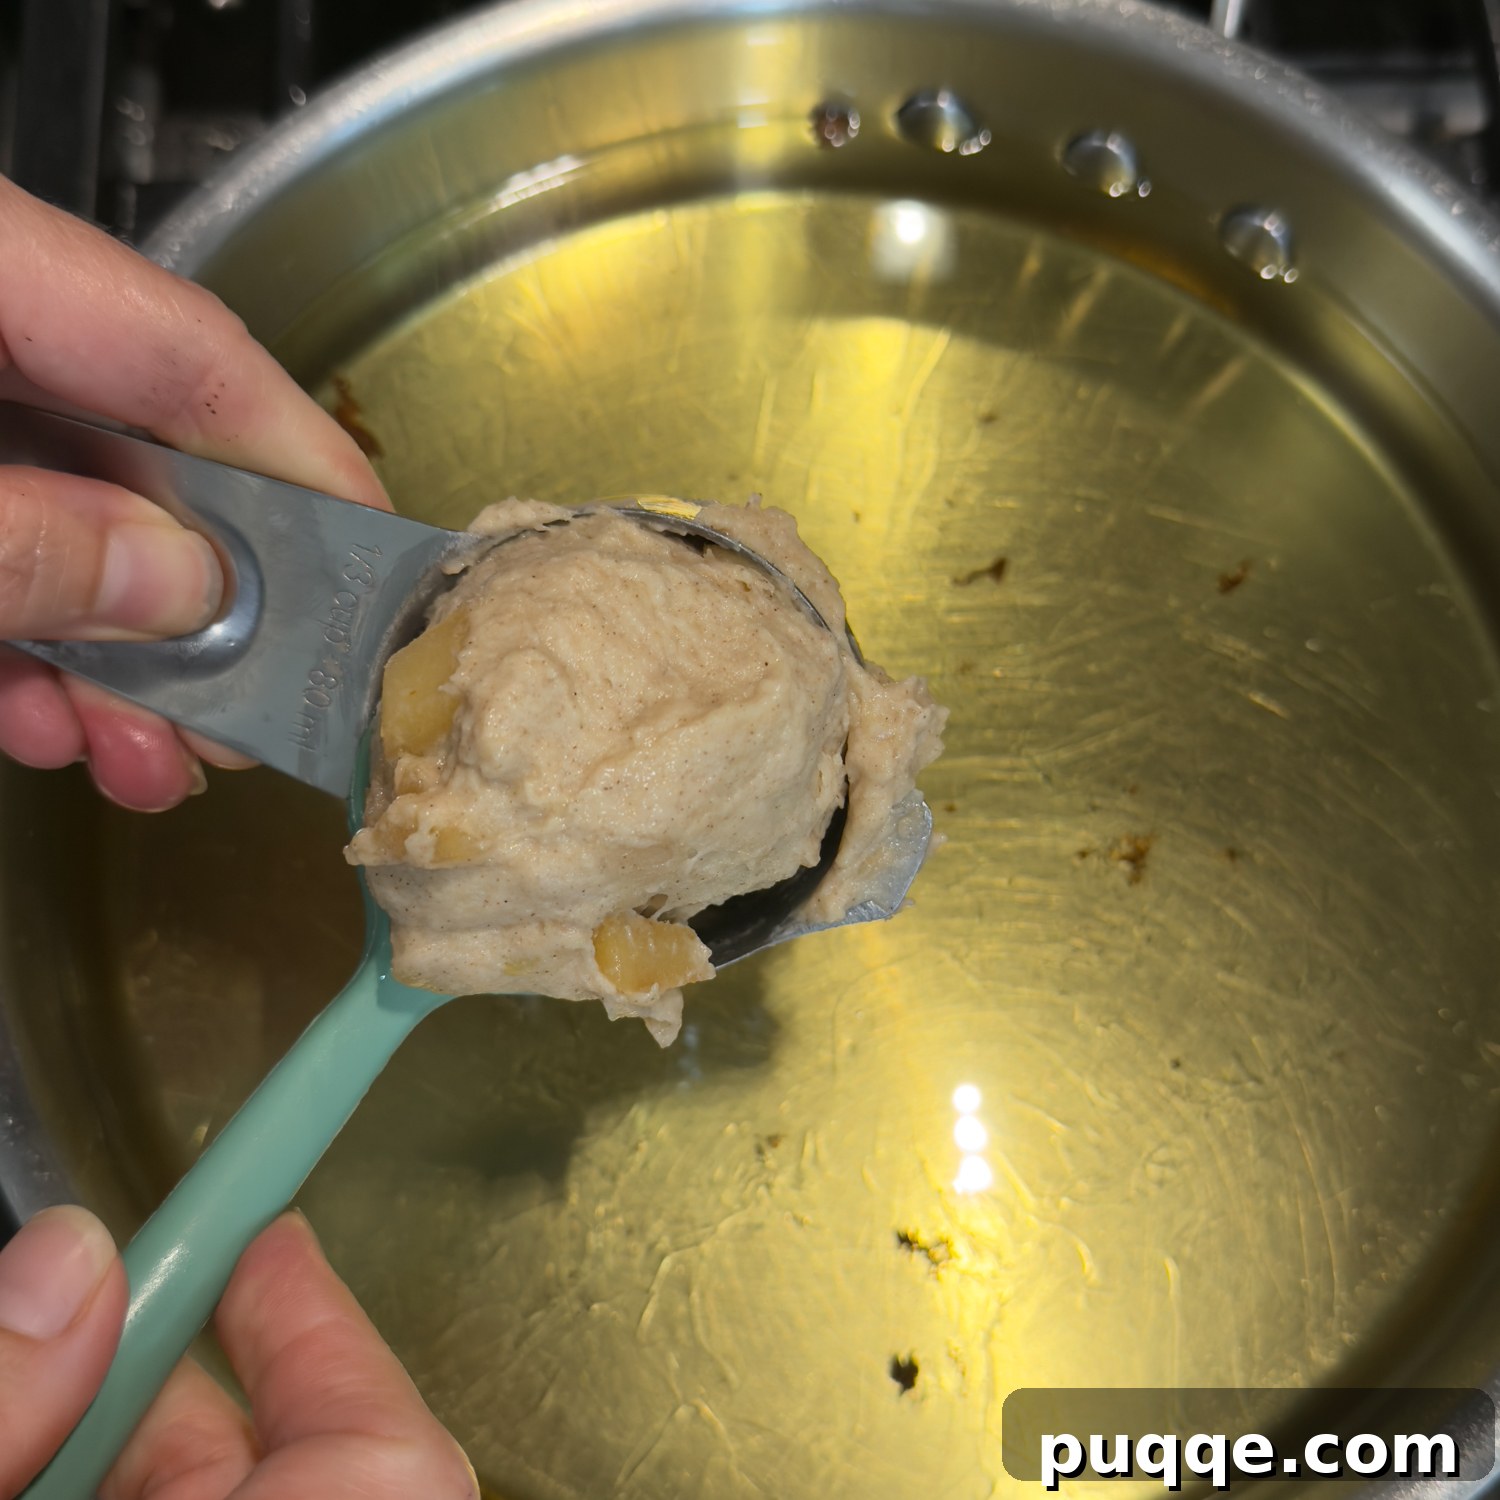
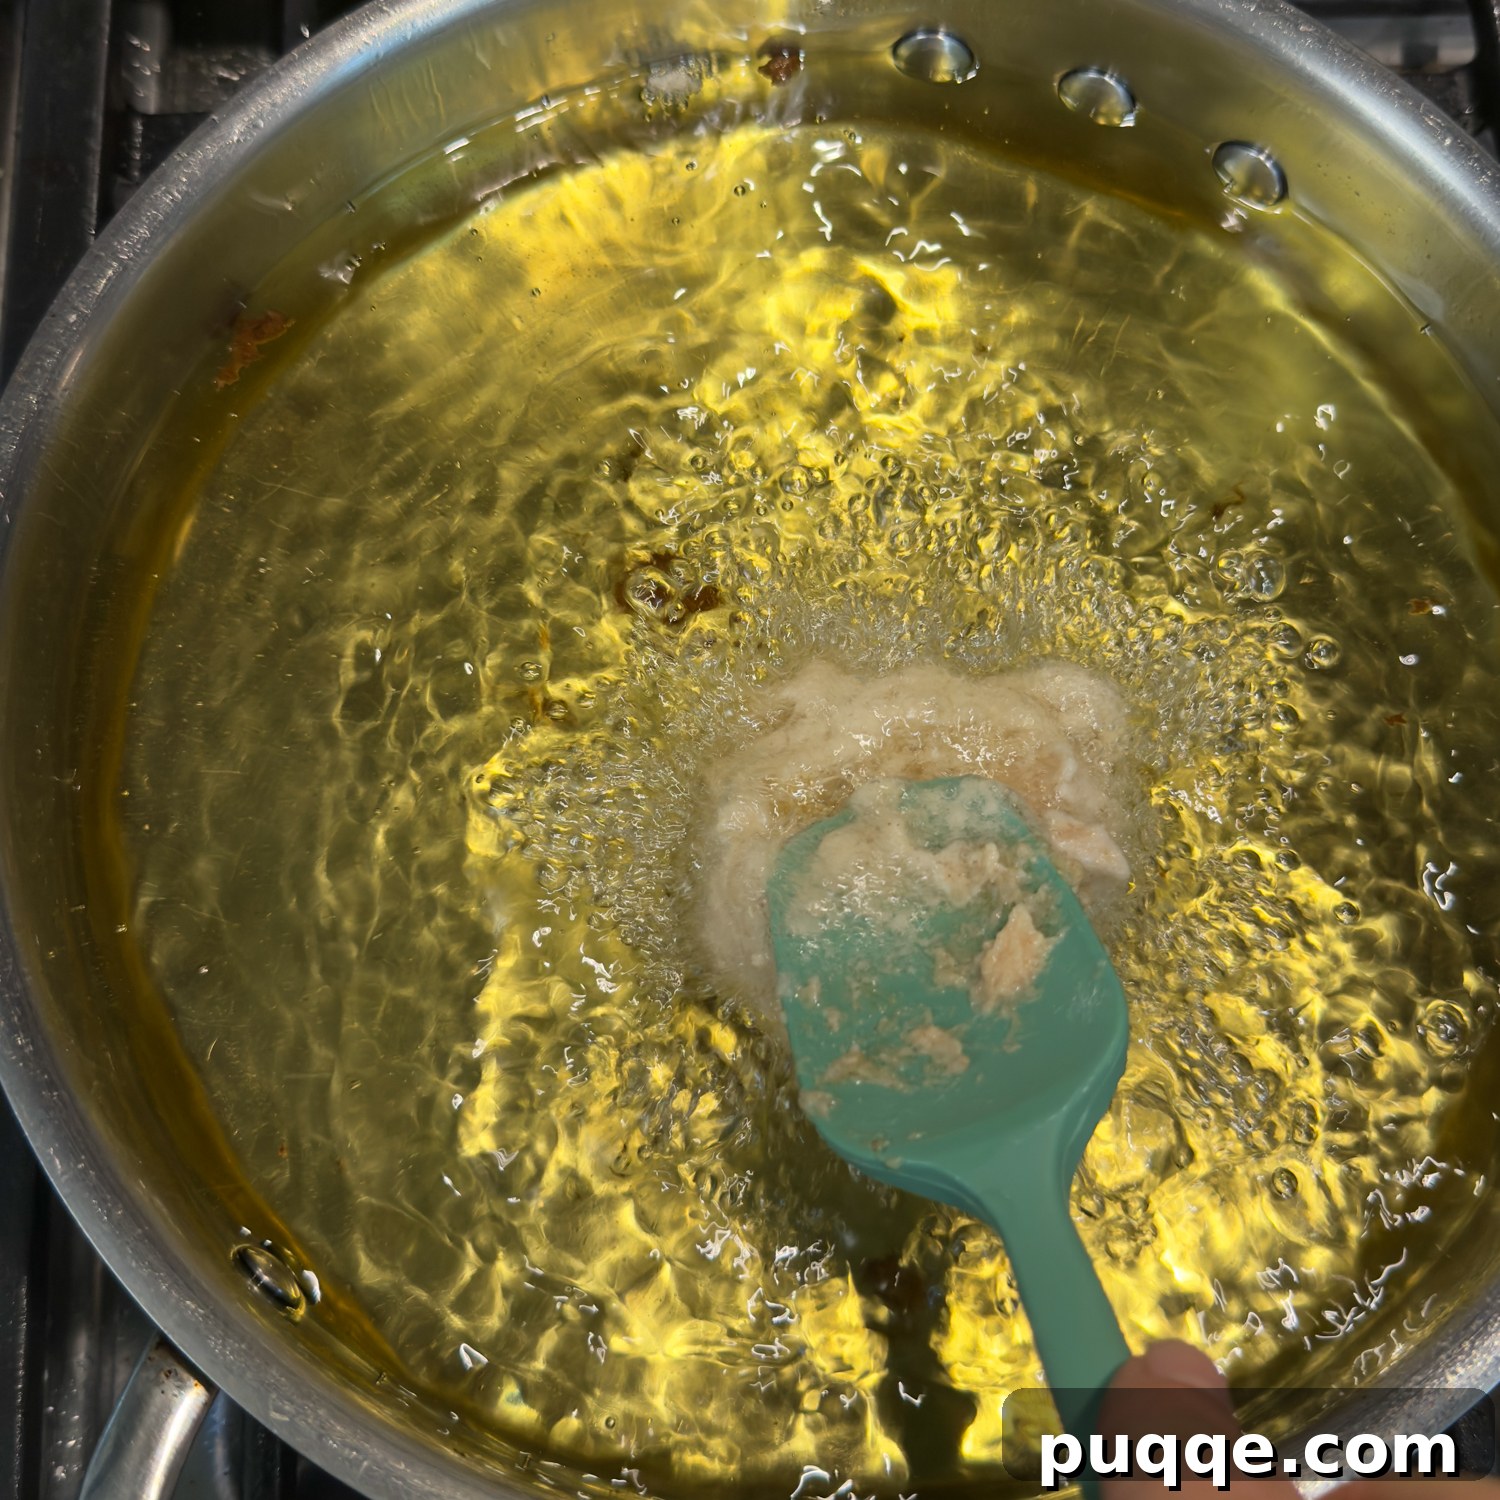
Here’s a slightly unique, yet totally doable, method for getting that batter into the hot oil without any pre-shaping. Use an even ⅓ cup measuring cup to scoop out your fritter dough. Then, employ a silicone spoon or another small spoon to gently plop the dough out of the cup and directly into the hot oil. Immediately after dropping, use that same spoon to gently flatten the dough slightly. This helps it spread out a bit, creating that characteristic fritter shape and ensuring it cooks evenly throughout.
Achieving the Perfect Cook: Tips for Gluten-Free Frying
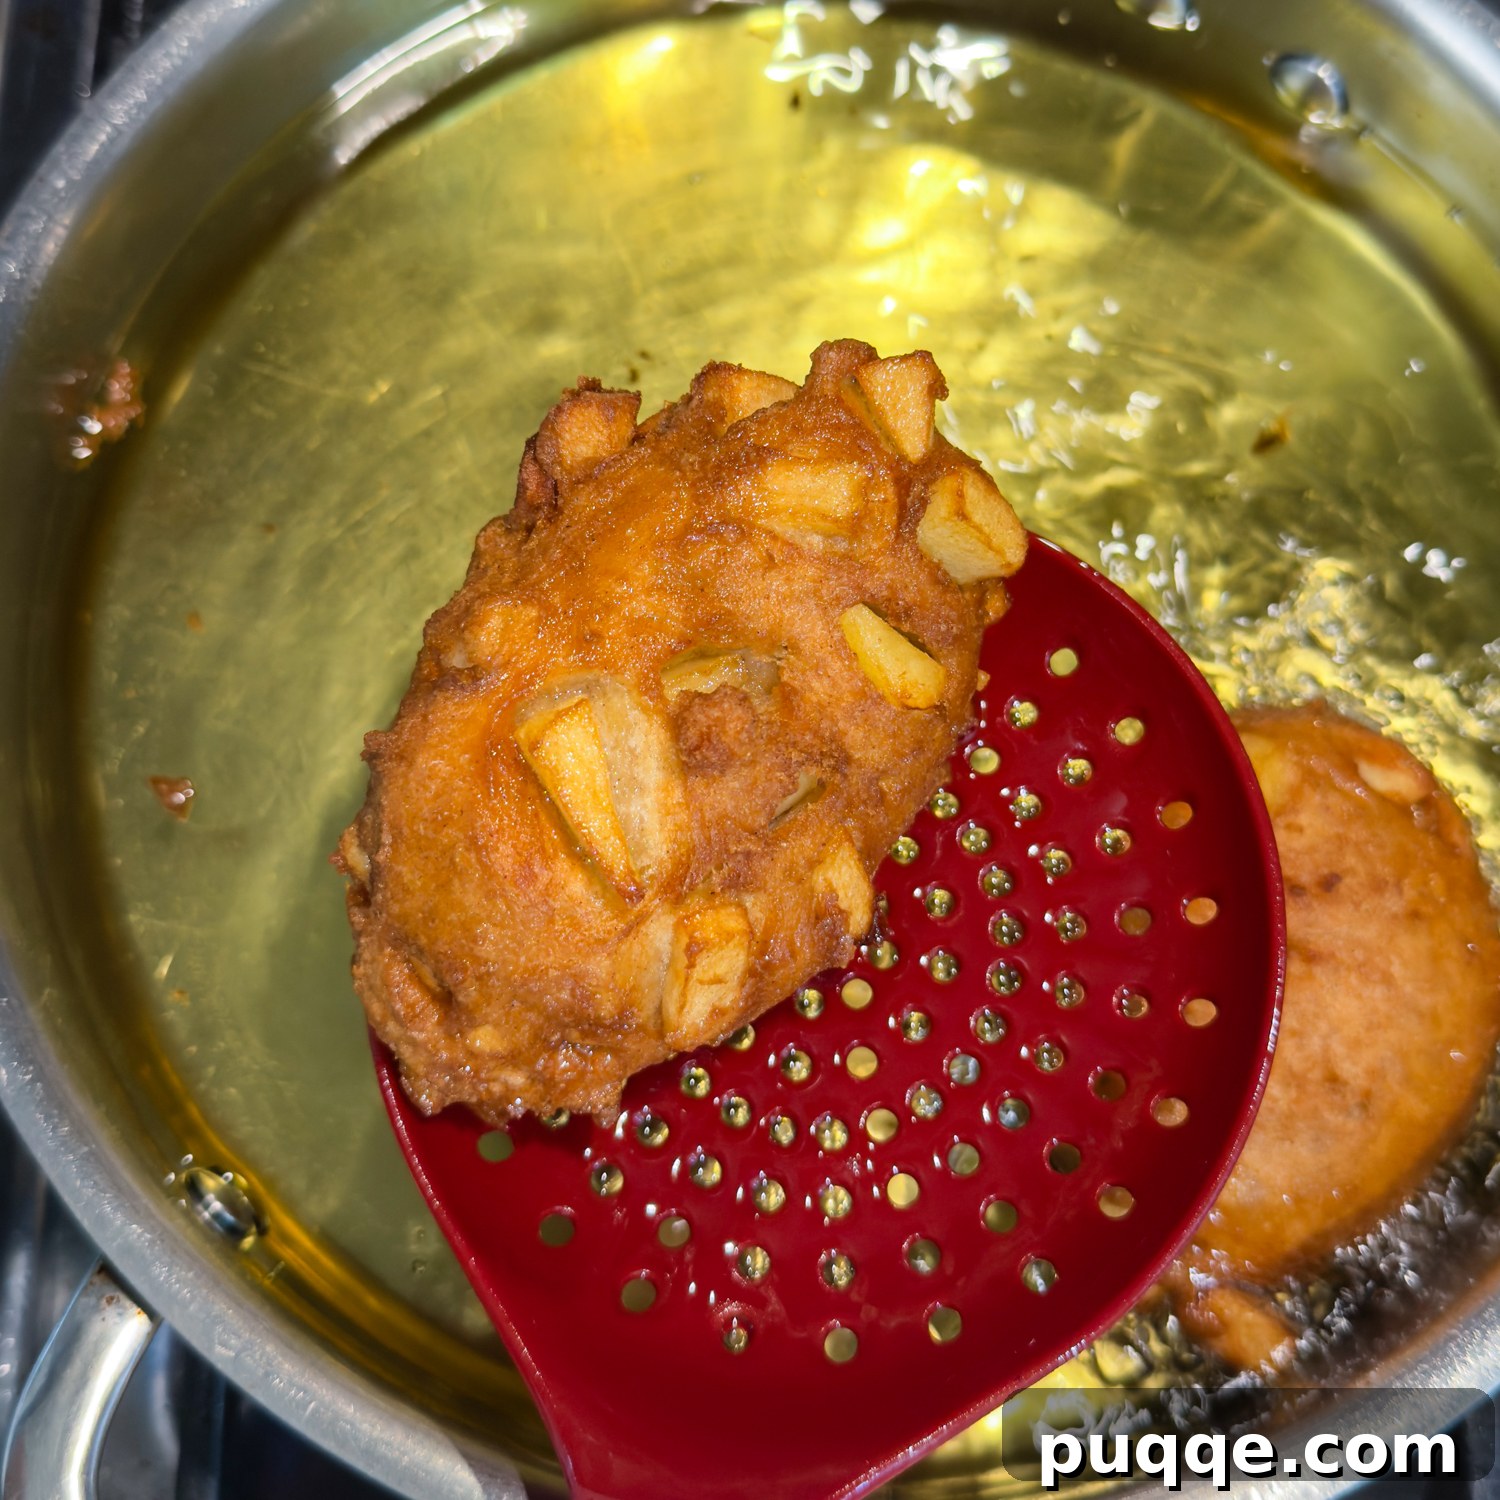
I typically drop about 3 fritters into the oil at a time. It’s crucial not to overcrowd the pan, as this will significantly lower the oil temperature and lead to soggy, undercooked results. Once the dough is scooped into the oil, fry for approximately 2 minutes on one side until golden brown. Use tongs or a wire skimmer to gently flip each fritter and cook for an additional 2 minutes on the other side. Once both sides are beautifully browned and the fritters are cooked through, lift them out and transfer them to your prepared wire rack to drain.
It’s worth noting that gluten-free donuts and fritters often require a slightly longer cooking time compared to their wheat-based counterparts. This extended time ensures that enough moisture cooks off, preventing a dense or gummy texture. If you notice the outside becoming too browned before they are cooked through to the center, check your oil temperature immediately and adjust the heat accordingly. A consistent 350°F is your best friend here.
The Grand Finale: Luscious Vanilla Glaze Coating
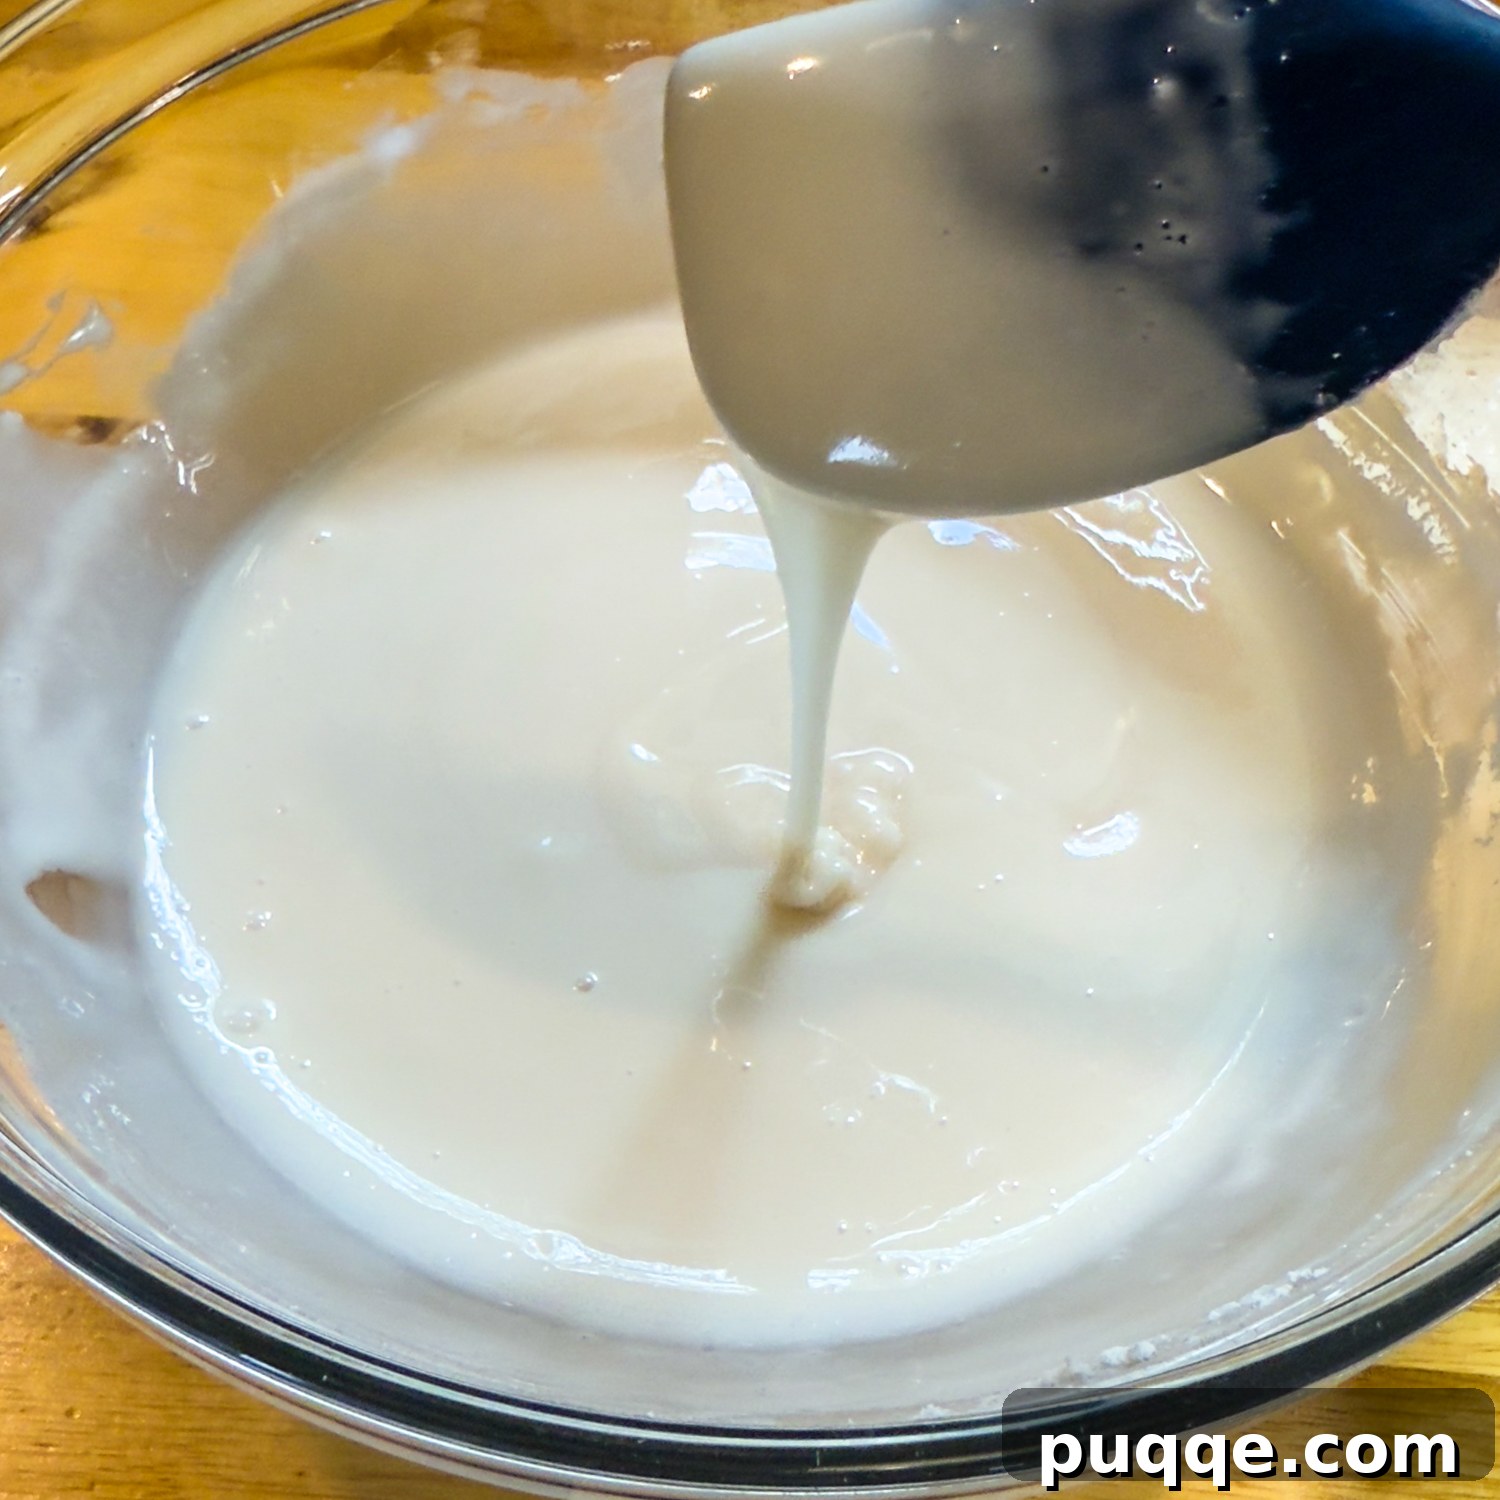
An apple fritter simply isn’t complete without that signature glossy, sweet coating oozing into all its crispy grooves and crevices. Our glaze is incredibly simple, a classic mixture of powdered sugar, milk, and vanilla extract. The trick lies in nailing the perfect consistency: it needs to be thick enough to adhere beautifully to the fritter, yet thin enough to gracefully drip off the spoon in a smooth trail. You can easily adjust the consistency by adding a little more powdered sugar for thickness or a splash more milk for a thinner glaze.
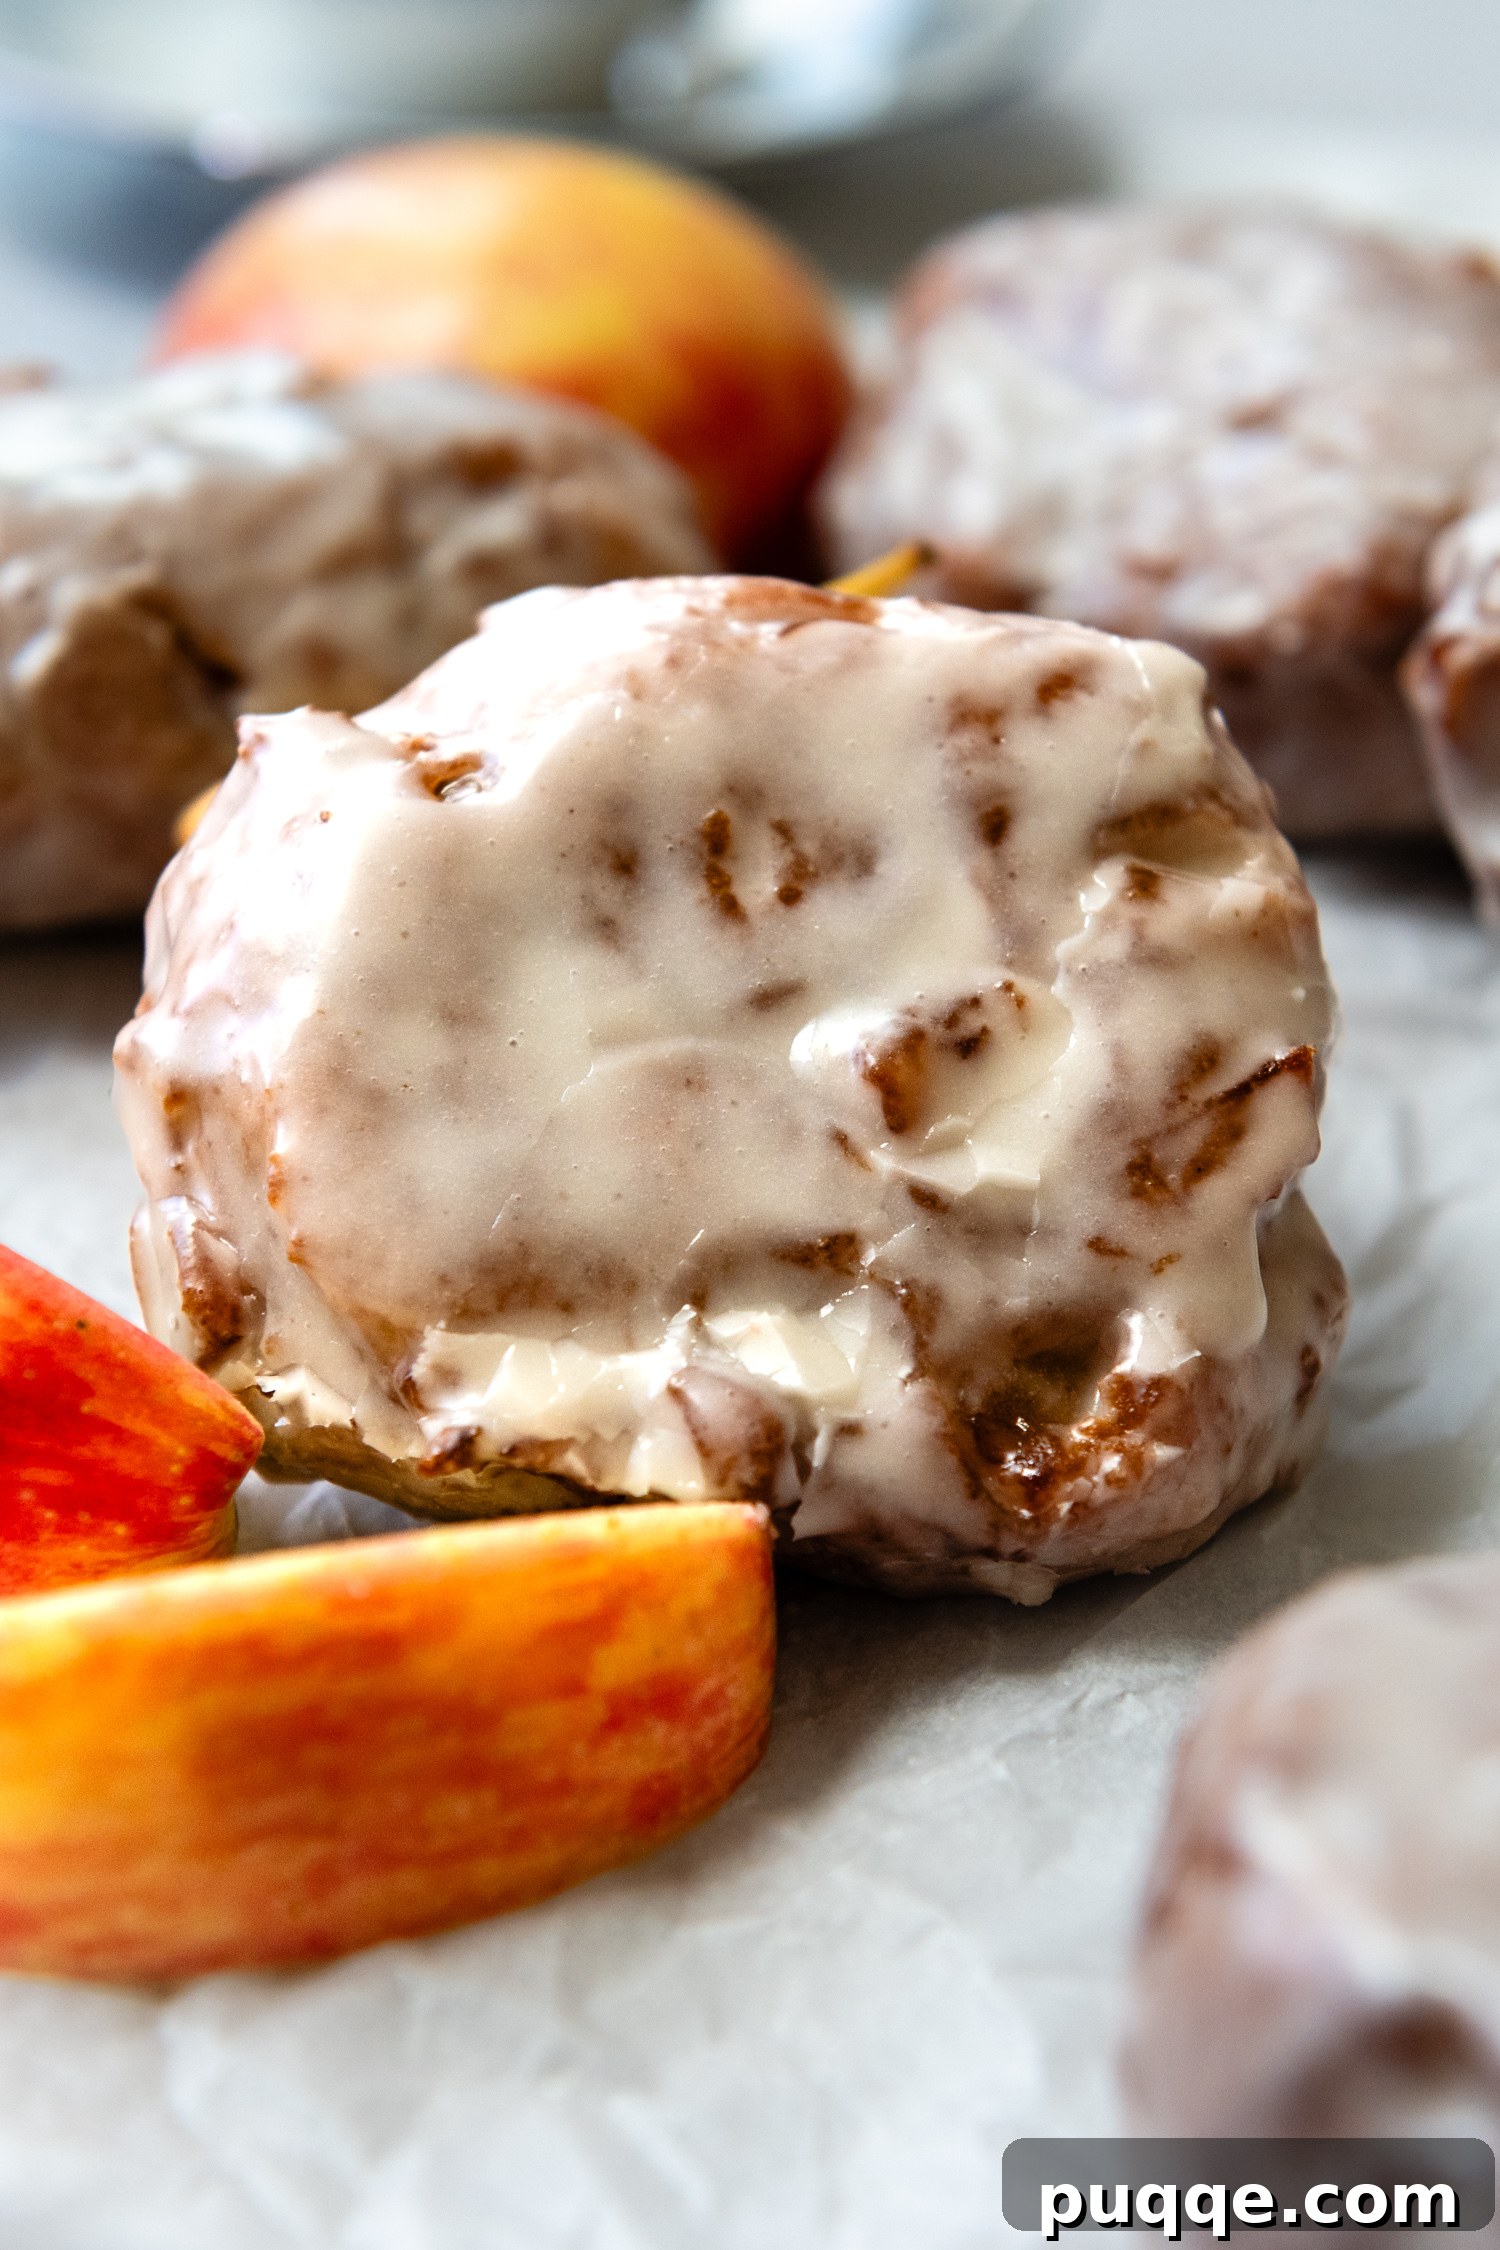
Once your fritters have cooled slightly (they shouldn’t be piping hot, but still warm), use a fork to gently plop each fried fritter into the bowl of glaze. Flip it to ensure both sides are thoroughly coated, then lift it out with the fork, allowing any excess glaze to drip back into the bowl. Set the glazed fritter back on the wire rack for the coating to set, though let’s be honest, chances are very good you’ll be digging into these heavenly treats long before the glaze has a chance to fully firm up!
Common Questions and Expert Tips for Fluffy Gluten-Free Fritters
Even with an easy recipe, a few common questions and tips can make all the difference for achieving apple fritter perfection:
- Why are my fritters dense or gummy? This is a common issue with gluten-free baking. It could be due to overmixing the batter, which develops the starches too much, or not cooking them long enough. Ensure you mix just until combined and fry them for the recommended time, maintaining the oil temperature.
- How do I prevent greasy fritters? The key here is consistent oil temperature (350°F / 175°C). If the oil is too cool, the fritters will absorb too much oil, becoming greasy. If it’s too hot, they’ll burn outside before cooking inside. Always use a thermometer!
- Can I make these dairy-free? Absolutely! As mentioned in the ingredient notes, simply swap out the whole milk for a full-fat non-dairy alternative (like oat or cashew milk) and use a plant-based butter for sautéing the apples.
- What if I don’t have a deep skillet? While a deep, heavy skillet is ideal for heat retention, you can use any sturdy pot or Dutch oven that allows for at least 1.5-2 inches of oil depth and even heat distribution. Just be extra vigilant about monitoring the oil temperature.
- Can I use different fruits? While this recipe is optimized for apples, you could experiment with other firm fruits like pears or even berries. If using softer fruits, you might skip the sautéing step or reduce the time significantly. Adjust spices accordingly.
Creative Variations to Elevate Your Apple Fritters
This versatile apple fritter dough can be transformed into more yummy creations! Don’t limit yourself to the classic fritter shape:
- Gluten-Free Donut Holes: Use a large cookie scoop to portion out smaller balls of dough into the hot oil. These will cook slightly faster than the larger fritters, so reduce the frying time accordingly (e.g., 1-1.5 minutes per side).
- Nutty Crunch: Before the glaze sets, sprinkle slivered almonds, chopped walnuts, or pecans over the top for an added layer of texture and flavor.
- Cinnamon Sugar Coating: For a different finish, skip the glaze! Immediately after removing the hot fritters from the oil, toss them in a bowl of cinnamon sugar. This creates a delightful crispy, sugary exterior, similar to gluten-free churros.
- Maple Glaze: Swap out a tablespoon of milk in the glaze for pure maple syrup for a delicious autumn-inspired flavor twist.
- Caramel Drizzle: After glazing, drizzle a store-bought or homemade caramel sauce over the set fritters for an extra indulgent touch.
Enjoy Now or Later: Storage and Freezing Gluten-Free Fritters
This apple fritter recipe yields 9-10 glorious servings, but be forewarned: they are notoriously difficult to resist and rarely last long! They are truly heavenly when fresh and warm. Since gluten-free treats tend to lose moisture and freshness more quickly than recipes made with wheat flour, I strongly recommend enjoying them the day they are made for the absolute best experience.
However, if you do manage to have leftovers (a rare feat!) or wish to save some for later to prevent an overindulgent stomach ache, freezing is an excellent option. Once the fritters are completely cooled, place them on the wire rack directly into the freezer to harden. This step ensures they won’t stick together. Once firm, remove them from the freezer and wrap each fritter individually in plastic wrap. Then, transfer the wrapped fritters to a ziplock freezer bag or an airtight freezer-safe container. They will keep well in the freezer for up to 2-3 months.
When you’re ready to enjoy a frozen fritter, simply thaw it at room temperature for an hour or two. Alternatively, unwrap it and defrost it in the microwave for about 15-20 seconds. I also highly suggest warming them slightly (around 15 seconds in the microwave) even after thawing, as this helps to soften the texture and bring back that fresh-baked warmth and tenderness. A quick toast in a toaster oven can also restore some crispness to the exterior.
Save This Easy Gluten-Free Apple Fritter Recipe to Your Pinterest Board!
Let’s be friends on Pinterest! I’m always sharing great recipes!
Did you make this recipe? I love hearing from you! Leave a star rating and comment below the recipe card. It helps others when searching for recipes and I appreciate feedback from our community. You will always hear back from me! -Melissa
The Ultimate Gluten-Free Apple Fritter Recipe
Gluten-Free Apple Fritters (Easy Scoop & Drop)

Melissa Erdelac
For those of you missing donut shop-style apple fritters, get ready to enjoy a classic treat again with identical taste and texture! Don’t let the epic homemade goodness fool you, though. Easy gluten-free apple fritters are ready to enjoy in less than 45 minutes, start to finish, and are as simple as mix, scoop, and drop. No rising, no yeast, no donut experience required. It’s that simple and I’ll show you how.
Pin Recipe
Rate This Recipe
Ingredients
For the Cinnamon Apple Filling
- 3 tablespoons unsalted butter
- 2 cups apples, peeled, cored, and chopped into ½-inch pieces (Honeycrisp or Golden Delicious recommended)
- 1 tablespoon light brown sugar (increase to 3 tbsp for Granny Smith apples)
- ½ teaspoon ground cinnamon
- 1 teaspoon vanilla extract
For the Fritters
- 1 ½ cup (231 g) gluten-free all-purpose flour (Cup4Cup brand highly recommended)
- ¼ cup (50 g) granulated sugar
- 2 teaspoons baking powder
- 1 teaspoon ground cinnamon
- ¼ teaspoon salt
- ½ cup whole milk (or preferred high-fat dairy-free alternative)
- ½ cup unsweetened applesauce
- 1 large egg
- Oil, for frying (about 48 ounces, enough to fill pan about 1 ½ inches deep, such as canola, vegetable, or peanut oil)
For the Glaze
- 2 cups (240 g) powdered sugar
- 3-4 tablespoons whole milk (adjust for desired consistency)
- 2 teaspoons vanilla extract
Equipment
- Large, deep, heavy skillet (e.g., All-Clad 3-Quart Sauté Pan)
- Instant Read Thermometer or Candy Thermometer (e.g., Thermoworks Thermapen)
- Large mixing bowls
- Whisk
- Measuring cups and spoons
- Baking sheet with wire rack
- Strainer spoon / wire skimmer (e.g., TEMCHY Hot Pot Skimmer Spoon)
Instructions
-
Prepare the Cinnamon Apple Filling: In a large skillet, melt the butter over medium heat. Add the chopped apples, brown sugar, and cinnamon, stirring to combine. Cook for about 5 minutes, or until the apples begin to soften. Remove from heat and stir in the vanilla extract. Set aside to cool completely.
-
Preheat Frying Oil: To save time, begin heating the oil while the apples cool. Pour oil into a large, heavy, deep skillet to a depth of about 1.5-2 inches. Heat over medium heat until it reaches a temperature of 350°F (175°C). Use a thermometer (candy or instant-read) to monitor and maintain the oil temperature throughout frying. This ensures proper cooking and prevents overly greasy or burnt fritters.
-
Prepare Your Frying Station: Line a baking sheet with paper towels and place a wire rack over the top. This setup is crucial for draining excess oil from the fritters after frying.
-
Mix the Easy Fritter Dough: In a large bowl, whisk together the gluten-free flour, granulated sugar, baking powder, cinnamon, and salt. Make a well in the center and stir in the milk, applesauce, and egg until just combined. Gently fold in the cooled cinnamon apple filling until evenly distributed. Do not overmix.
-
Fry the Fritters: Once the oil is at 350°F (175°C), use a ⅓ cup measuring cup to scoop out the batter. Use a small silicone spoon to scrape the batter into the hot oil and flatten it slightly with the spoon. Fry 3 fritters at a time to avoid overcrowding. Cook for 2 minutes on one side until golden brown, then flip with tongs or a wire skimmer and cook for an additional 2 minutes on the other side. Transfer the cooked fritters to the prepared wire rack to drain. Continue with the remaining batter, ensuring the oil temperature stays consistent.
-
Prepare and Glaze: In a medium bowl, whisk together the powdered sugar, 3-4 tablespoons of milk (start with 3 and add more as needed for desired consistency), and vanilla extract until smooth. The glaze should be thick enough to coat but still drip smoothly. Dip each slightly cooled fritter into the glaze, flipping with a fork to coat both sides. Lift out with the fork, allowing excess glaze to drip off, and place back on the wire rack to set. Enjoy these delicious gluten-free apple fritters immediately, preferably warm!
Notes
Storing and Freezing
For the best texture and flavor, these gluten-free apple fritters are truly best enjoyed the day they are made. Gluten-free baked goods tend to dry out more quickly.
If you have leftovers or wish to make them ahead, freezing is recommended. Allow the fritters to cool completely on the wire rack. For best results, place the entire wire rack with fritters in the freezer for about an hour until they are firm. This prevents them from sticking together. Remove, wrap each fritter individually in plastic wrap, and then transfer to a ziplock freezer bag or airtight container. Freeze for up to 2-3 months.
When ready to enjoy, thaw at room temperature or unwrap and defrost in the microwave. For optimal texture, I suggest warming them slightly in the microwave for about 15-20 seconds to soften them again.
Nutrition Information (Approximate Per Serving)
- Calories: 270kcal
- Carbohydrates: 54g
- Protein: 3g
- Fat: 6g
- Saturated Fat: 3g
- Polyunsaturated Fat: 0.4g
- Monounsaturated Fat: 1g
- Trans Fat: 0.2g
- Cholesterol: 30mg
- Sodium: 111mg
- Potassium: 169mg
- Fiber: 3g
- Sugar: 38g
- Vitamin A: 193IU
- Vitamin C: 1mg
- Calcium: 85mg
- Iron: 1mg
Please note that nutritional values are estimates and may vary based on specific ingredients and preparation methods. This calculation is based on approximately 9 servings.
Did you make this recipe? Please leave a star rating and review below. Your feedback is incredibly valuable and helps other home bakers discover delicious gluten-free treats!