
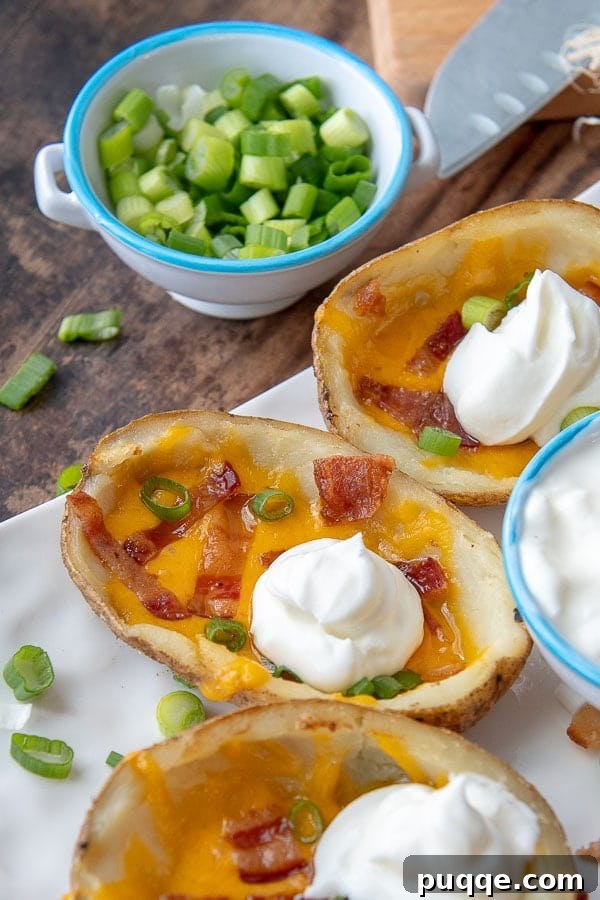
Unlock the secrets to crafting the ultimate crispy potato skins right in your own kitchen! Forget subpar restaurant versions; this definitive guide empowers you to create perfectly golden, irresistibly crunchy potato shells, generously loaded with your favorite savory fillings. Whether you’re seeking a crowd-plepleasing appetizer for game day, a delightful side dish for dinner, or a comforting snack, our twice-baked potato skins recipe is designed for ease, flavor, and maximum crispness. Get ready to impress with homemade potato skins that are truly exceptional!
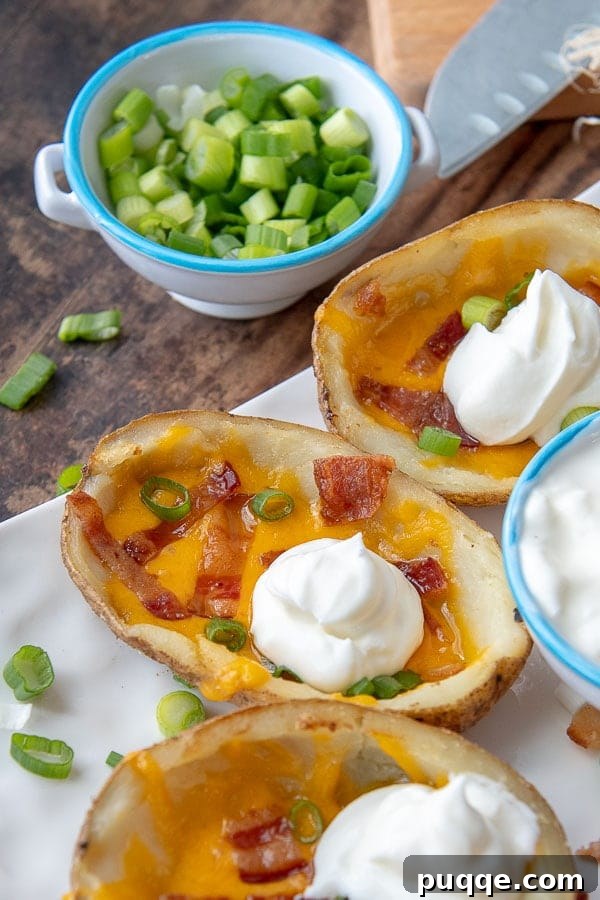
How to Master Crispy Oven-Baked Potato Skins
While the concept of making potato skins seems straightforward, achieving that perfect, binge-worthy, comfort food decadence at home can often be elusive. Many home cooks find their potato skins lack the essential crispiness and rich flavor that defines truly extraordinary versions.
This comprehensive guide reveals the “secret weapon” hacks—culled from years of culinary experience and inspired by beloved recipes like the Pioneer Woman’s famous rendition—that transform ordinary potato skins into an unforgettable culinary experience. Learn the precise techniques to produce crispy loaded potato skins, brimming with molten cheese and savory bacon, guaranteed to tantalize your taste buds.
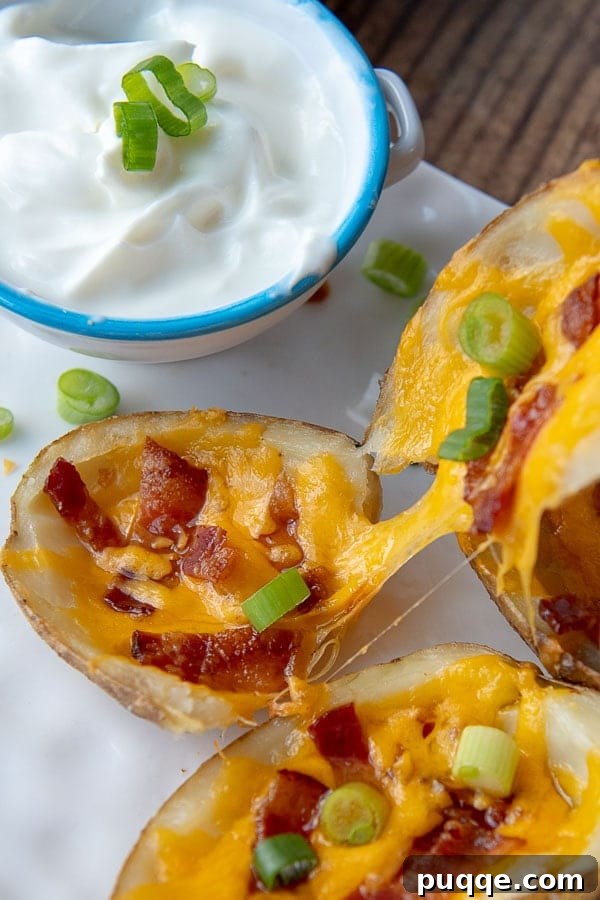
The Art of the Twice-Baked Potato Skin: Achieving Ultimate Crispiness
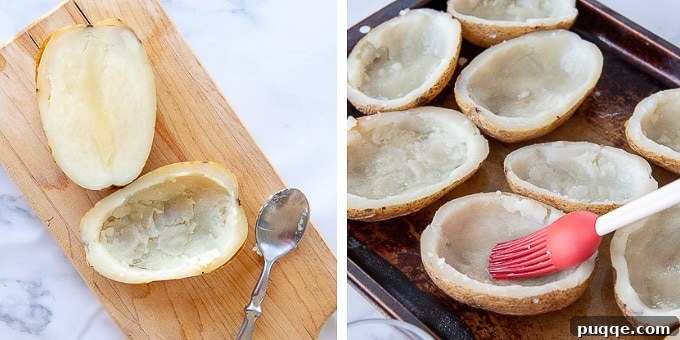
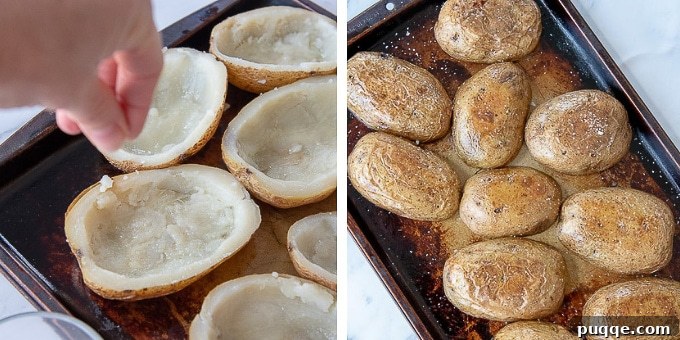
The secret to unparalleled crispiness lies in the “twice-baked” method. This technique involves an initial baking to cook the potato, followed by scooping out the flesh, and then a second bake of the empty shells. This critical second bake, enhanced by a generous brush of oil and a sprinkle of salt, is what dehydrates the potato skin, creating that coveted, shattering crunch. Without it, your potato skins risk being soft, chewy, and ultimately disappointing.
Key Ingredients for Perfect Potato Skins
- Russet Potatoes: These are the undisputed champions for potato skins due to their thick skin and fluffy interior. Their robust structure holds up well to the scooping and double-baking process, ensuring a stable and crispy shell.
- Good Quality Oil: Vegetable oil, canola oil, or even olive oil (for a more pronounced flavor) work wonders. The oil is crucial for both cooking the initial potato and achieving the golden crispness during the second bake.
- Generous Salt: Salt not only seasons the potato but also aids in drawing out moisture, contributing to a crispier exterior. Don’t be shy!
- Sharp Cheddar Cheese: While any meltable cheese works, sharp cheddar offers a classic, robust flavor that pairs beautifully with bacon and potato.
- Crispy Bacon: The ultimate savory companion. Pre-cook your bacon until extra crispy, then chop it into small pieces for even distribution and textural contrast.
- Fresh Toppings: Green onions and sour cream are non-negotiable for that authentic loaded potato flavor.
Beyond Classic: Creative Potato Skin Fillings
While a crispy, twice-baked potato shell sets the stage, the true magic unfolds when you load them with mouthwatering, imaginative fillings. Here are some ideas to get your creativity flowing, ensuring every bite is an explosion of flavor:
- Classic Indulgence: A timeless combination of sharp cheddar cheese, crispy bacon bits, fresh green onions, and a dollop of cool sour cream. This is the benchmark for a reason!
- Southwest Fiesta: For a vibrant twist, fill your skins with a hearty mix of seasoned black beans, sweet corn, diced bell peppers, a pinch of zesty taco seasoning, melted Colby Jack cheese, and serve with a side of fresh salsa.
- Hawaiian Delight: Transport your taste buds with chopped savory ham, sweet pineapple chunks, finely diced red onion, gooey cheddar, a drizzle of tangy BBQ sauce, and a sprinkle of fresh cilantro.
- Spicy Buffalo Chicken: Shredded chicken breast tossed generously with your favorite hot sauce, crunchy celery bits, creamy blue cheese crumbles, and served with a cooling ranch dressing for dipping.
- Mini Pizza Skins: A fun and family-friendly option! Layer with melted mozzarella cheese, savory pepperoni slices, finely diced green bell pepper, and serve alongside warm marinara sauce for dipping.
- Chili Cheese Extravaganza: A spoonful of hearty homemade chili (with or without beans), topped with a blend of cheddar and Monterey Jack cheeses, and a dollop of sour cream or a sprinkle of chives.
- Broccoli & Cheddar Bliss: Steamed broccoli florets combined with rich cheddar cheese sauce, a touch of garlic powder, and a sprinkle of black pepper for a comforting vegetarian option.

How to Make Decadent Deep-Fried Potato Skins
For an extra layer of indulgence and an even crispier texture, deep-frying the potato shells before loading them is an excellent alternative. If you’re ready to embrace true comfort food, follow these steps to create incredibly delicious deep-fried potato skins:
- Prepare Your Oil: Carefully heat a neutral oil (like vegetable or canola) to 375ºF (190ºC) in a deep fryer or a sturdy, heavy-bottomed saucepan. Ensure you have enough oil to submerge the potato shells completely. Always exercise caution when working with hot oil.
- Fry the Shells in Batches: Once your oil reaches the target temperature, gently place the scooped-out potato shells into the hot oil in small batches. Do not overcrowd the fryer, as this will lower the oil temperature and result in soggy skins. Fry each batch for approximately 5 minutes, or until they turn a beautiful golden brown and are exceptionally crispy.
- Drain and Season Immediately: Using a slotted spoon or spider, carefully remove the fried potato shells and transfer them to a baking sheet lined with paper towels to absorb any excess oil. Immediately sprinkle both sides generously with salt while they are still hot to ensure the seasoning adheres perfectly.
- Load and Finish Baking: Arrange the crispy, seasoned shells on a foil-lined baking sheet. Load each shell with your desired fillings, such as cheese and bacon. Place them into a preheated 400ºF (200ºC) oven for 5-10 minutes, just long enough for the cheese to melt and bubble, and the fillings to warm through.
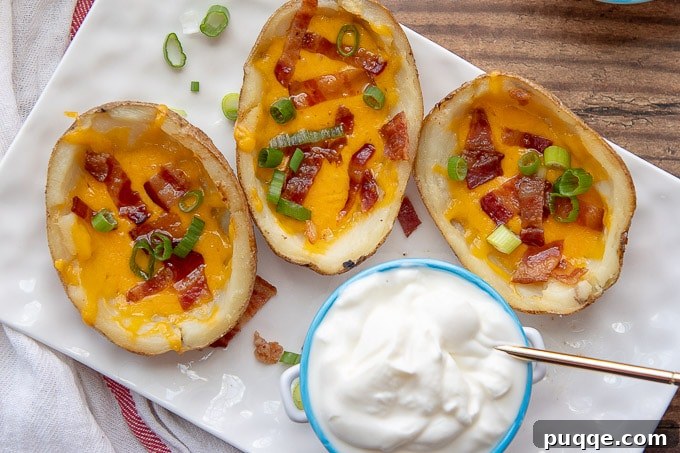
Freezing and Reheating Potato Skins for Future Enjoyment
Potato skins are fantastic for meal prepping or making ahead for entertaining. You can freeze them both as unfilled shells or with their delicious toppings already in place.
Freezing Unfilled Potato Shells:
- Initial Bake: After the first bake and scooping, brush the insides and outsides of the shells with oil, season them, and bake them for 16 minutes, flipping halfway through, as directed in the recipe.
- Cool Completely: Allow the double-baked potato shells to cool down entirely to room temperature. This is crucial to prevent ice crystals from forming and affecting their texture.
- Package for Freezing: Transfer the cooled shells to a freezer-safe container or a heavy-duty freezer bag. Arrange them in a single layer if possible, or separate layers with parchment paper to prevent sticking. Seal tightly, removing as much air as possible.
- To Bake from Frozen: Thaw the frozen shells in the refrigerator overnight or on the counter for a few hours. Once thawed, transfer them to a baking sheet, load them with your favorite fillings (cheese, bacon, etc.), and bake at 400ºF (200ºC) for 5-10 minutes, or until they are hot, the cheese is gloriously melted, and the toppings are bubbly.
Freezing Leftover Baked Loaded Potato Skins:
If you have any fully loaded and baked potato skins leftover, don’t let them go to waste!
- Cool Thoroughly: Ensure the loaded potato skins are completely cooled before freezing.
- Store Properly: Transfer them to an airtight, freezer-safe container.
- To Reheat: Thaw the frozen loaded potato skins completely in the refrigerator or on the counter. Once thawed, place them on a baking sheet and bake in a 400ºF (200ºC) oven for 5-10 minutes, or until they are heated through and the cheese is melted and bubbly again. For extra crispiness, you can briefly broil them at the very end, keeping a close watch to prevent burning.
Let’s Make This Together!
The Science of Crispiness: Why Twice-Baking Works
The magic of a crispy potato skin isn’t just a happy accident; it’s a result of deliberate technique. When you first bake the potatoes, you’re cooking the flesh until tender. But the key to crispiness comes with the second bake. Brushing the scooped-out shells with oil and sprinkling them with salt before their second trip to the oven achieves a crucial transformation:
- Dehydration: The heat of the oven, combined with the oil, effectively dehydrates the potato skin. Water evaporates, leaving behind a drier, more rigid structure.
- Fat for Flavor and Texture: The oil not only conducts heat efficiently, helping to crisp the skin evenly, but it also provides a rich flavor and contributes to that desirable crunchy mouthfeel.
- Salt for Enhancement: Salt not only seasons but can also help draw out moisture from the surface, further enhancing crispiness.
By following these methods, you’re not just baking potatoes; you’re engineering a perfectly crisp vessel for your delicious fillings.
Clever Make-Ahead Tips for Easy Entertaining
Planning a party or simply want to streamline your weeknight cooking? Potato skins are excellent candidates for make-ahead preparation. You can do most of the work in advance, then simply finish them off when you’re ready to serve.
To prepare ahead, follow the recipe instructions in their entirety up until the very last step of adding the cheese and bacon. Once the potato shells have been double-baked and are perfectly crispy, set them aside on a wire rack to cool completely to room temperature. This step is crucial to prevent condensation, which can lead to soggy skins.
Once thoroughly cooled, you can store the prepared, unfilled skins. Cover them tightly with aluminum foil or place them in an airtight container, and then refrigerate for up to 2-3 days. When you’re ready to enjoy them, preheat your oven to 400°F (200ºC). Arrange the chilled skins on a baking sheet, add your desired amount of shredded cheese and crispy bacon, and bake for 7-10 minutes, or until they are piping hot, and the cheese is beautifully melted and bubbly. This method ensures fresh, crispy potato skins with minimal fuss right before serving!

Serving Suggestions and Perfect Pairings
Classic potato skins shine as an appetizer or a hearty side. For an appetizer spread, arrange them on a large platter with small bowls of sour cream, extra chopped green onions, and perhaps some jalapeño slices for a kick. They pair wonderfully with other finger foods like mini quiches, buffalo wings, or a fresh salad.
As a side dish, they complement grilled steaks, roasted chicken, or hearty chili. Consider a themed meal: serve the Southwest Potato Skins with a taco night spread, or the Buffalo Chicken variety alongside a blue cheese salad. Don’t forget a refreshing beverage—a cold beer, iced tea, or even a sparkling lemonade will perfectly round out the meal.
Troubleshooting Common Potato Skin Problems
Even with the best intentions, sometimes things can go awry. Here’s how to address common issues to ensure your potato skins are always perfect:
- Soggy Skins: This is the most common complaint. It usually means the skins weren’t baked long enough during the second bake, or they cooled slowly under cover, trapping steam. Ensure skins are thoroughly brushed with oil and seasoned, then baked until truly golden and firm. Always let them cool on a wire rack to promote air circulation.
- Broken Skins: Scooping too aggressively or not leaving enough potato flesh can lead to flimsy skins. Aim for about a quarter-inch (0.5 cm) border of potato flesh to maintain structural integrity.
- Undercooked Potatoes: The first bake is critical. Potatoes must be fork-tender. If they’re still firm, they won’t scoop easily, and the remaining flesh will be hard. Increase the initial baking time if needed.
- Lack of Flavor: Don’t underestimate the power of salt! Season generously both inside and outside the skins before the second bake. High-quality cheese and crispy bacon also make a huge difference.
Save this recipe to your Pinterest board!
Let’s be friends on Pinterest! I’m always sharing great recipes!
Did you make this recipe? I love hearing from you! Leave a star rating and comment below the recipe card. It helps others when searching for recipes and I appreciate feedback from our community. You will always hear back from me! -Melissa

How to Make Crispy Potato Skins (Oven Baked)
 Melissa Erdelac
Pin
Rate
Remove Ads
Ingredients
- 8 russet potatoes,, scrubbed clean
- 8 slices bacon,, cooked crispy and chopped
- vegetable oil
- salt
- 2 cups cheddar cheese,, shredded
Toppings
- green onions,, thinly sliced
- sour cream
Instructions
-
Preheat your oven to 400ºF (200ºC). Prepare your potatoes by scrubbing them clean under running water. Use a fork to prick each potato several times all over.
*To significantly decrease cooking time, you can pre-cook the potatoes in the microwave: Place all pricked potatoes in the microwave and cook on high for 5 minutes. Flip them over, then microwave for an additional 5 minutes. This jump-starts the cooking process, reducing oven time.
**Alternatively, for perfectly baked potatoes, follow these specific directions to cook baked potatoes in the Instant Pot.
-
Place the prepared potatoes on a baking sheet. Drizzle vegetable oil generously over them. Using your hands or a pastry brush, rub the oil thoroughly over the entire surface of the potato skins. Bake for 15-20 minutes, then flip the potatoes over and bake for another 15-20 minutes, or until the potatoes are completely fork-tender. The exact cooking time will depend on the size of your potatoes and whether you pre-cooked them in the microwave.
-
Once the potatoes are cool enough to handle comfortably, carefully slice each potato in half lengthwise. Using a spoon, gently scoop out the cooked flesh from the center, making sure to leave about a quarter-inch (0.5 cm) border of potato flesh attached to the skin. This ensures the skins maintain their structure and crisp up beautifully.
-
Brush both the inside and outside of the scooped-out potato shells with more vegetable oil. Then, season both sides generously with salt. This step is crucial for achieving maximum crispiness and flavor in your potato skins.
-
Place the prepared skins cut-side down on the baking sheet. Bake for 8 minutes. Flip them over so the cut-side is facing up, and continue to bake for another 8-10 minutes, or until the skins are golden brown and wonderfully crispy.
-
Remove the crispy skins from the oven. Evenly divide the shredded cheddar cheese and cooked bacon bits among the potato skins, filling them generously. Return the loaded skins to the oven for an additional 5 minutes, or until the cheese is bubbling and completely melted. Serve warm, garnished with fresh green onions and a dollop of sour cream. Enjoy your homemade, restaurant-quality crispy potato skins!
-
DID YOU MAKE THIS RECIPE?? DON’T FORGET TO LEAVE FEEDBACK AND/OR CLICK A STAR RATING ON THE RECIPE CARD
Notes
Make Ahead Potato Skins
Prepare the recipe in its entirety until the very last step of adding cheese and bacon. Set double cooked potatoes aside to cool completely on a wire rack.
Cover cooled, prepared skins tightly with foil or transfer to an airtight container and place in the refrigerator for up to 2-3 days until ready to bake. Preheat oven to 400°F (200ºC). Place skins on baking sheet and add cheese and bacon. Bake for 7-10 minutes, or until hot and bubbly.
Alternative Fillings
- Southwest – black beans, corn, peppers, taco seasoning, colby jack cheese, and salsa
- Hawaiian – chopped ham, pineapple, red onion, cheddar, bbq sauce, and cilantro
- Buffalo Chicken – shredded chicken tossed with hot sauce, celery, blue cheese, and ranch for dipping
- Pizza – mozzarella cheese, pepperoni, green pepper, and marinara for dipping
- Broccoli & Cheddar – steamed broccoli florets and cheddar cheese sauce
- Chili Cheese – homemade chili and mixed shredded cheese