
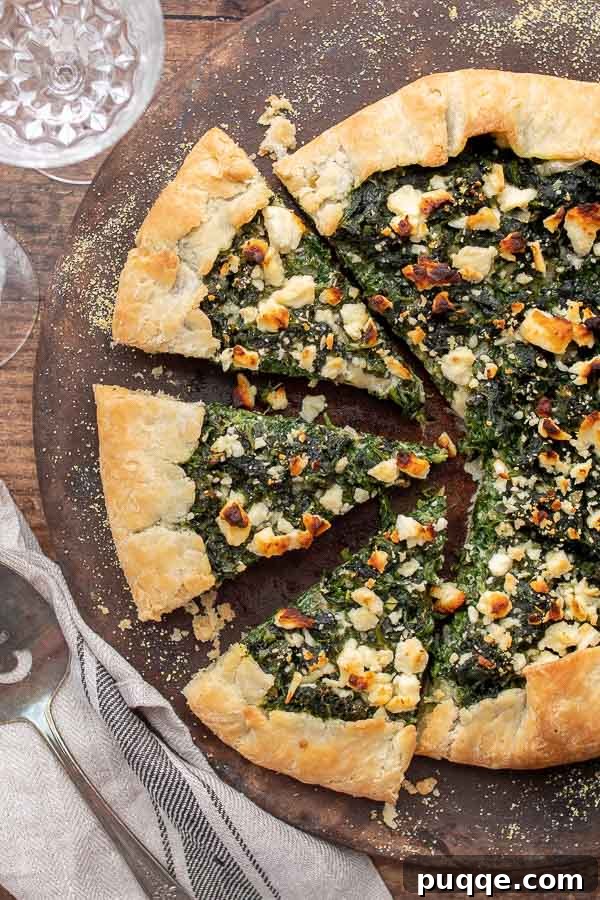
Welcome to the world of delicious and versatile cuisine with our exceptional Savory Vegetable Tart recipe. This isn't just a meal; it's an experience, offering a delightful blend of textures and flavors that will tantalize your taste buds. Whether you're planning an elegant brunch, searching for a standout appetizer, need a satisfying weeknight dinner, or a show-stopping holiday side dish, this vegetarian tart fits every occasion perfectly. We guide you through creating a flaky, golden crust from scratch, but for those busy days, we also provide a fantastic shortcut using store-bought puff pastry dough. Prepare to impress your family and friends with a dish that's as beautiful to behold as it is delicious to eat.
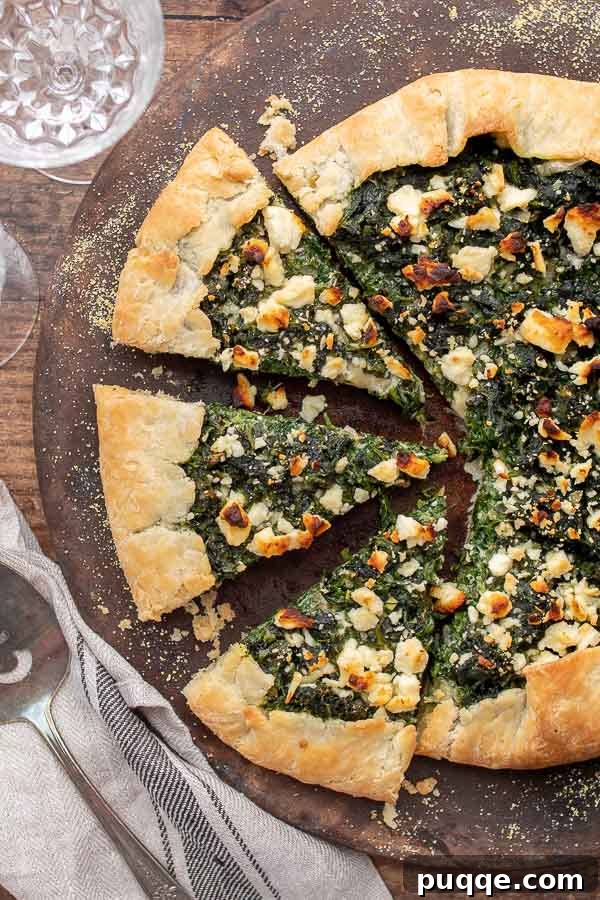
A Crowd-Pleasing Savory Vegetable Tart for Every Palate
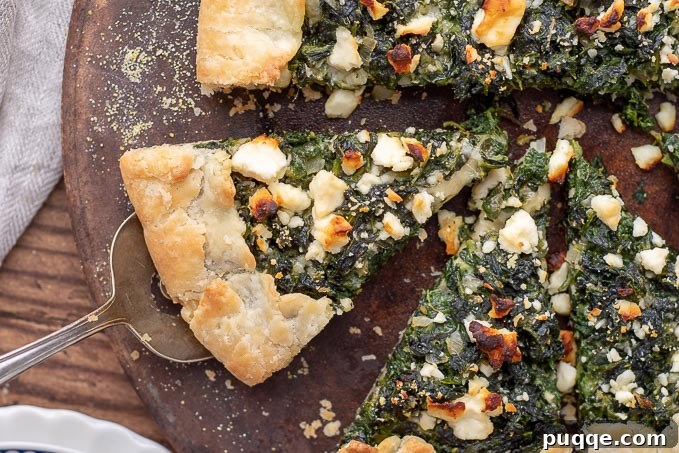
Our Savory Vegetable Tart is much more than just a vegetarian dish; it's a culinary masterpiece designed to appeal to everyone. Picture this: a golden-brown, flaky, and impossibly buttery crust, lovingly cradling a rich, creamy filling of tender spinach and a medley of cheeses, all crowned with a generous sprinkle of salty feta. The harmonious blend of textures—from the crisp crust to the soft, flavorful filling—and the hearty, earthy notes make this tart an undeniable hit. Its robust flavors and comforting warmth transcend dietary preferences, making it a perfect addition to any meal, whether your guests are vegetarian or not.
One of the true beauties of this Vegetarian Tart lies in its remarkable adaptability. This recipe serves as an excellent foundation, inviting you to experiment with an array of seasonal vegetables and your favorite cheese combinations. Imagine swapping spinach for sautéed mushrooms, adding vibrant roasted bell peppers, or delicate leeks. You could even incorporate slices of tender roasted squash for a more autumnal feel. The choice is yours! Simply layer your preferred vegetables over a bed of shredded cheese—Swiss, Gruyere, mozzarella, or a sharp white cheddar work wonderfully. To finish, a final flourish of freshly grated Parmesan, tangy goat cheese, or more crumbled feta will elevate the flavors, creating a personalized tart that's uniquely yours. Bake until golden and bubbly, and prepare for a chorus of compliments!
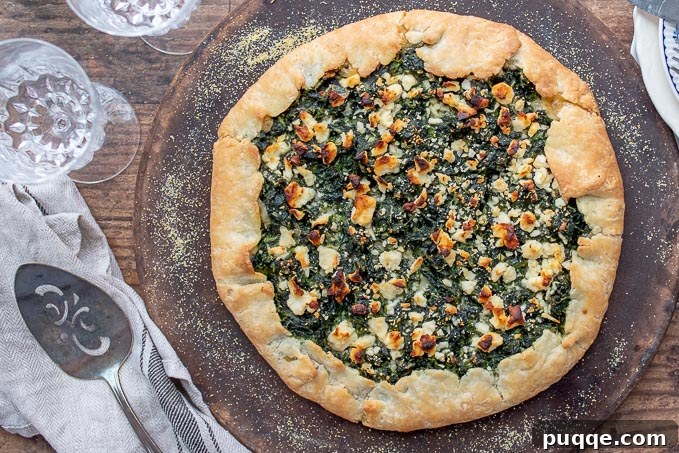
Effortless Elegance: Making Your Tart with Puff Pastry
For those times when you crave the luxurious taste of a savory tart but are short on time, a thawed frozen puff pastry sheet comes to the rescue. This clever shortcut doesn't compromise on flavor or presentation; it simply streamlines the process, allowing you to create an impressive dish with minimal effort. The puff pastry bakes up into a beautifully light, airy, and crisp crust that perfectly complements the rich filling. It's an ideal solution for impromptu gatherings or busy weeknights, delivering gourmet results in a fraction of the time. Follow these simple steps to create a quick and easy savory tart that tastes like you spent hours in the kitchen:
- Prepare the Puff Pastry: On a lightly floured piece of parchment paper, carefully unroll one thawed puff pastry sheet. Gently roll it out to form a rectangular shape, approximately 15x10 inches. Ensure an even thickness for uniform baking.
- Transfer and Prick: Carefully transfer the parchment paper with the rolled-out puff pastry onto a rimmed baking sheet. This makes handling much easier. Using a fork, prick the surface of the pastry several times across the center, leaving a 1-inch border untouched. This prevents the center from puffing up too much during baking.
- Assemble and Bake: Evenly spread your shredded cheese of choice over the pricked center, again leaving that 1-inch border. Spoon the prepared spinach custard filling directly on top of the cheese. Bake the tart in a preheated oven at 375ºF (190ºC) for 30-35 minutes, or until the edges of the puff pastry are beautifully golden brown, visibly puffed, and delightfully crisp. The filling should be set and slightly bubbly.
This method ensures a quick, yet incredibly satisfying tart that’s perfect for any meal.
Embracing Dietary Needs: Substituting Gluten-Free Tart Crust
Living a gluten-free lifestyle doesn't mean you have to miss out on the joy of a delicious, homemade savory tart. This recipe can be easily adapted to accommodate gluten-free diets, ensuring everyone can enjoy a slice of this comforting dish. Creating a show-stopping gluten-free Vegetable Tart is simpler than you might think. You have a couple of excellent options to achieve that perfect, flaky crust without gluten:
One fantastic way to make this tart gluten-free is by substituting with your favorite homemade gluten-free pie crust recipe. Many excellent recipes exist that deliver a tender, flavorful crust. If you already have a go-to gluten-free pie crust, feel free to use it as the base for this savory filling. Ensure it's rolled out to a similar size and thickness as recommended for the traditional crust.
Alternatively, you can utilize the pastry dough recipe included in our full Vegetable Tart recipe card, with a straightforward substitution: use a high-quality gluten-free all-purpose flour blend instead of regular all-purpose flour. Not all gluten-free flours are created equal, so choosing the right one is key to success. I personally recommend Cup4Cup gluten-free flour. This particular blend is renowned for yielding phenomenal results in baking, mimicking the texture and workability of traditional wheat flour remarkably well. Whichever method you choose, you'll be able to enjoy a savory, satisfying, and completely gluten-free tart.
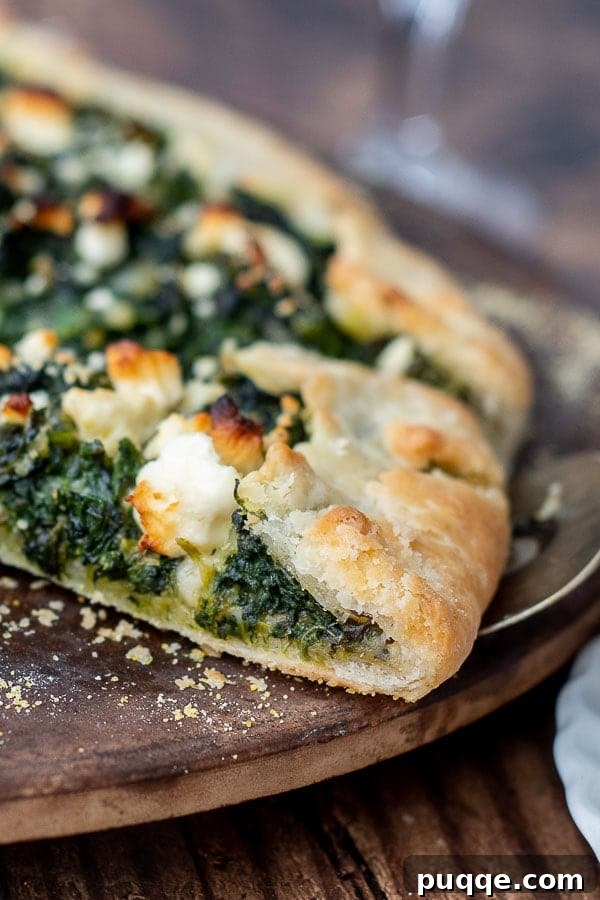
Preparing Ahead: Can This Vegetable Tart be Frozen?
One of the many benefits of this Savory Vegetable Tart is its freezer-friendly nature, making it an excellent make-ahead option for busy days or unexpected guests. You can freeze the vegetable tart in one of two convenient ways, ensuring fresh-tasting results whenever you're ready to enjoy it. Proper freezing techniques are crucial to maintain its quality, flaky crust, and vibrant flavors.
- How to Freeze Unbaked Vegetable Tart: This method is perfect for preparing a complete meal in advance.
- Assembly and Initial Freeze: Fully assemble your vegetable tart according to the recipe instructions, but do not bake it. Carefully transfer the assembled tart onto a baking sheet and place it in the freezer. Allow it to freeze for 1-2 hours, or until it is completely solid. This initial freeze prevents the tart from deforming during wrapping.
- Wrap and Store: Once frozen solid, remove the tart from the freezer. Carefully wrap it tightly with a layer of plastic wrap, ensuring no air pockets. Then, cover it completely with aluminum foil. This double-layer protection prevents freezer burn and preserves freshness.
- Freezer Life and Baking from Frozen: Return the wrapped tart to the freezer, where it can be stored for up to 3 months. When you're ready to bake, remove both the plastic wrap and foil. Transfer the frozen tart to a baking sheet and bake directly from frozen. You will need to add approximately 10-15 minutes to the original baking time. Keep an eye on the crust to ensure it doesn't over-brown.
- How to Freeze Baked Vegetable Tart: This method is ideal for saving leftovers or preparing individual portions for future meals.
- Cool and Slice: Allow any uneaten, baked tart to cool completely to room temperature. Once cooled, cut the tart into individual slices, which will make thawing and reheating much easier and more efficient.
- Wrap Individually: Wrap each slice securely with plastic wrap. This prevents moisture loss and protects the tart from other freezer odors.
- Bag and Store: Carefully transfer the wrapped slices into a freezer-safe ziplock bag or an airtight container. Remove as much air as possible before sealing. Freeze for up to 3 months.
- Thawing and Reheating: To thaw, you can either place the frozen slices in the refrigerator overnight or allow them to sit on the counter for a couple of hours. To reheat, place the thawed (or partially thawed) slices on a baking sheet and bake at 350ºF (175ºC) for 10-15 minutes, or until warmed through and the crust regains some crispness.
With these simple freezing techniques, you can enjoy the deliciousness of this Savory Vegetable Tart whenever the craving strikes, making meal planning a breeze!
Creative Combinations: Substitution and Addition Ideas
While our base Savory Vegetable Tart recipe features a classic and beloved spinach and shallot filling, its true magic lies in its flexibility. This recipe is an open invitation to culinary creativity, allowing you to customize the filling with a wide array of vegetables and cheeses based on your personal preferences, what's in season, or what you have on hand. Don't be afraid to experiment and make this tart truly your own!
- Embrace Leftovers: Instead of fresh or frozen spinach, consider using any leftover roasted vegetables you might have. Brussels sprouts, broccoli, or cauliflower can add fantastic flavor and texture. Simply chop them into bite-sized pieces and mix them into the custard.
- Mushroom Magic: For an earthy, umami-rich addition, sautéed mushrooms are an excellent choice. Cremini, shiitake, or even a mix of wild mushrooms would be delicious. Sauté them until golden brown to release their full flavor before adding them to the filling.
- Roasted Vegetable Medley: Elevate the tart with a vibrant roasted vegetable medley. Think slices of colorful bell peppers, tender zucchini, sweet eggplant, or thinly sliced potatoes. Toss your chosen vegetables with a drizzle of olive oil, a pinch of salt, and a grind of pepper. Roast them in a 450ºF (230ºC) oven for approximately 15-20 minutes, flipping halfway through, until they are tender and slightly caramelized. Let them cool slightly before incorporating into the filling.
- Cheese, Please!: The cheese component is crucial for flavor and creaminess. While Swiss cheese is a wonderful choice, feel free to substitute with other delicious options. Consider nutty Gruyere, a classic mozzarella and Parmesan combination, sharp white cheddar, or buttery Gouda. Each will impart a unique character to your tart.
- Topping Variations: Beyond the filling, the final topping can also be customized. If feta isn't your preference, try sprinkling fresh, tangy goat cheese crumbles for a creamy, zesty finish. Alternatively, a generous dusting of freshly grated Parmesan cheese adds a salty, umami depth.
By exploring these substitution and addition ideas, you can transform this Savory Vegetable Tart into a new and exciting dish every time you make it, ensuring it never gets boring and always suits your current cravings.
Crafting Your Masterpiece: How to Make Vegetable Tart
Creating this Savory Vegetable Tart is a rewarding process, combining simple techniques with fresh ingredients to yield a truly spectacular dish. From preparing the perfect crust to assembling the flavorful filling, each step contributes to the overall success. Here's a visual and textual guide to help you along the way:
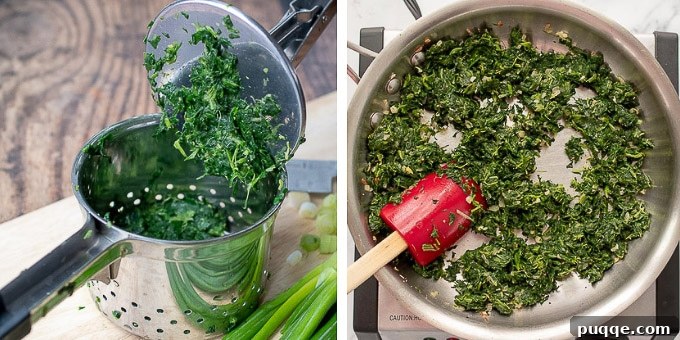
- Prepare the Spinach: Begin by thoroughly squeezing any excess moisture from your thawed frozen spinach. This is a critical step to prevent a soggy tart crust and ensure a beautifully textured filling. PRO TIP: A potato ricer is an invaluable tool for this task, as it efficiently extracts water, leaving your spinach perfectly dry and ready for the next steps.
- Sauté the Filling Base: In a skillet, gently sauté the minced shallot until translucent and fragrant. Add the minced garlic and cook for another minute, being careful not to burn it. Introduce the well-squeezed spinach along with your chosen spices – nutmeg and oregano are highly recommended for their complementary flavors. Stir well to combine all ingredients and break up any large clumps of spinach. Remove from heat and allow the mixture to cool completely.
- Prepare the Custard: Once the spinach mixture has cooled, whisk in the egg, egg yolk, and heavy cream. This creates a rich, binding custard that will hold your filling together and add incredible richness.
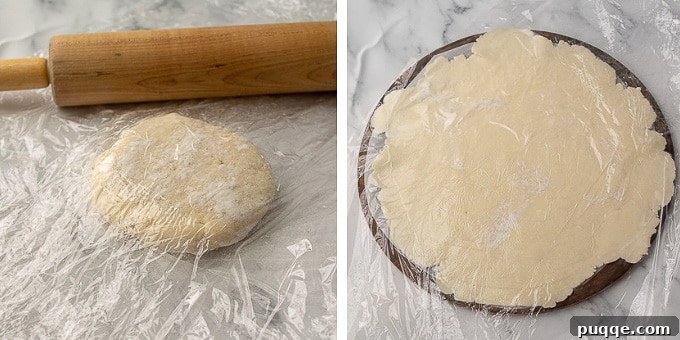
- Roll Out the Crust: On a lightly floured surface or between two sheets of plastic wrap, roll out your prepared tart crust (homemade or shortcut) into a roughly 12-inch circle. If using plastic wrap, peel off the top layer and carefully invert the crust onto a parchment-lined baking sheet or pizza stone. This method helps prevent sticking and makes transfer easy.
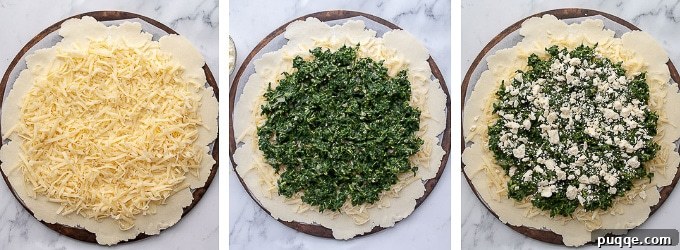
- Layer the Filling: Sprinkle a generous layer of shredded cheese over the crust, leaving about a 1-inch border all around the edge. Spoon the spinach-custard mixture evenly over the cheese, maintaining that crucial 1-inch border. Finally, sprinkle the crumbled feta cheese over the spinach mixture for an extra burst of flavor.
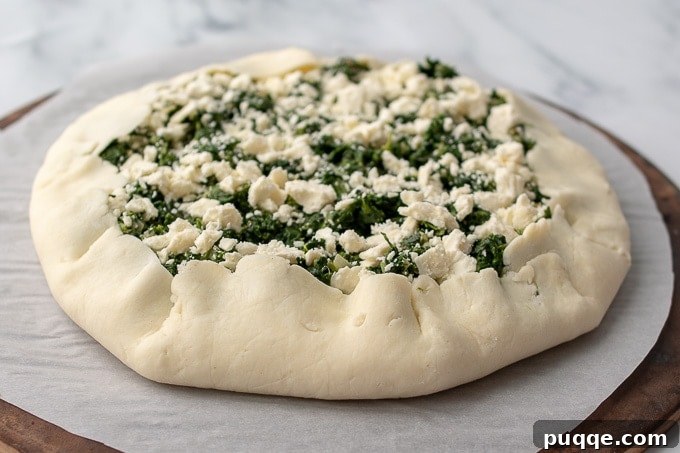
- Fold and Bake: Gently lift the border of the tart crust and fold it over the edges of the filling, creating a rustic, free-form look (often referred to as a galette style). Pinch any overlaps in the dough to secure the filling. Bake in a preheated oven until the crust is golden brown and the filling is hot, bubbly, and set. Allow it to cool for 10-15 minutes before slicing and serving. This resting time helps the filling set further and makes for cleaner cuts. Serve warm or at room temperature.
Expert Tips for a Perfect Savory Tart Every Time
Achieving a perfect savory tart is within reach with these insightful tips and tricks. Whether you're a seasoned baker or new to tart making, these recommendations will help ensure your Vegetable Tart turns out beautifully flaky, flavorful, and free from common baking woes. From crust shortcuts to moisture management, here's how to elevate your tart game:
- Crust Shortcuts for Convenience: While a homemade pastry crust offers unparalleled flavor and texture, sometimes time is of the essence. Don't hesitate to substitute with a good quality, store-bought refrigerated pie crust. These are readily available and can save a significant amount of prep time without sacrificing too much on taste.
- Puff Pastry as a Speedy Alternative: For an even quicker and lighter crust, consider using thawed frozen puff pastry dough. Its airy, flaky layers create a wonderful contrast to the rich filling. Detailed directions for using puff pastry are provided earlier in this article and also in the recipe notes for easy reference. This is an excellent option for an elegant yet fast dish.
- Mastering Moisture Control in Spinach: One of the most common issues with spinach-based tarts is a soggy crust. This is almost always due to excess moisture in the spinach. It is absolutely crucial to squeeze out as much liquid as possible from thawed frozen spinach. As mentioned, a potato ricer is incredibly effective for this. Alternatively, you can place the spinach in a clean kitchen towel and twist tightly to extract the water.
- Shallots vs. Onions: The recipe calls for shallots, which offer a milder, sweeter, and more delicate onion flavor. However, if shallots are not available, finely chopped yellow or white onion can be used as a suitable substitute. Just be aware that the flavor will be slightly more pungent.
- Optimal Baking Position: The placement of your tart in the oven can significantly impact the crust. Baking the Vegetarian Tart on a middle-low rack helps the bottom crust brown and crisp up beautifully. This prevents a pale, undercooked bottom while simultaneously ensuring the exposed top crust doesn't become overly browned or burnt before the filling is fully set.
- Don't Overwork the Dough: When preparing homemade crust, avoid overworking the dough. Over-mixing develops the gluten, leading to a tough rather than flaky crust. Work quickly and handle the dough as little as possible.
- Chill Time is Key: Whether homemade or store-bought, chilling the tart crust (or puff pastry) before baking is vital. This helps relax the gluten, prevents shrinkage, and ensures a flaky, tender texture.
By incorporating these bonus tips into your tart-making routine, you'll consistently create a delicious, perfectly baked Savory Vegetable Tart that's sure to impress with its irresistible flavor and texture.
Save this recipe to your Pinterest board!
Let’s be friends on Pinterest! I’m always sharing great recipes!
Did you make this recipe? We love hearing from you! Leave a star rating and comment below the recipe card. Your feedback helps others discover amazing recipes, and we truly appreciate hearing from our community. You will always hear back from us! -Melissa

Vegetable Tart

Melissa Erdelac
8
1 hour
35 minutes
1 hour 35 minutes
Pin
Rate
Remove Ads
Ingredients
Tart crust (See recipe notes for shortcut substitutions)
- 3 tablespoons water
- 2 teaspoons cornstarch
- 2 teaspoons sugar
- 1/4 teaspoon kosher salt
- 10 tablespoons cold butter,, cut into 1/2″ pieces
- 2 tablespoons sour cream
- 1 cup + 2 tbsp. all-purpose flour, (or substitute recommended Cup 4 Cup gluten free flour)
Vegetable Tart Filling
- 2 10 ounce packages frozen chopped spinach,, thawed and squeezed dry
- 1/4 cup shallot,, minced
- 3 cloves garlic,, minced
- 1 tablespoon olive oil
- 1/8 teaspoon ground nutmeg
- 1/4 teaspoon dried oregano
- 1/2 teaspoon salt
- 1/8 teaspoon ground pepper
- 2 cups shredded swiss cheese
- 1/4 cup crumbled Feta cheese
- 1 whole egg + 1 egg yolk
- 1/4 cup heavy cream
Instructions
Tart Crust:
-
In a small bowl, whisk together water and cornstarch. Microwave for 30-40 seconds, stirring halfway through, until the mixture thickens. Place the bowl in the freezer for 10-15 minutes to chill thoroughly.
-
Food processor method: Combine flour, sugar, and salt in a food processor. Pulse a few times to combine. Add the chilled cornstarch mixture and pulse until uniformly ground into the flour. Add the cold butter, cut into 1/2" pieces, and sour cream. Process until the dough just starts to come together, usually about 20-30 seconds. Be careful not to overmix.
-
By hand method: Whisk together flour, sugar, and salt in a large bowl. Use a pastry cutter or two forks to cut in the chilled cornstarch mixture until uniformly incorporated and crumbly. Add the cold butter, cut into 1/2" pieces, and sour cream. Continue cutting with the pastry cutter or forks until the mixture is uniformly combined and the dough just begins to come together.
-
Turn the dough out onto a large piece of plastic wrap. Gently form it into a 4-inch disk, pressing it together without kneading. Wrap tightly with plastic wrap and refrigerate for at least 1 hour, or up to 48 hours, to allow the dough to chill and rest.
Vegetable Tart:
-
Line a baking sheet or a pizza stone with parchment paper. Preheat your oven to 400ºF (200ºC).
-
Once the pie dough is thoroughly chilled, overlap 2 large pieces of plastic wrap on your clean work surface. Place the chilled tart dough disk in the center, sprinkle a little regular or gluten-free flour on top, and lay 2 more large pieces of plastic wrap over it. Roll the dough out into a roughly 12-inch circle. Carefully lift off the top layer of plastic wrap and invert the rolled-out crust onto your parchment-lined baking sheet or pizza stone so the exposed crust is face down. Leave the remaining plastic wrap on top and place in the refrigerator until ready to use. This keeps it cold and prevents sticking.
-
In a large skillet, heat the olive oil over medium heat. Add the minced shallot and sauté for 2-3 minutes until it becomes soft and translucent. Add the minced garlic and sauté for 1 minute longer, being careful not to let it brown. Stir in the well-squeezed dried spinach, ground nutmeg, dried oregano, salt, and pepper. Continue stirring to combine all ingredients, breaking up any large clumps of spinach. Remove the skillet from the heat and set the mixture aside to cool completely.
-
In a medium bowl, whisk together the whole egg, egg yolk, and heavy cream until well combined. Add the completely cooled spinach mixture to the egg and cream mixture and stir thoroughly to combine everything.
-
Remove the chilled galette crust from the fridge and carefully peel off the remaining plastic wrap. Evenly sprinkle the shredded cheese over the crust, ensuring to leave about a 1-inch border clear around the edges. Spoon the prepared spinach mixture on top of the cheese and gently spread it out, again maintaining the 1-inch border. Finally, sprinkle the crumbled feta cheese over the spinach filling.
-
Gently lift the border of the tart crust and carefully fold it over the edges of the filling, creating a rustic, free-form look. Pinch together any overlaps in the dough, if necessary, to secure the filling. Bake for 30-35 minutes, or until the crust is beautifully golden brown and the filling is hot, bubbly, and set. Allow the tart to cool for 10-15 minutes before cutting into slices and serving. This resting time helps the filling set for cleaner slices. Serve hot or at room temperature.
❉DID YOU MAKE THIS RECIPE?? DON’T FORGET TO LEAVE FEEDBACK AND/OR CLICK A STAR RATING ON THE RECIPE CARD❉
Notes
- Instead of making a homemade pastry crust or gluten-free crust, substitute store-bought, refrigerated pie crust instead. It's a convenient time-saver!
- For another fantastic shortcut, use thawed frozen puff pastry dough. It bakes up beautifully flaky. Directions for making with puff pastry are included in the section above this recipe card.
- Squeeze any excess moisture from the spinach to prevent a soggy tart crust. I find the best way to do this is with a potato ricer (see pic above for visual guidance). This step is crucial for the best results.
- Substitute finely chopped yellow or white onion for the shallot if you prefer or if shallots are unavailable. The flavor will be slightly different but still delicious.
- Baking the Vegetarian Tart on a middle-low rack helps the crust brown underneath without the exposed top crust becoming overly browned. This ensures a perfectly cooked crust all around.
Substituting Gluten-Free Tart Crust
Make a delicious gluten-free Vegetable Tart by substituting your preferred homemade gluten-free pie crust recipe.
Alternatively, use the tart crust recipe included here, but simply substitute gluten-free all-purpose flour. I highly recommend Cup4Cup gluten-free flour for phenomenal, reliable results!
How to Make Vegetable Tart with Puff Pastry (Quick Guide)
- On a piece of floured parchment paper, roll out a thawed puff pastry sheet to a 15x10″ rectangle.
- Transfer the parchment with the rolled-out puff pastry onto a rimmed baking sheet. Prick the center a few times with a fork, leaving a 1" border.
- Spread shredded cheese in the middle, still leaving a 1″ border. Top the cheese with the prepared spinach custard filling (no need to fold over edges like a galette here).
- Bake at 375ºF (190ºC) for 30-35 minutes, or until the edges are beautifully browned, puffed, and crisp.