
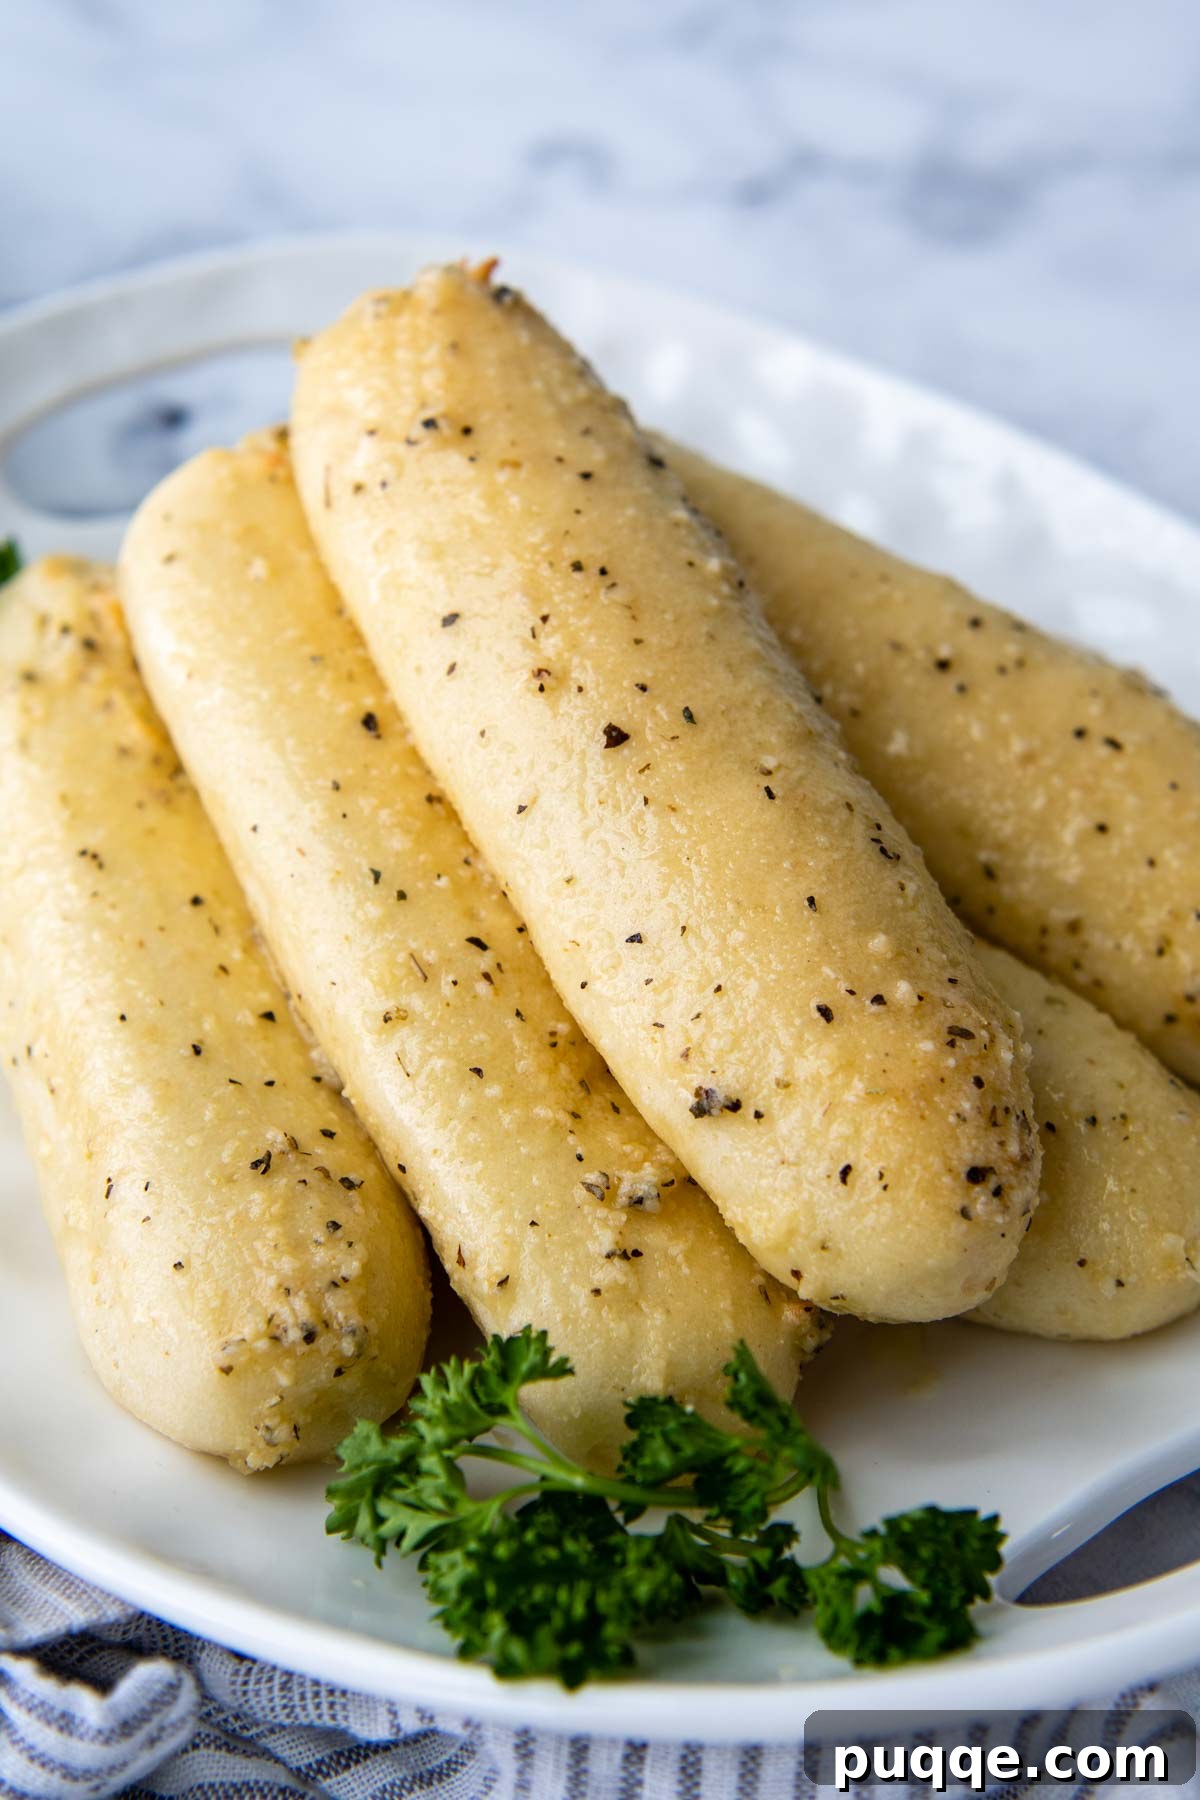
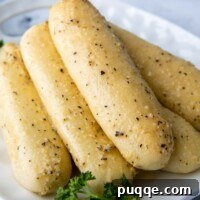
Prepare to rediscover the joy of warm, soft, and garlicky breadsticks, because this extraordinary homemade gluten-free recipe will make you forget every store-bought or restaurant version you’ve ever tasted! Imagine Olive Garden-style breadsticks, but even better – with a perfect chew, golden crust, and irresistible garlic topping, all completely gluten-free and offering a dairy-free option. This incredibly easy recipe utilizes the simplest preparation and baking methods, ensuring that even a novice baker can achieve spectacular results, transforming your gluten-free dining experience from good to absolutely unforgettable.
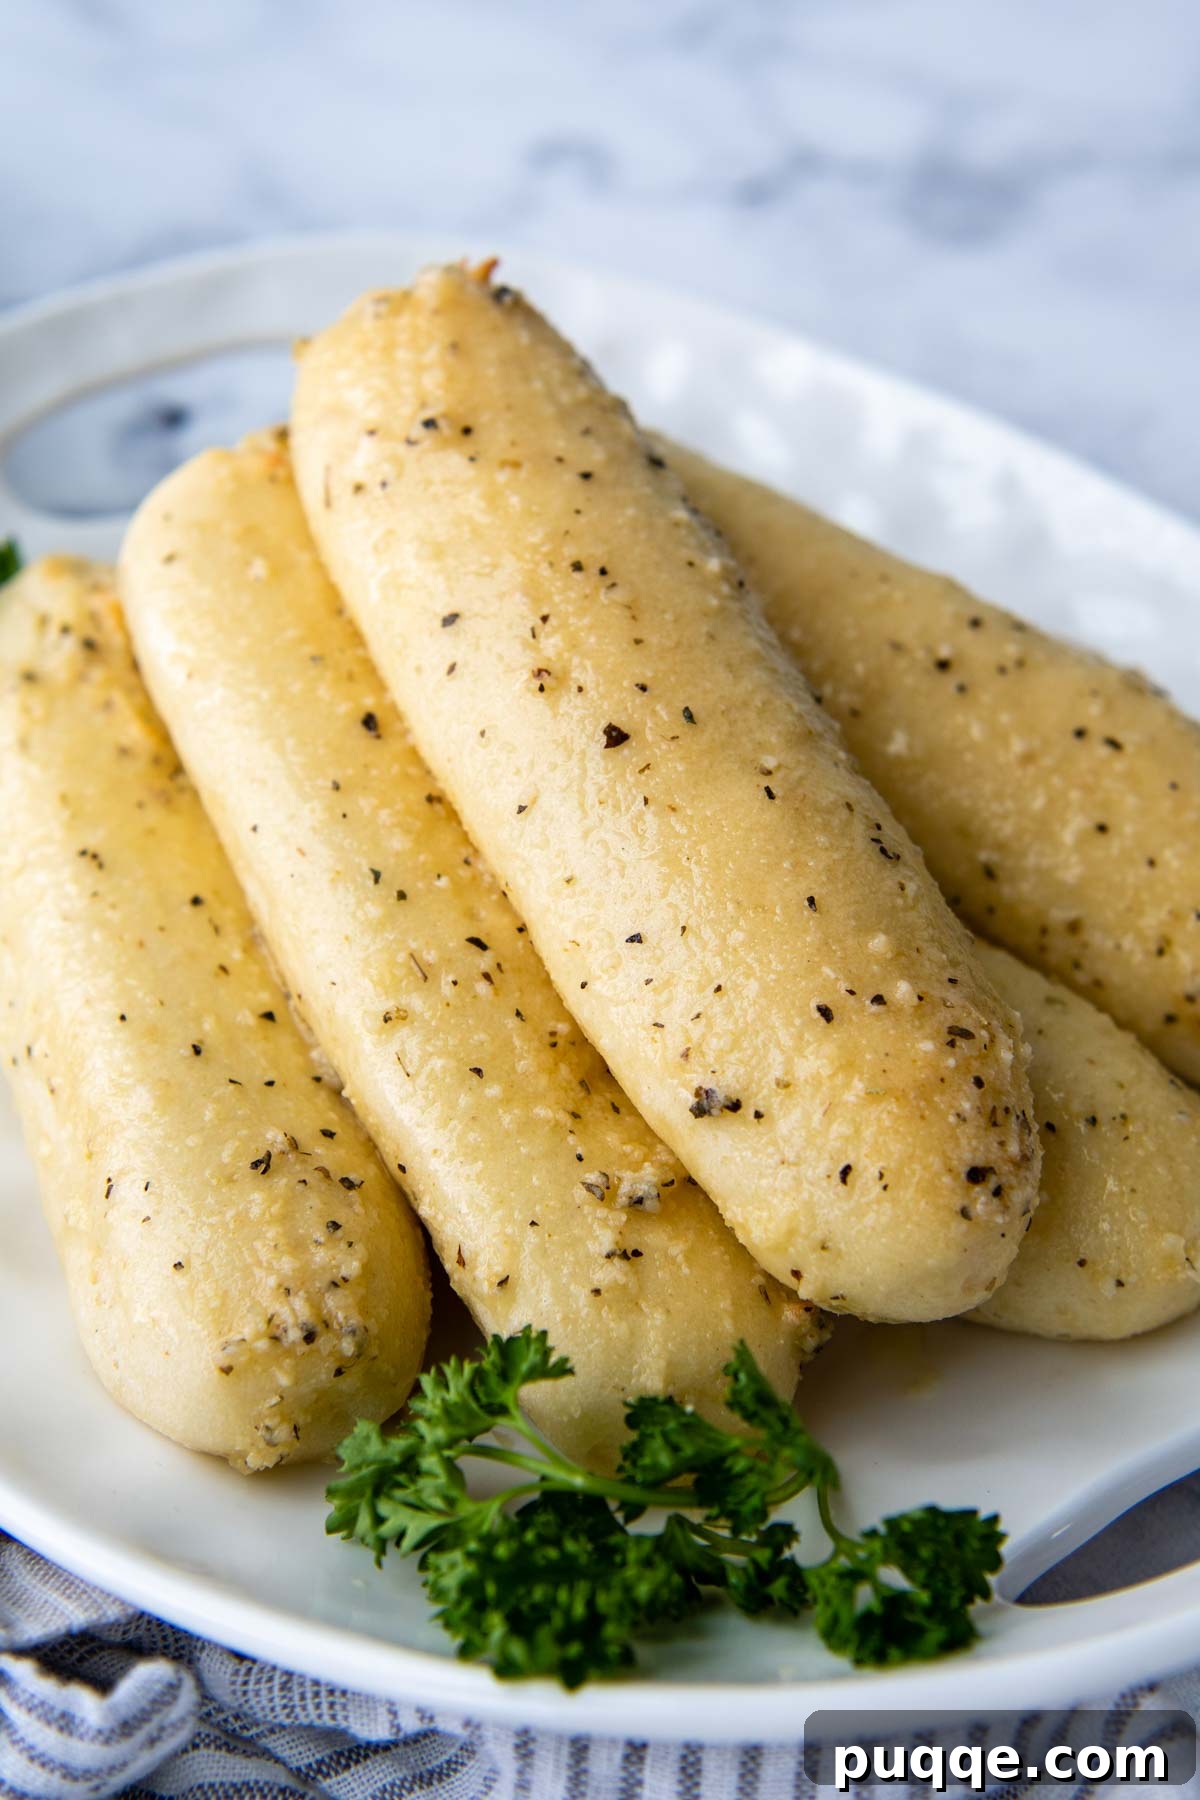
Beyond Olive Garden: The Ultimate Gluten-Free Breadsticks Experience
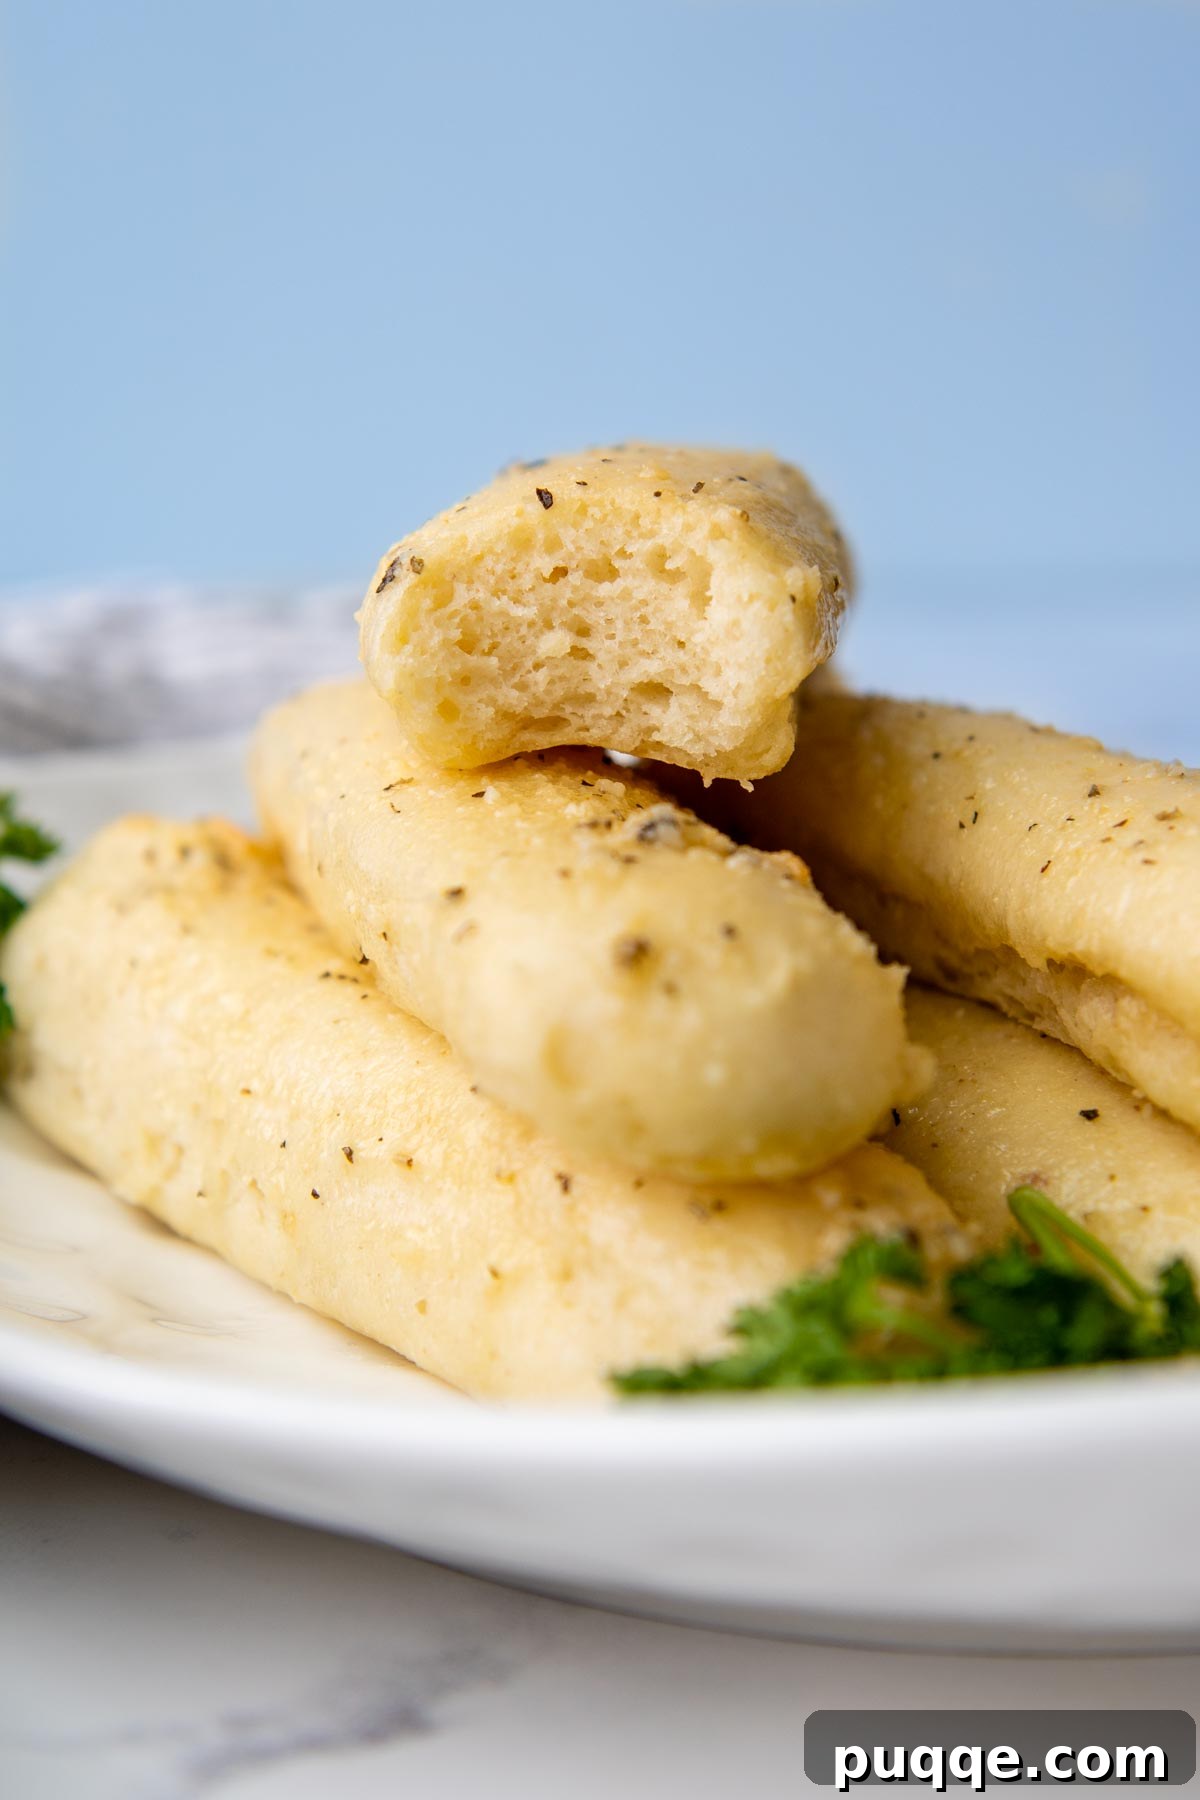
Are you yearning for those irresistibly soft, garlic-infused breadsticks reminiscent of your favorite Italian restaurant? Look no further! This simple gluten-free recipe delivers a taste and texture so authentic, it has consistently fooled even the most discerning palates in my own family, who couldn’t tell they were gluten-free. Forget the days of settling for dense, crumbly, or flavorless gluten-free alternatives. These breadsticks boast a light, airy interior and a satisfying chew that truly rivals, and dare I say surpasses, the traditional versions.
Drawing inspiration from two reader favorites – our celebrated gluten-free bread recipe and delectable gluten-free garlic knots – this recipe combines the best elements for optimal flavor and texture. The beauty lies in its simplicity: we use common kitchen staples that come together in mere minutes, meaning you don’t need exotic ingredients or complicated techniques to achieve perfection. With a remarkably brief rise time, you can go from mixing bowl to enjoying a platter of warm, parmesan-garlic breadsticks in less than 45 minutes, making them the ultimate last-minute side dish or a delightful snack for any occasion. This recipe proves that going gluten-free doesn’t mean compromising on deliciousness or convenience.
“Crazy easy! My non-GF husband has declared these the ‘go-to bread for company,’ so that’s as big of a win as I could ask for.”
—Caitlyn
Demystifying the Ingredients: What You Need for Stellar GF Breadsticks
One of the many reasons these gluten-free garlic breadsticks are a staple in my kitchen is that they rely on ingredients I almost always have on hand. This makes them the perfect versatile accompaniment to a wide range of meals, whether it’s my never-mushy gluten-free lasagna, a hearty soup, baked ziti, a fresh salad, tender homemade gluten-free meatballs, or a quick 10-minute silky gluten-free alfredo sauce. Let’s dive into the key components that make these breadsticks truly exceptional.
- Gluten-Free Flour Blend: The choice of gluten-free flour is paramount to the success of any baked good, and bread is no exception. I’ve rigorously tested this recipe with various flour blends to guarantee consistent, flawless results. While many blends exist, some undeniably perform better than others, creating a noticeable difference in the final product’s texture and rise. For all my gluten-free baking endeavors, my absolute preferred brand is Cup4Cup. This blend is exceptional because it already includes xanthan gum, a vital ingredient that mimics gluten’s elasticity and structure in gluten-free baking. Using a high-quality blend like Cup4Cup ensures your breadsticks will be soft, pliable, and far from gritty or crumbly.
- Psyllium Husk Powder: This might sound like an unusual ingredient, but it’s a game-changer in gluten-free bread. I’ve experimented extensively, making these breadsticks both with and without psyllium husk powder. While it doesn’t significantly alter the taste, its impact on texture is profound. Psyllium husk acts as a binder and helps to retain moisture, contributing significantly to the breadsticks’ signature softness and elasticity. It helps create that desirable chewy texture that is often missing in gluten-free breads. A crucial tip: opt for a lighter-colored brand of psyllium husk powder to avoid a subtle purplish tint in your baked breadsticks. The taste will be unaffected, but for aesthetic reasons, a lighter hue is preferred. The brand I recommend is specifically chosen for its quality and color.
- Instant (Rapid Rise) Yeast: For speed and convenience, instant yeast is our go-to. Unlike active dry yeast, which typically requires a preliminary activation step in warm water, instant yeast can be mixed directly with your dry ingredients, streamlining the process significantly. This contributes to the “impossibly easy” nature of this recipe, allowing for a faster rise and quicker baking time. To ensure freshness and potency, I highly recommend buying instant yeast in bulk and storing it in your refrigerator or freezer, extending its shelf life and ensuring your bread rises perfectly every time.
- Eggs: Room temperature eggs are crucial for optimal emulsion and integration into the dough. Cold eggs can stiffen the fat in the batter, leading to a denser texture. To quickly bring eggs to room temperature, simply place them in a bowl of hot tap water for about five minutes before cracking and adding them to your mixture. This small step makes a big difference in the final texture of your breadsticks.
- Olive Oil: A good quality olive oil adds richness and moisture to the dough, contributing to the overall flavor profile. If olive oil is not readily available or you prefer an alternative, an equal amount of vegetable oil or melted butter can be substituted without compromising the integrity of the recipe. This flexibility makes the recipe even more accessible.
Watch the Recipe: Visual Guide to Gluten-Free Breadstick Perfection
Let’s Make This Together!
(The detailed recipe card with exact ingredient amounts is located below these step-by-step photos and modified instructions. Use this section as a visual guide to confidently follow along.)
Easy Peasy Dump and Mix Dough
Here’s where gluten-free bread recipes truly shine and simplify your baking life – no tedious kneading necessary! This dough comes together effortlessly. Begin by combining all your dry ingredients (gluten-free flour, sugar, instant yeast, psyllium husk powder, baking powder, and salt) in the bowl of a stand mixer. Mix them on low speed until they are thoroughly incorporated. This initial step ensures an even distribution of all leavening agents and flavorings.
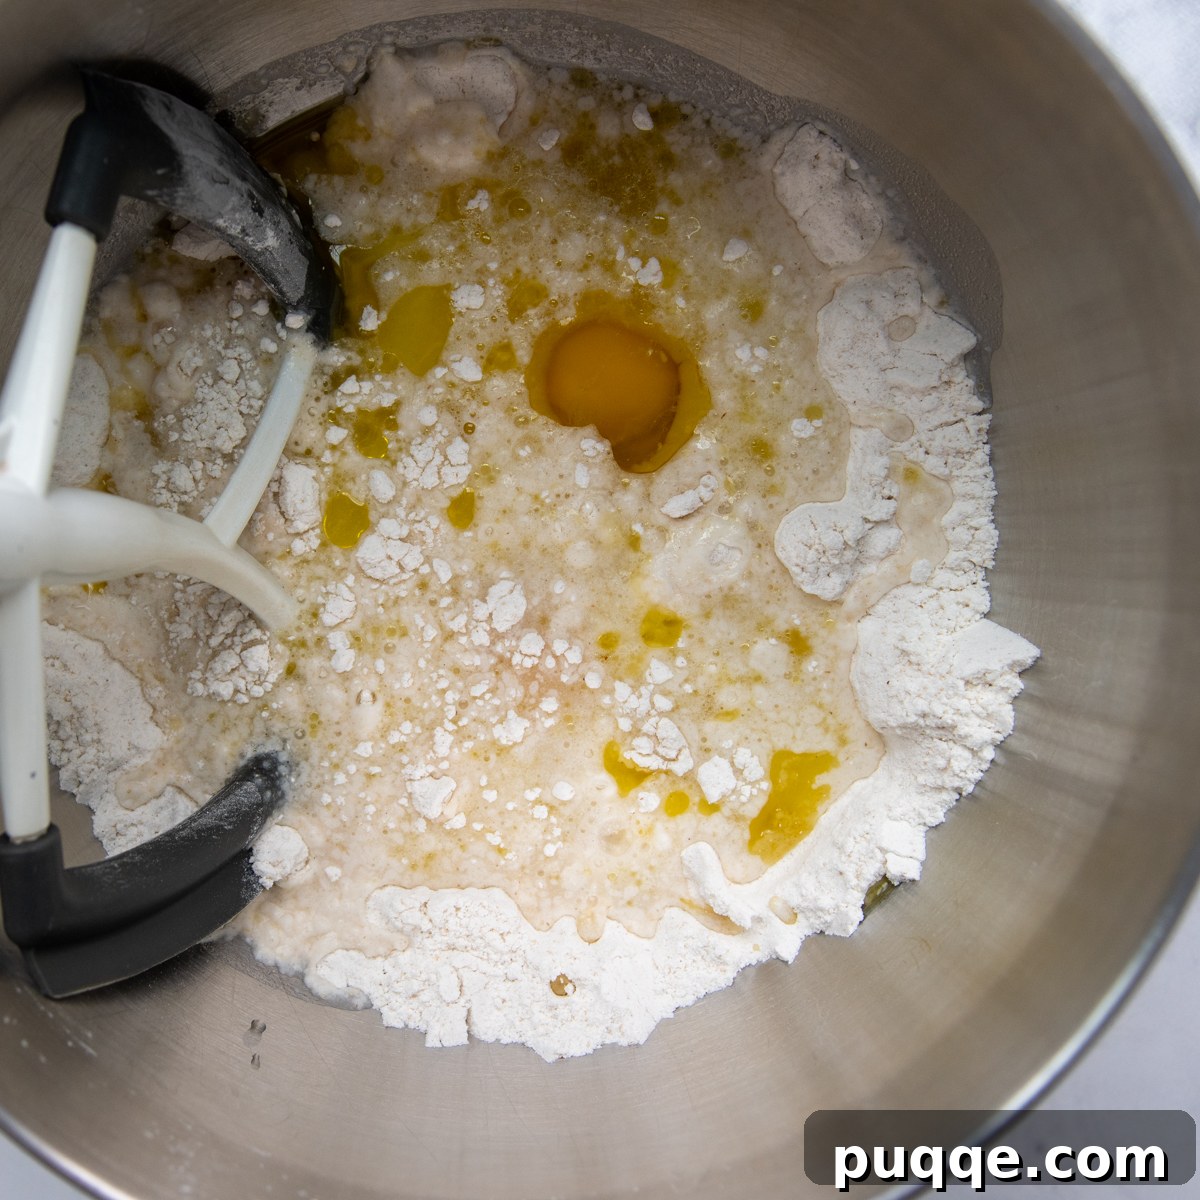
Next, add the wet ingredients: the warm water, room temperature eggs, and olive oil. Start mixing on low speed, allowing the dough to gradually come together. This should take about one minute. Once combined, increase the mixer speed to medium and beat the mixture for a full five minutes. This critical step is vital for hydrating the gluten-free starches, which is key to developing the incredibly soft and pliable texture of the breadsticks. Remember to scrape down the sides of the bowl and the paddle attachment halfway through to ensure everything is evenly mixed.
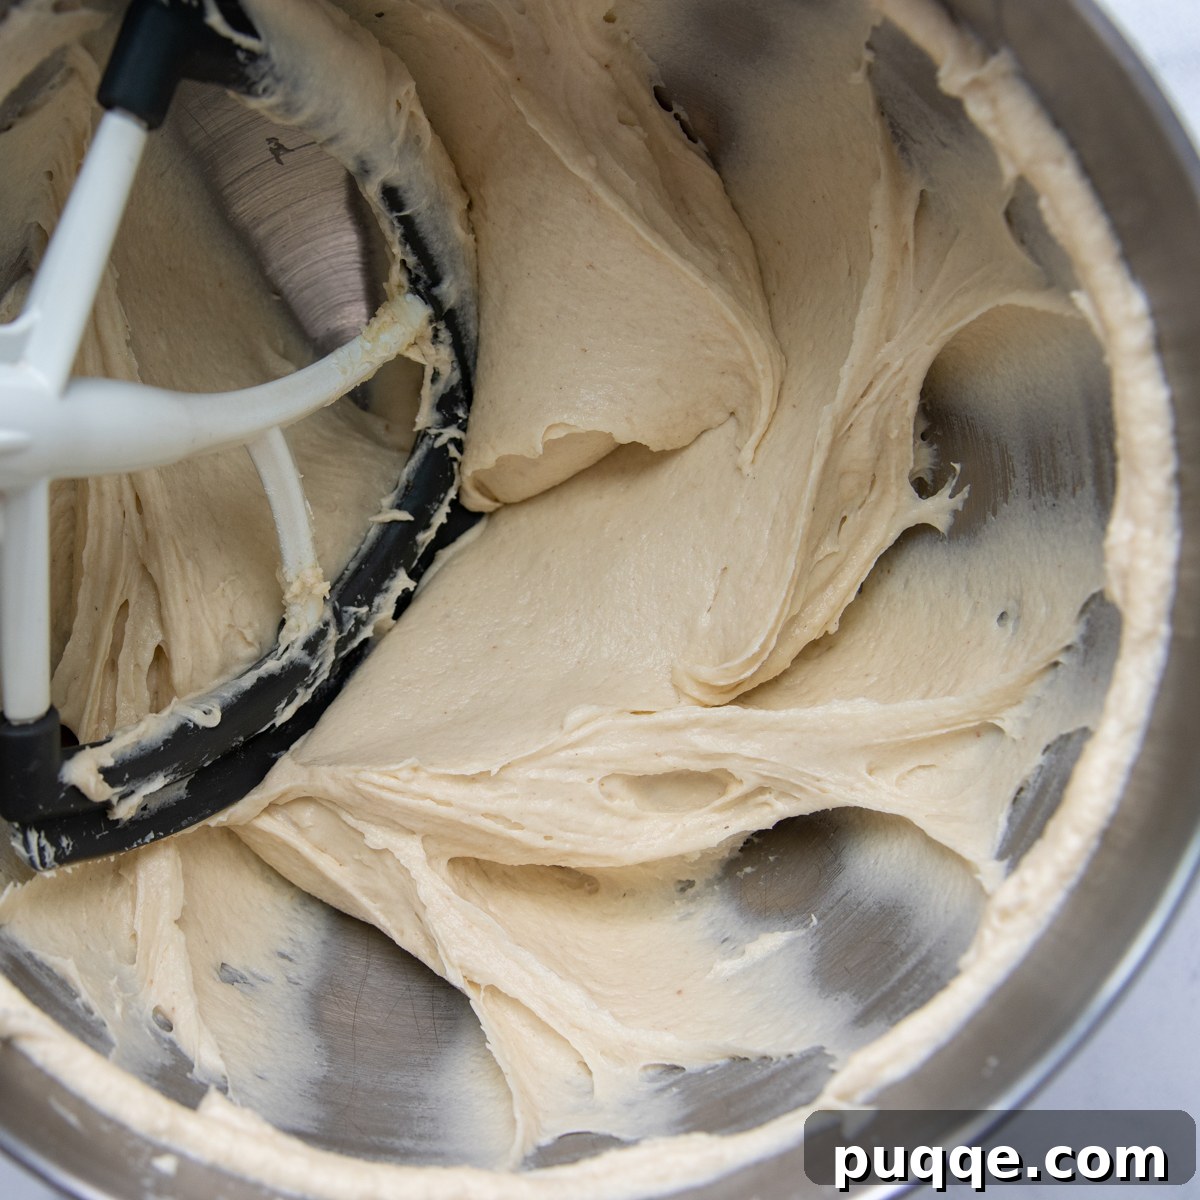
Don’t be alarmed by the consistency! The resulting batter will be slightly thick, resembling a rich brownie batter, rather than a stiff bread dough. This looser consistency is perfectly normal and desired, as it contributes to the unparalleled softness of these breadsticks. Since we won’t be rolling or traditionally shaping them, a firm dough isn’t necessary, making this process even more straightforward.
Simple Shaping Method and Bake
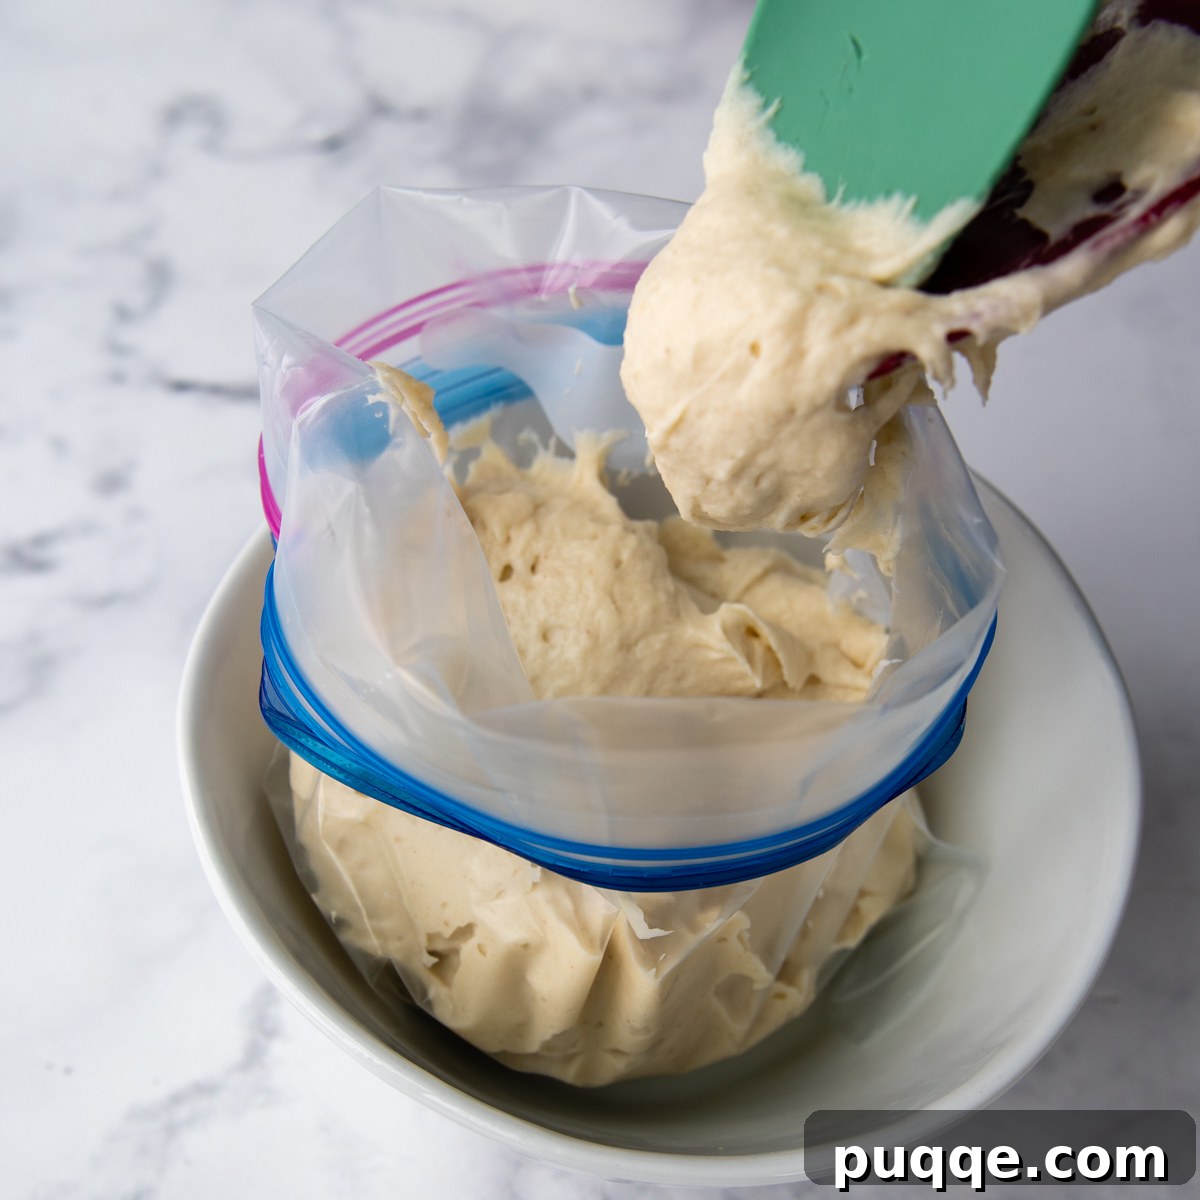
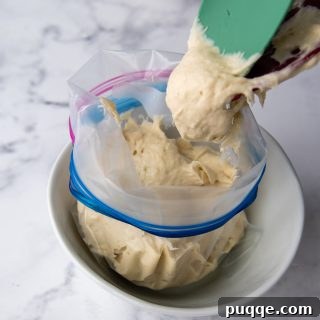
The secret to our incredibly soft breadsticks lies in the slightly looser dough, but how do we get this batter onto a baking sheet without a mess? The answer is brilliantly simple: a makeshift piping bag! First, prepare your baking sheet by lining it with parchment paper and lightly spraying it with nonstick cooking spray to prevent any sticking. Next, take a gallon-sized Ziploc bag, place it inside a bowl (this helps hold it open), and fold the sides over. Using two silicone spatulas or spoons, carefully scrape all the breadstick dough into the bottom of the bag. Once the dough is in, push it all to one corner, gently squeeze out any excess air from the top, and twist the bag to seal it – no need to zip it closed, as twisting will keep the dough contained.
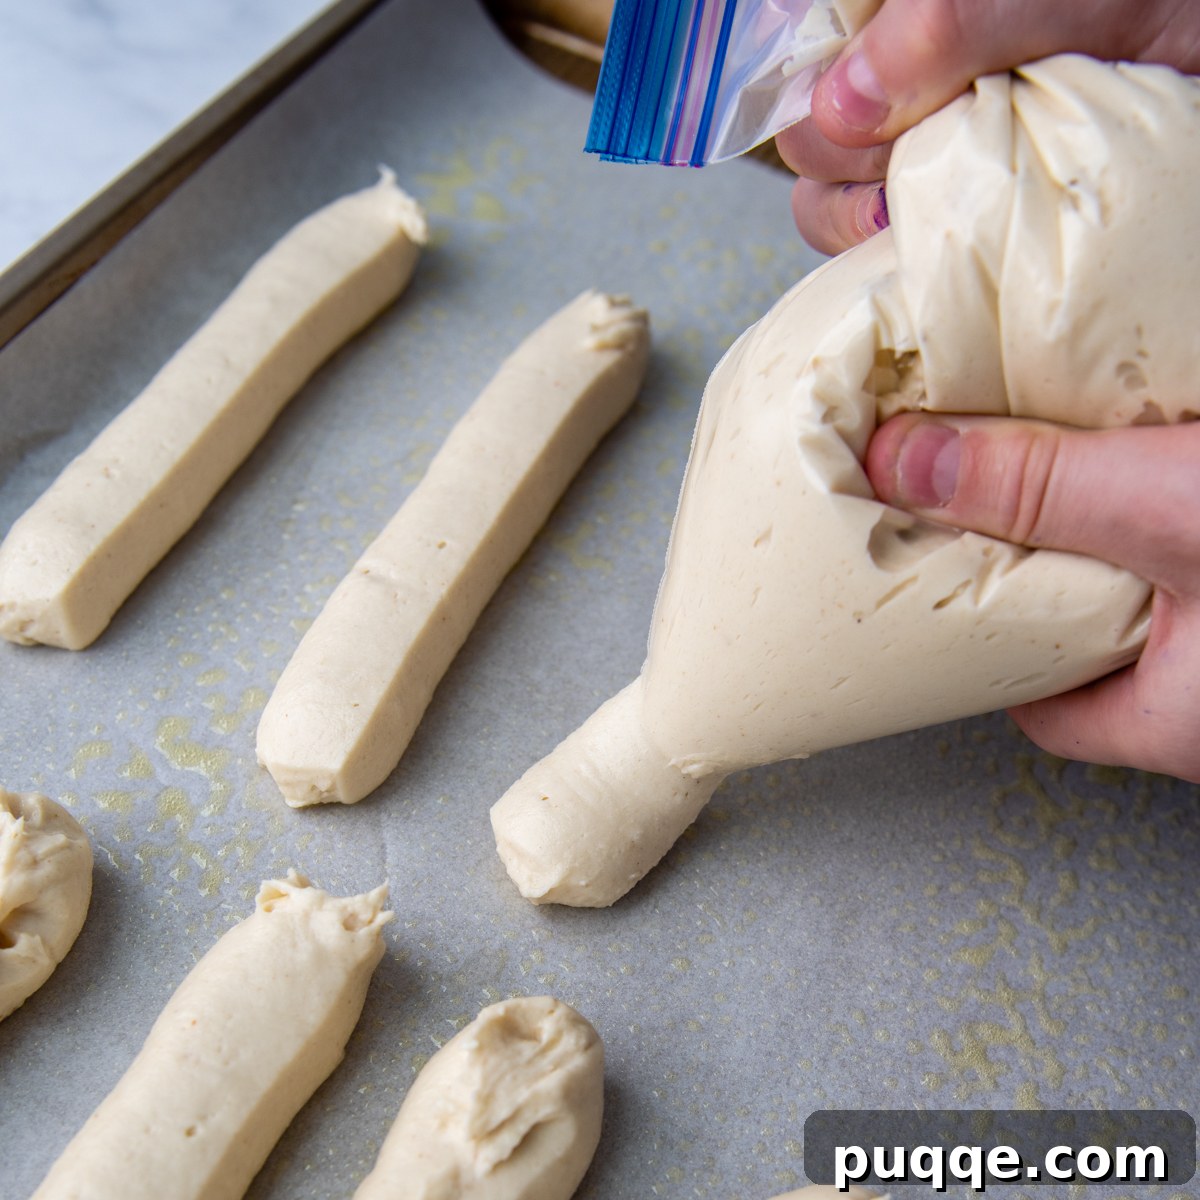
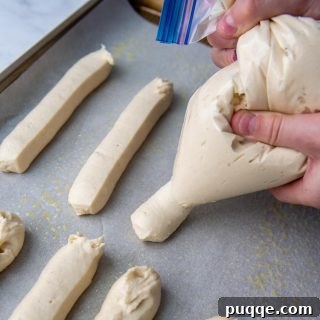
Now, to create your piping bag, snip off about a 1-inch corner from the bottom of the bag. Be mindful not to cut too large a hole initially; it’s always easier to make it larger if needed, but impossible to make it smaller. A smaller opening will yield daintier breadsticks, while a larger one will produce thicker, more substantial ones. Pipe 6-inch long breadsticks onto your prepared baking sheet, leaving approximately 2 inches between each to allow for expansion during baking. Depending on the size of your breadsticks and baking sheet, you may require a second baking sheet to accommodate all the dough.
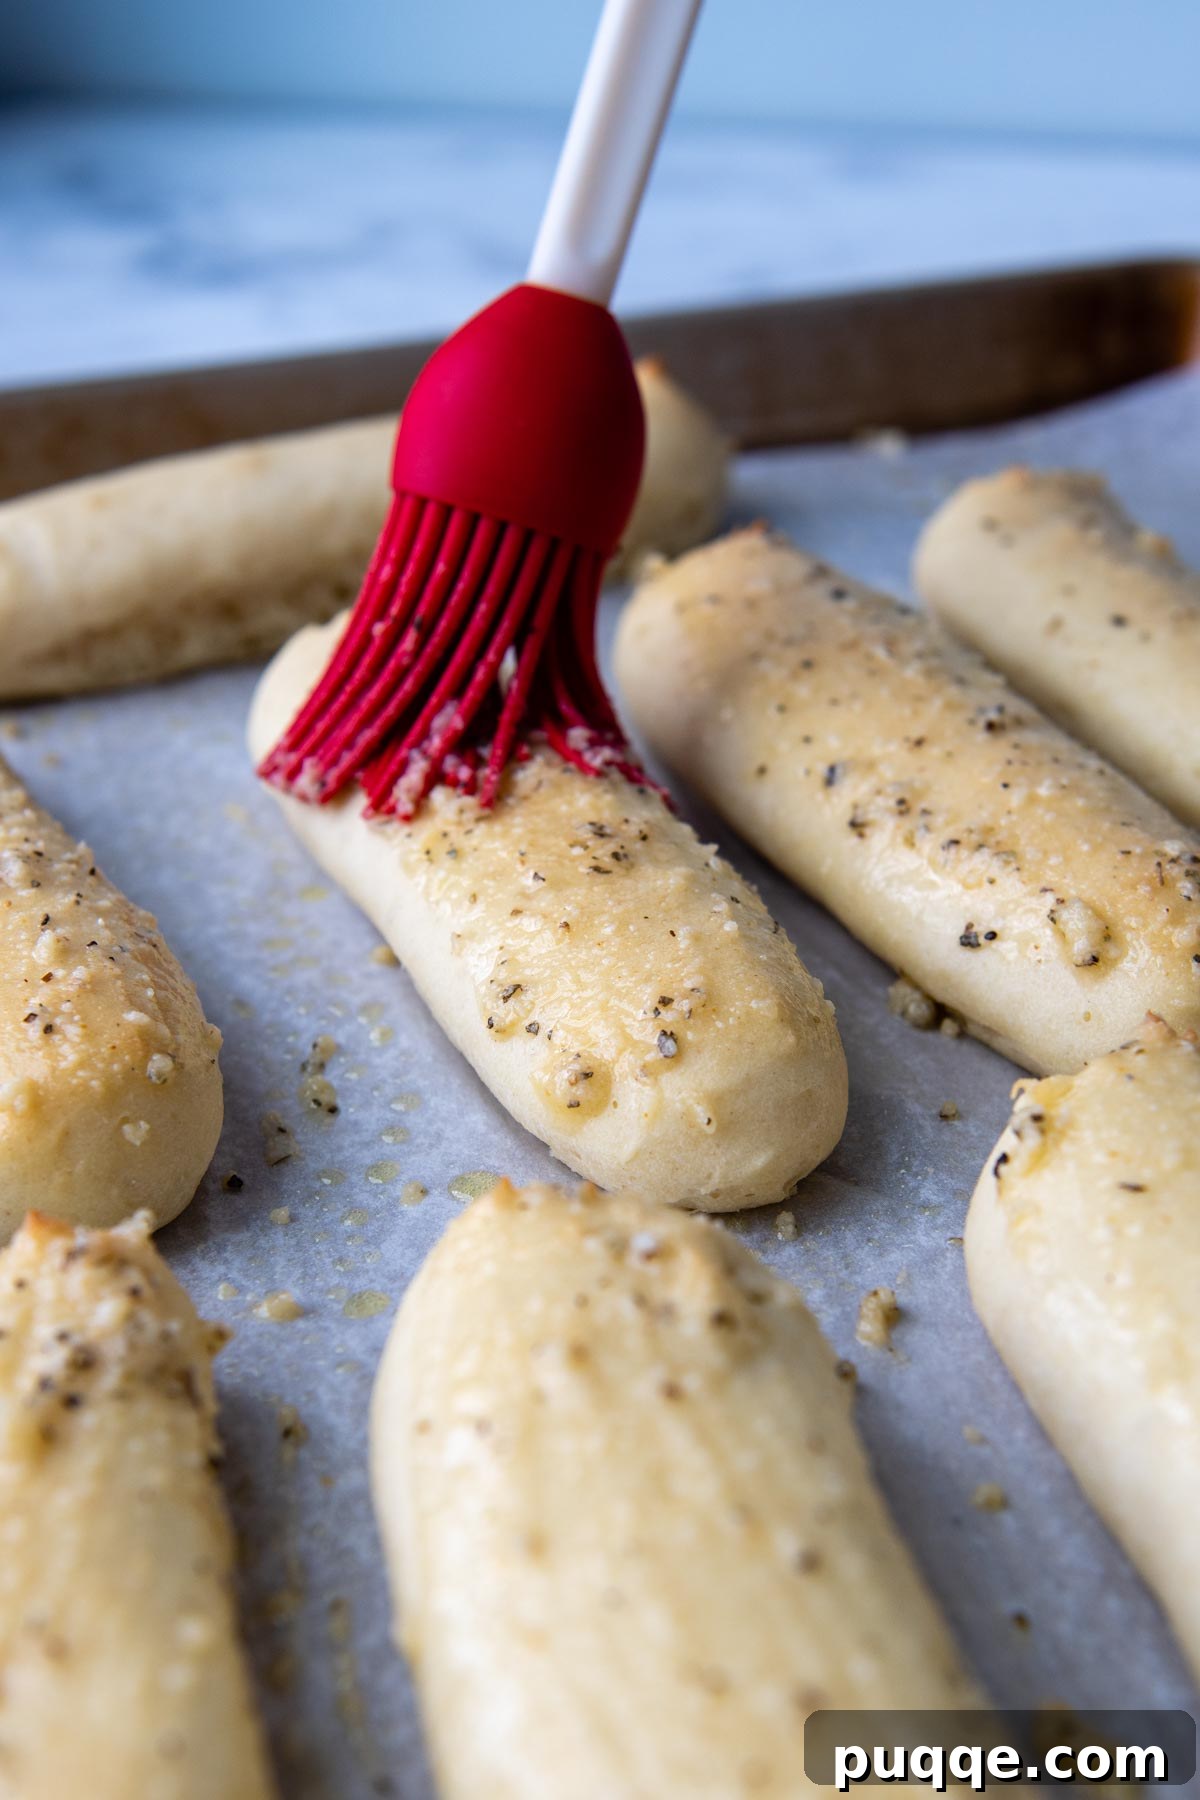
Once piped, let the breadsticks rise in a warm, draft-free spot for about 15 minutes. This is the perfect time to preheat your oven to 375°F (190°C). After their short rise, bake the breadsticks for 15-17 minutes, or until the bottoms are lightly golden brown and they reach the ideal internal temperature (more on this important tip below!). While they’re baking, quickly prepare your luscious garlic butter topping. As soon as the breadsticks emerge from the oven, brush them generously with the topping. Serve immediately and prepare for an immensely satisfying experience!
Parmesan Garlic Topping & Yummy Alternatives
The signature garlic breadstick topping is what truly elevates this recipe, evoking the mouthwatering flavors of classic pizzeria garlic knots. It features a harmonious blend of rich melted butter, savory parmesan cheese, fragrant garlic powder, and a touch of Italian seasoning, creating an aroma and taste that is utterly irresistible. However, the beauty of these soft breadsticks lies in their versatility, allowing for endless customization to suit your palate or dietary needs!
For any topping variation, the first step remains the same: brush the freshly baked breadsticks with melted butter or olive oil as soon as they come out of the oven. This creates the perfect base for your chosen flavors to adhere to. Then, get creative with one of these delicious alternatives:
- Dairy-Free Option: To make these breadsticks completely dairy-free, simply omit the parmesan cheese from the topping and substitute olive oil for the melted butter. For a cheesy flavor without dairy, nutritional yeast makes an excellent substitute, offering a similar umami depth.
- Savory Seed Blend: Sprinkle with sesame seeds for a slightly nutty flavor and delightful crunch, or try “everything bagel” seasoning for a burst of savory, salty goodness that works wonderfully.
- Herb Infusion: Mix dried herbs like oregano, basil, or a dash of red pepper flakes into your melted butter or olive oil for an aromatic kick. Freshly chopped rosemary or thyme can also be added for a gourmet touch.
- Spicy Twist: A pinch of cayenne pepper or a sprinkle of chili flakes can add a welcome heat to your garlic topping.
And of course, no breadsticks are complete without a delicious dipping sauce! For my favorite gluten-free dips, be sure to check out this easy recipe for gluten-free soft pretzels, which includes fantastic dipping ideas that pair perfectly with these breadsticks.
Essential Baking Tips for Gluten-Free Breadsticks
Achieving perfect gluten-free breadsticks is easier than you think, especially with a few expert tips. Here are some answers to common questions and insights to ensure your baking success:
Do I Need A Stand Mixer?
While this recipe can technically be attempted with a heavy-duty hand mixer, a stand mixer with a paddle attachment is highly recommended and makes the process significantly easier and more efficient. The dough for these breadsticks, while loose, is still quite substantial due to the volume of gluten-free flour. A stand mixer provides the necessary power to thoroughly combine and beat the ingredients for the recommended five minutes, ensuring proper hydration of the starches and a consistently smooth batter. Attempting this with a hand mixer can be quite taxing on both the appliance and your arm strength. If you happen to own a bread maker, it can also be effectively used for mixing the dough, offering another convenient alternative.
Best Way to Tell When They Are Done Baking
Visually determining when gluten-free bread is perfectly baked can be tricky, as it often “looks” done before it has fully cooked through. To avoid a gummy or dense interior – a common pitfall with GF baked goods – I highly recommend using an instant-read thermometer to check the internal temperature. This is a crucial tip I apply to every recipe in my gluten-free bread recipe collection.
If you remove the breadsticks from the oven too soon, the internal moisture won’t have had sufficient time to evaporate, resulting in that undesirable gummy texture. The ideal internal temperature for these breadsticks should reach between 195-205°F (90-96°C). A quick check with an instant-read thermometer will help the bread retain valuable heat while you get an accurate reading. My personal favorite kitchen tool for this is a Thermoworks Thermapen, known for its efficiency and accuracy – it’s truly one of my most valued kitchen gadgets!
Save This Recipe to Your Pinterest Board!
Let’s be friends on Pinterest! I’m always sharing great recipes and gluten-free tips!
Did you make this recipe? I love hearing from you! Leave a star rating and comment below the recipe card. Your feedback is incredibly helpful to others searching for recipes, and I always appreciate hearing about your culinary successes. You will always hear back from me! -Melissa
Softest Gluten-Free Breadsticks (Impossibly Easy)
 Melissa Erdelac
Pin
Rate
Remove Ads
Ingredients
- 3 cups (438g) gluten-free all purpose flour, (Cup4Cup gluten-free flour highly recommended)
- 2 tablespoons (25g) granulated sugar
- 1 packet (2 ½ tsp, 9g) instant rapid rise yeast
- 1 tablespoon (11g) psyllium husk powder, helps with bread moisture & structure (what is psyllium husk?)
- 1 teaspoon baking powder
- 1 teaspoon salt
- 1 ½ cups (360g) warm water (110°F)
- 2 large eggs, room temperature
- ¼ cup (53g) olive oil
Garlic Parmesan Topping
- 1 ½ tablespoons (21g) melted butter, see recipe notes for dairy-free
- 2 tablespoons grated parmesan, see recipe notes for dairy-free
- ¼ teaspoon garlic powder
- ¼ teaspoon kosher salt or sea salt
- ¼ teaspoon Italian seasoning
Equipment
-
Stand Mixer
-
Cup4Cup Gluten Free Flour
-
Pastry Brush
Instructions
-
In the bowl of a stand mixer fitted with a paddle attachment, combine the gluten-free flour, sugar, instant rapid rise yeast, psyllium husk powder, baking powder, and salt. Mix on low speed until all the dry ingredients are fully combined.3 cups (438g) gluten-free all purpose flour, 2 tablespoons (25g) granulated sugar, 1 packet (2 ½ tsp, 9g) instant rapid rise yeast, 1 tablespoon (11g) psyllium husk powder, 1 teaspoon baking powder, 1 teaspoon salt
-
Pour in the warm water, room temperature eggs, and olive oil. Begin mixing on low speed for about 1 minute, just until the dough starts to come together and appears uniformly moistened.1 ½ cups (360g) warm water (110°F), 2 large eggs, ¼ cup (53g) olive oil
-
Increase the mixer speed to medium and beat the dough for 5 minutes. Halfway through, stop the mixer and scrape down the paddle attachment and the sides of the bowl to ensure all ingredients are thoroughly incorporated. The finished batter will have a slightly thick, brownie-like consistency, which is ideal for these breadsticks.
-
 Line a baking sheet with parchment paper and lightly spray with nonstick cooking spray. To create a makeshift piping bag, place a gallon-sized Ziploc bag in a bowl and fold its sides over. Scrape all the dough from the mixer bowl into the Ziploc bag using two silicone spoons. Push the dough to one bottom corner of the bag, gently squeeze out any excess air, and twist the top to secure it.
 -
Snip off a 1-inch corner from the bottom of the Ziploc bag. Be cautious not to cut too large an opening initially; you can always enlarge it if needed. Pipe 6-inch long breadsticks onto the prepared baking sheet, leaving approximately 2 inches of space between each. You might require a second baking sheet to accommodate all the dough, depending on your breadstick size and pan dimensions.
-
Place the baking sheet in a warm, draft-free spot and allow the breadsticks to rise for about 15 minutes. During this time, preheat your oven to 375°F (190°C).
-
Bake for 15-17 minutes, or until the bottoms of the breadsticks are lightly browned and their internal temperature reaches between 190-200°F (90-93°C) when checked with an instant-read thermometer.
-
While the breadsticks are baking, combine all the ingredients for the garlic parmesan topping in a small bowl. As soon as the breadsticks are removed from the oven, immediately brush them generously with the prepared topping. Serve them warm for the best experience, or transfer them to a wire rack to cool completely before storing.1 ½ tablespoons (21g) melted butter, 2 tablespoons grated parmesan, ¼ teaspoon garlic powder, ¼ teaspoon kosher salt or sea salt, ¼ teaspoon Italian seasoning
Notes
Dairy-Free Option
For a dairy-free version of the garlic topping, simply omit the grated parmesan cheese and substitute an equal amount of olive oil for the melted butter. To retain a savory, cheesy flavor, you can sprinkle nutritional yeast on the breadsticks after brushing with olive oil.
Best Tips and Tricks for Success
- Snipping the Corner: The size of the snipped corner on your makeshift piping bag is crucial. On my first attempt, I cut too much, resulting in giant breadsticks! Always err on the side of making the opening smaller; you can easily snip off more if needed. Remember that the breadsticks will expand slightly in the oven.
- Immediate Topping Application: For the best flavor absorption and a truly irresistible finish, brush the garlic butter topping onto the breadsticks immediately as they come out of the hot oven. The residual heat helps the butter and seasonings melt beautifully into the bread.
- Serving Warm: These breadsticks are undeniably at their peak when served warm. If you need to prepare them ahead of time, simply wrap cooled breadsticks in a paper towel and microwave them for 10-15 seconds to restore their warmth and softness.
- Make-Ahead & Freezing: For ultimate convenience, breadsticks can be baked, cooled completely, and then frozen for future enjoyment. This is a fantastic option for meal prepping or unexpected guests. Thaw them at room temperature for about 1 hour before rewarming.
Freezing, Storing, and Rewarming
For the freshest and most delectable experience, these gluten-free breadsticks are best enjoyed immediately after baking or within the same day. However, if you have leftovers or wish to prepare them in advance, proper storage and reheating can maintain their deliciousness.
To rewarm individual breadsticks quickly, wrap them in a paper towel and microwave for 10-15 seconds. For larger batches or a crispier exterior, wrap the breadsticks loosely in foil and place them in a preheated 350ºF (175°C) oven for 5-7 minutes.
Leftover breadsticks can also be frozen for longer storage. For best results, wrap each breadstick individually in plastic wrap or foil, then transfer them to a freezer-safe Ziploc bag or airtight container. They can be frozen for up to three months. To enjoy, thaw at room temperature for about an hour before reheating using the methods described above.