
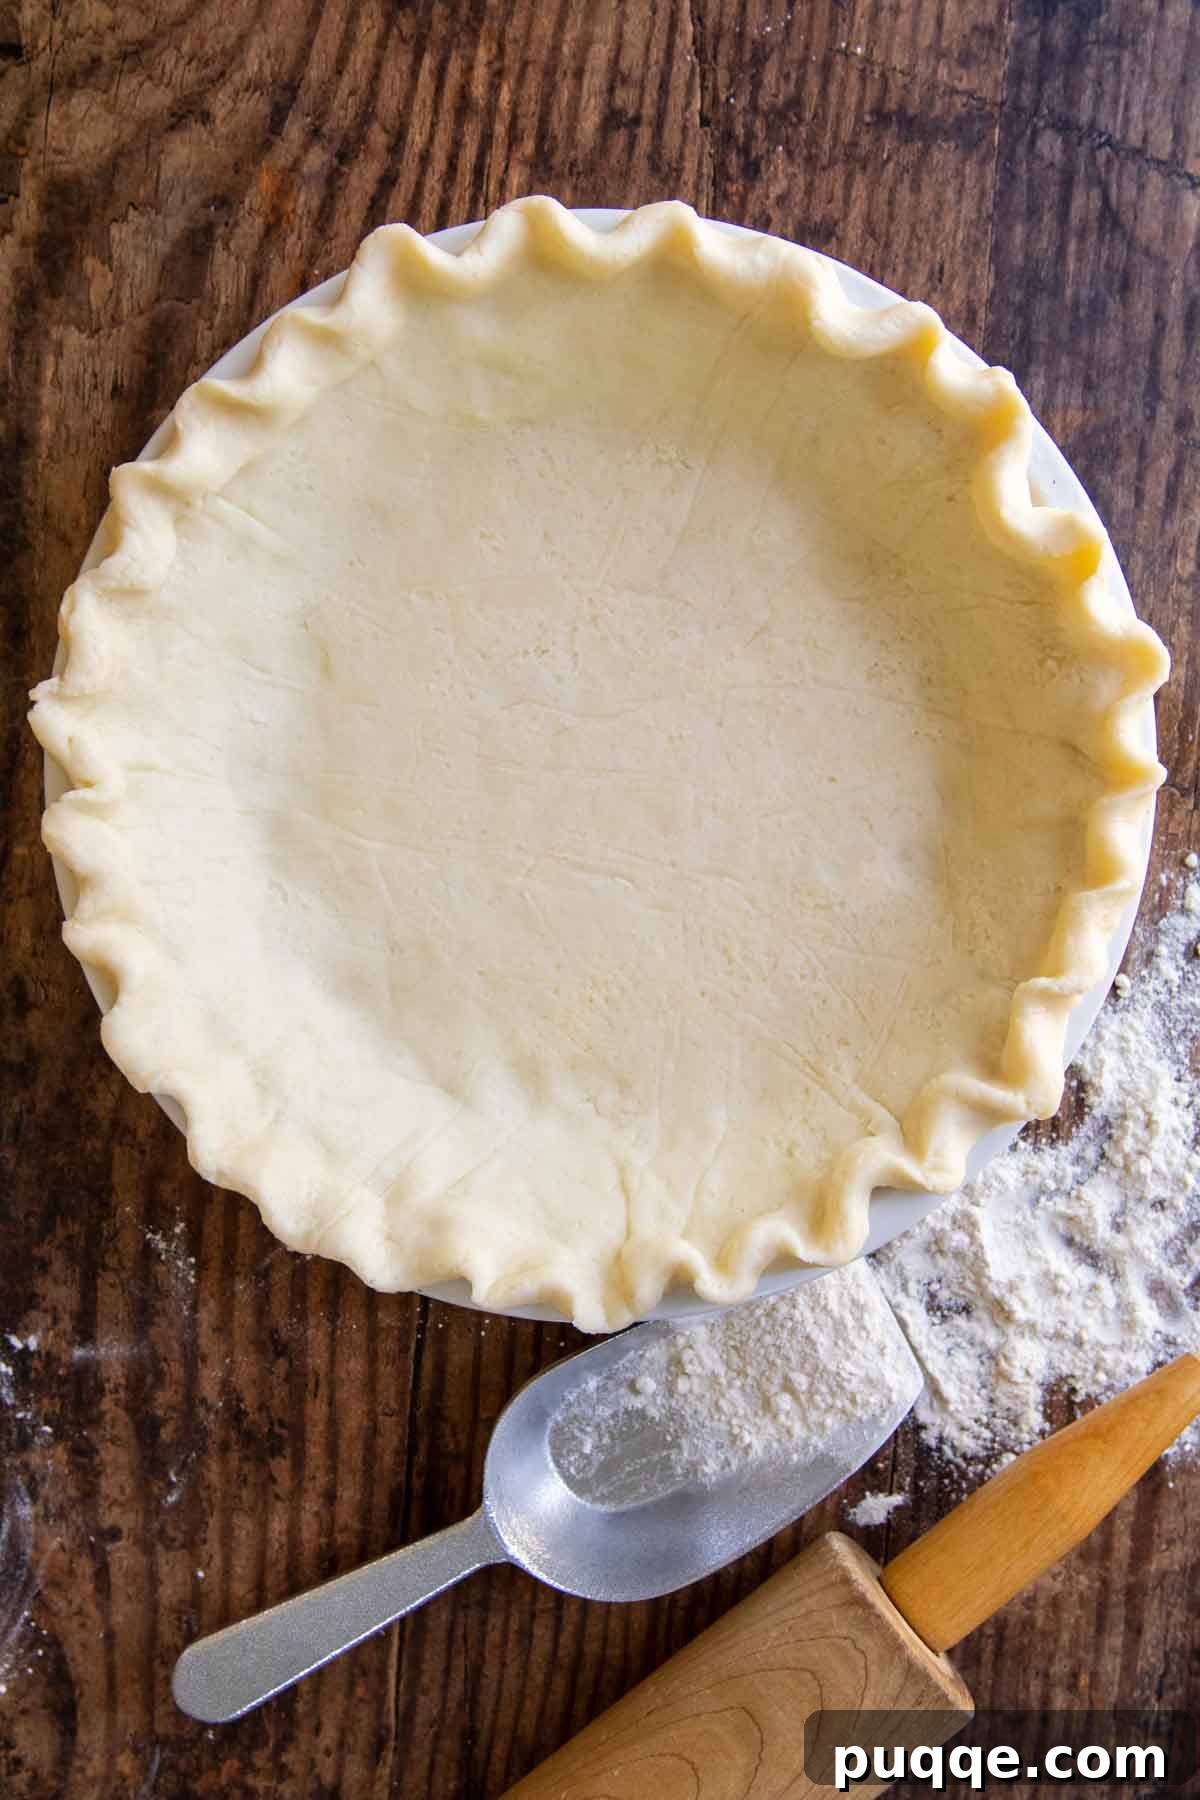
If you’ve been searching for a **flaky, tender, and incredibly easy-to-roll gluten-free pie dough**, your quest ends here. This isn’t just another gluten-free recipe; it’s a game-changer designed to deliver the best-tasting gluten-free pie crust you’ve ever experienced. Packed with expert tips and clever tricks, this comprehensive guide will empower you to create a perfect GF crust every single time right in your home kitchen. The secret behind its delightful texture, so light and similar to traditional all-butter crusts? A humble tablespoon of sour cream, which magically tenderizes the dough.
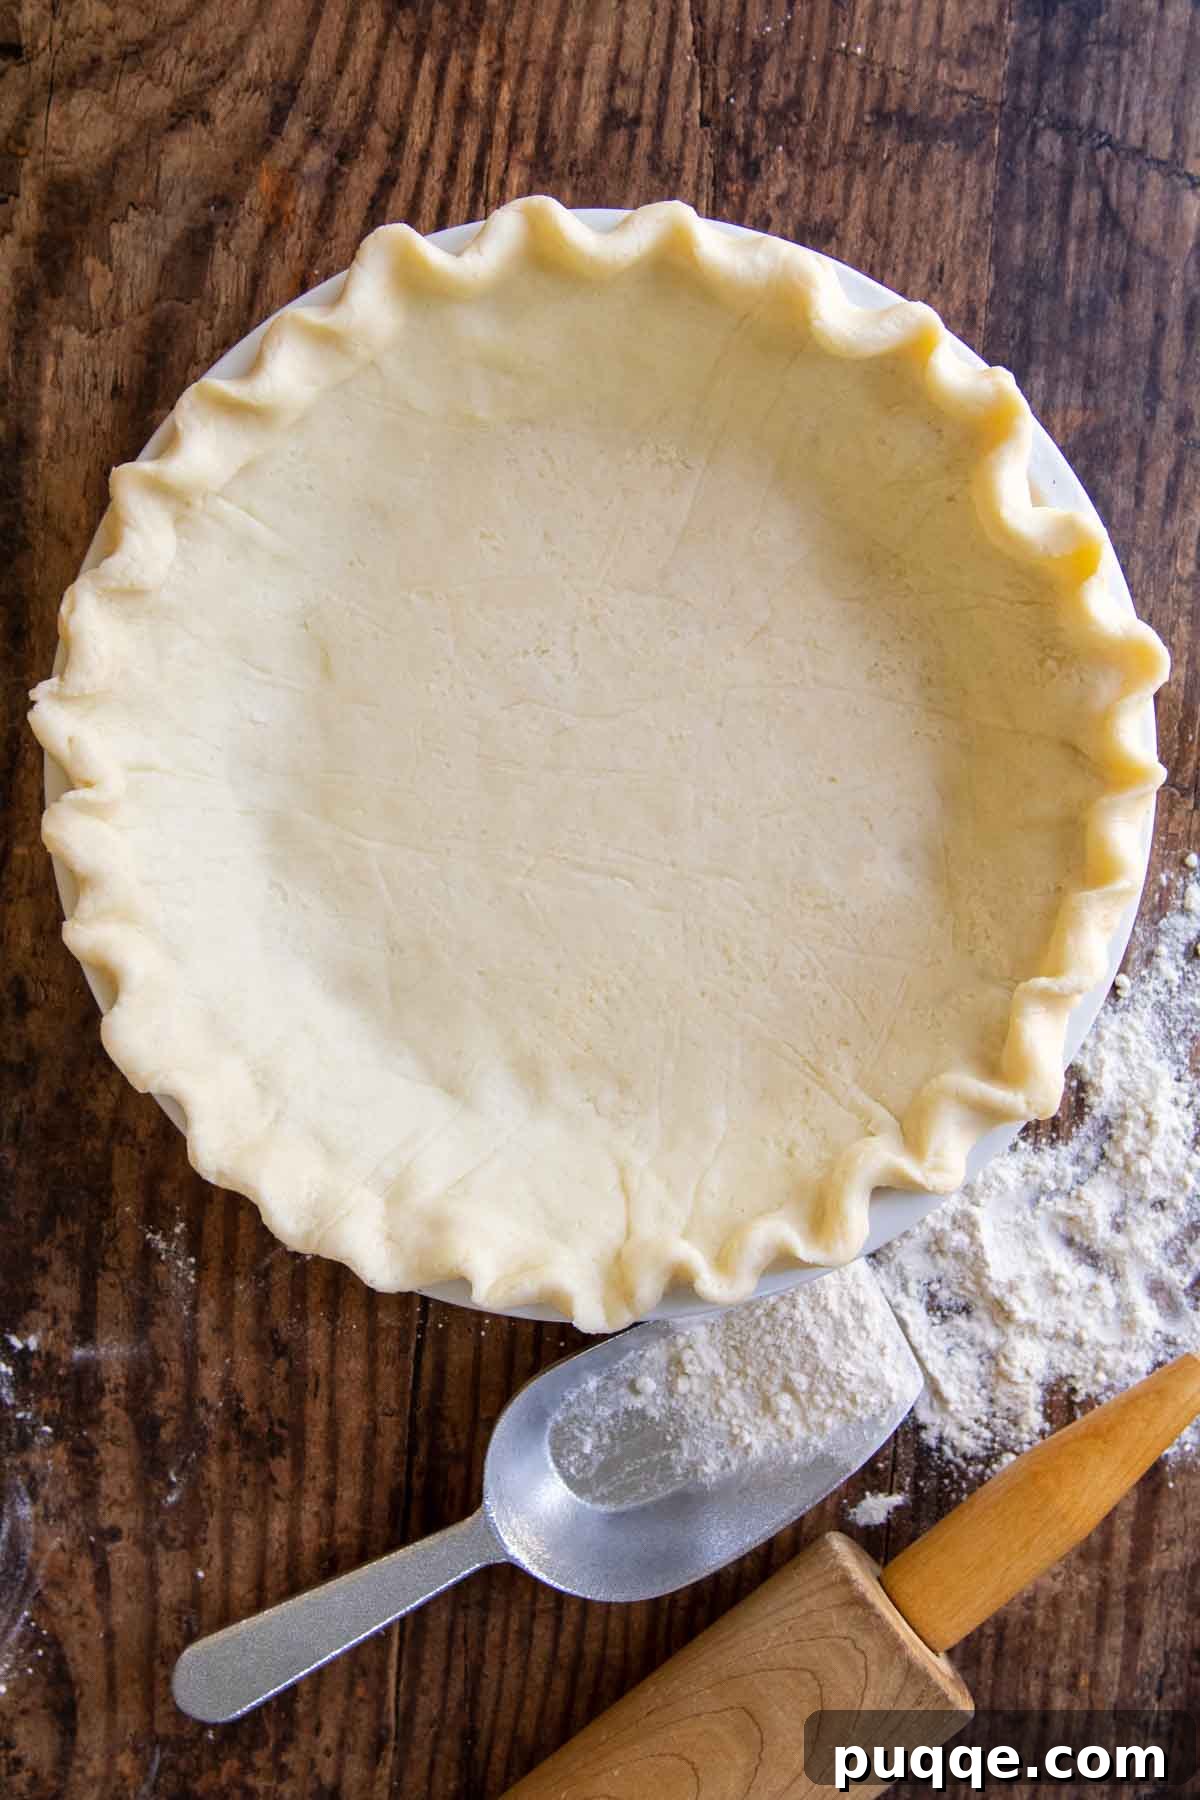
Unlocking the Perfect Gluten-Free Pie Crust: A Revolutionary Recipe
My baking journey, much like many others, hit a significant roadblock when I first ventured into gluten-free pie dough. What once felt intuitive and effortless in my pre-GF baking days became a frustrating, often tear-inducing challenge, yielding consistently dismal results. The elasticity and pliability I was accustomed to simply vanished with traditional gluten-free blends.
While I found solace in alternative crusts, like a press-in oatmeal pie crust that conveniently required no rolling or chilling, a void remained. I yearned for that classic, buttery, and truly flaky pie dough – the kind that perfectly cradles a warm apple pie filling or provides a crisp foundation for a creamy pumpkin pie. I missed the pure joy of crafting traditional pies.
Then, a pivotal resource entered my life: America’s Test Kitchen: The How Can It Be Gluten Free Cookbook. This groundbreaking cookbook offered revolutionary techniques and insights that not only reignited my passion for beloved desserts but also transformed me into a confident GF baker. It became the inspiration for many successful creations, including my legendary soft and squishy homemade gluten-free bread recipe, and ultimately set me on the path to publishing my own gluten-free cookbook.
One of the most profound lessons learned from their expertise was the indispensable role of sour cream in gluten-free pie crusts, especially when combined with all-butter. This seemingly small addition proved to be the missing ingredient I desperately needed. Sour cream works its magic by tenderizing the pastry dough, effectively coating the starches and preventing them from binding too tightly. This results in a homemade GF pie crust that is remarkably light and flaky, a stark contrast to the dense, chewy textures I had previously encountered.
Thanks to this revelation, pie-making and I joyfully reunited. This very recipe became the cornerstone of an entire collection of gluten-free pie recipes that I once thought were beyond my reach. I even utilize this versatile dough to create an amazing from-scratch GF chicken pot pie, a dish so delicious it has successfully won over even the toughest culinary critics, who often can’t tell it’s gluten-free.
Beyond its superior taste and texture, this guide offers an abundance of valuable information. I share numerous hacks, detailed rolling tips, recommendations for the best gluten-free flour blends, and essential equipment. Whether you prefer using a food processor for speed or crafting your dough by hand, I’ll walk you through each method, ensuring consistent, perfect results with every bake. You’ll gain the confidence to create pastry dough that performs beautifully every single time.
“This is The Best GF Pie Crust Recipe!! My non-GF son-in-law raved about the crust & was shocked when I told him it was GF! I feel I have arrived in the baking world when I can make a beautiful pie! This. Is. It!! Thank you for a grand recipe!”
—Julie
Essential Equipment to Simplify Your Gluten-Free Pie Making
While mastering a gluten-free pastry crust doesn’t strictly require an arsenal of fancy kitchen gadgets – a simple bowl, fork, and rolling pin will suffice – investing in a few key pieces of equipment can dramatically enhance your experience and consistency. If you’ve previously struggled with homemade pie crusts, these tools can truly be a game-changer, addressing common frustrations and ensuring easier, more reliable results. Below, I explain why each item is recommended, helping you decide what’s essential for your baking needs based on any challenges you might have faced.
- Food Processor: For those who find dough making intimidating or messy, a food processor is an invaluable asset. It streamlines the process, completing the dough from start to finish in approximately 10 minutes. The blades are exceptionally efficient at incorporating cold butter into dry ingredients, creating a perfectly consistent texture far superior to what can be achieved with just a fork or a pastry blender. It keeps the butter cold, which is crucial for flakiness.
- Silicone Dough Bag: If rolling out dough is a recurring struggle, this affordable tool is an absolute must-have. I used to rely on two sheets of parchment paper or plastic wrap, only to contend with frustrating creases and dough stubbornly sticking to the ridges. This silicone bag eliminates those issues entirely, making it incredibly easy to roll the dough to the correct size and effortlessly transfer it to your pie plate. No more sticking, no more uneven thickness, just smooth rolling every time.
- Pie Shield: The edges of a pie crust are notoriously prone to browning much faster than the bottom crust due to their direct exposure to oven heat. While aluminum foil offers a quick fix, it can be cumbersome to maneuver and check on the pie. A dedicated pie shield simplifies this process immensely, providing uniform protection and ensuring a beautifully golden crust without burnt edges.
- Metal Pie Pans: A common pitfall with gluten-free pies is a soggy bottom crust. GF starches often have difficulty absorbing fats, which can lead to a less flaky texture and a soft base. Baking your pie crust in a metal pan significantly improves heat conduction, ensuring faster and more even baking of the bottom crust, thus guaranteeing the best possible results and a delightfully crisp foundation.
- Pie Weights: When a recipe calls for blind baking (baking the crust without a filling) or partially baking (helpful for moisture-rich fillings), the crust needs to be weighted to prevent it from bubbling up and shrinking. Traditional methods involve lining the crust with parchment paper and filling it with dried beans. However, I highly recommend specialized pie weights. They eliminate the need for parchment and often feature holes that allow heat to circulate more effectively to the bottom crust, ensuring an evenly baked and stable base. Simply place them in and bake.
Crafting Your Gluten-Free Pie Crust: Step-by-Step
(Below, you’ll find detailed step-by-step photos and simplified instructions. For the complete recipe, including precise ingredient amounts, please scroll down to the full recipe card.)
Step 1: Prep Your Ingredients for Success
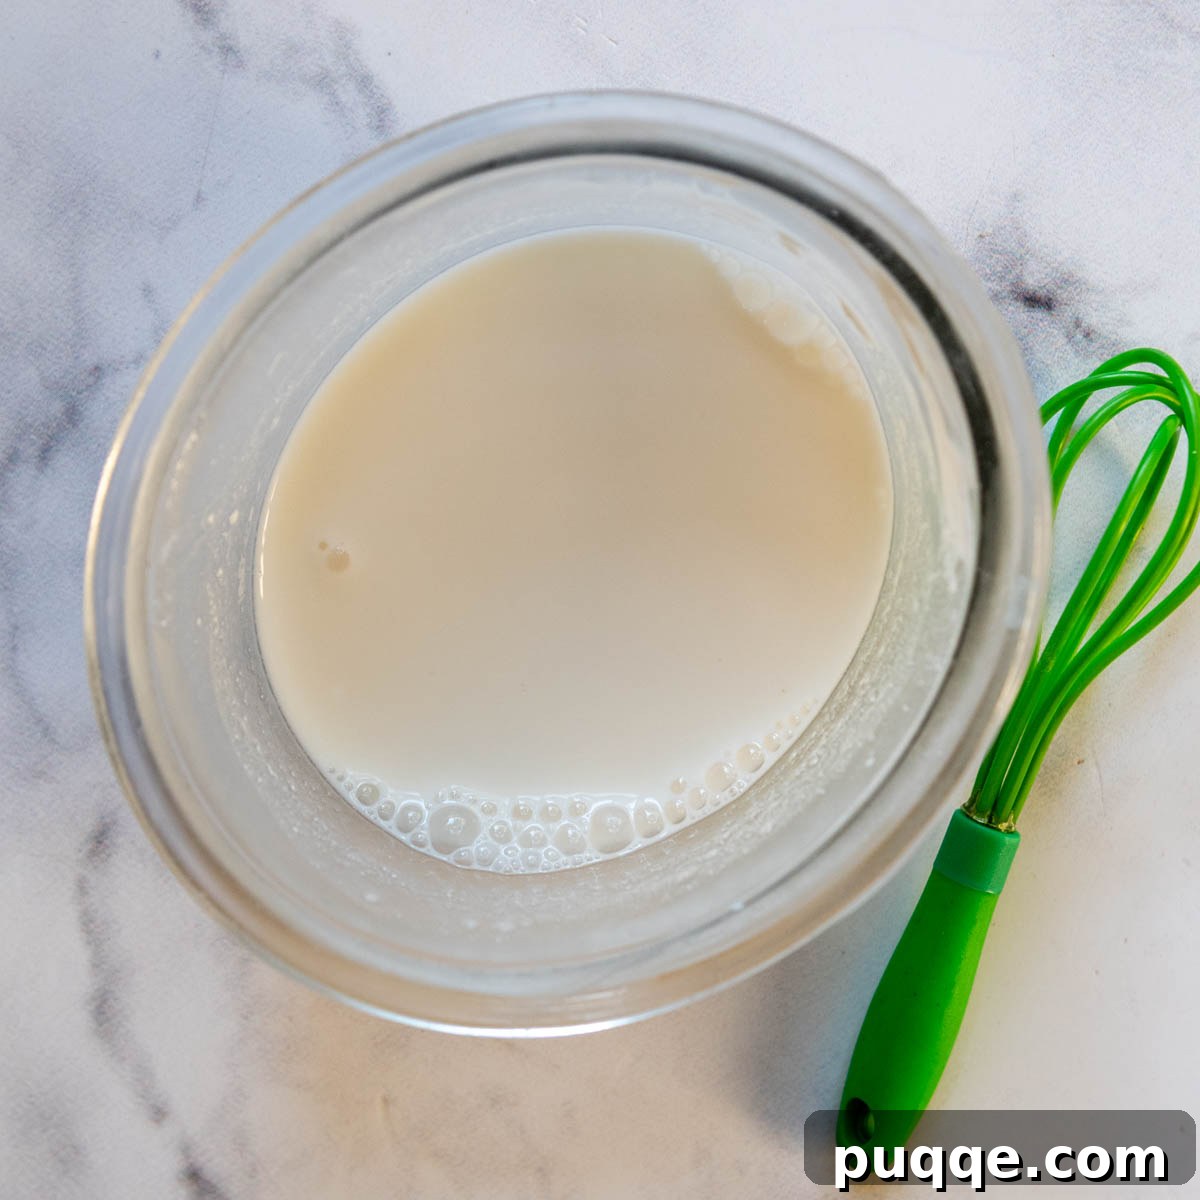
The cornerstone of an exquisitely flaky, all-butter pie crust, especially for gluten-free versions, lies in using very cold ingredients. Begin by whisking together your cold water, sour cream, and apple cider vinegar in a small bowl. Immediately place this bowl in the refrigerator to keep it chilled until you’re ready to incorporate it into the dough. Next, chop your unsalted butter into small cubes and place them in the freezer for about 10 minutes. This brief freezing ensures the butter remains solid and creates pockets of steam during baking, leading to that desirable flaky texture.
Step 2: Combine Dry Ingredients and Butter
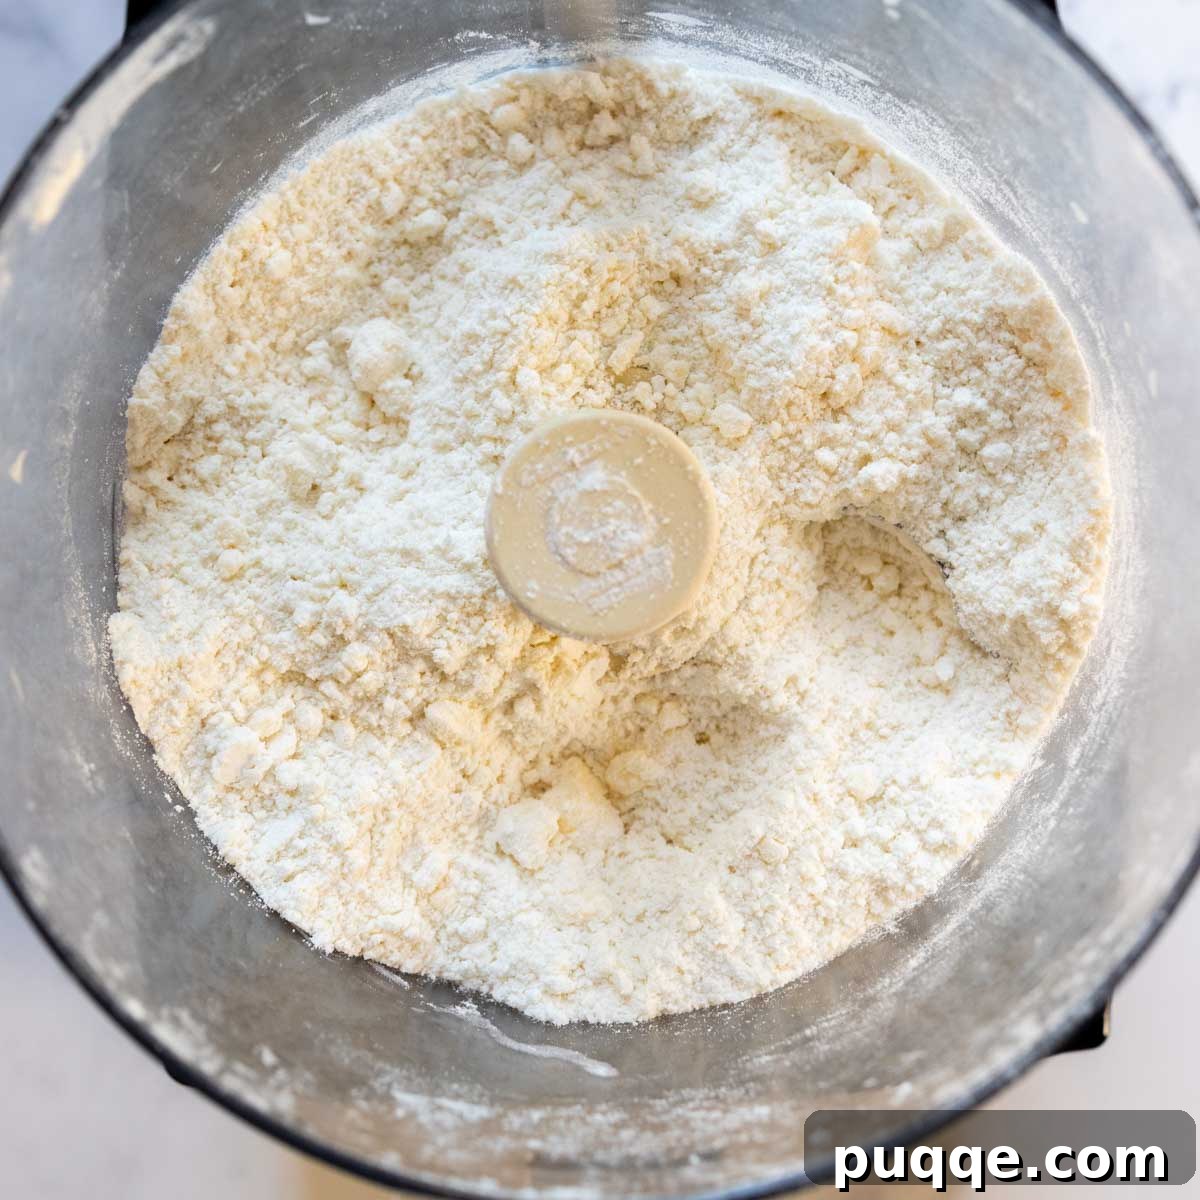
Start by adding your dry ingredients – the gluten-free flour blend, granulated sugar, and salt – to your food processor or mixing bowl, and mix them thoroughly. Then, introduce the partially-frozen butter cubes. Using a pastry blender or by pulsing in a food processor, work the butter into the dry ingredients. The goal is to achieve an even incorporation, where the butter is broken down into small, pea-sized pieces and the mixture resembles coarse sand. Avoid overmixing at this stage to prevent the butter from warming too much.
Step 3: Incorporate Wet Ingredients and Achieve the Right Consistency
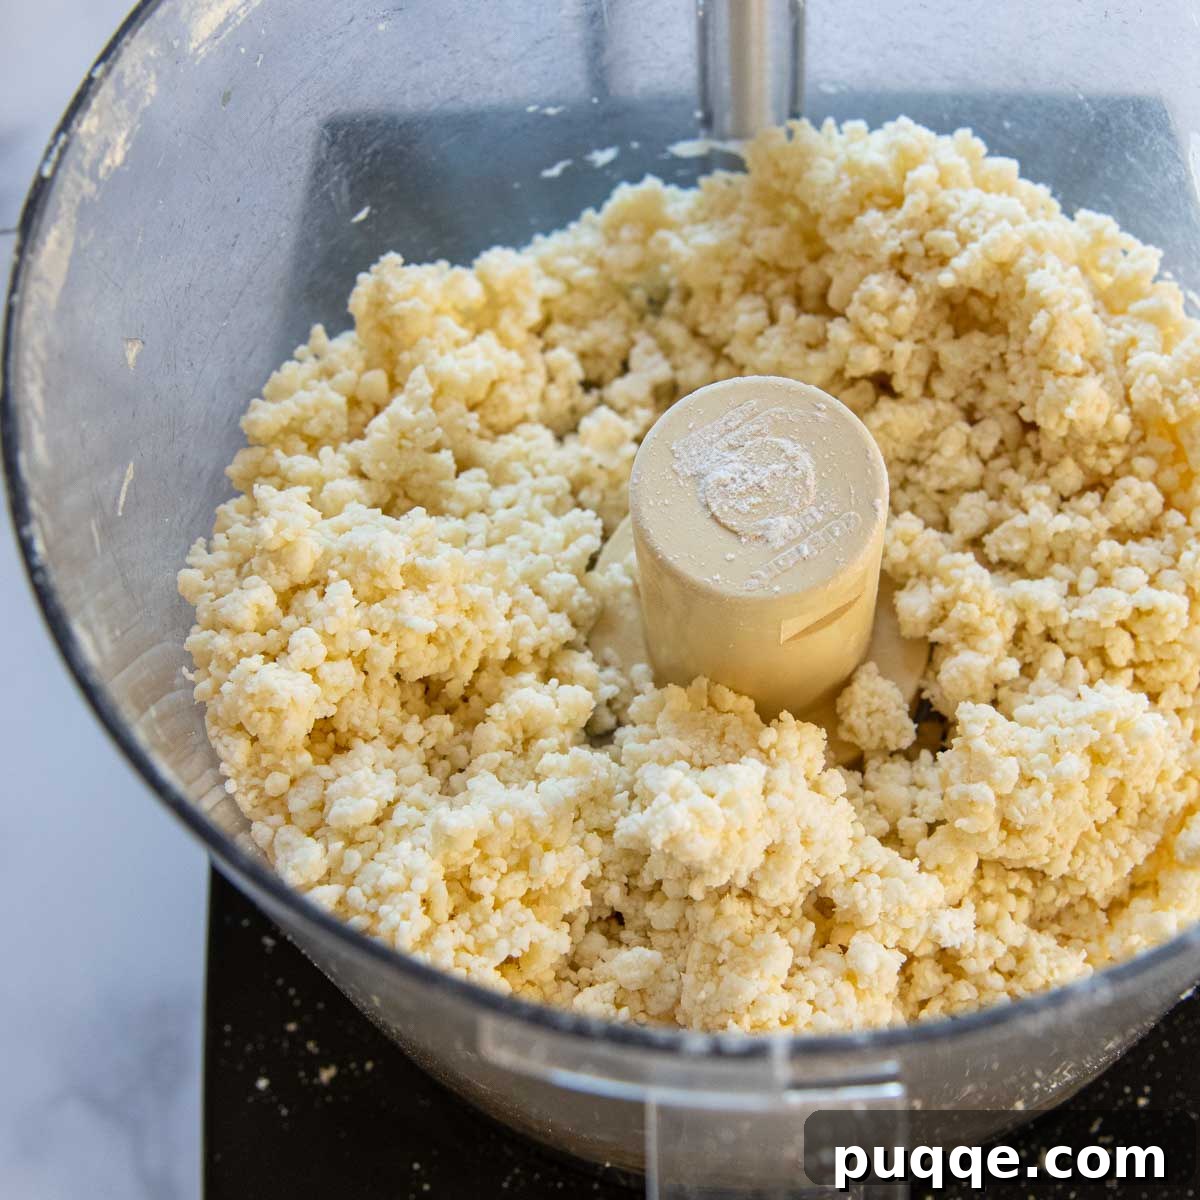
Finally, add the chilled liquid mixture from the refrigerator to your butter-flour blend. Continue to mix, either by pulsing in the food processor or gently working by hand, until the dough becomes moistened and small clumps begin to form. The dough should just come together but not be overly sticky or wet.
Pro Tip for Consistency: To accurately gauge if your dough has enough liquid, take a small pinch and flatten it between your fingers. If it holds together without crumbling or breaking apart easily, you’ve reached the right consistency. If it’s too crumbly, add a tiny dash more ice water, pulse a few times, and recheck. Conversely, if the dough feels excessively wet or sticky, add a small dash of gluten-free flour, pulse, and recheck until the ideal texture is achieved. This fine-tuning is crucial for easy rolling.
Step 4: Shape, Wrap, and Chill the Dough
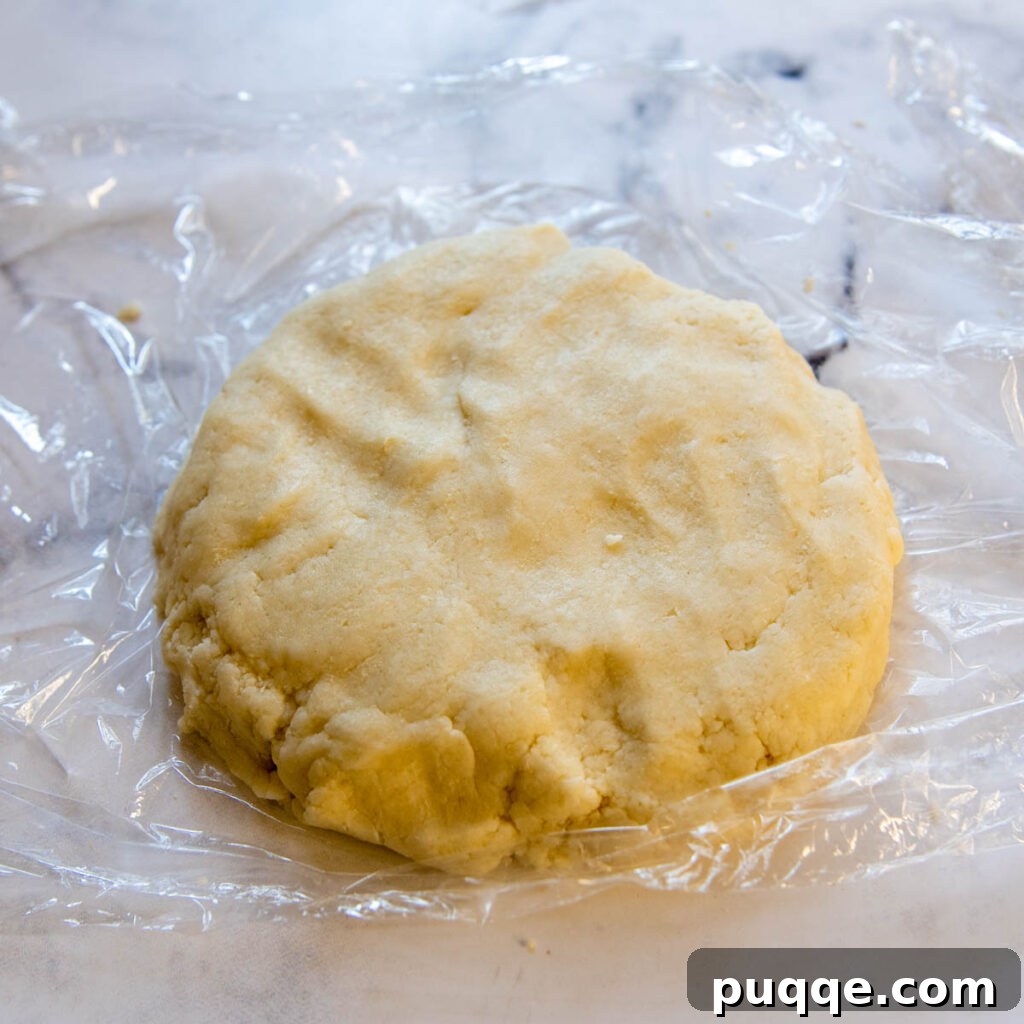
Once your dough has reached the perfect consistency, it’s time for the crucial chilling and resting phase before rolling. Lay a large piece of plastic wrap on your counter. Carefully transfer the dough onto the plastic wrap and gently shape it into a flat, thick disc, approximately 1 inch in thickness. This disc shape will make rolling much easier later. Wrap the dough tightly in the plastic wrap, ensuring no air can get in. Refrigerate for a minimum of 1 hour, or if you’re in a hurry, you can freeze it for about 30 minutes. Chilling allows the butter to solidify and the gluten-free flours to properly hydrate, making the dough more stable and easier to handle.
Pro Tip for Storage: Wrapped pie crust dough can be safely refrigerated for 1-2 days without losing its quality. For longer storage, place the tightly wrapped disc inside a freezer-safe ziplock bag and freeze for up to 1 month. When you’re ready to use it, simply thaw the frozen dough in the refrigerator overnight to ensure it’s ready for rolling.
Mastering the Roll: Tips for Gluten-Free Pie Crust Success
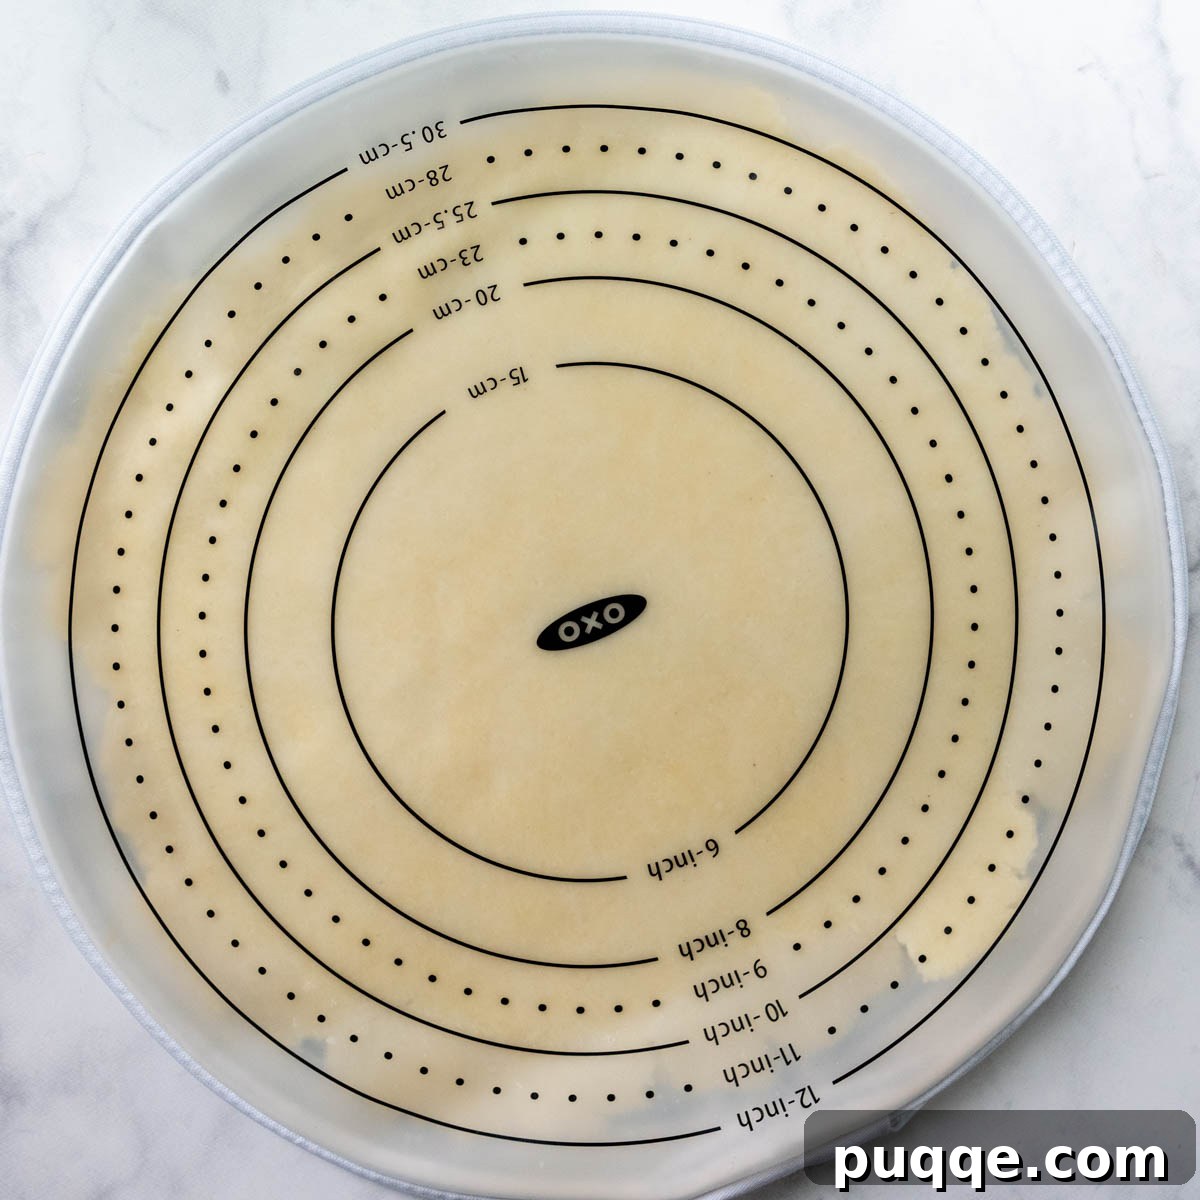
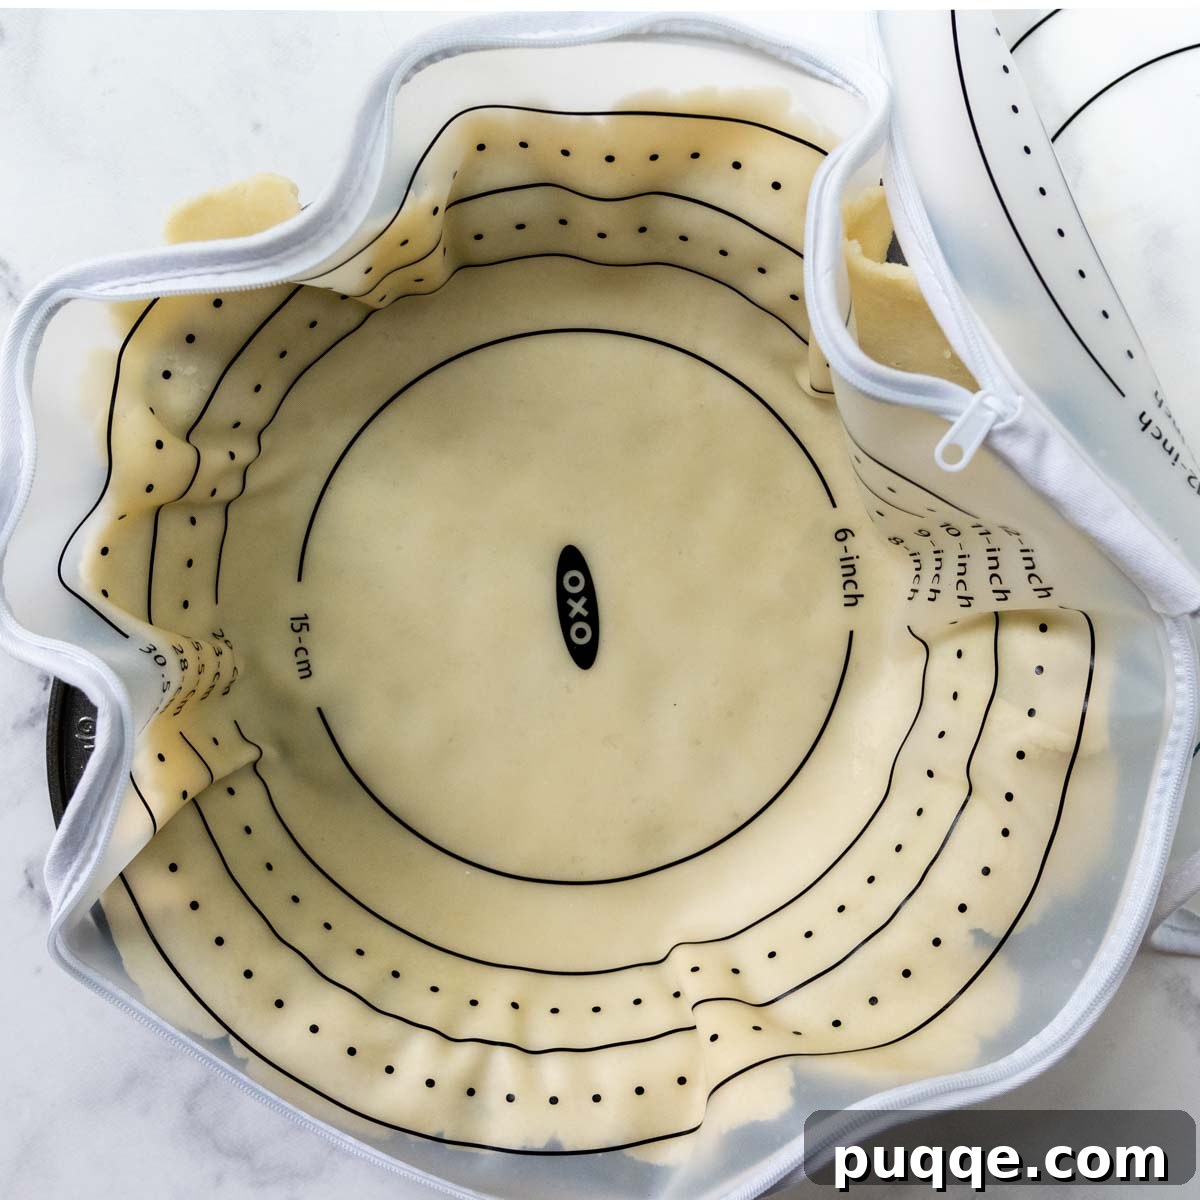
- **Embrace the Silicone Dough Bag:** For the absolute easiest and most mess-free rolling experience, I highly recommend using a silicone pie bag. This ingenious tool prevents the dough from sticking, eliminates the need for extra flour (which can dry out your dough), and makes shaping a perfect circle effortless. If a silicone bag isn’t available, two large sheets of parchment paper are your next best option. While plastic wrap can work, it tends to stick more stubbornly to the dough, potentially causing frustration.
- **Respect the Temperature:** Gluten-free dough can be finicky with temperature. If your dough is excessively cold straight from the fridge or freezer, it will be rigid, difficult to roll, and prone to breaking and cracking. To avoid this, let the dough disc sit on your counter for about 5-10 minutes before attempting to roll it. This slight warming will make it much more pliable and cooperative.
- **Roll from the Center Outward:** To ensure an even thickness across your entire pie crust, always start by pressing down firmly in the center of the dough. Then, gently push the dough outward from the middle with your rolling pin. This technique prevents the center from becoming too thick while the edges become excessively thin, a common issue that can lead to uneven baking.
- **Rotate for a Perfect Circle:** As you roll, make a conscious effort to regularly rotate the pie dough a quarter turn. This simple action helps to maintain a perfectly round shape. If you notice one side getting larger or thinner than the other, you can carefully trim a small amount of dough from the thicker side and gently press it onto the thinner side to even it out before continuing to roll.
- **Combat Sticking with Chilling:** Sometimes, during the rolling process, the warmth from your hands or the rolling surface can cause the butter in the dough to soften, leading the parchment paper (or silicone bag) to stick. Should this happen, don’t force it. Simply place the rolled pie crust, still sandwiched between the parchment paper, back into the refrigerator for about 5 minutes. The butter will re-solidify, making it much easier to peel away the paper without tearing the dough.
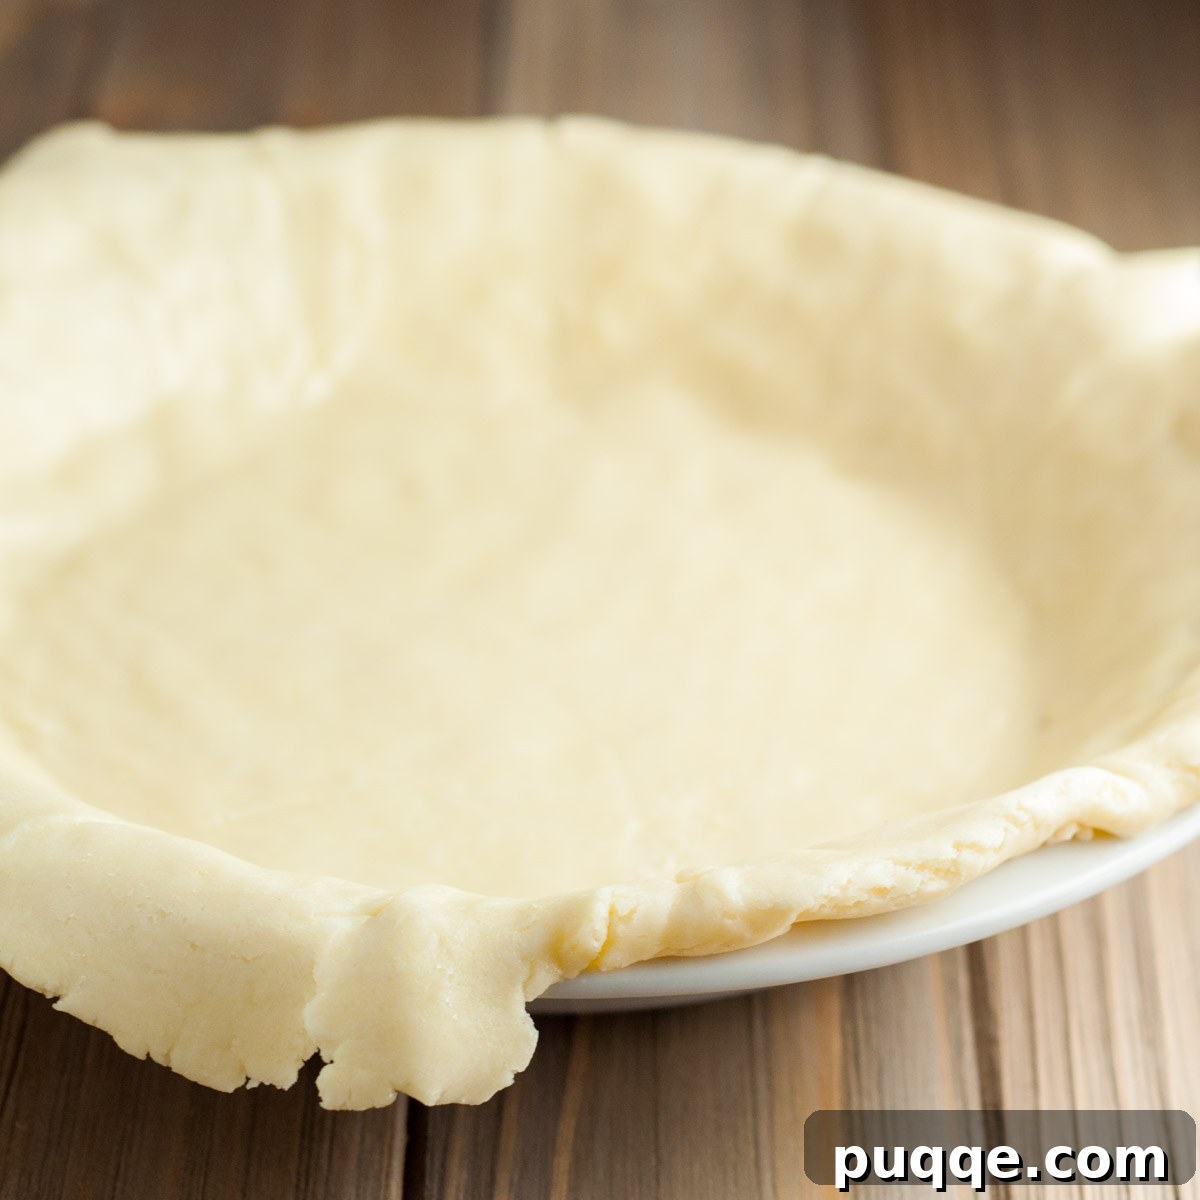
- **Flawless Edges: Trim and Fold:** Once you’ve successfully transferred the rolled dough into your pie dish, use kitchen scissors to carefully trim any excess dough around the edges, leaving about a ½-inch overhang. This overhang is crucial for creating a decorative edge. If any section of the edge seems sparse or needs more dough to fold under, you can press on some of the clipped-off scraps to reinforce it. Then, gently tuck the overhang dough underneath itself, pressing it firmly against the rim of the pie dish.
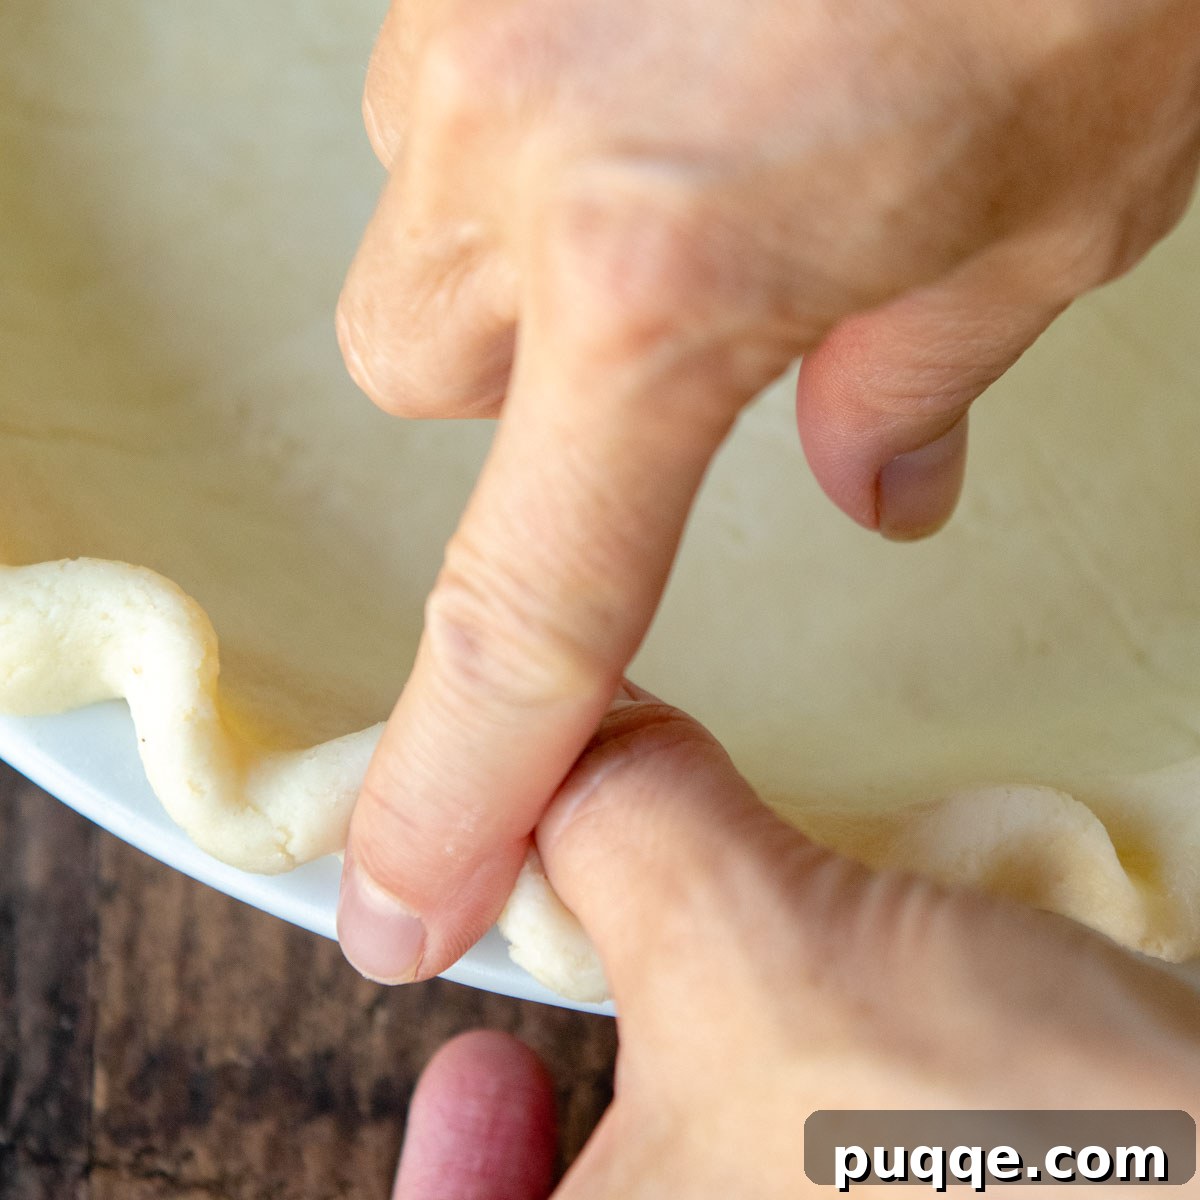
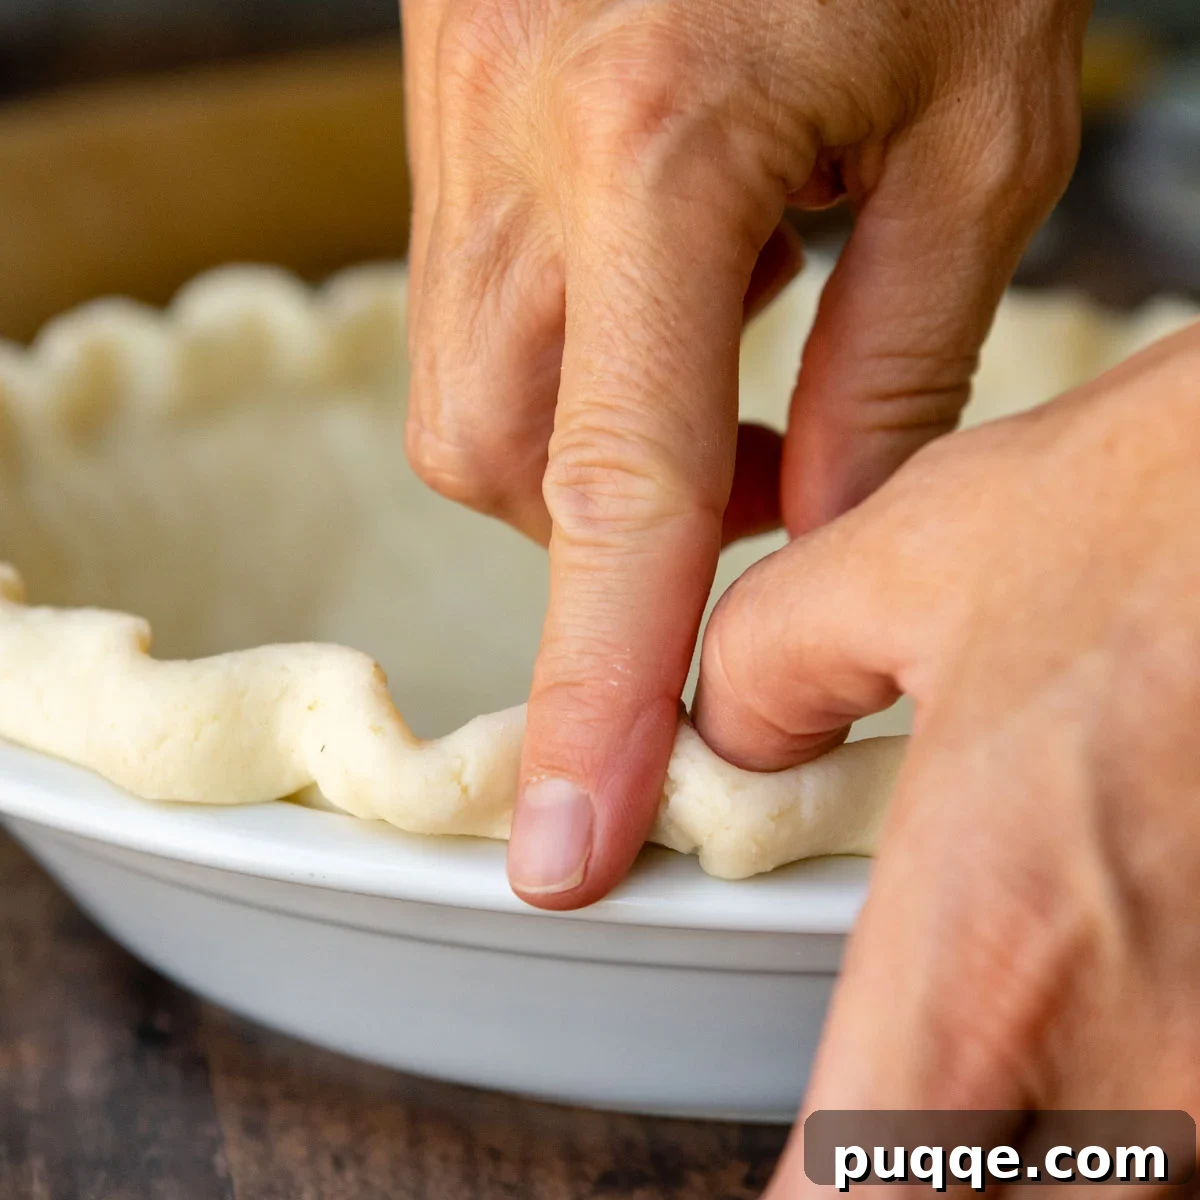
- **Decorative Fluting and Shine:** To create a beautiful, decorative edge, use two fingers to flute the crust. You can press one finger down while pushing another up next to it, or use a fork for a simpler crimped edge. For an extra touch of golden shine and crispness, brush the exposed edges of your pie crust with an egg wash (a whisked egg with a splash of water) before adding your filling. This will give your pie a professional, appetizing finish.
Essential Baking Methods for Gluten-Free Pie Crusts
Once your beautifully rolled and shaped gluten-free dough is nestled in your pie pan, it’s crucial to give it a final chill. Move the pie dish to the freezer for 15 minutes, or up to an hour, until the dough is firm and very cold. This step is vital for preventing shrinkage and maintaining the crust’s structure during baking. After chilling, simply add your desired pie filling and bake according to the specific recipe’s instructions.
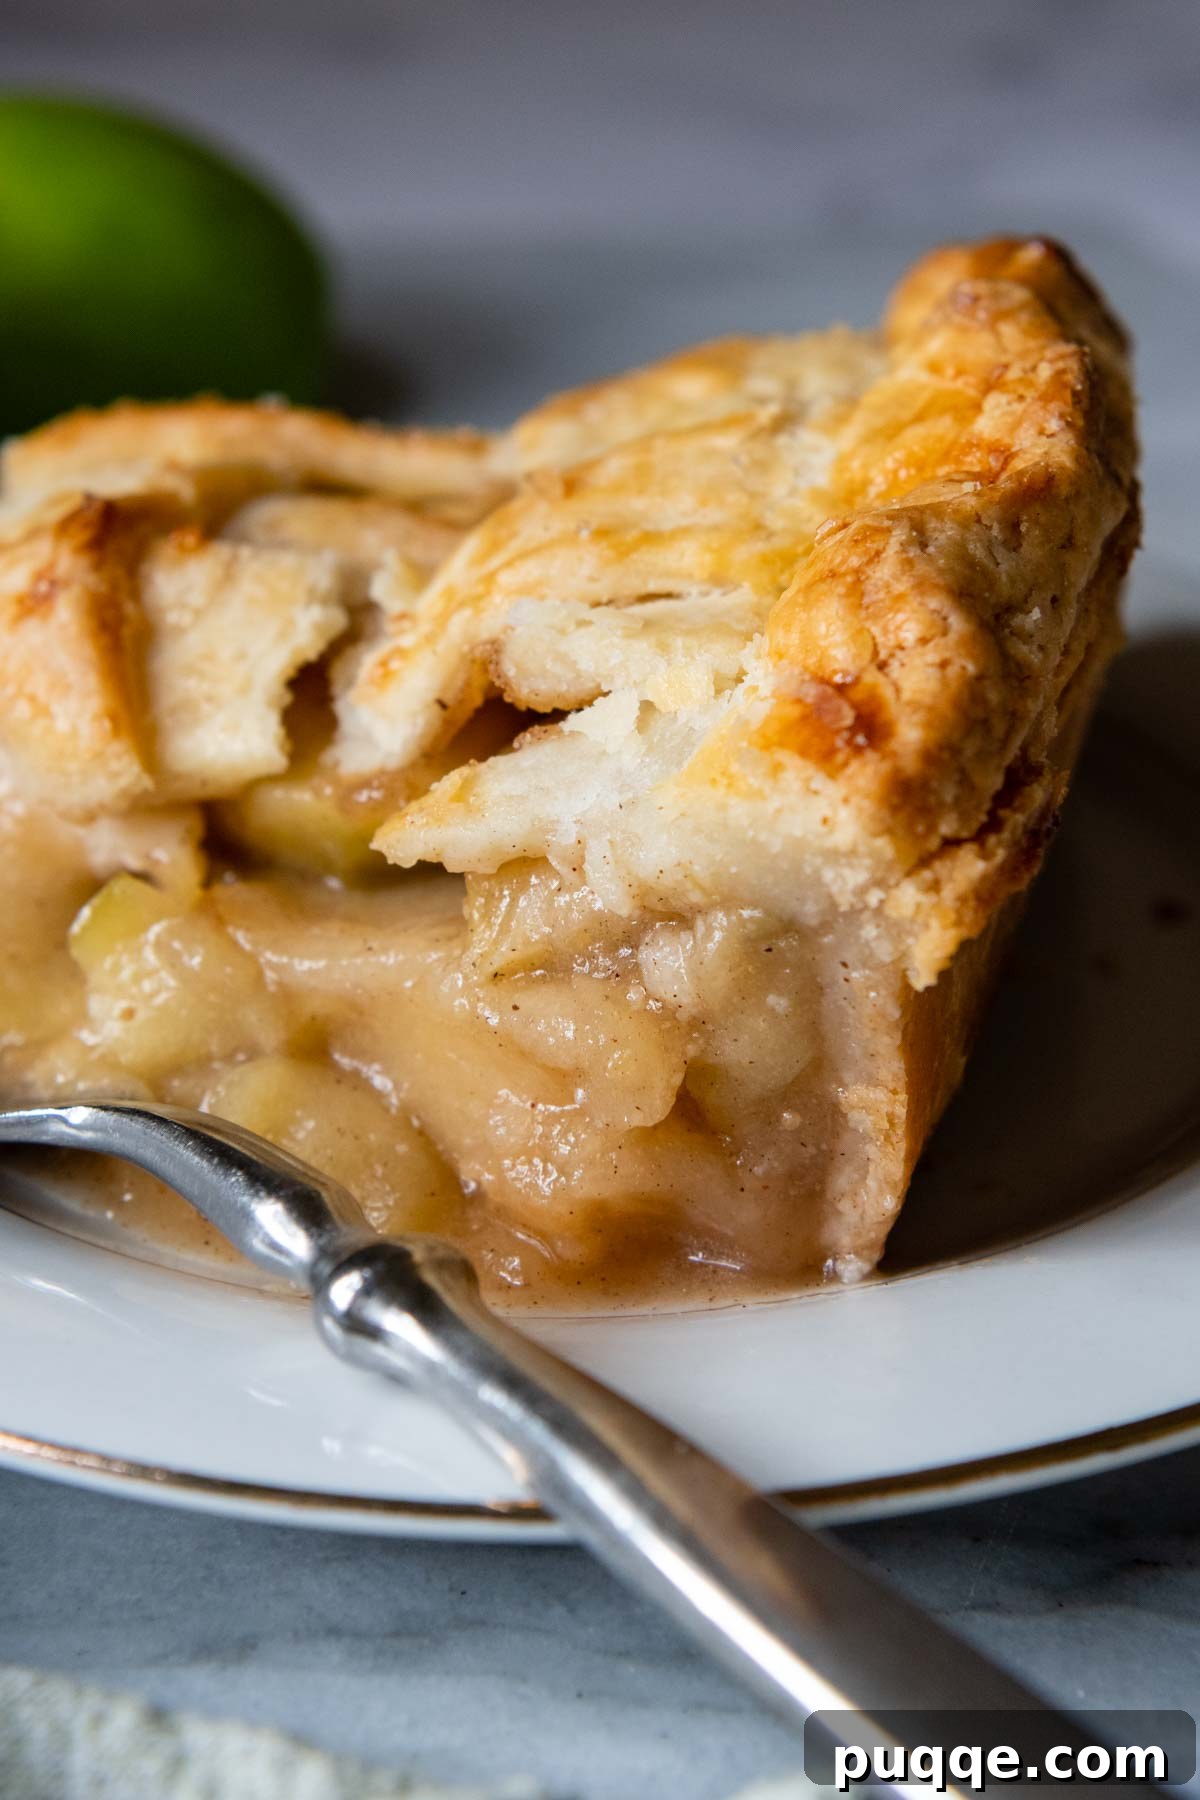
- Double or Lattice Crust: This recipe provides enough dough for a single-crust pie. If your recipe calls for a double crust or a decorative lattice top, you will need to double the ingredients from the recipe card. Once doubled, divide the dough into two equal discs and refrigerate them separately. For an elegant lattice top, follow the detailed tutorial provided in this homemade gluten-free apple pie recipe. For a traditional double crust, gently invert the second chilled crust over your filling, trim any excess dough as necessary, and then seal the top and bottom edges together by tucking them underneath. Finally, use your fingers and thumb to create a beautiful, decorative fluted edge.
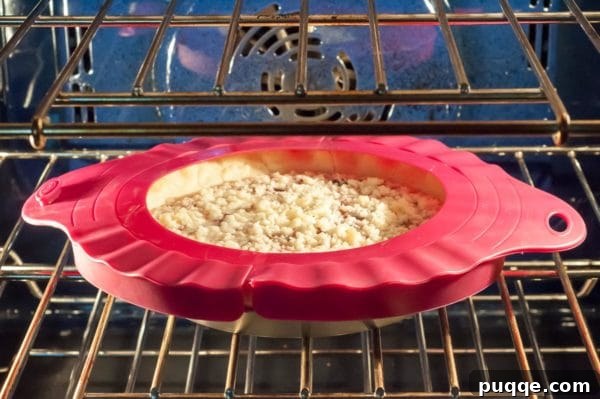
- Partially Baked Crust (Par-Baking): Some pie recipes, particularly those with wetter fillings (like quiches or custard pies), require a partially baked crust to prevent a soggy bottom. To par-bake, preheat your oven to 375ºF (190ºC). Place a pie weight directly onto the chilled crust. Alternatively, you can line the bottom of the chilled crust with a piece of parchment paper and fill it with dried beans or rice. Bake on the middle rack for 15 minutes, rotating the pie halfway through to ensure even baking. The crust should be lightly golden and set, but not fully cooked.
- Blind Baked Crust (Fully Baked): For pies that have no-bake fillings, or fillings that require minimal baking (like fresh fruit tarts), a fully blind-baked crust is essential. Preheat your oven to 375ºF (190ºC). Just as with par-baking, place a pie weight onto the chilled crust, or use parchment paper filled with dried beans. Bake on the middle rack for 20-25 minutes, rotating halfway through. During the last 5-10 minutes, carefully remove the pie weights and parchment paper to allow the bottom crust to fully brown and crisp. Keep a close eye on the edges and use a pie shield to protect them from over-browning if needed.
Demystifying Gluten-Free Flours for Pie Crusts
The choice of gluten-free flour blend is paramount to the success of your pie crust. I’ve personally tested this recipe with several commercially available gluten-free flour blends, and my findings consistently highlight the significant differences in their performance, taste, and texture. Below are my detailed notes on three popular flours, but I also encourage you to explore the comments section to see what other readers have successfully used. Remember, not all GF flour blends are created equal, and their starch compositions can dramatically affect your final product.
- Recommended: Cup4Cup Gluten Free Flour: My absolute top recommendation for gluten-free pie crusts, and indeed for most gluten-free baking, is Cup4Cup. This blend consistently yields exceptional results. The dough rolls out beautifully, without cracking or becoming overly sticky, and the baked crust achieves a wonderfully flaky and tender texture. What truly sets Cup4Cup apart is its incredibly neutral taste; it mimics the flavor of traditional wheat flour so closely that most people would never suspect it’s gluten-free. It has a balanced blend of rice flour, cornstarch, tapioca starch, and potato starch, which contributes to its superior texture and workability.
- Bob’s Red Mill Gluten-Free 1-to-1 Baking Flour: This flour blend proved relatively easy to work with and rolled out well, offering a decent alternative. However, when baked, the resulting crust had a noticeably chewier texture, lacking the delicate flakiness I strive for, and felt slightly denser compared to the Cup4Cup crust. Furthermore, I detected a subtle, somewhat off-putting aftertaste, which some people may find undesirable in a sweet pie. This is likely due to its different blend of flours, which includes garbanzo bean flour and fava bean flour, sometimes imparting a distinctive flavor.
- King Arthur Measure-for-Measure Gluten-Free Flour: My experience with King Arthur Measure-for-Measure was the most challenging. The dough consistently turned out quite dry and crumbly, requiring me to add a significant amount of extra liquid to get it to bind together. This adjustment likely threw off the delicate balance of the recipe. Consequently, the baked crust was dense and had a chewy, almost gummy texture, rather than the desired flakiness. This indicates that its specific blend of rice flour, tapioca starch, and potato starch may absorb liquid differently or lack the necessary elasticity for a truly tender pie crust. It highlights the importance of recipe-specific flour recommendations.
Save This Recipe to Your Pinterest Board!
Let’s be friends on Pinterest! I’m always sharing great recipes!
Did you make this recipe? I love hearing from you! Leave a star rating and comment below the recipe card. It helps others when searching for recipes and I appreciate feedback from our community. You will always hear back from me! -Melissa
Best Gluten-Free Pie Crust (Flaky, Tender, Easy To Roll)

Melissa Erdelac
8
15 mins
1 hr 15 mins
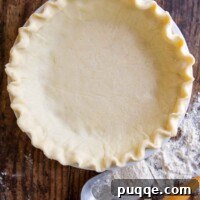
If you’re looking for a flaky, tender gluten-free pie dough (or pastry dough) that is fabulously easy to roll out, look no further. Not only is this the best tasting gluten-free pie crust, this detailed guide is also full of tips and tricks to help you make perfect GF crust at home. The secret? A tablespoon of sour cream! It tenderizes the dough to make it just as light as all butter pie crusts you grew up on.
Pin
Rate
Remove Ads
Ingredients
- 8 tablespoon (113 g) unsalted butter, cut into small cubes and frozen for 10 minutes
- 2 ½ tablespoons ice water
- 1 ½ tablespoons sour cream
- 1 ½ teaspoon apple cider vinegar
- ¾ PLUS ⅔ cup (194 g) gluten-free flour, I highly recommend Cup4Cup gluten-free flour
- 1 ½ teaspoon granulated sugar
- ½ teaspoon salt
Equipment
- Pie Shield
- Pie Weight
- Food Processor
Instructions
Food Processor Method:
- Place the cubed butter in the freezer for 10 minutes. Mix together the cold water, sour cream, and vinegar in a small bowl. Place the liquids bowl in the refrigerator until you are ready to use.
- Pulse together the flour, sugar, and salt together until mixed.
- Process the butter into the flour mixture until well incorporated, evenly dispersed, and without large chunks.
- Add the liquids to the food processor and pulse until the flour becomes moistened and small dough clumps appear.
Tip: To check if you have enough liquid, clump and flatten a small bit of dough. If it doesn’t stick together, is crumbly, or breaks apart easily, add a small dash of ice water. Pulse a few times and recheck. If the dough is too wet or sticky, add a dash of flour. Pulse a few times and recheck.
- Turn the dough onto a large sheet of plastic wrap and flatten into a thick 1″ disk. Wrap tightly and refrigerate for at least 1 hour or freeze for 30 minutes. Before rolling out, let sit on counter 5 minutes so it is easier to work with.
By Hand Method:
- Mix together the cold water, sour cream, and vinegar in a small bowl and place in the fridge until ready to use. Freeze the butter for 10 minutes until very cold.
- In a large bowl whisk together the gluten-free flour, sugar and salt.
- Use a pastry blender, fork, or fingers to cut and knead butter into the dough until it is well incorporated throughout.
- Add half the liquids and knead with fingers or a fork. Pour in the remaining liquids. Knead until the dough starts to come together and the liquids are well mixed with flour.
- Turn the dough onto a large sheet of plastic wrap and flatten into a thick 1″ disk. Wrap tightly and refrigerate for at least 1 hour or freeze for 30 minutes. Before rolling out, let sit on counter 5 minutes so it is easier to work with.
How To Roll Out Crust:
- I find rolling in a silicone pie bag works best because the dough doesn’t stick, no additional flour is needed, and it’s easy to shape. If you don’t have one, use two large pieces of parchment paper. Plastic wrap may be used, but it has a tendency to stick to the dough more.
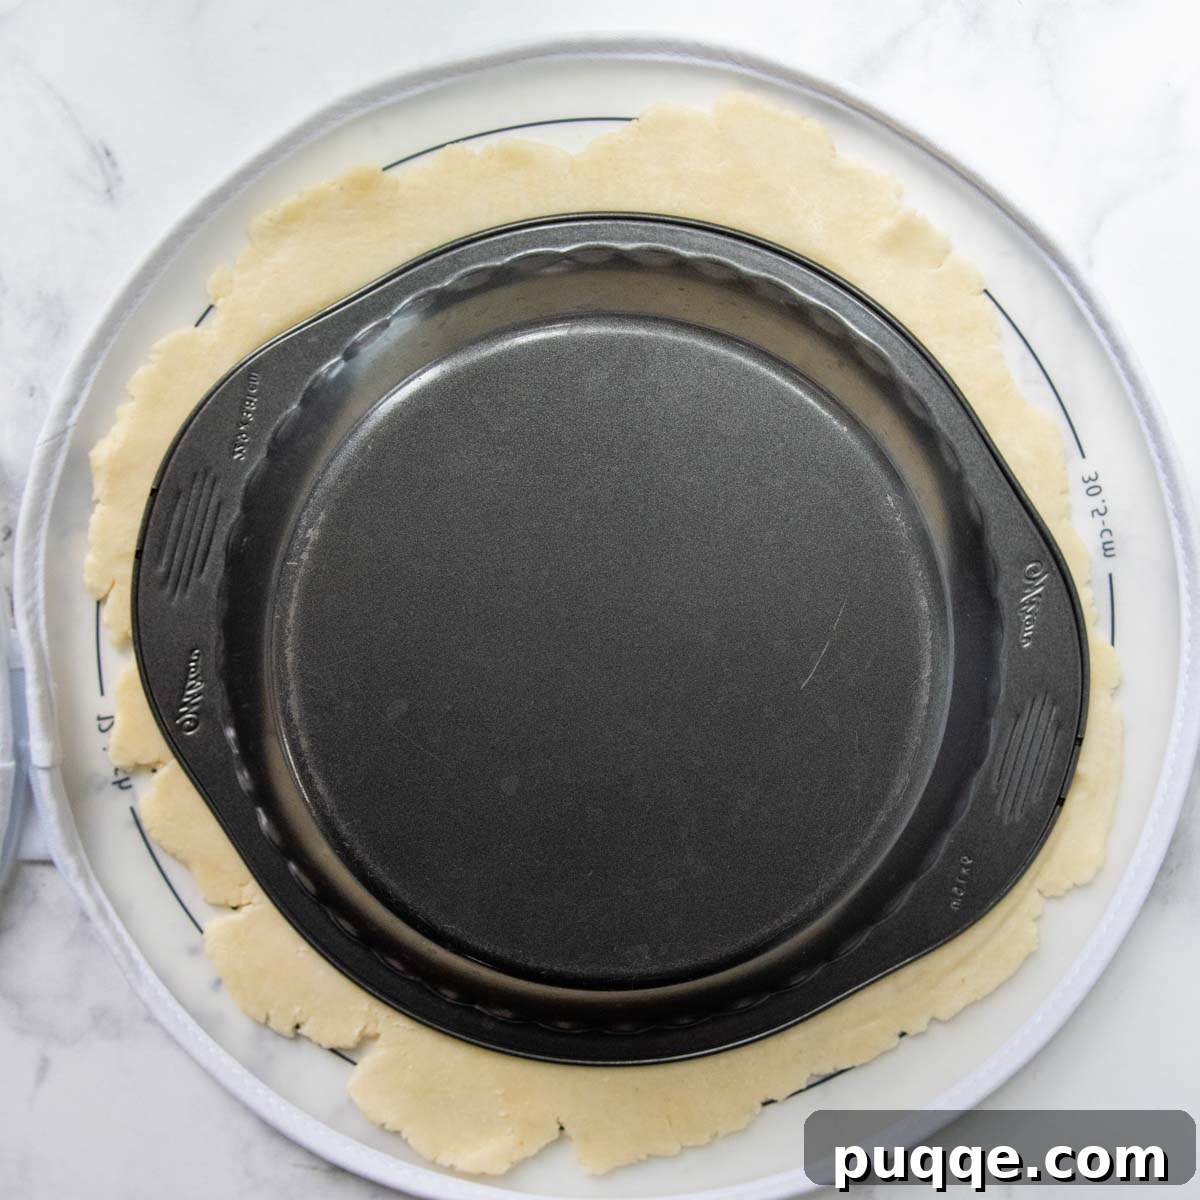
- Place the unwrapped dough disc in middle. Use a rolling pin to press and spread the dough from the middle out. Roll into a circle slightly larger than your pie dish.
- Remove the top paper, and invert into the pie plate. Remove the second paper.
Tip: If the dough has warmed while rolling, it may be trickier to take the paper off. If this happens, leave the paper on, and stick the whole thing in the fridge for 5 minutes. Once the crust is chilled again it’s much easier to pull off the paper. If the dough is too cold and the crust breaks, let it sit on the counter for a minute first before trying again.
- Trim off excess dough around the edges. If some edges need more dough to fold under, press on some of the clipped off pie dough. Tuck the overhang dough under to meet edge of pie dish. Using both forefingers, flute edges by pressing one down and one up next to each other.
- Wrap loosely with plastic wrap and place in freezer 15 minutes, or up to an hour, until chilled. Fill and bake according to recipe directions, or see recipe notes for a partially or fully baked crust.
Notes
Best tips For Rolling Out Crust
- If the dough is too cold it will be hard to roll and break apart. Let it sit on the counter for 5 minutes and try again.
- When you are rolling, press down in the middle and push the dough out from center. This will ensure the middle not being too thick, while edges are too thin.
- Rotate the pie dough as you are rolling so it forms a perfect circle. If one side is bigger than the other, cut some dough off and add it to the smaller side of the circle.
- While rolling, the dough may warm, which causes the parchment paper to stick. If this happens, place rolled pie crust, with parchment still on, in the refrigerator for 5 minutes so butter re-solidifies and releases from the paper.
- Once the dough is turned over in the pie dish use kitchen scissors to trim off excess dough around edges. If some edges need more dough to fold under, press on some of the clipped-off pie dough.
- Use two fingers to flute into a decorative edge. For a shiny crust brush the exposed edges with an egg wash before adding filling.
Dairy-Free
For a gluten-free dairy-free or vegan pie dough, plant-based butter sticks or shortening may be substituted, but will affect the taste and flakiness. I also recommend cutting the salt by half if using plant-based butter. Replace the sour cream with a dairy-free substitute.
Storing / Freezing
Wrapped dough may be refrigerated up to 1 day. Longer than that, place the wrapped disc in a freezer ziplock bag to freeze for 1 month. Thaw in refrigerator overnight.
Recipe adapted from America’s Test Kitchen: The How Can It Be Gluten Free Cookbook.
Nutrition Facts
Calories: 188kcal, Carbohydrates: 17g, Protein: 2g, Fat: 13g, Saturated Fat: 7g, Cholesterol: 32mg, Sodium: 227mg, Potassium: 5mg, Fiber: 2g, Sugar: 1g, Vitamin A: 380IU, Calcium: 22mg, Iron: 0.8mg
Did you make this recipe? Please leave a star rating and review below. It helps others when searching for recipes and I LOVE feedback!