
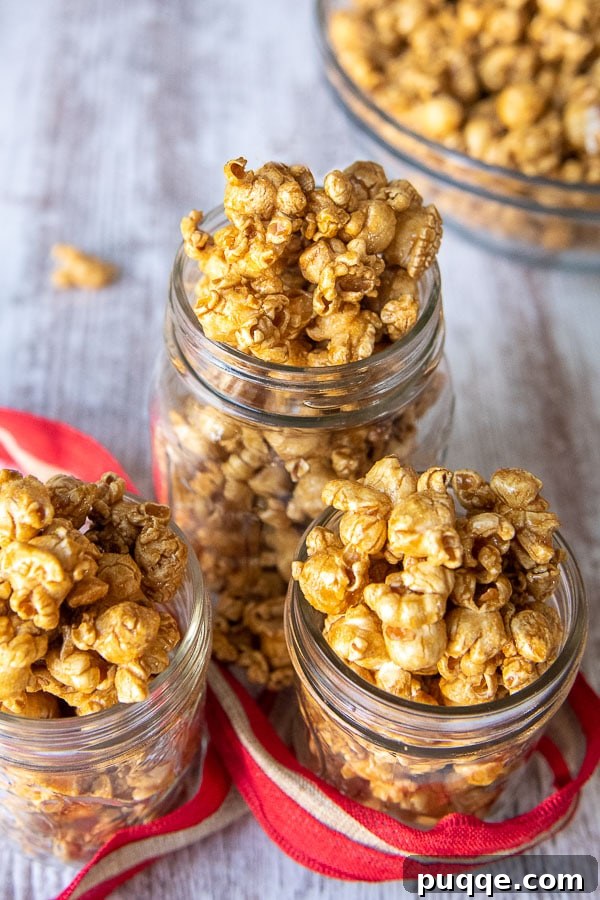
Prepare to revolutionize your snack game with the quickest, easiest, and most irresistible homemade caramel corn recipe you’ll ever encounter. For over five decades, this no-bake wonder has been a staple in our family, whipping up a perfectly buttery, sweet, and salty treat in less than 10 minutes – all thanks to the magic of your microwave. Forget complicated stovetop methods or long baking times; grab a simple paper bag, and let’s unlock the secret to this addictive snack that’s ready in a flash.
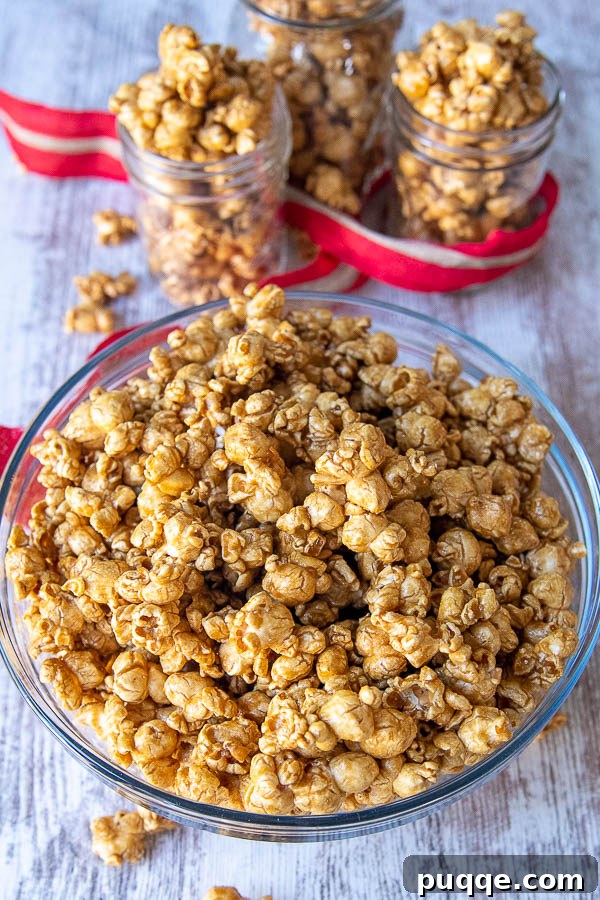
Simply The BEST Microwave Caramel Corn: A Timeless Family Tradition
There’s a reason this microwave caramel corn recipe has stood the test of time, passed down through generations. It’s not just “good”; it’s *ridiculously* simple to prepare and, dare we say, rivals even famous local favorites like Chicago’s Garrett Popcorn Shops. Our family has cherished this easy recipe for over fifty years, and its unwavering ability to delight has made it a true culinary heirloom. The sheer speed and minimal effort required to produce such a gourmet-quality snack are nothing short of amazing, making it an ideal choice for busy weeknights, impromptu gatherings, or simply satisfying that sudden sweet tooth craving.
Beyond its incredible taste, making this caramel corn is an experience in itself. It holds a unique “wow” factor that captivates children and adults alike. I vividly recall watching my mom vigorously shaking the paper bag, the buttery aroma seeping through, building an almost unbearable anticipation for the golden treasures within. The soft paper bag, warm with newly coated popcorn, felt like a magical sack of treats. Once spread on a baking sheet to cool, it was a race to scoop up handfuls as soon as it was safe to touch. This cherished memory is now a tradition I share with my own children, seeing their faces light up with the same wonder. It’s truly on par with other beloved, interactive treats like Nutella puppy chow in terms of sheer fun and deliciousness.
This homemade microwave caramel corn transcends being just a snack. Its addictive buttery, sweet, and salty profile makes it an outstanding homemade gift, a delightful treat for road trips and vacations, or the star of any party. The ingredients are readily available and incredibly affordable, and once prepared, the popcorn maintains its freshness beautifully when stored in an airtight container. Honestly, who can resist a perfectly crispy, perfectly coated piece of caramel corn? It’s right up there with our 5-minute stove top candied pecans as a sweet indulgence that hits the spot quickly and effortlessly.
Unlock the Perfect Caramel Corn: Essential Ingredient Insights
While the microwave does much of the heavy lifting, understanding the role of each ingredient is key to achieving that flawless, irresistible microwave caramel corn. Each component plays a crucial part in the caramel’s flavor, texture, and overall success.
- Corn Syrup: The Foundation of Smoothness
Our traditional recipe calls for dark corn syrup, which imparts a richer, deeper caramel color and a slightly more robust flavor profile to the coated popcorn. Think of it as the secret behind that beautifully burnished, old-fashioned look. However, if light corn syrup is all you have on hand, it will certainly work! Just be aware that your final caramel corn might have a lighter hue and a slightly milder taste. The primary function of corn syrup here is to prevent crystallization of the sugar, ensuring a smooth, pliable caramel that coats the popcorn evenly without becoming grainy. - Brown Sugar: The Heart of Caramel Flavor
Similar to corn syrup, the choice of brown sugar significantly impacts the depth of flavor. Dark brown sugar, with its higher molasses content, contributes a more intense, complex caramel flavor that truly shines through. If you opt for light brown sugar, your caramel corn will still be delicious, but expect a subtly sweeter, less pronounced caramel note. For the ultimate gourmet experience, dark brown sugar is highly recommended. - Butter: Richness and Mouthfeel
Butter is non-negotiable for that signature luxurious, melt-in-your-mouth richness. I typically use unsalted butter for most of my baking, which allows me to control the salt content precisely. If you’re using salted butter, remember to adjust the recipe’s added salt amount by reducing it by half. This prevents the caramel from becoming overly salty, striking the perfect sweet-and-salty balance. - Popcorn: The Canvas for Caramel
For this recipe, starting with plain popcorn is essential, as it allows the caramel coating to be the star. This is an excellent opportunity to dust off that air popper if you have one! Air-popped popcorn offers a light, fluffy, and neutral base, free from added oils or seasonings that might interfere with the caramel. It’s almost as much fun to watch the kernels pop as it is to shake the caramel-coated bag! Don’t worry if you don’t own an air popper; we’ll cover other fantastic popcorn options further down, ensuring everyone can enjoy this treat. - Salt: The Flavor Amplifier
A pinch of salt is vital in caramel recipes. It doesn’t just add a salty note; it enhances and balances the sweetness of the sugar, preventing the caramel from tasting one-dimensionally sweet. The combination of sweet and salty is what makes caramel corn so incredibly addictive. - Baking Soda: The Crunch Factor
This unassuming ingredient is the secret weapon for achieving that perfectly light, airy, and crunchy caramel texture. When added to the hot caramel, baking soda reacts with the acids in the brown sugar, creating tiny air bubbles. This chemical reaction aerates the caramel, preventing it from becoming rock-hard and sticky once cooled. Without baking soda, your caramel corn would be a dense, chewy, and difficult-to-eat mess. It’s a small addition with a huge impact! - Optional Nuts: Elevating the Experience
For an even more irresistible sweet and salty combination with added crunch and protein, consider adding 1-2 cups of your favorite nuts. Peanuts, cashews, or almonds are classic choices that pair wonderfully with caramel. Simply toss them with the popped popcorn before pouring over the warm caramel sauce for a delightful texture contrast.
Mastering Microwave Caramel Corn: Step-by-Step Guide
Creating this delectable treat is surprisingly straightforward. Below, we’ll walk you through each step with detailed instructions, ensuring your success. For precise ingredient measurements and a printable version, please refer to the recipe card at the end of this guide.
Step 1: Prepare Your Popcorn Base
First things first, get your popcorn ready! Air pop ½ cup of kernels to yield approximately 13 cups of fluffy, plain popcorn. Alternatively, prepare 2-3 bags of unflavored microwave popcorn. The key is to have plain popcorn, free from butter or excessive salt, to allow our homemade caramel to truly shine. Once popped, carefully remove any unpopped kernels to prevent unpleasant hard bites. Transfer the popped popcorn into a large, sturdy paper grocery bag. This bag is crucial for the microwave shaking process, so make sure it’s intact and large enough to hold all the popcorn comfortably. Set it aside for now.
Step 2: Crafting the Microwave Caramel Syrup
The 70s brought us the microwave, and with it, a newfound enthusiasm for quick kitchen creations – a perfect fit for this caramel corn! To begin your rich, buttery caramel coating, combine the butter, dark brown sugar, light corn syrup, and salt in a large, microwave-safe measuring cup or bowl. Ensure your container is large enough to prevent boil-overs. Place it in the microwave and cook on high for 1 minute. Carefully remove and stir the mixture thoroughly until the sugar begins to dissolve. Return the mixture to the microwave and cook for an additional 2 minutes on high. This cooking time is vital for the caramel to reach the proper temperature and consistency. The mixture should be bubbly and well-combined. Do not add the baking soda yet; that comes next!
Step 3: The Magical Baking Soda Activation
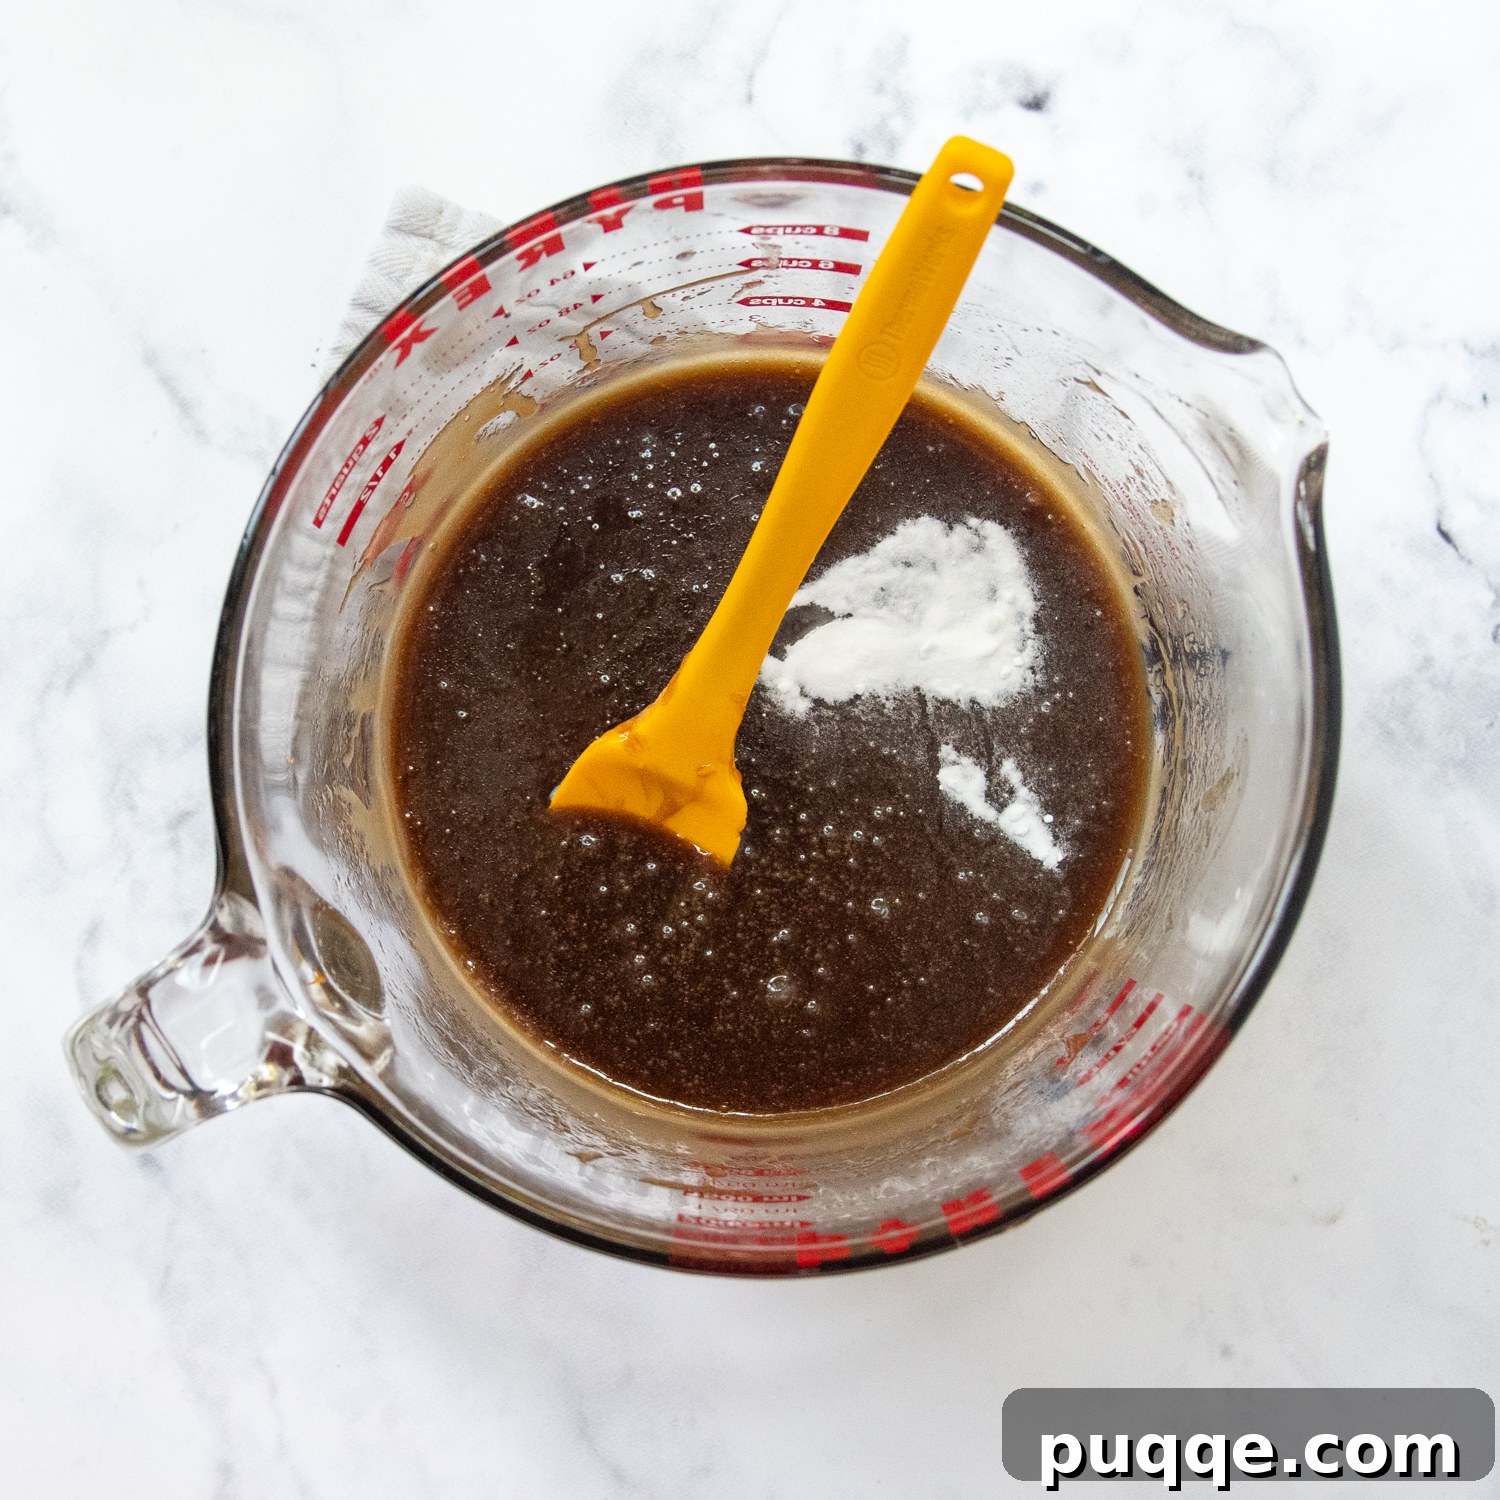
Immediately after the second microwave cooking interval, remove the hot caramel mixture from the microwave and quickly stir in the baking soda. You’ll notice an immediate and exciting chemical reaction: the caramel will foam up and lighten in color. This is exactly what you want! The baking soda aerates the caramel, which is essential for achieving that signature crunchy, non-sticky texture once it cools. Without this step, your caramel corn might turn out hard and chewy. Work quickly, stirring until the baking soda is fully incorporated and the mixture is light and frothy.
Step 4: Pour, Shake, and Microwave to Perfection
As soon as the baking soda is stirred in, immediately pour the warm, foamy caramel sauce over the popcorn in the paper grocery bag. This is where the fun (and a little bit of arm strength!) comes in. Roll down the top of the paper bag securely, sealing it tightly. Now, shake, shake, shake! Vigorously shake the bag for about 30-60 seconds, ensuring the caramel begins to coat all the popcorn kernels evenly. This initial shake helps distribute the sauce before the final microwave steps.
Next, and this might seem mind-blowing if you’ve never done it – place the closed paper bag back into the microwave. Cook for 90 seconds on high. Be prepared for a delightful aroma to fill your kitchen! Carefully remove the hot bag (use oven mitts, as it will be very hot!) and shake it well again for about 30 seconds. The shaking helps redistribute the caramel and prevent burning. Flip the bag over to ensure even cooking and coating, then return it to the microwave and cook for another 90 seconds. Remove, shake well once more. For the final microwave burst, flip the bag one last time and cook for 45 seconds. Yes, it’s a very specific sequence of times and shaking, but trust the process – you’ve got this!
Step 5: Cool and Indulge
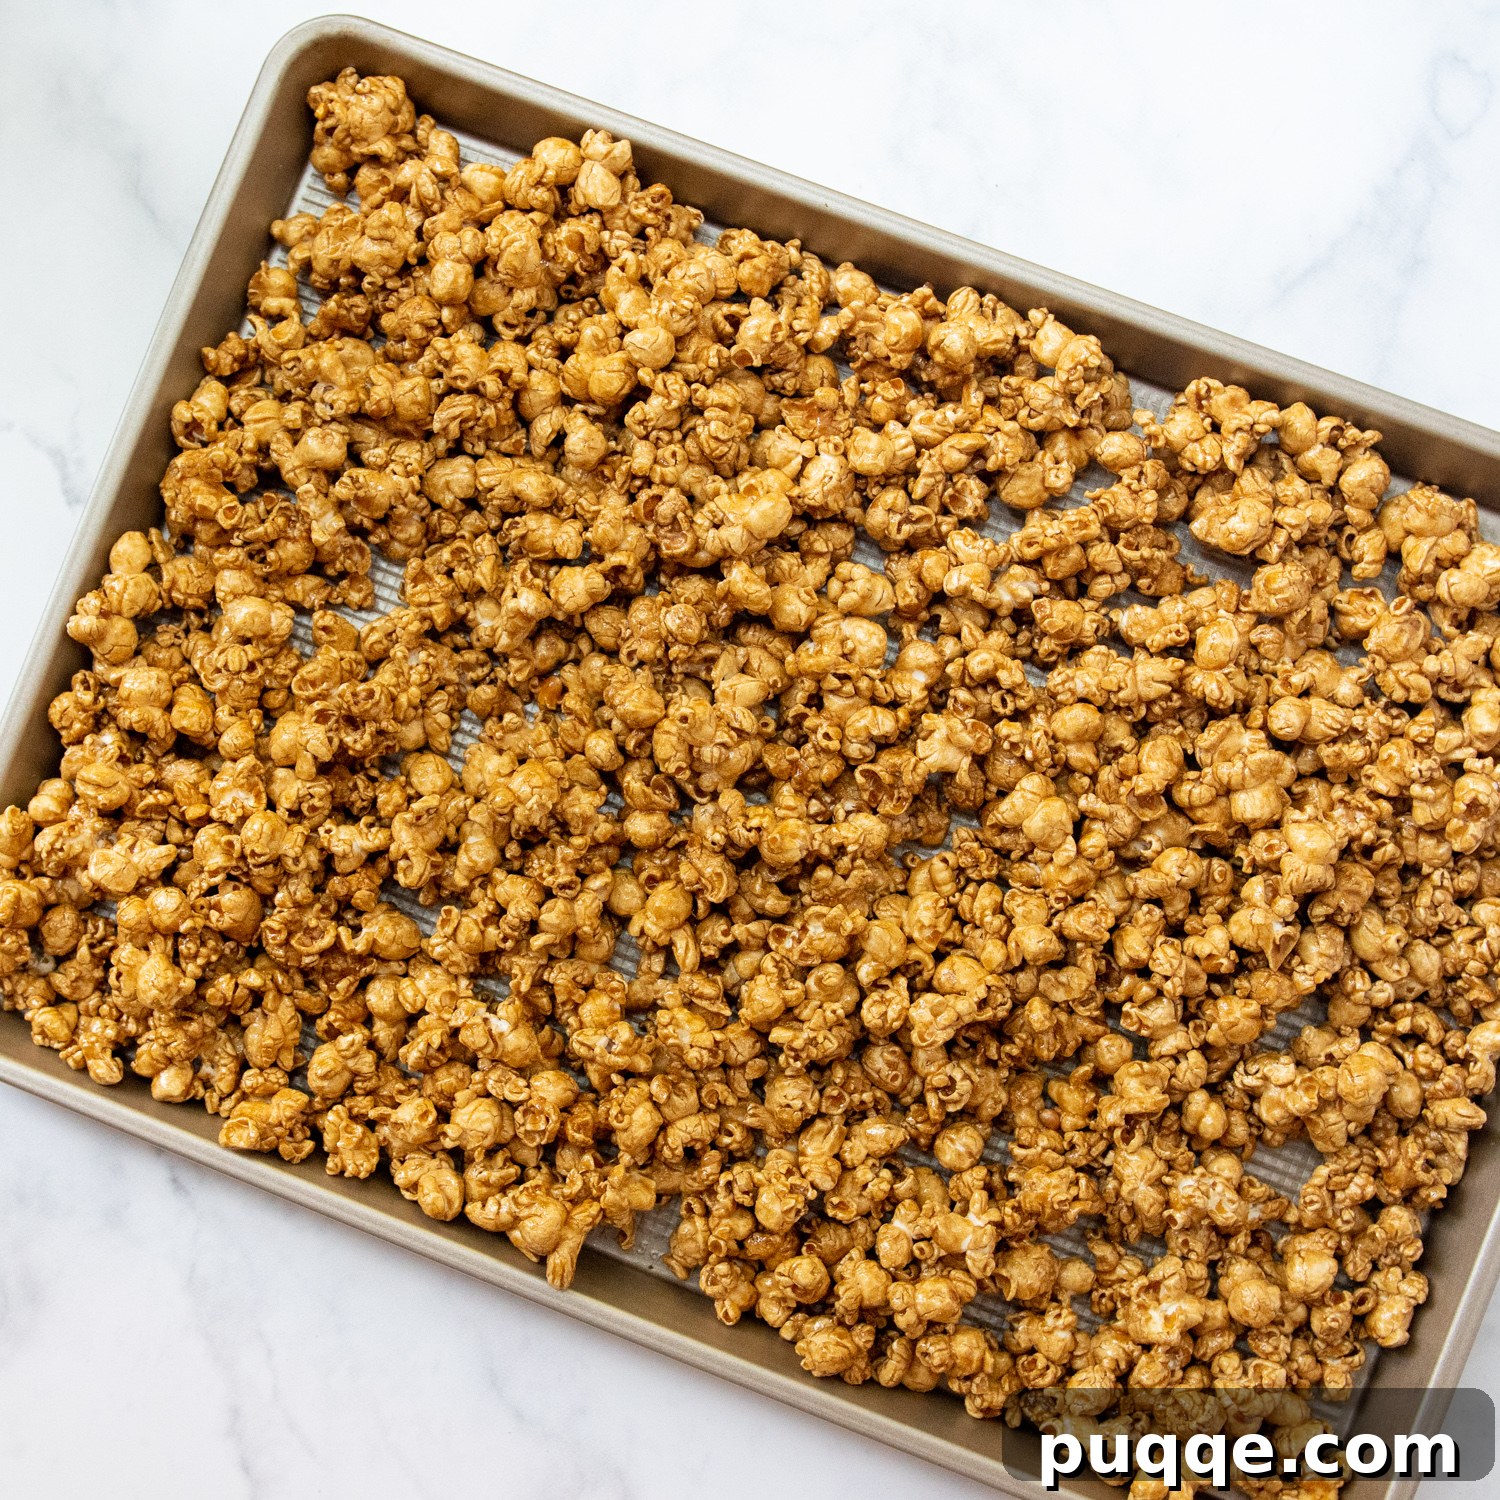
The moment of truth has arrived! By now, your kitchen will smell like the most heavenly caramel corn factory, and everyone will be drawn in by the irresistible scent. Shoo them away for just a few more minutes of patience! Carefully pour the freshly coated caramel corn onto an ungreased baking sheet or a sheet lined with parchment paper. Spread it out into a single layer to allow it to cool and harden completely. This is a surprisingly quick process, and you’ll soon find the caramel transforming from sticky to wonderfully crisp. Resist the urge to dive in immediately; letting it cool fully ensures that satisfying crunch. Once cooled, break it into smaller pieces and prepare for immediate snacking!
Pro Tips & Troubleshooting for Perfect Caramel Corn
Even the simplest recipes can sometimes present challenges. Here are some insights to ensure your caramel corn turns out perfectly every time, along with solutions for common hiccups.
Why is My Caramel Corn Chewy or Sticky?
This is the most common issue, and it almost always points to one thing: the caramel syrup wasn’t cooked long enough. Different microwaves have varying wattages and power levels, which can affect cooking times. If your caramel corn ends up chewy or overly sticky, it means the sugar didn’t reach a high enough temperature to caramelize properly and set hard. Don’t despair, it can still be salvaged!
Rescue Mission: Spread the sticky caramel corn out evenly on a parchment-lined baking sheet. Bake it in a preheated 250ºF (120ºC) oven for 15-20 minutes, stirring gently halfway through. The low, slow heat in the oven will allow the caramel to finish cooking and dehydrate, resulting in a crispier texture. Keep a close eye on it to prevent burning.
Preventative Measures for Future Batches:
- Know Your Microwave: If your caramel corn is consistently sticky, try increasing the second microwave cooking interval for the caramel syrup by 30-60 seconds in your next batch.
- Accurate Measurements: Ensure precise measurements of all ingredients, especially the butter and sugar, as ratios are important for caramel consistency.
- Vigorous Shaking: The shaking process in the paper bag is not just for coating; it helps the caramel cool slightly and distribute heat, which contributes to its final texture. Don’t be shy with your shakes!
- Cooling Time: Allow the caramel corn to cool completely on the baking sheet. Rushing this step can lead to a less crispy result.
Additional Tips for Success:
- Don’t Overcrowd: Ensure your paper bag isn’t too full of popcorn, as this makes even coating and shaking difficult.
- Use a Sturdy Bag: A standard brown paper grocery bag works best. Thin bags might tear or absorb too much butter.
- Mitts are a Must: Always use oven mitts when handling the hot paper bag from the microwave. The caramel gets extremely hot!
Choosing the Best Popcorn for Caramel Corn
The type of popcorn you start with can significantly impact the final texture and taste of your homemade caramel corn. While the goal is generally plain, unseasoned popcorn, let’s explore the best options:
1. Air-Popped Popcorn (Highly Recommended)
For our family’s no-bake caramel corn, air-popped popcorn is the gold standard. It’s perfectly plain, free of any added butter, oils, or salt, which provides the ideal neutral canvas for our rich caramel. Hot air poppers are wonderfully affordable to purchase, and popcorn kernels themselves are incredibly cheap and have a long shelf life. This method allows you complete control over the final product and is a surprisingly fun process to watch!
2. Store-Bought Popped Corn
If you don’t own an air popper or are simply looking for a shortcut, store-bought popped corn is a viable option. The key is to select a brand that is as close to its natural, unseasoned state as possible. Brands like SmartFood Lightly Salted can work well. If using salted pre-popped popcorn, remember to reduce the amount of salt called for in the caramel recipe to ¼ teaspoon to avoid over-salting.
3. Microwave Popcorn
Even microwave popcorn can be used, but again, prioritize the plainest variety you can find. Many brands offer “Naturals Simply Salted” versions, such as Orville Redenbacher, which I’ve used successfully in the past. You will typically need to pop 2-3 standard bags to yield approximately 13 cups of popcorn, which is the amount required for this recipe. Just like with store-bought pre-popped corn, if your microwave popcorn is already salted, reduce the added salt in the caramel syrup to ¼ teaspoon.
Tips for Popcorn Preparation:
- Remove Unpopped Kernels: Regardless of your popping method, always take a moment to sift through your popped corn and remove any unpopped kernels. Biting into a hard kernel amidst soft caramel corn is never pleasant!
- Avoid Buttery/Heavily Seasoned Popcorn: While delicious on its own, heavily buttered or seasoned popcorn will interfere with the caramel’s ability to coat evenly and can create an off-flavor. Stick to plain for the best results.
- Freshly Popped is Best: Pop your corn just before making the caramel. Stale popcorn won’t absorb the caramel as well and can result in a chewier texture.
Creative Variations and Serving Suggestions
While classic microwave caramel corn is perfect on its own, it also serves as a fantastic base for endless creative variations. Don’t be afraid to experiment and make this recipe your own!
Flavor Enhancements:
- Chocolate Drizzle: Once the caramel corn has cooled and hardened, melt some chocolate chips (milk, dark, or white) and drizzle it generously over the popcorn. Allow the chocolate to set, then break into clusters. This adds a decadent layer of flavor.
- Spiced Caramel Corn: Add a pinch of cinnamon, nutmeg, or pumpkin spice to your caramel syrup for a warm, aromatic twist, especially perfect for fall holidays.
- Salty Pretzel Mix: For an extra layer of salty crunch, mix in some small pretzel twists or sticks with your popped popcorn before adding the caramel. The sweet and salty combination is truly irresistible.
- Nutty Delights: As mentioned, peanuts, cashews, or almonds are wonderful additions. You can also try pecans or mixed nuts for a gourmet touch. Lightly toast the nuts before adding them to enhance their flavor.
- Sprinkle Fun: For festive occasions or kid-friendly treats, sprinkle colorful sprinkles over the warm caramel corn immediately after pouring it onto the baking sheet, before it fully sets.
Serving and Gifting Ideas:
- Movie Night Must-Have: Elevate your next movie night from ordinary popcorn to an extraordinary caramel corn experience.
- Party Snack Star: Serve it in a large bowl at parties. It’s a crowd-pleaser that disappears quickly!
- Thoughtful Homemade Gifts: Package your homemade caramel corn in decorative tins, glass jars, or cellophane bags tied with a ribbon. It makes a beautiful, personal gift for neighbors, teachers, or friends during holidays or as a thank-you. Be prepared, once gifted, it will likely be requested year after year!
- Dessert Topping: Crush some caramel corn and use it as a topping for ice cream, yogurt, or even brownies for an unexpected crunch and flavor boost.
- On-the-Go Snack: Portion it into small bags for a convenient and delicious snack to take to work, school, or on road trips.
Storage Solutions for Lasting Freshness
While this caramel corn is notoriously difficult to resist and often vanishes quickly, knowing how to store it properly ensures you can enjoy its irresistible crunch for longer. With superhuman restraint, your homemade caramel corn can stay wonderfully fresh for up to one month when stored correctly.
- Airtight Containers are Key: The absolute best way to maintain freshness is by storing your caramel corn in an airtight container. This prevents moisture from making it stale or soft. Traditional cookie tins are excellent choices, not just for aesthetics but for their effective seal.
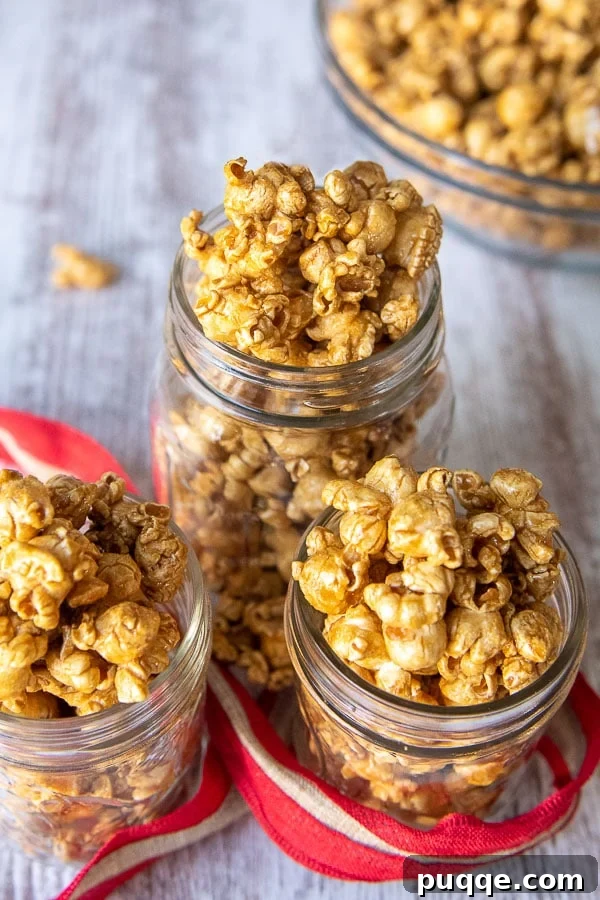
- Glass Jars: Large lidded glass jars are another fantastic option. They provide an airtight seal and allow you to showcase your delicious creation beautifully.
- Heavy-Duty Ziplock Bags: If using a resealable plastic bag, ensure it’s heavy-duty and that you press out as much air as possible before sealing. However, remember that constantly opening and closing the bag can shorten its overall freshness compared to rigid containers.
- Room Temperature is Ideal: Store caramel corn at room temperature, away from direct sunlight or excessive heat, which can cause the caramel to melt or become sticky.
- Avoid Refrigeration: Do not refrigerate caramel corn, as the moisture in the fridge can cause it to become soft and lose its crispness.
These storage tips apply not only to this microwave caramel corn but also to other homemade popcorn recipes, like our quick chocolate-covered popcorn, ensuring all your delicious creations stay fresh and enjoyable.
Did you make this recipe? We love hearing from you! Please leave a star rating and comment below the recipe card. Your feedback helps other home cooks find and enjoy delicious recipes, and I personally appreciate hearing from our community. I always make sure to respond! -Melissa
Mom’s Favorite Microwave Caramel Corn Recipe
Author: Melissa Erdelac
Yield: 14 cups
Prep Time: 5 mins
Cook Time: 5 mins
Total Time: 10 mins
We’ve been making this quick and easy version of homemade caramel corn in the microwave for over 50 years. Learn how to make a no bake buttery, sweet and salty snack that comes together in less than 10 minutes. Grab a paper bag and let’s get started!
Pin Recipe
Watch how to make this delicious caramel corn!

Video: Homemade Caramel Corn
Ingredients
- ½ cup popcorn kernels, air popped plain OR 13 cups plain microwave popcorn (2-3 bags)
- ½ cup unsalted butter
- 1 cup dark brown sugar
- ¼ cup light corn syrup
- 1 teaspoon salt
- ½ teaspoon baking soda
- Optional: 1-2 cups of mixed nuts (peanuts, cashews, almonds)
Instructions
- Prepare Popcorn: Pop the popcorn using an air popper or microwave bags, aiming for approximately 13 cups of plain, unbuttered popcorn. Carefully remove any unpopped kernels. Place the popped popcorn into a large, sturdy paper grocery bag. Set aside.
- Melt Caramel Base: In a large microwave-safe measuring cup or bowl, combine the unsalted butter, dark brown sugar, light corn syrup, and salt. (Do NOT add baking soda yet.)
- First Microwave & Stir: Microwave the mixture on high for 1 minute. Remove from the microwave and stir thoroughly until the sugar begins to dissolve.
- Second Microwave & Baking Soda: Return the mixture to the microwave and cook for an additional 2 minutes on high. Immediately remove from the microwave and quickly stir in the baking soda. The mixture will foam up and lighten in color; this is the desired chemical reaction for crunchy caramel.
- Coat Popcorn: Immediately pour the hot caramel sauce over the popcorn in the paper bag. Roll down the top of the bag securely and shake vigorously for 30-60 seconds to evenly distribute the caramel.
- Microwave Shaking Cycle 1: Place the closed paper bag in the microwave and cook on high for 90 seconds. Carefully remove the bag (using oven mitts as it will be very hot!) and shake well again for about 30 seconds.
- Microwave Shaking Cycle 2: Flip the bag over and cook again in the microwave for 90 seconds. Remove and shake well once more.
- Final Microwave & Shake: Flip the bag over one last time and cook for 45 seconds. Remove and give it a final good shake.
- Cool and Serve: Pour the caramel corn onto an ungreased cookie sheet or a parchment-lined baking sheet. Spread it out into a single layer and allow it to cool completely and harden. Once cool, break into pieces and enjoy!
Notes
Storage
Once completely cooled, store your homemade microwave caramel corn in an airtight container, such as large glass jars with lids, cookie tins, or heavy-duty resealable bags. Store at room temperature for up to 1 week for optimal freshness. Avoid refrigeration.
Troubleshooting
If your caramel corn turns out chewy or sticky, the caramel syrup likely wasn’t cooked long enough. Microwaves vary in wattage; you may need to increase the caramel cooking time slightly (e.g., an extra 30-60 seconds in step 4). To salvage sticky caramel corn, spread it on a parchment-lined baking sheet and bake in a 250°F (120°C) oven for 15-20 minutes, stirring halfway through.
Nutrition Information (per serving, approximately 1 cup)
Calories: 157kcal, Carbohydrates: 24g, Protein: 1g, Fat: 7g, Saturated Fat: 4g, Polyunsaturated Fat: 0.4g, Monounsaturated Fat: 2g, Trans Fat: 0.3g, Cholesterol: 17mg, Sodium: 266mg, Potassium: 39mg, Fiber: 1g, Sugar: 20g, Vitamin A: 203IU, Calcium: 16mg, Iron: 0.3mg
Don’t Forget to Pin This Recipe!
Let’s connect on Pinterest! I’m always sharing great recipes and foodie inspiration!