

The Ultimate Almond Flour Pizza Crust: Your Gluten-Free & Low-Carb Dream
Craving a delicious pizza but following a gluten-free, low-carb, or keto lifestyle? Look no further! This incredible recipe delivers a **thick, fluffy, yet delightfully crispy almond flour pizza crust** using only a handful of common ingredients and incredibly easy steps. You’ll have a fantastic homemade pizza base ready in **less than 30 minutes**, guaranteed to satisfy your pizza cravings without compromising your dietary goals. Forget dry, crumbly alternatives; this almond flour pizza crust is designed to impress with its perfect texture and robust flavor.

Why Choose Almond Flour for Your Pizza? The Gluten-Free & Low-Carb Advantage
When you’re committed to a low-carb or gluten-free diet, the idea of enjoying a truly satisfying pizza crust might seem like a distant dream. Many traditional crusts rely heavily on wheat flour, which contains gluten and high carbohydrates. This almond flour pizza crust recipe changes the game, allowing you to indulge in pizza that’s every bit as good as you remember, if not better!
Almond flour is an exceptional alternative for several reasons. Firstly, it’s naturally **gluten-free**, making it a safe and delicious option for individuals with celiac disease or gluten sensitivities. Secondly, almond flour is significantly **lower in carbohydrates** compared to wheat flour, aligning perfectly with keto and low-carb eating plans. Beyond its dietary benefits, almond flour imparts a wonderfully subtle, nutty flavor and a rich texture that contributes to both the crispiness and fluffiness of the crust.
Unlike conventional pizza doughs or even many gluten-free flour blends, this grain-free almond flour dough requires absolutely **no yeast, no kneading, and no lengthy rise time**. The magic happens quickly, allowing you to whip up a fresh crust in under 5 minutes of active prep. The combination of simple ingredients works harmoniously to create a pliable dough that’s easy to handle and transforms into a golden, inviting crust.
Essential Ingredients for a Perfect Almond Flour Pizza Dough
Crafting a stellar almond flour pizza crust begins with selecting the right ingredients. All components in this recipe are naturally gluten-free and suitable for various dietary needs, including low-carb and keto. Here’s a closer look at what you’ll need and why each ingredient is key:
- Almond Flour: The foundation of our crust. For optimal results, use fine, blanched almond flour. This type of almond flour is made from blanched (skinless) almonds, resulting in a smooth texture perfect for baking. Avoid almond meal, which is coarser and retains the almond skins, leading to a more rustic, dense crust. You can even explore making your own homemade almond flour for maximum freshness.
- Psyllium Husk Powder: This powerful fiber is crucial for gluten-free baking. It acts as a binder, absorbing liquids and giving the dough elasticity and pliability that mimics gluten. This prevents the crust from becoming dry or crumbly, making it easy to roll and shape. Psyllium husk powder is also very low in carbohydrates, making it ideal for keto-friendly recipes. Learn more about baking with psyllium husk for best results.
- Baking Powder: Our leavening agent. Unlike yeast, baking powder works instantly when combined with liquid and heat, creating a thick, fluffy texture without any wait time. It’s also low in net carbs, perfectly fitting a low-carb pizza.
- Seasonings (Garlic Powder & Salt): These foundational seasonings enhance the overall flavor of the crust. Feel free to experiment by adding other complementary spices like Italian seasoning or onion powder for a more aromatic base.
- Eggs (1 Whole Egg + 1 Egg White): Eggs serve as a vital binder, holding the ingredients together and adding structure to the dough. The specific ratio of one whole egg and one egg white is important; two whole eggs can introduce too much liquid, impacting the dough’s consistency. This balance ensures the perfect moisture level.
- Oil (Olive Oil): Olive oil adds moisture, richness, and contributes to the crust’s tender interior and crispy exterior. You can substitute with other neutral-flavored oils such as avocado oil or grapeseed oil, based on your preference.
- Apple Cider Vinegar: While you won’t taste the vinegar in the final product, it plays a key role in activating the baking powder, promoting a better rise and a lighter, airier crust as it bakes.
- Boiling Water: Incorporating boiling water helps activate the psyllium husk powder more effectively, creating a more cohesive and pliable dough that’s easier to work with.
Recommended Equipment for an Optimal Pizza Crust
Achieving that coveted golden, crispy bottom with a perfectly soft layer for your favorite toppings requires a few key pieces of equipment. While not all are strictly necessary, they significantly enhance the baking process and the final outcome of your almond flour pizza crust:
- Pizza Stone: For the ultimate crispy crust, a pizza stone is highly recommended. Preheat the stone in the oven to an extremely hot temperature before adding the dough. This high, initial heat provides a “thermal shock” to the crust, quickly crisping the bottom and sides while the toppings bake. I prefer a circular stone as it serves as a natural guide for shaping the dough and often includes handles for easier handling.
- Pizza Paddle (or Peel): Transferring an unbaked pizza onto a scorching hot pizza stone can be tricky. A pizza paddle (or peel) is an invaluable tool for safely sliding your assembled pizza into and out of the hot oven, preventing burned fingers and keeping toppings intact.
- Alternative Baking Surface: If you don’t own a pizza stone, a heavy-duty baking sheet or a dedicated pizza pan can work. The key is to **preheat it in the oven** just like you would a pizza stone. While it may not achieve the same level of crispness as a stone, it’s far better than placing the dough on a cold pan. A rimless baking sheet is also useful if you plan to use a pizza paddle for transfer.
- Rolling Pin: Essential for evenly rolling out your dough to the desired thickness.
- Parchment Paper: Crucial for rolling out sticky doughs and ensuring easy transfer.
Step-by-Step Guide: Crafting Your Almond Flour Pizza Crust
Follow these detailed instructions to create your perfect almond flour pizza crust. The visual aids below will guide you through each stage, ensuring a smooth and enjoyable baking experience.
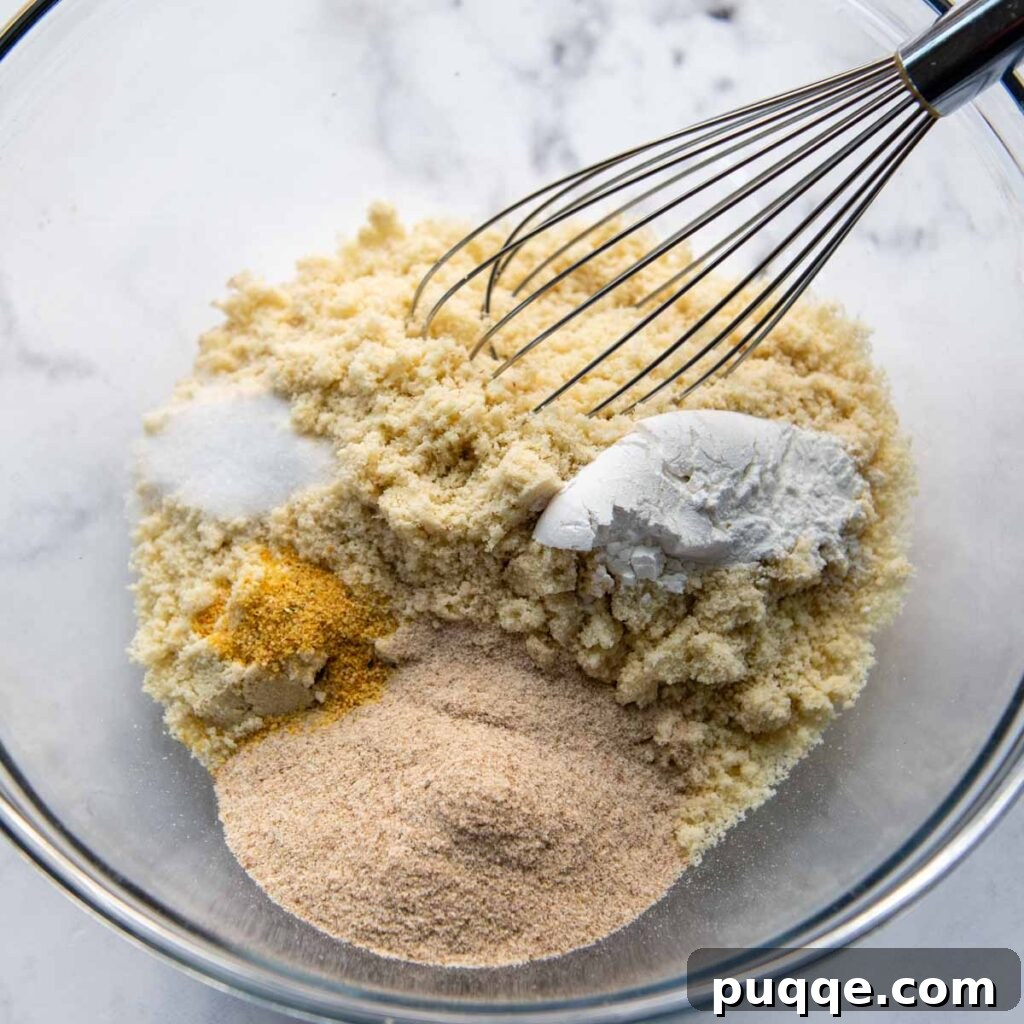
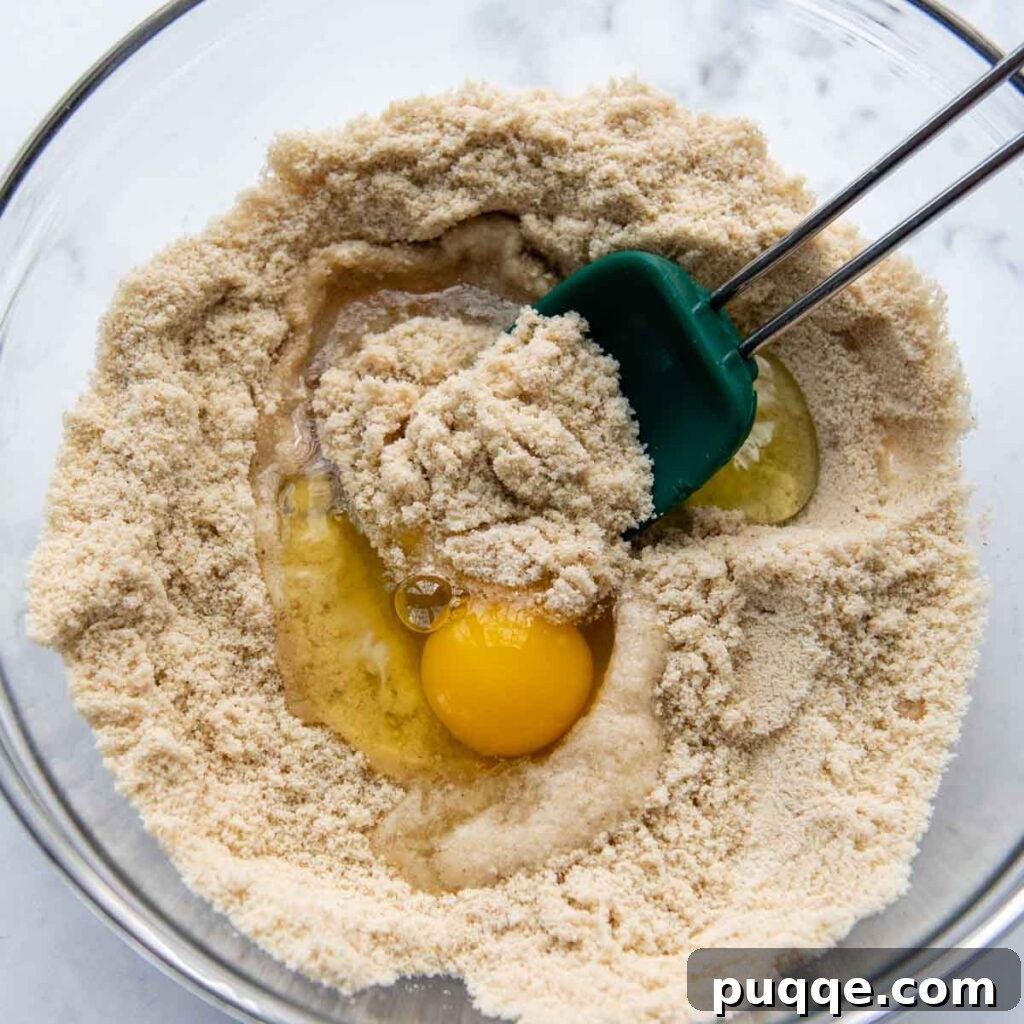
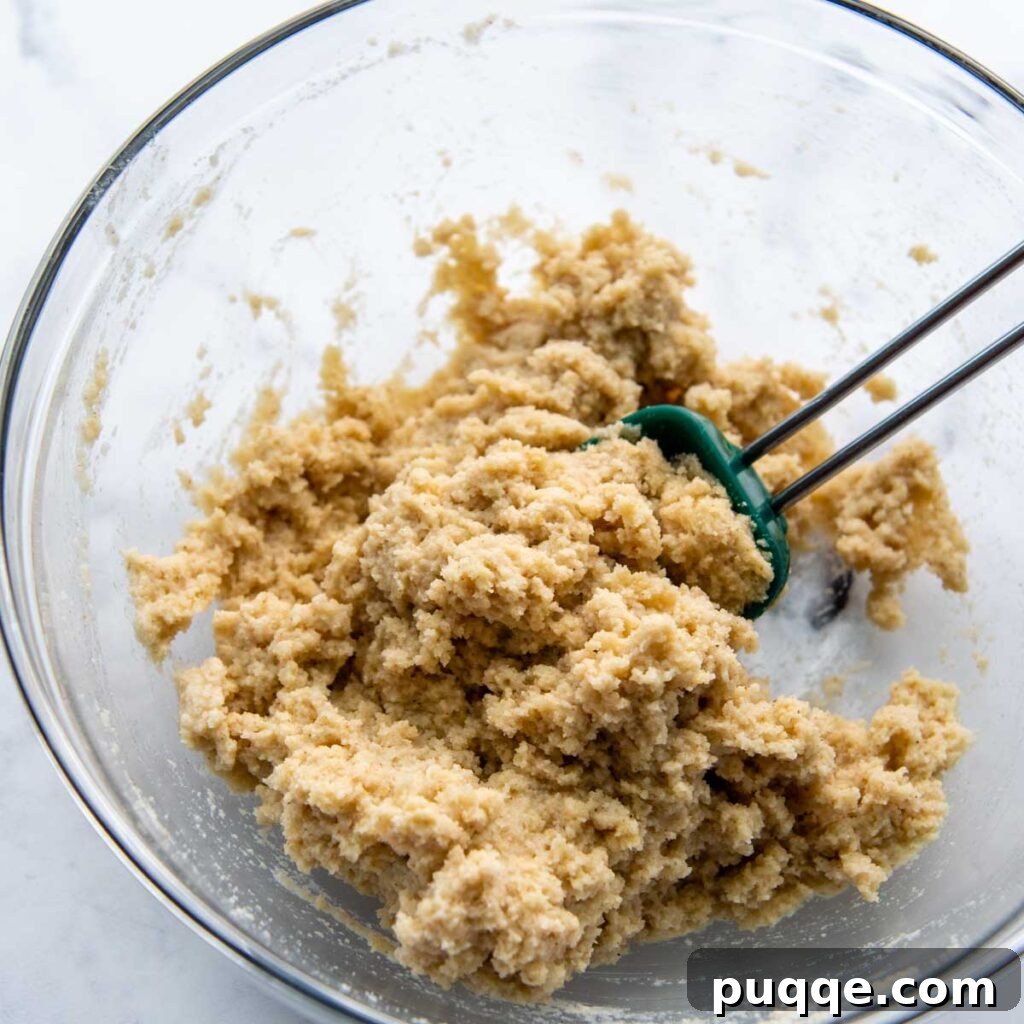
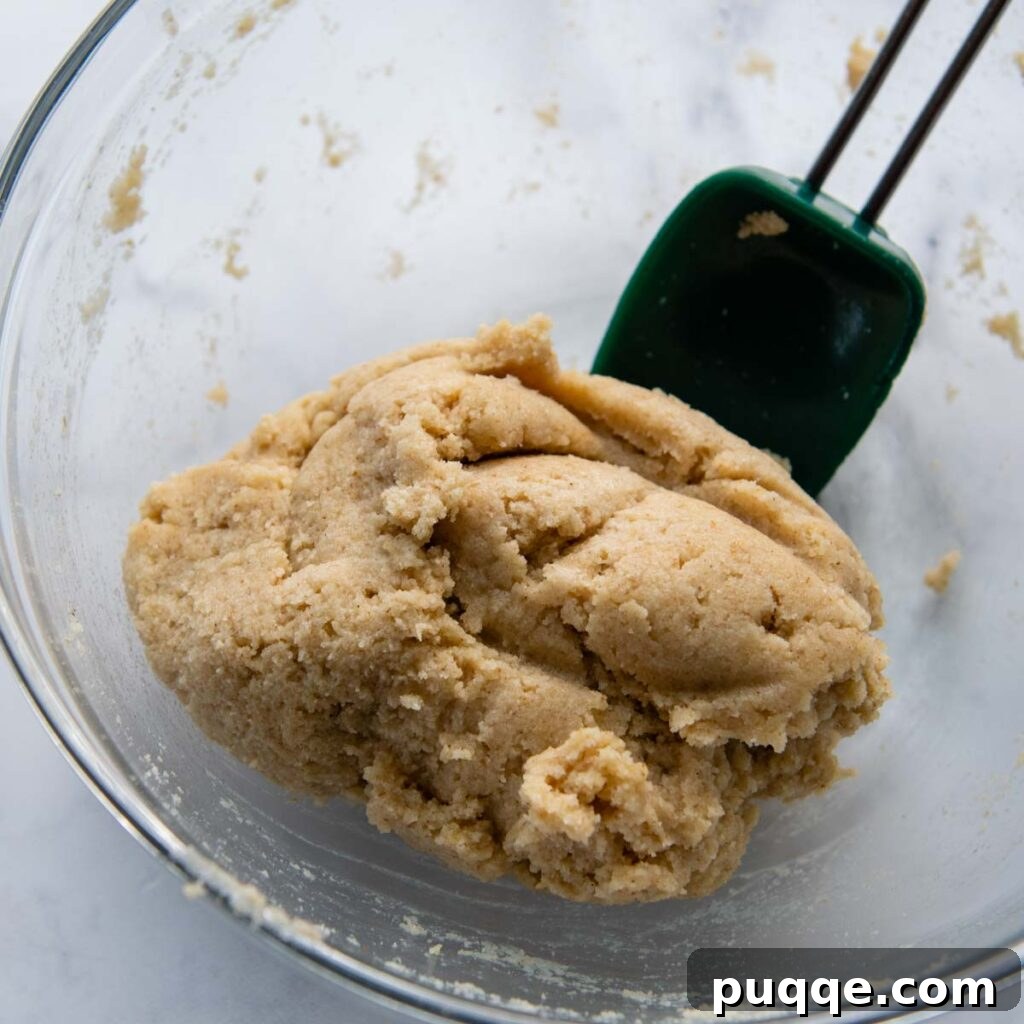
- Preheat Your Oven: Start by preheating your oven to 350ºF (175ºC). If you are using a pizza stone or a baking sheet, place it in the oven to preheat simultaneously. A hot baking surface is crucial for a crisp crust.
- Combine Dry Ingredients: In a large mixing bowl, thoroughly whisk together the almond flour, psyllium husk powder, baking powder, garlic powder, and salt. Ensure all dry ingredients are well combined for even distribution in the dough.
- Incorporate Wet Ingredients & Rest: Add the eggs (1 whole and 1 white), olive oil, and apple cider vinegar to the dry mixture. Stir well to combine. Next, pour in the boiling water and stir vigorously for about 1 minute until a cohesive dough forms. Let the dough rest for 5 minutes. This resting period allows the psyllium husk to fully absorb the liquids, making the dough much easier to handle and preventing a sticky mess.
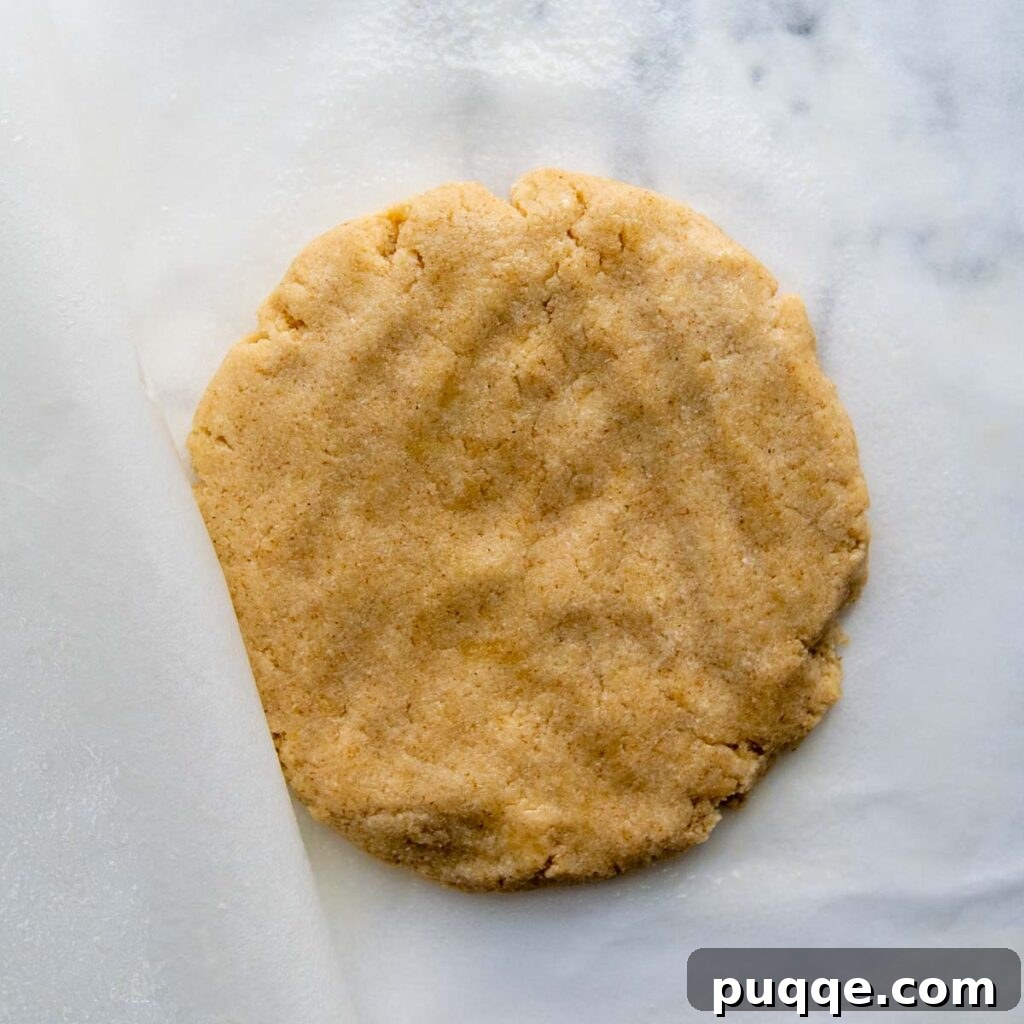
- Prepare for Rolling: After resting, shape the dough into a rough ball. Place this ball between two pieces of greased parchment paper. Lightly coat the inner sides of the parchment paper with non-stick cooking spray to prevent sticking. Gently flatten the dough into a thick disc shape.
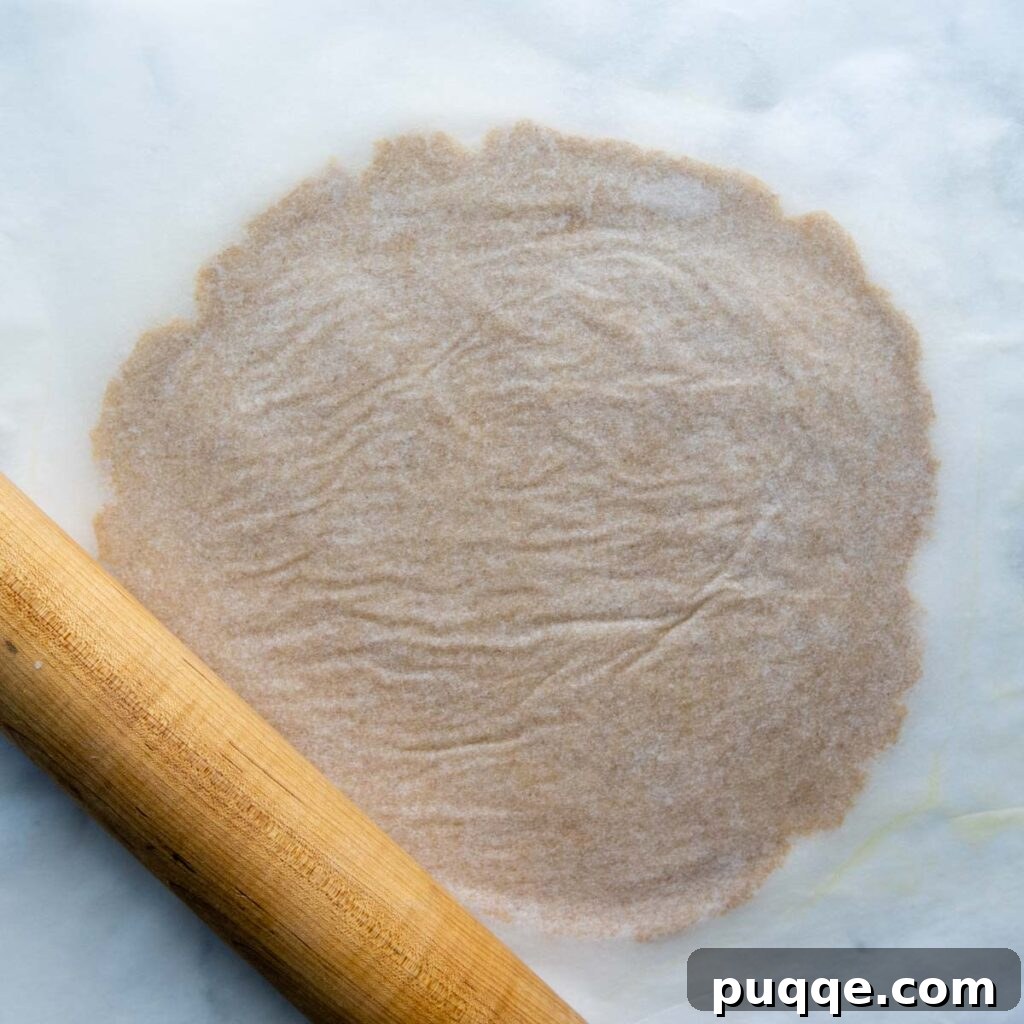
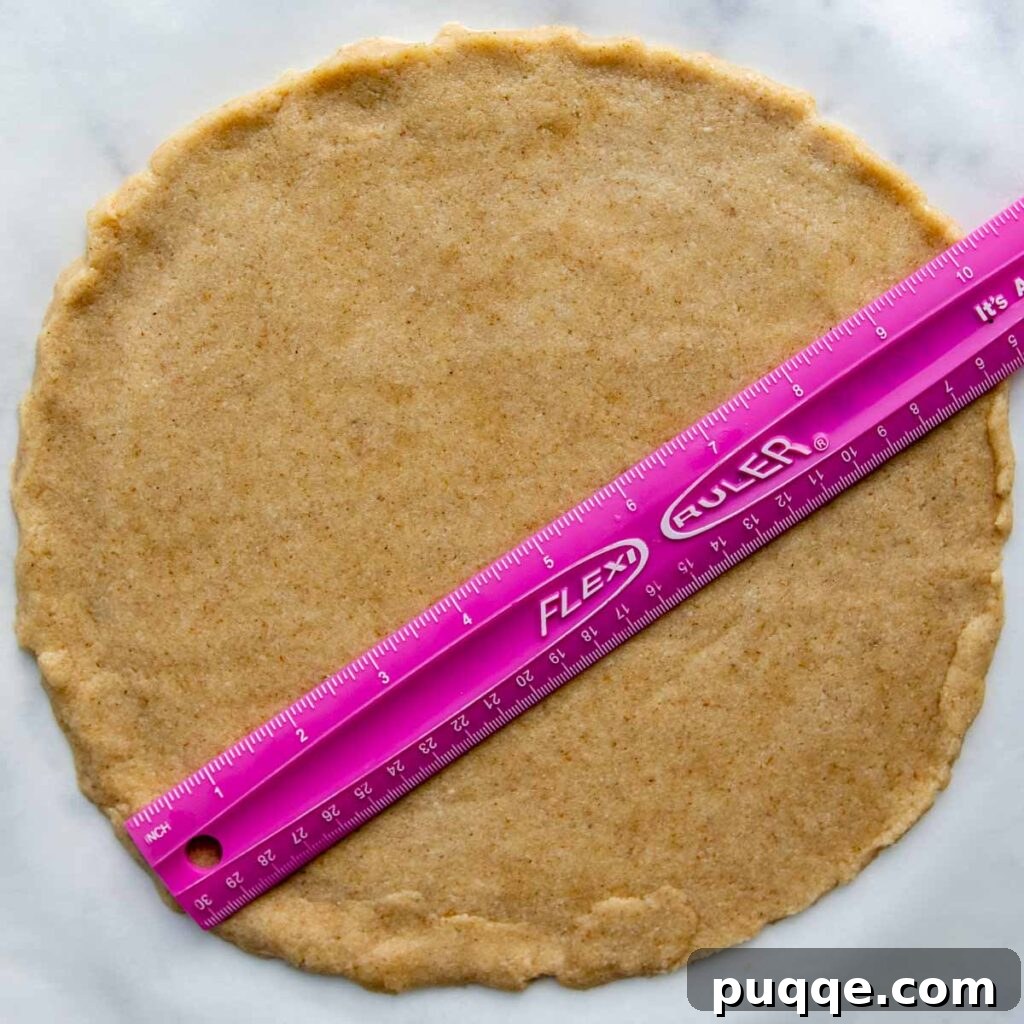
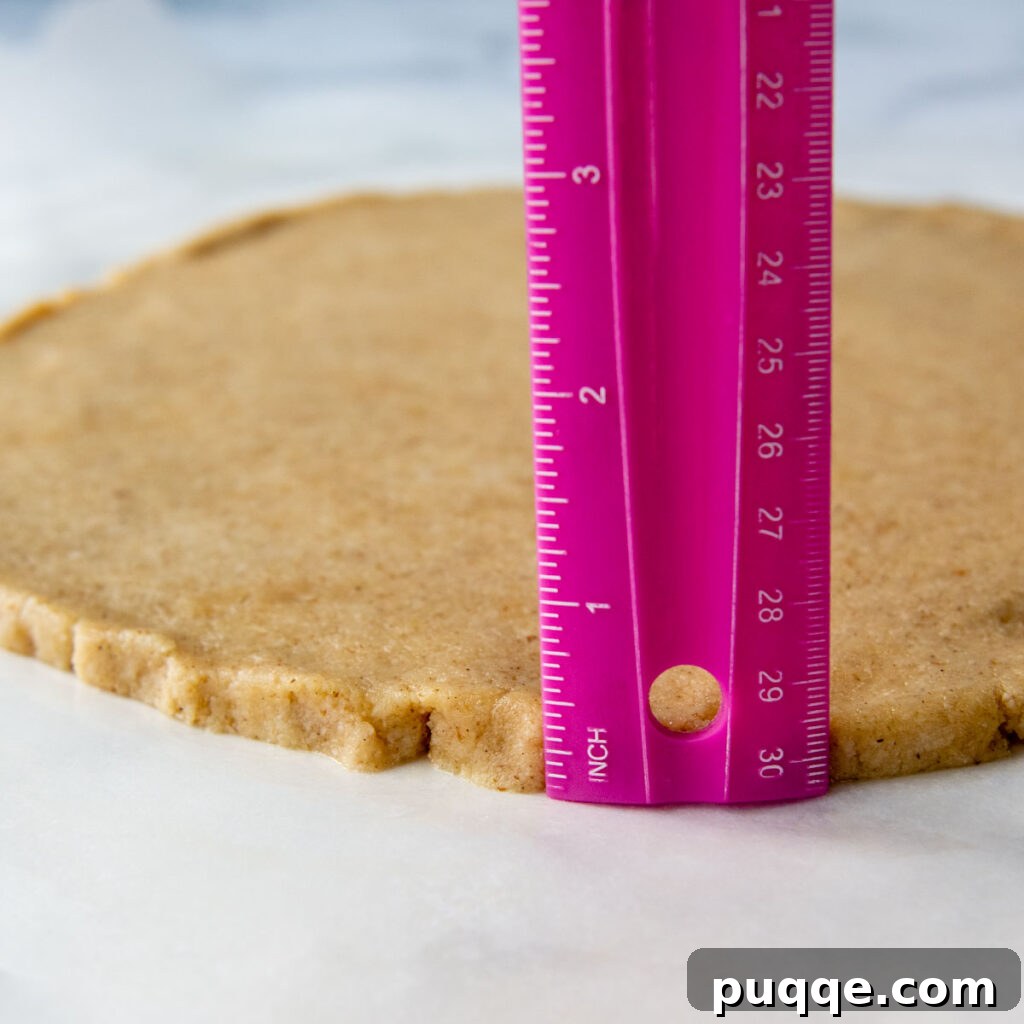
- Roll Out the Crust: Using a rolling pin over the top parchment paper, roll the dough into a 10-inch (25 cm) circle, aiming for a thickness of approximately 1/4 to 1/2 inch (0.6 – 1.2 cm). If you prefer a thin and crispy crust, roll it thinner; for a fluffy crust, keep it closer to 1/2 inch. If the dough becomes uneven, simply tear off excess from thicker areas and press it onto thinner edges to create a smooth, even circle.
- Par-Bake the Crust: Carefully remove the top parchment paper, leaving the dough on the bottom piece. Transfer this parchment paper with the dough onto your preheated baking tray or pizza stone. Bake for 15 minutes, rotating the crust halfway through for even cooking. The crust should be firm but not yet golden on the bottom. This par-baking step is essential to give the almond flour crust structural integrity before adding toppings. It will finish baking once your toppings and cheese are added.
Mastering Your Pizza: Toppings and Final Bake
Once your almond flour crust is perfectly par-baked, it’s time to transform it into the pizza of your dreams! The key to a non-soggy, perfectly baked pizza lies in careful topping application and a final high-heat bake.
- Prepare for Final Bake: Remove the par-baked crust and its pan from the oven. Carefully place it on a heat-proof surface. Increase your oven temperature to 375ºF (190ºC) to prepare for the final bake.
- Apply Sauce Judiciously: Spread a thin, even layer of your favorite pizza sauce over the par-baked crust. Be mindful not to use too much sauce, as excessive moisture can lead to a soggy crust. A thin layer ensures flavor without compromising crispness.
- Add Your Favorite Toppings: Now, load up your pizza with your desired toppings! Classic choices like pepperoni, cooked sausage, mushrooms, bacon, olives, and bell peppers all work wonderfully. For specific recommendations and important considerations regarding high-water content vegetables, please refer to our Important Note About Toppings section below.
- Top with Cheese: Finish with a generous layer of mozzarella cheese, or your preferred dairy-free alternative.
- Final Bake to Golden Perfection: Carefully return the pan with your assembled pizza to the middle oven rack. Bake for 7-8 minutes, or until the cheese is beautifully melted and bubbly. For an extra golden, caramelized finish, you can turn on the broiler for 1-2 minutes during the last stage of baking. Keep a close eye on it to prevent burning!
- Rest, Slice, and Enjoy: Once out of the oven, let your pizza rest for 1-2 minutes before slicing. This allows the cheese to set slightly and makes for cleaner cuts. For an extra burst of flavor, sprinkle with fresh basil, grated Parmesan cheese, or a pinch of red pepper flakes before serving.
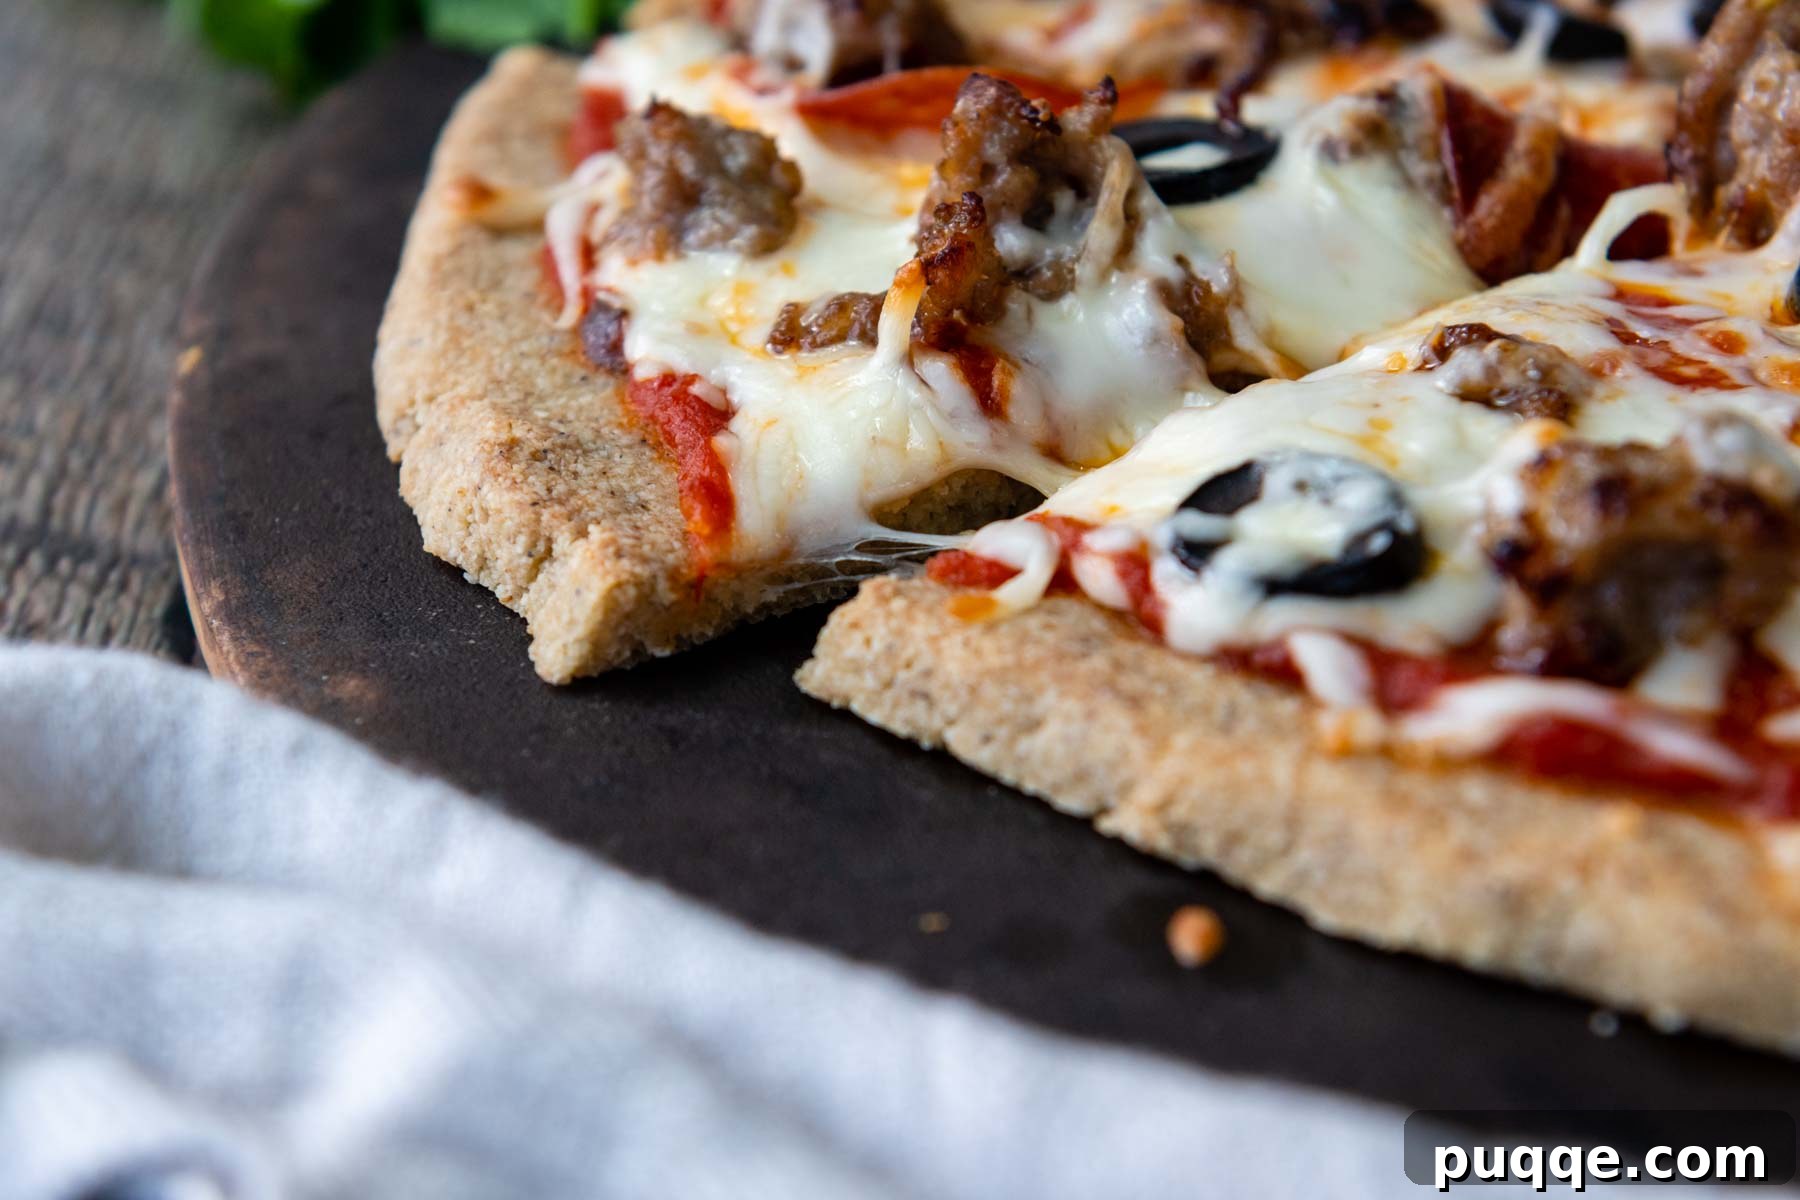
Important Note About Toppings for Almond Flour Pizza
The beauty of this almond flour pizza recipe lies in its versatility, allowing you to recreate your favorite pizza styles, from classic pepperoni to a loaded veggie feast. However, when selecting toppings, especially vegetables, there’s an important consideration to ensure your crust remains crispy and delicious:
Avoid High-Water Content Vegetables (Directly): Vegetables such as fresh tomato slices, zucchini, or eggplant contain a significant amount of water. If added directly to the pizza and baked, they will release this moisture, which can be absorbed by the crust, leading to a soggy, undesirable texture.
The “Roast First” Trick: If you love these high-water content vegetables and still wish to include them on your almond flour pizza, there’s a simple solution! **Roast or sauté these vegetables beforehand** to draw out most of their moisture. Once the veggies are softened and slightly dehydrated, they can be added to your pizza without risking a soggy crust. This extra step ensures all your toppings contribute to a perfectly balanced and flavorful pizza experience.
Prepare Ahead: Freezing and Storing Your Almond Flour Pizza Crust
This fluffy almond flour pizza crust is incredibly freezer-friendly, making it an excellent option for meal prep and quick weeknight dinners. You can easily double the recipe and freeze an extra crust for future use. Here’s how to prepare and store your make-ahead almond flour pizza crust:
Freezing Pre-Baked Almond Flour Pizza Crust:
- Prepare and Cool: Follow the dough preparation and rolling instructions as directed in the “Crafting Your Almond Flour Pizza Crust” section. Par-bake the crust and allow it to cool completely to room temperature before proceeding. Do not add any toppings before freezing.
- Wrap Securely: Once completely cool, wrap the crust tightly first with plastic wrap, then with a layer of aluminum foil. This double layer helps protect against freezer burn and maintains freshness.
- Freeze: Store the wrapped crust in the freezer for up to 2 months.
- Baking from Frozen: When you’re ready to enjoy your frozen crust, there’s no need to thaw it first! Place your pizza stone or baking sheet on the middle oven rack and preheat your oven to 375ºF (190ºC). Assemble your frozen pizza crust on a piece of parchment paper with your desired sauce, toppings, and cheese. Carefully slide the parchment paper with the assembled pizza onto the hot pan in the oven. Bake for approximately 8 minutes, or until the cheese is melted and bubbly. For extra crispness and golden cheese, you can turn on the broiler for 1-2 minutes at the end, watching carefully.
Reheating Leftover Almond Flour Pizza for Best Results
Leftover almond flour pizza can be just as delicious as when it was freshly made, provided you reheat it correctly. Proper reheating methods preserve the crust’s texture and ensure a satisfying experience. Store any leftover pizza in an airtight container or wrapped securely in aluminum foil in the refrigerator for up to three days. For optimal taste and texture, avoid reheating in the microwave, as it tends to make the crust soft and chewy.
Stovetop Reheating (Recommended for Crispness):
For a beautifully crisp bottom crust, the stovetop method is highly recommended. Place a single slice of leftover pizza in a cold, nonstick skillet. Cover the skillet with a lid and turn the heat to medium-low. Heat for about 3 minutes, or until the bottom of the crust is crisp. Turn off the heat and let the pizza sit under the lid for an additional 2 minutes. The residual heat will perfectly melt the cheese without overcooking the crust.
Air Fryer Reheating (Quick & Convenient):
The air fryer offers a quick and efficient way to reheat pizza, producing a good balance of crispness and melted cheese. Preheat your air fryer to 360ºF (180ºC). Place your pizza slices on a piece of aluminum foil in the air fryer basket (this helps with cleanup). Heat for 3-6 minutes, or until the pizza is hot, and the cheese is re-melted and slightly bubbly.
Oven Reheating (For Multiple Slices):
If you’re reheating multiple slices, the oven is an excellent choice. Preheat your oven to 350ºF (175ºC). Arrange the pizza slices on a baking sheet. Reheat for approximately 5 minutes, or until the pizza is thoroughly warmed through and the cheese is melted.
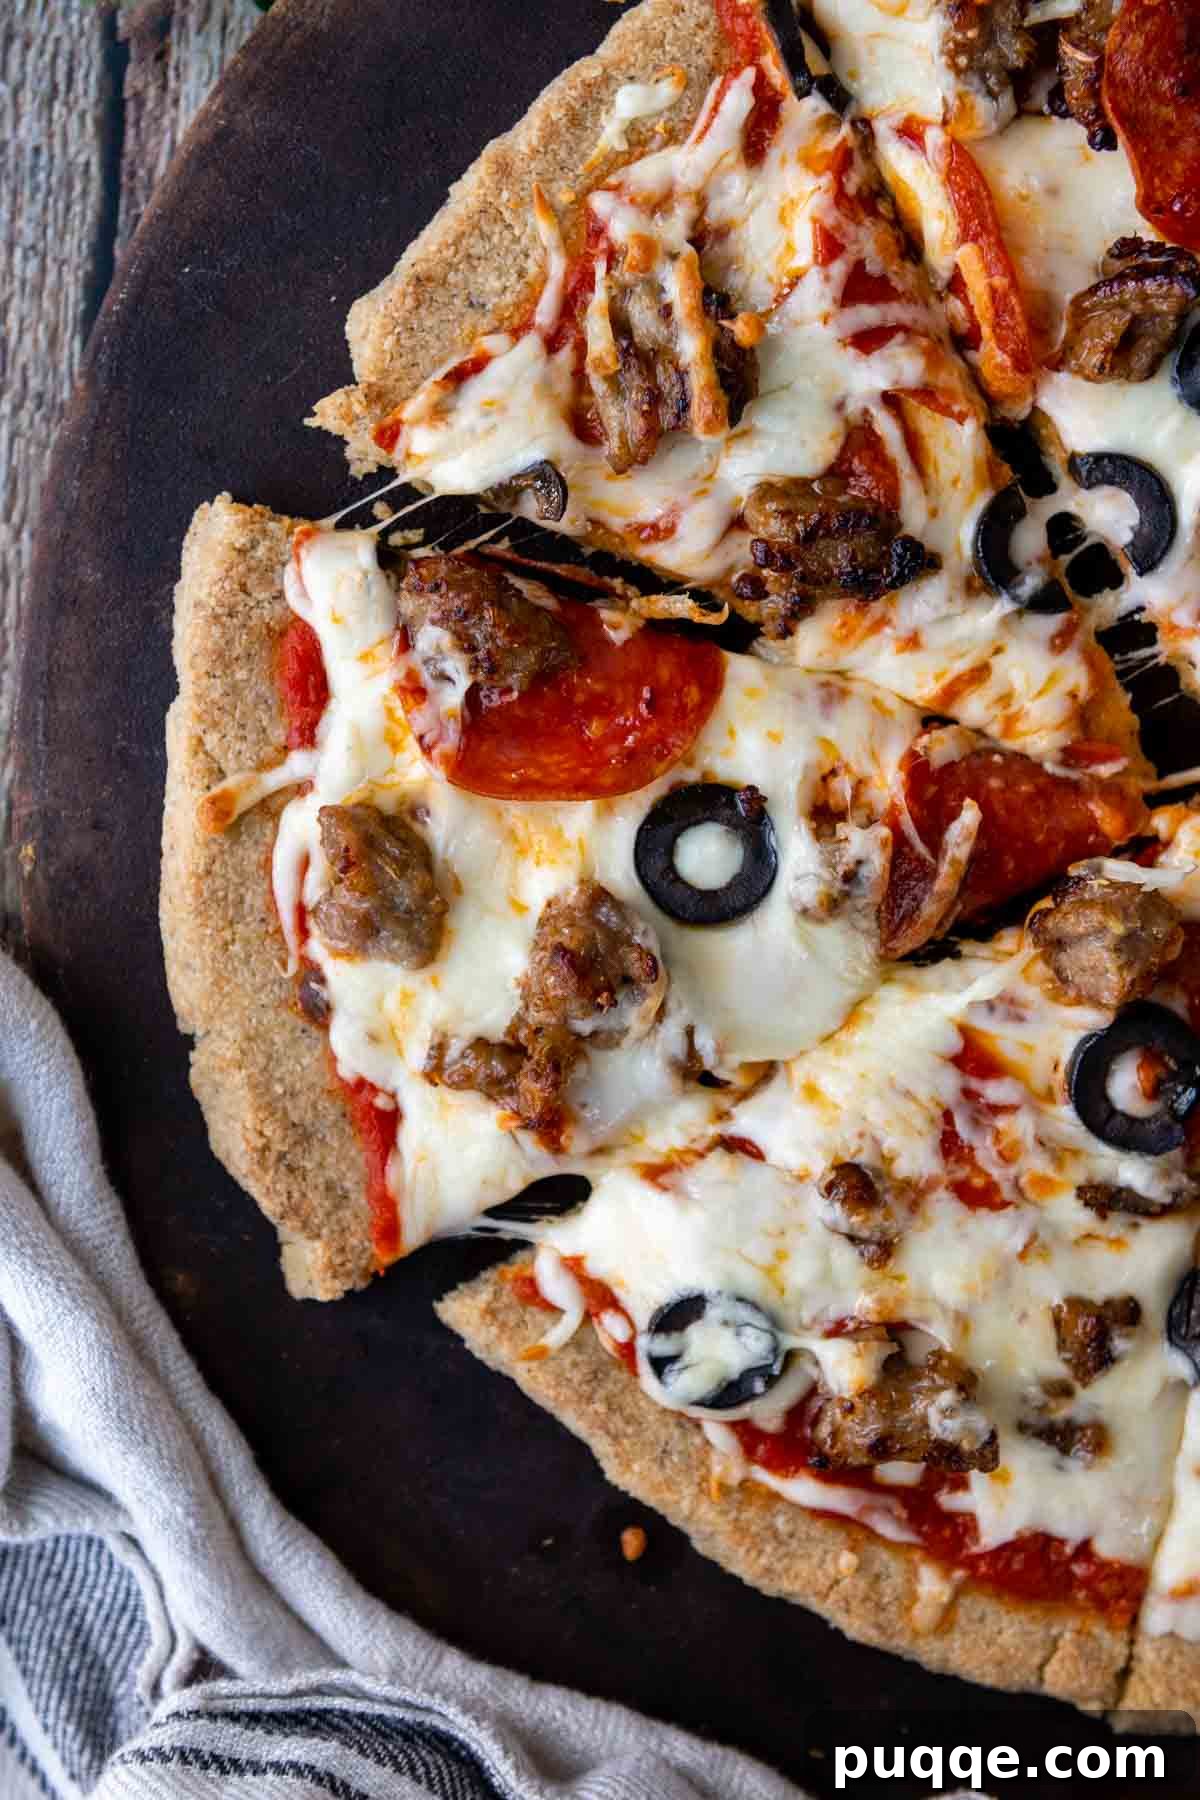
Frequently Asked Questions About Almond Flour Pizza Crust
Can I use almond meal instead of almond flour?
While both are made from ground almonds, almond meal is coarser and still contains the almond skins. For this recipe, fine, blanched almond flour is highly recommended as it results in a smoother, lighter, and more pliable dough. Using almond meal might lead to a denser, more rustic, and potentially crumbly crust, which isn’t ideal for a pizza base.
Why is my almond flour pizza crust crumbly or too dry?
If your crust is crumbly or too dry, it’s often due to insufficient liquid absorption by the psyllium husk or incorrect measurement of ingredients. Ensure you use the exact measurements specified, especially for the eggs and boiling water. The 5-minute resting period is also crucial for the psyllium husk to fully hydrate and create a pliable dough. If your dough still feels too dry after resting, you can add a tiny bit more boiling water, a teaspoon at a time, until it reaches the right consistency.
Can I make this pizza crust dairy-free?
Absolutely! The crust recipe itself is naturally dairy-free. To keep your entire pizza dairy-free, simply use your favorite dairy-free pizza sauce and a good quality dairy-free cheese alternative for your toppings. Many brands offer excellent plant-based mozzarella and cheddar-style shredded cheeses.
What if I don’t have psyllium husk powder? Are there substitutes?
Psyllium husk powder is a unique and critical ingredient in this recipe as it provides essential binding and elasticity to the gluten-free, grain-free dough. There isn’t a perfect 1:1 substitute that will yield the exact same results. While some recipes might suggest ground flaxseed or chia seeds, they tend to absorb liquid differently and may result in a denser or less pliable crust. For the best texture and workability, we highly recommend using psyllium husk powder.
Can I double the recipe?
Yes, you can easily double this recipe to make two pizza crusts. This is an excellent idea for meal prepping, allowing you to enjoy one now and freeze the other for later using the instructions provided above. Just make sure you have a large enough bowl to mix the ingredients thoroughly.
How do I know if my pizza stone is hot enough?
For best results, place your pizza stone in a cold oven and allow it to preheat with the oven to 350ºF (175ºC), then continue heating for at least another 30 minutes after the oven reaches temperature. This ensures the stone is uniformly and thoroughly hot, providing that crucial initial crisping effect for the crust. A thoroughly preheated stone is key to preventing a soggy bottom.
Conclusion: Enjoy Your Delicious & Healthy Homemade Pizza!
This almond flour pizza crust recipe truly redefines what’s possible for gluten-free and low-carb eaters. No longer do you have to sacrifice flavor or texture to enjoy a homemade pizza. With its effortless preparation and fantastic results, you’ll find yourself turning to this recipe again and again for quick, healthy, and utterly delicious pizza nights. Experiment with your favorite toppings, savor the perfect balance of crisp and fluffy, and reclaim your love for pizza!
Don’t forget to save this recipe for almond flour pizza crust to your Pinterest board!
Let’s be friends on Pinterest! I’m always sharing great recipes!
Recipe Card: Thick, Crispy Almond Flour Pizza Crust
Yield: 3 servings
Prep Time: 10 minutes
Cook Time: 23 minutes
Total Time: 33 minutes
Ingredients
- 1 ¼ cup blanched almond flour
- 3 tablespoons psyllium husk powder
- 1 tablespoon baking powder
- ½ teaspoon salt
- ¼ teaspoon garlic powder
- 1 large egg
- 1 egg white
- 2 tablespoons olive oil, or preferred oil
- 1 tablespoon apple cider vinegar
- ¼ cup boiling water
- Toppings: Pizza sauce, cheese, and your favorite pizza toppings (see notes on high-water content vegetables).
Equipment
- Pizza Stone (recommended)
- Pizza Peel (recommended for pizza stone)
- Large Mixing Bowl
- Rolling Pin
- Parchment Paper
Instructions
- Preheat the oven to 350ºF (175ºC). If using a pizza stone or baking sheet, place it in the oven to preheat.
- In a large mixing bowl, whisk together the dry ingredients: almond flour, psyllium husk powder, baking powder, salt, and garlic powder.
- Add the wet ingredients: large egg, egg white, olive oil, and apple cider vinegar. Stir well. Then, add the boiling water and stir for about 1 minute until fully combined. Let the dough rest for 5 minutes to allow the liquids to absorb.
- Shape the dough into a ball and place it between two large pieces of greased parchment paper. Flatten into a thick disc.
- Using a rolling pin, roll the dough out to a 10-inch (25 cm) circle, about 1/4 to 1/2 inch (0.6 – 1.2 cm) thick. Adjust thickness for desired crispiness or fluffiness. Even out edges with your fingers if needed.
- Remove the top parchment paper and transfer the dough (on the bottom parchment) to the preheated baking tray or pizza stone. Par-bake for 15 minutes, rotating halfway. The crust should be firm but not yet golden.
- Remove the crust from the oven and increase oven temperature to 375ºF (190ºC). Place the crust on a heat-proof surface.
- Spread a thin layer of pizza sauce, add your desired toppings, and top with cheese. Remember to pre-roast high-water content vegetables.
- Return the pan to the middle oven rack and bake for 7-8 minutes, or until the cheese is melted. For a golden, bubbly cheese, broil for 1-2 minutes, watching carefully.
- Remove from the oven, let rest 1-2 minutes, then slice and enjoy!
Notes
Note About Toppings
High-water content vegetables (like fresh tomato slices, zucchini, or eggplant) are not recommended for direct topping as they release moisture and can make the crust soggy. If you wish to use them, roast the vegetables first to remove excess water before adding them to the pizza.
Reheating Leftovers
Store leftovers in an airtight container or foil for up to three days. Avoid microwave reheating.
- Stovetop: Place a slice in a cold, nonstick skillet, cover, and heat over medium-low for 3 minutes until crisp. Turn off heat and let sit for 2 more minutes.
- Air Fryer: Preheat to 360ºF (180ºC). Place slices on foil in the basket and heat for 3-6 minutes until hot.
- Oven: Preheat to 350ºF (175ºC). Place slices on a baking sheet and rewarm for 5 minutes until hot.
Freezing / Make-Ahead Pizza Crust
- Prepare and roll out the dough, then par-bake and cool completely. Do not add toppings before freezing.
- Wrap the cooled crust securely with plastic wrap and foil. Freeze for up to 2 months.
- To bake from frozen: Preheat oven to 375ºF (190ºC) with a pizza stone or baking sheet inside. Assemble the frozen crust (do not thaw) with sauce, toppings, and cheese on parchment paper.
- Transfer the pizza to the hot pan and bake for 8 minutes. Broil for 1-2 minutes for golden, bubbly cheese.
Nutritional Facts are calculated for the crust only, without pizza sauce, cheese, and toppings.
Nutrition Information (per serving, crust only)
- Calories: 408 kcal
- Carbohydrates: 20g
- Protein: 13g
- Fat: 34g
- Saturated Fat: 3g
- Polyunsaturated Fat: 1g
- Monounsaturated Fat: 7g
- Trans Fat: 0.01g
- Cholesterol: 55mg
- Sodium: 430mg
- Potassium: 447mg
- Fiber: 12g
- Sugar: 2g
- Vitamin A: 79 IU
- Vitamin C: 0.003mg
- Calcium: 282mg
- Iron: 2mg