
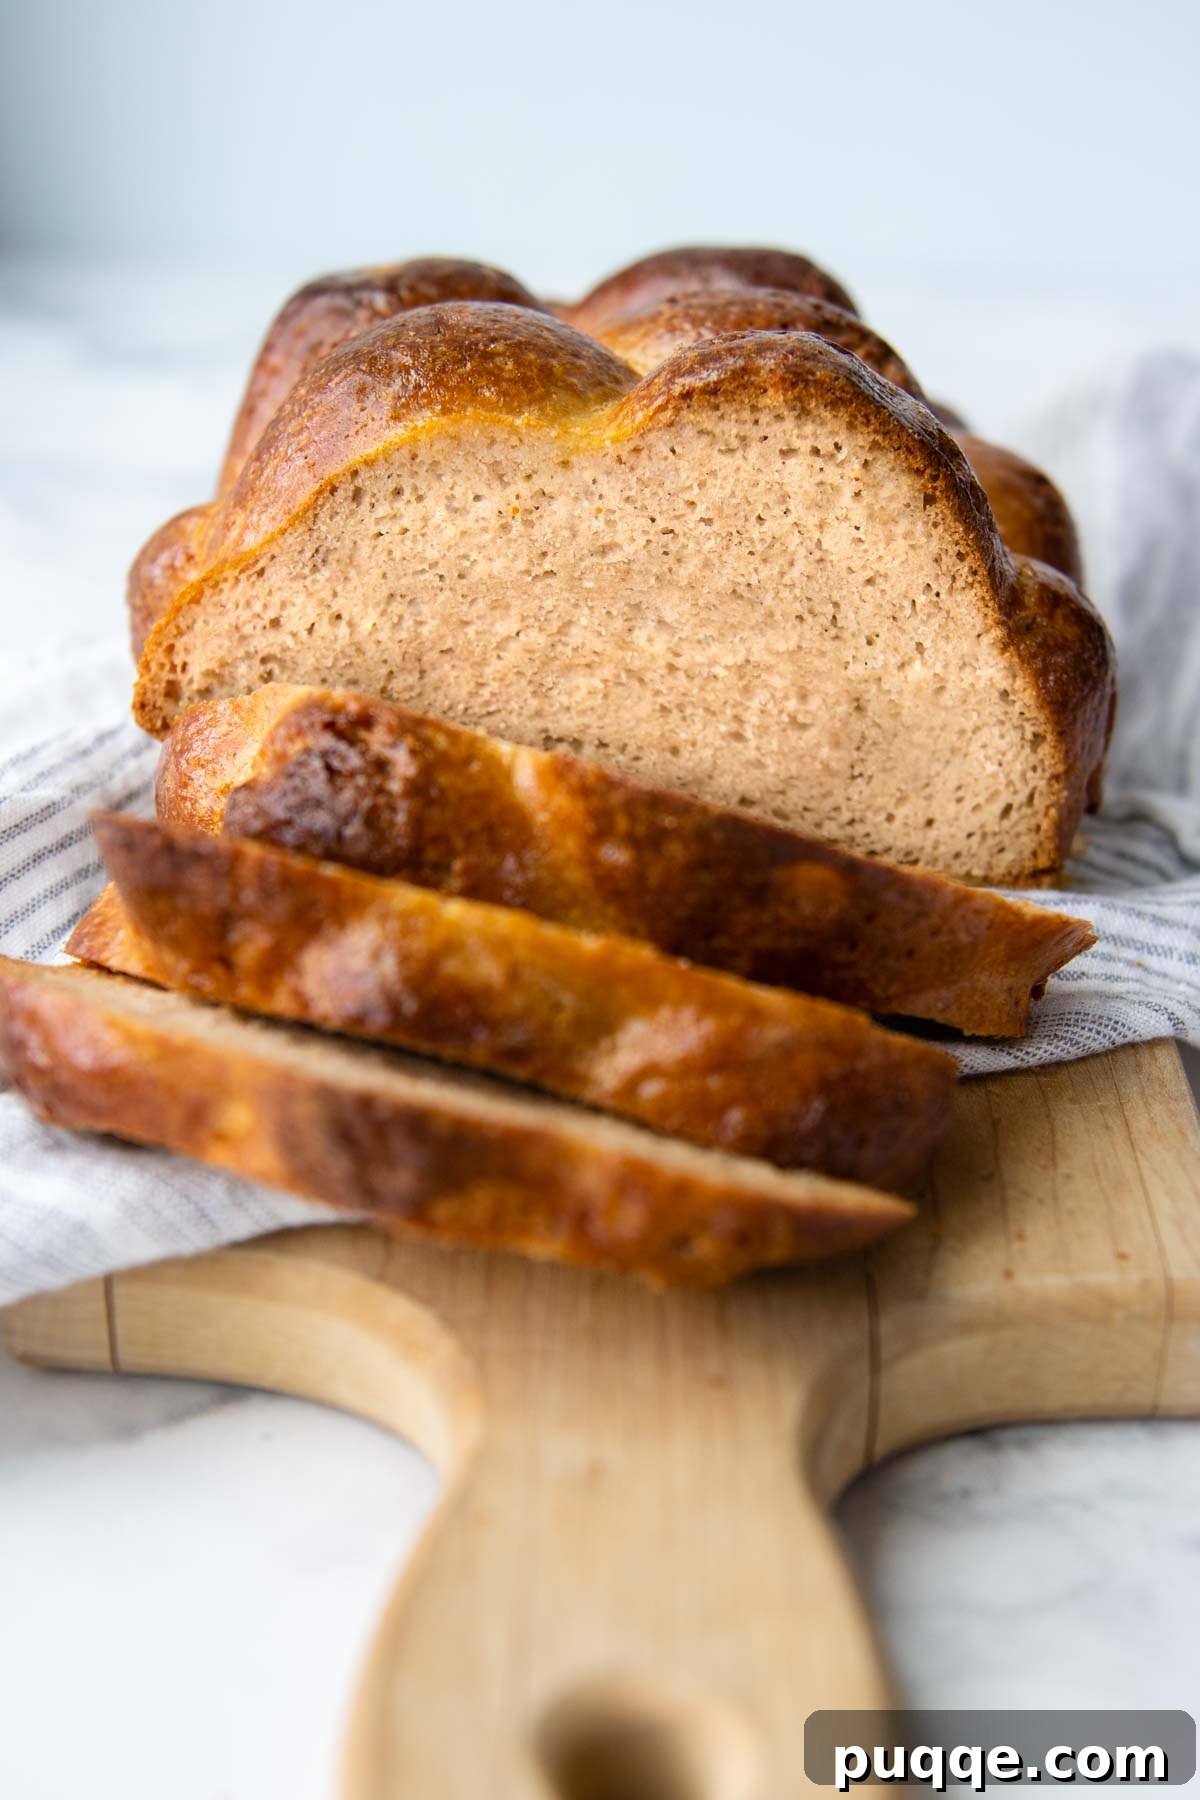
Unlock the secret to baking exceptional gluten-free challah bread right in your own kitchen! This recipe promises a loaf that is both easy to make and utterly delicious, featuring a signature slightly sweet flavor, a gorgeous golden, shiny crust, and an incredibly soft, tender crumb. Designed as a make-ahead overnight challah, it uses readily available gluten-free all-purpose flour, the essential psyllium husk, instant yeast, and eggs, making it a perfect, stress-free addition to any holiday table or special gathering.
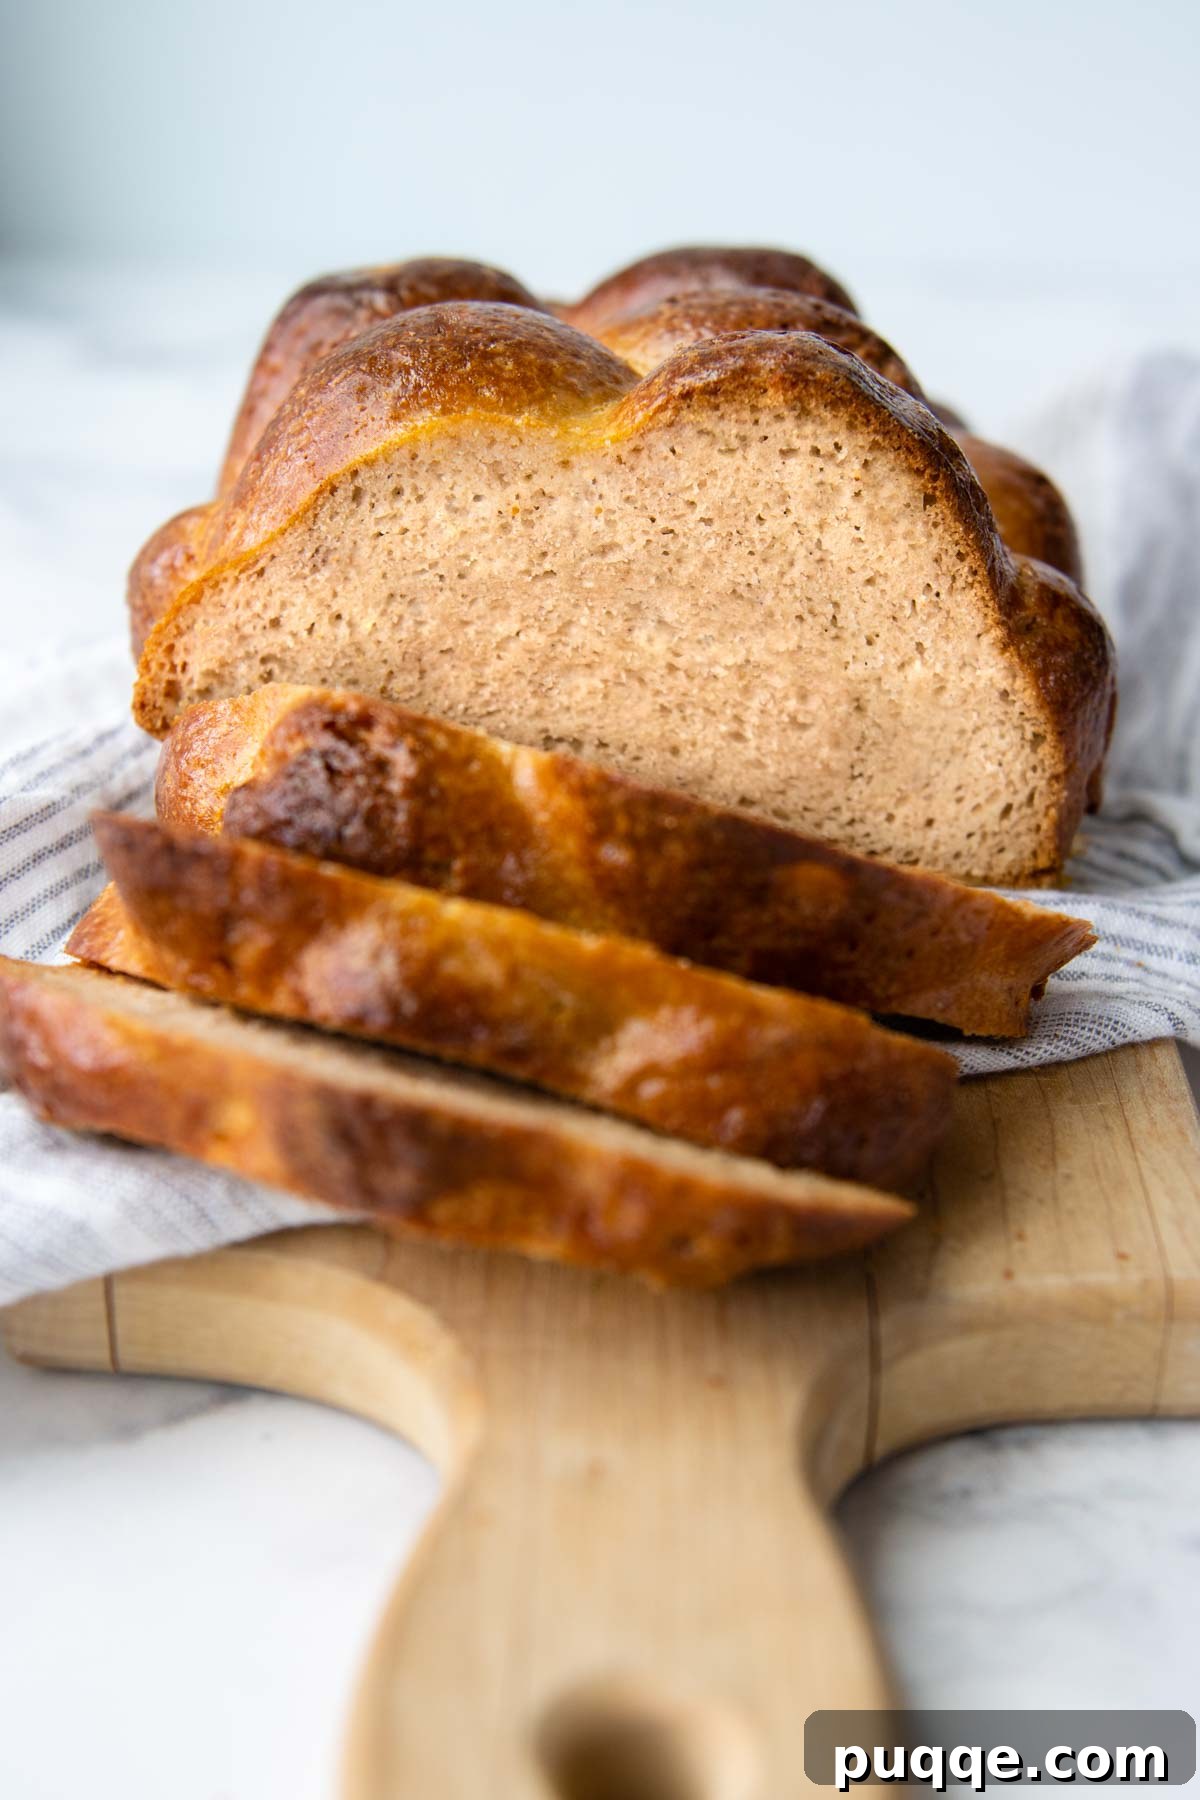
Effortless Gluten-Free Challah Bread: A Beginner-Friendly Recipe
Whether you cherish the culinary traditions of Jewish holidays or simply adore the rich, sweet taste of an egg-enriched bread, this easy gluten-free challah bread recipe is crafted with you in mind. Much like our other popular gluten-free bread recipes, this challah loaf boasts an irresistibly soft and tender crumb, all without the need for strenuous kneading. It’s designed to bring the joy of homemade bread to every baker, regardless of experience.
Traditionally, challah is intricately braided, a symbol laden with significance in Jewish culture and the Torah. However, many home bakers opt for simpler shaping methods, often utilizing challah molds to achieve that classic appearance with less effort. This particular recipe for gluten-free challah embraces simplicity, deliberately sidestepping the complexities of braiding. This makes it an incredibly straightforward and achievable project for bakers of all skill levels, ensuring delicious results without the frustration.
During the development of this recipe, I made a dedicated effort to replicate the traditional braided challah. However, the inherent lack of elasticity in gluten-free flours posed significant challenges. Achieving a pliable dough required an excessive amount of additional ingredients, and even then, the process was often frustrating, yielding inconsistent results and a dense, heavy crumb that strayed from the light, airy texture desired. My priority was replicating the sweet, airy taste and tender texture akin to my beloved gluten-free dinner rolls, rather than strictly adhering to traditional shaping methods. This recipe offers a direct and simple approach, allowing you to achieve beautiful, rounded humps effortlessly by using an affordable challah mold. If you prefer to use what you already have, simply divide the dough into two 8×4 inch loaf pans for rising and baking.
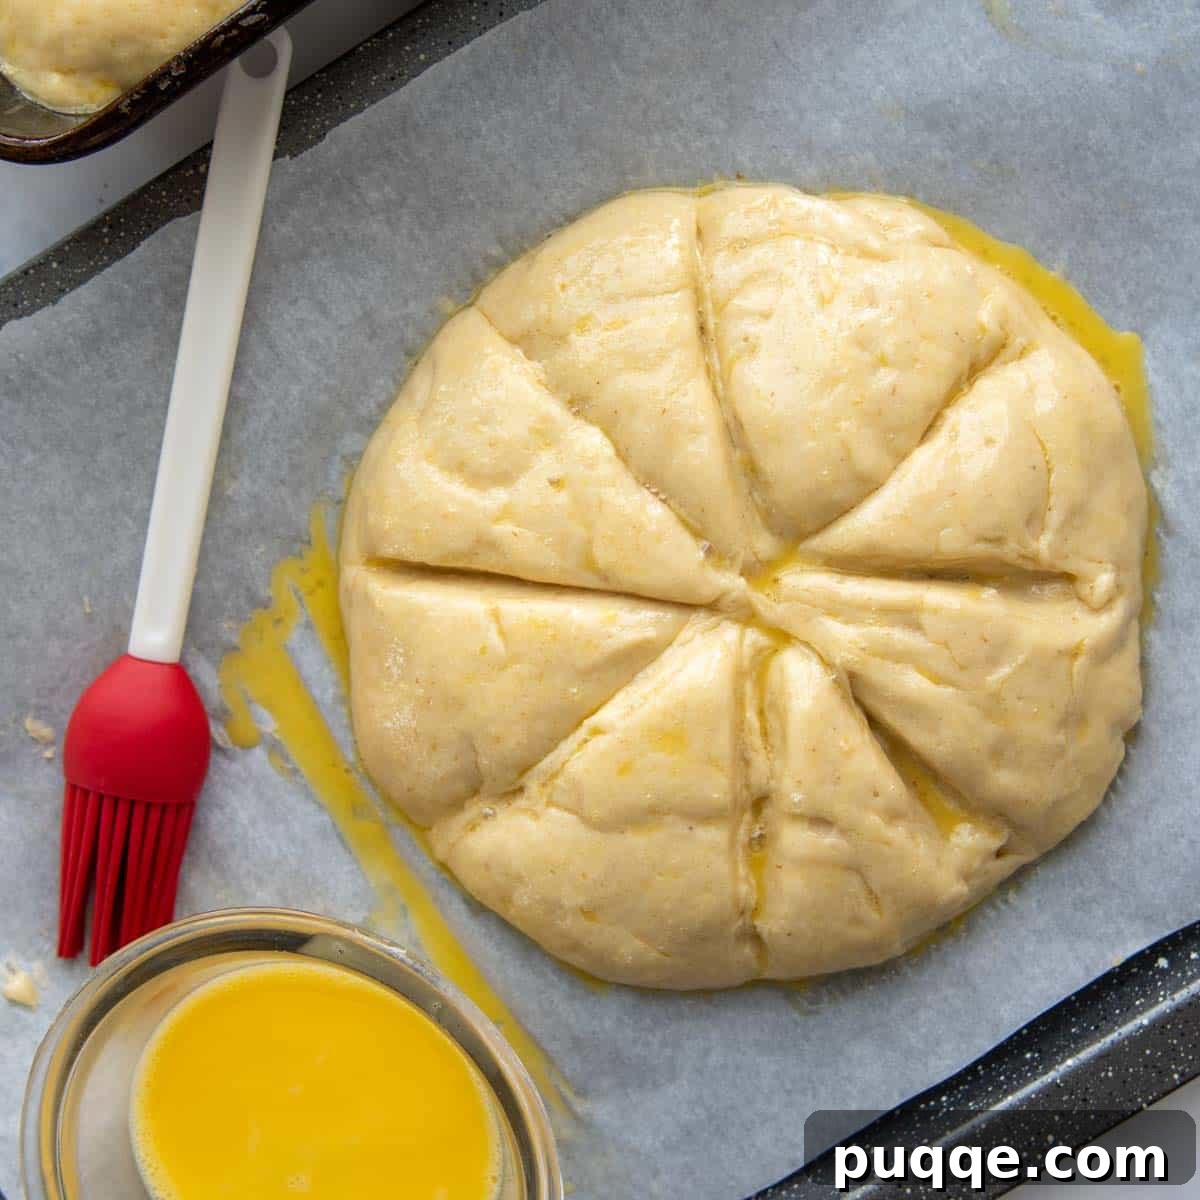
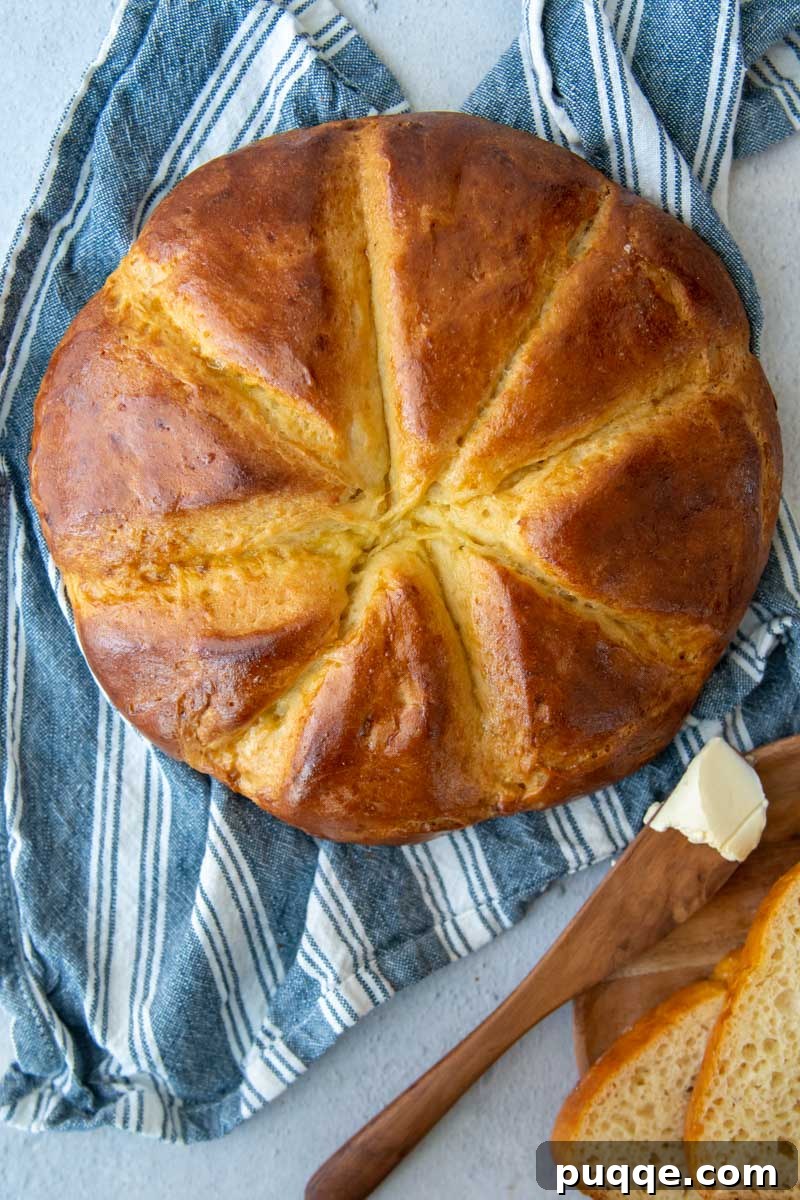
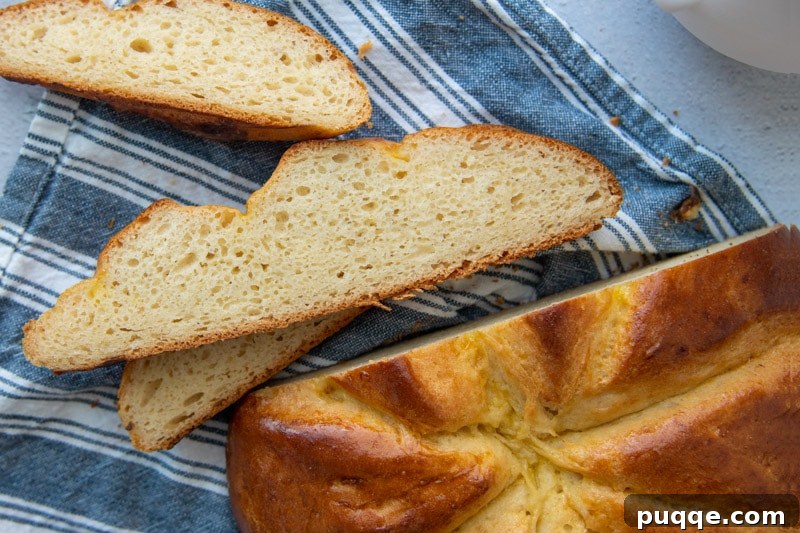
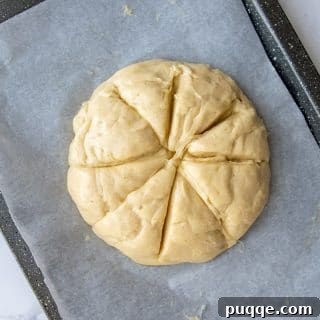
For an alternative presentation without specialized molds, you can bake this easy challah recipe on a baking sheet. Shape the dough into a round loaf and, before its second rise, use a sharp, greased knife to gently score a star pattern on top. This clever technique beautifully mimics the traditional braided humps, adding an elegant touch without the need for complex rolling and shaping. This beginner’s guide to homemade gluten-free challah ensures that you don’t need to be an expert or even extensively versed in gluten-free baking to achieve stunning results. Much like our remarkably easy gluten-free focaccia bread, you can confidently produce bakery-quality challah on your very first attempt!
What Exactly Is Challah? Exploring Its Rich History and Symbolism
Challah, at its heart, is a traditional Jewish braided bread, instantly recognizable by its shiny, golden crust. Its taste is often compared to brioche or Hawaiian bread, characterized by its rich, slightly sweet flavor. This special bread is baked to celebrate the Jewish holidays and Shabbat, a central part of weekly observance. While the iconic braided shape is widely recognized, challah can also be shaped into round, oblong, or rectangular loaves, each form carrying its own symbolic significance.
The shape of the challah often coincides with the particular Jewish holiday being celebrated. For instance, round loaves are traditionally baked for Rosh Hashanah, the Jewish New Year, symbolizing continuity, the cycle of the year, and an unended future. The braids themselves represent arms intertwined, beautifully symbolizing profound concepts such as love, truth, peace, and justice. Sometimes, the top of the challah is sprinkled with poppy or sesame seeds, which are said to symbolize the manna that miraculously fell from heaven, sustaining the Israelites during their exodus.

Key Ingredients for Your Gluten-Free Challah
Creating exceptional gluten-free challah often requires one specialty item: psyllium husk powder. This remarkable ingredient is crucial for maintaining moisture and preventing the bread from becoming crumbly, a common challenge in gluten-free baking. Psyllium husk is relatively affordable and plays an indispensable role in mimicking the structure and texture of traditional bread. I also rely on its benefits in my recipe for soft, white gluten-free bread.
- Gluten-Free All-Purpose Flour: For this recipe, I highly recommend Cup4Cup gluten-free flour blend, which conveniently includes xanthan gum. It’s important to note that this particular blend contains a small amount of milk powder. If you’re aiming for dairy-free challah, I suggest opting for Cup4Cup Wholesome Blend or King Arthur Measure-for-Measure gluten-free flour, both excellent dairy-free alternatives.
- Sugar: You can easily customize the sweetness of your challah. Use 1 cup of granulated sugar for a distinctly sweet bread, or reduce it to ½ cup for a subtle hint of sweetness that still complements the rich, eggy flavor.
- Instant Yeast (Rapid Rise): This recipe utilizes instant yeast, also known as rapid-rise yeast, which facilitates a desirable slow overnight rise. A key advantage of instant yeast is that it doesn’t require prior proofing in water, simplifying the preparation process.
- Psyllium Husk Powder: The specific brand linked here is my favorite because it consistently produces a light-colored crumb, unlike some darker varieties that can impart a purplish hue to baked goods. To delve deeper into the transformative properties of psyllium in gluten-free breads, including how it enhances moisture retention and builds elasticity, explore the detailed guide provided.
- Baking Powder: This is one of my expert gluten-free baking tips! Incorporating baking powder alongside the yeast significantly contributes to achieving an airy texture and an impressive rise, which can sometimes be challenging in gluten-free baking.
- Eggs and Oil: Essential for richness, moisture, and the signature golden color of challah. The additional egg yolk contributes to a more tender and custardy crumb.
- Water and Salt: Basic yet crucial ingredients that balance the flavors and activate the yeast.
Baking Gluten-Free Challah: Your Step-by-Step Guide
This make-ahead challah recipe benefits immensely from an overnight rise in the refrigerator, so remember to prepare your dough the day before you plan to bake. This slow, cold fermentation not only contributes to a softer texture but also develops a significantly richer and more complex flavor profile.
(Note: This section provides a detailed step-by-step tutorial. For precise ingredient quantities and a comprehensive recipe card, please scroll to the bottom of this post.)
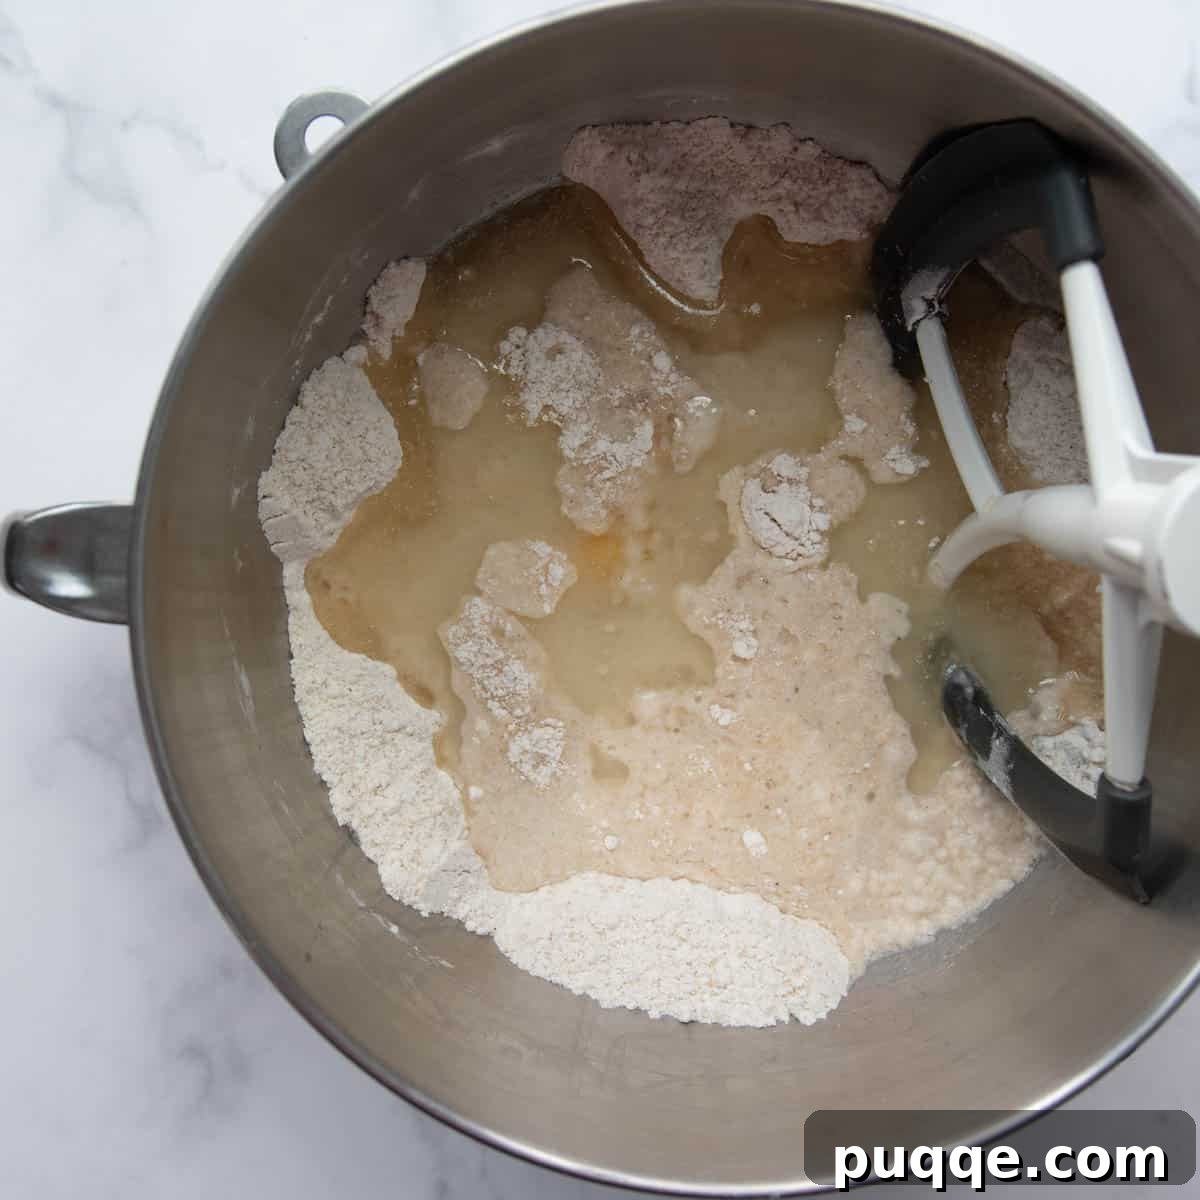
- Combine Dry Ingredients: In the bowl of a stand mixer, combine the gluten-free flour blend, granulated sugar, instant yeast, psyllium husk powder, baking powder, and salt. Use the paddle beater attachment to mix these dry ingredients together on low speed until well combined.
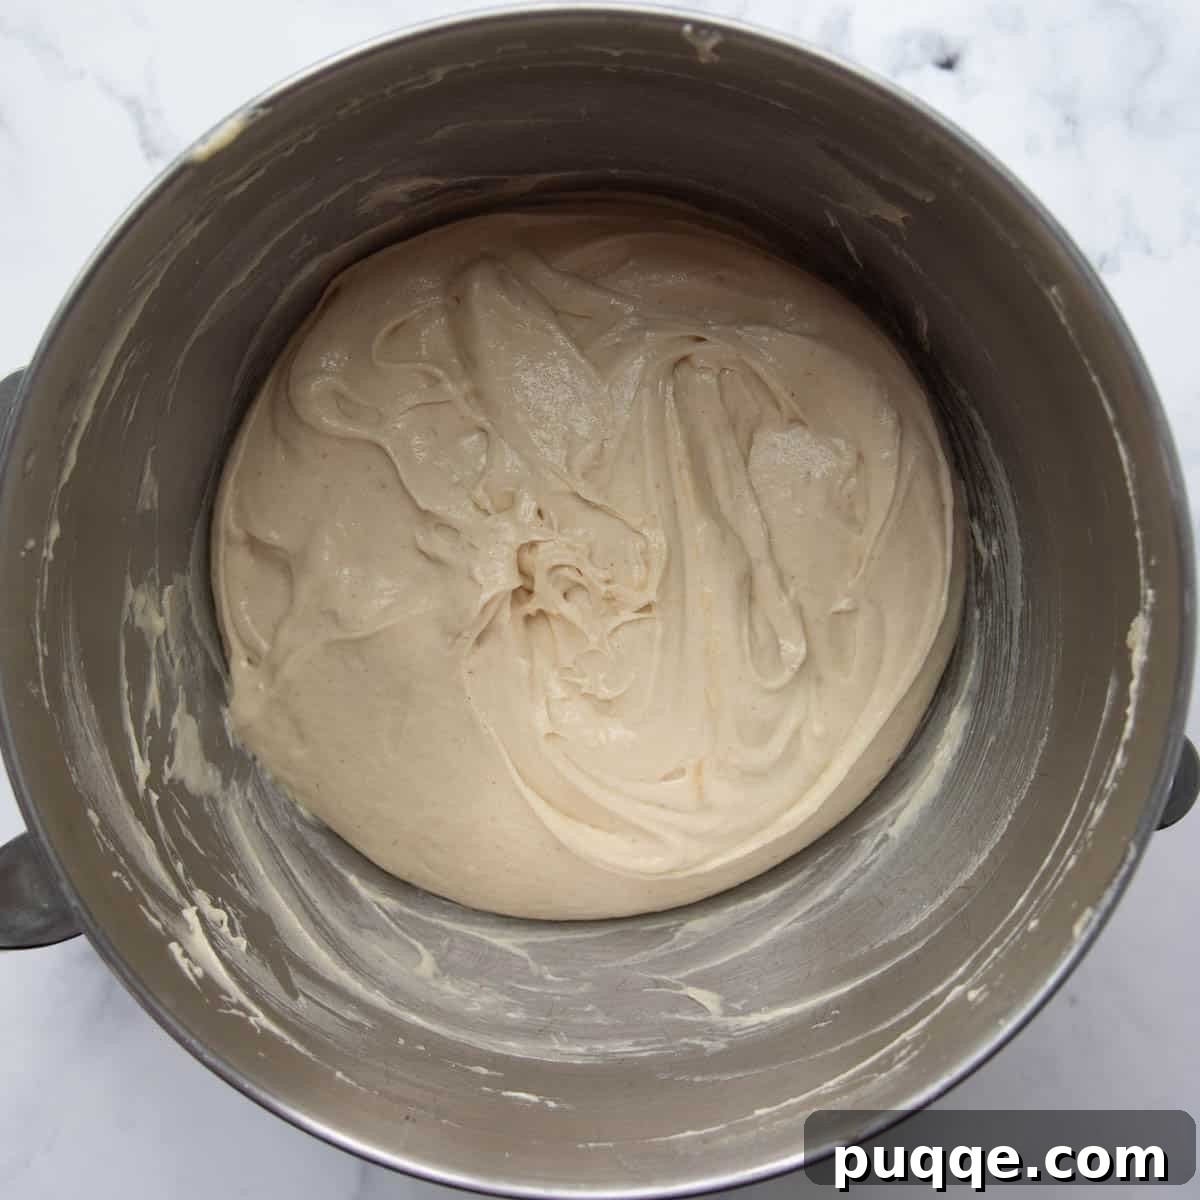
- Add Wet Ingredients & Beat: To the dry mixture, add the warm water, oil, eggs, and extra egg yolk. Mix initially on low speed to combine all the liquids with the dry ingredients. Once roughly mixed, scrape down the sides of the bowl and the beater. Increase the mixer speed to medium-high and beat the dough for a full 4 minutes. This vigorous beating is crucial for developing the dough’s structure in gluten-free baking.
- Overnight Chill: Using a rubber spatula, scrape the well-beaten dough into the center of the mixing bowl, forming a neat mound. Securely cover the bowl with plastic wrap, ensuring an airtight seal. Refrigerate the dough overnight, or for up to 2 days. This long, cold proofing time is essential for optimal flavor development and a superior texture.
- Prepare Baking Vessels: When you’re ready to bake, prepare your chosen baking vessel. For round-shaped bread, line baking sheets with parchment paper. If you prefer traditional loaves, generously grease two 8×4 inch loaf pans. For a classic challah shape without braiding, grease a large challah mold or two smaller molds thoroughly with cooking spray.
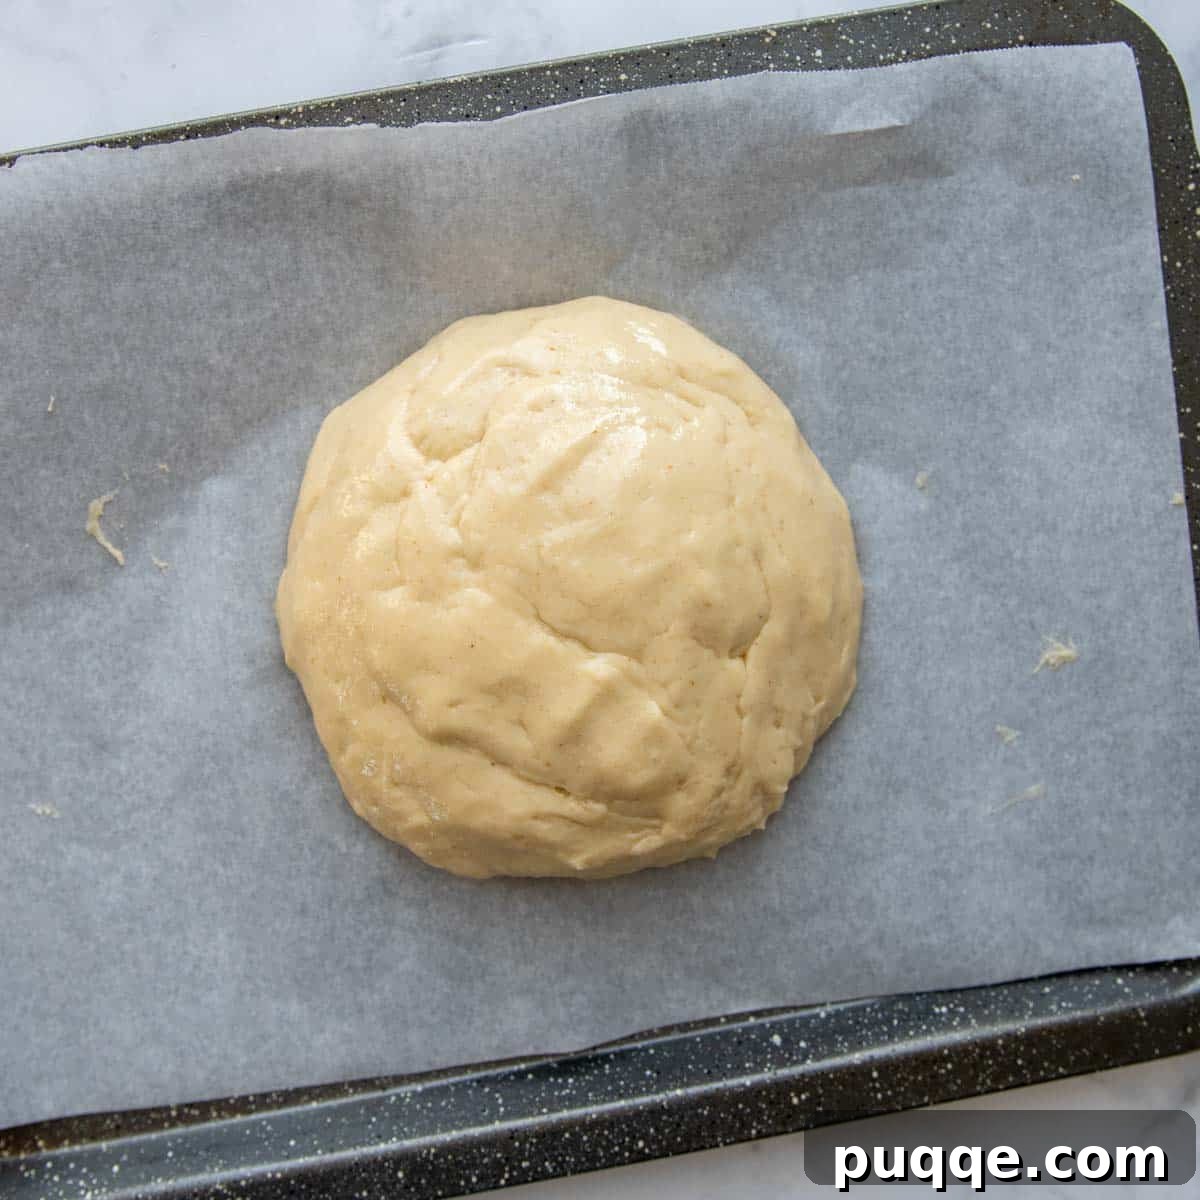
- Shape the Dough: Divide the chilled dough according to your chosen method. For loaf pans, divide evenly between the two pans. For round challah, form two loosely shaped balls and place them on the prepared baking sheets. If using a mold, fill it about two-thirds full with dough. Lightly spray your hands with cooking spray to prevent sticking, and then gently shape the dough into smooth balls or smooth out the tops of the loaves for an even appearance.
- Decorative Scoring (Optional): For round challah loaves, if you desire a decorative top that mimics braids, spray a sharp knife with cooking spray. Carefully cut a star pattern into the top of each round dough ball. This creates beautiful humps during baking without the complexities of braiding. You may need to wipe and re-spray the knife blade periodically to maintain a clean cut.
- Second Rise: Spray two large pieces of plastic wrap with cooking spray (to prevent sticking to the rising dough) and loosely cover your shaped loaves. Allow the dough to rise in a warm, draft-free place for approximately 1 hour. The dough should become noticeably puffy, though it may not double in size like traditional gluten-containing doughs.
- First Egg Wash & Preheat: While the dough is rising, preheat your oven to 375ºF (190ºC). Just before baking, use a pastry brush to thoroughly brush the tops of the loaves with the prepared egg wash (made from 1 egg lightly beaten with 1 tablespoon of water). If you are using molds, you can omit this initial egg wash, as the mold will define the shape. Reserve any remaining egg wash for a later step.
- Initial Bake: Carefully place the bread into the preheated hot oven. Immediately reduce the oven temperature to 350ºF (175ºC). Bake for 25 minutes.
- Second Egg Wash & Final Bake: After 25 minutes, remove the bread from the oven. If baking in loaf pans or as round loaves, rebrush generously with the reserved egg wash to enhance the shine. If using molds, gently overturn the molds onto a parchment-lined baking sheet to release the challah, then brush the newly exposed tops with the egg wash. Return the bread to the oven for another 20-25 minutes for round loaves or bread pan loaves. For challah molds, return to the oven for 15 minutes, remove and rebrush with egg wash, then bake for an additional 10-15 minutes. Baking times for molds can vary depending on their size, so keep an eye on them. If the top of the bread begins to brown too quickly, loosely tent it with aluminum foil for the final 10 minutes. The internal temperature of the bread should reach 200-205ºF (93-96ºC) when tested with an instant-read thermometer.
- Cool & Serve: Once baked, remove the challah from the oven and allow it to cool in its pan or on the baking sheet for 5 minutes. Then, carefully transfer it to a wire cooling rack to cool completely. For the best texture and flavor, serve the challah on the same day it is baked. Any leftovers can be frozen for future enjoyment.
Choosing the Right Gluten-Free Flour Blend
When developing baking recipes, I typically test several different gluten-free flour blends to compare their performance. However, for this particular challah recipe, I confidently proceeded directly with Cup4Cup, having conducted extensive testing with it in numerous other gluten-free bread recipes, consistently achieving excellent results.
It’s important to highlight that Cup4Cup does contain a small amount of milk powder. This is a relevant consideration, as traditional challah recipes are inherently dairy-free. If you require a strictly dairy-free challah, I recommend consulting this helpful article on the best gluten-free flours to understand how various blends compare and which common allergens they may contain.
How to Ensure Your Challah is Perfectly Baked
One of the most common challenges in gluten-free baking is knowing precisely when breads are fully cooked. Golden brown exteriors can often be deceptive, leading to an undercooked, gummy interior. To eliminate this guesswork and ensure consistently perfect results with all my gluten-free breads, I always rely on an instant-read thermometer. When inserted into the thickest part of the challah, the internal temperature should register between 200ºF and 205ºF (93-96ºC). This reliable method applies not only to quick breads and yeast breads but also to other baked goods like bagels and breadsticks, guaranteeing a thoroughly cooked and delightful crumb every time.
Storing and Freezing Your Gluten-Free Challah
Like most gluten-free bread recipes, this challah has a relatively short shelf life when stored at room temperature. For the best possible texture and freshness, I highly recommend enjoying the bread on the very same day it is baked. Any leftovers should be frozen promptly to preserve their quality.
You can freeze the challah either as a whole loaf or pre-sliced, depending on your preference and anticipated use. Regardless of the method, ensure the bread is wrapped securely to prevent the formation of ice crystals and freezer burn. Proper wrapping will help maintain its texture and flavor for up to 3 months in the freezer.
Creative Ways to Enjoy Your Challah Leftovers
This gluten-free challah recipe yields two generous loaves, typically providing about 24 servings. Given challah’s shorter shelf life compared to traditional breads, it’s wise to either freeze leftovers immediately or transform them into one of these delicious dishes:
- Gluten-Free Bread Pudding: The rich, sweet challah is perfect for a comforting bread pudding.
- French Toast: Slice thickly and dip in an egg and milk mixture for a luxurious breakfast.
- Strata or Gluten-Free French Toast Casserole: A savory or sweet baked dish, perfect for brunch.
- Kugel: A traditional Jewish noodle or potato casserole that can be adapted with challah.
- Stuffing or Dressing: Use day-old challah cubes for a flavorful holiday side dish.
- Croutons: Cube and toast for crispy salad toppers or soup garnishes.
- Bread Crumbs: Process stale challah into flavorful bread crumbs for various recipes.
- Grilled Cheese: The tender crumb and slight sweetness elevate a classic grilled cheese sandwich.
Choosing Your Challah Baking Pan Options
You have several flexible options for shaping your gluten-free challah, each offering a slightly different aesthetic and level of ease:
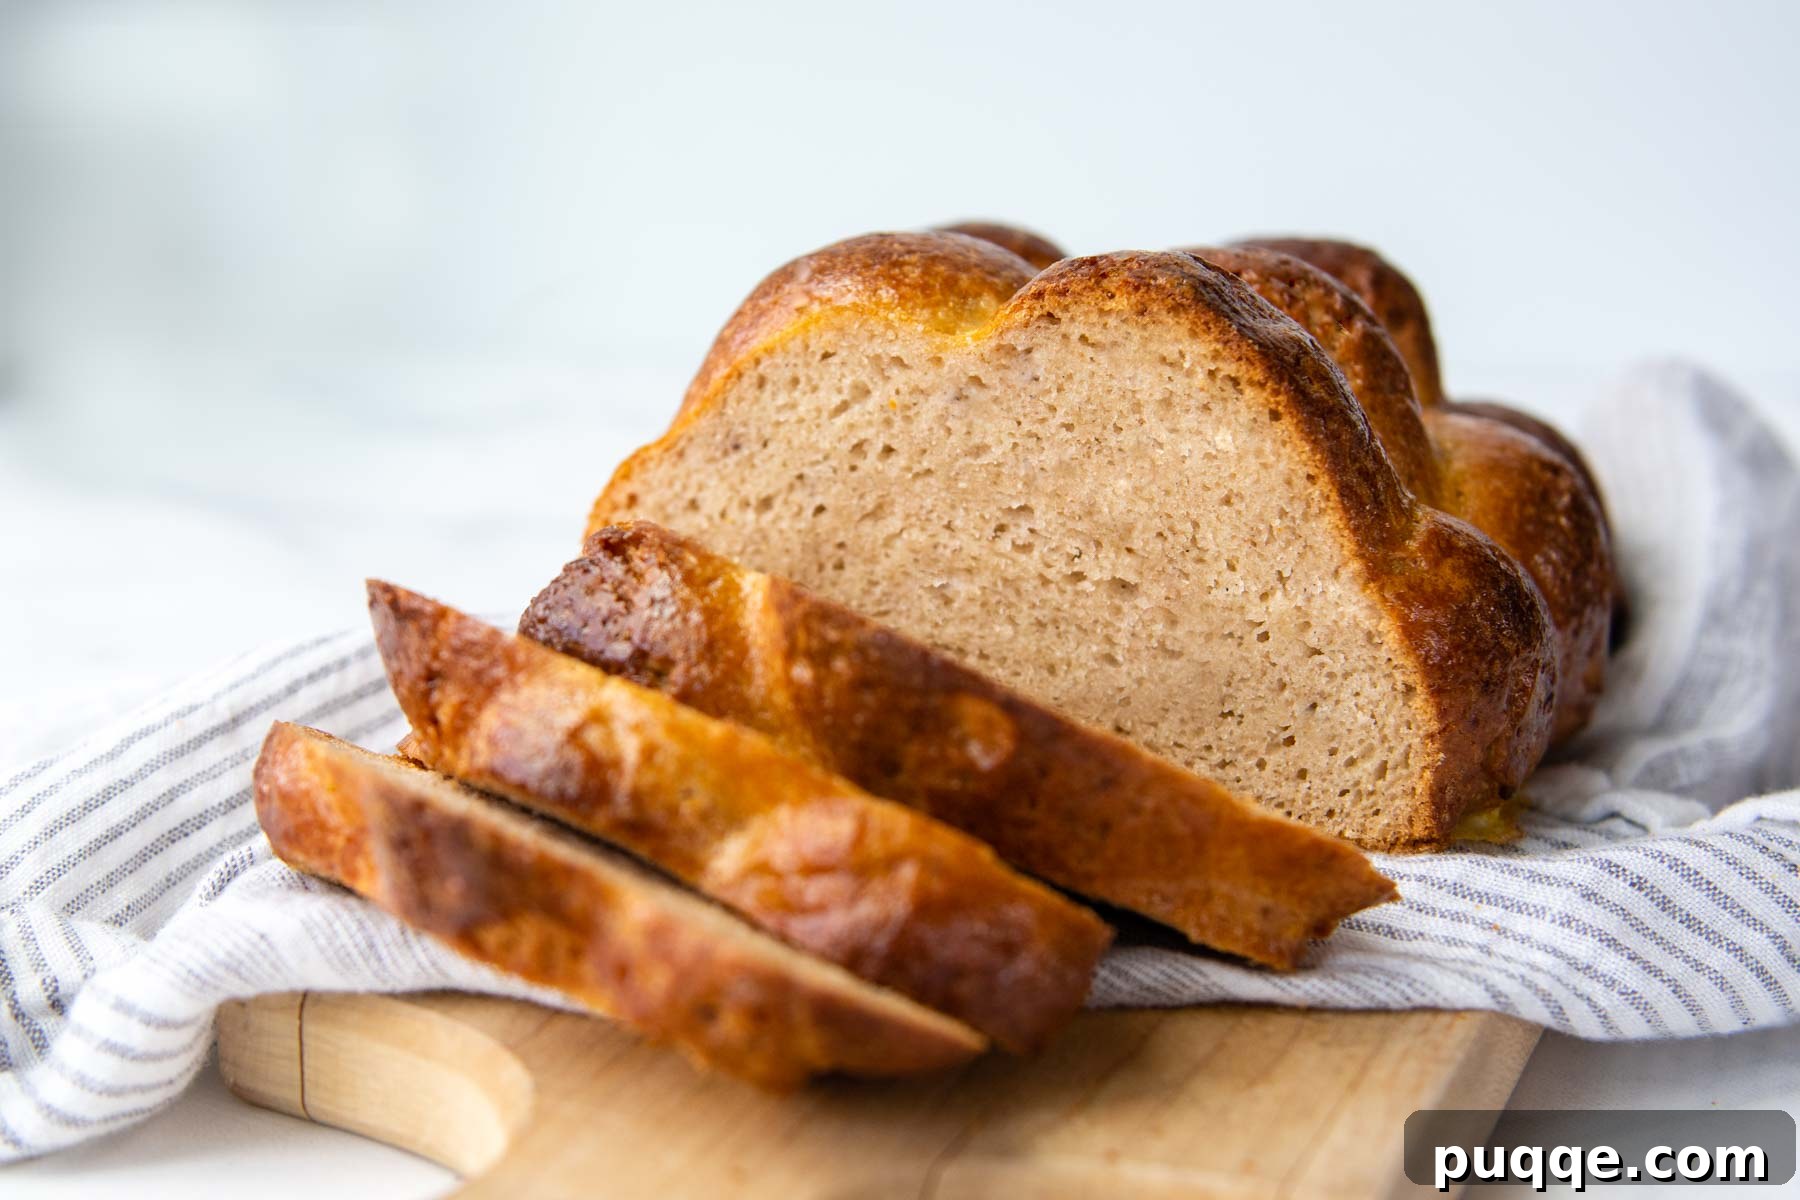
- For the Most Traditional Look: To achieve a challah that closely resembles the classic braided form without the braiding effort, I recommend using a large challah mold or splitting the dough between two smaller molds. These molds create the iconic humps and curves beautifully.
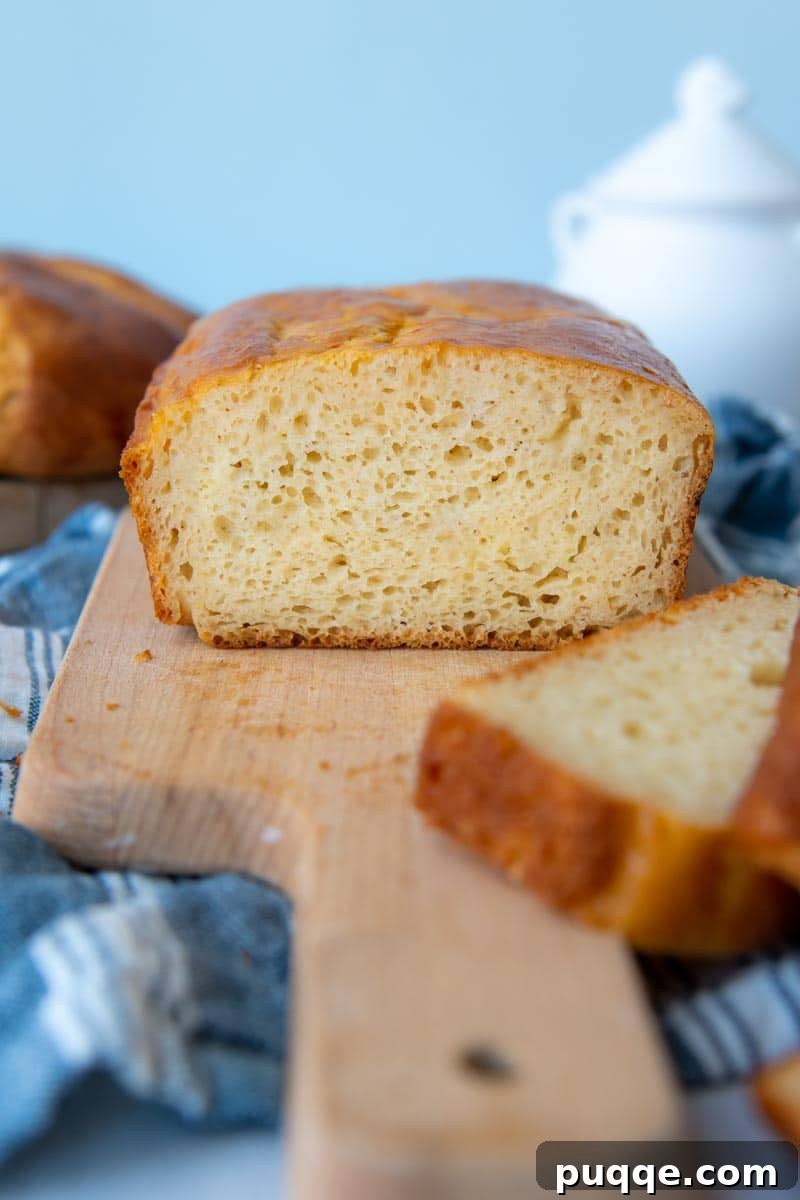
- For Ultimate Simplicity: If you’re looking for the easiest possible method, simply divide the prepared dough between two standard 8×4 inch loaf pans. This yields two perfectly shaped loaves with minimal fuss.
- For a Decorative Round Loaf: As an alternative, you can shape the dough into a single round loaf and place it on a parchment-lined baking sheet. Before the second rise, spray a sharp knife with cooking spray and carefully cut a star pattern across the top. This technique creates an appealing decorative effect, mimicking the look of traditional challah without needing to roll and shape individual strands.
The Magic of an Overnight Cold Rise
Allowing dough to undergo a low, slow rise in the refrigerator is a time-honored technique that consistently produces a richer, more flavorful end product. For gluten-free bread recipes, this overnight cold proofing is even more beneficial. It allows the flour to fully hydrate, the flavors to meld and deepen, and the yeast to work its magic gradually. The result is a remarkably softer texture and a significantly more enhanced, complex flavor that simply cannot be achieved with a quick rise.
Mastering the Egg Wash for a Perfect Crust
Applying an egg wash to your challah bread is a simple yet transformative step that gives it that distinctively ultra-shiny, golden crust. To truly make your challah stand out with an impressive glaze, I employ a double-brushing technique: once before the bread enters the oven, and then again halfway through the baking process. This second application ensures maximum sheen and a beautiful, deep golden color.
Don’t Forget to Pin This Gluten-Free Challah Recipe!
Be sure to save this incredible gluten-free challah recipe to your Pinterest board so you can easily find it whenever you’re ready to bake a delicious loaf! You can also connect with us on Pinterest; we’re always sharing fantastic recipes and baking tips!
Did you make this delicious recipe? I’d love to hear about your experience! Leave a star rating and comment below the recipe card to share your feedback. Your insights help other bakers in our community discover fantastic recipes, and I truly appreciate hearing from you! -Melissa
Gluten-Free Challah Bread: A Beginner’s Guide

Melissa Erdelac
Learn how to bake fresh gluten-free challah bread at home with this easy and effortless recipe! Challah bread is slightly sweet with a golden, shiny crust and soft, tender crumb. This make-ahead overnight challah recipe is made with all-purpose gluten-free flour, psyllium husk, instant yeast, and eggs, and is the perfect addition to your holiday table.
Pin Recipe
Rate Recipe
Ingredients
- 3 ¼ cup (473 g) gluten-free all-purpose flour (recommend Cup4Cup; see notes for dairy-free options)
- ¾ cup (150 g) granulated sugar
- 2 tablespoons (22g) instant (rapid rise) yeast
- 2 tablespoons (22 g) psyllium husk powder (what is psyllium husk?)
- 2 teaspoons baking powder
- 1 teaspoon table salt or kosher salt
- 1 ¼ cup (300 g) water
- ½ cup (107 g) canola or vegetable oil
- 2 large eggs + 1 yolk
- For egg wash: 1 egg lightly beaten with 1 tbsp water
Equipment
- Stand Mixer
- Pastry Brush
- Challah Mold (optional)
Instructions
- In the bowl of a stand mixer, add the gluten-free flour, sugar, yeast, psyllium husk powder, baking powder, and salt. Use a paddle beater attachment to blend on low speed until combined.
- Add the water, oil, eggs, and egg yolk. Mix the liquids in on low speed. Scrape the bowl and beater down, then increase the speed to medium-high and beat for 4 minutes.
- Use a rubber spatula to scrape the dough into the center of the bowl. Cover securely with plastic wrap and refrigerate overnight, or up to 3 days.
- When ready to bake, line baking sheets with parchment (for round shaped bread), grease two 8×4 loaf pans (for loaves), or grease a large challah mold or two small molds with cooking spray (for traditional shaped challah).
- Divide the dough between the loaf pans, into two loosely shaped balls on the baking sheets, or fill 2/3 of the mold with dough. Spray your hands with cooking spray, and shape the dough into smooth balls or smooth the top of loaves evenly.
-

For the round challah, if you would like to give a more decorative top, spray a sharp knife with cooking spray and cut through in a star pattern. This will mimic the humps without having to roll and shape the dough. You might have to wipe the blade several times and respray.
- Spray two large pieces of plastic wrap with cooking spray and then cover the loaves. Let the dough rise in a warm, draft-free place for 1 hour.
- Preheat the oven to 375ºF (190ºC). Use a pastry brush to brush the loaves thoroughly with the egg wash (omit this step if using molds). Reserve the remaining egg wash for later use.
- Place the bread in the hot oven and immediately turn down the heat to 350ºF (175ºC). Bake for 25 minutes. Remove the bread from the oven and rebrush with the egg wash. If using molds, overturn on a baking sheet lined with parchment and release from the mold. Brush the top with egg wash.
- For round loaves or the bread pan, return to the oven for another 20 minutes. If the top of the bread becomes too brown, loosely cover with foil for the last 10 minutes. The interior temperature of the bread should be at 200ºF (93ºC). For challah molds, return to the oven for 15 minutes, remove and rebrush with egg wash, then bake again for 10-15 minutes longer. Depending on the size of the challah mold used, the baking time will increase or decrease. For best results, use a thermometer to see if the internal temperature reaches 200ºF (93ºC).
- Remove from the oven, cool for 5 minutes, and then transfer to a cooling rack to cool completely. For best results, serve the same day and freeze any leftovers.
Notes
Gluten-Free Flour Recommendations
I use and recommend Cup4Cup gluten-free flour, but please note that Cup4Cup does contain a small amount of milk powder. Traditional challah recipes are dairy-free. For dairy-free challah, I recommend Cup4Cup Wholesome GF blend or King Arthur Measure-for-Measure gluten-free flour.
Storing Tips
Like other gluten-free breads, this challah recipe has a short shelf life. I recommend enjoying it the same day it is baked and freezing any leftovers.
Challah may be frozen whole or sliced. Either way, make sure the bread is protected and wrapped securely to prevent ice crystals, and it can be frozen for up to 3 months.
Recipe adapted from Let Them Eat GF Cake.
Nutrition Information
Calories: 137 kcal,
Carbohydrates: 21 g,
Protein: 2 g,
Fat: 6 g,
Saturated Fat: 4 g,
Trans Fat: 1 g,
Cholesterol: 20 mg,
Sodium: 106 mg,
Potassium: 45 mg,
Fiber: 2 g,
Sugar: 9 g,
Vitamin A: 30 IU,
Vitamin C: 1 mg,
Calcium: 29 mg,
Iron: 1 mg
Did you make this recipe? Please leave a star rating and review below. It helps others when searching for recipes and I LOVE feedback!