
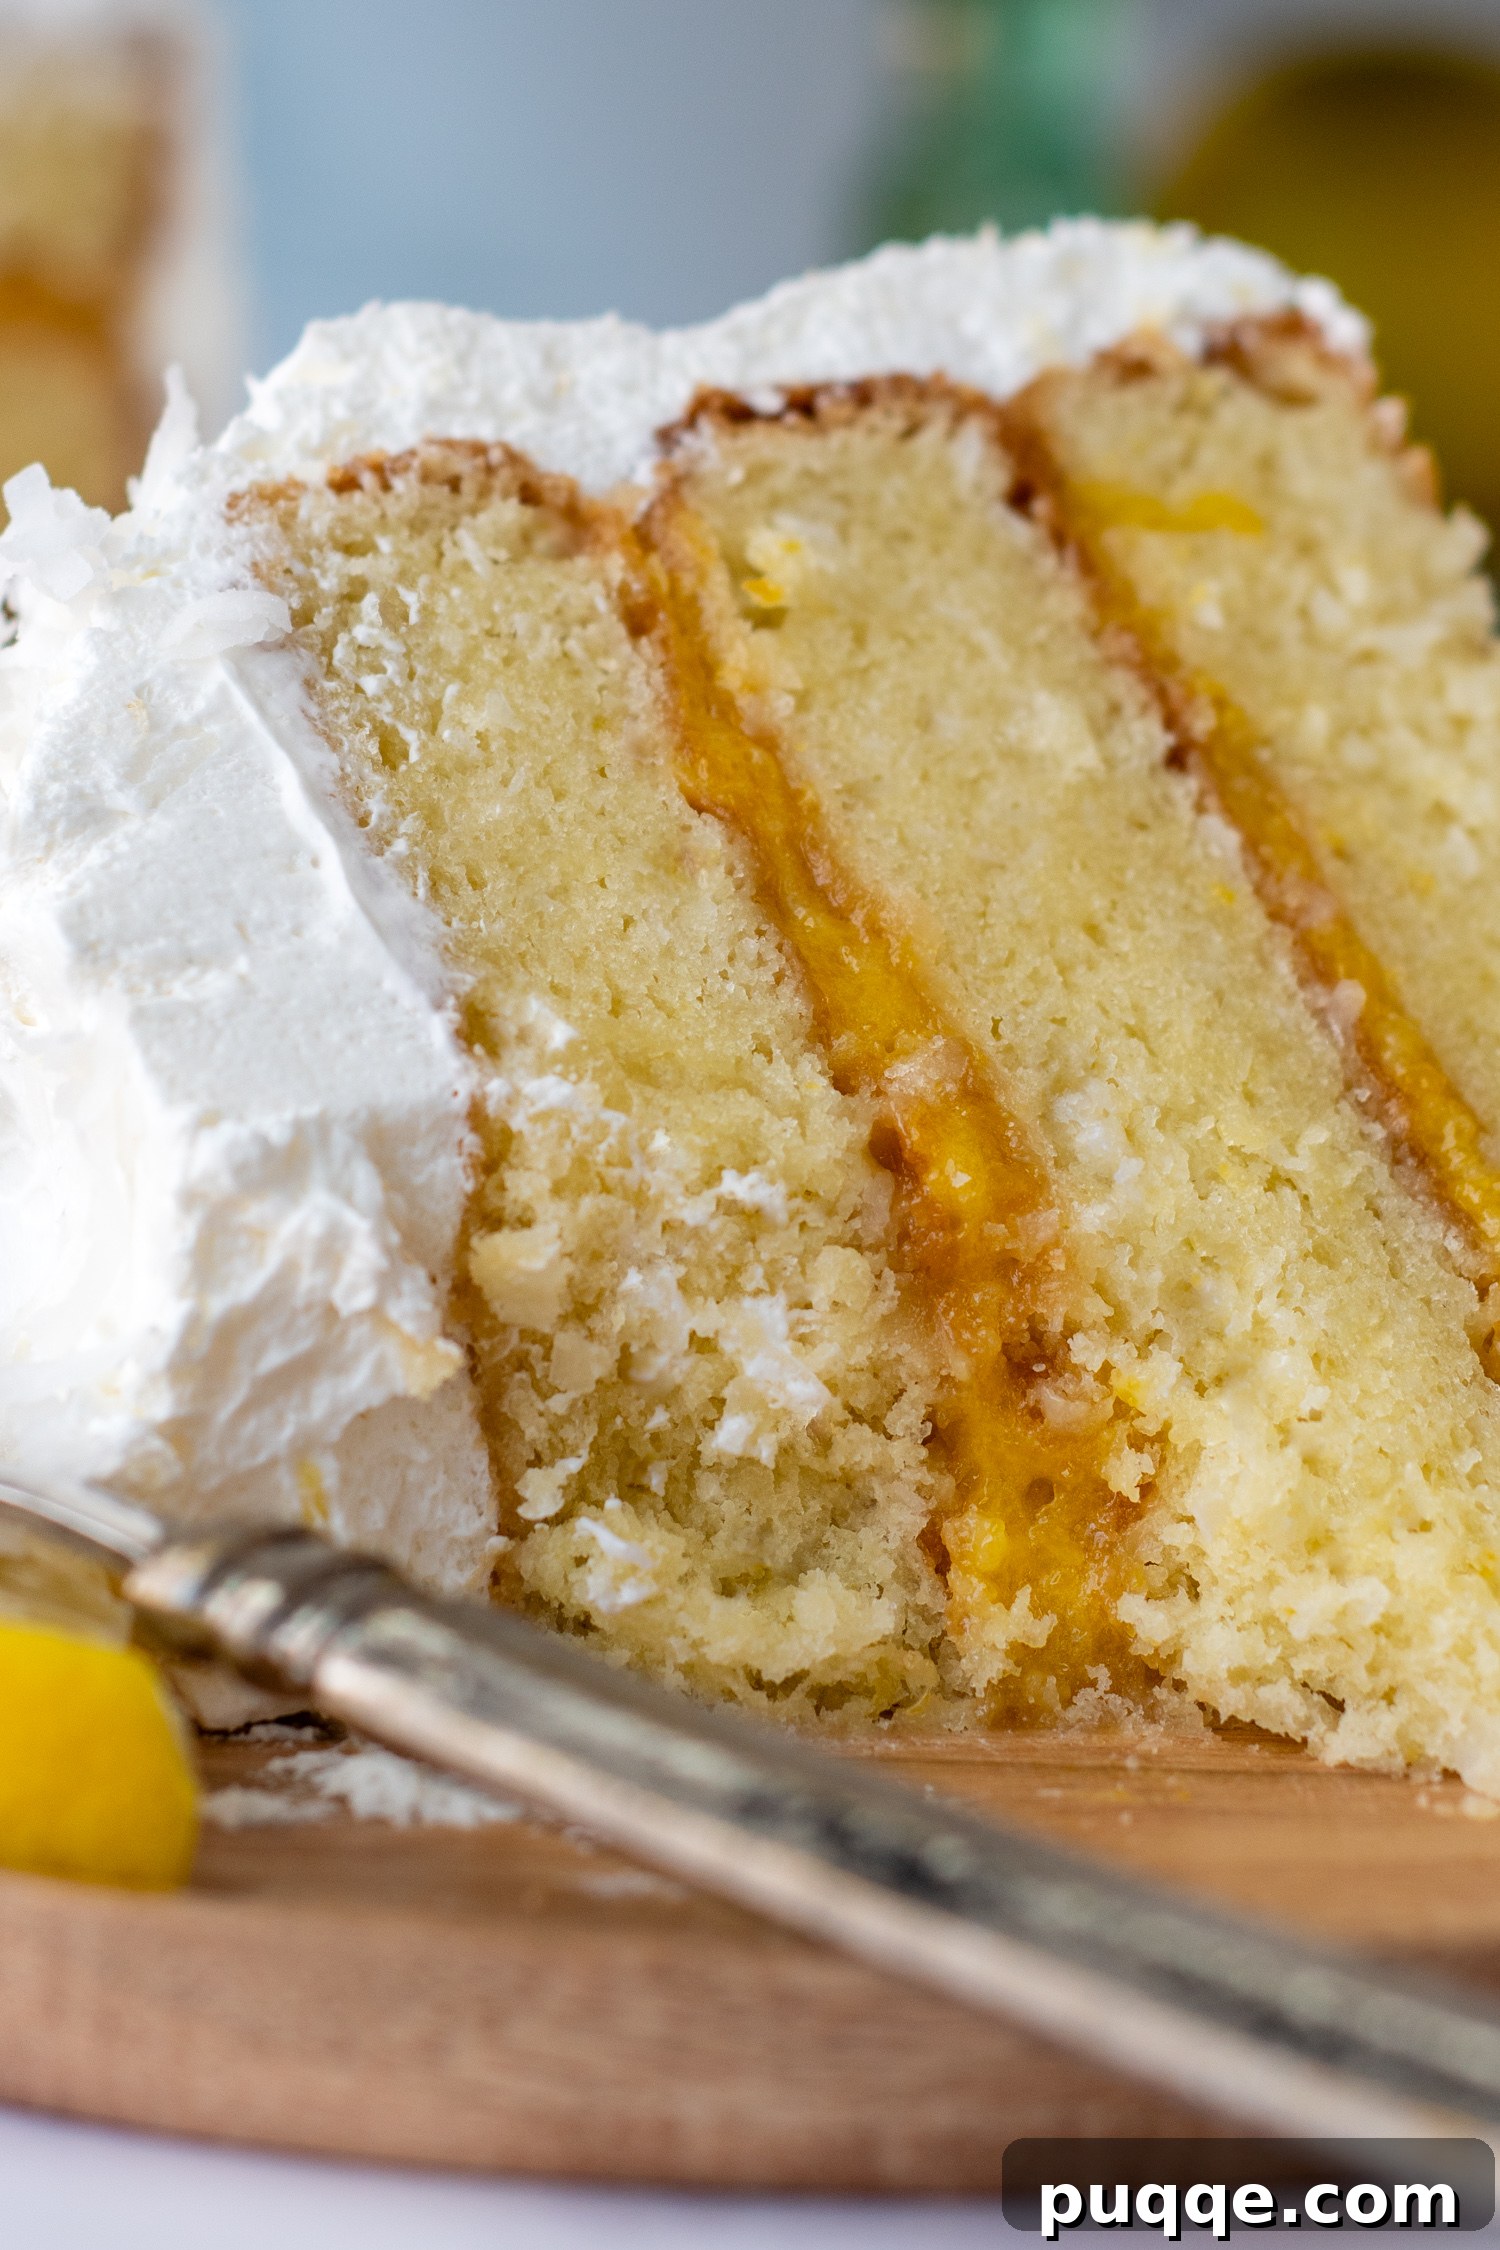
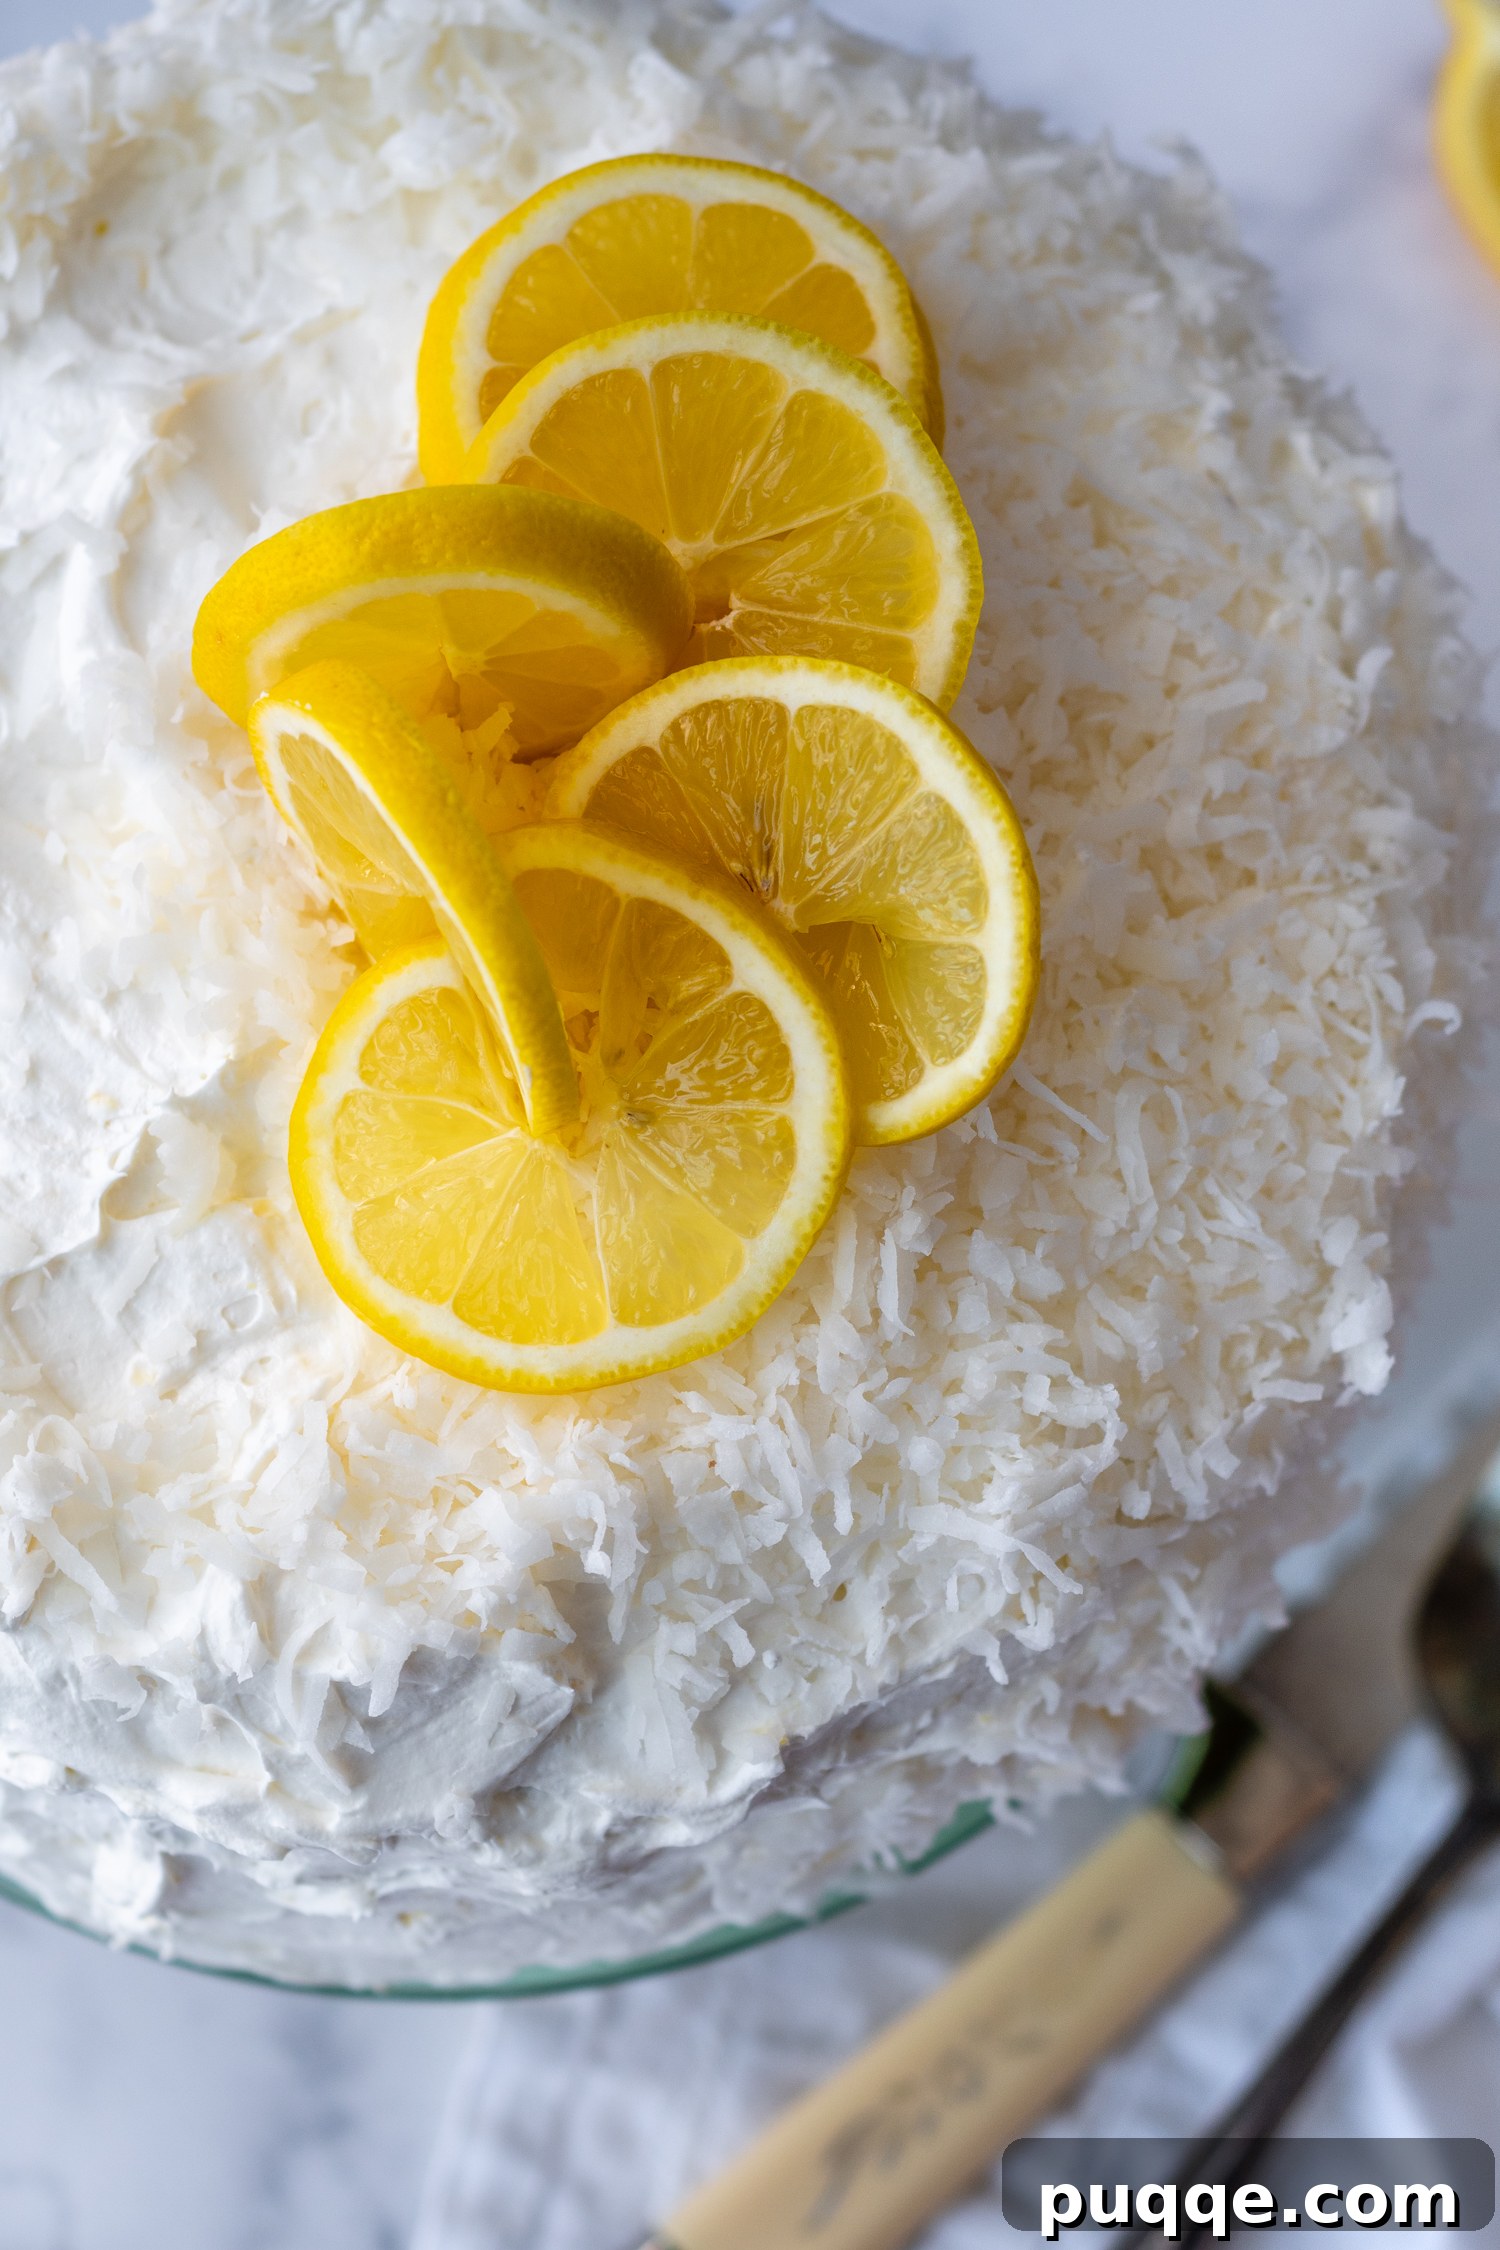
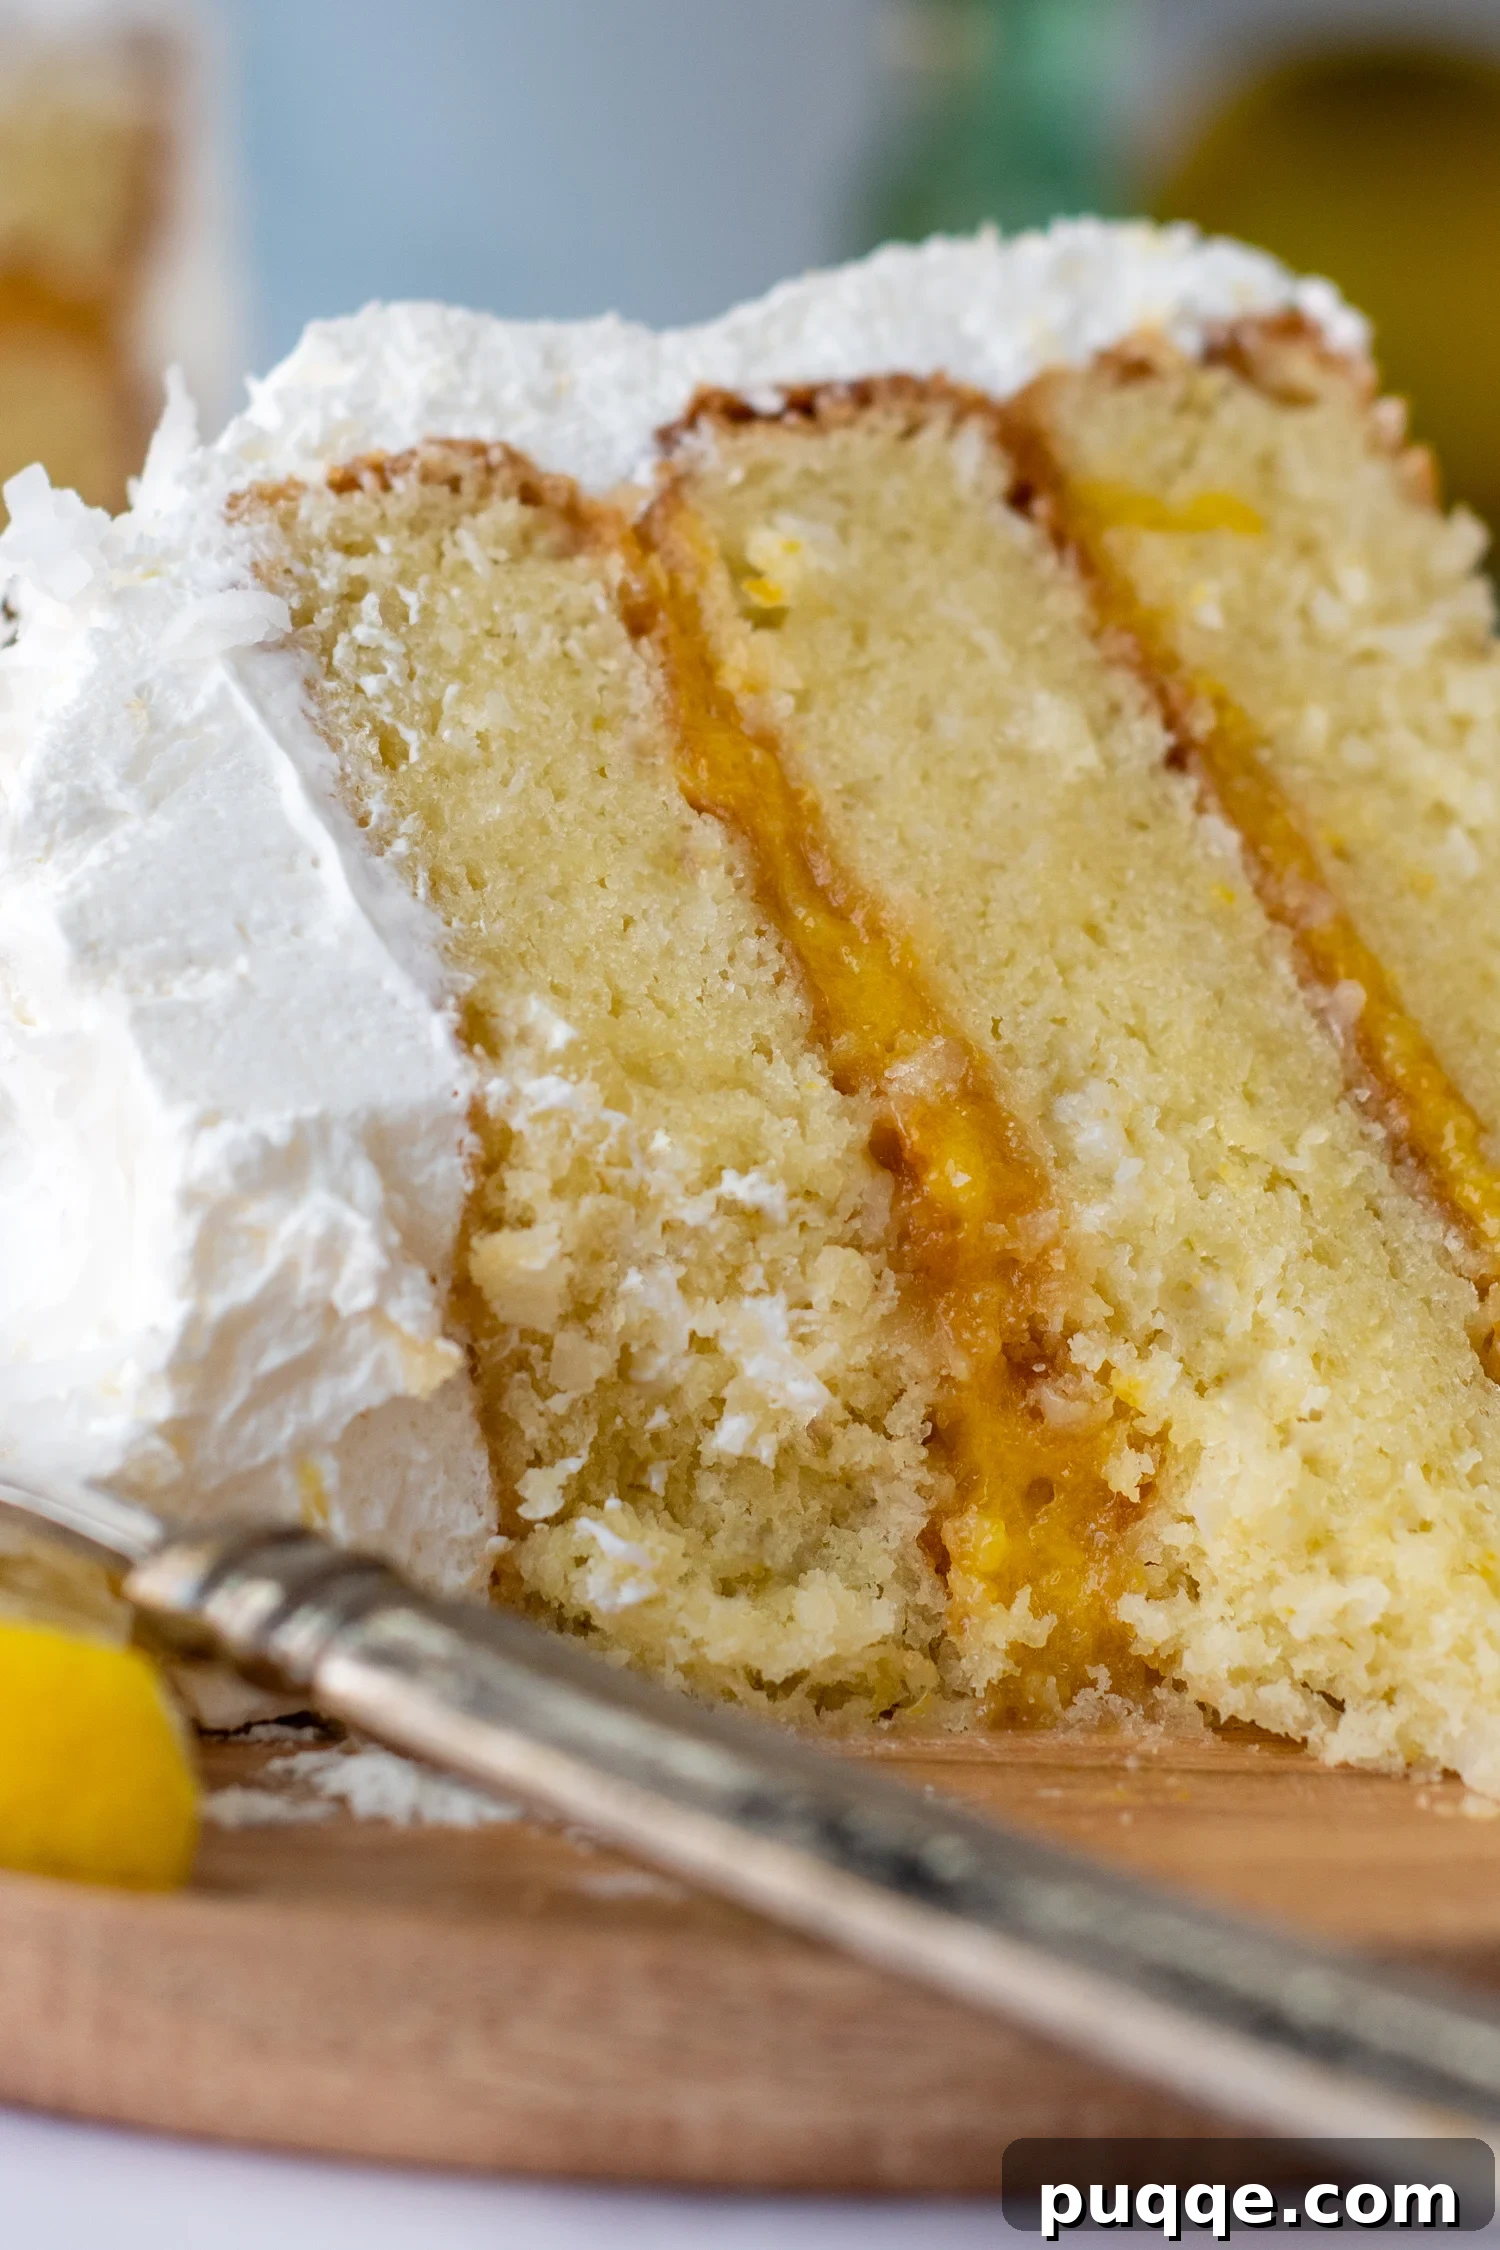
Unlock the secrets to baking an exceptionally fluffy and moist gluten-free coconut lemon cake with this comprehensive, easy-to-follow recipe. This delightful homemade creation features a vibrant, tangy, and sweet citrus curd filling, artfully layered between tender, aromatic coconut cake sponges, all crowned with an airy lemon cream cheese frosting. Whether you’re a baking purist opting for a completely from-scratch experience or prefer a streamlined approach using a cake mix adaptation, we’ll guide you through every step to achieve a truly impressive gluten-free layer cake that will wow your guests and satisfy your sweet cravings.
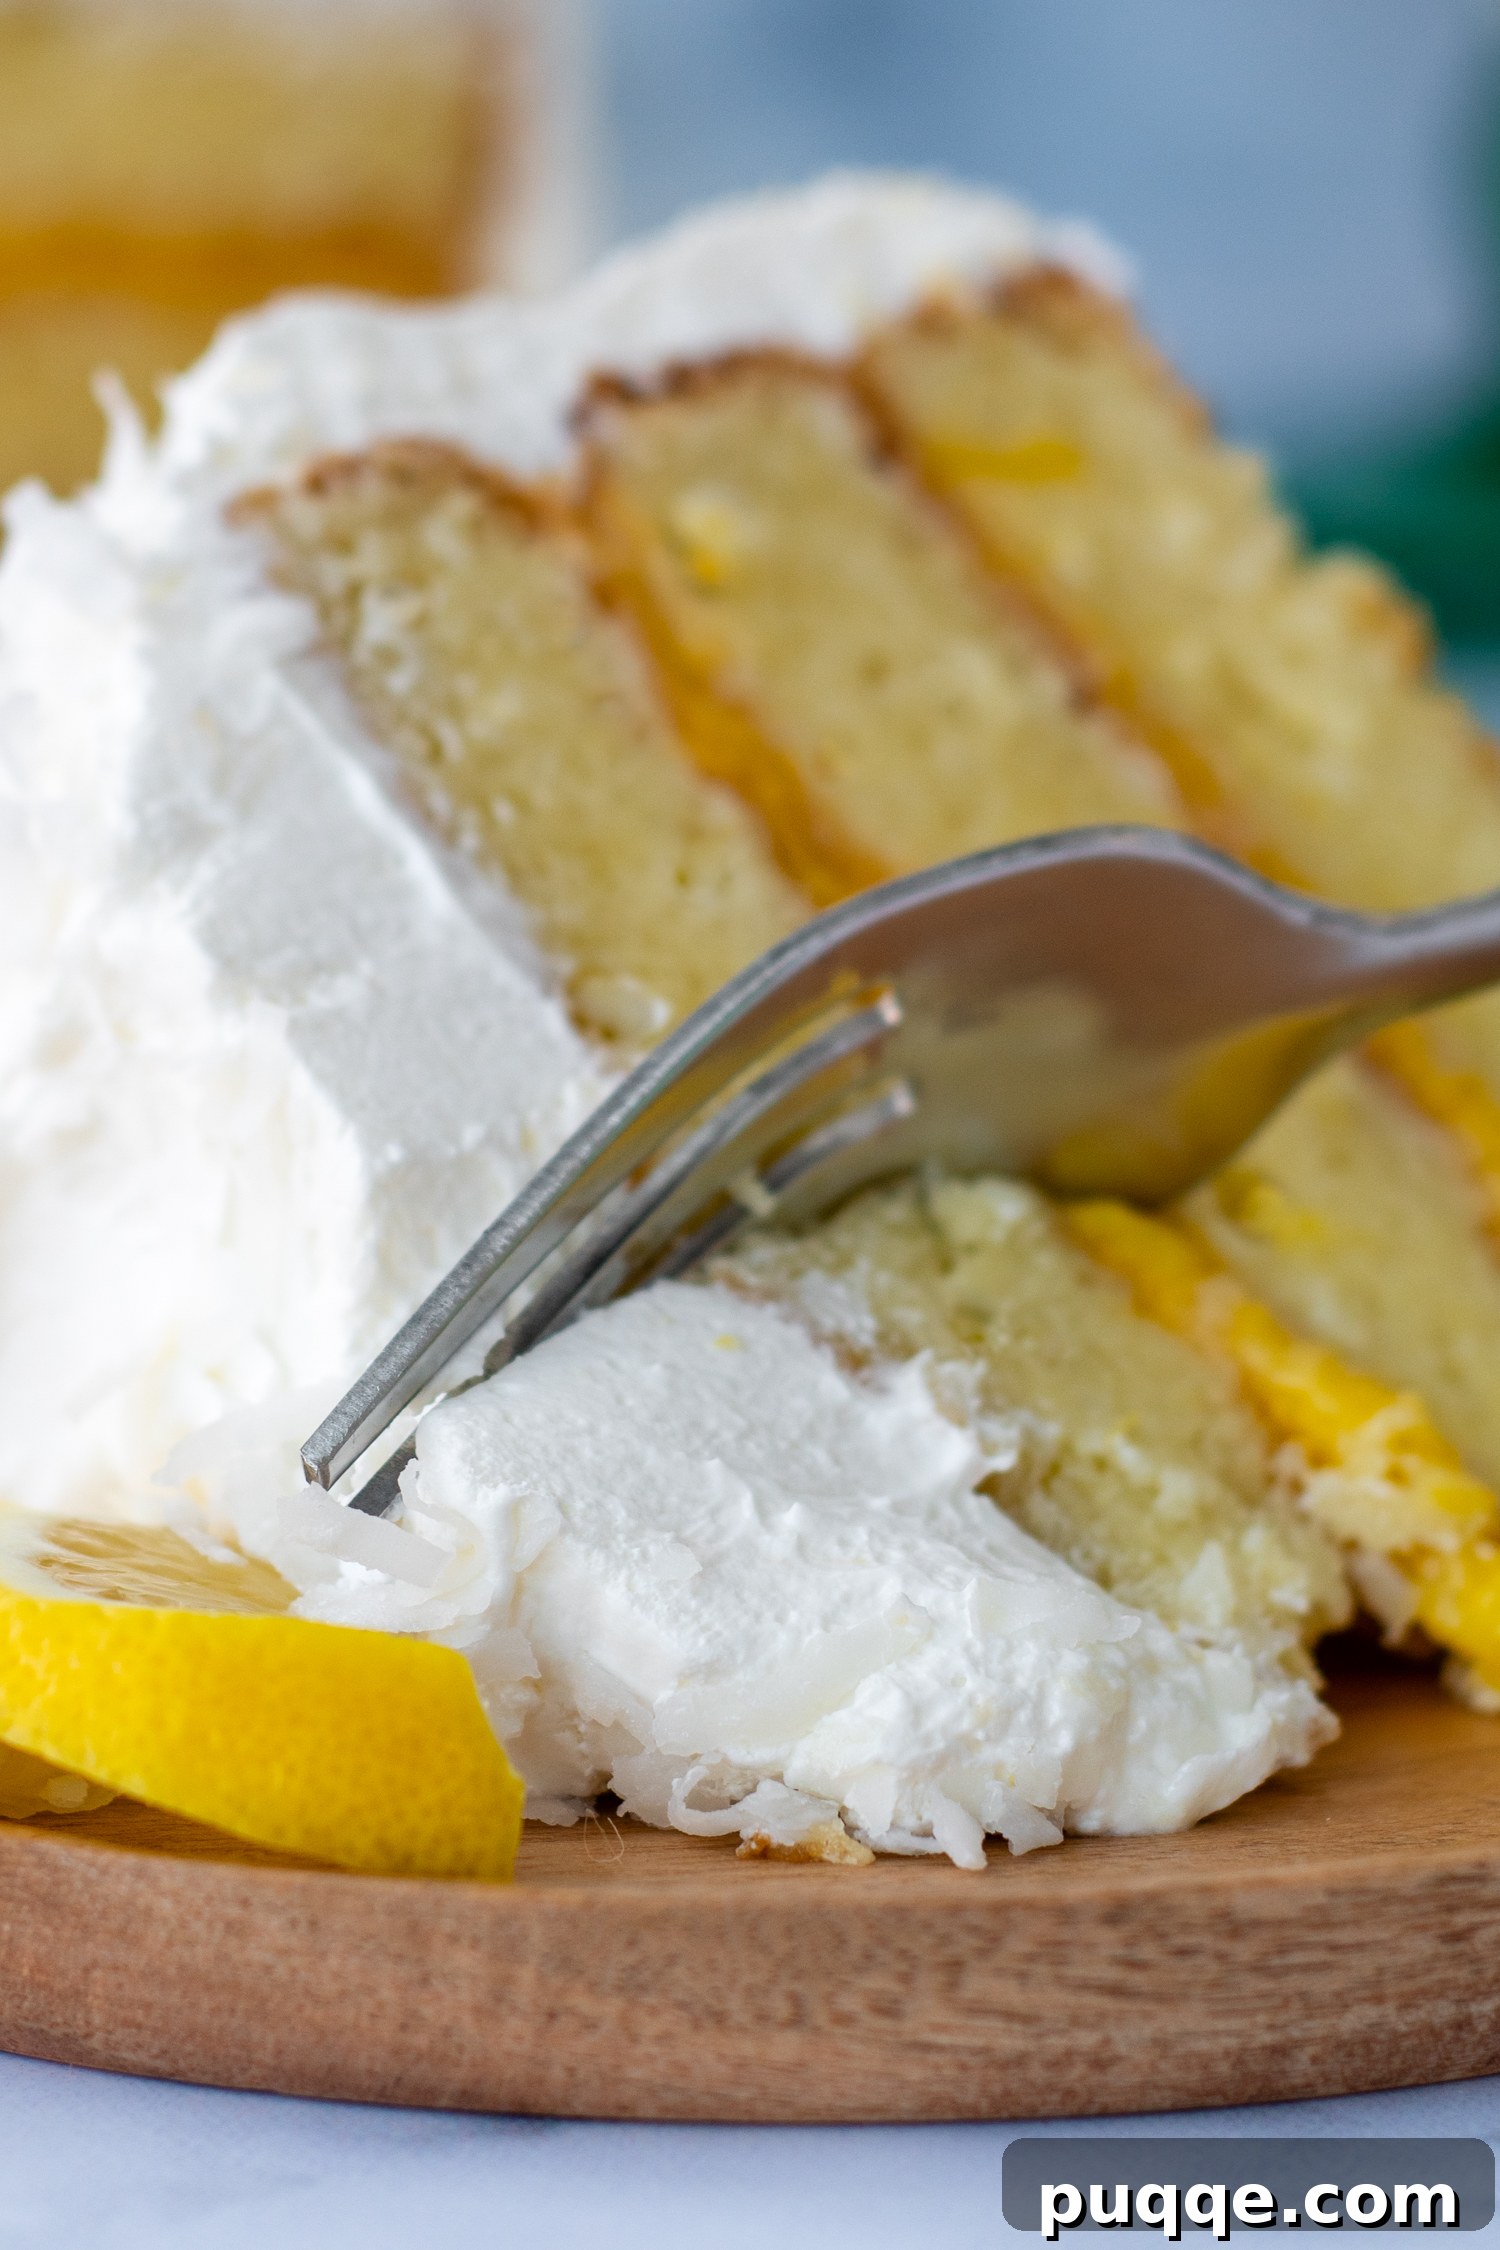
Bake the Best Gluten-Free Coconut Lemon Cake with Zesty Filling
When it comes to show-stopping desserts, our gluten-free cake collection boasts a true gem: this incredible Gluten-Free Coconut Lemon Cake. It’s an ideal choice for celebrating special occasions such as Easter, Mother’s Day, or as a decadent birthday centerpiece. Despite its elegant appearance, reminiscent of a professional bakery creation, this moist and flavorful homemade dessert is surprisingly straightforward to prepare, even for novice bakers. Imagine the joy of serving a cake that looks complex but is utterly simple to execute.
Much like our highly-rated homemade gluten-free white cake, this recipe achieves that coveted perfect texture: incredibly fluffy, yet undeniably moist. You have the flexibility to choose your baking adventure: embark on a full homemade journey, crafting fresh lemon curd and baking tender coconut cake layers from scratch, or simplify the process by starting with a quality gluten-free cake mix and store-bought lemon curd. Either path leads to a spectacular dessert that embodies both comfort and sophistication. This recipe is designed to ensure success, whether you’re a seasoned gluten-free baker or just beginning your journey.
Creating the ultimate gluten-free coconut and lemon cake becomes a literal piece of cake when you apply a few proven gluten-free baking tips. One of the key elements distinguishing this recipe is the harmonious blend of oil and butter. This combination ensures maximum moisture retention, preventing the dry, crumbly texture often associated with gluten-free baked goods, while simultaneously imparting a rich, creamy, buttery flavor that elevates every bite. We understand the importance of texture in gluten-free baking, and this carefully balanced fat content is crucial to achieving that desirable light, airy crumb.
Many traditional coconut cake recipes call for buttermilk, but for this gluten-free rendition, we’ve innovatively opted for full-fat canned coconut milk. The high fat content of coconut milk is a game-changer, not only infusing the cake with an additional layer of tropical coconut flavor but also significantly boosting moisture. More importantly, coconut milk effectively coats gluten-free starches, preventing them from becoming dry and gritty, a common pitfall in gluten-free baking. This strategic ingredient choice results in an exceptionally tender, moist, and flavorful cake that truly stands out.
Delicious and easy! Made gluten-free for my Mother-in-law’s birthday. Everyone loved it! Used store-bought lemon curd to save time. The fluffy frosting is light and not too sweet and very easy to spread on the cake. Never would have thought to put lemon and coconut together but it’s amazing. Thanks for another great recipe!
—Tamara
Let’s Bake This Together: A Step-by-Step Guide
This section provides detailed step-by-step photos and modified instructions to guide you through the baking process. For precise ingredient amounts and the complete recipe, please scroll down to the dedicated recipe card below. Each step is crafted to ensure your success in creating this marvelous gluten-free dessert.
Crafting Your Lemon Curd: Homemade or Store-Bought?
The vibrant lemon curd filling is a cornerstone of this cake. While a homemade lemon filling adds an incomparable fresh zest and silky texture, opting for a high-quality store-bought lemon curd is a perfectly acceptable time-saver. Both options yield delicious results, so choose what best suits your schedule and comfort level.
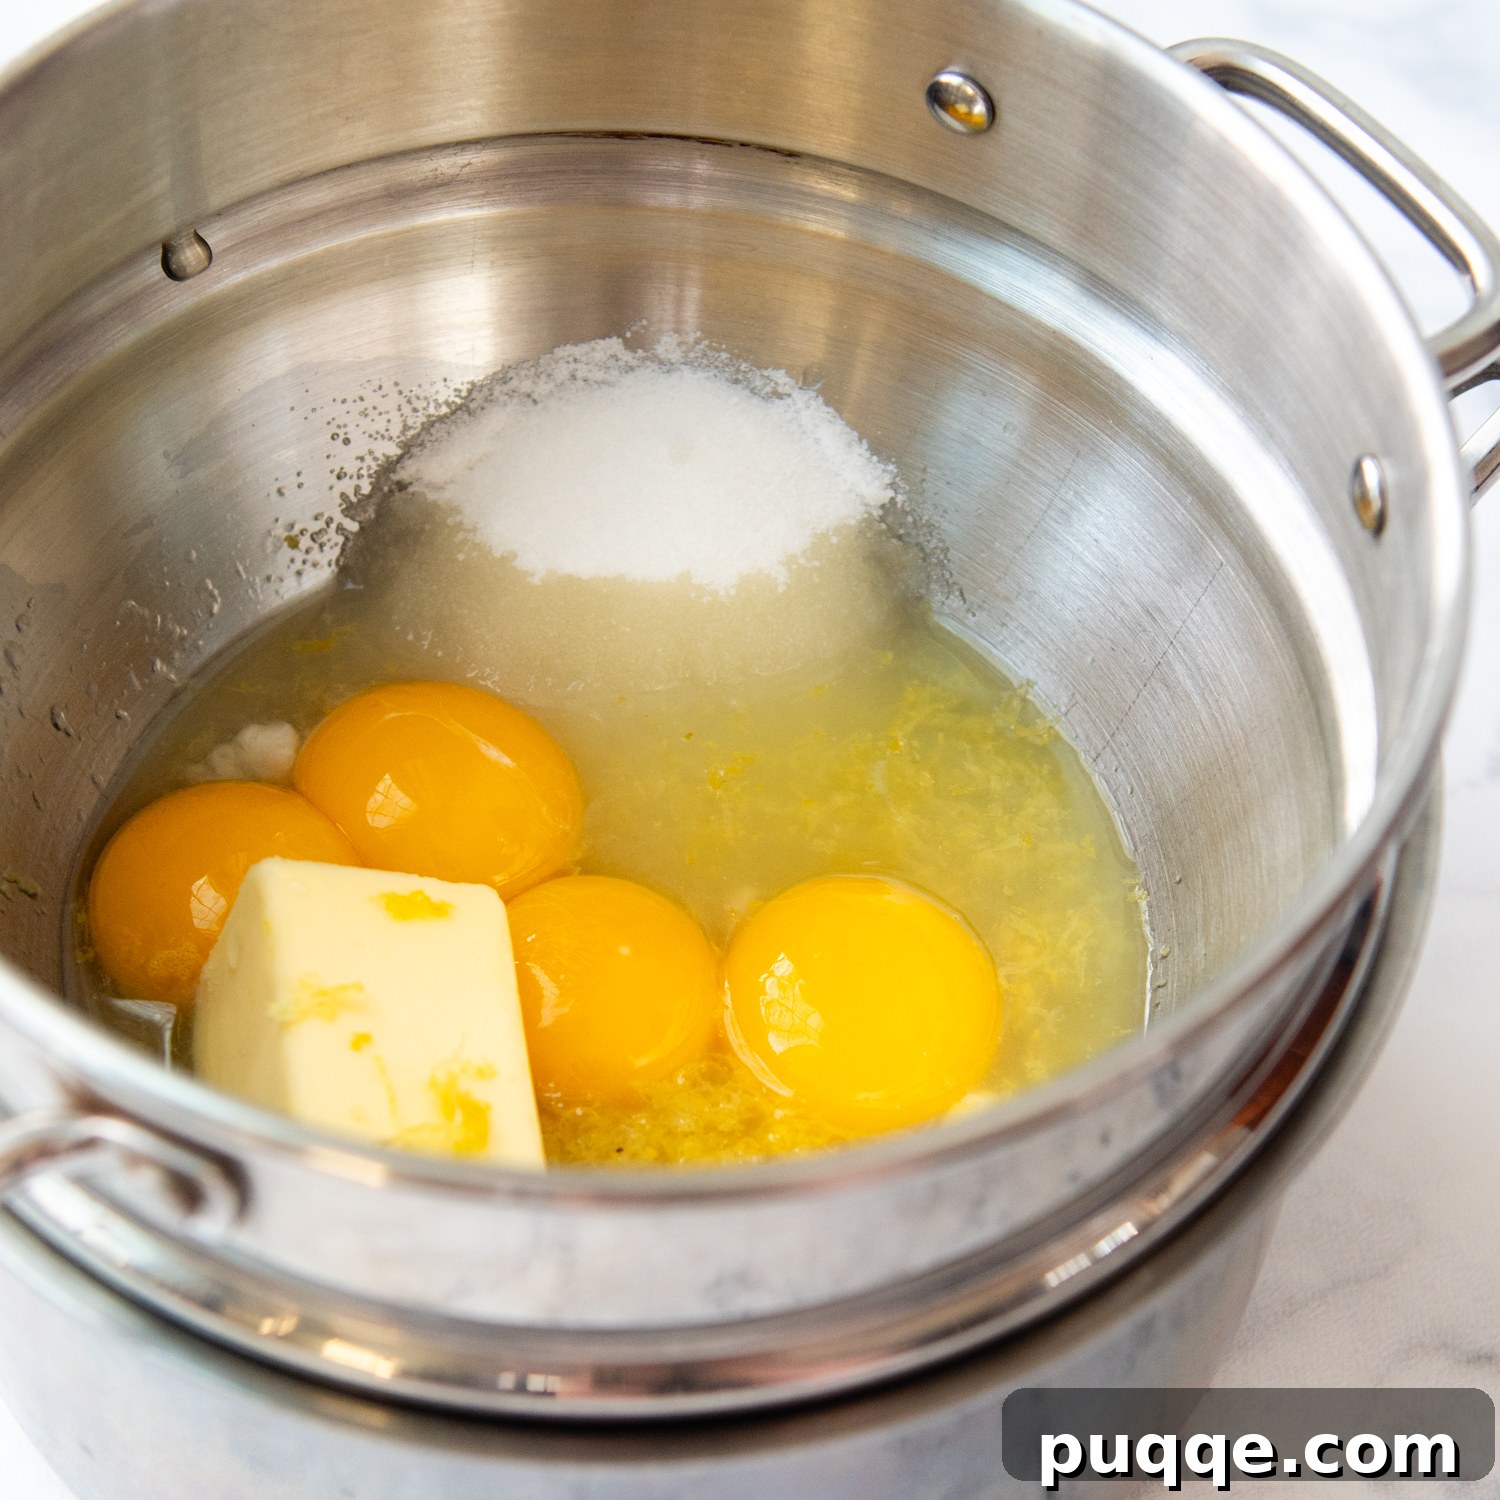
If you’re making homemade lemon curd, rest assured, it’s easier than you might think! Begin by gathering all your lemon curd ingredients into a metal bowl. This bowl will sit over a gently simmering pot of water, effectively creating a double boiler. Ensure the water level in the lower pot is just high enough to generate steam, but not directly touching the bottom of the upper bowl. The gentle, indirect heat from the steam is crucial for cooking the curd evenly without scrambling the eggs.
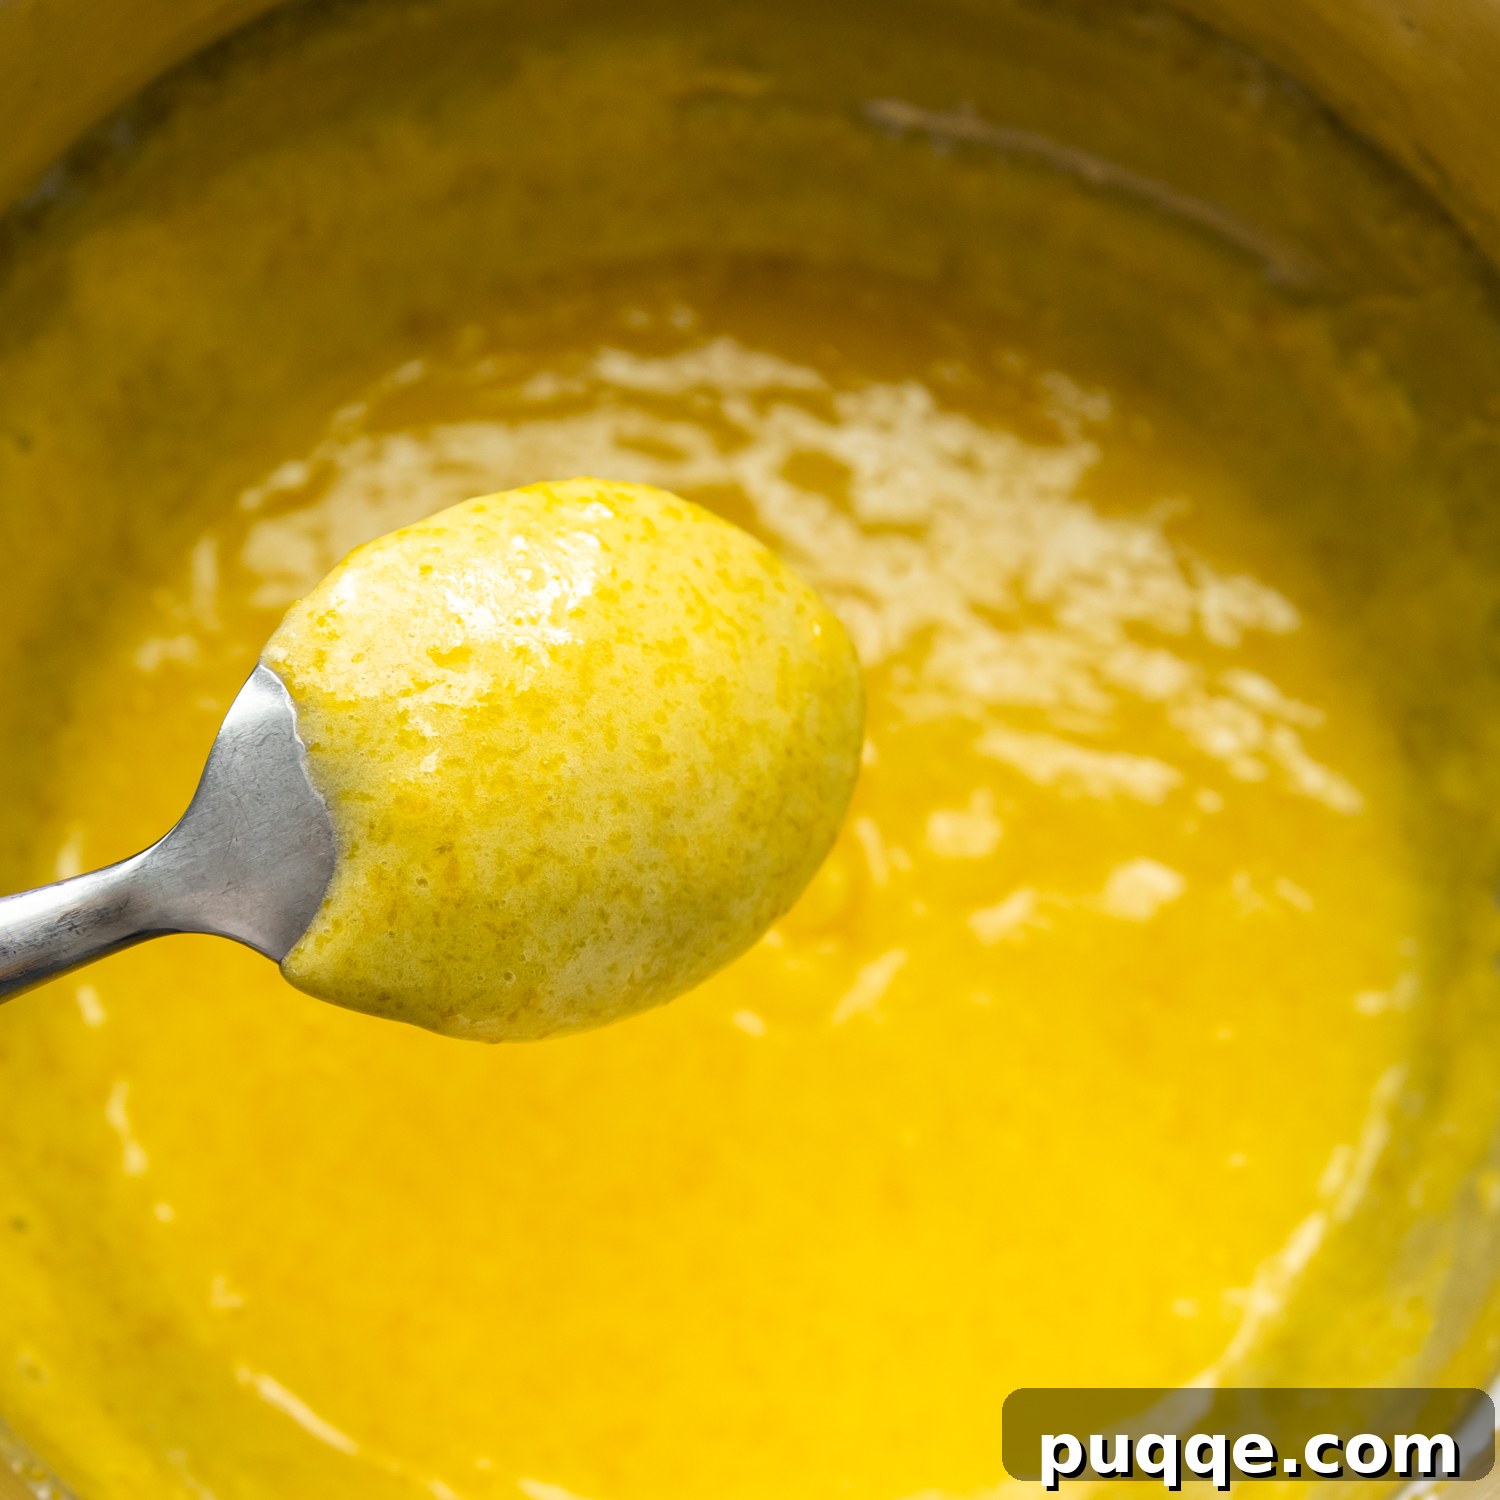
Continuously whisk the mixture over the simmering water. This constant agitation prevents sticking and ensures a smooth, creamy consistency as it thickens. Continue heating and whisking until the mixture visibly thickens, becoming substantial enough to coat the back of a spoon. For precision, use an instant-read thermometer to check the temperature; it should reach 170°F (77°C). This temperature ensures the egg yolks are fully cooked and the curd will set properly. Immediately remove from heat once the desired temperature is reached to prevent overcooking.
Mastering the Art of Creaming for a Fluffy Cake
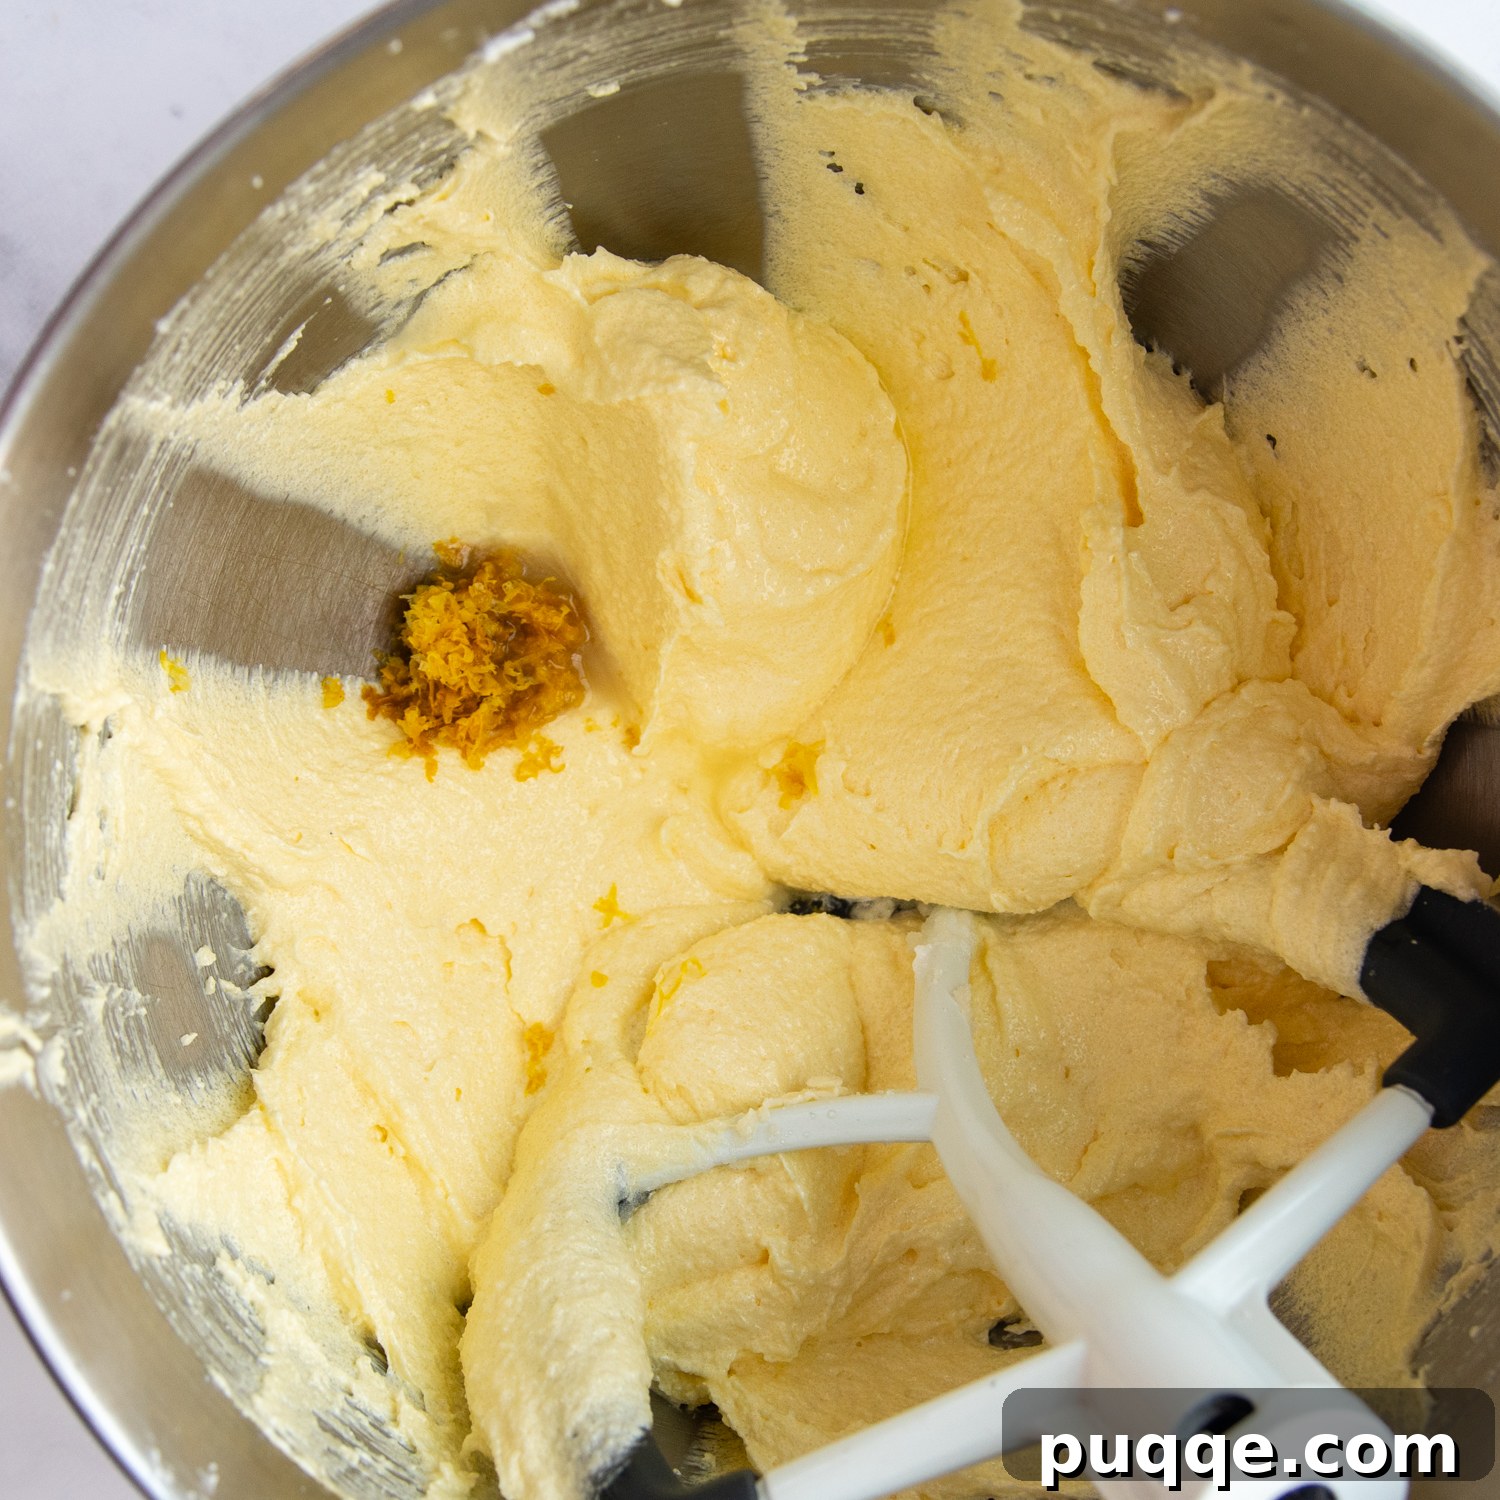
The first foundational step for a truly fluffy coconut cake is proper creaming. In a large mixing bowl, combine the softened unsalted butter, vegetable oil, and granulated sugar. Beat these ingredients together until the mixture transforms into a light, airy, and fluffy consistency. This isn’t just about combining; it’s about incorporating air, which contributes significantly to the cake’s tender crumb. This process typically takes about 3 minutes of continuous beating, so resist the urge to stop once they’re merely mixed. Keep beating until the color lightens and the texture becomes visibly aerated.
Next, introduce the egg yolks, adding them one at a time and beating thoroughly after each addition. This allows each yolk to fully emulsify into the mixture, ensuring a smooth and cohesive batter. Finally, stir in the fresh lemon zest, coconut extract, and lemon extract. These extracts and zest are vital for infusing the cake with its distinctive bright citrus and tropical coconut notes, balancing the sweetness and adding depth to the flavor profile.
Alternating Wet and Dry: The Key to a Smooth GF Batter
In a separate bowl, meticulously whisk together all your dry ingredients: the gluten-free flour blend (we highly recommend Cup4Cup gluten-free flour for its consistent results), baking powder, baking soda, and salt. Whisking ensures these ingredients are evenly distributed, which is crucial for uniform leavening and flavor throughout the cake.
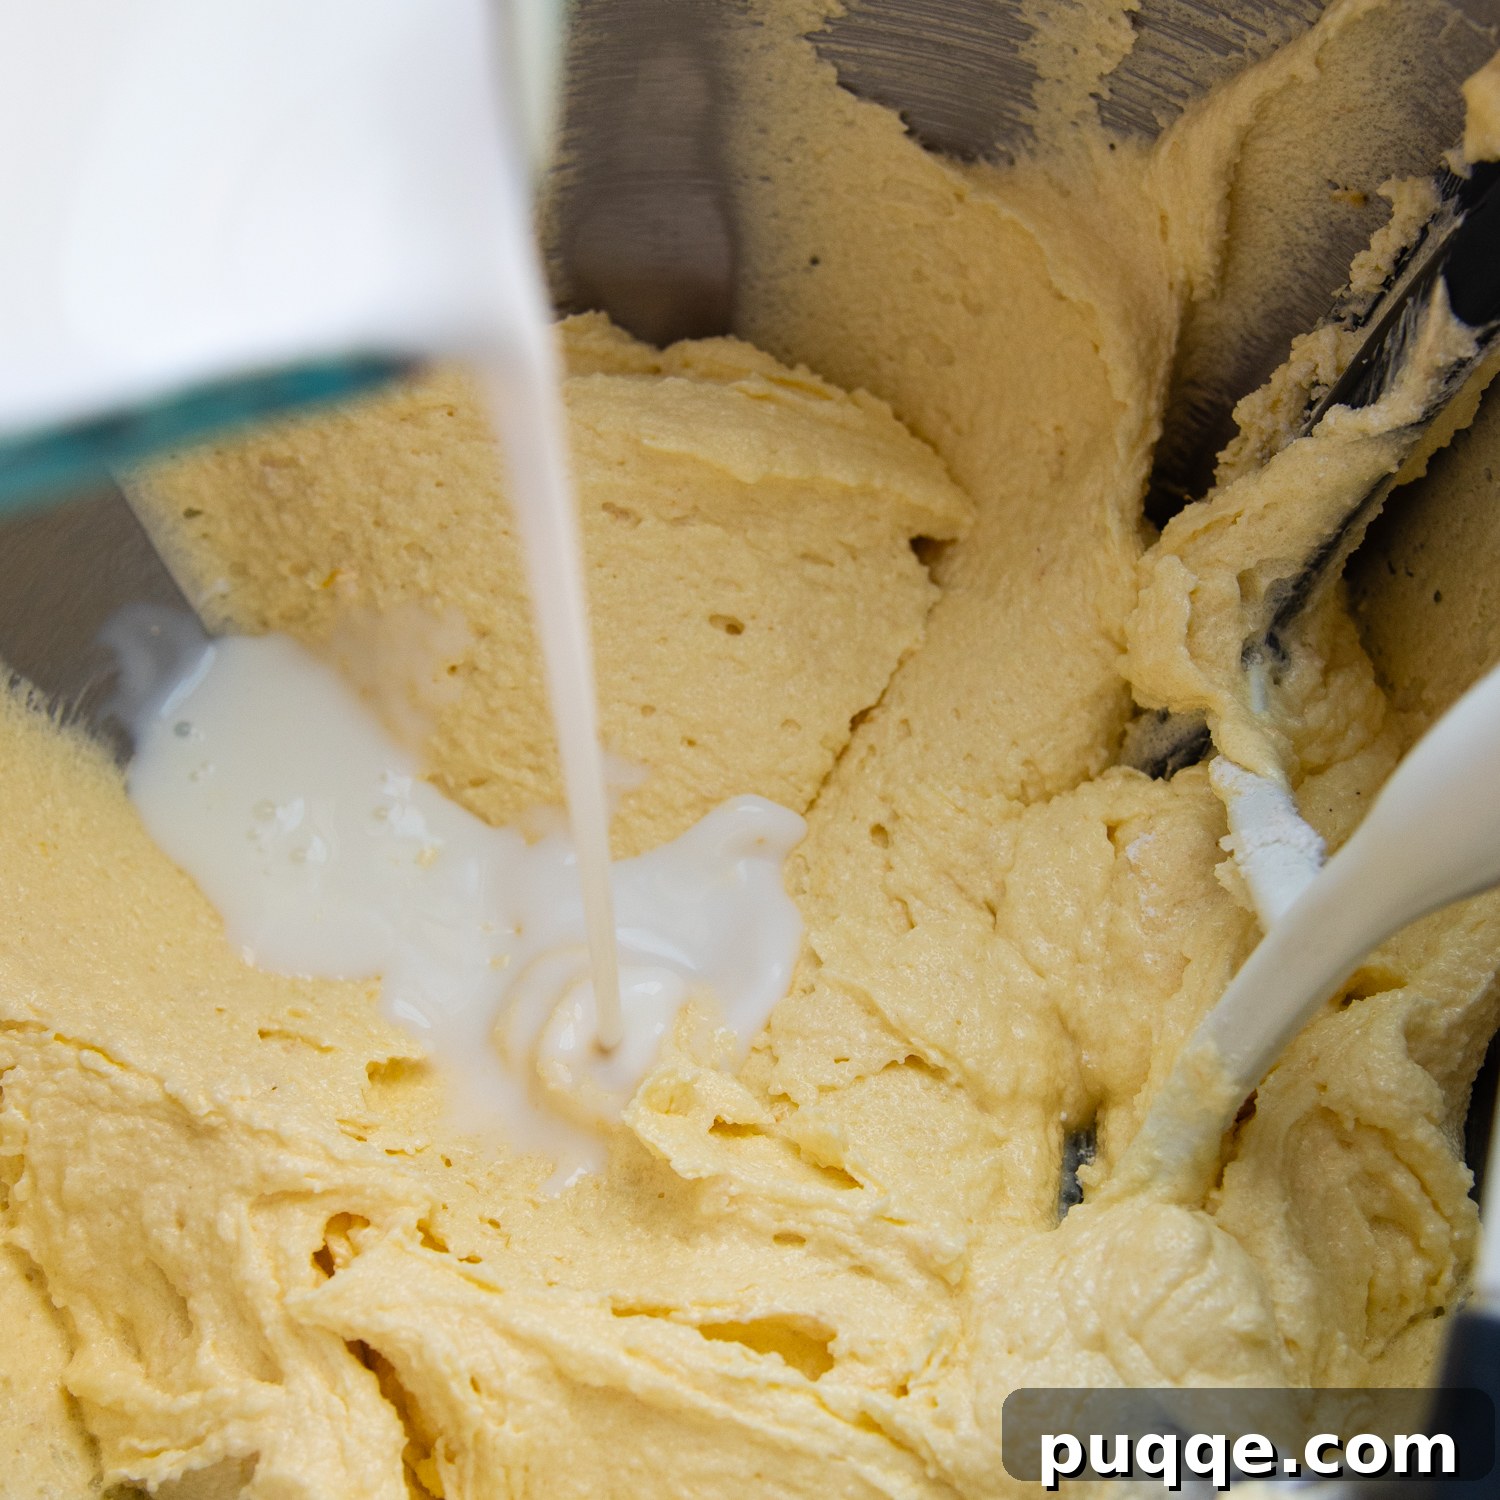
Now, it’s time to incorporate the dry mixture with the canned coconut milk into the creamed butter and sugar. The technique of alternating additions is vital for gluten-free baking. Begin by adding about one-third of the dry flour mixture to the creamed ingredients, mixing gently until just combined. Follow this with approximately one-third of the full-fat canned coconut milk, mixing until smooth. Repeat this process, alternating between the dry mixture and coconut milk, ensuring you end with the dry ingredients. This method prevents overmixing the gluten-free flour, which can lead to a tough cake, and helps maintain the batter’s emulsification, contributing to a wonderfully moist crumb.
Folding in Egg Whites and Achieving Perfect Bake
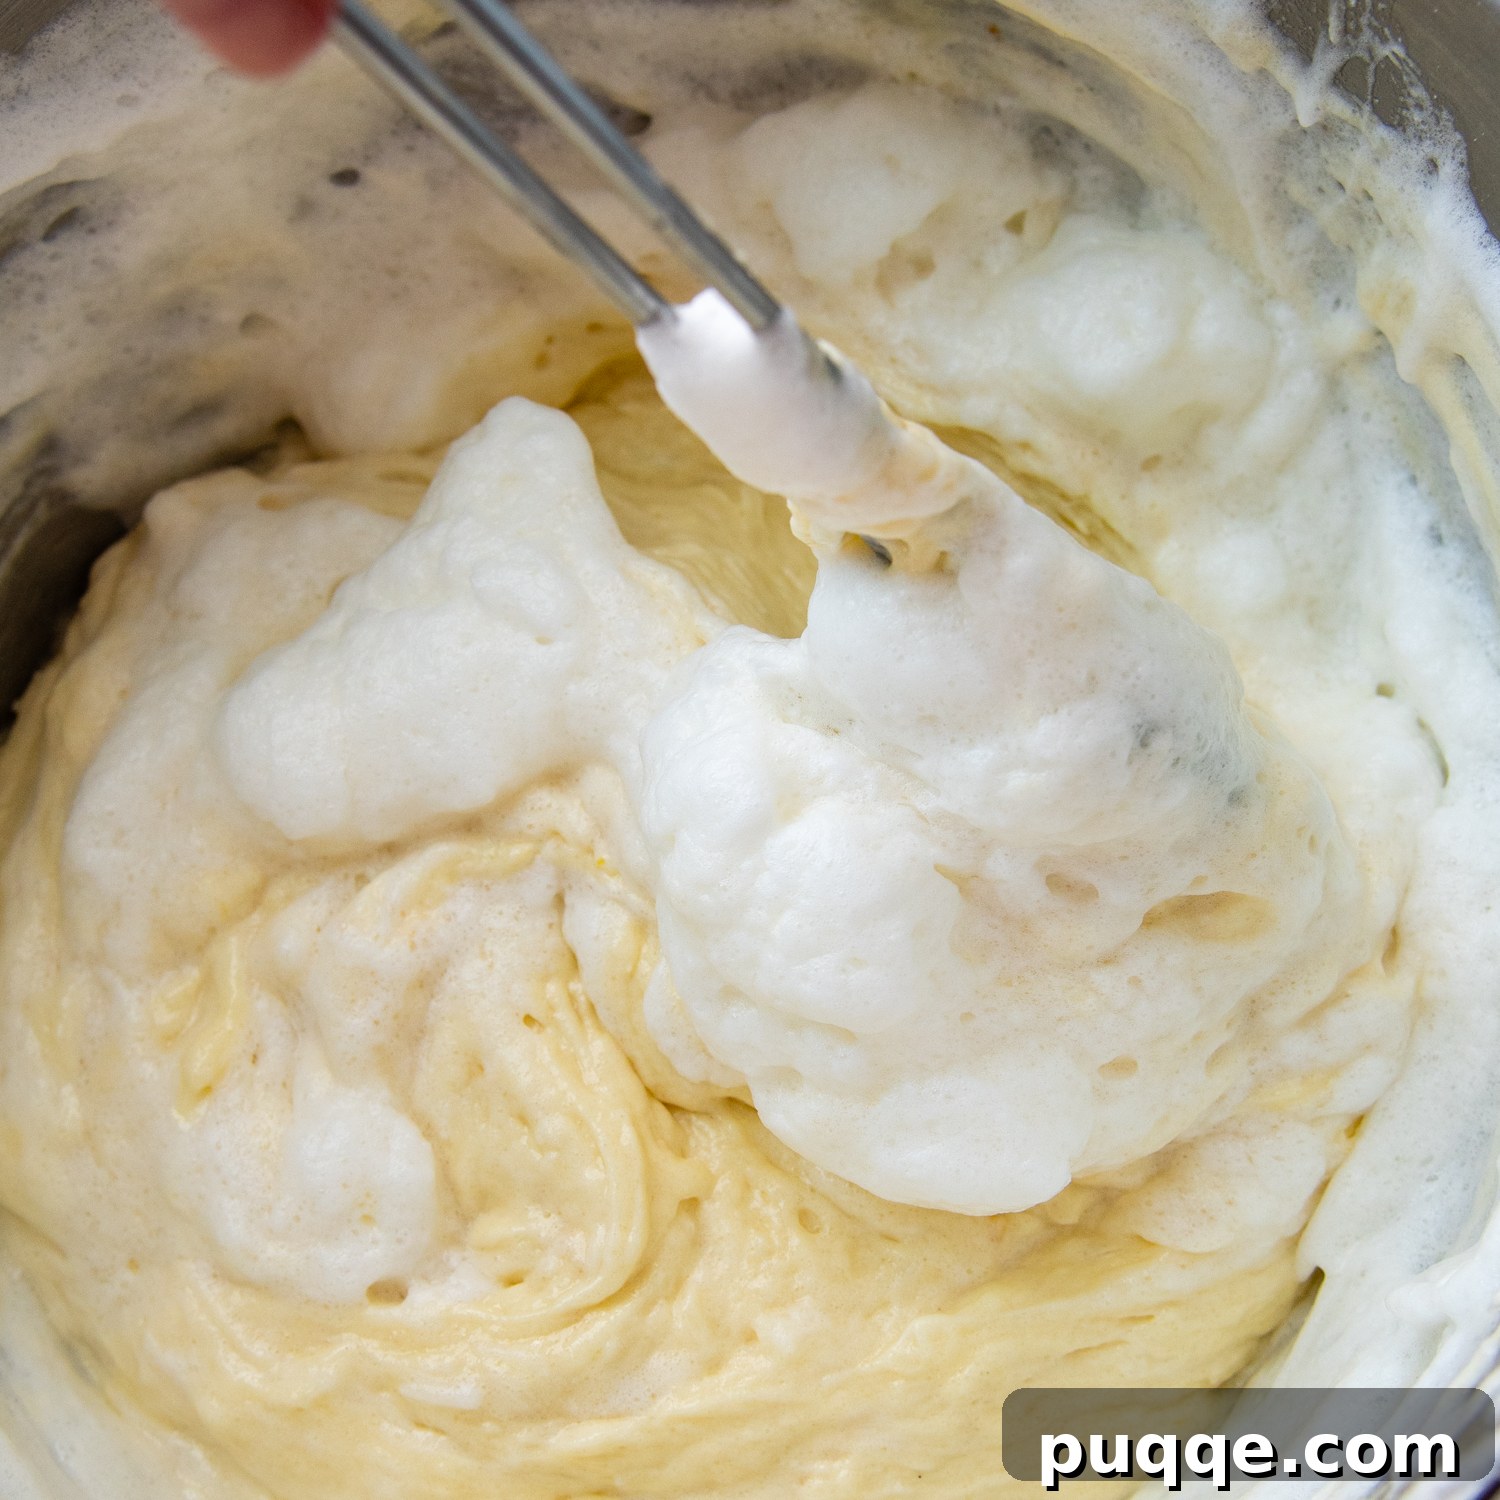
At this stage, your cake batter might appear slightly thick, which is perfectly normal. The next step, folding in the whipped egg whites, will gently loosen it and introduce additional aeration, resulting in an incredibly light and fluffy texture. In a separate, clean bowl with clean, dry beaters, beat the reserved egg whites with a touch of cream of tartar until stiff peaks form. The cream of tartar helps stabilize the egg whites, ensuring they hold their volume.
Carefully fold about one-quarter of the beaten egg whites into the cake batter to lighten it, then gently fold in the remaining whites until no streaks remain. Be gentle to preserve the air incorporated into the whites. Divide the lightened batter evenly among three prepared 9-inch cake pans. Bake in a preheated 325°F (160°C) oven for 25-30 minutes. For gluten-free cakes, we highly recommend using a long cake tester; its length provides a more accurate assessment of the interior crumb’s doneness. The tester should come out clean. Once baked, allow the layers to cool in their pans for about 10 minutes before inverting them onto a wire rack to cool completely. Patience during the cooling process is key before frosting.
Next-Level Fluffy Lemon Cream Cheese Frosting
While many coconut cakes traditionally feature a generous, thick layer of classic cream cheese frosting, we wanted something a bit more refined and airy for this gluten-free coconut lemon cake. Our goal was a frosting that not only provided a beautiful complement to the cake’s flavors but also offered a lighter, fluffier texture with a distinct, bright citrusy lemon punch. This led to the creation of our unique Fluffy Lemon Cream Cheese Frosting.
This frosting starts with a judiciously smaller amount of cream cheese than typical recipes, which delivers that beloved tangy cream cheese flavor without overwhelming the palate. We blend this with a touch of heavy cream, fresh lemon zest, pure lemon extract, and powdered sugar. This combination yields a frosting that is subtly sweet, wonderfully creamy, and infused with an irresistible lemon essence. The lemon zest adds fragrant bright notes, while the extract intensifies the citrus flavor, creating a perfect harmony with the coconut cake layers.
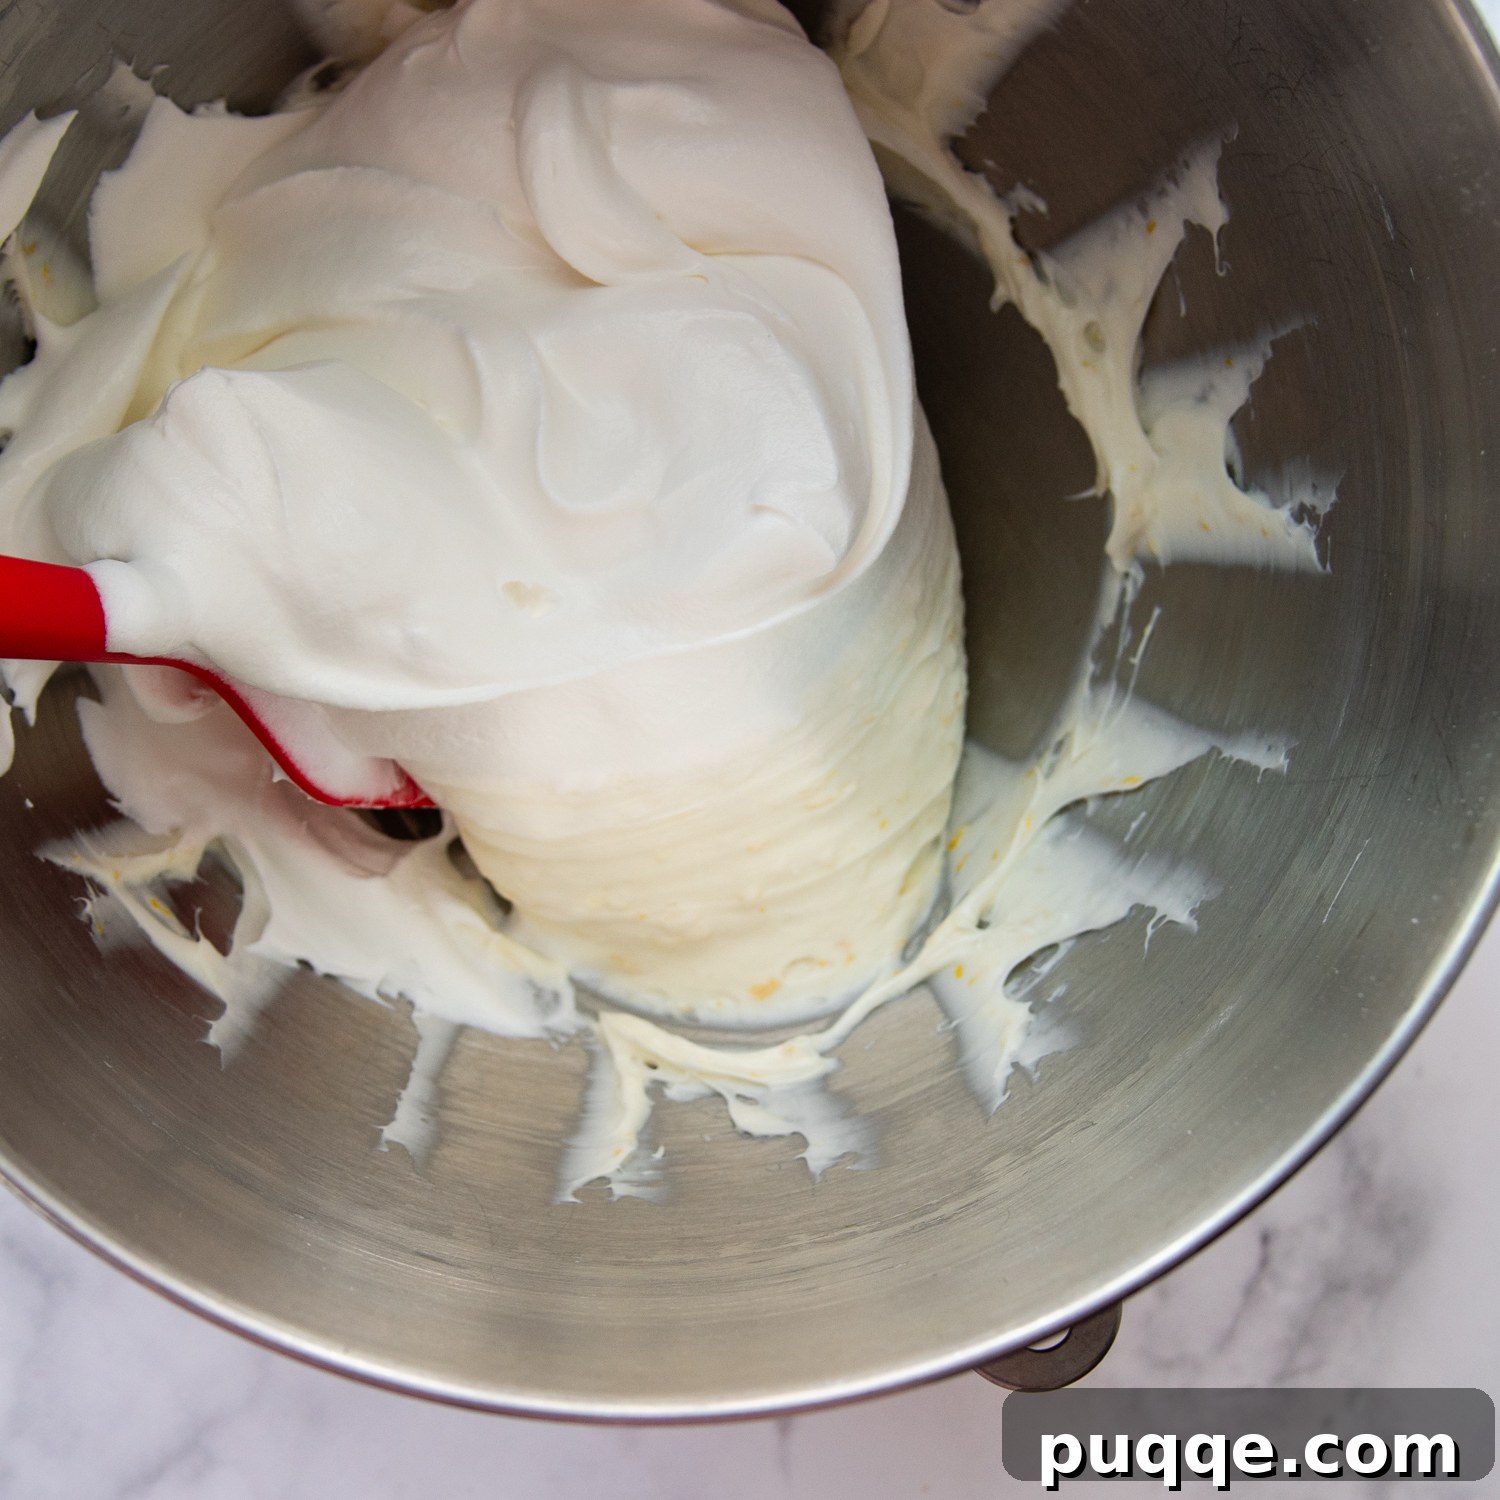
The secret to its exceptional fluffiness lies in the final step: gently folding in store-bought whipped topping (like Cool Whip). This ingenious addition lightens the frosting considerably, transforming it into an ethereal, cloud-like texture that spreads beautifully and melts delicately in your mouth. If you prefer to avoid store-bought whipped topping, a homemade alternative is easily achievable. Simply increase the amount of powdered sugar by 3 tablespoons and, in a separate bowl, beat 1 ½ cups of heavy cream until stiff peaks form. Then, gently fold this homemade whipped cream into the prepared cream cheese mixture until thoroughly combined. This ensures a similarly light and airy frosting, tailored to your preference.
Can I Use a Gluten-Free Cake Mix Instead of Baking from Scratch?
Absolutely! We understand that sometimes time is of the essence, or you simply prefer the convenience of a cake mix. Our recipe provides a fantastic adaptation for using a gluten-free yellow cake mix to create a delightful “homemade-ish” coconut cake. This semi-homemade approach allows you to achieve impressive results with less effort. Please note that most standard gluten-free cake mixes yield enough batter for a two-layer cake, meaning you will only need half the amount of our homemade lemon filling recipe for assembly.
But don’t fret about the extra lemon filling! This delicious tangy curd is incredibly versatile and can be put to excellent use. Stir it into your morning yogurt for a burst of citrus, spread it generously on fluffy gluten-free biscuits or warm homemade gluten-free scones, drizzle it over ice cream, use it as a vibrant topping for cheesecake, or elevate your breakfast pancakes and delicate gluten-free crepes. Its bright flavor will enhance any dish!
What If My Lemon Curd Filling Doesn’t Thicken? Troubleshooting Tips
Achieving a perfectly thick and silky lemon curd is crucial for the success of this cake. The most critical factor for proper thickening is measuring the temperature accurately. We highly recommend using your favorite kitchen gadget, an instant-read thermometer, to check the curd’s temperature in mere seconds. The mixture should consistently reach a temperature of 170°F (77°C) to ensure the egg yolks are fully cooked and activated, which is what causes the curd to thicken. This precise measurement eliminates guesswork and ensures a reliable outcome.
For the most accurate temperature reading, always remove the bowl from the double boiler or simmering water before inserting the thermometer. Checking the temperature while the bowl is still over heat can give a falsely high reading, leading you to believe the curd is done when the eggs haven’t cooked sufficiently, resulting in a runny filling later. The curd should be thick enough to generously coat the back of a spoon; if you draw a line through it with your finger, the line should hold.
If you accidentally remove the mixture from the heat too early, or if it simply hasn’t reached the optimal temperature, you might find yourself with a thin, runny lemon curd. The good news is that it can often be saved! Don’t despair; here are a couple of troubleshooting methods:
- **Reheat It:** The simplest solution is often the best. Place the runny lemon curd back into your double boiler setup and whisk vigorously while heating again. More often than not, the mixture simply didn’t reach the crucial 170°F (77°C) mark the first time. Continue whisking and heating until it thickens to the desired consistency and registers the correct temperature.
- **Use a Cornstarch Slurry:** If reheating alone doesn’t seem to do the trick, you can use cornstarch as a gentle thickening agent. In a small bowl, mix a little of the runny lemon filling (about 1-2 tablespoons) with 1 teaspoon of cornstarch until a smooth slurry forms. Whisk this slurry back into the main lemon curd mixture in the double boiler. Continue to heat and whisk until the curd thickens to your satisfaction. You may need to add up to 1 tablespoon of cornstarch in total, depending on how thin your curd is, but always start with a small amount to avoid over-thickening.
By following these tips, you can ensure your lemon curd sets beautifully, providing the perfect tangy contrast to the sweet coconut cake.
Save This Irresistible Recipe to Your Pinterest Board!
Let’s be friends on Pinterest! I’m always sharing great recipes and baking inspiration!
Did you make this recipe? We absolutely love hearing from you! Please leave a star rating and comment below the recipe card. Your feedback is invaluable, as it helps other aspiring bakers discover and trust our recipes, and we truly appreciate hearing about your culinary successes. You will always hear back from me! -Melissa
Extra Moist Gluten-Free Coconut Lemon Curd Cake

Melissa Erdelac
12 servings
25 mins
30 mins
1 hr 55 mins
Pin
Rate
Remove Ads
Ingredients
Lemon Filling
- 5 egg yolks, separated and room temperature
- 3 tablespoons unsalted butter, softened and cubed
- ¼ cup fresh lemon juice
- ½ cup sugar
- 2 teaspoons lemon zest
- pinch salt
Coconut Cake
- 2 cups granulated sugar
- ½ cup vegetable oil
- ½ cup unsalted butter, softened
- 5 eggs, separated and at room temperature
- 1 teaspoon coconut extract
- 1 teaspoon lemon extract
- 1 teaspoon lemon zest
- 2 ¼ cups all purpose gluten free flour, (I use and recommend Cup4Cup gluten free flour)
- 1 teaspoon baking powder
- ½ teaspoon baking soda
- ½ teaspoon salt
- 1 cup canned coconut milk, full fat
- 1 cup sweetened shredded coconut
- ¼ teaspoon cream of tartar
Lemon Cream Cheese Frosting
- 4 ounces cream cheese, softened
- ½ cup powdered sugar
- ¼ cup heavy cream
- 1 teaspoon lemon zest
- ½ teaspoon lemon extract
- 8 ounce tub whipped topping (3 cups Cool Whip)
- for decorating sweetened shredded coconut, fresh lemon slices
Equipment
-
Stand Mixer
-
9 inch Cake Pans
-
Double Boiler
Instructions
Lemon Curd Filling
-
Place all the lemon curd ingredients in a metal bowl (or double boiler) set over a pot of gently simmering water. Ensure the water in the lower pot is only a couple of inches deep and does not touch the bottom of the upper bowl. This prevents direct heat from scrambling the eggs. Continuously and vigorously whisk the ingredients until the mixture heats through.5 egg yolks,
3 tablespoons unsalted butter,
¼ cup fresh lemon juice,
½ cup sugar,
2 teaspoons lemon zest,
pinch salt -
Continue heating and whisking until the mixture thickens, coats the back of a spoon, and reaches an internal temperature of 170°F (77°C). The curd’s volume will slightly increase, and its color will become paler. TIP: For accurate temperature measurement, remove the bowl from the simmering water before testing. This avoids falsely high readings, ensuring the eggs are fully cooked and the filling will thicken properly upon cooling.
-
Pour the finished lemon curd into a heat-proof bowl. Press a piece of plastic wrap directly onto the surface of the curd to prevent a film from forming as it cools. Refrigerate until completely cold, which takes about 1 hour. If preparing ahead of time, transfer the lemon curd to an airtight container and store in the refrigerator for 1-2 weeks.
Coconut Cake
-
Preheat your oven to 325ºF (160°C). Lightly spray three 9-inch cake pans with cooking spray. Line the bottom of each pan with a parchment or wax paper circle cut to size. Spray again to ensure non-sticking and set the prepared pans aside.
-
In a large mixing bowl, combine the granulated sugar, softened unsalted butter, and vegetable oil. Beat with an electric mixer until the mixture is light, airy, and well blended, approximately 2 minutes. Add the room temperature egg yolks one at a time, beating thoroughly after each addition until fully incorporated. Finally, mix in the coconut extract, lemon extract, and lemon zest.2 cups granulated sugar,
½ cup vegetable oil,
½ cup unsalted butter,
5 eggs,
1 teaspoon coconut extract,
1 teaspoon lemon extract,
1 teaspoon lemon zest -
In a separate medium bowl, whisk together the gluten-free all-purpose flour, baking powder, baking soda, and salt until well combined. Gradually add about one-third of this dry mixture to the creamed butter mixture, mixing until just combined. Then, add about one-third of the full-fat canned coconut milk and mix well. Continue alternating between the flour mixture and coconut milk, beating after each addition until smooth. Once all the flour and coconut milk have been incorporated, gently stir in the sweetened shredded coconut. Set the cake batter aside.2 ¼ cups all purpose gluten free flour,
1 teaspoon baking powder,
½ teaspoon baking soda,
½ teaspoon salt,
1 cup canned coconut milk,
1 cup sweetened shredded coconut -
In a clean, separate bowl, using clean, dry beaters, beat the reserved egg whites with the cream of tartar until stiff peaks form. Gently fold about one-fourth of the beaten egg whites into the cake batter to lighten it. Then, carefully fold in the remaining egg whites until no streaks of white remain, being careful not to deflate the mixture.¼ teaspoon cream of tartar
-
Divide the batter evenly among the three prepared cake pans. Bake for 25-30 minutes, or until a wooden skewer or cake tester inserted into the center of a cake layer comes out clean. Allow the cakes to cool in their pans for 10 minutes before carefully inverting them onto wire racks to cool completely. Ensure they are fully cooled before frosting.
Fluffy Lemon Cream Cheese Frosting
-
In a large mixing bowl, combine the softened cream cheese, powdered sugar, heavy cream, lemon zest, and lemon extract. Beat with an electric mixer until the mixture is completely smooth and fluffy, which should take about 1-2 minutes. Scrape down the sides of the bowl as needed to ensure everything is well combined.4 ounces cream cheese,
½ cup powdered sugar,
¼ cup heavy cream,
1 teaspoon lemon zest,
½ teaspoon lemon extract -
Gently fold in the whipped topping (Cool Whip) until it is thoroughly mixed into the cream cheese mixture and no white streaks remain. Be careful not to overmix, as this can deflate the frosting.8 ounce tub whipped topping (3 cups Cool Whip)
Assembly
-
Once all cake layers are completely cooled, place the first cake layer on your serving platter. Tuck strips of wax paper underneath the edges of the cake to catch any drips and keep your serving platter clean during frosting.
-
Evenly spread half of the chilled lemon filling over the top of the first cake layer. Carefully place the second cake layer on top, then spread the remaining lemon curd evenly over it. Finally, top with the third cake layer.
-
Using an offset spatula, spread the fluffy lemon cream cheese frosting over the top and sides of the assembled cake, starting from the top and working your way down, ensuring an even coat. For an extra touch of elegance, decorate the cake with additional sweetened shredded coconut and fresh lemon slices, if desired.
-
If you are preparing the cake ahead of time, store it loosely covered in the refrigerator. For best flavor and texture, allow the cake to come to room temperature for about 2 hours before serving. Securely wrap any leftover cake and refrigerate.
Notes
Using a Gluten-Free Cake Mix
Please note that most standard gluten-free yellow cake mixes will typically yield enough batter for a two-layer cake, which means you will only need half the amount of the lemon filling prepared in this recipe. Don’t worry about the extra lemon curd – it’s a versatile treat! It can be stirred into yogurt, spread generously on biscuits, drizzled over ice cream, used as a delicious topping for cheesecake, incorporated into crepes, or even served with pancakes.
- In a large bowl, beat together your chosen gluten-free yellow cake mix with ½ cup softened unsalted butter, ¾ cup full-fat canned coconut milk, ½ cup water, and 3 whole eggs.
- Begin mixing on low speed until the ingredients are just combined, then increase the speed to medium and continue beating for 2 minutes to ensure a smooth, aerated batter.
- Divide the prepared batter evenly between two 9-inch layer cake pans. Ensure the bottoms are lined with parchment paper and the pans are thoroughly sprayed with cooking spray.
- Bake in a preheated 350ºF (175°C) oven for 33-36 minutes, or until a toothpick inserted into the center comes out clean. Allow the cakes to cool in their pans for 10 minutes before transferring them to wire racks to cool completely.
- Prepare the lemon cake filling as directed in the recipe, using only half the amount for the two-layer cake, or opt for a store-bought lemon curd.
- Once the cake layers are cooled, prepare the fluffy lemon cream cheese frosting and assemble your delightful two-layer cake.
Calories:
629
kcal
,
Carbohydrates:
75
g
,
Protein:
9
g
,
Fat:
34
g
,
Saturated Fat:
24
g
,
Cholesterol:
188
mg
,
Sodium:
371
mg
,
Potassium:
234
mg
,
Fiber:
1
g
,
Sugar:
54
g
,
Vitamin A:
642
IU
,
Vitamin C:
3
mg
,
Calcium:
102
mg
,
Iron:
1
mg
Did you make this recipe?
Please leave a star rating and review below. It helps others when searching for recipes and I LOVE feedback!
º