
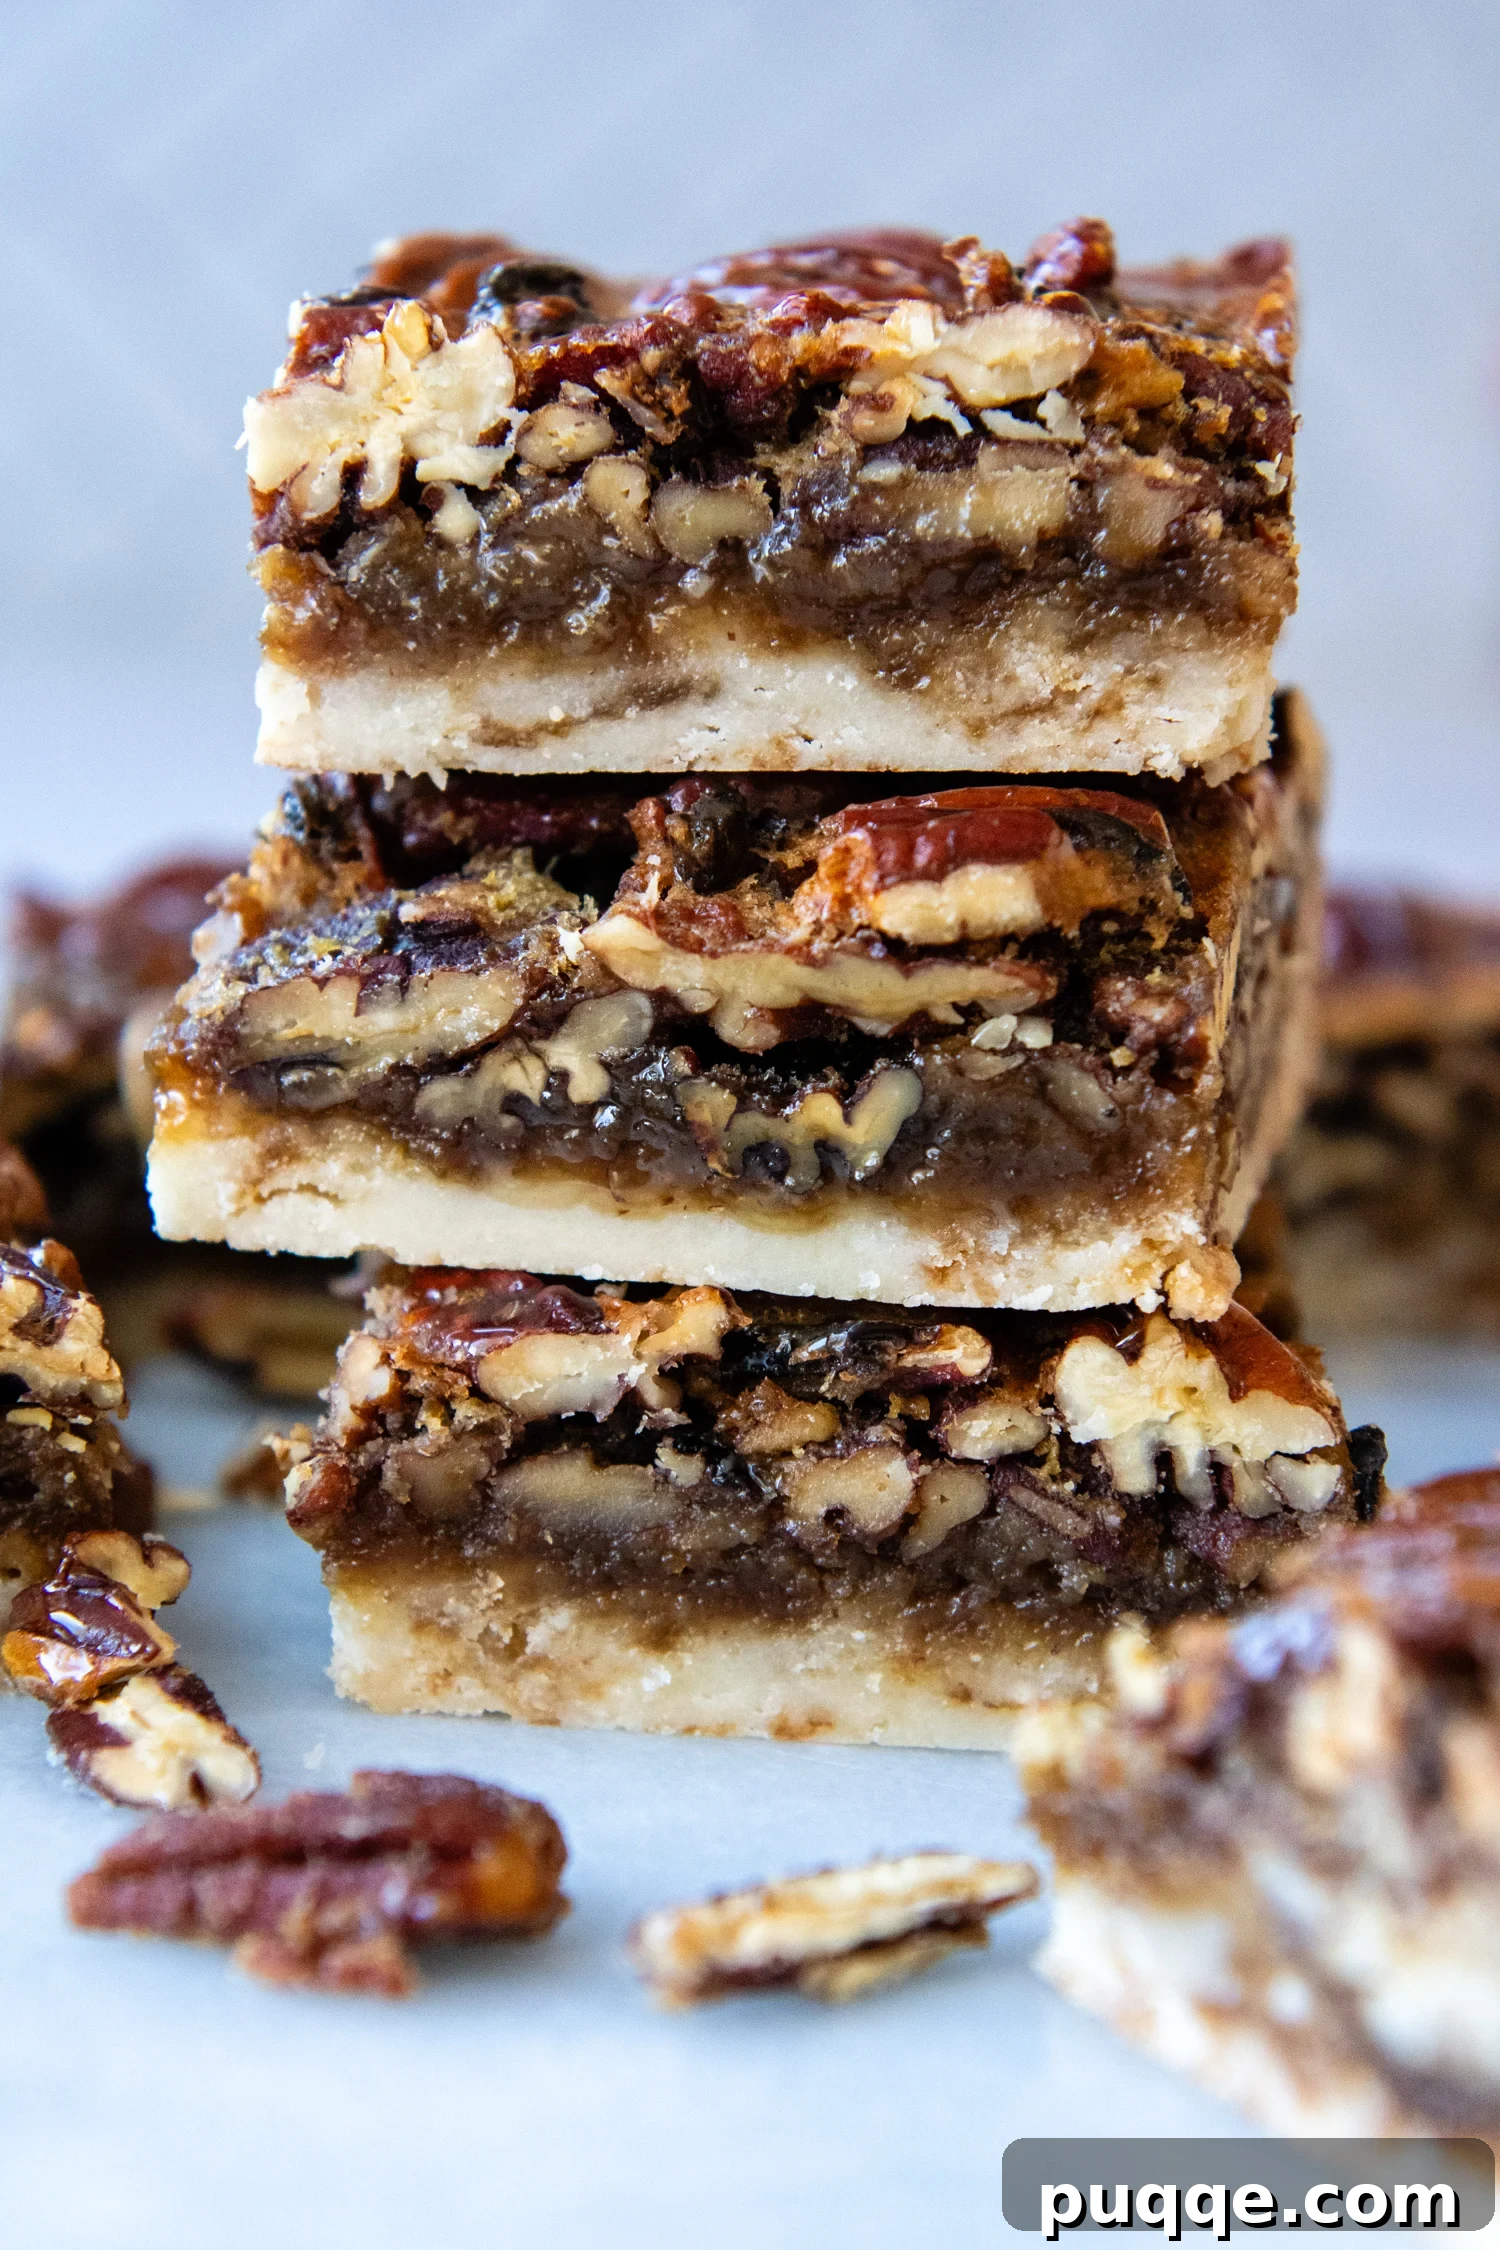
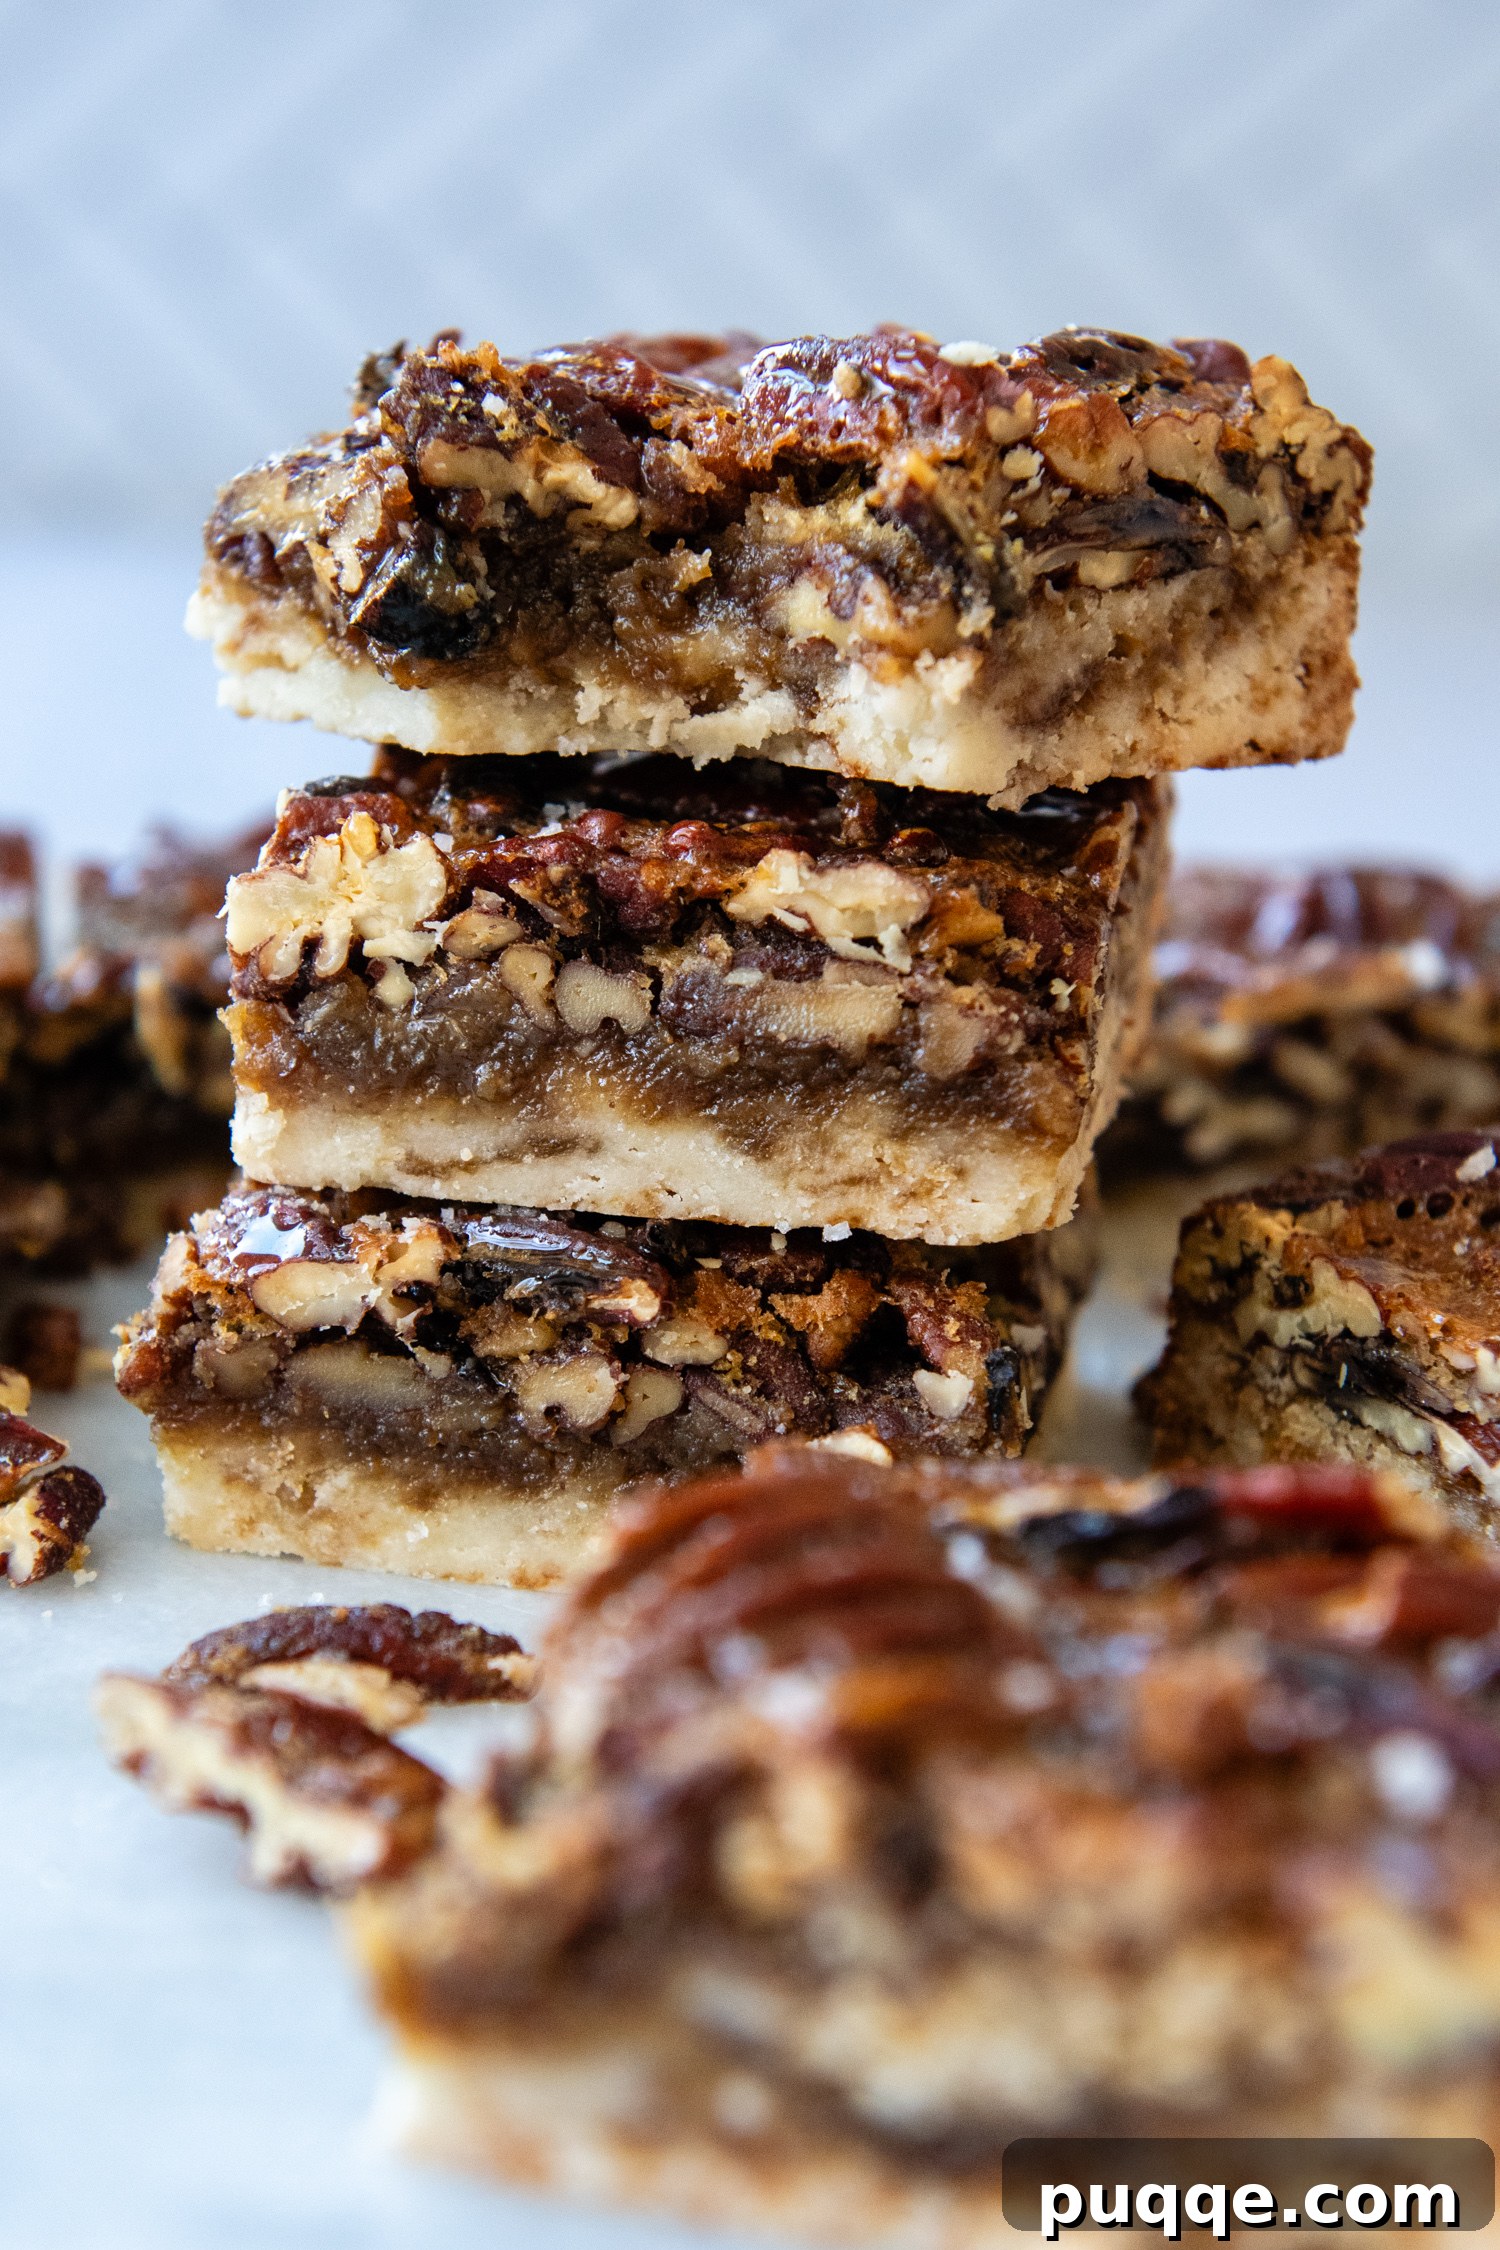
Craving that iconic, comforting taste of the South but need a gluten-free option? Look no further! These irresistible gluten-free pecan bars are your ticket to enjoying a classic dessert once more. Featuring an effortlessly pressed-in shortbread crust and a perfectly thickened, salty-sweet maple nut filling, this homemade treat is designed for success. Say goodbye to the frustrations of runny fillings or overly sweet bars; our meticulously crafted recipe guarantees a luscious, sliceable delight that will become a cherished staple in your kitchen.
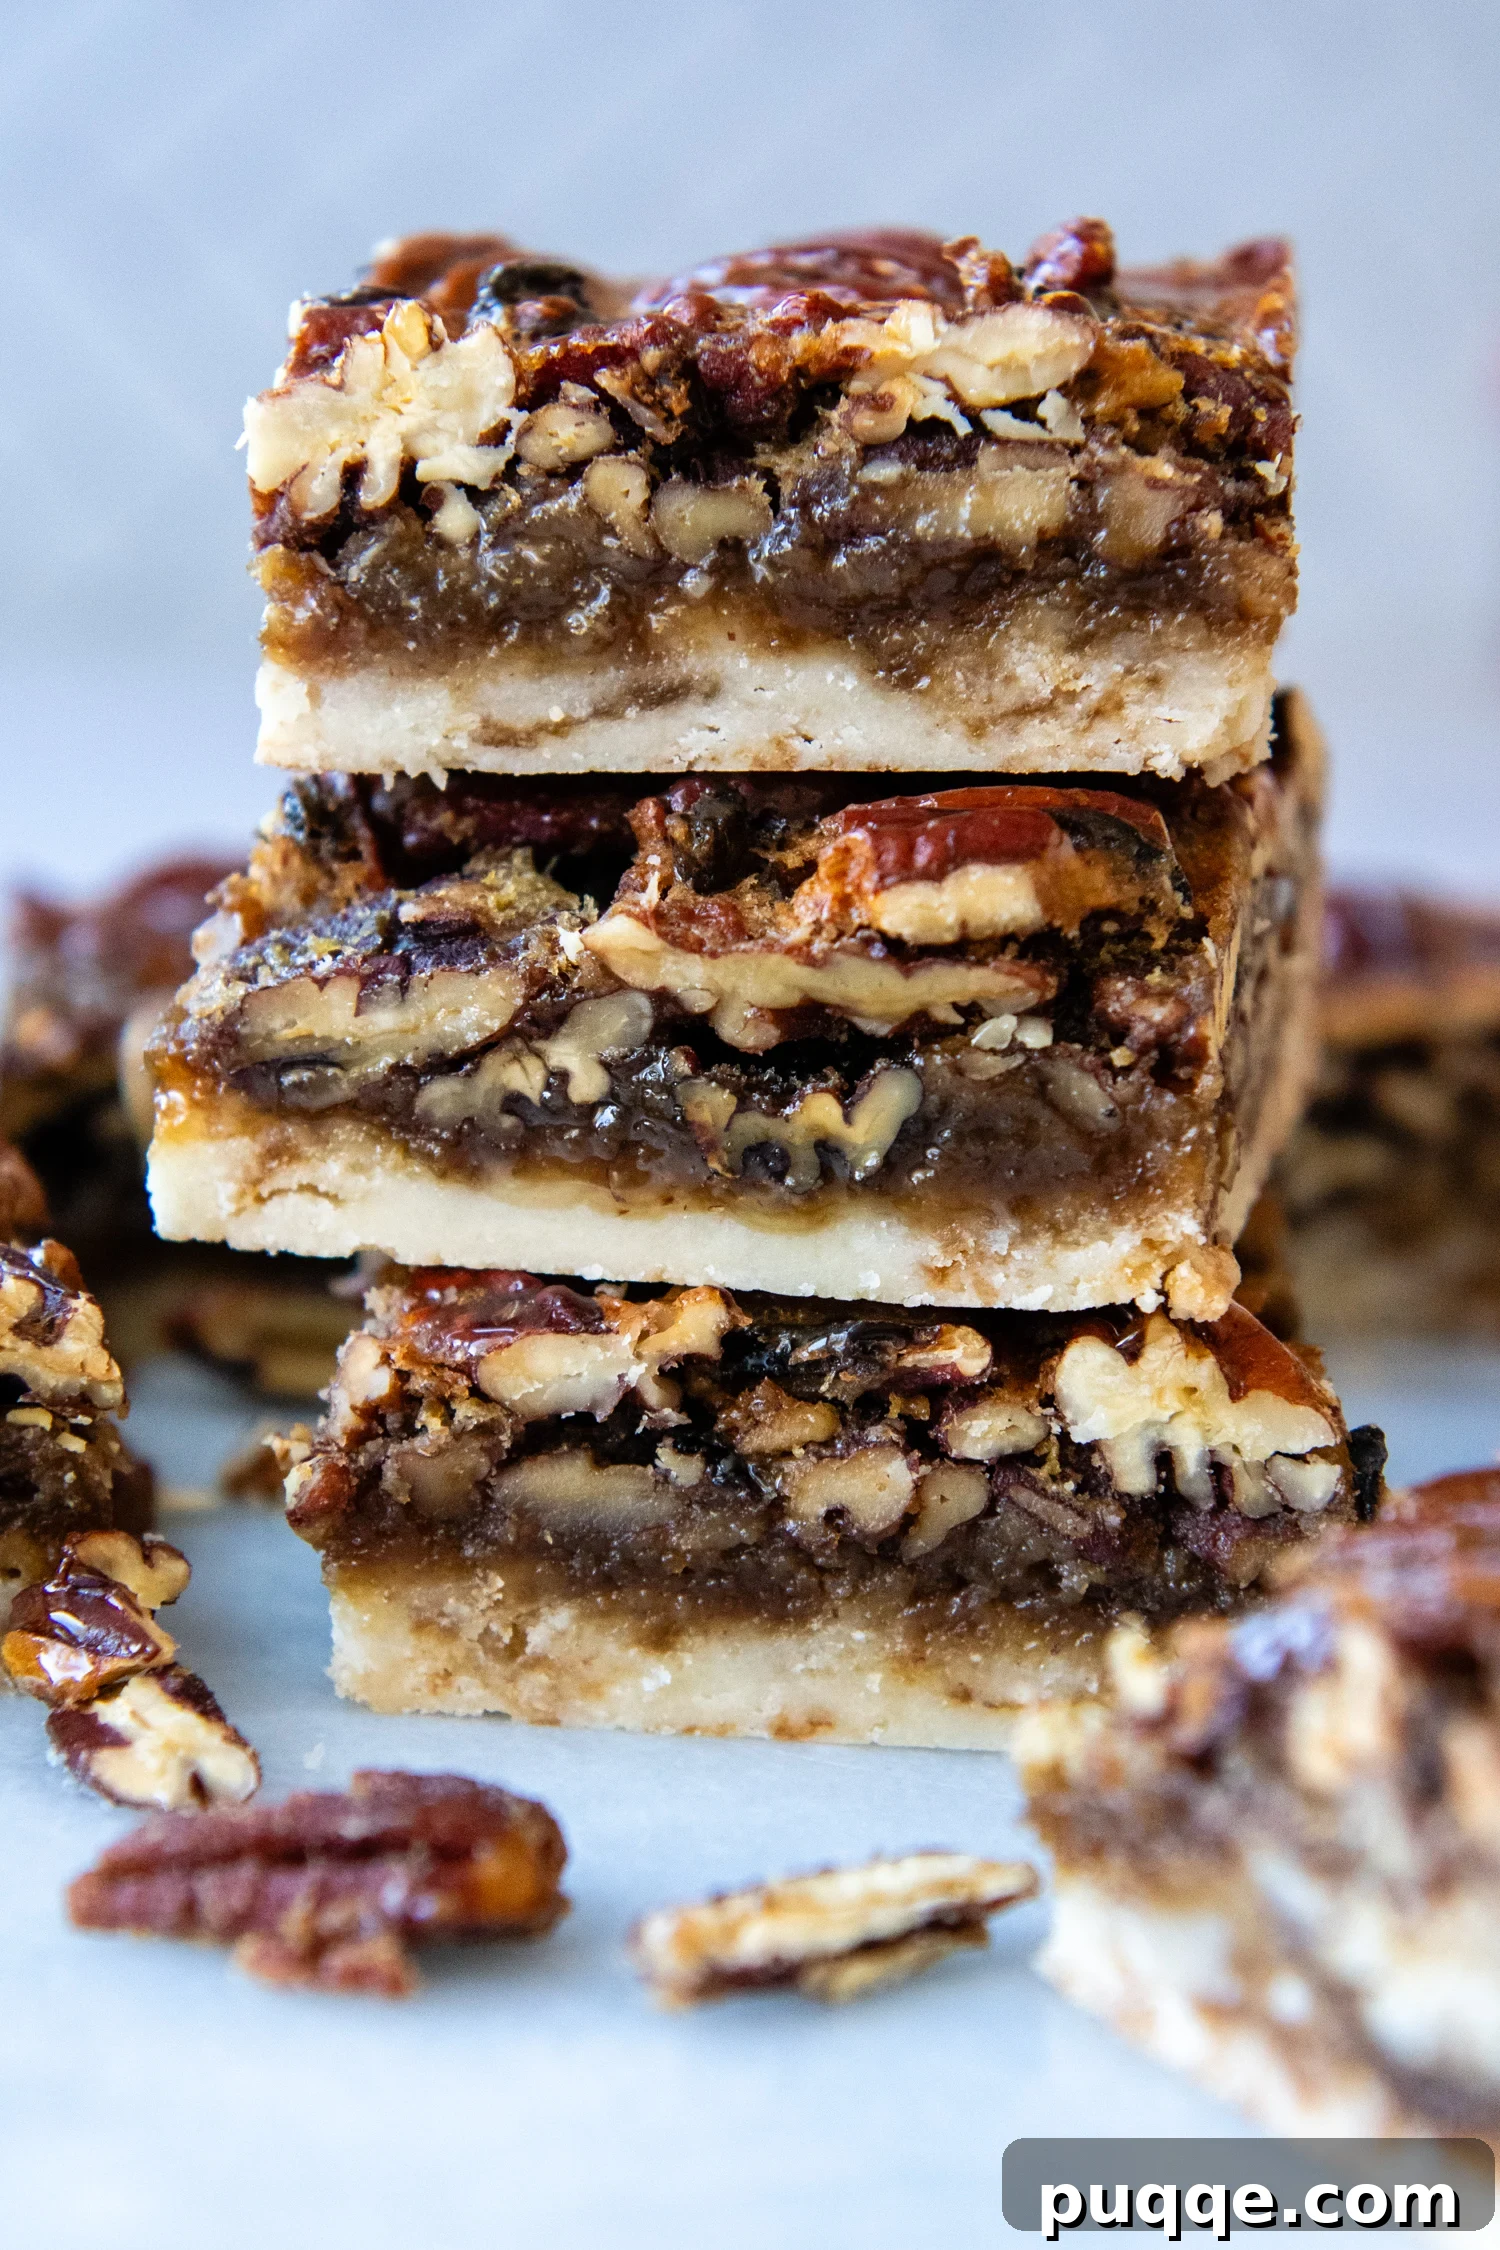
Mastering Gluten-Free Pecan Bars: A Recipe That Always Delivers!
Recreating old-fashioned pecan pie bars in a gluten-free format was an unexpected culinary journey for me. It’s fascinating how certain desserts we overlooked as children slowly evolve into irresistible temptations in adulthood. I certainly wasn’t immune, and neither was my family, who quickly grew to adore this easy-to-make treat. During extensive recipe testing – a process I’ll elaborate on shortly – their initial skepticism (pecans can be tricky with kids!) transformed into genuine excitement with each fresh batch. This recipe truly holds a special place in my collection of gluten-free bars and brownies.
The foundation of these remarkable bars begins with a flawless gluten-free shortbread crust, ingeniously adapted from my popular fresh gluten-free lemon bars. The ingredient list is refreshingly simple, and the process couldn’t be easier: just mix, dump, press, and bake. A crucial discovery made during the adaptation process for these gluten-free pecan bars was the significant impact of using a metal baking pan. Unlike glass, a metal pan consistently yields a crispier, more perfectly browned crust – a subtle but impactful detail that elevates the entire bar.
The pecan filling, however, was where the real development work happened. My goal was a harmonious balance: an ideal ratio of crunchy nuts to a gooey, caramelized filling that wasn’t excessively sweet and, most importantly, set beautifully for clean slicing. Achieving this required careful experimentation. I found the perfect sweet spot by combining pure maple syrup, rich dark brown sugar, and a hint of molasses. This trio delivers a deep, complex sweetness without overwhelming the palate, allowing the natural pecan flavor to shine through.
When it came to thickening the filling, some traditional homemade pecan bar recipes omit a thickener, which can lead to unpredictable results. The line between a perfectly baked, gooey filling and one that’s either runny or dry and crumbly is incredibly fine. To ensure consistent success and eliminate guesswork, I incorporated a precise amount of cornstarch. This small addition makes all the difference, guaranteeing a perfectly set, yet wonderfully gooey, filling every single time. I couldn’t be more delighted with the final recipe. These bars now stand proudly alongside my vintage sweet potato pie with a gluten-free crust as a beloved Thanksgiving dessert that everyone eagerly anticipates. If you, like me, appreciate pie-inspired desserts without the fuss of baking an actual pie, you might also want to add these creamy gluten-free pumpkin pie cookies to your baking list!
Embark on a Baking Journey: Crafting Your Own Gluten-Free Pecan Bars
Get ready to create these delightful pecan bars with confidence! Below, you’ll find detailed step-by-step photos and expanded instructions to guide you through the process. For precise ingredient measurements and the complete recipe, please scroll down to the comprehensive recipe card.
Effortless Gluten-Free Shortbread Crust
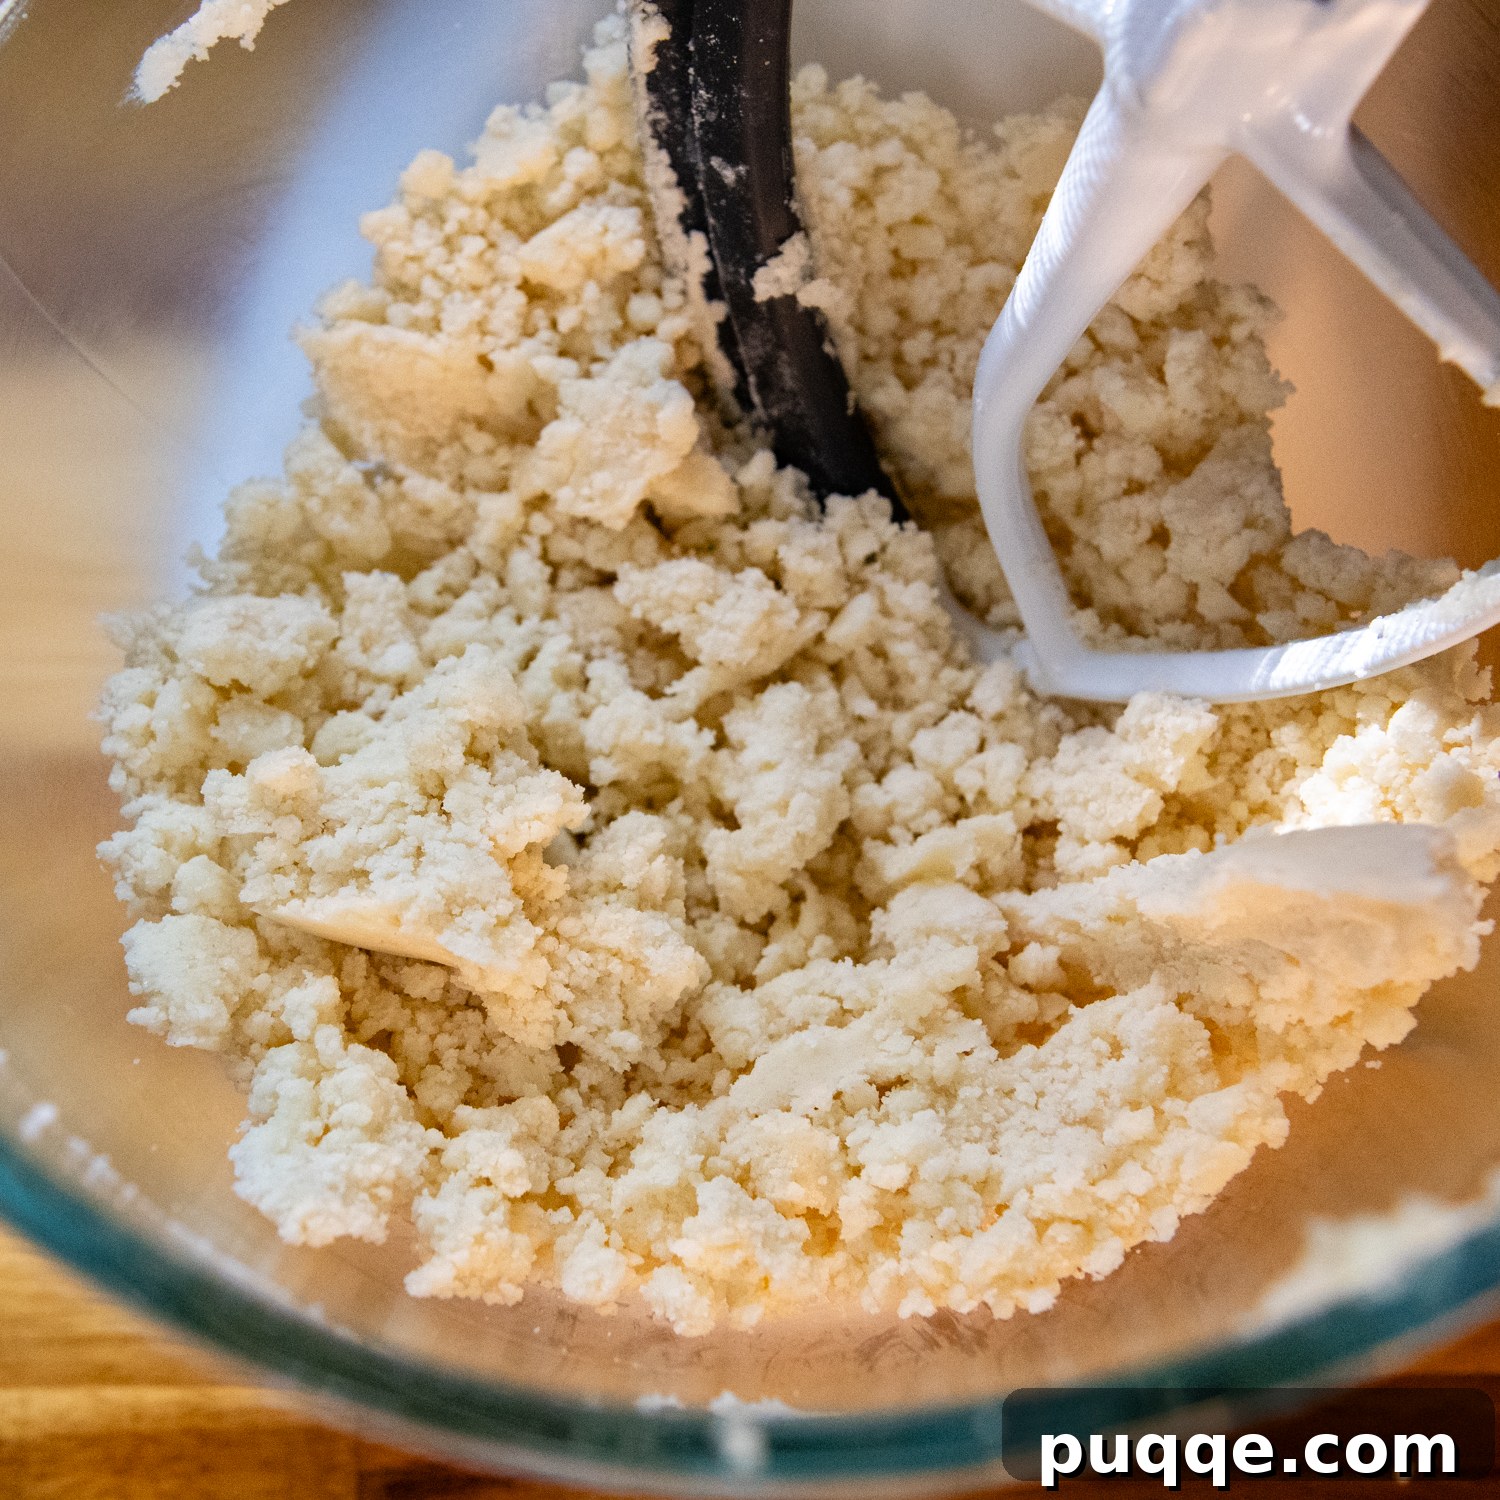
One of the many joys of these pecan bars is enjoying all the delightful flavor and texture of pecan pie, minus any fuss. To begin, simply combine your chosen gluten-free flour blend, granulated sugar, and salt in a large mixing bowl. Next, gradually incorporate the softened butter, adding it one tablespoon at a time and mixing thoroughly after each addition. Initially, the mixture might appear quite dry and sandy, but patience is key. Continue mixing; as the butter fully integrates, the dough will transform, coming together into soft, cohesive clumps. This process ensures an even distribution of butter, leading to a tender and flaky crust.
For those who prefer an even sturdier and crispier shortbread base, here’s a fantastic trick borrowed from my viral GF millionaire bars recipe: after you’ve blended the butter into the flour mixture, add a single egg yolk. The egg yolk introduces additional fat and a binding agent, resulting in a richer, more robust crust that holds its shape beautifully and provides an extra layer of decadence to your bars.
Press (No Rolling Required!), Bake, and a Game-Changing Tip!
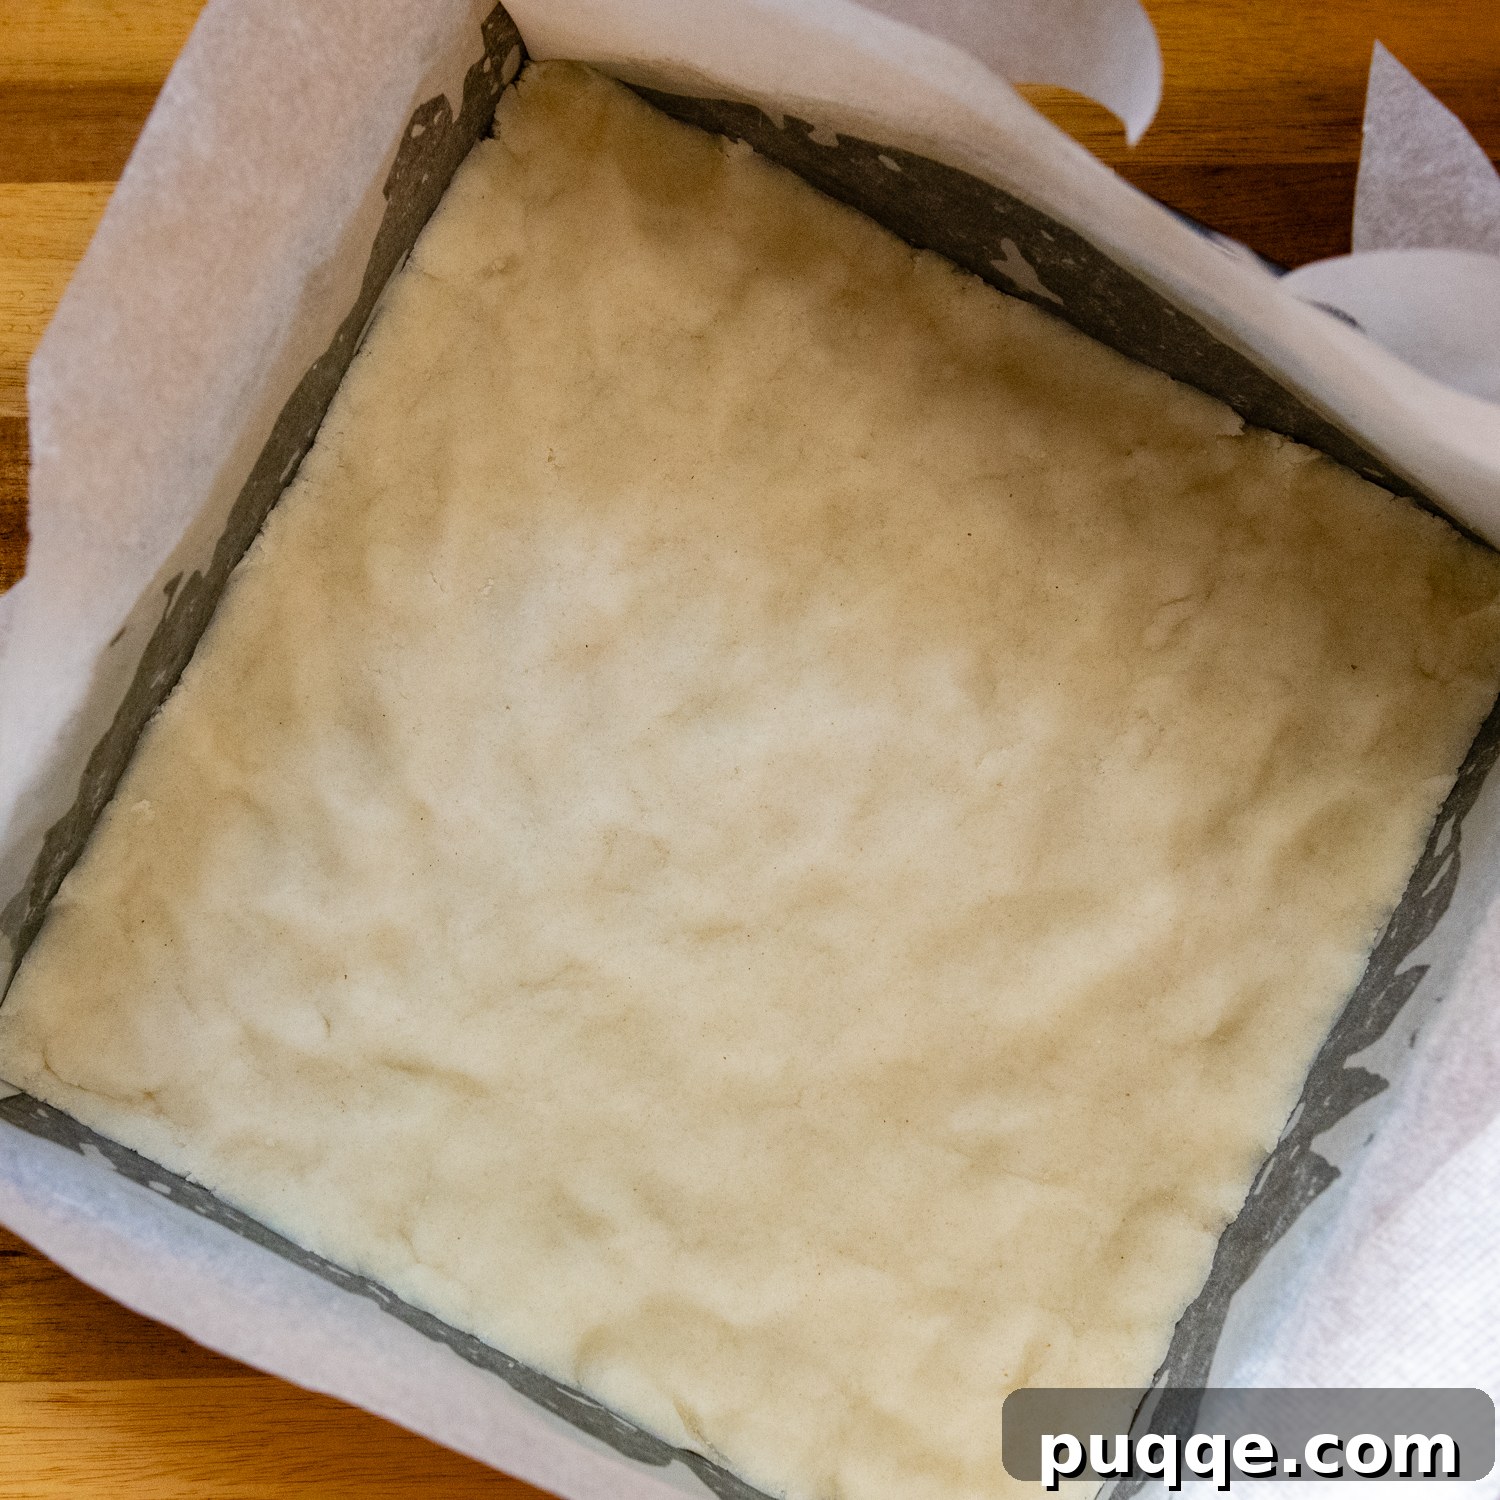
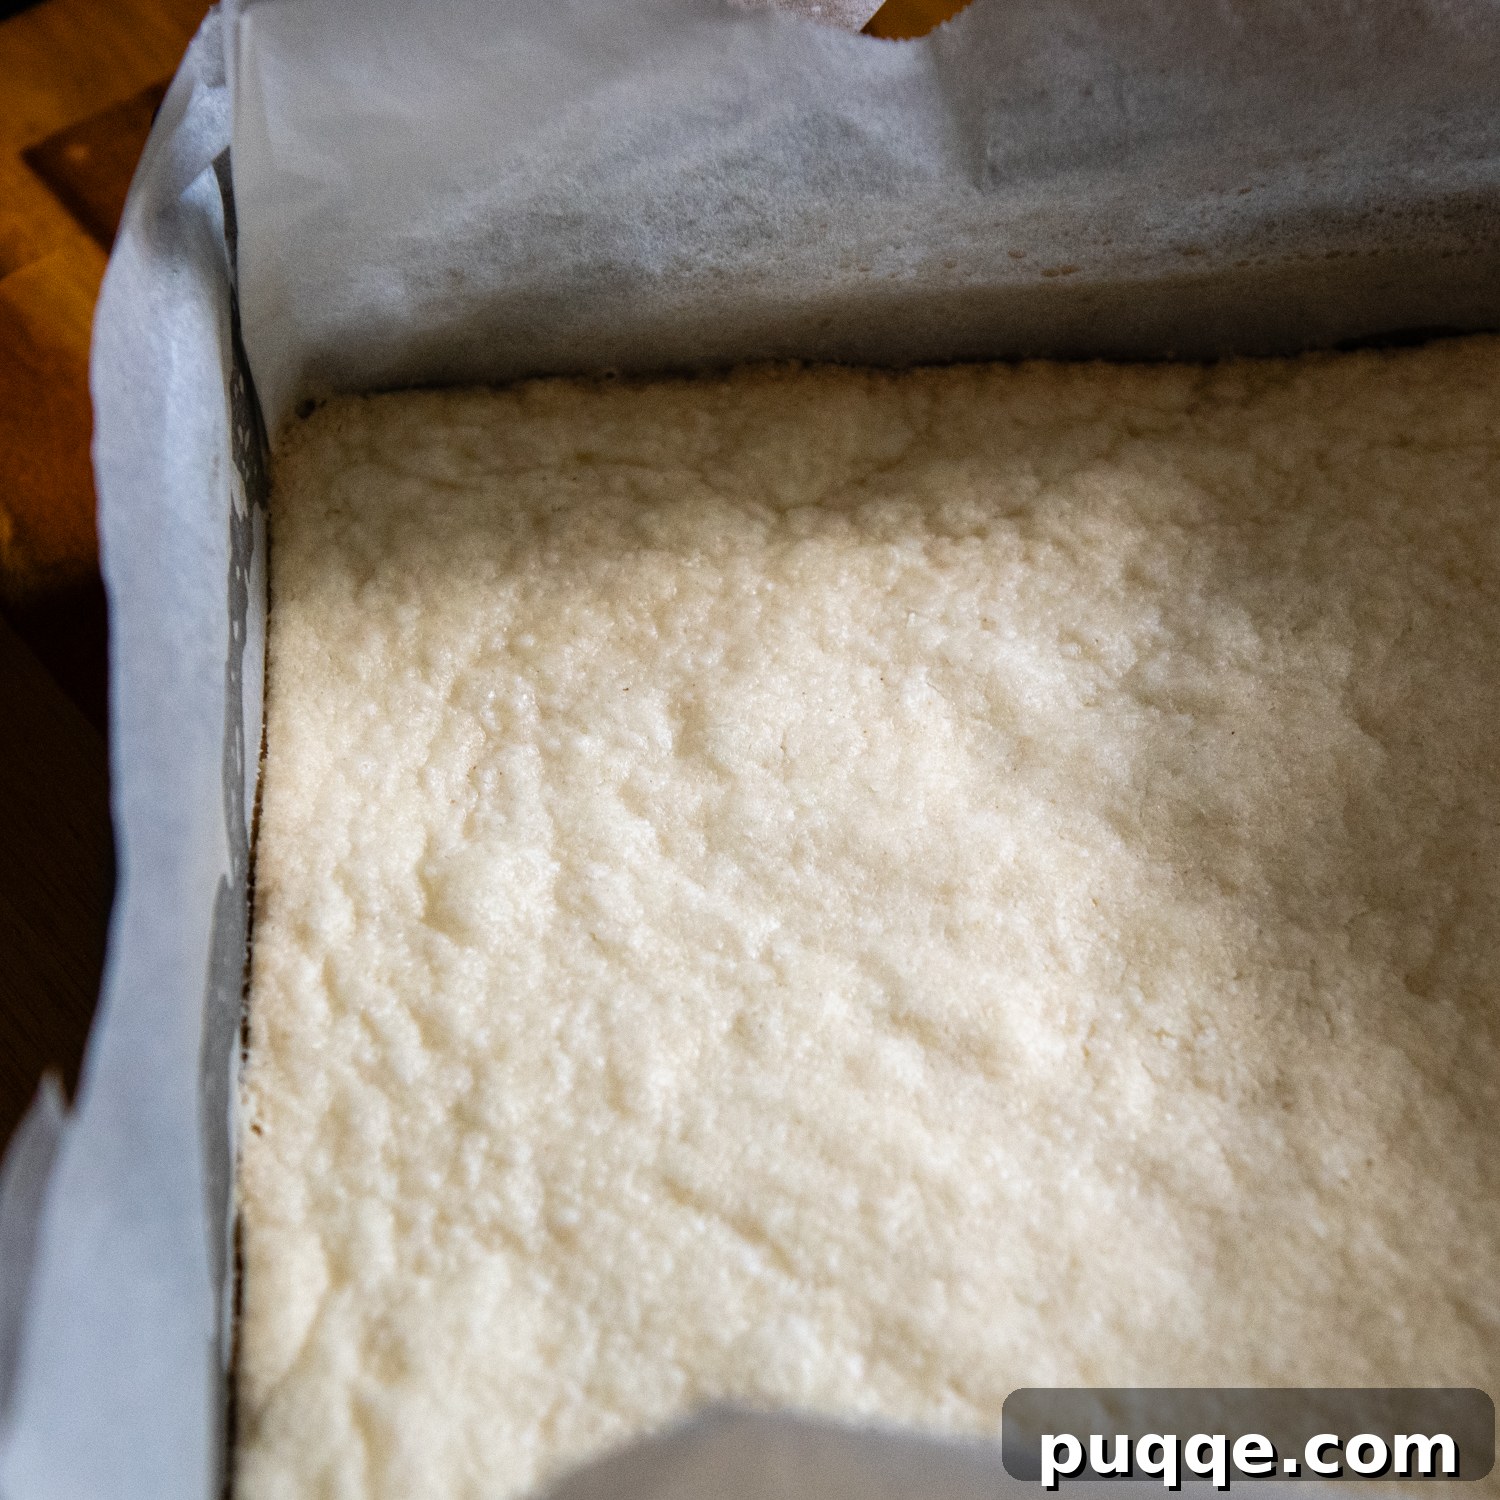
To ensure your pecan bars are effortlessly removable and easy to serve, I highly recommend lining your baking pan with parchment paper. Make sure to leave a generous overhang on all sides, which will act as convenient handles for lifting the entire batch out once cooled. Through rigorous recipe testing, I consistently found that an 8×8-inch metal baking pan yields superior results compared to a glass dish. Metal pans conduct heat more efficiently, resulting in a noticeably crispier, more golden-brown crust, enhancing both the texture and flavor.
Bake the pressed shortbread crust in a preheated 350°F (175°C) oven for approximately 20-23 minutes. You’ll know it’s ready when the edges begin to show a light, appealing golden-brown hue. While the crust is baking, here’s a highly recommended bonus tip that significantly elevates the flavor profile of your bars: spread your pecans on a small, separate baking tray and toast them in the oven alongside the shortbread crust for about 10 minutes. This toasting step brings out a deeper, richer, and more complex nutty flavor that truly makes a difference in the final product. Trust me, the difference between toasted and untoasted pecans is undeniable!
Whisk Together the Ultimate Pecan Bar Filling
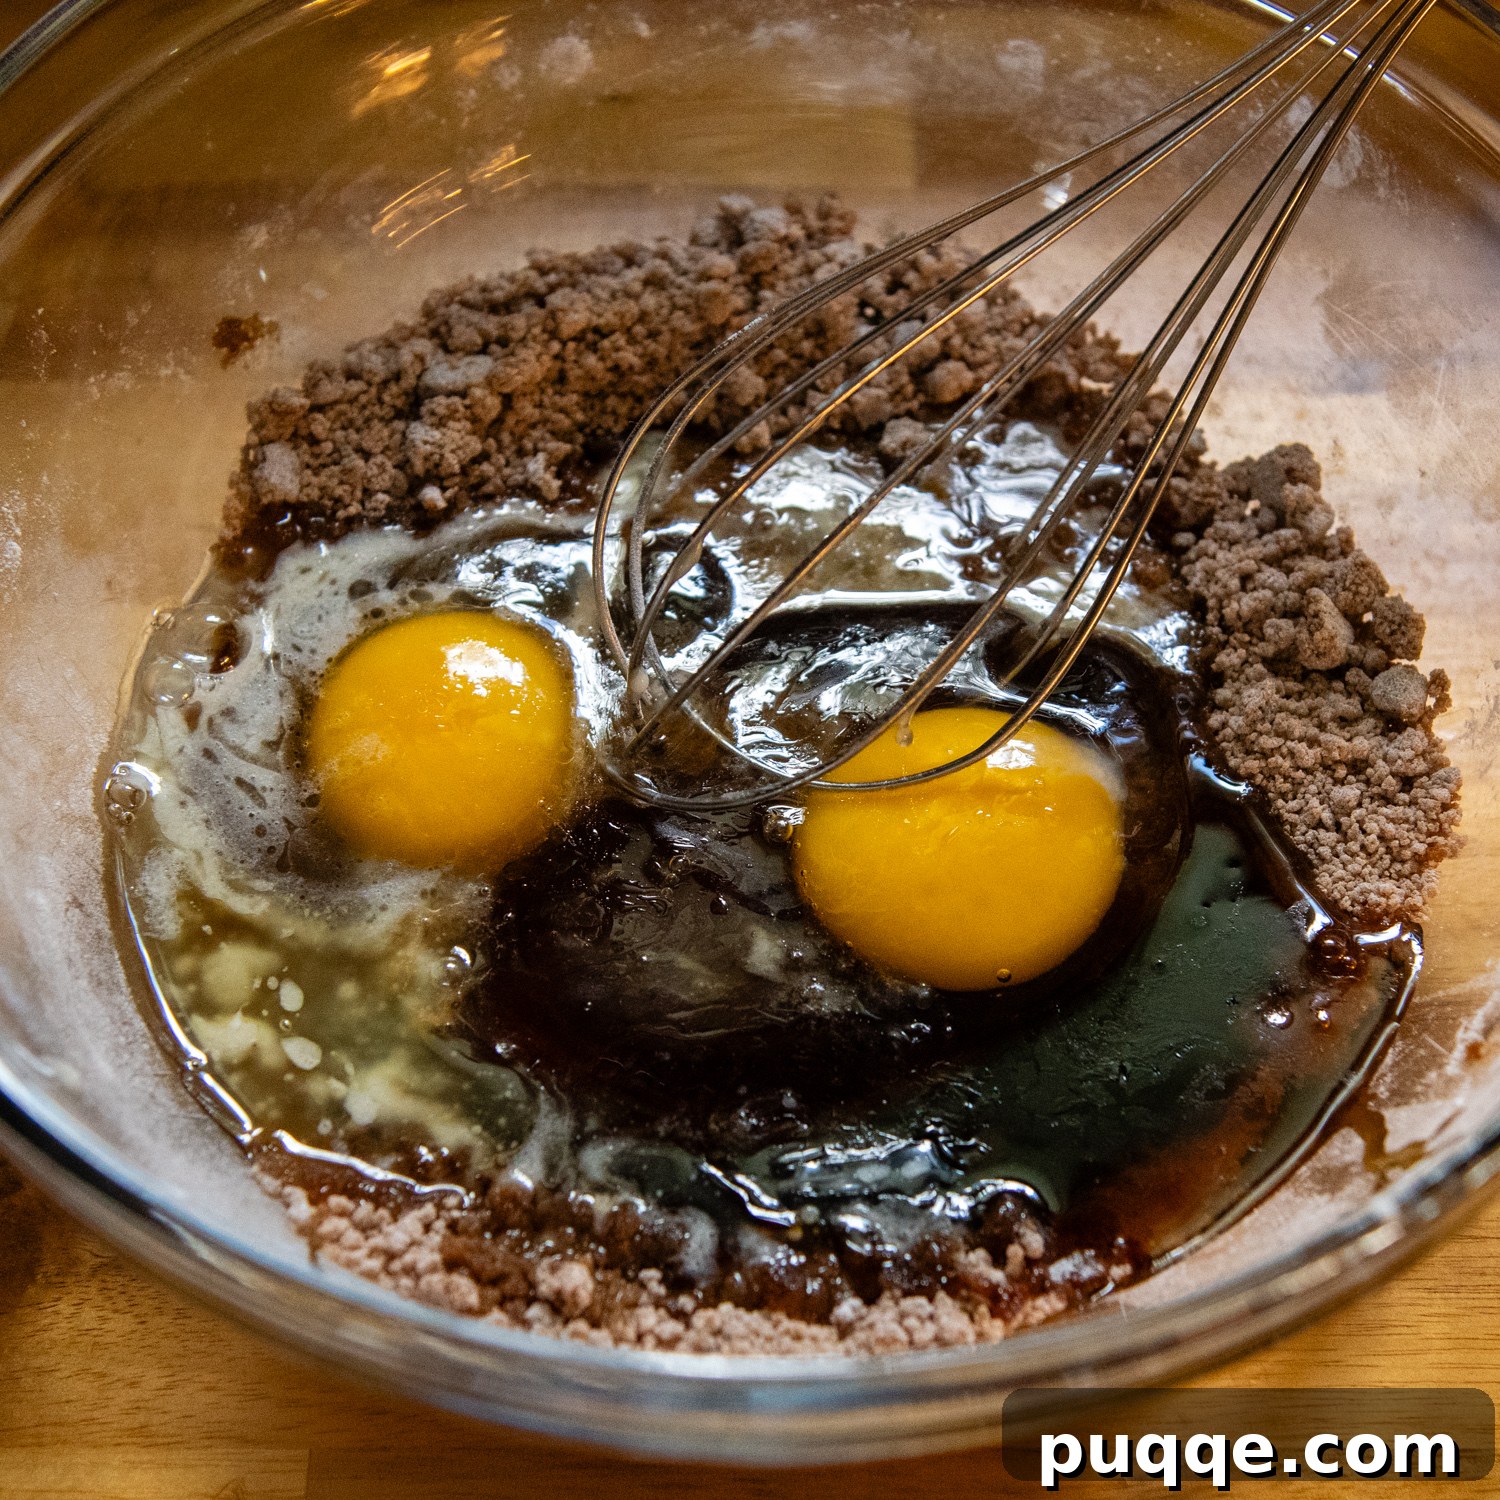
Now for the star of the show: the incredibly flavorful pecan filling! For maximum convenience and to minimize cleanup, you can use the very same mixing bowl you used for the shortbread crust – no need to grab another dish! Start by whisking together the dark brown sugar, cornstarch, and salt. This initial step is vital because it ensures the cornstarch is evenly distributed throughout the sugar mixture, preventing any lumps and guaranteeing a consistently thickened filling.
Once your dry ingredients are well combined, proceed to whisk in the remaining wet ingredients: the large eggs, the luscious pure maple syrup, the melted and cooled unsalted butter, a spoonful of rich molasses, and the fragrant vanilla extract. Whisk vigorously until all components are smoothly and thoroughly incorporated. The mixture should be uniform in color and texture, without any streaks or unmixed ingredients. This careful preparation guarantees a silky-smooth, perfectly balanced filling that will caramelize beautifully and bind the toasted pecans into a decadent layer.
Pour, Bake, and Witness the Magic Unfold
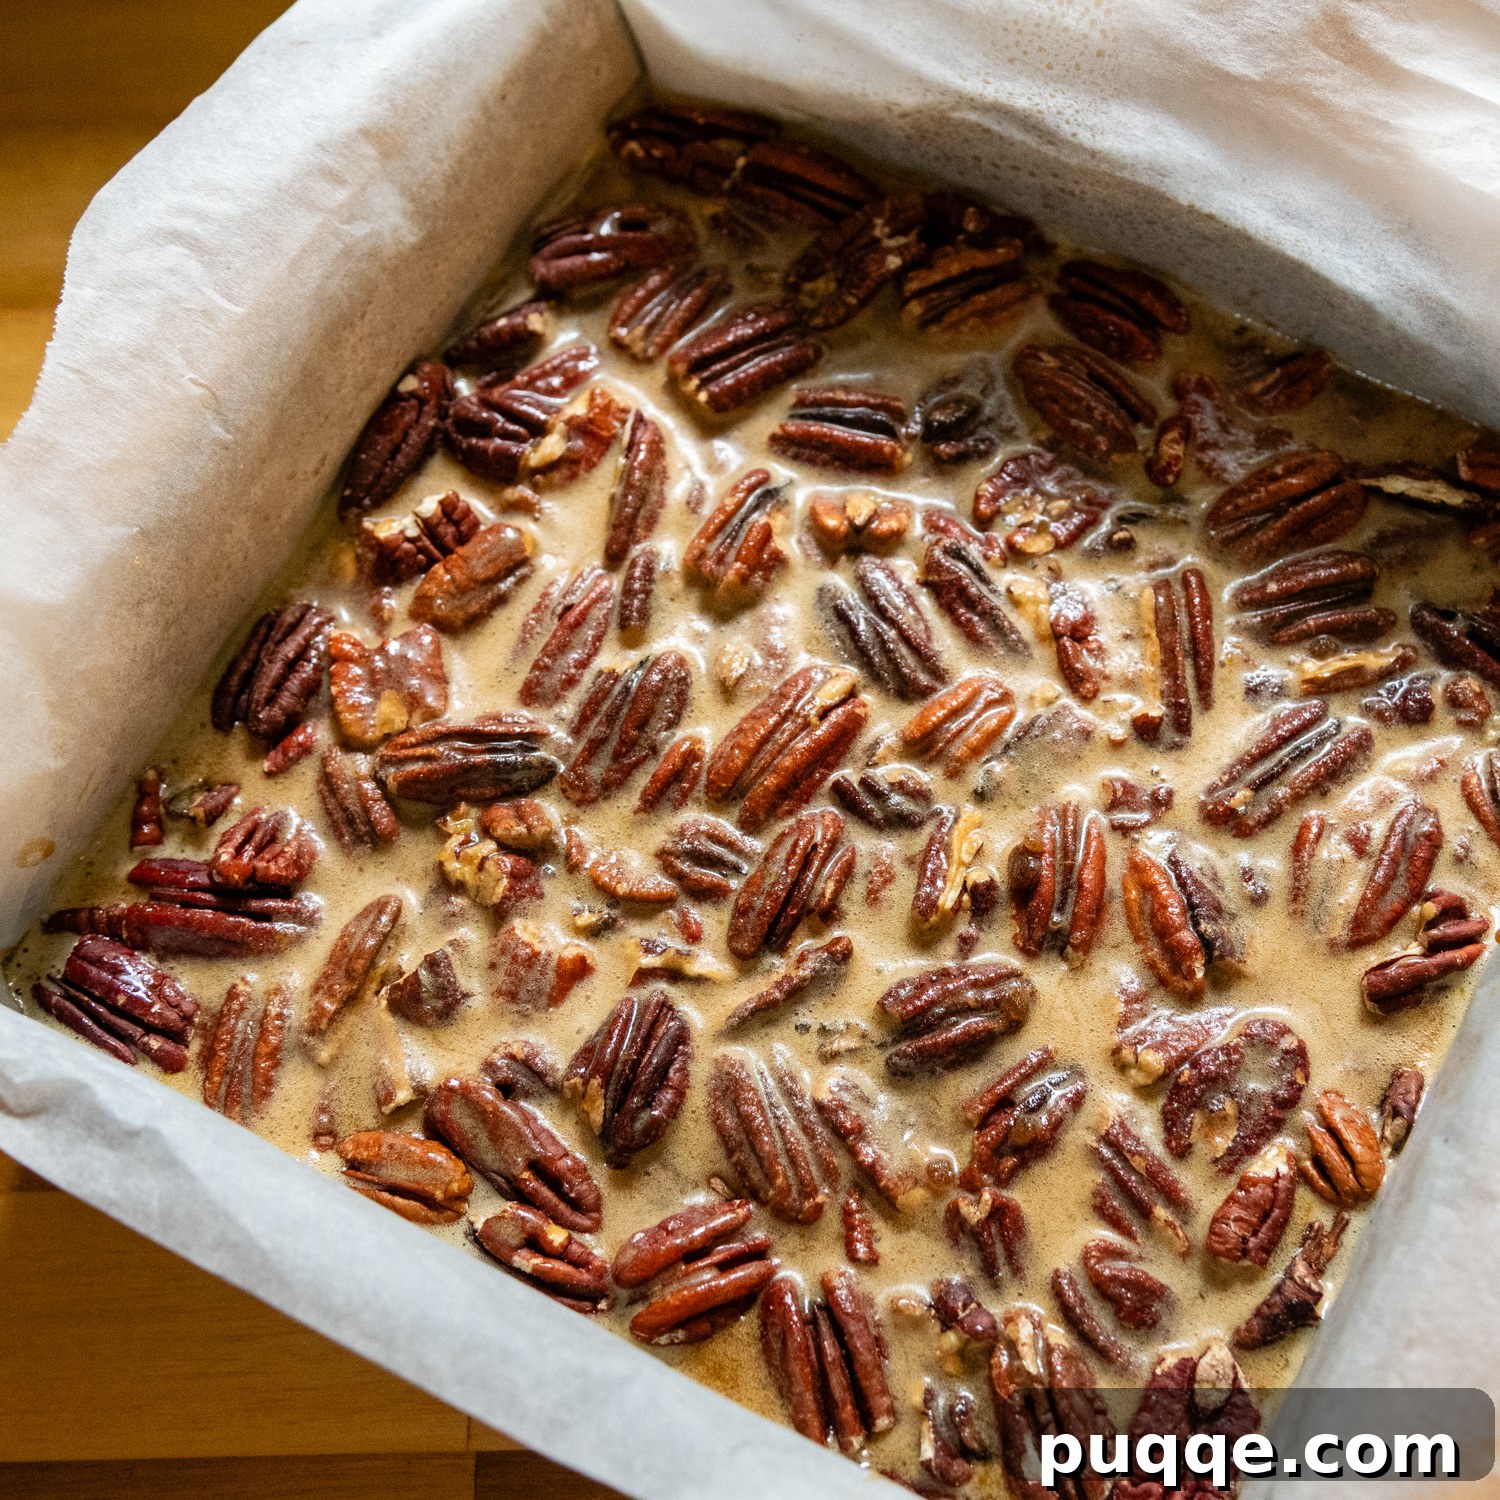
Once your shortbread crust has partially baked and the toasted pecans are ready, it’s time to bring everything together. Carefully spread the warm, toasted pecans evenly over the bottom of the par-baked crust. The warmth of the crust will help them settle slightly. Next, gently pour the prepared pecan filling over the nuts, ensuring it covers them completely and spreads evenly across the crust. Precision here helps achieve uniform slices later.
Return the baking pan to the oven and continue baking for another 20-25 minutes. During this phase, keep a close eye on your bars. You’re looking for the edges of the filling to be visibly set and firm, while the very center should still exhibit a slight jiggle – it shouldn’t be completely liquid, but it also shouldn’t be entirely firm or sloshy. This delicate balance is crucial for achieving that coveted gooey consistency. As the bars cool, the filling will continue to firm up and set beautifully, allowing for perfect, clean slices. I promise, a little patience during the cooling stage will yield the most satisfying results!
Storing and Make-Ahead Tips: Say Goodbye to Soggy Bars!
One of the many fantastic qualities of these scratch-made pecan bars is that they often taste even better the next day as the flavors meld and deepen. To achieve this optimal texture and flavor, allow the bars to cool completely to room temperature. Once cooled, store them uncovered on your kitchen counter until you’re ready to serve them the following day. This open-air storage allows any residual moisture to dissipate, preventing the crust from becoming soggy.
Through my testing, I discovered that covering them, even with foil after they were fully cooled, had a tendency to slightly soften the bottom shortbread layer. If you have any leftovers after serving, you can store them covered with foil and refrigerated, or loosely covered with foil at room temperature for up to 3 days. However, in my experience, these delicious bars rarely last that long – they’re simply too good to resist!
For longer storage, these gluten-free pecan bars freeze beautifully. Once completely cooled, slice them into individual portions. Wrap each bar tightly in plastic wrap, then place them in an airtight freezer-safe container or bag. They can be frozen for up to 2-3 months. To enjoy, simply thaw them at room temperature or warm them gently in the oven for a freshly baked experience. This makes them an excellent make-ahead dessert for holidays or unexpected guests.
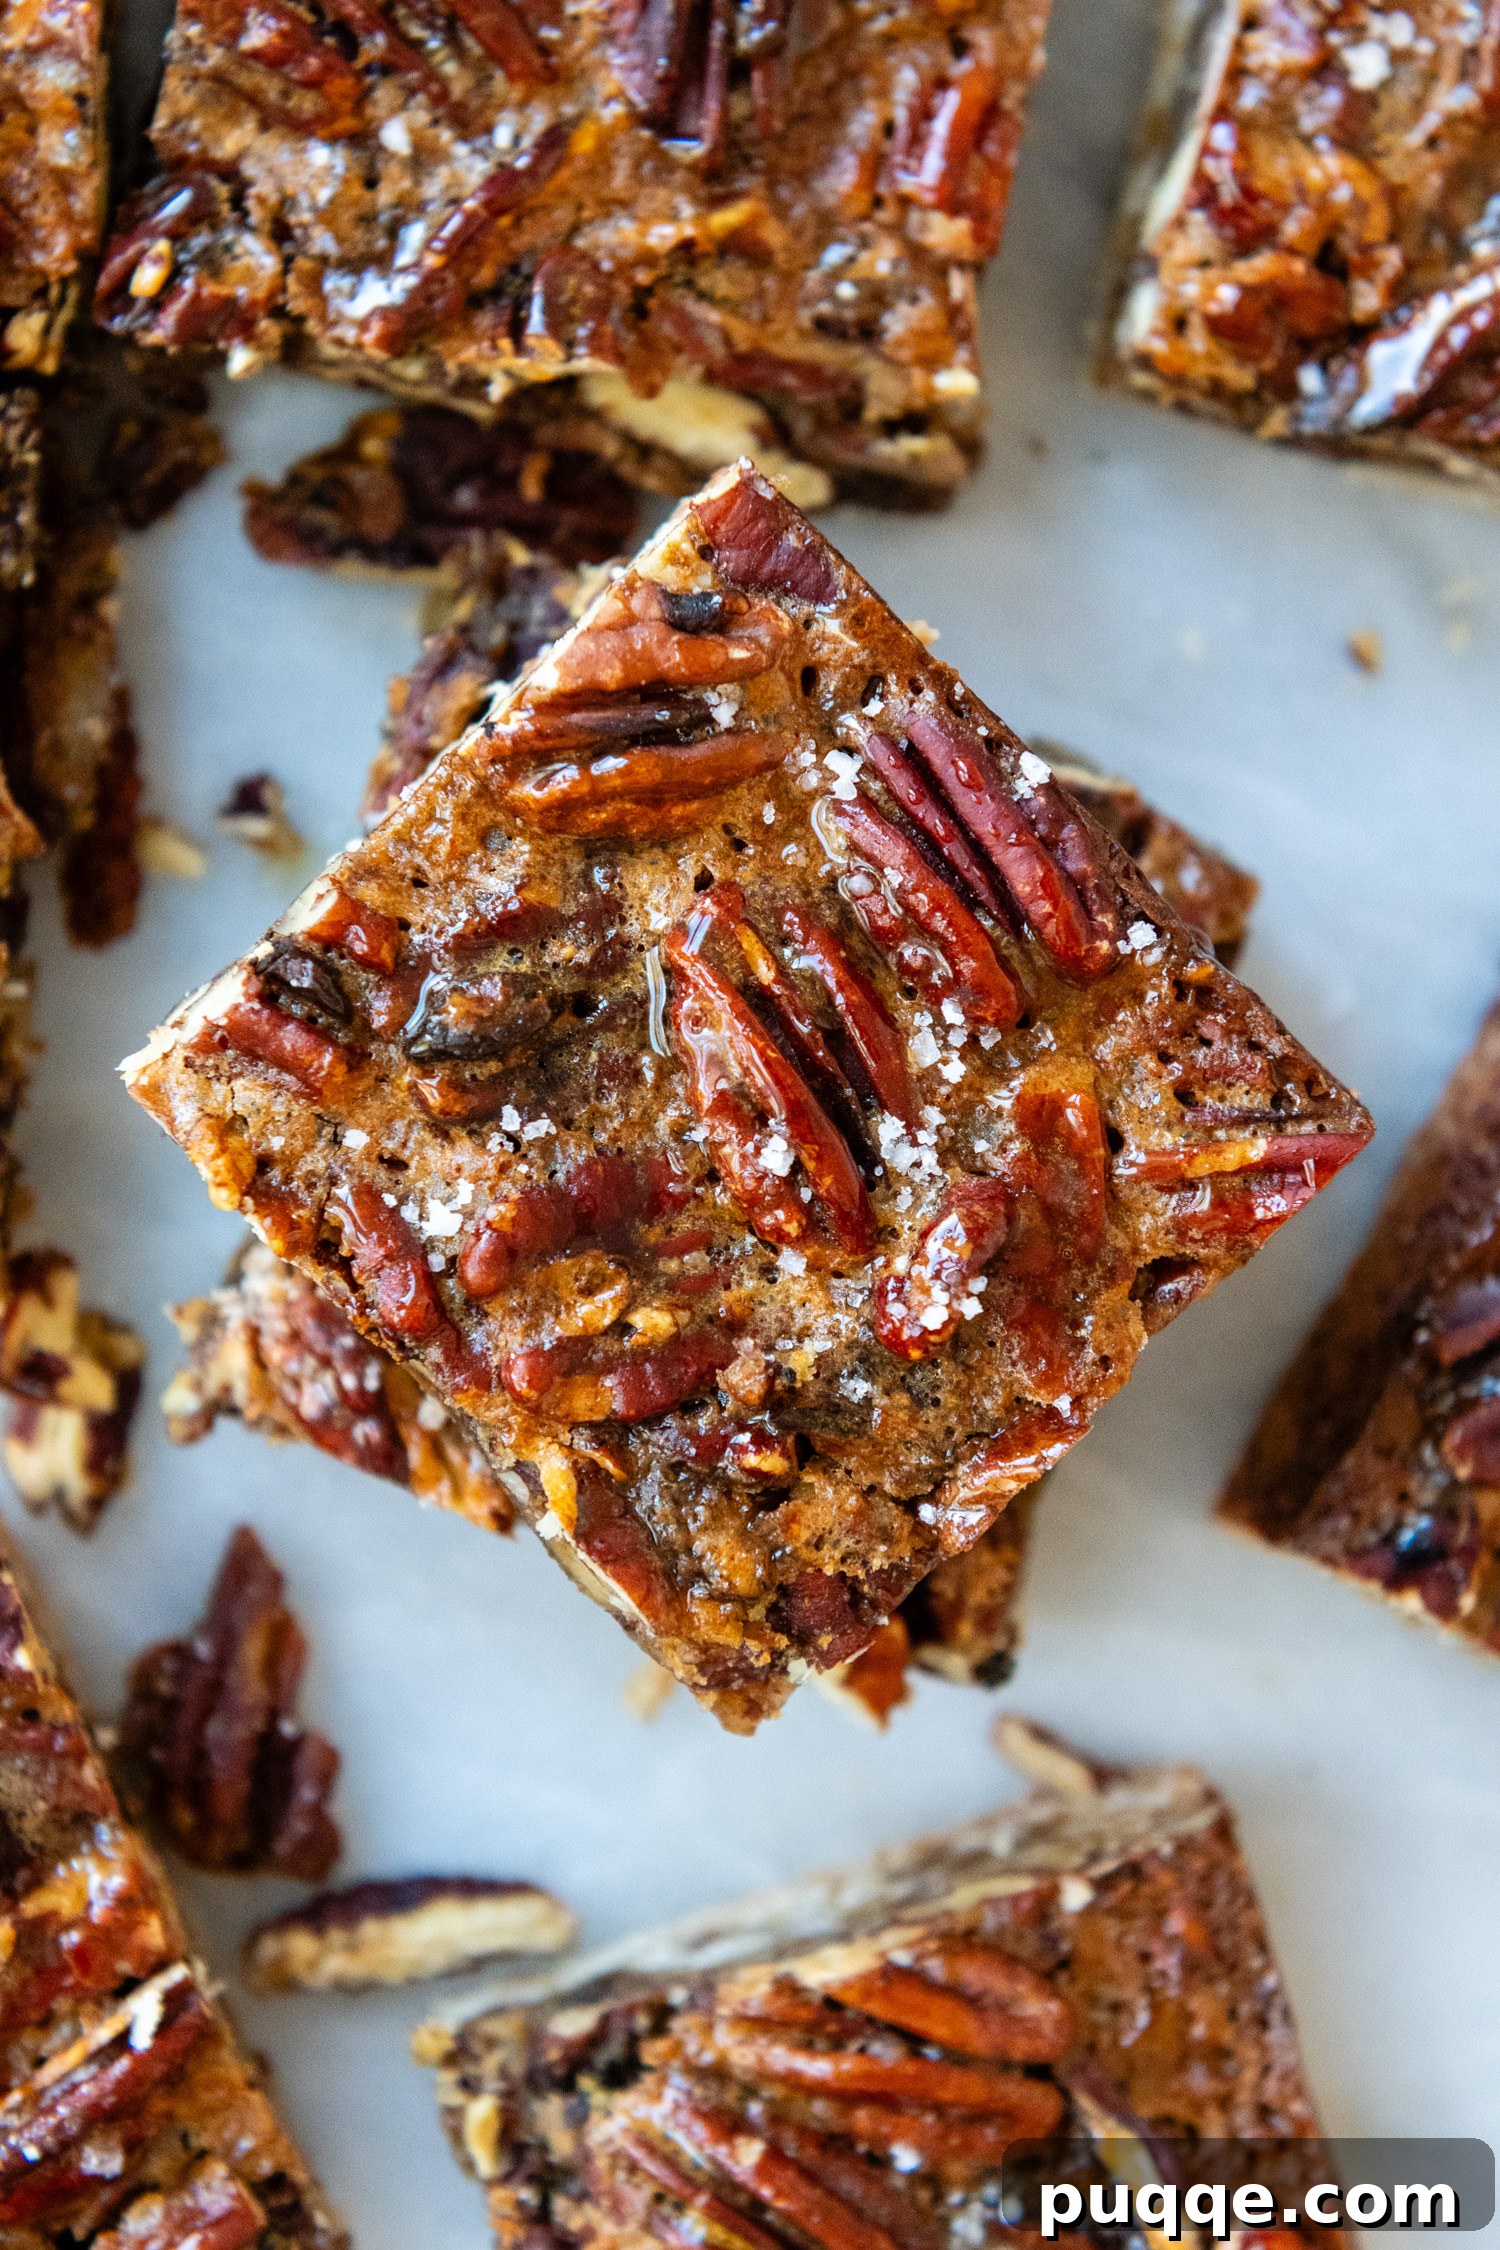
Beyond the traditional, these can easily transform into a delightful gluten-free mixed nut bar! On one occasion, finding myself short on pecans, I experimented with a combination of chopped cashews, slivered almonds, and pecans. The result was absolutely amazing! Feel free to use any combination of your favorite nuts, as long as the total volume equals 2 cups.
Elevate Your Experience: Creative Variations for Your Pecan Bars!
Just like my renowned recipe for gluten-free pecan pie, these bars offer a fantastic canvas for culinary creativity. Don’t hesitate to experiment with these exciting variations to tailor them to your taste or seasonal cravings:
- Decadent Chocolate Chips: For a delightful twist, after spreading the nuts on the crust, sprinkle a generous layer of semi-sweet, milk, or even dark chocolate chips over them before pouring on the filling. The chocolate will melt into the pecan layer during baking, creating a rich, gooey, and utterly irresistible chocolate-pecan fusion.
- Sparkling Flaky Sea Salt: A sprinkle of flaky sea salt is a game-changer! It beautifully enhances the sweet and salty finish, creating a sophisticated flavor contrast. You can sprinkle a little on top of the filling before baking, or for a fresh burst of flavor and visual appeal, garnish the bars with it just after they come out of the oven.
- A Medley of Nuts: As mentioned, don’t limit yourself to just pecans! A blend of nuts like walnuts, cashews, almonds, or even hazelnuts can create a unique flavor and texture profile. This baking move is one you absolutely will not regret – it adds complexity and allows for personalization. Ensure the total quantity of mixed nuts remains 2 cups.
- Southern Bourbon Infusion: For a true taste of Southern tradition and an added layer of depth, swap out the molasses for a dash of bourbon in your filling. The alcohol will bake off, leaving behind a warm, slightly smoky, and incredibly aromatic flavor that complements the pecans perfectly. Start with 1-2 tablespoons and adjust to your preference.
- Warm Spiced Delight: Introduce a cozy element by adding a hint of warm spices to your filling. A half teaspoon of ground cinnamon or a quarter teaspoon of nutmeg, or even a blend of pumpkin pie spice, can add another dimension of flavor, making these bars perfect for autumn and winter gatherings.
Save This Irresistible Recipe to Your Pinterest Board!
Let’s be friends on Pinterest! I’m always sharing great recipes and fresh baking inspiration!
Did you delight in this recipe? I absolutely love hearing from you and seeing your culinary creations! Please leave a star rating and a comment below the recipe card. Your feedback is incredibly valuable; it helps other home bakers discover wonderful recipes and builds our amazing community. You can always expect a response from me! -Melissa
Frequently Asked Questions About Gluten-Free Pecan Bars
- What makes these pecan bars gluten-free?
- The primary difference is the use of a high-quality gluten-free all-purpose flour blend for the shortbread crust. I specifically recommend a blend like Cup4Cup because it’s designed to mimic the properties of wheat flour, ensuring a tender, flaky crust without the gluten. It’s crucial to use a blend that contains xanthan gum or add it separately if your blend doesn’t include it, as this provides structure and prevents crumbliness in gluten-free baking.
- Can I substitute the maple syrup with corn syrup or another sweetener?
- While corn syrup is a traditional ingredient in many pecan pies and bars, I opted for pure maple syrup in this recipe for its rich, complex flavor profile and natural sweetness. Maple syrup also contributes to the filling’s beautiful caramelization and gooey texture. You could substitute with an equal amount of light corn syrup if preferred, but you might miss some of the depth of flavor that maple syrup provides. Honey could also work, but its distinct flavor might alter the overall taste of the bars.
- How do I know when the pecan filling is perfectly set?
- The key to a perfectly gooey, yet set, filling is to watch for the edges to be firm and lightly golden, while the center still has a slight wobble when gently shaken. It shouldn’t be sloshy, but it also shouldn’t be completely firm like a cake. The filling will continue to set as the bars cool to room temperature. Overbaking can lead to a dry, crumbly filling, so err on the side of slightly underbaked for that ideal gooey consistency.
- My shortbread crust turned out crumbly. What went wrong?
- A crumbly crust can often be attributed to several factors. Ensure your butter is truly softened (but not melted) so it can properly incorporate into the flour. Over-mixing the dough after adding the butter can also develop gluten (even in gluten-free flours if they contain wheat starch or other problematic binders), leading to a tough rather than tender crust. Additionally, if your gluten-free flour blend lacks adequate binders like xanthan gum, the crust may not hold together well. Using the metal baking pan and the optional egg yolk as suggested in the recipe can also significantly improve the crust’s structure.
- What’s the best way to slice these pecan bars cleanly?
- Patience is paramount for clean slices! Ensure the bars are completely cooled to room temperature, ideally for at least 2 hours, or even chilled slightly in the refrigerator for 30 minutes. This allows the gooey filling to fully set. For the cleanest cuts, use a sharp, thin-bladed knife, wiping it clean with a damp cloth between each slice to prevent sticking and dragging the filling.
Easy Maple Gluten-Free Pecan Pie Bars
 Melissa Erdelac
Pin
Rate
Remove Ads
Ingredients
Shortbread crust
- 1 ⅓ cup (192 g) gluten free all purpose flour, I use and recommend Cup4Cup
- ⅓ cup (67 g) granulated sugar
- ¼ teaspoon salt
- 8 tablespoons (113 g) unsalted butter, softened and cut into 8 pieces
Pecan Filling
- 2 cups (250 g) salted pecan halves
- ½ cup (117 g) packed dark brown sugar
- 1 tablespoon cornstarch
- ½ teaspoon salt
- 2 large eggs, room temp
- ¼ cup (80 g) pure maple syrup
- 3 tablespoons (42 g) unsalted butter, melted and cooled
- 1 tablespoon molasses
- 1 teaspoon vanilla
- (optional) flaky sea salt
Equipment
-
8X8 Metal Baking Pan
-
Cup 4 Cup Gluten Free Flour
-
Stand Mixer
Instructions
-
Preheat your oven to 350ºF (175°C). Lightly grease an 8×8-inch baking pan, preferably metal for that extra crispy crust. Line the pan with a piece of parchment paper, pressing it firmly against the bottom and up the sides, ensuring sufficient overhang to easily lift the baked bars out later. Set the prepared pan aside.
-
In a large mixing bowl, combine the gluten-free all-purpose flour, granulated sugar, and salt. Add the softened unsalted butter, one tablespoon at a time, mixing well between each addition until fully incorporated. The mixture will initially appear dry and sandy, but as you continue to mix, the butter will bind the ingredients, forming soft clumps. Keep mixing until the dough forms cohesive, soft balls.1 ⅓ cup (192 g) gluten free all purpose flour , ⅓ cup (67 g) granulated sugar, 8 tablespoons (113 g) unsalted butter , ¼ teaspoon salt
-
Evenly press the prepared dough into the bottom of your parchment-lined baking pan. Bake on the middle rack for 20-23 minutes, or until the edges begin to lightly brown. While the crust is baking, spread the pecans on a small, separate baking tray and toast them in the oven alongside the crust for 10 minutes. This step significantly enhances their flavor. Remove the pecans and set them aside while the crust finishes baking.2 cups (250 g) salted pecan halves
-
For the filling, use the same large mixing bowl (no need to dirty another dish!). Whisk together the dark brown sugar, cornstarch, and salt until well combined. Then, add the room temperature eggs, pure maple syrup, melted and cooled unsalted butter, molasses, and vanilla extract. Whisk thoroughly until all ingredients are smoothly incorporated and the mixture is uniform.½ cup (117 g) packed dark brown sugar, 1 tablespoon cornstarch, ½ teaspoon salt, 2 large eggs, ¼ cup (80 g) pure maple syrup, 1 tablespoon molasses, 1 teaspoon vanilla, 3 tablespoons (42 g) unsalted butter
-
Once the crust is out of the oven, carefully spread the toasted pecans evenly over its surface. Pour the prepared pecan filling over the nuts, ensuring it covers them uniformly. Return the pan to the oven and bake for an additional 20-25 minutes. The bars are ready when the edges of the filling are set and firm, but the middle still has a slight, delicate jiggle. Avoid overbaking for the best gooey consistency; the filling will continue to set as it cools. If desired, sprinkle optional flaky sea salt on top immediately after baking. Allow the bars to cool completely for at least 2 hours before attempting to slice and serve for perfectly clean cuts. Refer to the recipe notes for optimal storage guidelines.(optional) flaky sea salt
Notes
Storing and Make-Ahead
If you plan to make these bars the day before serving, ensure they cool completely to room temperature, then store them uncovered on the counter. For leftovers, you can either refrigerate them, covered with foil, or keep them at room temperature, loosely covered with foil. They generally stay fresh for up to 3 days. For longer storage, see the detailed notes in the article above regarding freezing.
Carbohydrates: 44g,
Protein: 5g,
Fat: 31g,
Saturated Fat: 10g,
Polyunsaturated Fat: 6g,
Monounsaturated Fat: 13g,
Trans Fat: 1g,
Cholesterol: 78mg,
Sodium: 217mg,
Potassium: 179mg,
Fiber: 4g,
Sugar: 28g,
Vitamin A: 500IU,
Vitamin C: 0.2mg,
Calcium: 62mg,
Iron: 2mg
Did you make this recipe?Please leave a star rating and review below. It helps others when searching for recipes and I LOVE feedback!