

Welcome to the ultimate guide for creating the best gluten-free sugar cookies from scratch. Imagine soft, perfectly shaped cookies that are incredibly easy to roll out, bake beautifully, and taste so amazing, no one will guess they’re gluten-free! This isn’t just another recipe; it’s a proven method that has garnered hundreds of 5-star reviews and brought countless smiles to bakers and cookie lovers alike. Whether you’re a seasoned gluten-free baker or just starting your journey, prepare to master the art of homemade gluten-free cut-out cookies that stand shoulder-to-shoulder with their traditional counterparts.

Mastering Gluten-Free Cut-Out Cookies: A 5-Star Recipe
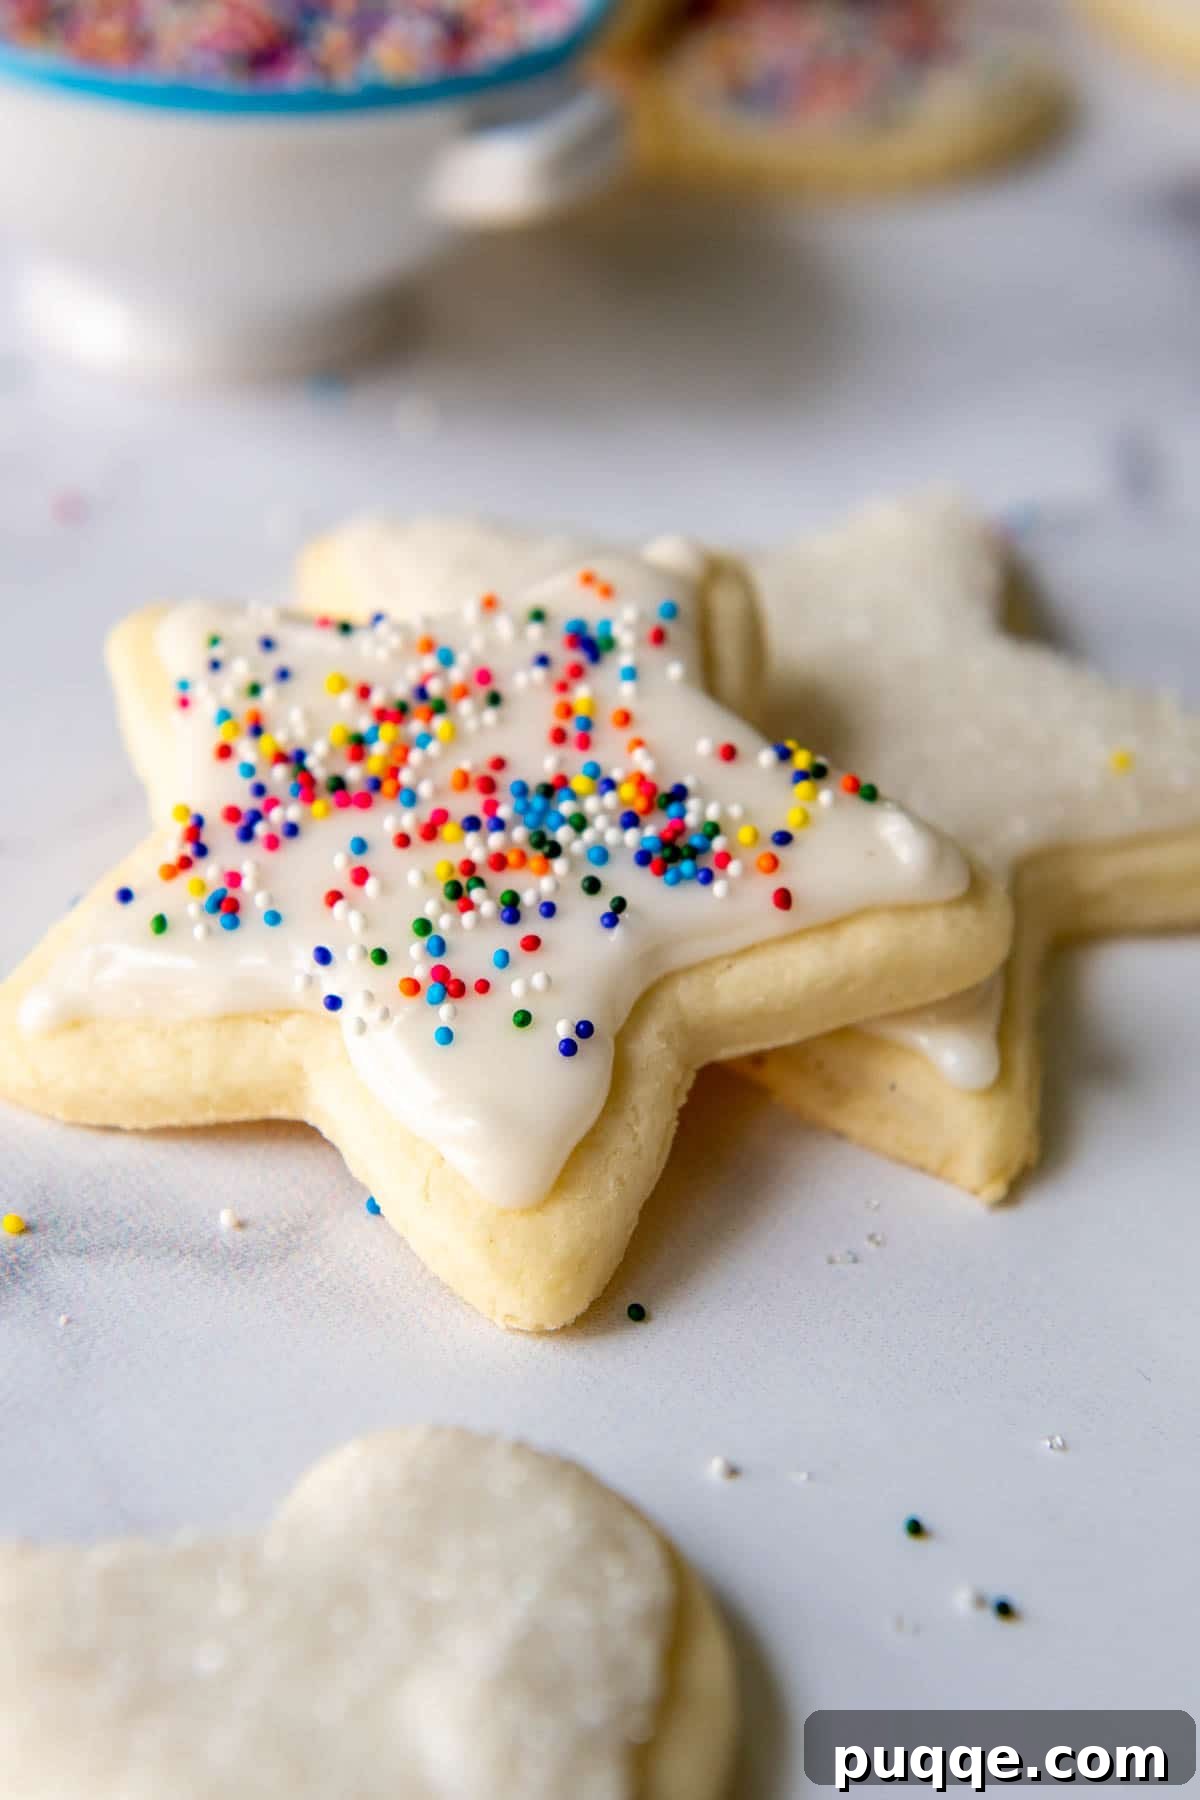
Holidays and special occasions just wouldn’t be the same without a batch of classic rolled sugar cookies. Growing up, I cherished the annual tradition of decorating festive cut-outs with glossy sugar cookie icing and a generous showering of sprinkles. Now, as a mom of four, I delight in watching my children experience the same joy – even if it means a sprinkle explosion in my kitchen!
After embracing a gluten-free lifestyle over a decade ago and even writing a gluten-free cookbook, I was determined to recreate that cherished childhood experience. Many gluten-free recipes struggle to deliver the authentic taste and texture of traditional sugar cookies, often resulting in dry, crumbly, or shapeless treats. My mission was clear: develop a gluten-free sugar cookie recipe that was not only delicious but also incredibly easy to work with, allowing for perfect cut-outs every time.
The result is a recipe so exceptional, I now prefer these gluten-free cookies over the ones I grew up baking! And it’s not just my family who loves them; hundreds of readers have shared their own success stories, confirming that these cookies truly are a game-changer. The secret lies in a carefully balanced blend of ingredients and a precise technique that ensures a soft, tender crumb and a flawless shape retention – without the need for baking powder.
Traditional sugar cookie recipes often omit baking powder to prevent the cookies from puffing up and losing their intricate shapes during baking. This gluten-free version follows the same principle. You’ll find that the dough maintains its form perfectly, from rolling and cutting to baking. This makes them ideal for intricate designs and a wide variety of celebrations, including Christmas, Valentine’s Day, graduations, birthdays, or any event where beautiful, delicious cookies are desired. Pair them with other gluten-free holiday classics like GF peanut butter blossoms for an unforgettable spread. Best of all, I confidently guarantee that no one will ever suspect these delightful cookies are gluten-free!
“By far the BEST sugar cookies! These are just perfectly soft and delicious. The dough is so easy to work with. I could not even critique this recipe in the slightest. My family and I love these cookies! I’m grateful to have this recipe and it’s the only cut out cookie recipe I’ll use.”
—Sunny
“My go-to gluten free sugar cookie recipe!! The recipe is detailed, well explained and beginner friendly! I am not good at cooking and baking but my first attempt turned out amazing!! People cannot tell it’s gluten free which makes me feel really satisfied. Within two months, I made sugar cookies following this recipe three times.”
—Minatsu
Let’s Bake These Together: Step-by-Step Guidance
Creating these perfect gluten-free sugar cookies is a straightforward process, and with a few key tips, you’ll achieve fantastic results every time. Below, you’ll find detailed step-by-step photos and expanded instructions to guide you. For the complete list of ingredients and their precise measurements, please refer to the comprehensive recipe card at the end of this article.
Achieving the Creamiest Butter and Sugar Mixture
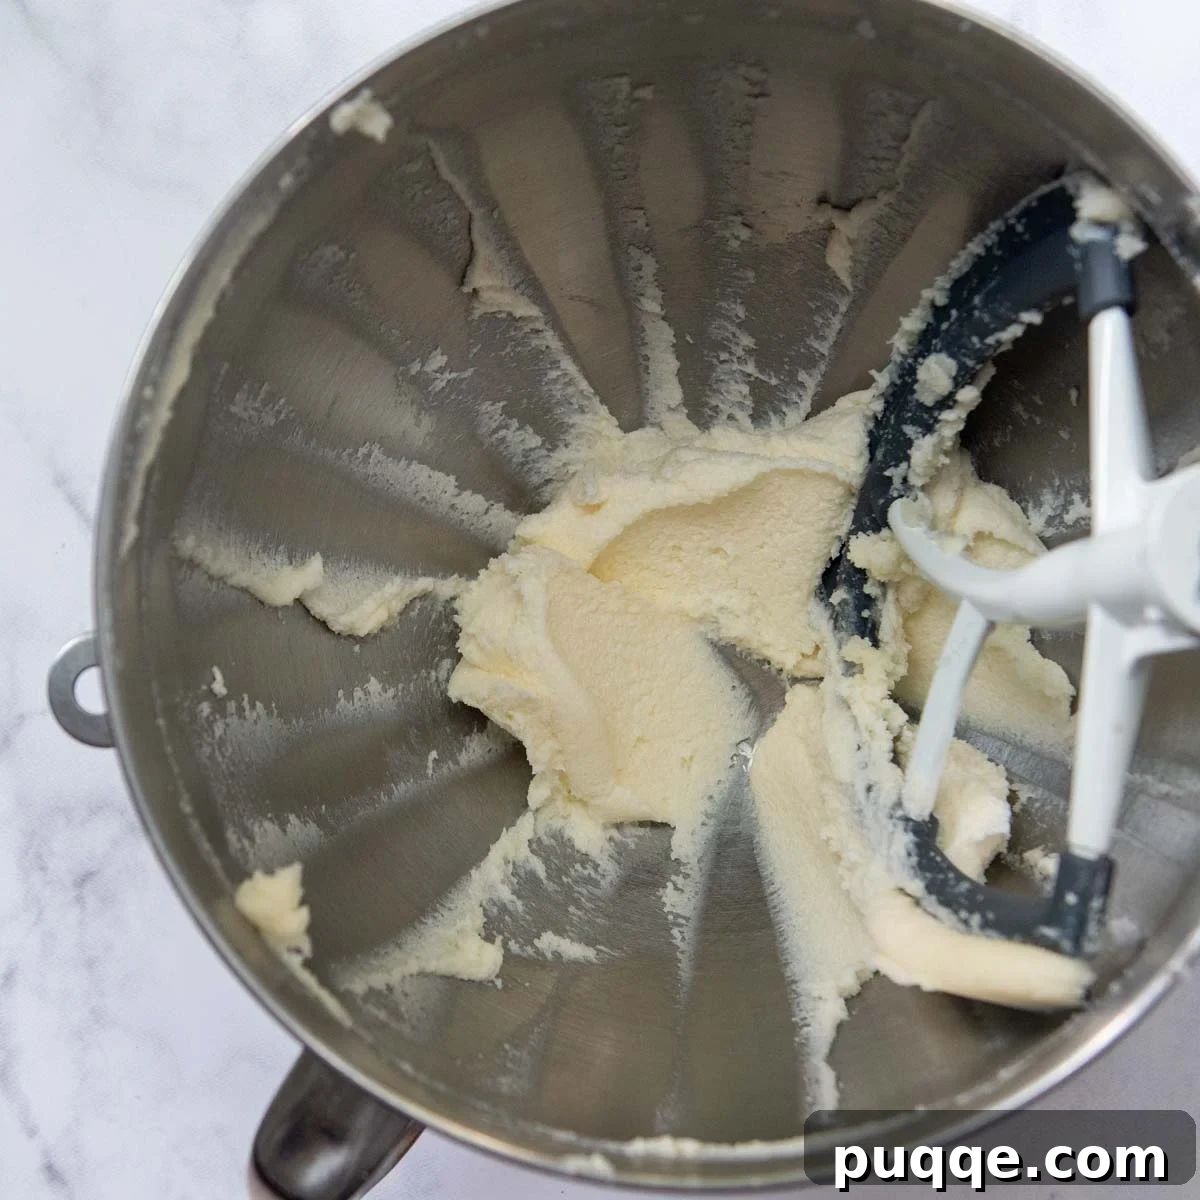
The foundation of a great sugar cookie lies in properly creaming the butter and sugar. This step is crucial for achieving that wonderfully soft and tender texture. You’ll want to beat the softened unsalted butter and granulated sugar together until the mixture becomes very light, fluffy, and noticeably pale in color. This process typically takes about 3 minutes of continuous beating. While it might seem like a long time, especially when you’re holding a hand mixer, don’t rush it! This aeration creates tiny pockets of air that contribute to the cookie’s delicate structure and helps prevent a dense, hard cookie. Investing these few minutes at the start will truly reward you with exceptionally delicious cookies.
Incorporating Liquids for a Smooth Blend
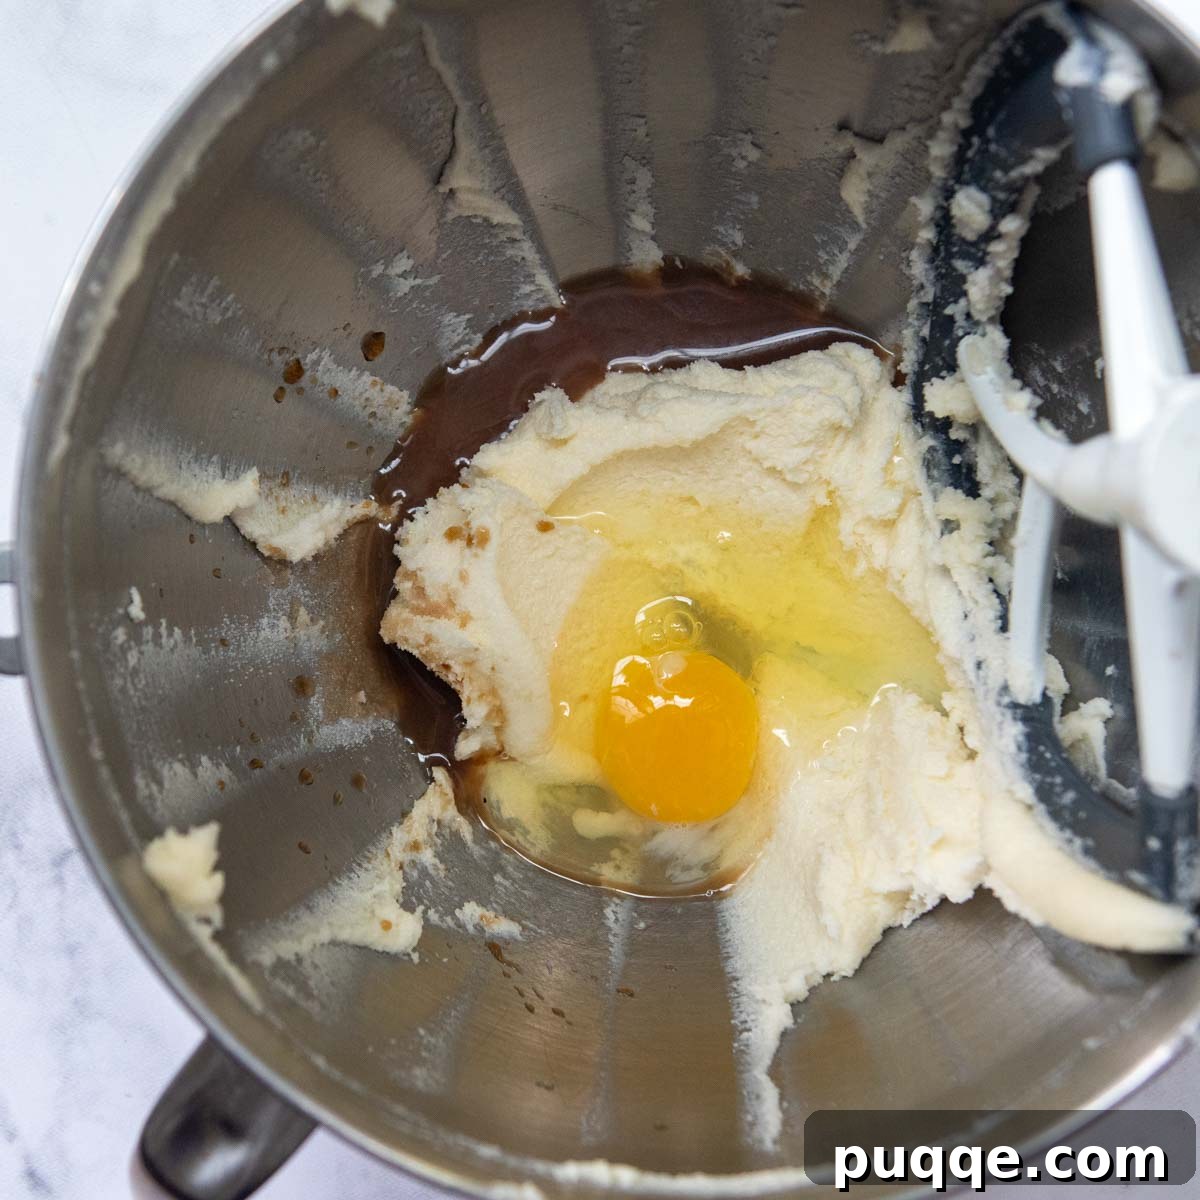
Once your butter and sugar are perfectly creamed, it’s time to add the wet ingredients. Incorporate the large egg (ensure it’s at room temperature for better emulsification), milk (dairy-free alternatives work beautifully here), and pure vanilla extract. Beat the mixture again until everything is thoroughly combined and smooth. Don’t be alarmed if the mixture initially looks a little curdled or separated – this is perfectly normal due to the different fat and water content. Just keep mixing! With continued beating, it will come together into a homogeneous, smooth batter. The vanilla extract, or a delightful combination of vanilla and almond extract, will infuse your cookies with a warm, inviting flavor.
Adding GF Flour and Chilling the Dough
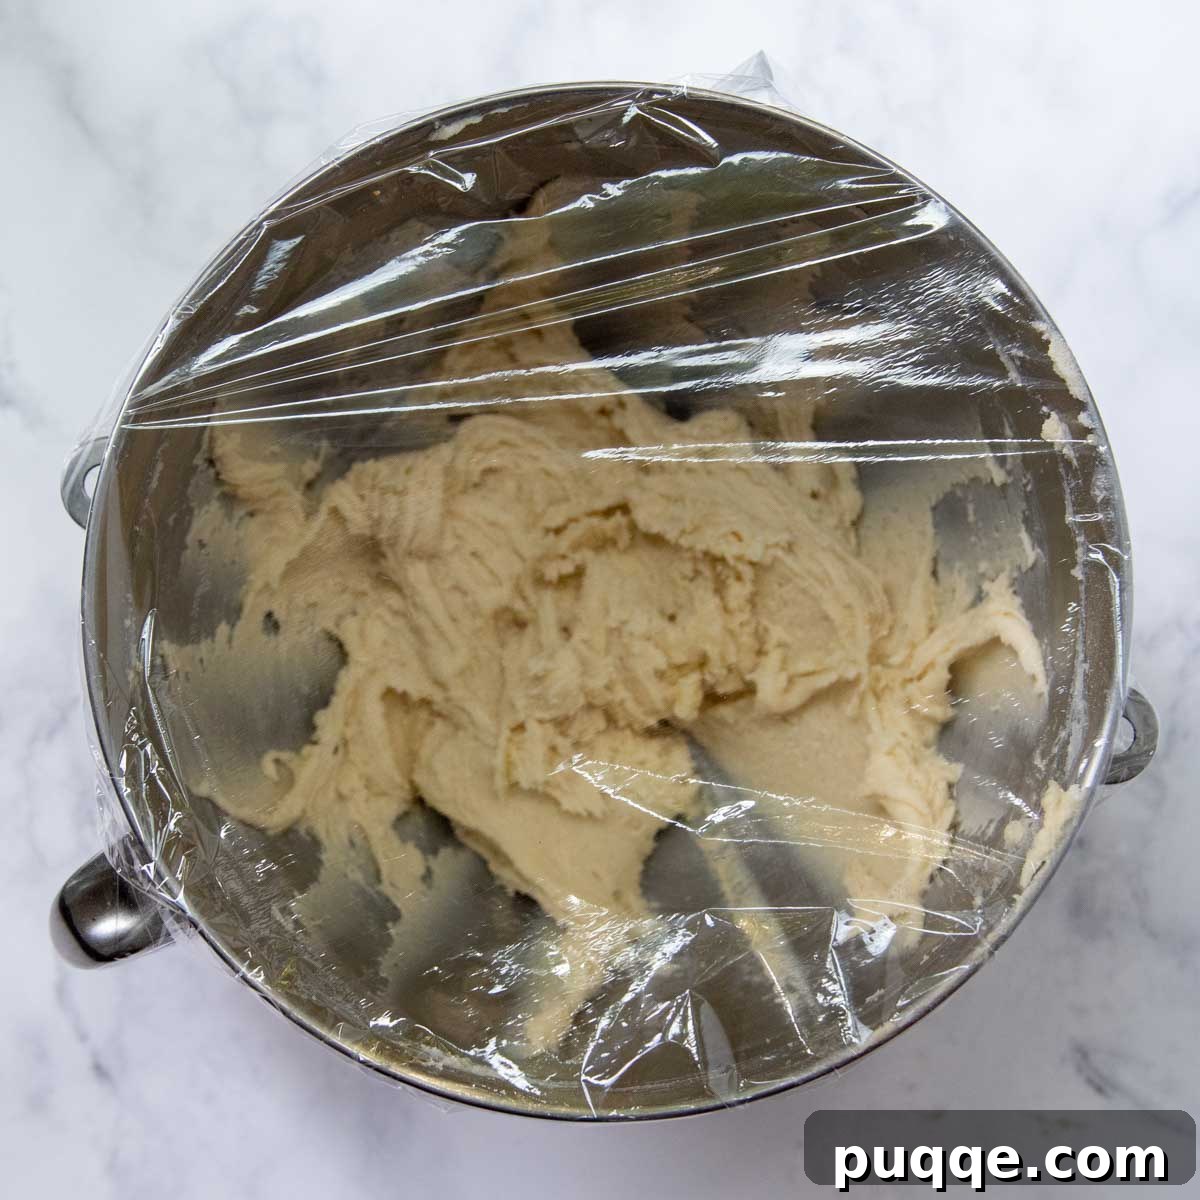
Now for the simplest part! Gently mix in your chosen gluten-free all-purpose flour blend and salt (remember to omit salt if using salted butter). Mix on low speed just until no dry streaks of flour remain; overmixing can lead to tougher cookies. Once combined, cover the bowl tightly with plastic wrap and refrigerate the dough for at least 1 hour. Chilling the dough is an absolutely critical step for gluten-free sugar cookies. It allows the flours to fully hydrate, preventing a gritty texture, and solidifies the fats, which makes the dough much easier to handle and roll out without sticking. If you’re short on time, you can also freeze the dough for 30-40 minutes for a quicker chill. The colder the dough, the better it will maintain its shape during rolling and baking.
Roll Gluten-Free Sugar Cookies Like A Pro
Let’s be honest, the trickiest part of making cut-out cookies, especially gluten-free ones, is often the rolling. But with these expert tips, you’ll roll your gluten-free sugar cookie dough like a seasoned professional, ensuring beautifully shaped cookies every time!
- Flour Your Surface Wisely: Generously sprinkle your rolling surface (a clean countertop or a silicone mat works wonderfully) with gluten-free flour. The key is to use enough to prevent sticking, but not so much that you dry out your delicate dough. I typically sprinkle some flour, then lightly rub my rolling pin with it as well. This creates a barrier without incorporating excessive flour into the dough.
- Work with Cold Dough in Batches: Always use cold dough directly from the refrigerator or freezer. Divide your chilled dough into two or three manageable portions. This keeps the rest of the dough cold while you work, preventing it from becoming too soft and sticky. If your dough is extremely cold and firm, let it sit out for just 5-10 minutes to become slightly more pliable, but still very cool to the touch.
- Consistent Thickness is Key: Roll the dough out to an even 1/4-inch thickness. A consistent thickness ensures that all your cookies bake evenly, preventing some from being underbaked while others are overdone. Using a rolling pin with adjustable guides can be incredibly helpful for this step.
- Gentle Cutting and Transferring: Press your cookie cutters firmly into the dough to get clean edges. For easy transfer, use a thin, wide spatula – preferably an offset spatula – to carefully lift the cut-out cookies from the rolling surface onto your prepared baking sheets. Handling them gently is crucial to preserve their shape, as gluten-free dough can sometimes be more delicate than traditional dough.
- Chill Before Baking: This is another non-negotiable step for perfectly shaped cookies! If you’re not baking your cut-out cookies immediately, transfer the baking sheets with the unbaked cookies to the refrigerator. Chilling the cookies again for at least 15-20 minutes (or even longer) before baking helps them maintain their shape beautifully and prevents spreading in the oven. Cold dough bakes up crispier and holds its form much better.
- Bake Until Just Set: Bake your cookies for 10-12 minutes in a preheated oven, or until the edges are just barely set and very lightly golden. Avoid overbaking, as this can lead to dry and crumbly gluten-free cookies. If you prefer an extra crispy cookie, you can let them bake for a few extra minutes, but keep a close eye on them to prevent burning.
Delicious Gluten-Free Sugar Cookie Icing Options
The perfect sugar cookie isn’t complete without the right frosting! While these gluten-free sugar cookies are delightful on their own, a touch of icing takes them to the next level. Here are some fantastic options to consider, depending on your desired look and taste:
- My Go-To Easy Sugar Cookie Icing: If you’ve ever struggled with runny icing that never sets, then my easy recipe for sugar cookie icing that hardens is your secret weapon. This simple yet effective recipe takes only about 5 minutes to prepare and dries to a beautiful, glossy sheen. The best part? It hardens enough for you to stack and store your cookies without fear of ruining your intricate designs. Plus, it uses ingredients you likely already have on hand, making it incredibly convenient. This is my absolute favorite for classic decorated cut-out cookies.
- Tangy Cream Cheese Icing: For a delightful twist on traditional sugar cookie flavor, consider using a cream cheese icing. The slight tanginess of cream cheese perfectly balances the sweetness of the cookie, adding another layer of depth. While it won’t harden to the same degree as royal icing, a well-made cream cheese frosting can still set enough for careful stacking.
- Precise Royal Icing: If you’re aiming for highly detailed, professional-looking cookie decorations, royal icing is the way to go. Its ability to dry completely hard and crisp, with precise lines and smooth finishes, makes it ideal for intricate designs and cookie artistry. Be aware that royal icing requires a bit more practice and specialized techniques like flooding to achieve the best results.
- Heavenly Fluffy Buttercream Frosting: For those who love a rich, airy, and decadent frosting, my heavenly fluffy buttercream frosting is an absolute dream. This frosting is incredibly smooth and light, offering a melt-in-your-mouth experience. You’ll only need about half of the full buttercream recipe to generously frost an entire batch of these sugar cookies. While it won’t dry hard like royal icing, it’s perfect for a softer, more indulgent cookie experience.
Important Notes About Gluten-Free Flours
Understanding gluten-free flour blends is crucial for successful gluten-free baking, as not all blends are created equal. The world of gluten-free flours can be a bit daunting, with various starches and flours used in different ratios. These variations significantly impact the texture, taste, and overall performance of your cookies. Generally, when baking gluten-free, it’s highly recommended to measure your flour by weight (grams) rather than volume (cups) for the most accurate and consistent results, as GF flours can pack differently.
Typically, I achieve the best gluten-free cookies using Cup4Cup all-purpose gluten-free flour blend, and I highly recommend it for this recipe due to its exceptional performance and consistency. However, if Cup4Cup isn’t available or you prefer other options, here’s a deeper dive into some other popular brands and what to expect:
- Cup4Cup All-Purpose Gluten-Free Flour Blend (Highly Recommended): This blend is a superstar in gluten-free baking. Its unique composition, often including cornstarch and milk powder, creates a texture very close to traditional wheat flour. It yields wonderfully soft, tender, and perfectly structured cookies that hold their shape beautifully. If you can find it, this is my top choice for this recipe.
- Bob’s Red Mill Gluten Free 1-to-1 Baking Flour: Another excellent and widely available GF flour blend known for its ease of use and reliable results. It’s designed to be a direct substitute for wheat flour in many recipes. While it generally produces a soft sugar cookie, I find the texture can sometimes be slightly denser compared to Cup4Cup. Nonetheless, it’s a solid choice that performs well.
- King Arthur Measure-for-Measure Gluten-Free Flour: When choosing King Arthur, it is absolutely essential to use their “Measure-for-Measure” variety. King Arthur also offers an “all-purpose GF flour” that does *not* include xanthan gum, which is a crucial binder in gluten-free baking that helps provide elasticity and structure. Without it, your cookies may be crumbly or spread too much. The Measure-for-Measure blend already contains xanthan gum, making it a reliable 1:1 substitute.
- Namaste Gluten-Free Flour Blend: This mix is a popular choice for many bakers, often favored for its economical price point and availability, particularly at stores like Costco. While cookies made with Namaste will hold their shape, some bakers (myself included) have noted that the taste can be somewhat gritty or have an earthy undertone. To improve the flavor and texture, a fantastic tip is to replace about 1/2 cup of the Namaste flour with an equal amount of finely ground almond flour. This addition can significantly enhance the richness and reduce any grittiness.
Experimenting with different blends can be a fun journey, but always be prepared for slight variations in texture and flavor. Sticking to high-quality, trusted 1:1 blends that include a binder like xanthan gum will generally give you the most consistent and delightful results for these gluten-free sugar cookies.
Save This Gluten-Free Cut-Out Cookie Recipe for Later!
Let’s be friends on Pinterest! I’m always sharing great recipes!
Did you make this recipe? I love hearing from you! Leave a star rating and comment below the recipe card. It helps others when searching for recipes and I appreciate feedback from our community. You will always hear back from me! -Melissa

No-Fail Gluten-Free Sugar Cookies (Cut Out)

Melissa Erdelac
24
10 mins
12 mins
Learn how to make the best gluten-free sugar cookies from scratch that are soft, easy to roll out, and taste amazing. Easy, homemade gluten-free cut-out cookies tastes so much like old-fashioned ones, no one will know the difference!
Pin Recipe
Rate This Recipe
Ingredients
- 1 cup (200 g) granulated sugar
- ½ cup (113 g) unsalted butter, softened
- 1 large egg, room temperature
- 1 tablespoon milk (or dairy-free alternative)
- 2 teaspoons vanilla extract, (or 1 tsp. almond extract + 1 tsp. vanilla)
- ¼ teaspoon salt, (omit if butter is salted)
- 2 cups (292 g) gluten-free all purpose flour, (Cup4Cup all purpose gluten-free flour highly recommended)
Equipment
-
Baking Sheets
-
Stand Mixer
-
Cup4Cup Gluten-Free Flour
Instructions
- In a large bowl, cream together the sugar and butter until very light and fluffy. This should take about 3 minutes for the mixture to be fully creamed.
- Add the egg, milk, vanilla, and salt to the butter/sugar mixture. Beat again until very well combined. It may look separated and curdled at first, but as it beats longer, it will blend together smoothly.
- Add the flour and beat at low speed until just combined, being careful not to overmix. Cover the bowl with plastic wrap and refrigerate for at least 1 hour or freeze for 30 minutes. The dough should be very cold throughout.
- Preheat the oven to 350°F (175°C). Line baking sheets with parchment paper for best results. Otherwise, leave baking sheets ungreased. Set aside.
- Sprinkle gluten-free flour onto a rolling surface or silicone mat. Use half the cold dough and roll out to about 1/4″ thickness. TIP: If the dough is very cold, you may have to let it sit out 5-10 minutes for the dough to become more pliable. Cut out the dough with cookie cutters and use a spatula to transfer the cut-out cookies to prepared baking sheets. Repeat with all the remaining dough. TIP: If you plan on baking the cookies at the same time, store the baking sheets with cut-out cookies in the refrigerator until ready to bake. Warmed dough spreads more during baking.
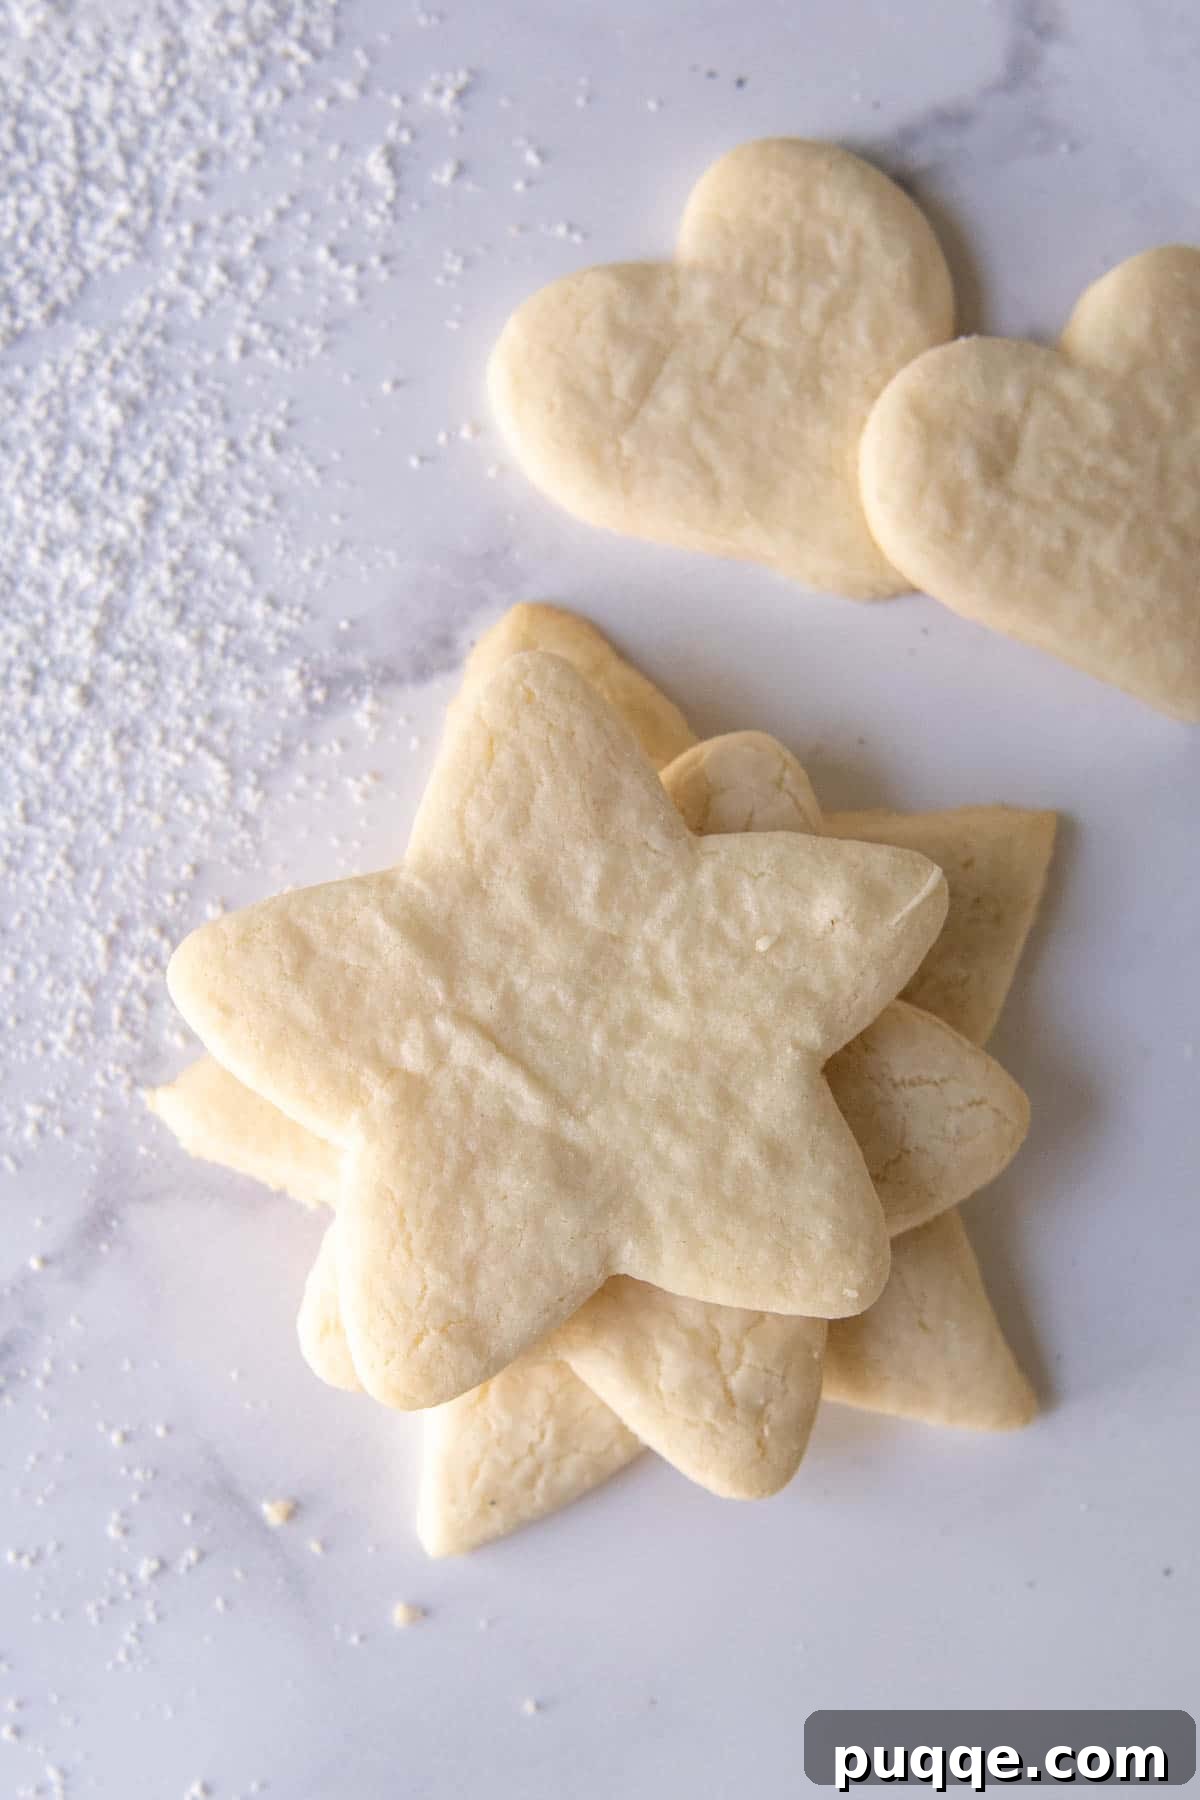
- Bake for 10-12 minutes, or until cookies are set and edges are very lightly browned. Let the cookies cool for 5 minutes on the baking sheets before transferring to wire racks to cool completely. After cookies have cooled, decorate with your favorite sugar cookie icing. Store in an airtight container for up to 3 days.
Notes and Expert Tips
Funfetti Sprinkle Cookies Variation
For a fun, colorful twist, add 2/3 cup gluten-free sprinkles (ensure they are *not* nonpareils, which can bleed color) to the dough after mixing in the dry ingredients. Scoop the dough using a large 2-tablespoon cookie scoop and roll into balls. If desired, roll the tops in additional sprinkles. Flatten slightly with the bottom of a glass.
Transfer the balls to a parchment-lined plate or small lined baking tray, cover, and refrigerate until well chilled, about 1 hour (can freeze for faster chilling if needed). Preheat oven to 350℉ (175°C) and position balls 2 inches apart on parchment or silicone-lined baking sheets. Bake for 13-15 minutes, or until bottoms are very lightly browned, but middles are still soft. Cool on baking sheets for 10 minutes before transferring to a wire rack. This variation makes approximately 20 cookies.
Expert Tips and Tricks for Success
- The cookie dough can be made up to 1 day ahead of time. Simply store it covered tightly in the refrigerator until you’re ready to bake.
- Ensure the dough is very cold before rolling and cutting out the cookies. This is paramount for preventing spread and helping them hold their intricate shapes during baking. However, if the dough is too stiff, let it sit out for 5-10 minutes to soften slightly before rolling for easier handling.
- Customize your cookie texture: Prefer crispier cookies? Roll out the dough slightly thinner. If you enjoy a softer, chewier cookie, roll it out a bit thicker.
- If you plan on cutting out all your cookies first, store the baking sheets holding the unbaked gluten-free cookies in the refrigerator until ready to bake. Baking from a cold state significantly reduces spreading.
- For quicker chilling, freeze the dough for 30 minutes. Remove it from the freezer before the dough freezes completely solid.
- For dairy-free cookies, simply replace the unsalted butter with your preferred vegan butter sticks and the milk with a non-dairy substitute like almond or soy milk.
Freezing Gluten-Free Sugar Cookies
Freezing Baked Sugar Cookies:
Prepare the gluten-free sugar cookie recipe as directed, allowing the cookies to cool completely. Cookies may be frozen either unfrosted or with frosting. If cookies are frosted, ensure the icing has completely set and hardened before stacking to prevent damage. Place the cooled cookies in a large airtight container, or layer them with parchment paper in a freezer-safe bag. For extra protection against freezer burn, you can wrap the container with an additional layer of plastic wrap or aluminum foil. Freeze for up to 2 months.
To serve, allow the cookies to thaw for about one hour at room temperature before frosting (if unfrosted) or enjoying.
Freezing Unbaked Sugar Cookies:
Prepare the cut-out cookie dough as directed in the recipe. When it’s time to chill the dough, transfer it to a freezer-safe ziplock bag, pressing out any excess air to prevent freezer burn. You can freeze the dough in a solid block for up to 2 months. When ready to bake, thaw the dough in the refrigerator overnight before rolling and cutting out.
Alternatively, you can roll out the cookie dough and cut out your desired shapes as directed. Place the raw cut-out cookies on parchment paper-lined baking sheets and transfer the baking pans directly to the freezer. Once the cookies have hardened (typically after 30-60 minutes), carefully remove them from the parchment and stack them in freezer-safe ziplock bags or airtight containers, layering with parchment paper to prevent sticking. Freeze, laying flat, for up to 2 months. When you’re ready to bake, transfer the frozen cookie cut-outs back to lined baking sheets. Bake from frozen, adding an extra 2-3 minutes to the recommended baking time.
Recipe adapted from MOMables.
Nutrition Information (per cookie)
Calories:
103
kcal
,
Carbohydrates:
16
g
,
Protein:
1
g
,
Fat:
4
g
,
Saturated Fat:
2
g
,
Cholesterol:
17
mg
,
Sodium:
61
mg
,
Potassium:
3
mg
,
Fiber:
1
g
,
Sugar:
9
g
,
Vitamin A:
128
IU
,
Calcium:
10
mg
,
Iron:
1
mg
Did you make this recipe?
Please leave a star rating and review below. It helps others when searching for recipes and I LOVE feedback!