
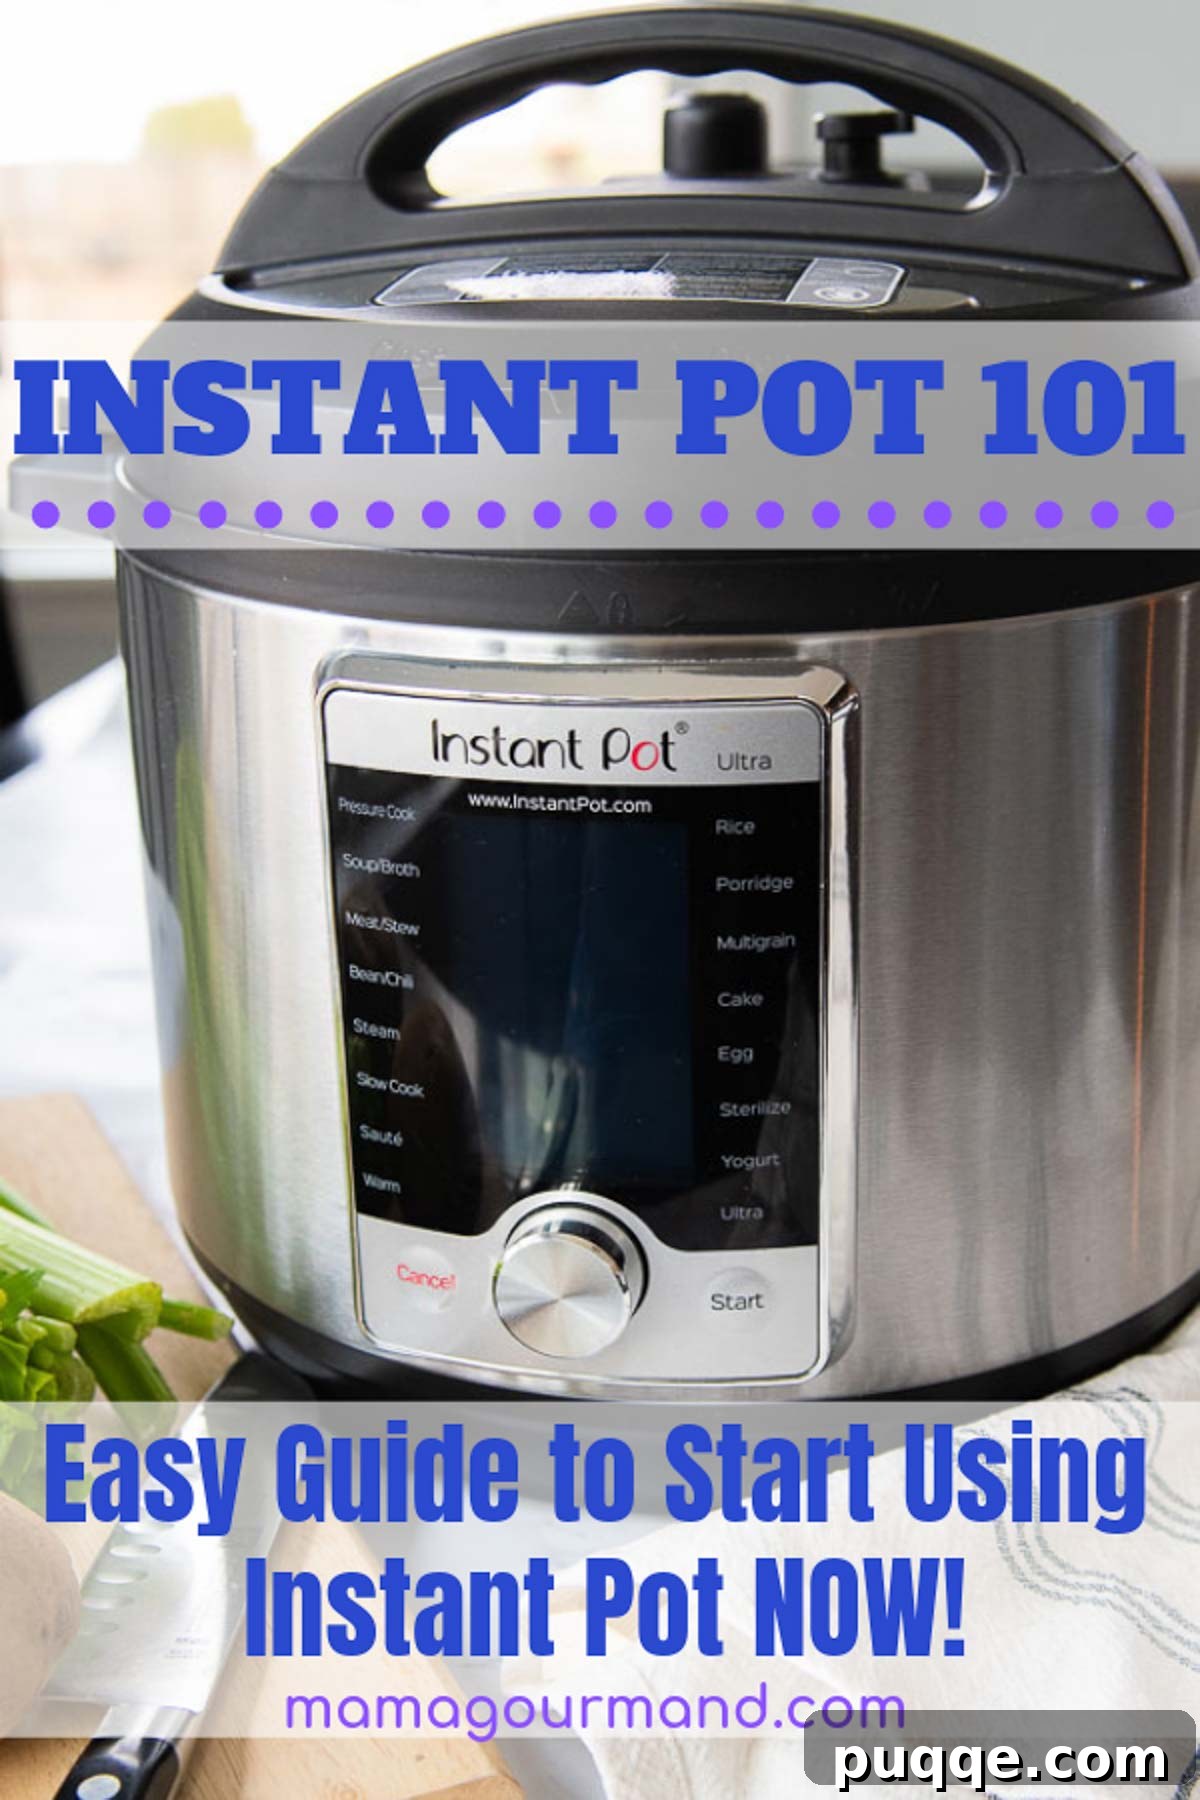
Are you the proud new owner of an Instant Pot, yet it’s still sitting in its box, intimidating you with its array of buttons and functions? You’re not alone! Many people feel overwhelmed by this versatile kitchen appliance, but with the right guidance, you’ll be cooking delicious meals in minutes. This comprehensive guide is designed specifically for beginners, offering clear, step-by-step instructions, essential tips, and troubleshooting advice to help you master your Instant Pot with confidence.
From understanding basic operation to mastering pressure release techniques and deciphering button functions, we’ll transform you from an Instant Pot novice into a culinary expert. Get ready to unlock a world of quick, convenient, and incredibly flavorful meals!
You’ve heard the rave reviews: “You need an Instant Pot!” and “I love my Instant Pot!” Now that you finally have one, it’s time to move past the initial hesitation and discover why this appliance is a true game-changer in the kitchen. In just a few minutes, you’ll gain the knowledge and confidence to start using your pressure cooker and prepare to be amazed by its efficiency and results.
Understanding Your Instant Pot: More Than Just a Pressure Cooker
Before diving into the cooking process, let’s briefly understand what makes the Instant Pot so revolutionary. It’s a multi-cooker, combining the functions of a pressure cooker, slow cooker, rice cooker, steamer, sauté pan, yogurt maker, and more, all in one compact device. Its primary function, pressure cooking, uses steam pressure to cook food significantly faster than traditional methods, locking in nutrients and flavors.
Why Embrace Instant Pot Cooking?
- Speed: Drastically reduce cooking times for everything from tough cuts of meat to dried beans and grains.
- Convenience: Enjoy one-pot meals, minimizing cleanup.
- Flavor & Nutrition: Pressure cooking traps moisture and nutrients, resulting in incredibly tender, flavorful dishes.
- Energy Efficiency: Cooks faster, often using less energy than conventional ovens or stovetops.
- Versatility: With multiple functions, it can replace several kitchen appliances, saving counter space.
First Things First: The Initial Water Test
Before you cook your first meal, performing a “water test” is highly recommended. This simple step helps you familiarize yourself with the Instant Pot’s basic operation, ensures it’s working correctly, and builds your confidence without the risk of ruining food. Consult your Instant Pot manual for specific instructions for your model, but generally, it involves adding 2-3 cups of water, sealing the lid, and running it on High Pressure for 2-5 minutes. This allows you to witness the pressure building, the float valve rising, and the pressure releasing process firsthand.
Instant Pot Basic Instructions for Beginners
Ready to start cooking? Follow these fundamental steps to operate your Instant Pot:
- Prepare Ingredients in the Inner Pot: Begin by placing all your ingredients, including the required liquid, into the stainless steel inner pot. Remember, many recipes call for using the SAUTÉ function first to brown meats, onions, or garlic before adding liquids and pressure cooking. When sautéing, the lid is typically not in place.
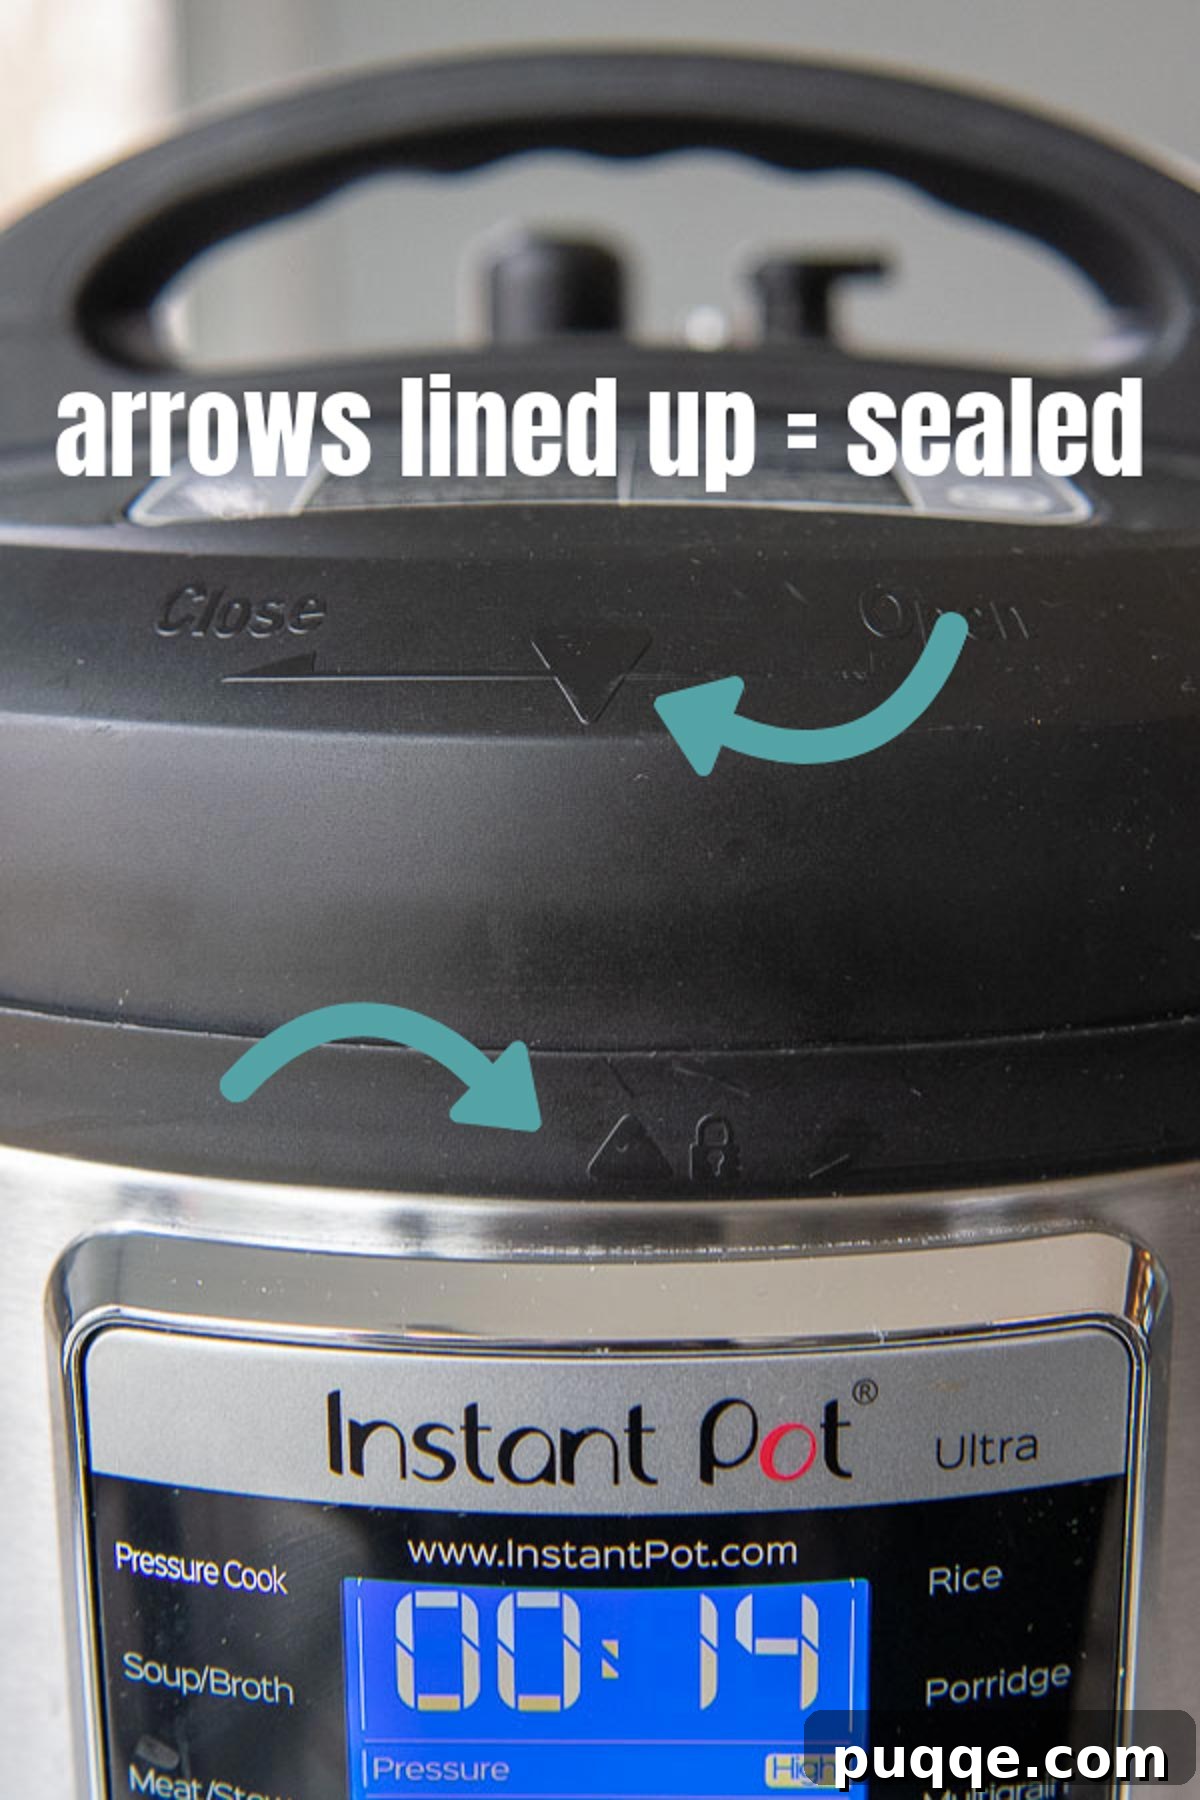
- Secure the Lid and Seal the Valve: Carefully place the lid on the Instant Pot and turn it clockwise until it locks into position. You’ll usually hear a chime indicating it’s sealed. Next, ensure the steam release valve (the small knob on top of the lid) is in the “SEAL” position. For some newer Instant Pot models, the valve automatically seals when the lid is closed, but it’s always good to double-check.
- Select Cooking Function and Time: Choose your desired cooking program. For most recipes requiring “high pressure,” you’ll select the MANUAL or PRESSURE COOK button. Use the +/- buttons to adjust the cooking time as specified by your recipe. Once set, the Instant Pot will typically display “On” or begin heating.
- Allow Pressure to Build: After setting the time, the Instant Pot will begin to heat up and build pressure internally. This phase, known as the “preheating cycle,” can take anywhere from 10 to 40 minutes, depending on the volume and temperature of the food inside. During this time, the float valve will rise, indicating that full pressure has been reached. Once pressure is fully built, the Instant Pot will beep once, and the display will begin counting down the set cooking time.
- Cooking Cycle Completion: When the set cooking time has expired, the Instant Pot will beep several times and automatically switch to the “KEEP WARM” setting. At this point, the cooking is complete, but the pressure inside still needs to be released before you can safely open the lid. This leads us to the crucial step of pressure release.
- Release Pressure and Open Lid Safely: Pressure release is a critical step. Once the pressure is fully released, the float valve will drop back down. Only then can you carefully turn the lid counter-clockwise to unlock and remove it. If the lid does not turn easily, it means there’s still residual pressure; press the pressure release valve again to ensure all remaining steam has escaped.

Mastering Pressure Release: Quick Release vs. Natural Release
The method you choose for releasing pressure significantly impacts the final texture and cooking of your food. During pressure cooking, extreme steam pressure builds within the pot, making food incredibly tender and delicious in a fraction of the time. To safely remove the lid, this pressure must be released. The float valve will only drop when the internal pressure equalizes with the ambient air pressure, achievable through either Quick Release (QR) or Natural Pressure Release (NPR).
Quick Release (QR)
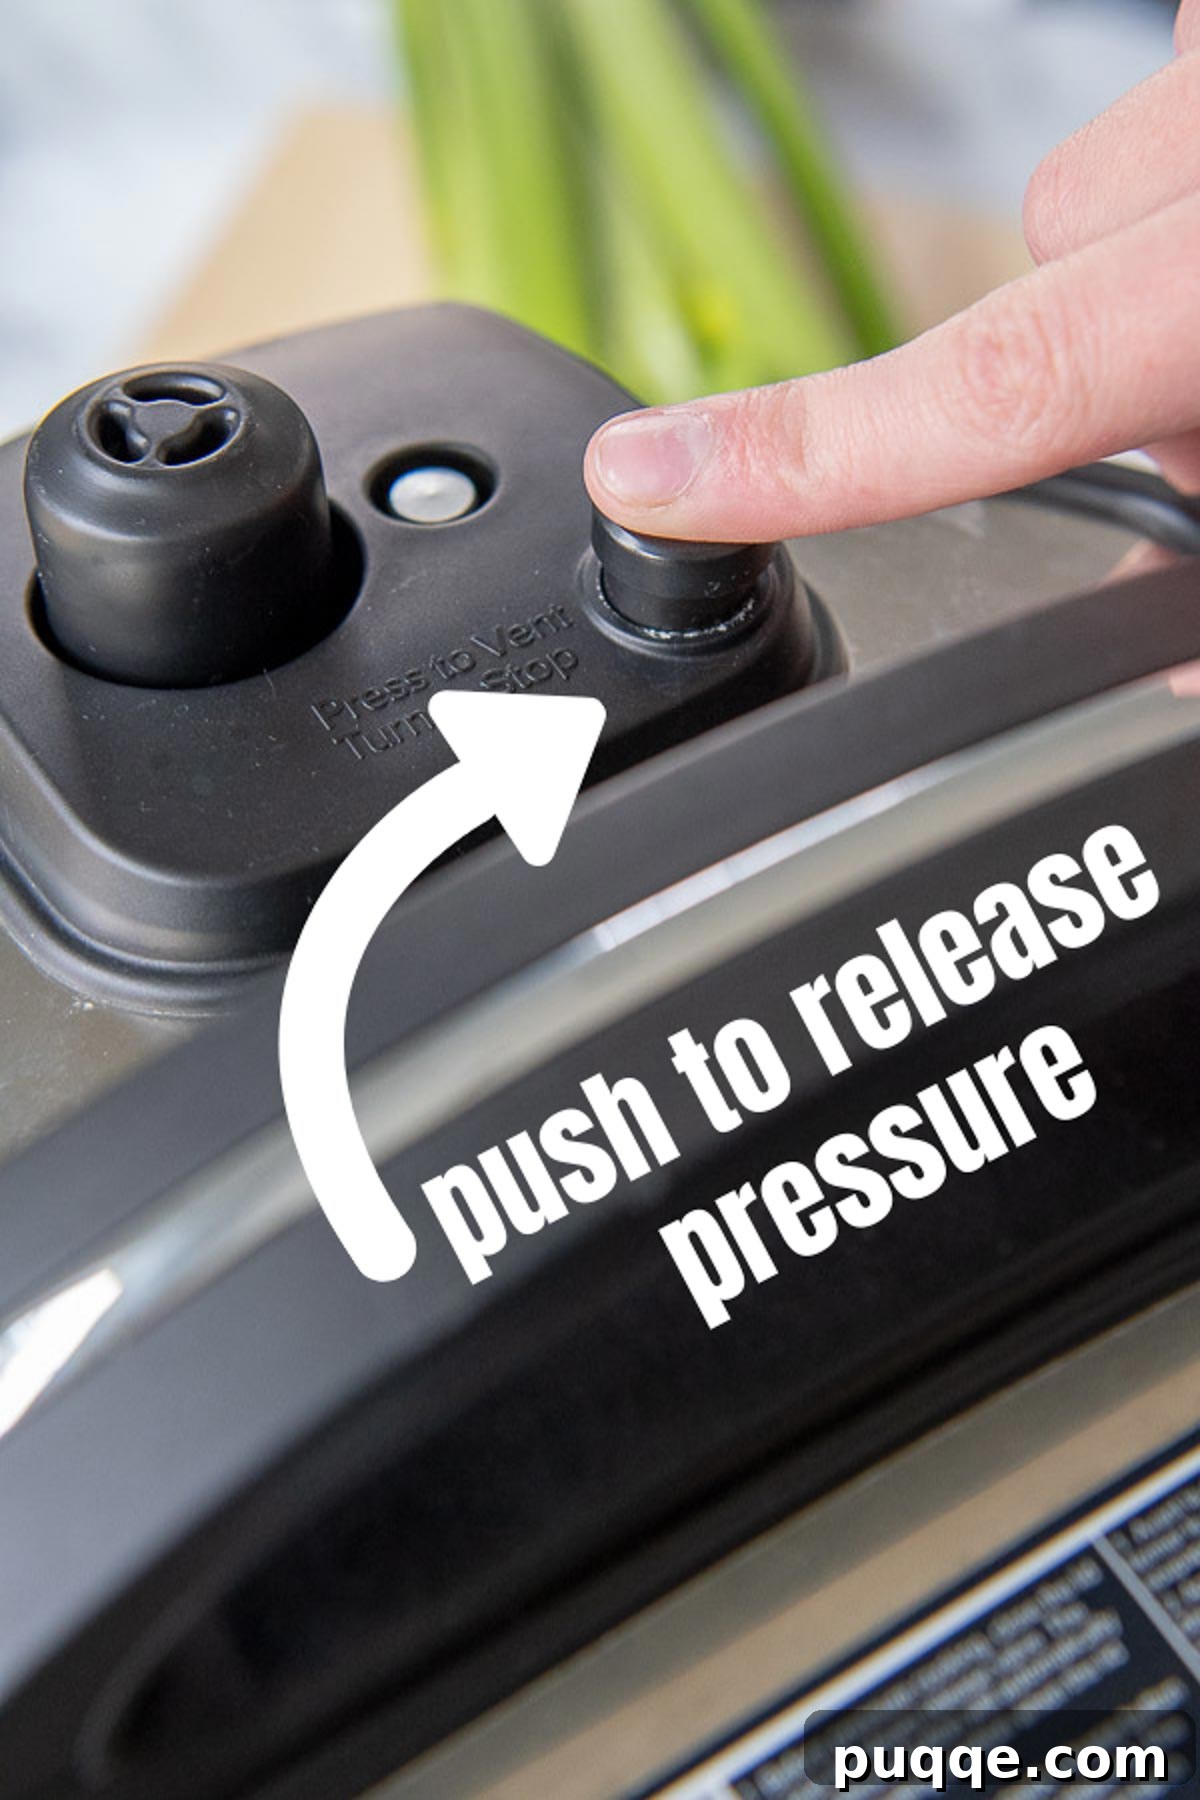
How to do it: When the cooking time ends and the Instant Pot switches to “KEEP WARM,” carefully press or turn the steam release valve to the “VENTING” position. Hot steam will rapidly escape from the valve. Many users prefer to use the handle of a wooden spoon or a long-handled utensil to activate the valve, preventing direct contact with the hot, fast-releasing steam. You don’t need to hold it down; simply activate it and let the steam escape until the float valve drops.
When to use it: Quick release is ideal for foods that can easily overcook or become mushy, such as delicate vegetables (broccoli, asparagus), pasta, and fish. It immediately stops the cooking process once the timer goes off, preserving texture and color.
Natural Pressure Release (NPR)
How to do it: For a natural release, simply do nothing! Once the cooking cycle finishes and the Instant Pot switches to “KEEP WARM” (or “CANCEL” or turns off, depending on the model/settings), leave the steam release valve in the “SEALING” position. The pressure will gradually dissipate on its own as the pot cools down. This can take anywhere from 5 to 40 minutes, depending on the volume and type of food inside. You’ll know it’s complete when the float valve drops down completely, and the lid can be easily twisted open.
When to use it: Natural release is generally used for dishes with large volumes of liquid (like soups or stews), foamy foods (oatmeal, beans), or ingredients that benefit from a slower cooking finish, such as meats, poultry, and grains. The gradual pressure reduction helps prevent food from boiling over and allows meats to become even more tender by resting in the residual heat.
Some recipes might specify a “timed natural release,” for example, “Natural release for 10 minutes, then quick release.” This technique allows for a controlled finishing period before quickly releasing the remaining pressure.
Essential Instant Pot Tips for Success
To ensure safe and successful pressure cooking experiences, keep these vital tips in mind:
- Always Include Liquid: A minimum of 1 cup of thin liquid (water, broth, juice) is typically required for the Instant Pot to build pressure safely and efficiently. Some recipes may call for slightly less if ingredients themselves release significant moisture (e.g., chicken, certain fruits, high-water content vegetables).
- Steam Release Safety: When performing a quick release, always direct the steam release valve away from your face, hands, kitchen cabinets, and any overhead obstructions. The steam is extremely hot and can cause burns or damage surfaces.
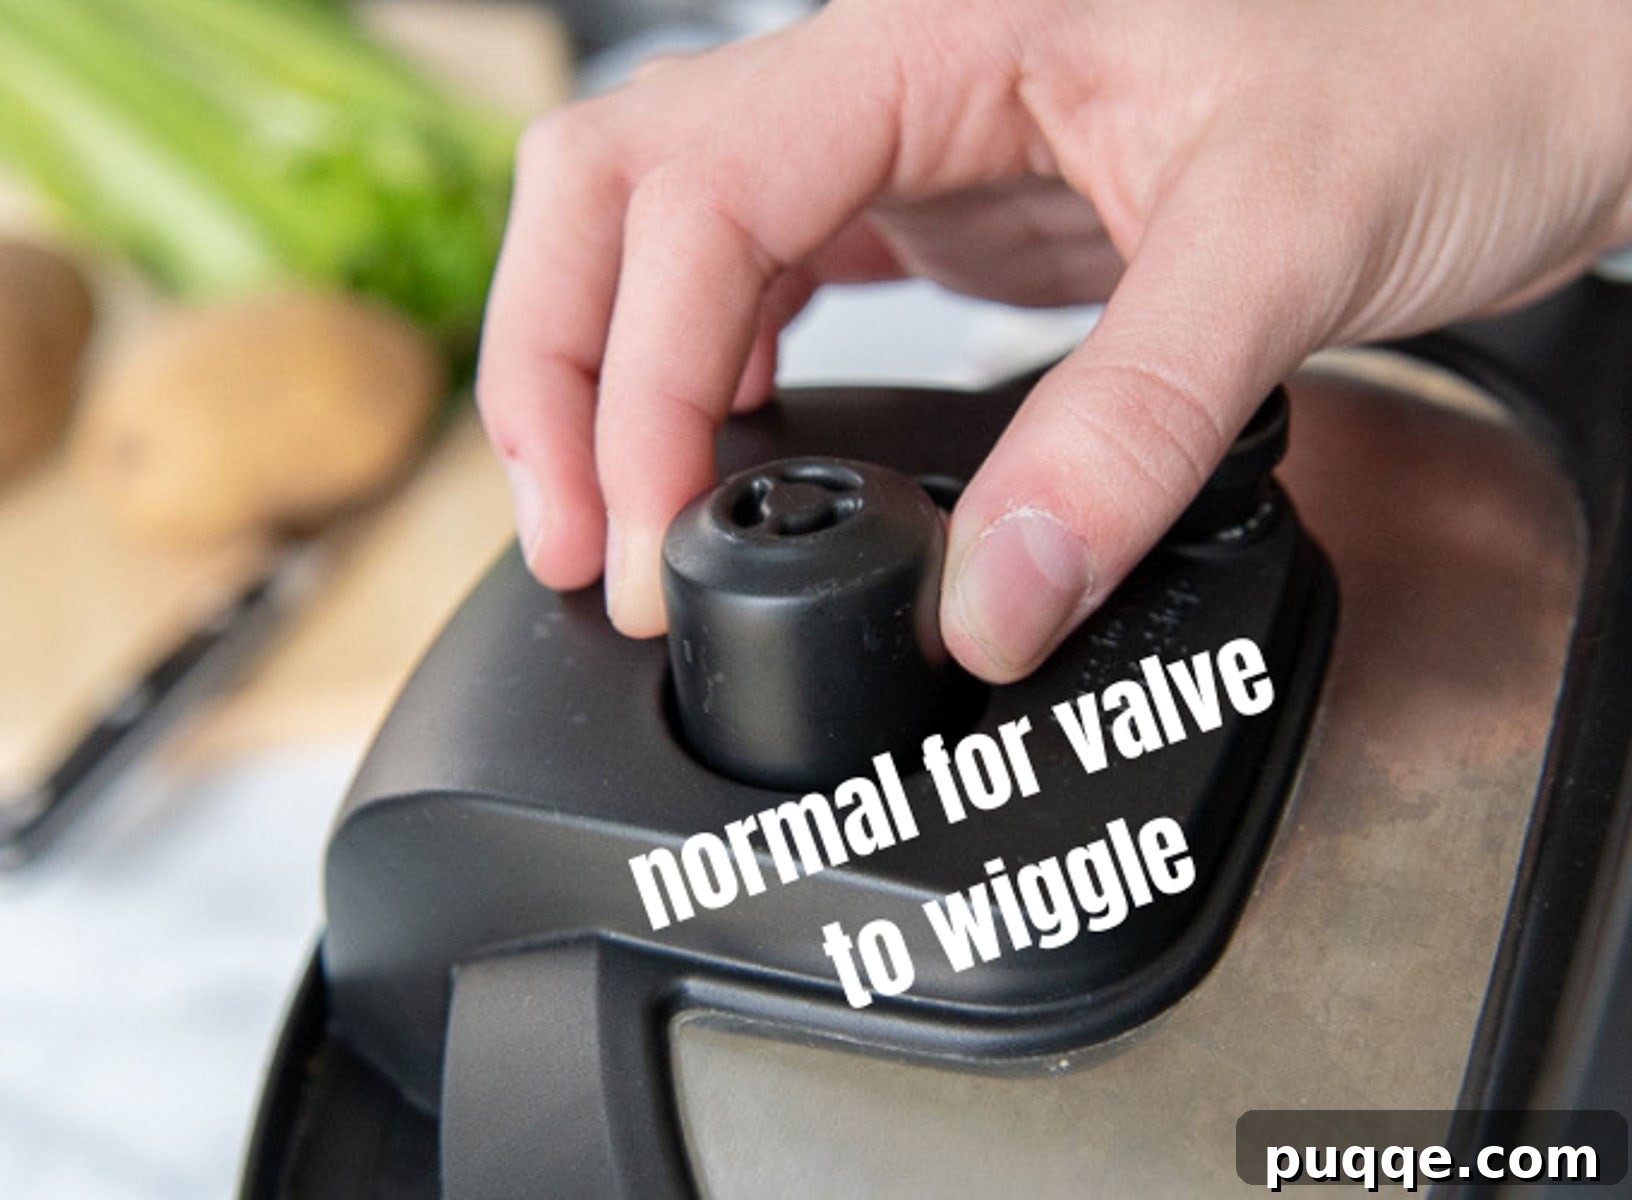
- Normal Steam During Pressure Build-Up: It’s completely normal for a small amount of steam to escape from the steam release valve and around the float valve as the Instant Pot builds pressure. This will stop once full pressure is reached, and the float valve locks into its upward position.
- Observe Fill Lines: Never fill your Instant Pot more than 2/3 full for most foods. For foods that expand during cooking, such as rice, dry beans, or pasta, do not fill beyond the 1/2 mark to prevent blockages and ensure proper cooking.
- Maintain the Condensation Collector: The small cup on the back or side of your Instant Pot is the condensation collector. It gathers excess steam and liquid. Periodically check, empty, and clean it to prevent spills and maintain hygiene.
- Check the Sealing Ring: Before each use, inspect the silicone sealing ring inside the lid. Ensure it’s clean, properly seated, and free of any tears or damage. A properly installed, clean ring is crucial for the pot to seal and build pressure.
- Cleanliness is Key: Regularly clean the inner pot, lid (including the steam release valve and float valve), and sealing ring. Food particles can impede sealing and affect performance.
Instant Pot FAQ & Troubleshooting Common Issues
The Instant Pot Will Not Come to Pressure
It’s normal for an electric pressure cooker to take varying amounts of time to come to pressure. Factors like the quantity and temperature of the contents (e.g., frozen meat will take longer) influence this. If it seems excessively long (over 20-30 minutes) and pressure isn’t building, check these points:
- Sealing Ring: Perform a quick release (if any pressure has built) and carefully remove the lid. Is the silicone sealing ring correctly locked into place all around the inside of the lid? Ensure it’s not twisted or dislodged.
- Steam Release Valve: Is the steam release valve securely placed on the lid and turned to the “SEAL” position? It should have a slight wobble but not be loose enough to fall off easily.
- Fill Level: Is the inner pot overfilled? Check the maximum fill line; it should not exceed two-thirds full for most foods, or half full for expanding foods.
- Sufficient Liquid: Confirm your recipe includes at least the minimum required liquid (usually 1 cup).
Safe Pressure Release Techniques
When it’s time to release pressure, always prioritize safety. As mentioned, many users find it helpful to use a long-handled wooden spoon or similar utensil to push down or turn the valve, avoiding direct contact with the hot steam. Always point the valve away from your face, body, and any delicate kitchen surfaces or cabinets. Aiming it towards a kitchen exhaust fan operating at full blast can also help dissipate the steam more quickly and safely.
Why is Steam Coming Out of the Valve During Cooking?
If steam is continuously escaping from the steam release valve *before* the Instant Pot comes to full pressure and the float valve rises, this is usually normal. It indicates that air is being purged from the pot as pressure builds. Once full pressure is achieved, the float valve will rise and lock, and the steam should stop escaping from the valve. However, if steam continues to escape from the sides of the lid, it suggests that the lid is not properly sealed. In this case, turn off the unit, perform a quick release, and check under the lid to ensure the silicone ring and float valve are correctly in place and free of any food particles.
Why is Liquid Sputtering Out of the Valve?
If liquid (not just steam) is sputtering or spraying from the steam release valve, it typically points to one of two issues: the Instant Pot is either too full, or you’re cooking foods prone to frothing. Never fill the Instant Pot more than 2/3 full. For foods that commonly froth or foam, such as pasta, soups, applesauce, beans, grains, and potatoes, ensure the pot is not more than 1/2 full. Additionally, adding 1-2 tablespoons of oil to the liquids can often help suppress foaming.
Instant Pot Stopped Cooking and LCD Displays “BURN.”
The “BURN” message is a safety feature indicating that the bottom of the inner pot is overheating, likely due to food scorching. This often happens with thick sauces, tomato-based dishes, or when there isn’t enough liquid. If you see this, immediately perform a quick release, remove the lid, and stir the contents. Check for anything stuck to the bottom. If food is stuck, gently scrape it off, add a bit more liquid if needed, and then resume cooking for the remaining time. Layering ingredients with liquids at the bottom and thicker items on top can help prevent this issue.
Can I Cook Frozen Meats in an Instant Pot?
Yes, the Instant Pot is excellent for cooking certain frozen meats, offering incredible convenience. Frozen chicken breasts, for example, cook beautifully and quickly. However, large, solid frozen roasts or whole chickens may not cook evenly or within a reasonable time, as the core will remain frozen for too long, potentially leading to uneven cooking. Always add extra cooking time when cooking from frozen, typically 50% more than for thawed meat.
Undercooked Meat / Pasta / Vegetables
If your food isn’t cooked to your liking after the initial cycle, you have a couple of options:
- For Fruits, Veggies, or Pasta: If they are just slightly undercooked, you can use the SAUTÉ or SIMMER function (without the lid) to finish cooking them on the stovetop setting. Be careful not to overcook.
- For Meats: If meat isn’t tender enough or hasn’t reached the desired internal temperature, simply re-seal the lid, select HIGH pressure, and add an additional 5-10 minutes of cooking time. If you have vegetables in the pot that are already cooked, you can remove them and keep them warm while the meat finishes.
Thinning or Thickening Sauces
Achieving the perfect sauce consistency is easy with the Instant Pot after pressure cooking:
- To Thicken: After releasing pressure and removing the lid, select the SAUTÉ or SIMMER function. You can either let the sauce simmer uncovered to reduce and naturally thicken, or create a cornstarch slurry. Mix equal parts cornstarch with cold water (e.g., 2 tablespoons cornstarch with 2 tablespoons water) until smooth. Gradually stir this mixture into the simmering sauce until it reaches your desired thickness.
- To Thin: If your sauce is too thick, simply stir in additional liquid—water, broth, or any liquid specified in your recipe—until it reaches the desired consistency.
Demystifying Instant Pot Buttons: Your Control Panel Guide
The Instant Pot’s control panel, with its multitude of buttons, can seem daunting, but most are simply pre-programmed convenience settings, much like the popcorn button on a microwave. Understanding a few core buttons will empower you to use your Instant Pot effectively for almost any recipe.
- PRESSURE COOK / MANUAL: This is your most important button. It’s used for all recipes that specify “cook at high pressure.” Press it, and then use the +/- buttons to set your desired cooking time. This button gives you full control over the pressure cooking duration.
- SAUTÉ / SIMMER: This versatile button is used both before and after pressure cooking.
- Before: Use High SAUTÉ heat to brown meats, sauté vegetables, or reduce liquids before pressure cooking.
- After: Use Low SAUTÉ or SIMMER heat (often activated by pressing SAUTÉ multiple times) to thicken sauces, cook delicate ingredients like pasta or vegetables, or simply keep food warm without pressure.
- YOGURT: A fantastic feature for making incredibly easy and delicious homemade yogurt. If you’re a yogurt lover, this button will become your best friend. Many guides, including this one on Instant Pot yogurt, offer detailed instructions to help you create creamy, fresh yogurt.
- MEAT/STEW, BEAN/CHILI, RICE, POULTRY, MULTIGRAIN: These are preset programs designed for specific food types. They typically cook at HIGH pressure for a pre-programmed time optimized for that food. Always check the default time and adjust it using the +/- buttons according to your specific recipe and desired doneness before pressing START. For example, the RICE button often defaults to a low-pressure setting, perfect for white rice.
- KEEP WARM / CANCEL: The KEEP WARM function automatically turns on after most cooking cycles, maintaining the food’s temperature. The CANCEL button stops any active cooking program or cancels the KEEP WARM function.
- DELAY START: This ingenious feature allows you to prepare your ingredients, place them in the pot, and then set a delayed start time. The Instant Pot will automatically turn on and begin the cooking process at your specified future time, perfect for meal prepping and coming home to a freshly cooked dinner.
Instant Pot Cooking Times Reference
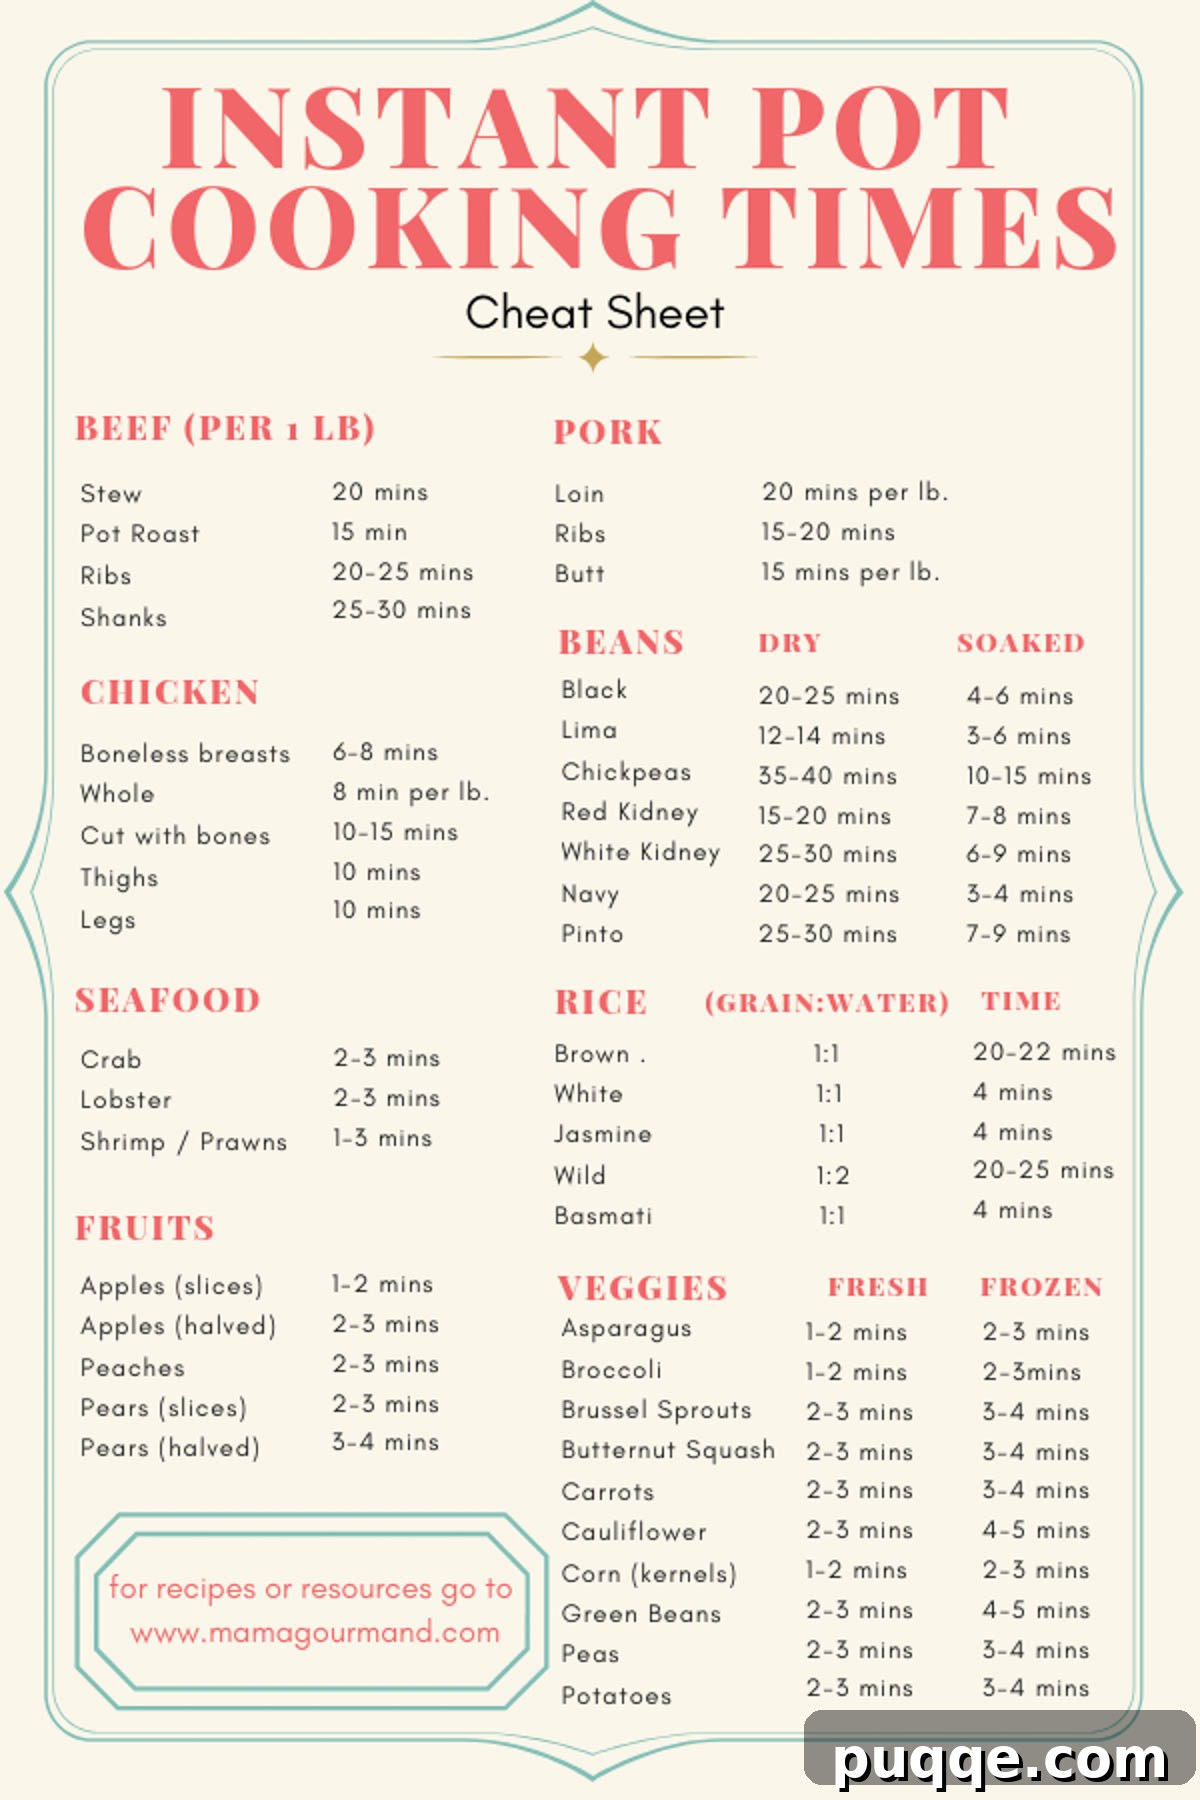
Understanding approximate cooking times is key to successful Instant Pot cooking. While the image below provides a visual reference, remember that actual times can vary based on food size, cut, and initial temperature. Always refer to a trusted recipe for precise timings. For common items, chicken breasts might cook in 6-8 minutes, rice in 3-5 minutes, and dried beans in 20-30 minutes, all followed by appropriate pressure release methods.
Discovering Delicious Instant Pot Recipes
Now that you’re armed with the knowledge of how to operate your Instant Pot, it’s time for the most exciting part: cooking! The possibilities are endless, from hearty soups and tender meats to quick pasta dishes and flavorful sides. Here are some fantastic recipes to get you started and inspire your culinary adventures:

- Broccoli Cheese Soup – Thick, creamy, and healthy soup prepared in only 15 minutes!
- Cincinnati Chili – The perfect medley of unexpected spices served over spaghetti with piles of cheddar cheese.
- Cilantro Lime Chicken – Tender, seasoned cilantro chicken with a creamy, lime sauce.
- BBQ Pulled Chicken – Takes two simple steps, five minutes to prepare an effortless dinner or party food.
- Creamy Buffalo Chicken Chili – Award-winning with the perfect amount of spice, a smooth creamy base, and lots of tender chicken.
- Corned Beef and Cabbage – Corned Beef brisket flavored with brown sugar, mustard, and apple juice.
- Beef Stroganoff – Tender, fall-apart beef in a creamy, comforting sauce.
- Zuppa Toscana – Better than Olive Garden’s, made in minutes!
Conclusion: Your Instant Pot Journey Begins Now!
You’ve now got all the essential information to confidently unbox your Instant Pot and begin creating culinary masterpieces. Don’t let the initial intimidation hold you back from discovering the incredible convenience and versatility this appliance offers. With a little practice, your Instant Pot will quickly become an indispensable tool, saving you time and effort while delivering delicious, healthy meals. Happy cooking!