
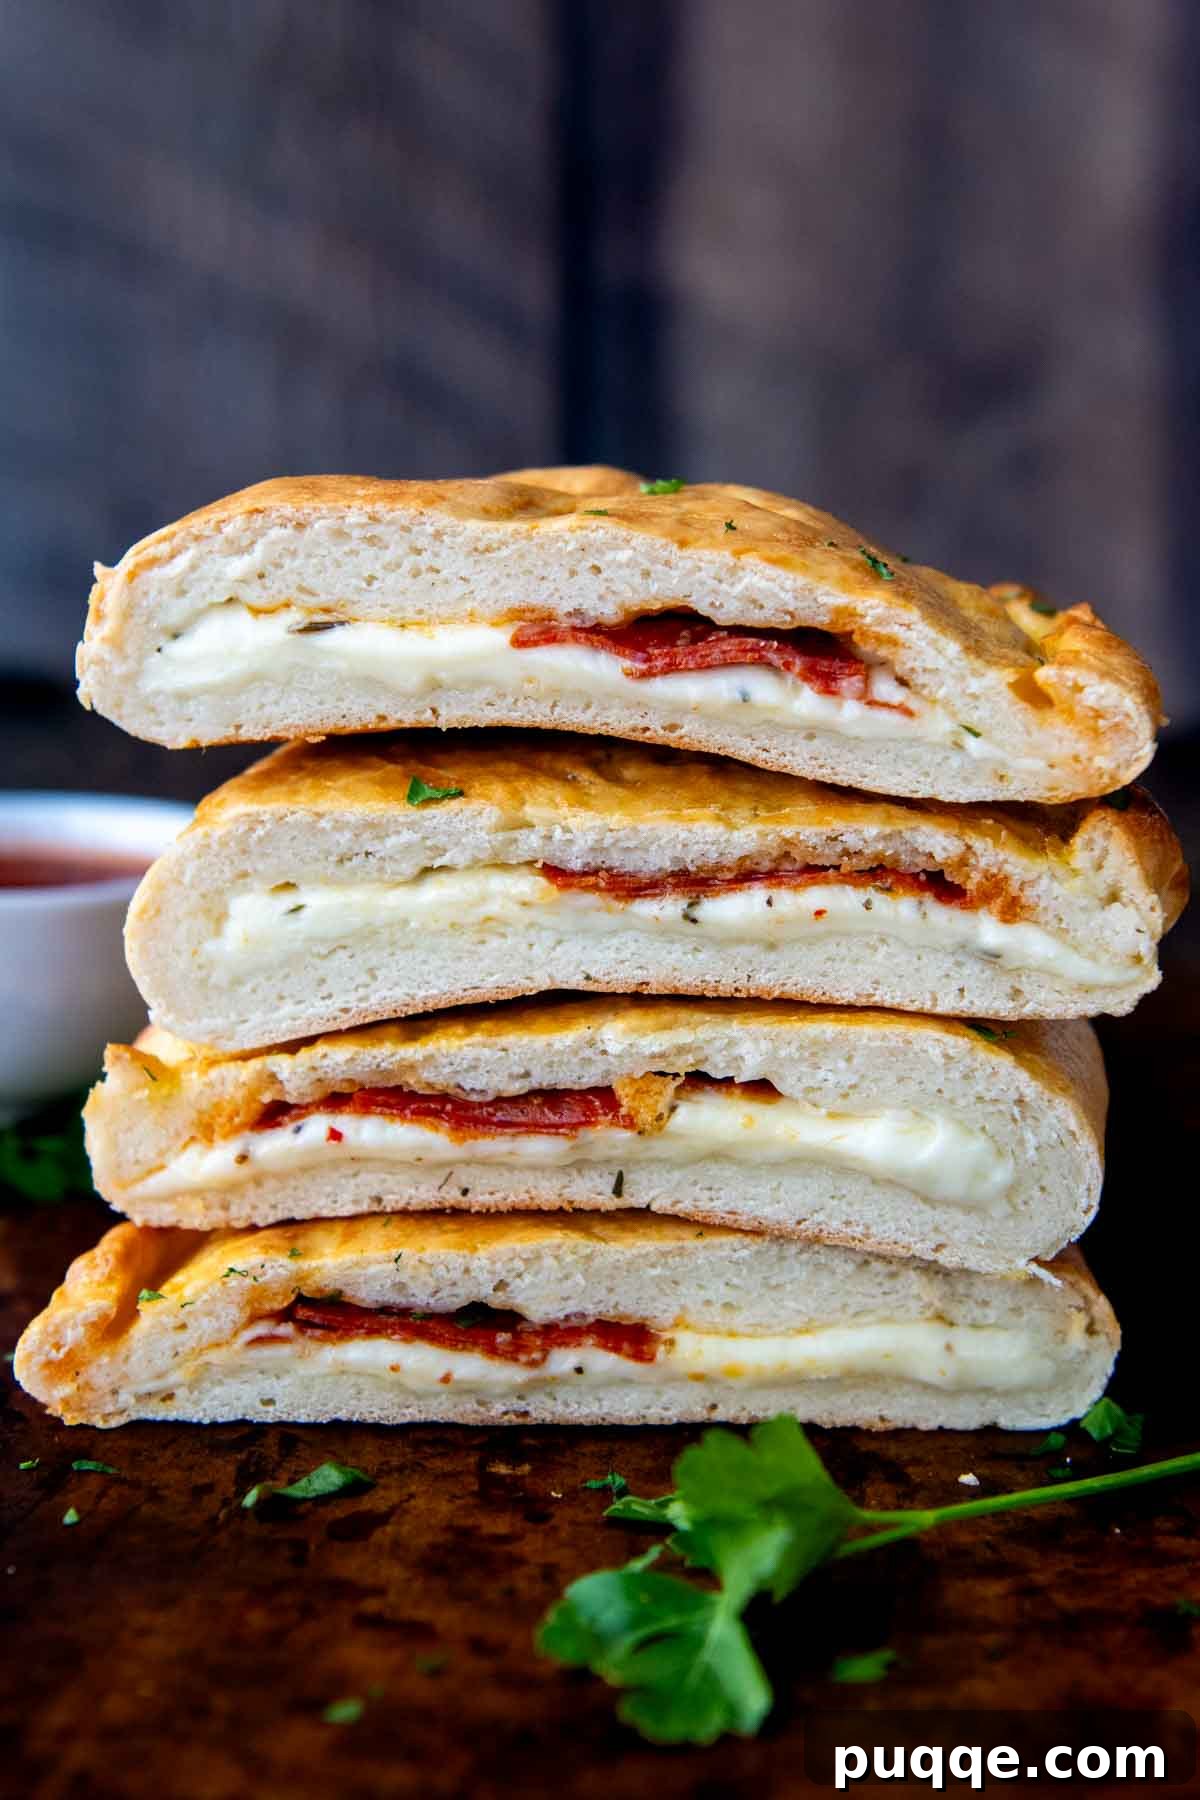
Imagine sinking your teeth into a warm, golden-brown pocket of melted cheese and savory fillings, all wrapped in a perfectly soft, tender crust. Now imagine doing all that while adhering to a gluten-free diet – and making it incredibly simple! Our recipe for Italian-style gluten-free calzones makes this culinary dream a delicious reality. Crafted with a beginner in mind, this no-fuss approach simplifies gluten-free baking. The calzone dough comes together effortlessly in just one bowl, is surprisingly easy to pat out and shape, and bakes into a delightful soft, fluffy texture with satisfyingly chewy edges. We’ll guide you step-by-step through the process, using gluten-free flour and other accessible ingredients, to achieve results so good, you won’t believe they are truly GF!
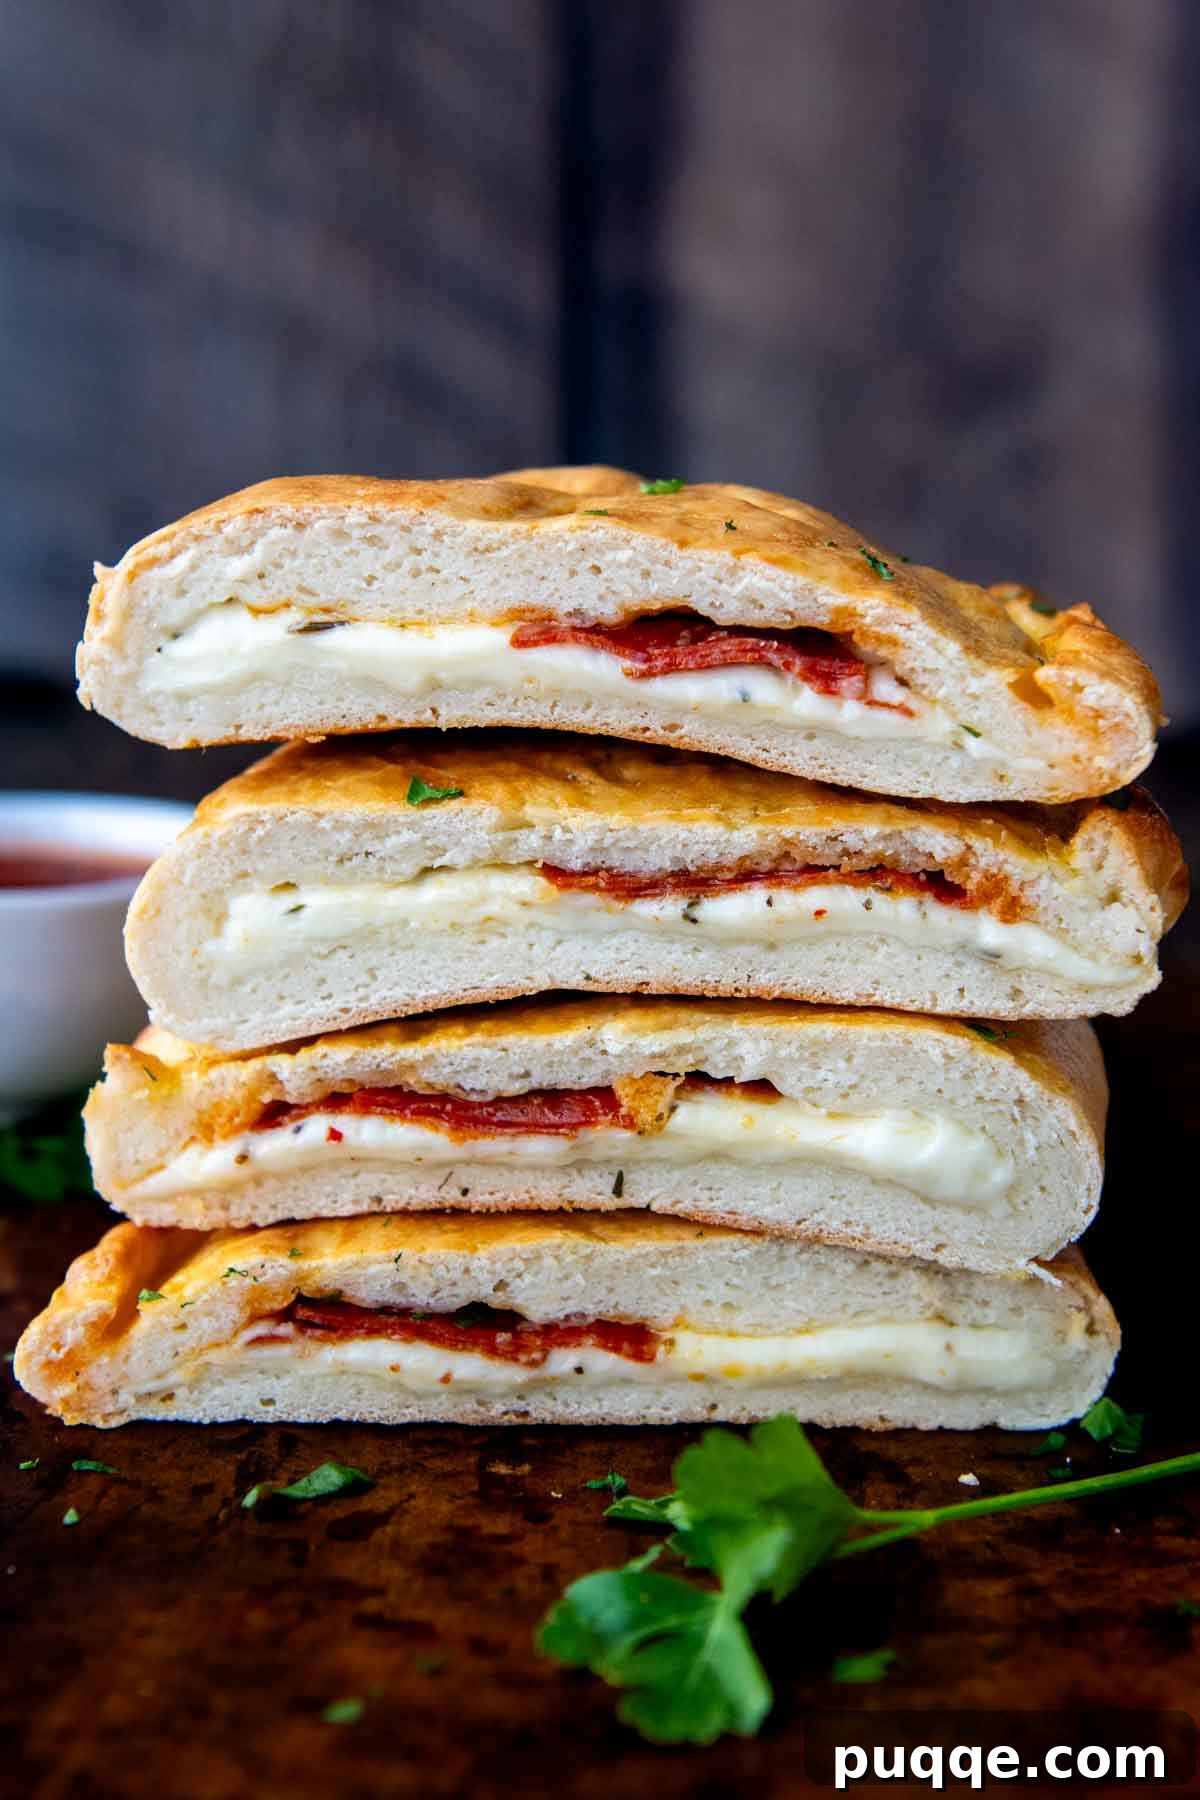
Effortless Gluten-Free Calzones: A Mastered Method
My extensive experience developing and rigorously testing gluten-free baking recipes has led me to perfect a method where working with gluten-free dough is not only straightforward but often simpler than handling traditional yeast-based recipes. When I set out to create these homemade gluten-free calzones, I applied some of my most effective baking insights and techniques.
The secret to a wonderfully soft, tender, and fluffy gluten-free calzone crust lies in how we fortify the gluten-free flour. I’ve incorporated specific ingredients that have consistently delivered outstanding results in highly-praised recipes, such as our soft gluten-free flatbread and easy gluten-free hamburger buns. These key players are psyllium husk powder and potato starch.
Psyllium husk powder is a game-changer for gluten-free dough. It acts as an exceptional binder, absorbing moisture and creating a gel-like matrix that mimics the elasticity and structure typically provided by gluten. This transformation makes the dough remarkably supple, elastic, and incredibly easy to handle and shape without tearing or becoming crumbly – a common challenge in gluten-free baking. Furthermore, the inclusion of potato starch, by swapping out a small amount of the all-purpose gluten-free flour, contributes significantly to the dough’s texture. It imparts a delightful “squishy” and moist quality, ensuring the crust remains tender and never dry or crumbly. The synergy of these ingredients results in a dough that’s a pleasure to work with and a calzone crust that’s both robust and incredibly palatable.
You’ll find that this gluten-free calzone dough is surprisingly cooperative, arguably even easier to work with than conventional pizza dough. Much like our easy homemade gluten-free pizza crust, this dough requires no complex rolling. Instead, you simply pat it into a perfect circle using lightly greased hands. Once the base is formed, you add your savory fillings to one side, gently fold the other side over, seal the edges with a simple crimp, and bake. This fuss-free process leads to irresistible, gooey pizza pocket perfection every single time.
Continue reading to unlock more expert tips and tricks for making your from-scratch gluten-free calzones truly shine. We’ll cover crucial techniques like how to effectively seal the edges to prevent any delicious filling from escaping, explore a variety of ideal gluten-free toppings and creative filling ideas, share essential make-ahead strategies to fit your busy schedule, and even suggest other versatile uses for this fantastic dough. Get ready to impress your taste buds and your loved ones with these incredible GF calzones!
Understanding Your Ingredients: The Pillars of Gluten-Free Calzones
Each ingredient in this recipe plays a specific and vital role in achieving the perfect soft, tender, and flavorful gluten-free calzone. Here’s a detailed breakdown of why these components are essential:
- Gluten-Free All-Purpose Flour: The very foundation of our dough, a high-quality gluten-free all-purpose flour blend is crucial for optimal results. For consistent success, this recipe was developed using Cup4Cup gluten-free flour, known for its excellent performance in baking. If you choose a different brand, it’s highly recommended to use the included weight measurements (grams) rather than measuring by cups, as the density of gluten-free flour blends can vary significantly.
- Potato Starch (not potato flour): This is an essential “secret ingredient” that profoundly impacts the texture of our gluten-free dough, making it wonderfully soft and fluffy. Instead of relying on additional flour, which can lead to a dry outcome, potato starch contributes to a moist, pliable, and squishy texture, effectively countering the common dryness and crumbliness in GF baking. For the best results, use potato starch as specified; however, tapioca starch can be substituted if absolutely necessary, though it may slightly alter the final texture.
- Psyllium Husk Powder: This ingredient is indispensable for gluten-free dough, acting as a powerful natural binder. It significantly helps in maintaining moisture and enhancing the dough’s soft, elastic texture. In gluten-free breads and doughs, psyllium husk absorbs liquid to form a viscous gel, which mimics gluten’s role in providing structure and pliability. This enables the dough to be shaped effortlessly without the need for excessive additional flour, ensuring a tender crust.
- Baking Powder: While instant yeast is our primary leavening agent, baking powder works in tandem to provide an additional boost, ensuring a lighter, more airy texture. This is particularly beneficial in gluten-free doughs, where achieving a light and soft crumb can be more challenging. It contributes to an overall enhanced rise and a more tender final product.
- Instant (Rapid Rise) Yeast: This type of yeast is chosen for its convenience; it doesn’t require activation in warm liquids (proofing) and can be mixed directly with the dry ingredients. For cost-effectiveness and sustained freshness, consider purchasing instant yeast in bulk and storing it in your refrigerator. If you only have active dry yeast, simply add it to the warm water specified in the recipe and let it sit for about 5 minutes until it becomes foamy before adding it to your dry ingredients.
- Oil (Olive Oil Recommended): The addition of oil is crucial for coating the gluten-free starches, which helps prevent a gritty or dry mouthfeel. It enriches the dough, contributing to a smoother consistency and a more tender, flavorful crust. A good quality olive oil will also impart a lovely subtle flavor.
- Calzone Fillings: The possibilities for fillings are vast, but successful calzones depend on thoughtful choices and preparation. Properly selecting and preparing your fillings is key to keeping the calzone sealed during baking and achieving that perfect melty interior. We delve into specific tips and a range of delicious suggestions in the dedicated calzone fillings section further down the page.
Visual Guide to Crafting Your Calzones
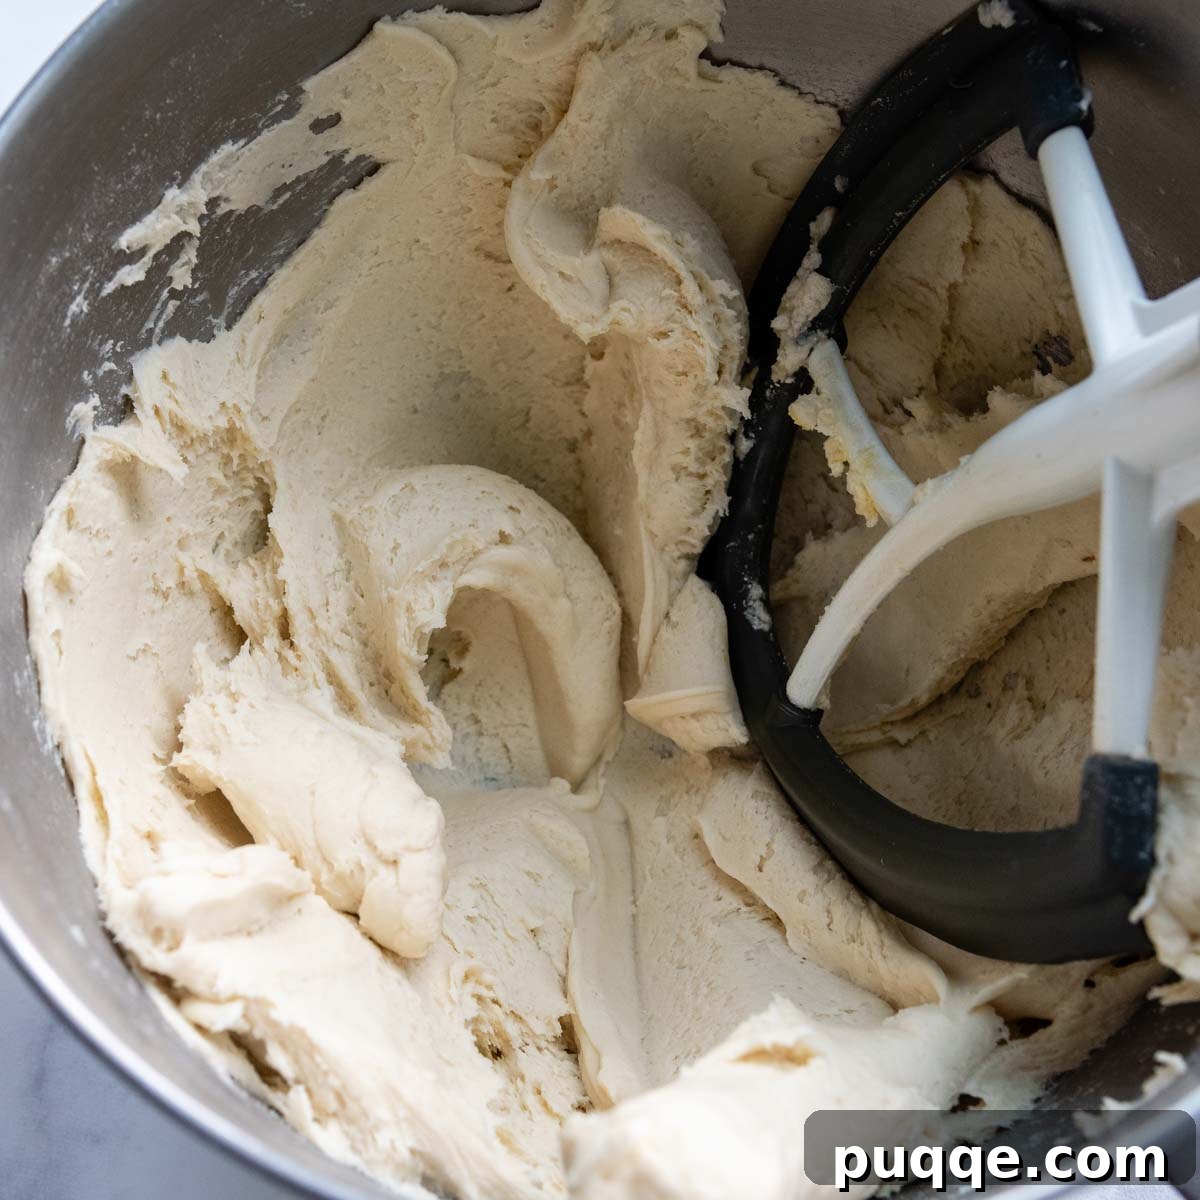
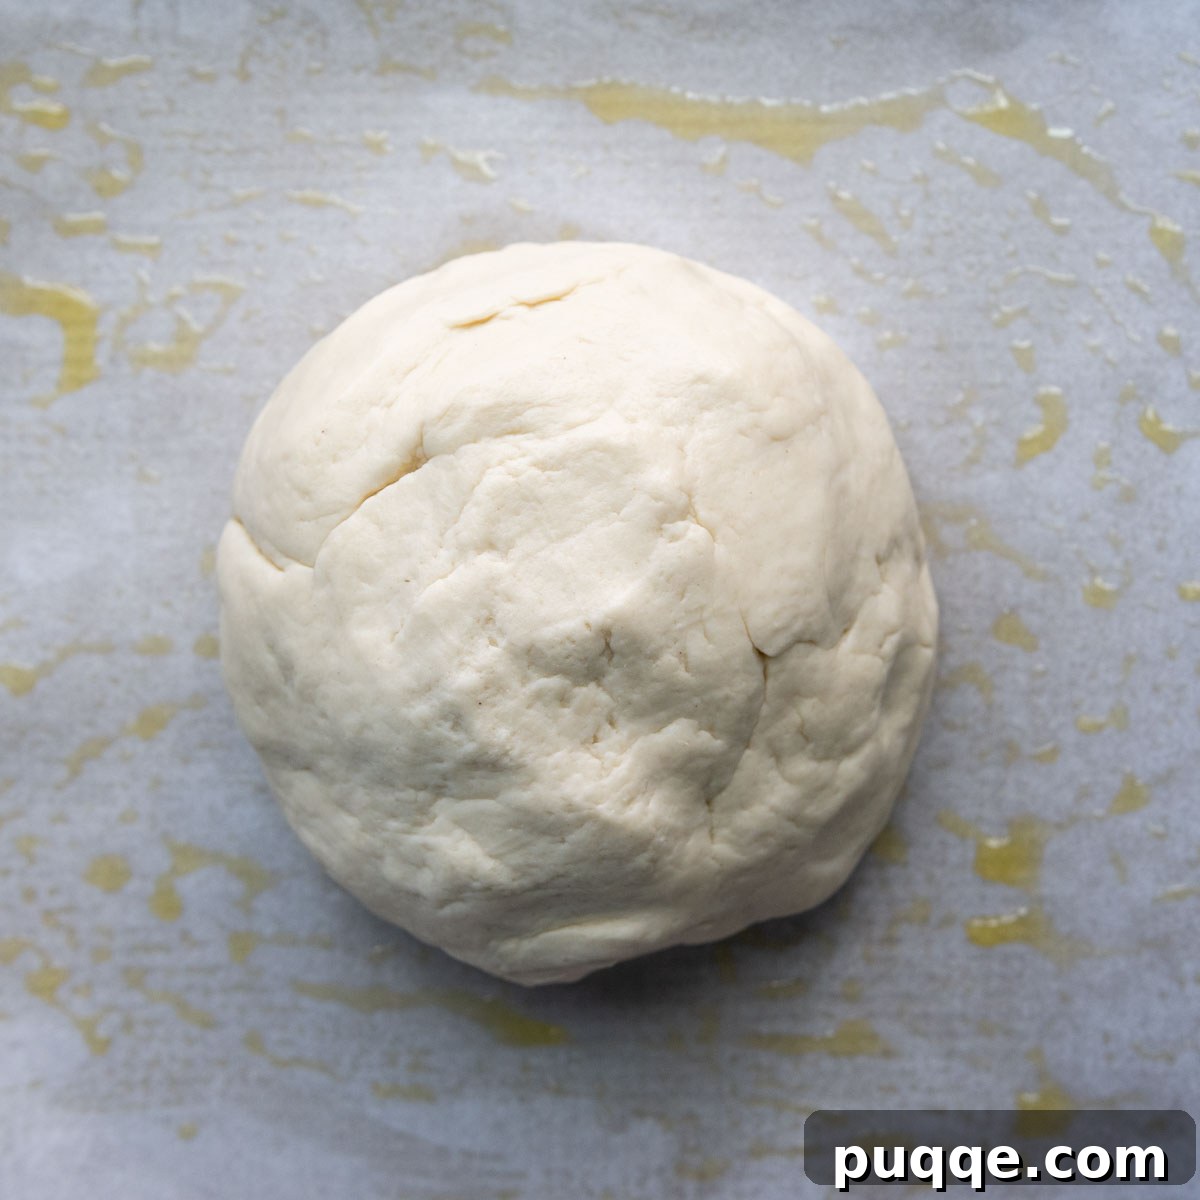
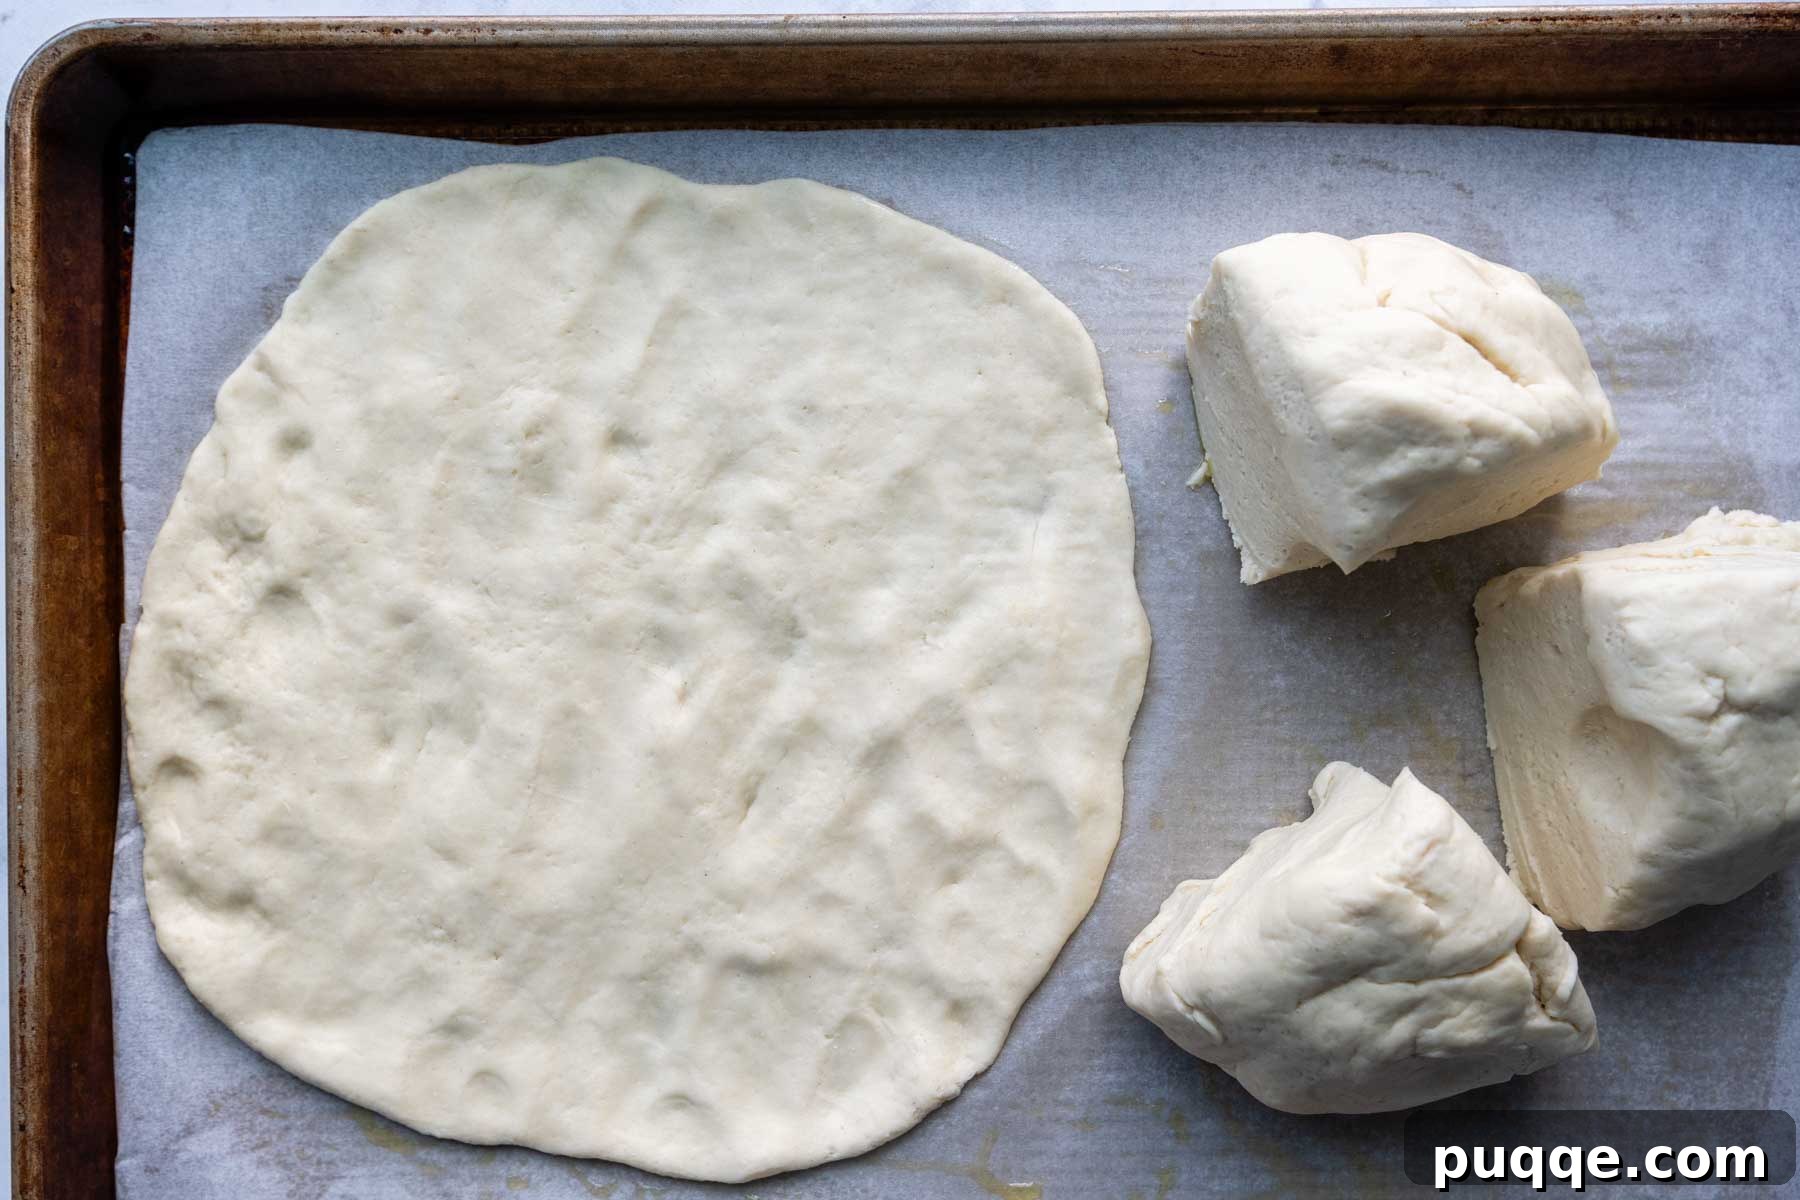
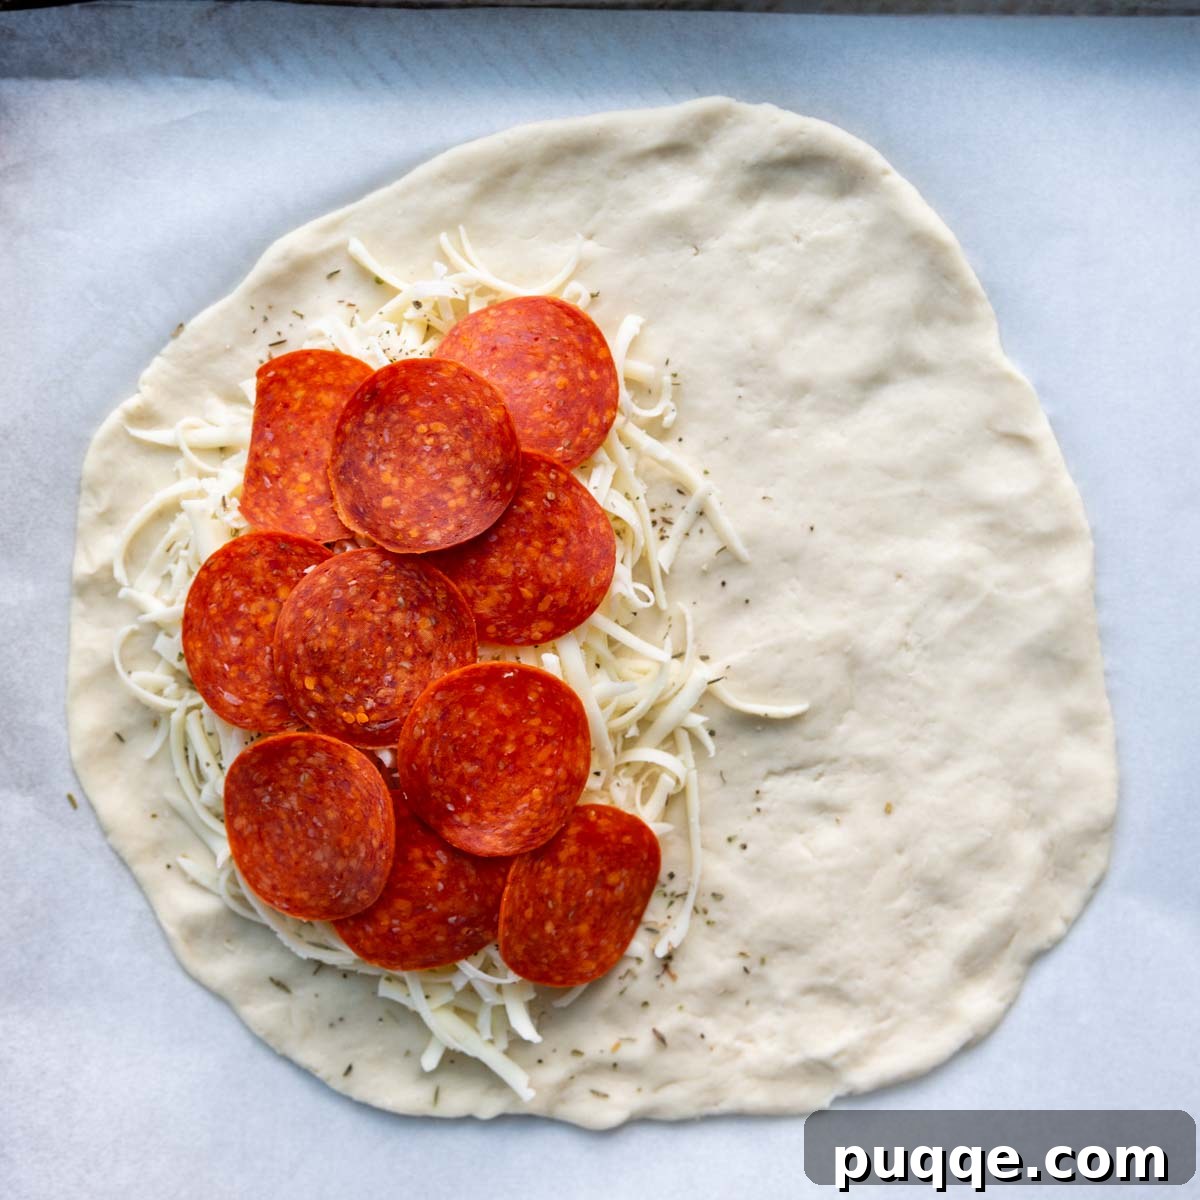
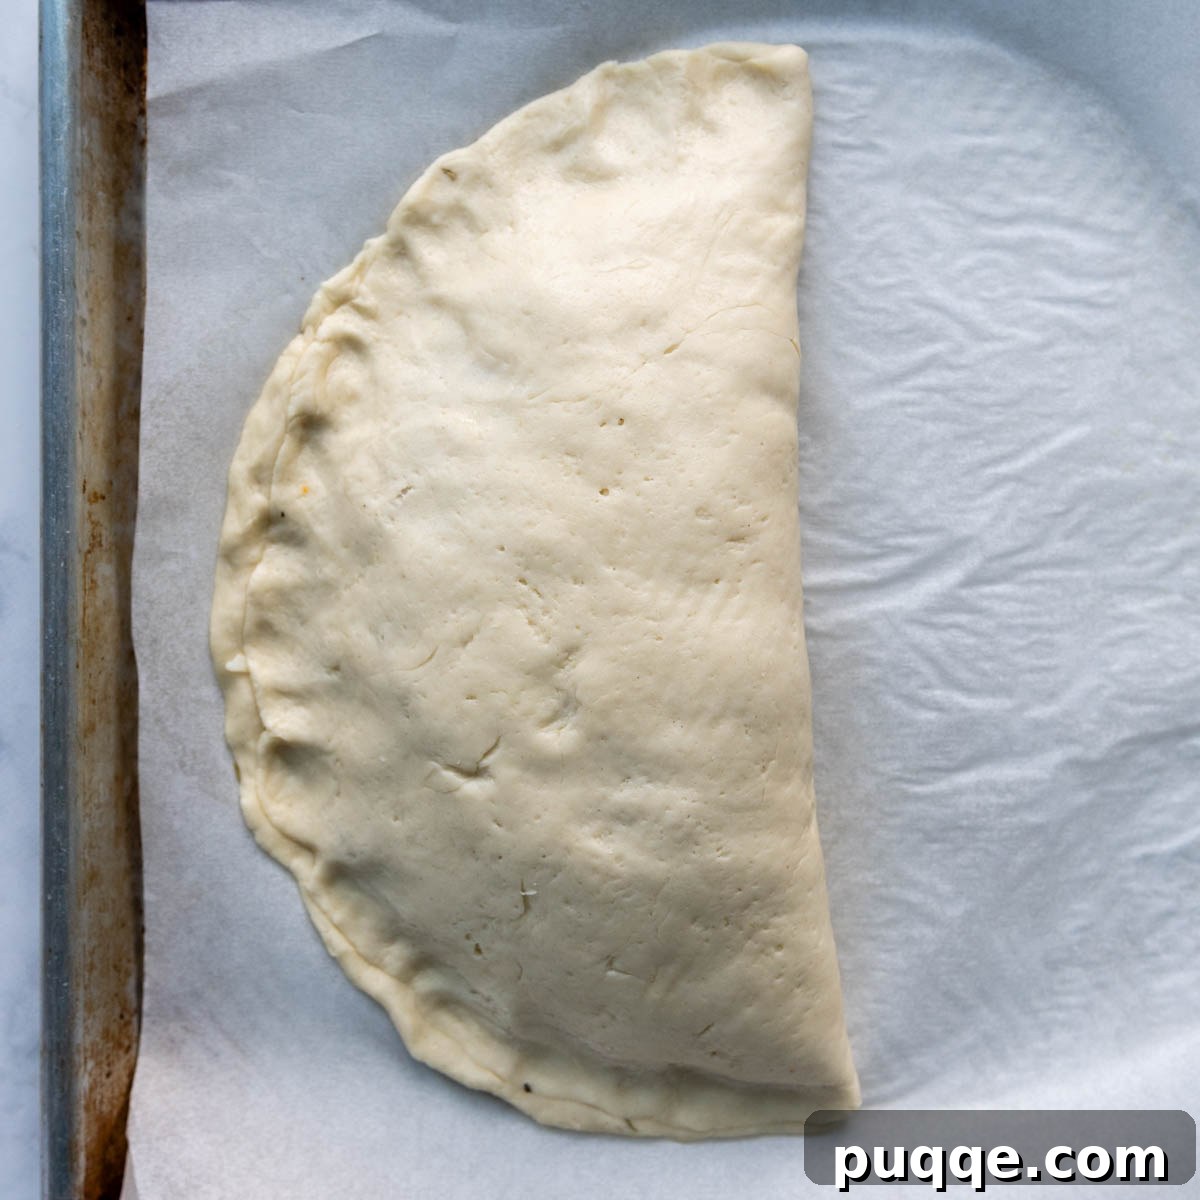
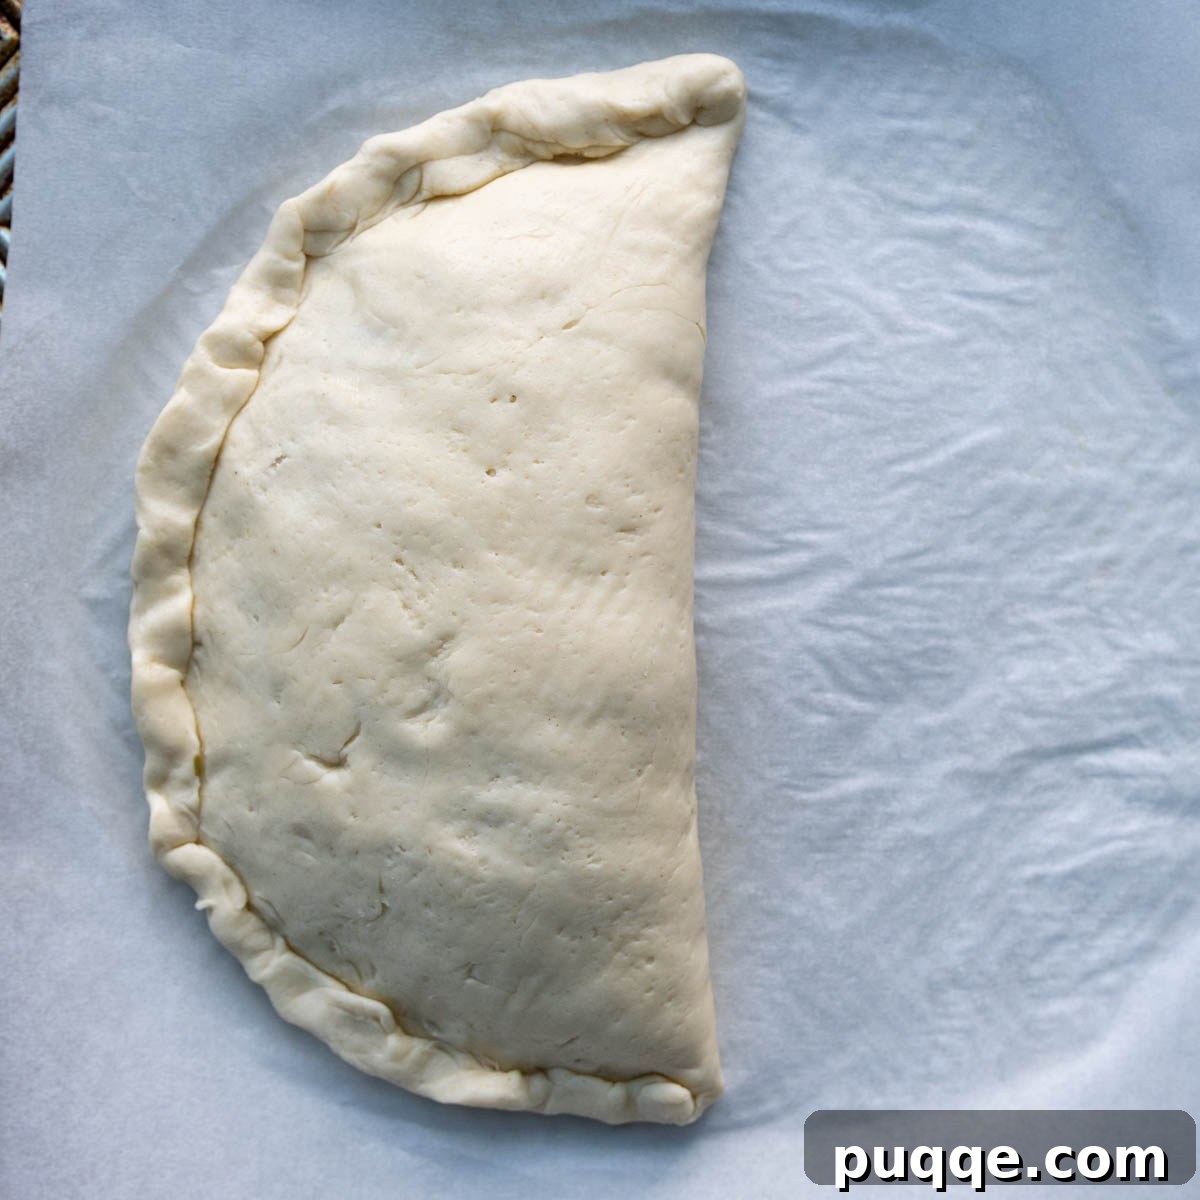
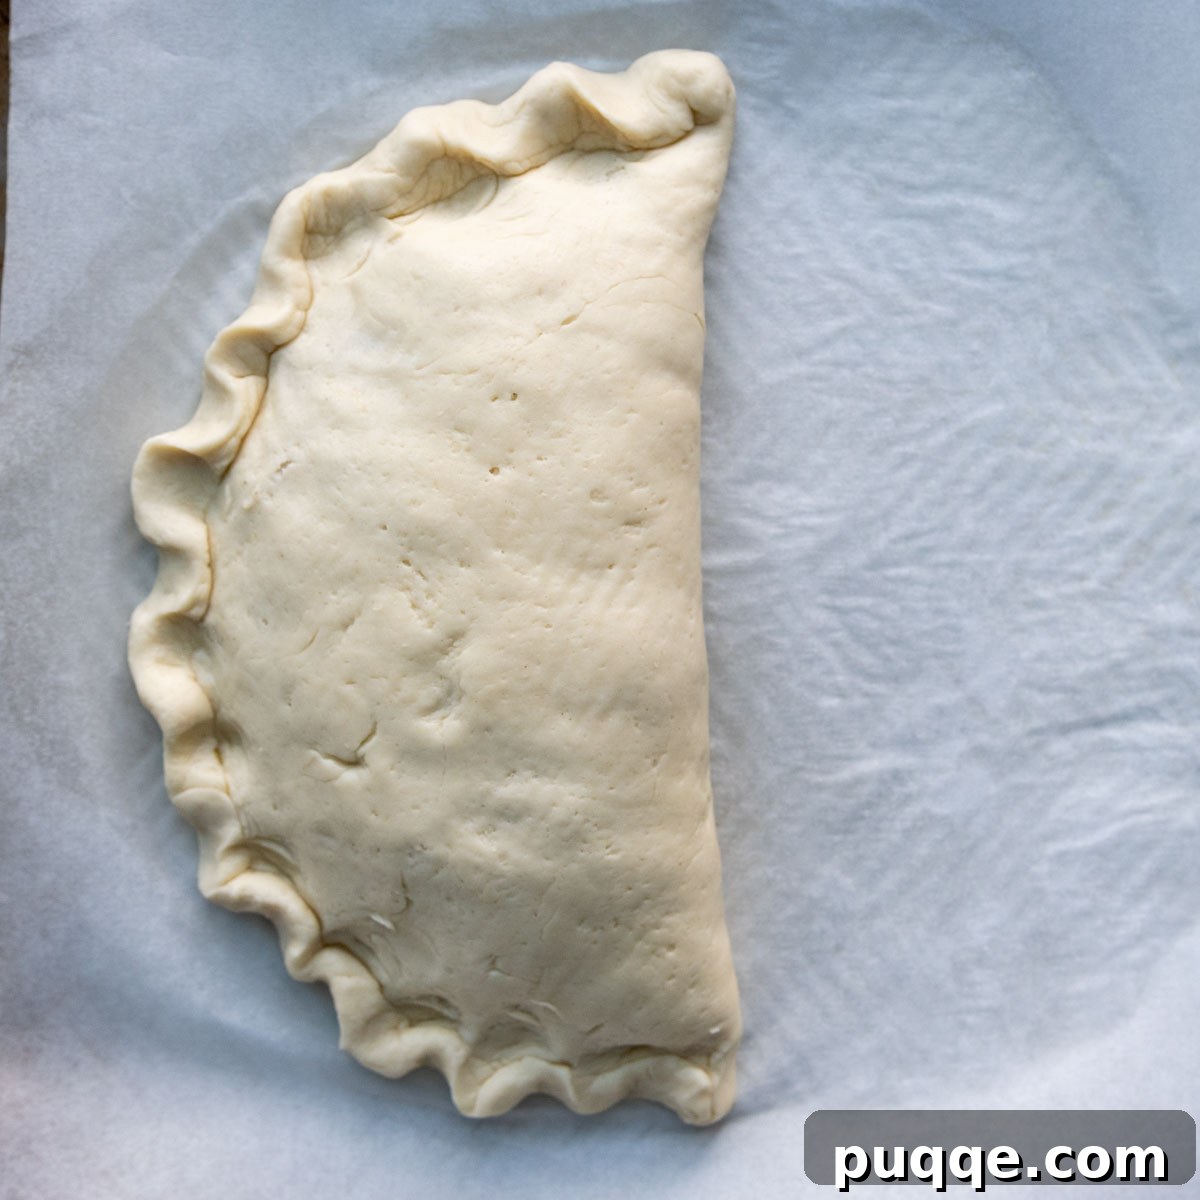
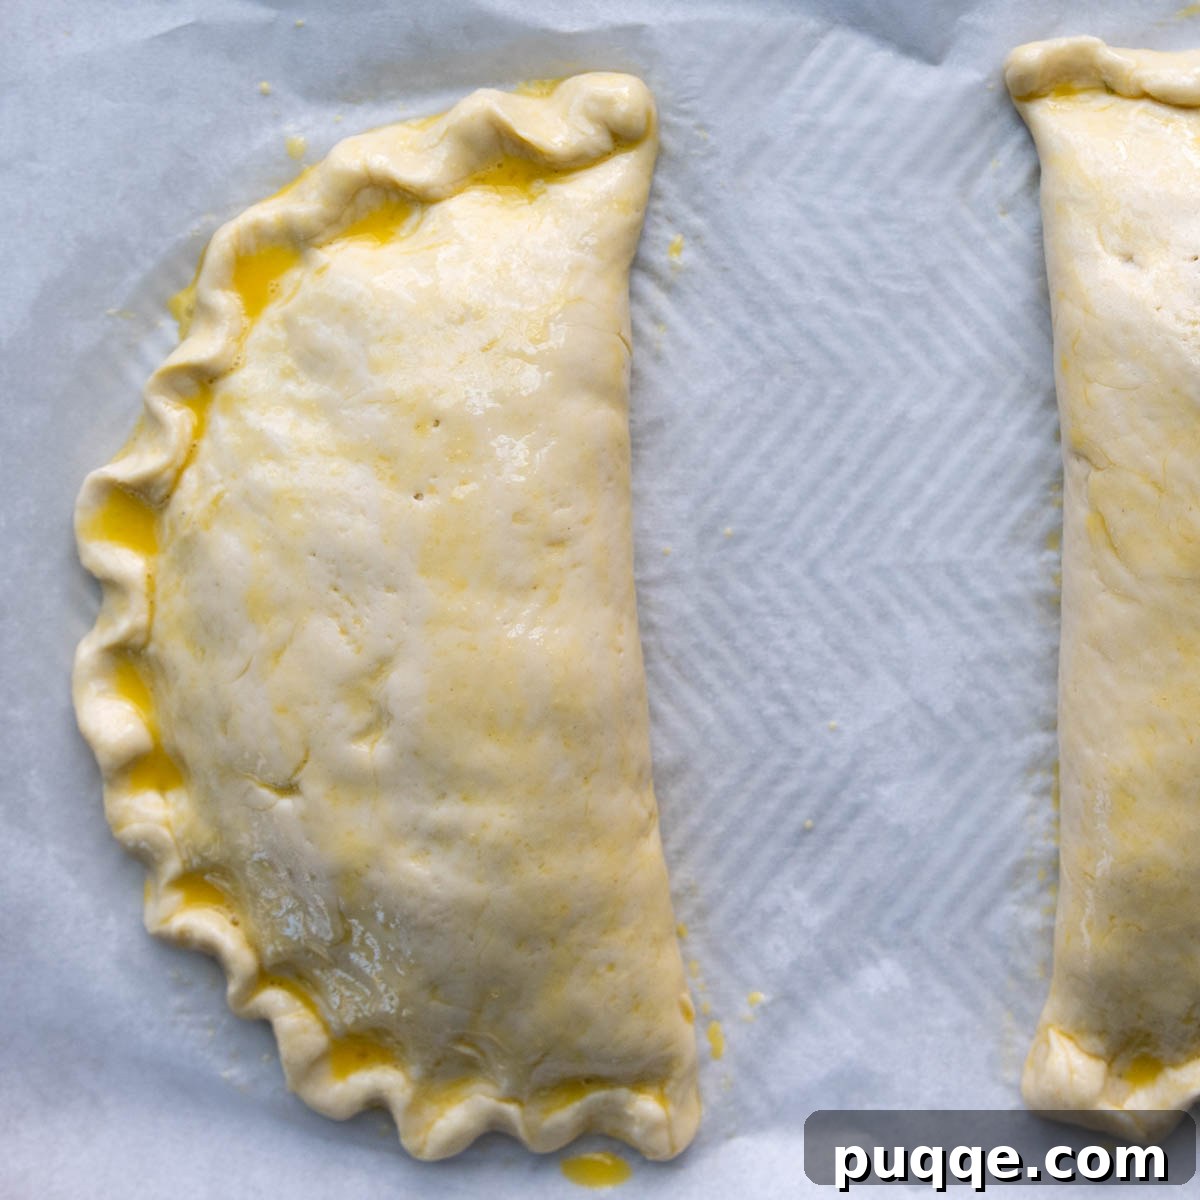
Follow along with these step-by-step photos, which illustrate key moments in the calzone-making process. For complete detailed instructions and precise ingredient measurements, please refer to the comprehensive recipe card below.
Calzone Fillings & Expert Tips for a Perfect Bake
Creating beautiful, pizzeria-style calzones, even with a gluten-free crust, is easily achievable by following a few simple yet crucial tips. While slight aesthetic imperfections won’t diminish the incredible taste, these guidelines will help ensure your GF calzones are perfectly sealed and baked every time.
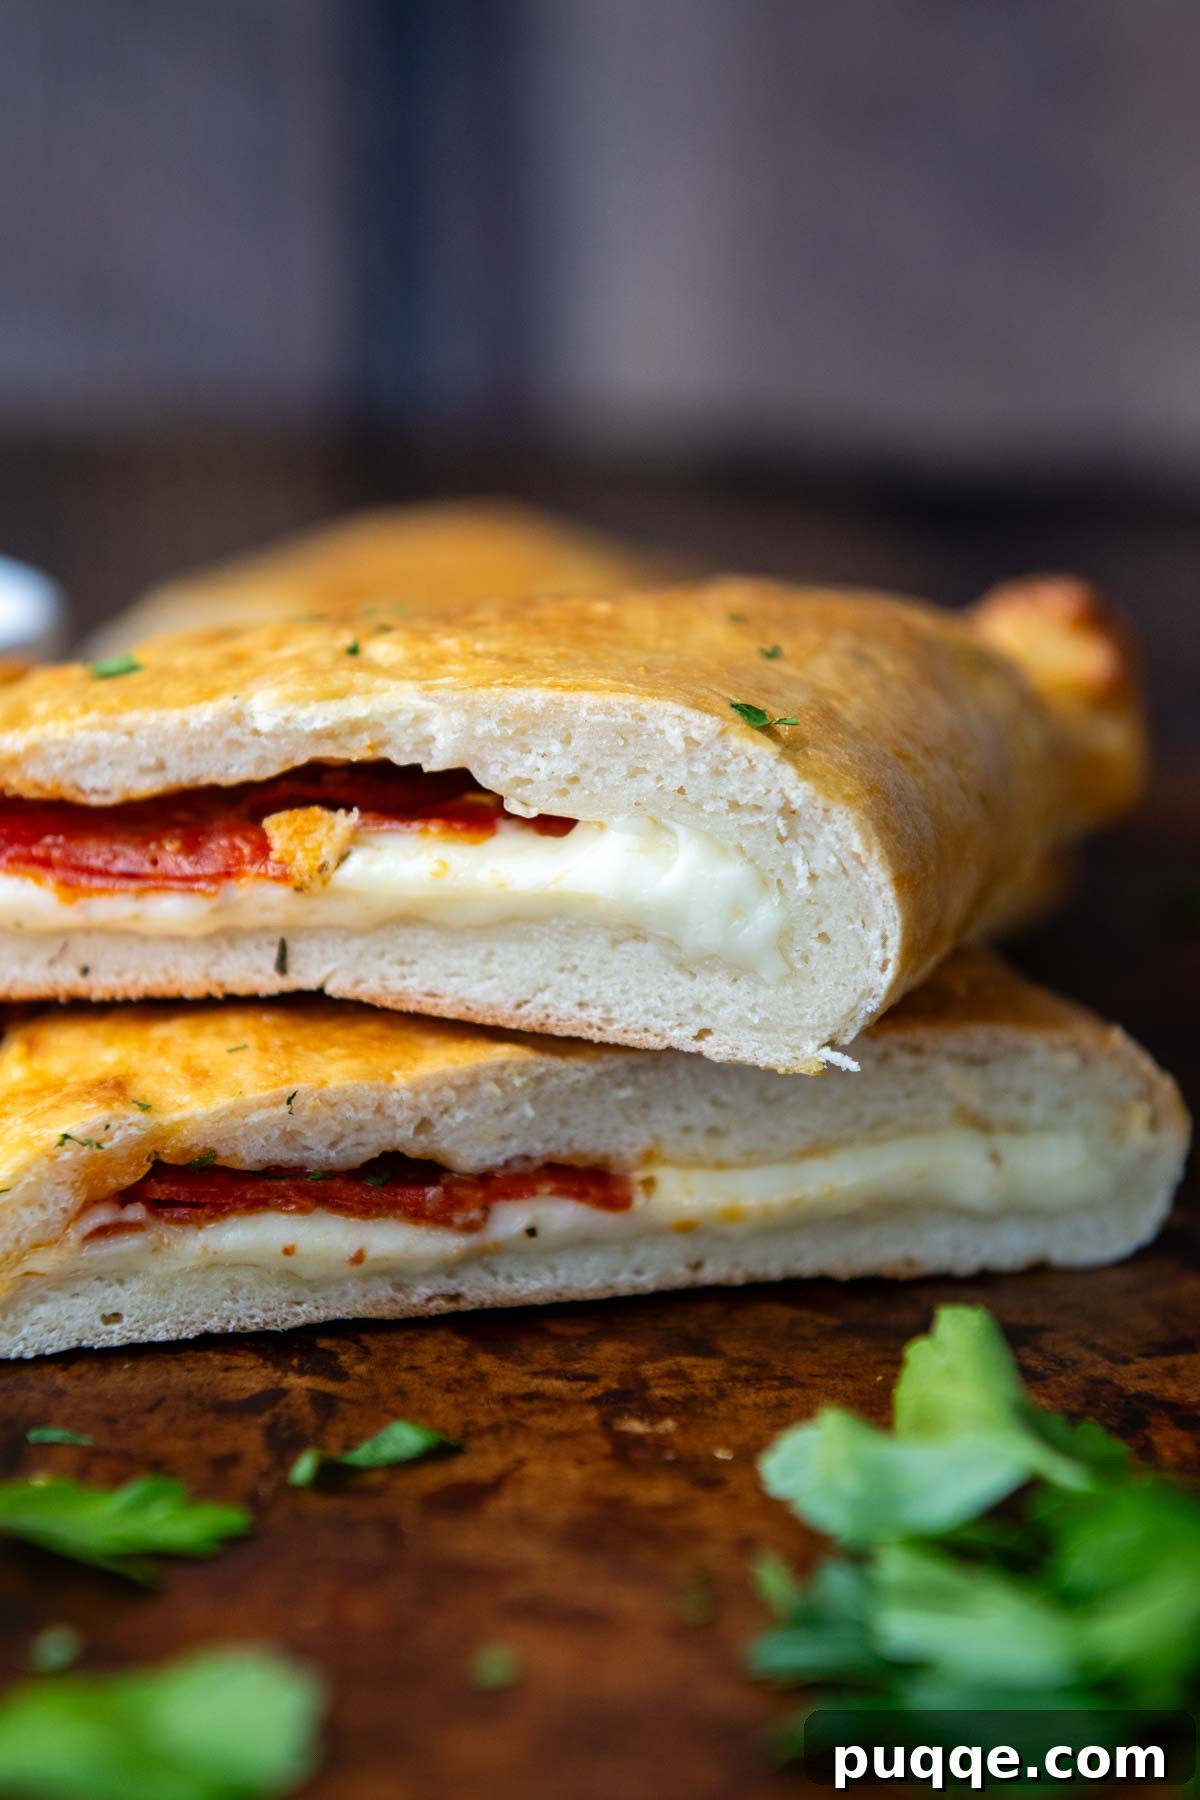
Optimize Your Cheese: For the ultimate gooey, melty interior, always use freshly grated cheese, especially mozzarella. Pre-shredded varieties often contain anti-caking agents that can hinder smooth melting. Two 8-ounce blocks of mozzarella are ideal for this recipe, providing approximately 1 cup of grated cheese per calzone. While this might seem like a generous amount before baking, it’s essential for achieving the perfect bread-to-cheese ratio. Using less can result in a calzone that feels sparse and less satisfying.
Strategic Sauce Placement: A common dilemma is whether to include pizza sauce inside the calzone. My experience suggests that the extra moisture from internal sauce can often cause the dough seams to soften and potentially open during baking, leading to leakage. To prevent this and ensure a beautifully sealed calzone, I highly recommend serving your favorite marinara or pizza sauce on the side for dipping. This allows the crust to bake perfectly and keeps all that cheesy goodness securely enclosed. Of course, this is largely a matter of presentation; a leaky calzone will still taste incredible!
Dairy-Free Alternatives: Although this recipe was developed with traditional dairy cheeses, it should adapt well to dairy-free alternatives if you require a non-dairy option. Select a high-quality dairy-free mozzarella that is known for melting well for the best results. A little experimentation may be needed to find your preferred brand and texture.
Beyond Mozzarella: Don’t hesitate to experiment with other cheese varieties! Spreading a thin layer of ricotta cheese on one half of the dough before adding mozzarella can introduce a delightful creaminess and richness, akin to a traditional Stromboli. A sprinkle of Parmesan or provolone can also add depth and complexity to the flavor profile.
Prepare Fillings Thoughtfully: Many fillings benefit from pre-preparation to minimize moisture release during baking, which can otherwise lead to a soggy crust or compromised seals. For instance, if using fresh mushrooms or spinach, it’s best to sauté them first and then thoroughly squeeze out any excess liquid. Meat toppings like Italian sausage or ground beef should be fully cooked and drained of all fat before being added to the calzone.
Here are some of our favorite gluten-free calzone topping ideas to inspire your next culinary creation:
- Pepperoni: A timeless favorite, offering savory, slightly spicy notes and a delightful crisp texture when baked.
- Mushrooms: Cook fresh mushrooms until tender and their moisture has evaporated, or use well-drained canned mushrooms.
- Spinach: If using frozen spinach, thaw it completely and squeeze out as much water as possible. For fresh spinach, quickly wilt it in a pan and then press out excess liquid.
- Italian Sausage: Brown and crumble Italian sausage thoroughly, draining any grease before incorporating it into your calzones.
- Peppers: A colorful mix of bell peppers (red, green, yellow) or thinly sliced sweet peppers can add freshness and a mild crunch.
- Chopped Artichokes: Well-drained and finely chopped canned or jarred artichoke hearts provide a delicious tangy, briny element.
- Black Olives: Sliced black olives offer a distinct salty and earthy flavor that complements the cheese beautifully.
- Ricotta Cheese: For an extra layer of creamy goodness, spread a thin, even layer of ricotta cheese on one half of the dough before adding your mozzarella and other fillings.
- Sautéed Onions & Garlic: Finely diced and gently sautéed onions and minced garlic can infuse your calzones with aromatic depth and sweetness.
- Sun-Dried Tomatoes: Chopped, oil-packed sun-dried tomatoes (well-drained) bring an intense, concentrated tomato flavor.
Remember, the goal is to keep the fillings relatively dry and not over-packed. A balanced approach ensures your calzone bakes beautifully, seals securely, and delivers maximum flavor with every satisfying bite.
Save This Recipe to Your Pinterest Board!
Let’s be friends on Pinterest! I’m always sharing great recipes!
Did you make this recipe? We love hearing from you! Please leave a star rating and comment below the recipe card. Your feedback is incredibly helpful for others searching for delicious recipes and greatly appreciated by our community. I always look forward to hearing about your experiences! -Melissa

Easy Gluten-Free Calzones (Soft, Tender Texture)

Melissa Erdelac
4 Calzones
20 mins
30 mins
1 hr 10 mins
Make Italian-style gluten-free calzones with a simple, no-fuss recipe even a beginner can pull off! The calzone dough comes together in minutes using one bowl, is easy to pat out and shape, and bakes into a soft, fluffy texture with chewy edges. I will teach you, step-by-step, how to make calzones with gluten-free flour and other simple ingredients, yielding results so good, you won’t believe they are actually GF!
Pin Recipe
Rate Recipe
Ingredients
- 3 cups (438 g) gluten-free all-purpose flour (Cup4Cup GF flour highly recommended)
- ½ cup (88 g) potato starch (not potato flour)
- 2 tablespoons (26 g) granulated sugar
- 1 packet (2 ¼ tsp, 9 g) instant rapid rise yeast
- 1 ½ tablespoons (17 g) psyllium husk powder (What is psyllium husk?)
- 1 teaspoon baking powder
- 1 teaspoon salt
- 1 ½ cups (360 g) warm water (110°F / 43°C)
- 1 large egg, room temperature
- 3 tablespoons (40 g) olive oil
- Two 8-ounce blocks mozzarella cheese, freshly grated
- Italian seasoning, to taste (optional)
- Optional toppings: pepperoni slices, cooked Italian sausage, sautéed mushrooms, black olives, cooked spinach, chopped artichokes
- Egg wash: 1 large egg lightly beaten with 1 tablespoon water
- Marinara or pizza sauce, for dipping
Equipment
- Stand Mixer with paddle attachment (highly recommended)
- Cheese Grater
- Two Baking Sheets
- Parchment Paper
- Sharp Knife or Dough Scraper
Instructions
- Combine Dry Ingredients: In the large bowl of your stand mixer, fitted with a paddle attachment, combine the gluten-free all-purpose flour, potato starch, granulated sugar, psyllium husk powder, instant rapid rise yeast, baking powder, and salt. Mix on low speed until all dry ingredients are thoroughly combined and uniform.
- Mix Dough: Add the warm water (approximately 110°F or 43°C), the room temperature large egg, and olive oil to the dry mixture. Mix on low speed until the wet ingredients are fully incorporated into the dry, forming a cohesive dough. Increase the mixer speed to medium-low and beat for 5 minutes, stopping once or twice to scrape down the sides and bottom of the bowl. The dough will be quite stiff and slightly sticky.
- Prepare Baking Surface: Line two large baking sheets with separate pieces of parchment paper. Lightly grease the parchment on one of the sheets with a little olive oil. This will serve as your primary work surface for shaping the calzones. Set the second, ungreased baking sheet aside for transferring the shaped calzones.
- Divide Dough: Scrape the stiff dough onto the lightly greased parchment paper. To prevent sticking, spray your hands with nonstick cooking spray or rub them with a small amount of olive oil. Gently shape the dough into a smooth, even ball. Using a sharp knife or a dough scraper, divide this large dough ball into 4 equal sections. Move three of these sections to the side of the greased baking sheet to create an open work area for shaping your first calzone.
- Shape Calzone Base: Take one portion of the dough and gently flatten it into a thick, round disc. Using your greased hands, carefully press and spread the dough outwards into a neat 8-9 inch (20-23 cm) circular shape. Aim for an even thickness across the entire circle. Once shaped, carefully transfer this circular dough base to the second, ungreased baking sheet. This makes handling and baking easier.
- Fill Calzone: On one half of the dough circle, sprinkle approximately 1 cup of freshly grated mozzarella cheese. It is crucial to leave a clean, uncheesed border of about 1 inch (2.5 cm) around the entire edge of the dough, as this area is needed for a secure seal. (Expert Tip: I generally recommend against adding pizza sauce directly inside the calzones, as its moisture can cause the seams to weaken and the filling to seep out during baking. Serve sauce on the side for dipping instead.) If desired, sprinkle your preferred seasonings, such as oregano, basil, or Italian seasoning, over the cheese. Then, add your chosen pizza toppings on top of the cheese layer. Ensure any high-moisture vegetables or cooked meats are prepped (cooked, drained, squeezed) to prevent a soggy interior.
- Seal the Calzone: Gently fold the empty half of the dough over the filled half, aligning the edges precisely. First, firmly press the raw edges together with your fingertips to create a strong initial seal. Next, carefully roll the pressed seam upwards towards the main body of the calzone, reinforcing the closure. Finally, use your forefinger and thumb to crimp and “flute” this rolled edge, similar to how you would finish a pie crust. This technique creates a robust and attractive seal that effectively contains the delicious fillings during baking. (Refer to the step-by-step images provided above for visual guidance on this sealing method.)
- Repeat Shaping: Repeat steps 5 through 7 for the remaining three dough sections. Each baking sheet will comfortably accommodate two calzones. Place the final two shaped calzones on the original greased baking sheet.
- Egg Wash & Rise: In a small bowl, prepare the egg wash by lightly whisking 1 large egg with 1 tablespoon of water. Generously brush the tops and edges of all the unbaked calzones with this egg wash. Reserve any leftover egg wash for later. Loosely cover the baking sheets with a piece of plastic wrap and allow the calzones to rise at room temperature for 20-30 minutes. During this rising period, preheat your oven to 375ºF (190ºC). This brief rise contributes to a lighter, more airy crust.
- Bake to Perfection: Once the oven is preheated, remove the plastic wrap from the risen calzones. Carefully place the baking sheets into the preheated oven. Bake for a total of 30 minutes. Approximately halfway through the baking time (after about 15 minutes), carefully remove the baking sheets from the oven, brush the calzones again with the reserved egg wash for an even shinier, golden-brown crust, and rotate the baking sheets for uniform cooking. Discard any remaining egg wash. Return to the oven and continue baking until the calzones are beautifully golden brown, puffed, and the filling is bubbly. Serve hot with your favorite marinara or pizza sauce for dipping. Enjoy your homemade, utterly delicious gluten-free calzones!
Notes & Make-Ahead Tips
Storing and Reheating Gluten-Free Calzones
For any delightful leftovers, allow the baked calzones to cool completely to room temperature. Once cooled, wrap each calzone securely in aluminum foil to protect them from air exposure and drying out. Refrigerate for up to 2 days.
To reheat in the oven: Preheat your oven to 350ºF (175ºC). Place the foil-wrapped calzone directly into the oven and bake for 20-30 minutes, or until thoroughly warmed through. This method helps the crust regain some of its original crispness.
For a quicker reheating option: Wrap a calzone in a damp paper towel and microwave it at 50% power. Heat in short bursts (e.g., 30-60 seconds at a time) until hot. Be cautious not to overheat, as excessive microwaving can lead to a chewy or rubbery crust. Sometimes, a combination of both methods works best: partially warm the calzone in the microwave, then wrap it in foil and finish warming in the oven for an optimal texture and faster reheating time.
Can I Make These Ahead of Time?
I’ve thoroughly experimented with various make-ahead methods to provide you with the most reliable solutions. My testing showed that freezing unbaked calzones and baking them directly from frozen (which took approximately 40 minutes) did not yield results as excellent as baking with freshly prepared dough. The texture was noticeably different and less desirable.
Recommended Make-Ahead Method (Unbaked): If your goal is to prepare the calzones in advance but bake them fresh, shape the calzones as instructed in the recipe. Place them on a baking sheet and freeze until they are completely solid. Once frozen, transfer them to an airtight freezer-safe bag or container to prevent freezer burn, and store for up to 1 month. The day before you plan to bake, transfer the frozen calzones to the refrigerator to thaw overnight. On baking day, allow them to come to room temperature for approximately one hour before proceeding with Step 9 (egg wash and rise) and then baking as usual. This gentle thawing helps maintain the dough’s integrity and results in a better texture.
Make-Ahead Method (Baked & Frozen): Another highly reliable option is to bake the calzones completely according to the recipe instructions. Once baked, allow them to cool fully to room temperature. Then, wrap each calzone securely in aluminum foil and place them in a freezer-safe bag or container. Freeze for up to 2-3 months. When you’re ready to enjoy them, thaw the frozen, baked calzones overnight in the refrigerator. Let them sit at room temperature for about an hour before reheating using one of the methods described above (oven or a combination of microwave and oven). This approach ensures a delicious, ready-to-eat meal with minimal fuss on a busy day, perfect for meal prepping!
This recipe has been thoughtfully adapted from our popular Gluten-Free Pizza Rolls, ensuring a trusted and delicious foundation.
Nutrition Information (per calzone)
Calories: 779kcal | Carbohydrates: 104g | Protein: 29g | Fat: 31g | Saturated Fat: 11g | Polyunsaturated Fat: 2g | Monounsaturated Fat: 13g | Trans Fat: 0.01g | Cholesterol: 97mg | Sodium: 1058mg | Potassium: 373mg | Fiber: 15g | Sugar: 11g | Vitamin A: 539IU | Vitamin C: 1mg | Calcium: 494mg | Iron: 5mg
Nutritional information is an estimate and may vary based on specific ingredients and preparation methods.
Did You Love This Recipe? Share Your Experience!
Your feedback truly helps our community grow and thrive. Please take a moment to leave a star rating and a comment below.
It’s wonderful to hear how these delicious gluten-free calzones turn out for you!