
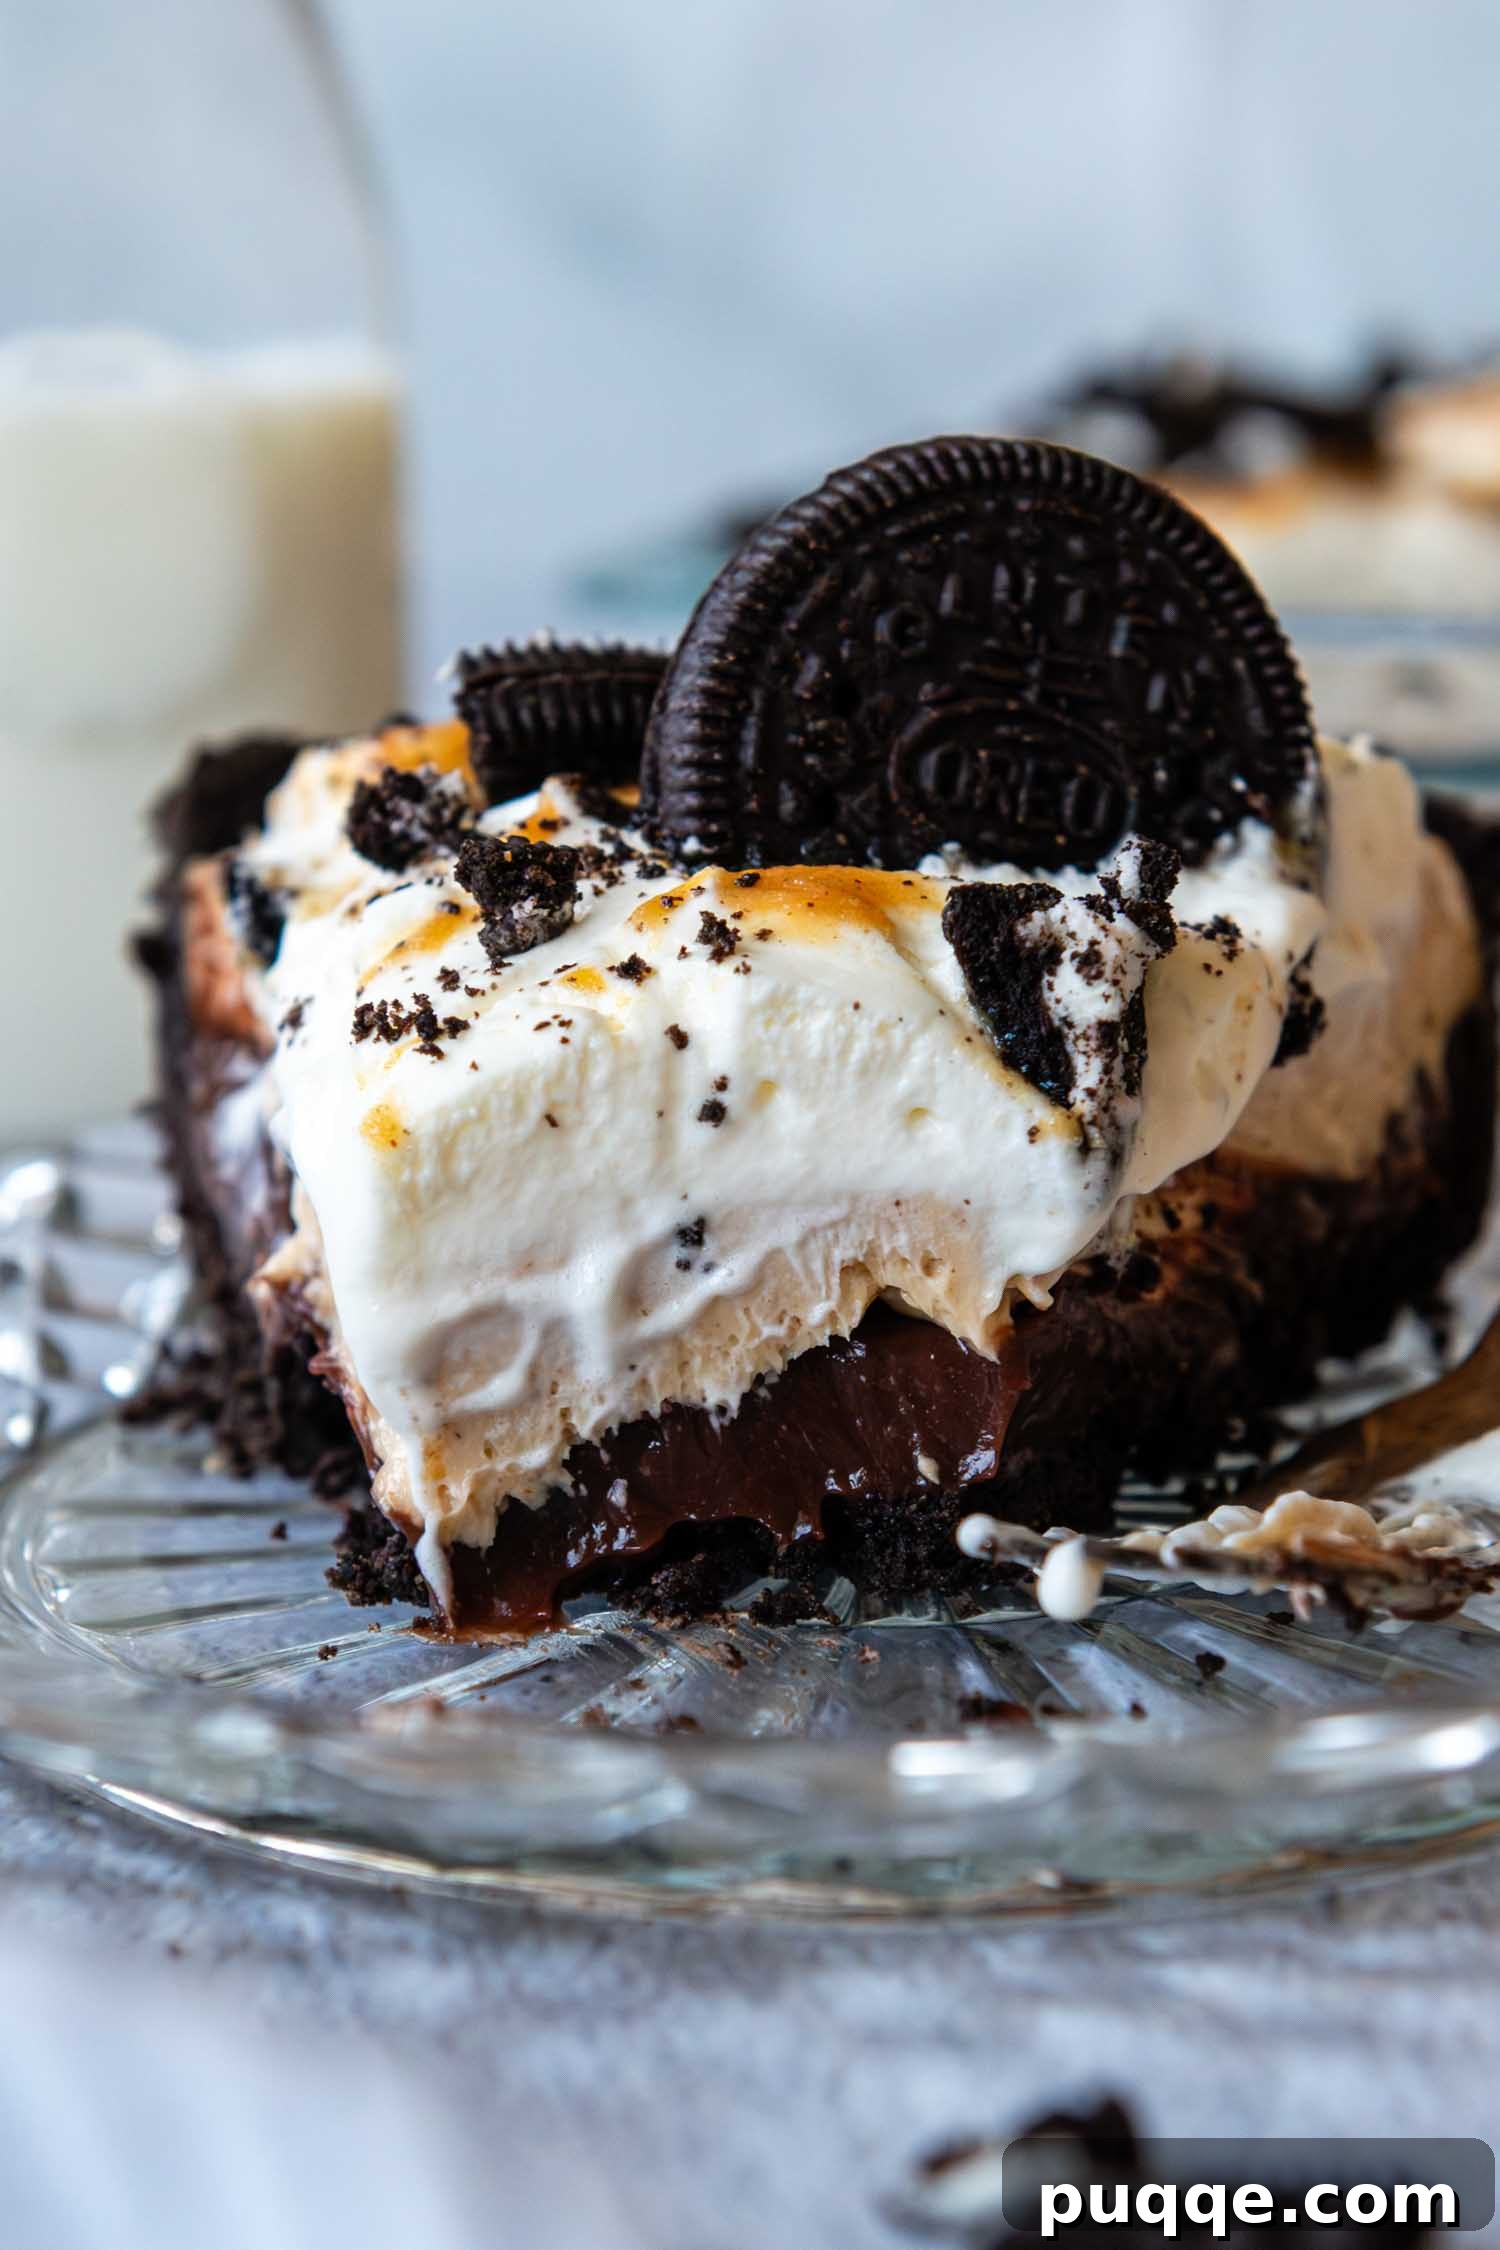
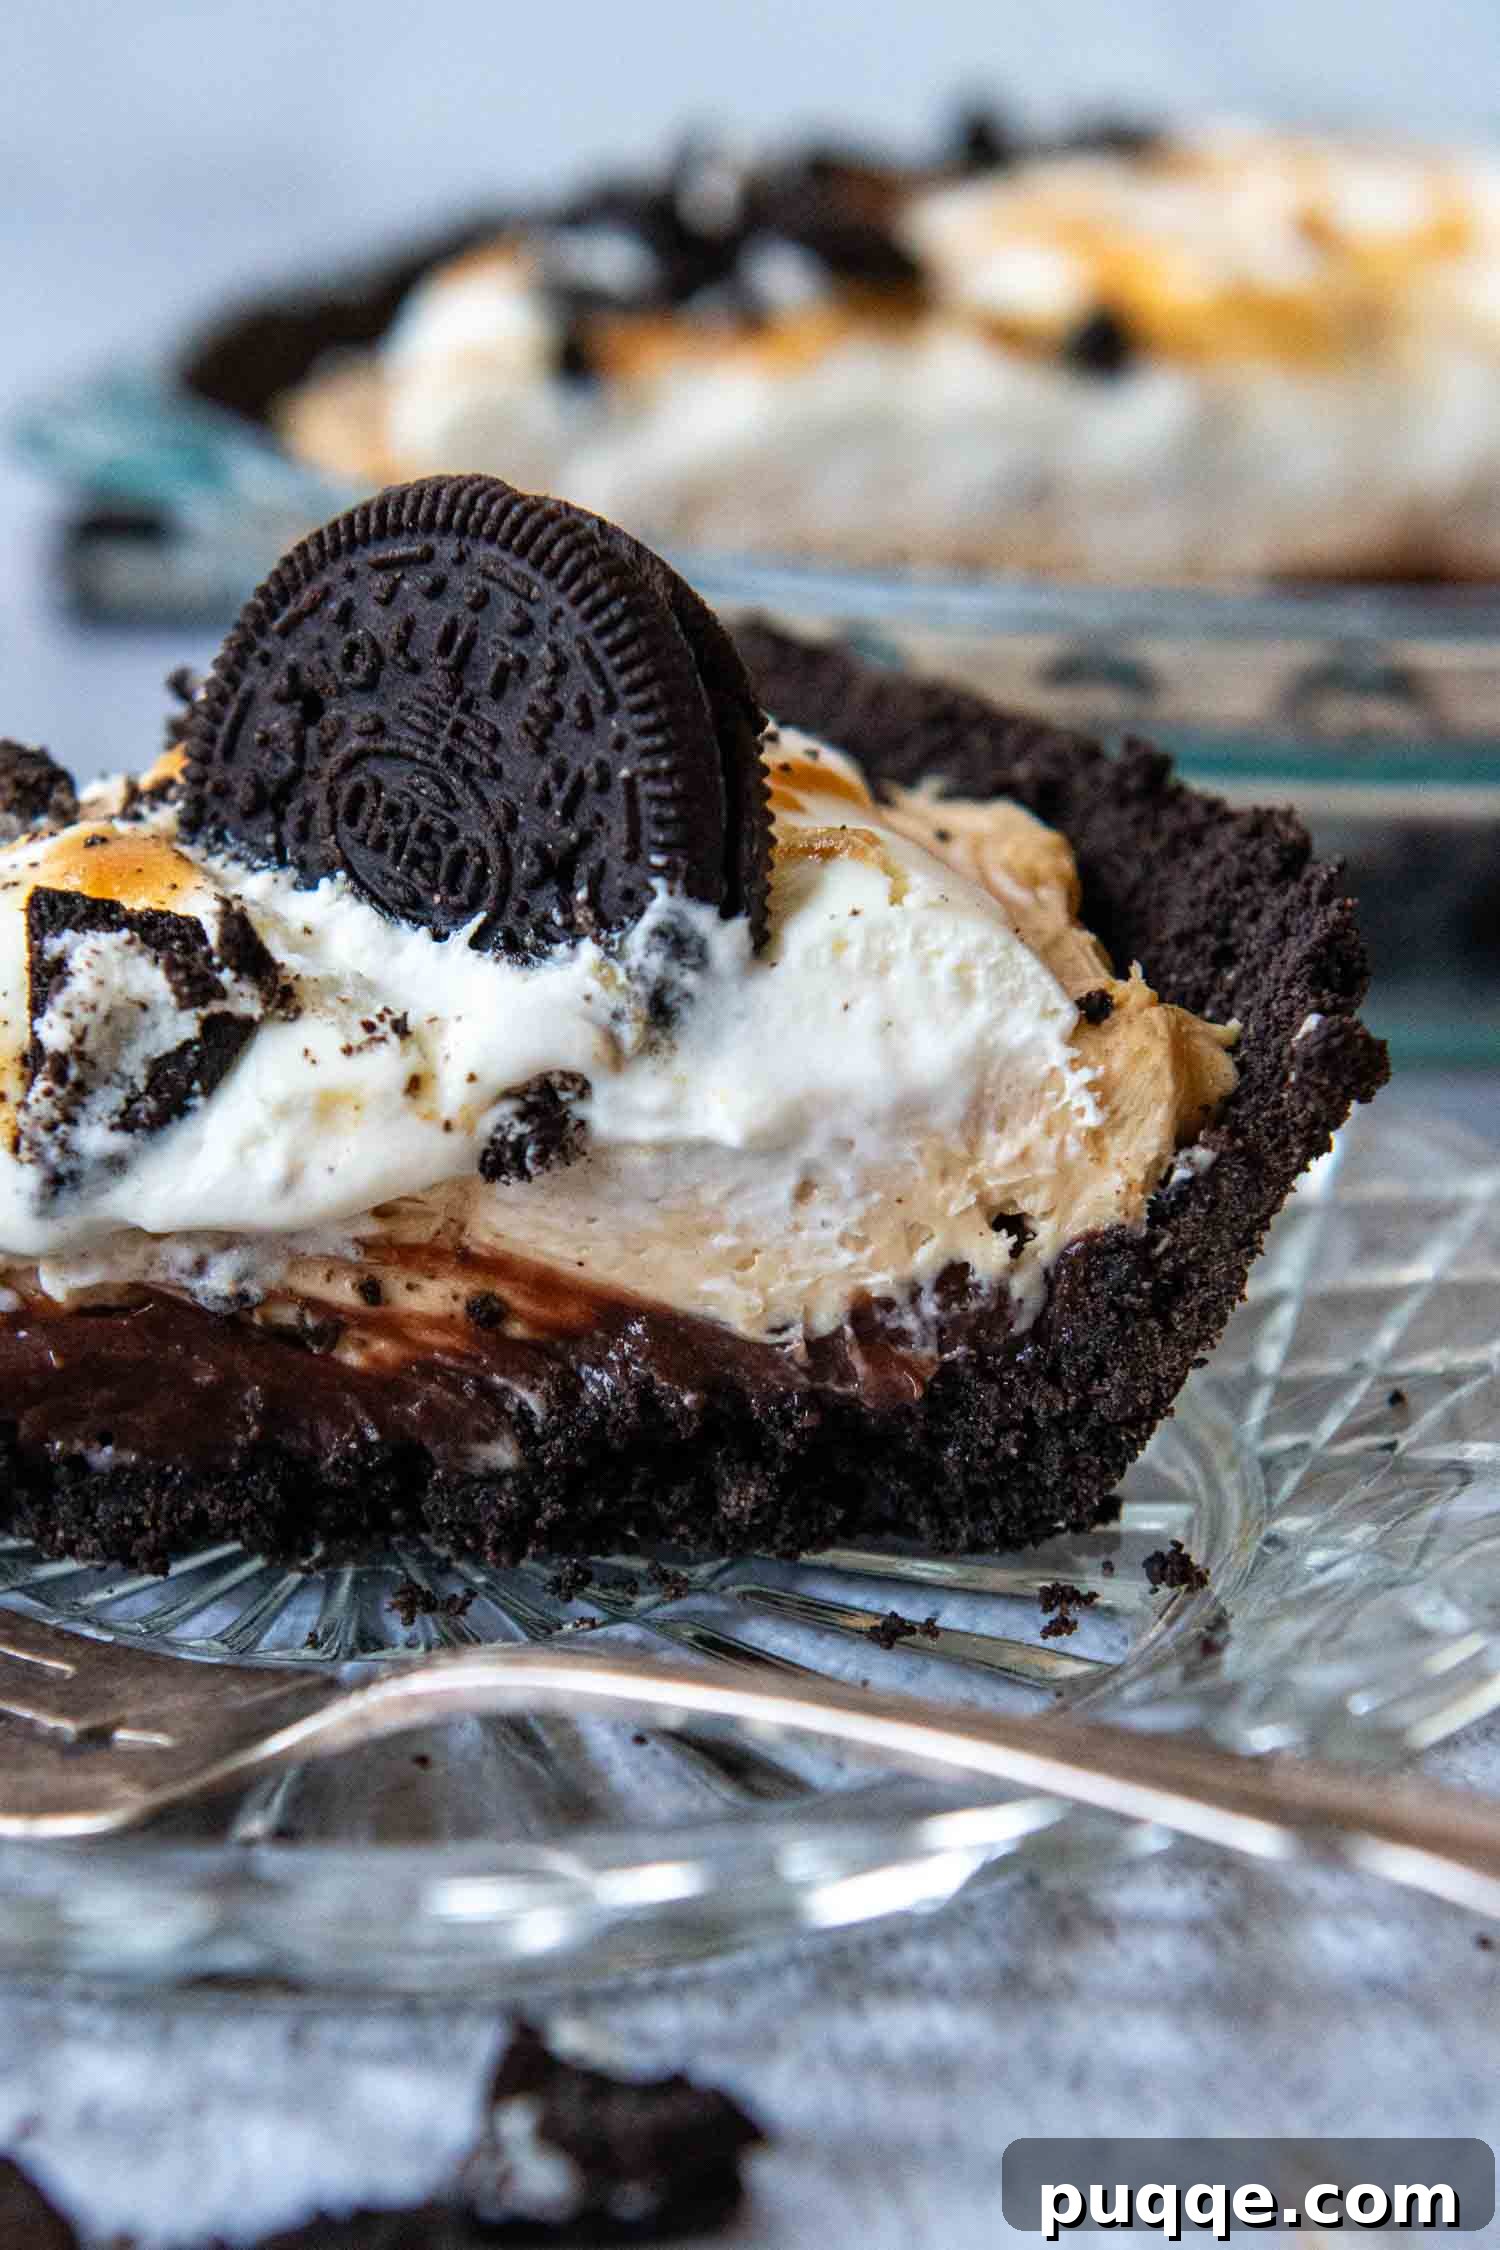
Prepare to be amazed, Reese’s lovers! This incredibly luscious Peanut Butter Oreo Pie is the quintessential dessert for anyone who adores the timeless combination of peanut butter and chocolate. Imagine a perfectly crunchy Oreo crust – whether traditional or gluten-free – generously filled with a rich layer of chocolate pudding, followed by a light and airy peanut butter cream cheese filling, all crowned with a cloud of whipped cream. If you’re searching for a spectacular, virtually no-bake pie that can be prepared in advance, look no further. You’ve just stumbled upon the magic recipe that will steal the show at any gathering!
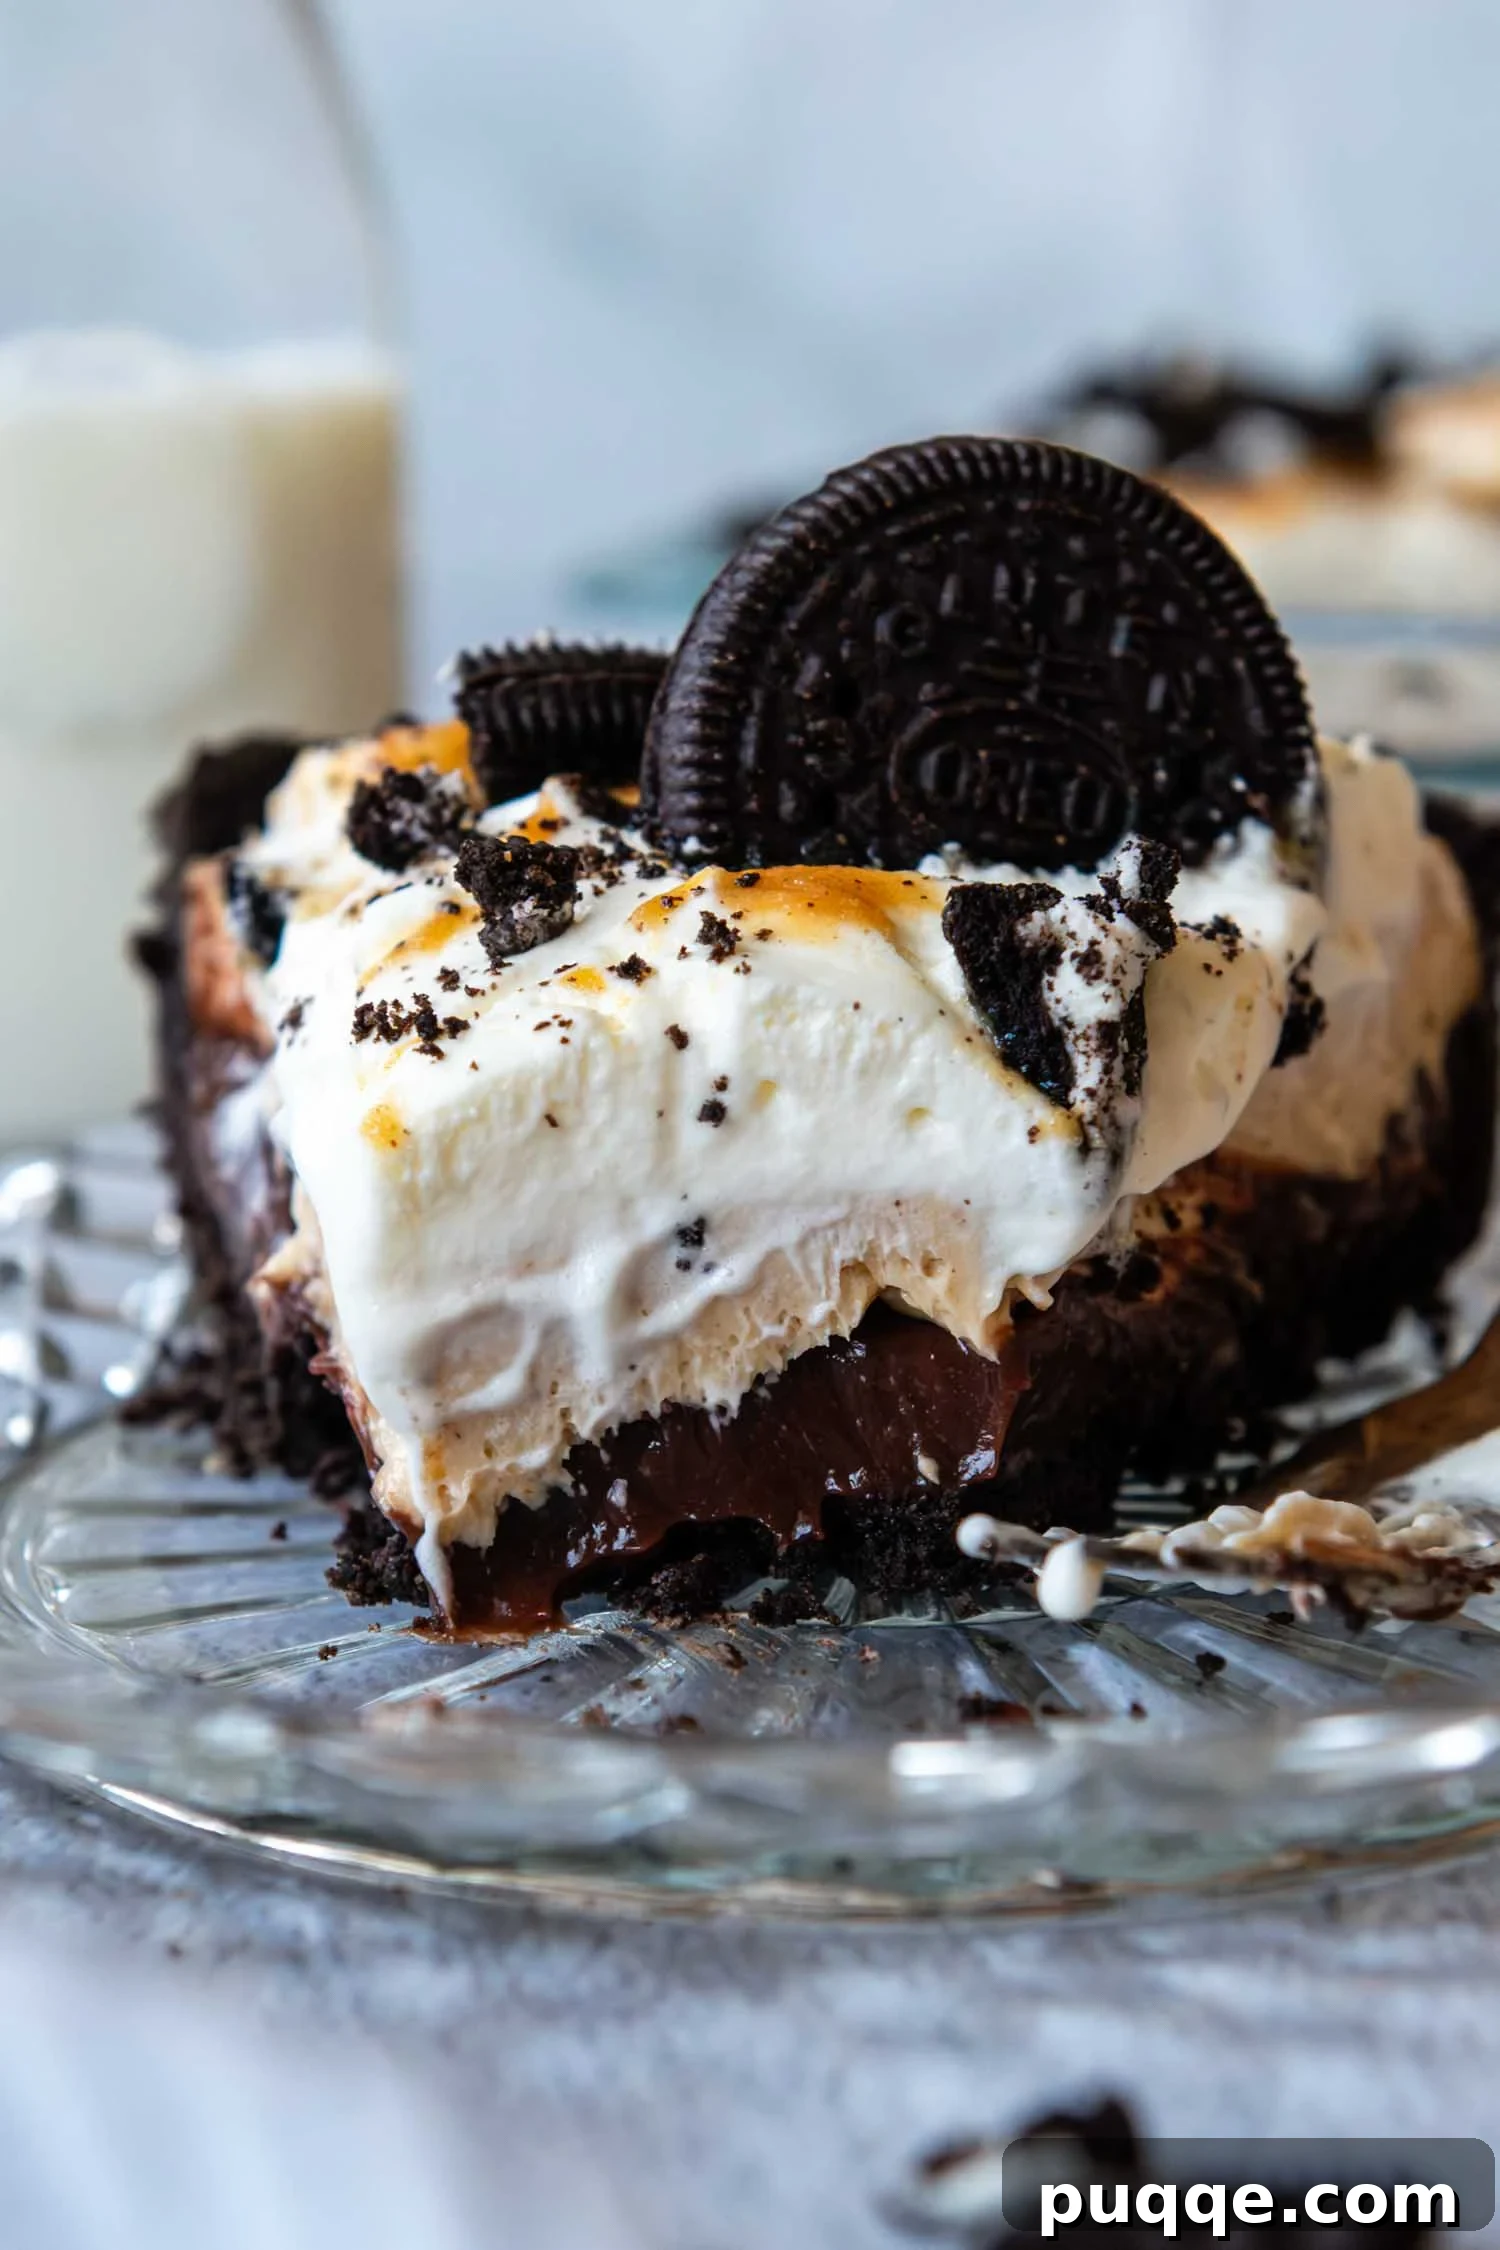
The Ultimate No-Bake Peanut Butter Oreo Pie: A Chocolate & PB Dream
There are some flavor combinations so legendary, they transcend ordinary dessert status. For many, the marriage of peanut butter and chocolate sits atop that pedestal. And when you combine it with the irresistible crunch of an Oreo crust, you create something truly extraordinary: the Peanut Butter Oreo Pie. This isn’t just a dessert; it’s a culinary masterpiece that will have everyone reaching for a second slice, a rich tapestry of textures and tastes that come together in perfect harmony.
Each layer of this pie plays a crucial role in creating its knockout flavor profile. It all begins with a robust, crunchy chocolate cookie crust made from finely crushed Oreos. This provides the ideal foundation for the decadent filling layers. Next comes a thick, luscious layer of instant chocolate pudding, adding a cool, creamy depth. But the real star is the thick, fluffy, and perfectly balanced salty-sweet peanut butter cream cheese mousse. Finally, the pie is generously topped with light whipped cream and a delicate peanut butter glaze drizzle, inviting you to dive into pure bliss. This dessert, much like our viral buckeye turtle brownies, is all about maximizing flavor zones for an unforgettable experience.
This versatile pie is perfect for any occasion. Whether you’re hosting an elegant dinner party, preparing for a festive Thanksgiving feast, or simply celebrating a smaller milestone, this peanut butter Oreo pie is always a hit. While traditionally made in a 9-inch pie plate, you can also prepare it in an 8 or 9-inch square baking pan if you need to serve more people, making it easier to portion out smaller (or larger!) squares. No judgment here – go for those big, glorious slabs if that’s what your heart desires!
Key Ingredients for a Perfect Peanut Butter Oreo Pie
Crafting this phenomenal pie relies on a few key ingredients, each chosen for its specific role in achieving the perfect texture and flavor. Here’s a closer look at what you’ll need and some insider tips for the best results:
- Creamy Peanut Butter: For this recipe, stick to classic, creamy peanut butter. Just like when preparing our famously smooth peanut butter glaze, the consistency of traditional creamy peanut butter ensures a silky-smooth filling and drizzle. Avoid natural peanut butter, which can separate and alter the texture.
- Instant Chocolate Pudding: Ensure you grab a small box (around 3.9 oz) of *instant* chocolate pudding mix, not the “cook and serve” variety. A crucial tip for this pie: you’ll use slightly less milk than the box instructions recommend. This creates an extra-thick pudding layer that stands up beautifully when sliced, preventing any messy collapses.
- Heavy Whipping Cream (or Cool Whip): Freshly whipped heavy cream adds an unparalleled lightness and richness to both the filling and the topping. You’ll beat heavy cream with a portion of powdered sugar until stiff peaks form. Part of this whipped cream will be gently folded into the peanut butter filling to create that airy mousse-like texture, while the rest is reserved for the glorious topping. For a convenient shortcut, an 8-ounce container of thawed Cool Whip can be a fantastic substitute.
- Cream Cheese: Full-fat cream cheese is ideal for creating a rich, tangy, and stable peanut butter filling. If you prefer a slightly lighter option, Neufchâtel cheese can be used as a delicious alternative without compromising on the creamy texture. Ensure your cream cheese is softened to room temperature for a lump-free, smooth filling.
- Oreo Cookies: The foundation of this pie! You’ll need approximately 26 Oreo cookies for the crust. The beauty of this recipe is its adaptability – both traditional and gluten-free Oreos work wonderfully, allowing everyone to enjoy this decadent treat.
Let’s Assemble This Dreamy Pie Together!
Making this pie is a joyful experience, and these step-by-step instructions, complete with visual cues (see accompanying photos), will guide you to perfection. For exact ingredient measurements, please refer to the complete recipe card below.
1. Prepare the Crunchy Oreo Crust
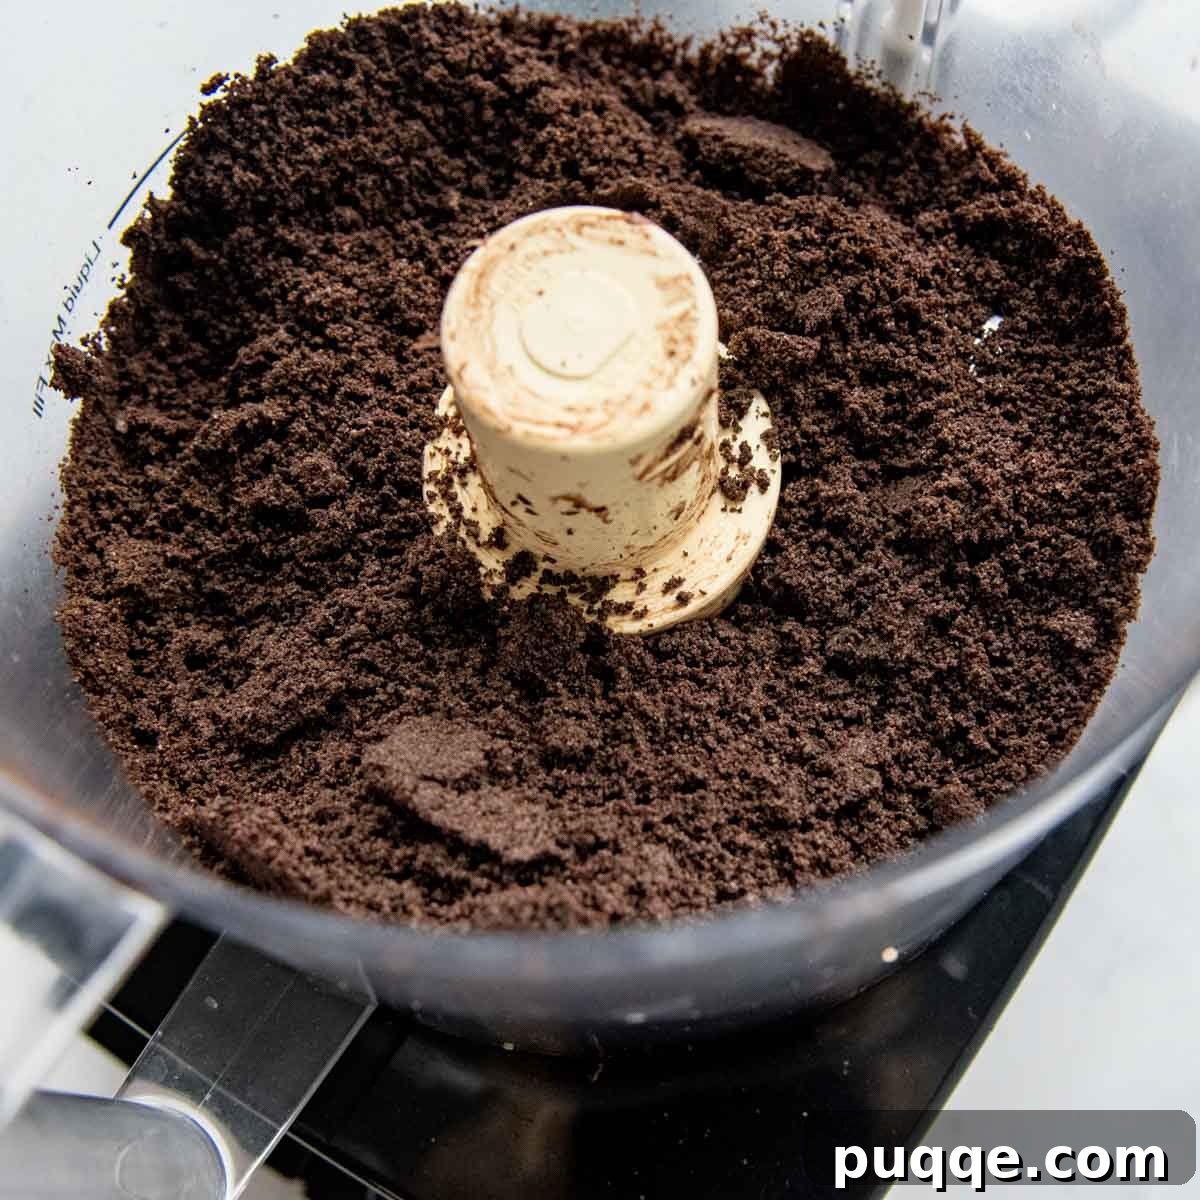
Creating the perfect Oreo crust is surprisingly simple. Begin by finely crushing 26 Oreo cookies. A food processor is a game-changer here, quickly transforming cookies into uniform fine crumbs. If you don’t have one, no worries! Place the cookies in a sturdy Ziploc bag and use a rolling pin or meat mallet to crush them thoroughly until they resemble very fine sand.
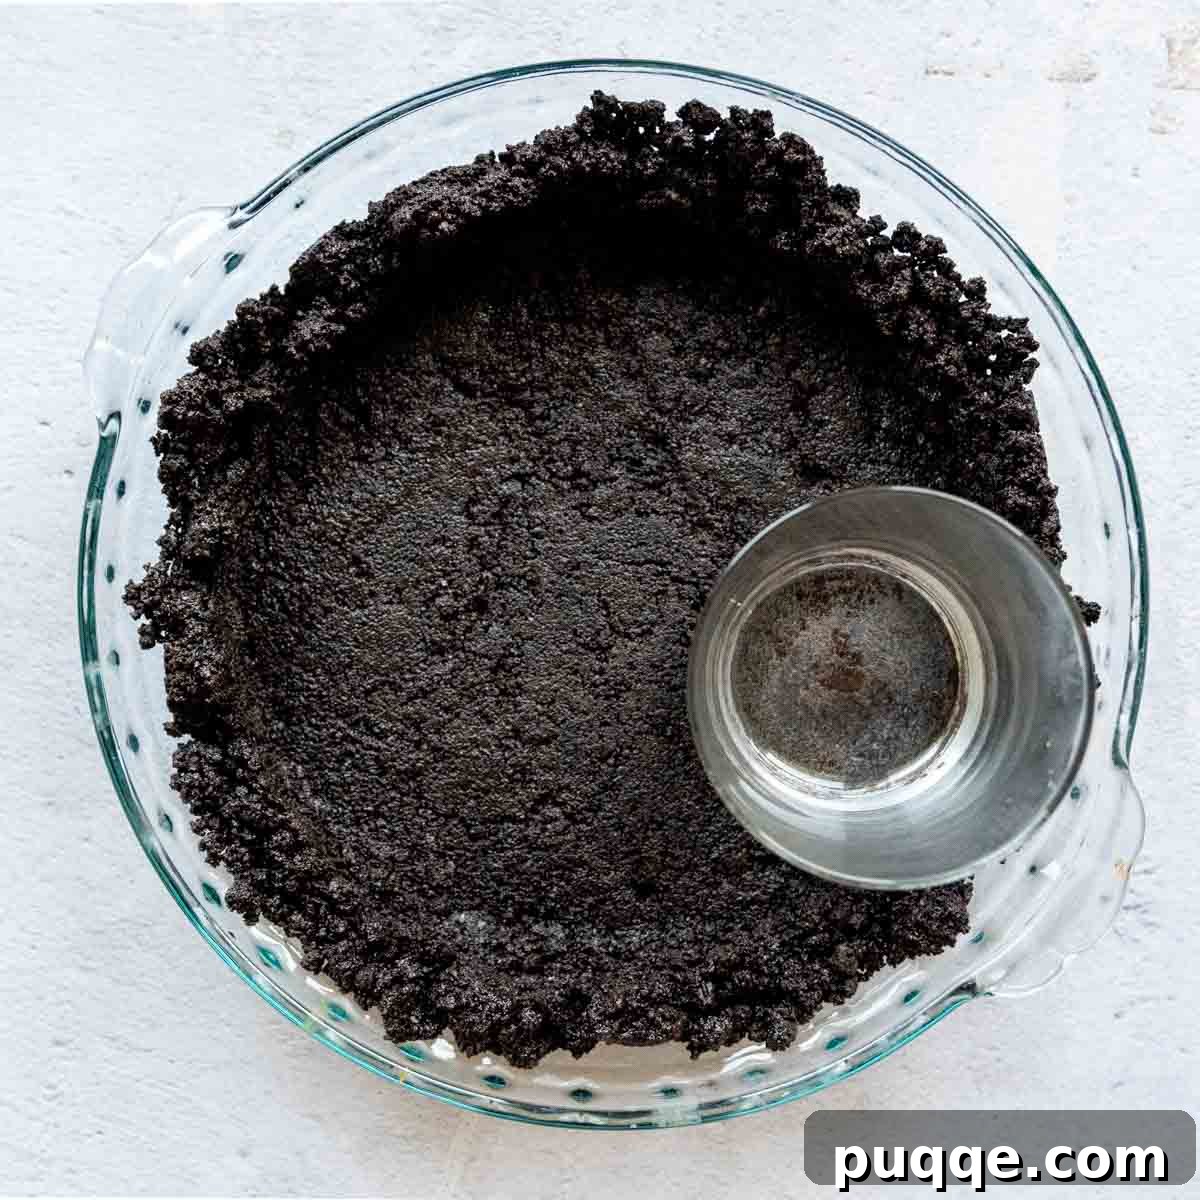
Next, combine these fine crumbs with melted butter, pulsing in the food processor or mixing in a bowl until fully incorporated. The mixture should resemble wet sand. Press this mixture firmly and evenly into the bottom and up the sides of your 9-inch pie plate or springform pan. The bottom of a drinking glass works wonders for achieving a smooth, compact base. For added stability and cleaner slices, bake the crust in a 350°F (175°C) oven for just 10 minutes. This essential step helps bind the crumbs, ensuring your pie slices hold their shape beautifully. Allow it to cool completely before proceeding.
2. Craft the Thick Chocolate Pudding Layer
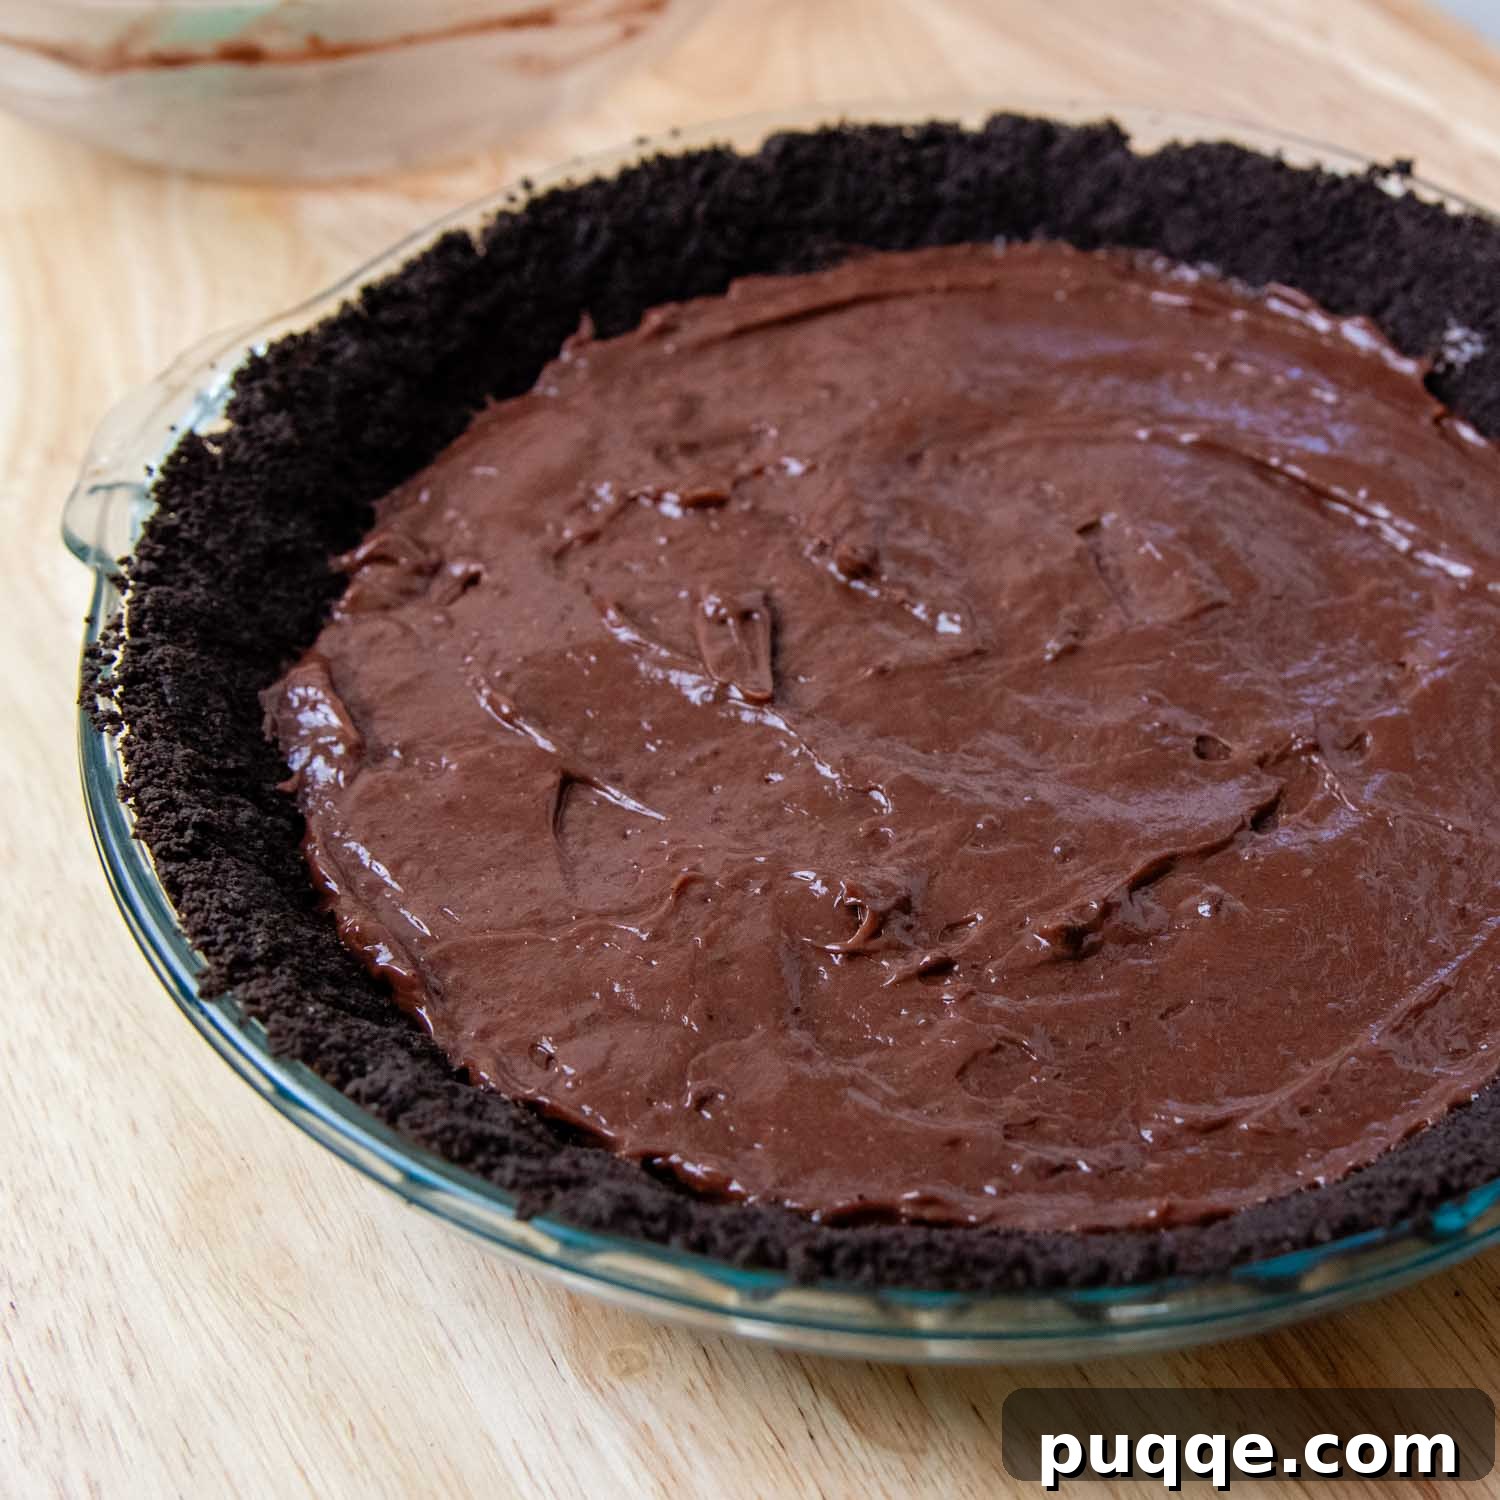
While your crust is baking and cooling, prepare the indulgent chocolate pudding layer. In a medium bowl, whisk together the instant chocolate pudding mix and the specified amount of milk (remember, slightly less than the box calls for to achieve that extra thickness). Continue whisking until the pudding is very thick and smooth. This denser consistency is exactly what you want, as it will hold its shape beautifully once chilled and sliced. Cover the bowl and refrigerate the pudding until it’s time to spread it onto your now-cooled Oreo crust.
3. Add the Fluffy Peanut Butter Cream Cheese Filling
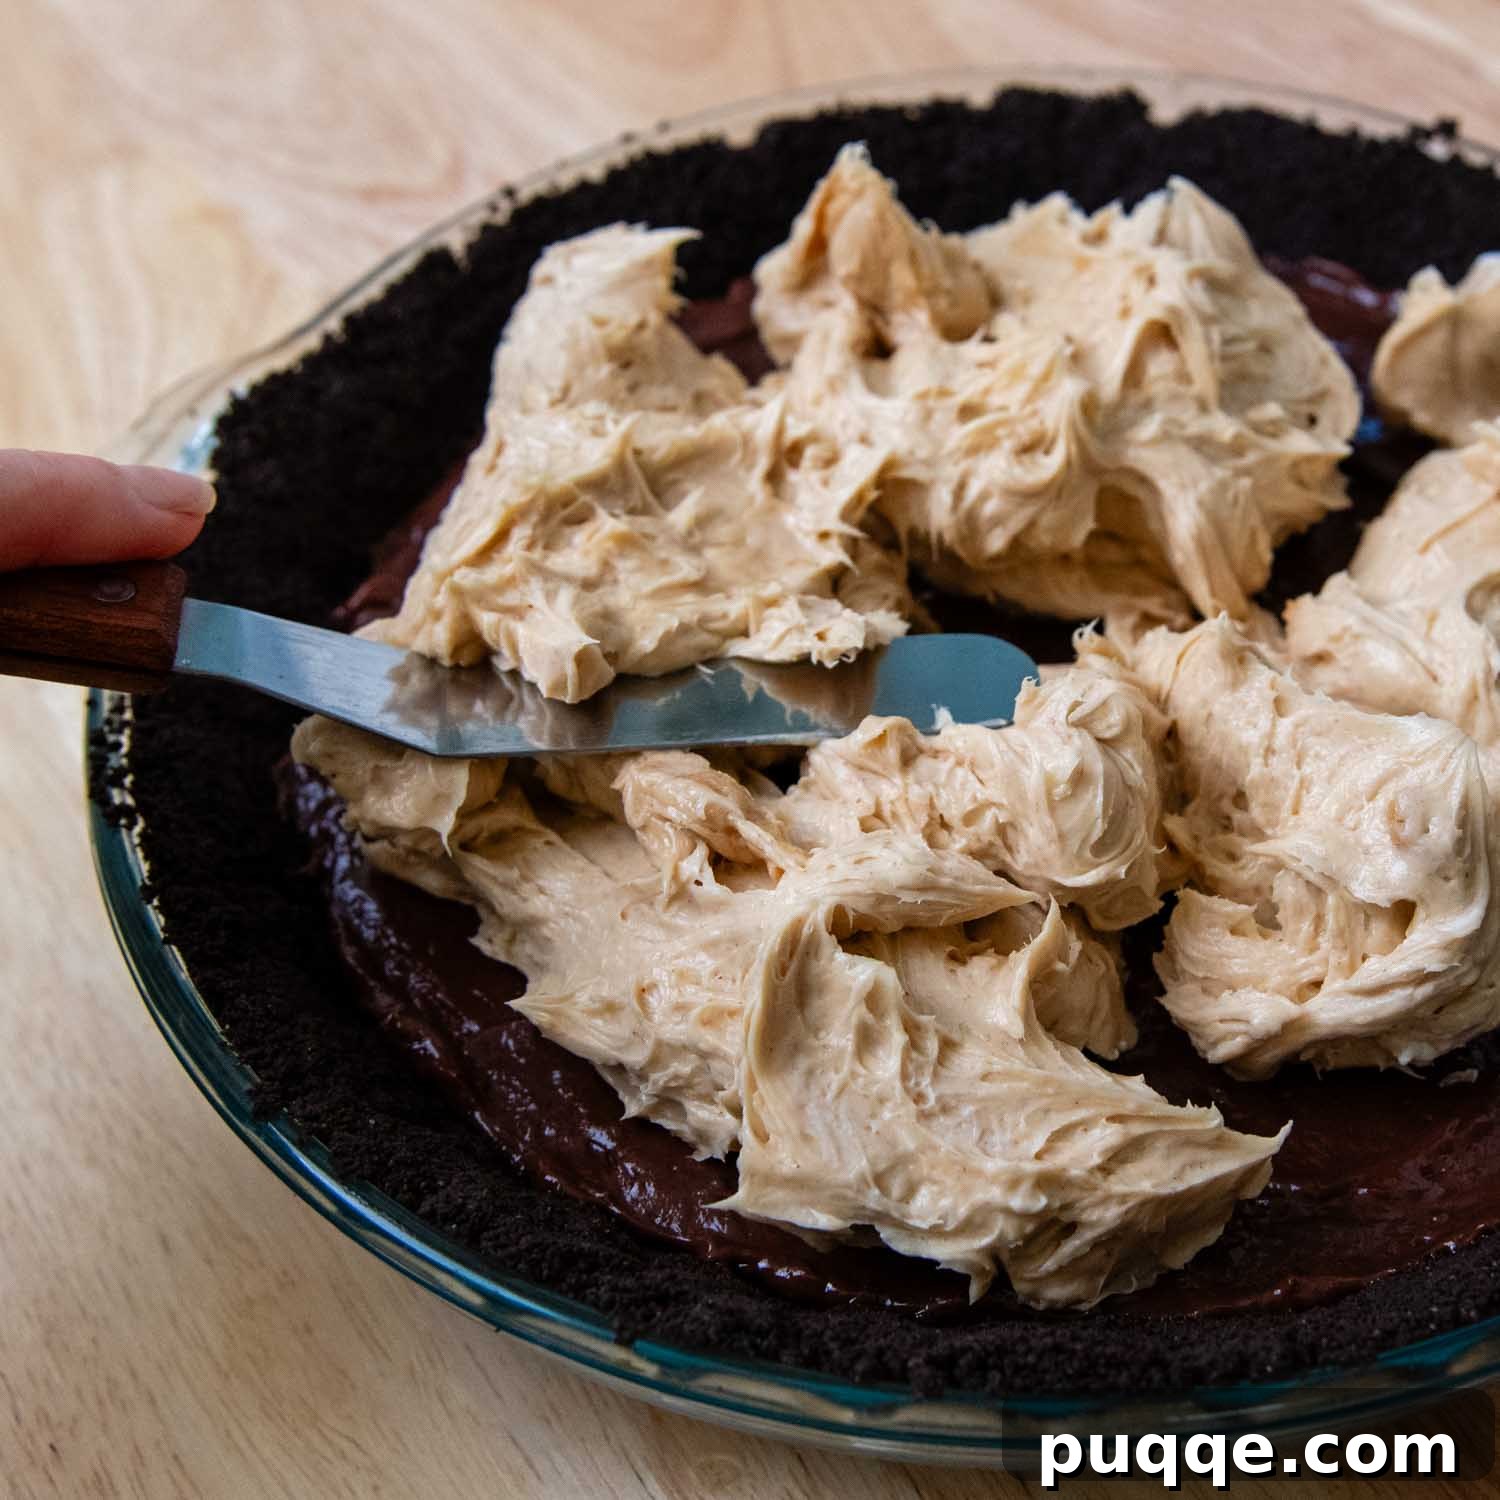
This, dare we say, might be the favorite layer for many! First, in a large bowl, beat the heavy cream with ¼ cup of powdered sugar until stiff peaks form – this is your homemade whipped cream. Transfer about 1 cup of this whipped cream to another bowl and set aside; the rest will be used for topping. Using the same large bowl (no need to wash it!), beat softened cream cheese with the remaining ½ cup of powdered sugar, creamy peanut butter, vanilla extract, and a pinch of salt until the mixture is completely smooth and creamy. Gently fold in the reserved 1 cup of whipped cream to create a light, airy, and mousse-like peanut butter filling. Spread this delightful concoction evenly over the chilled chocolate pudding layer.
4. Crown with Whipped Cream and Peanut Butter Drizzle
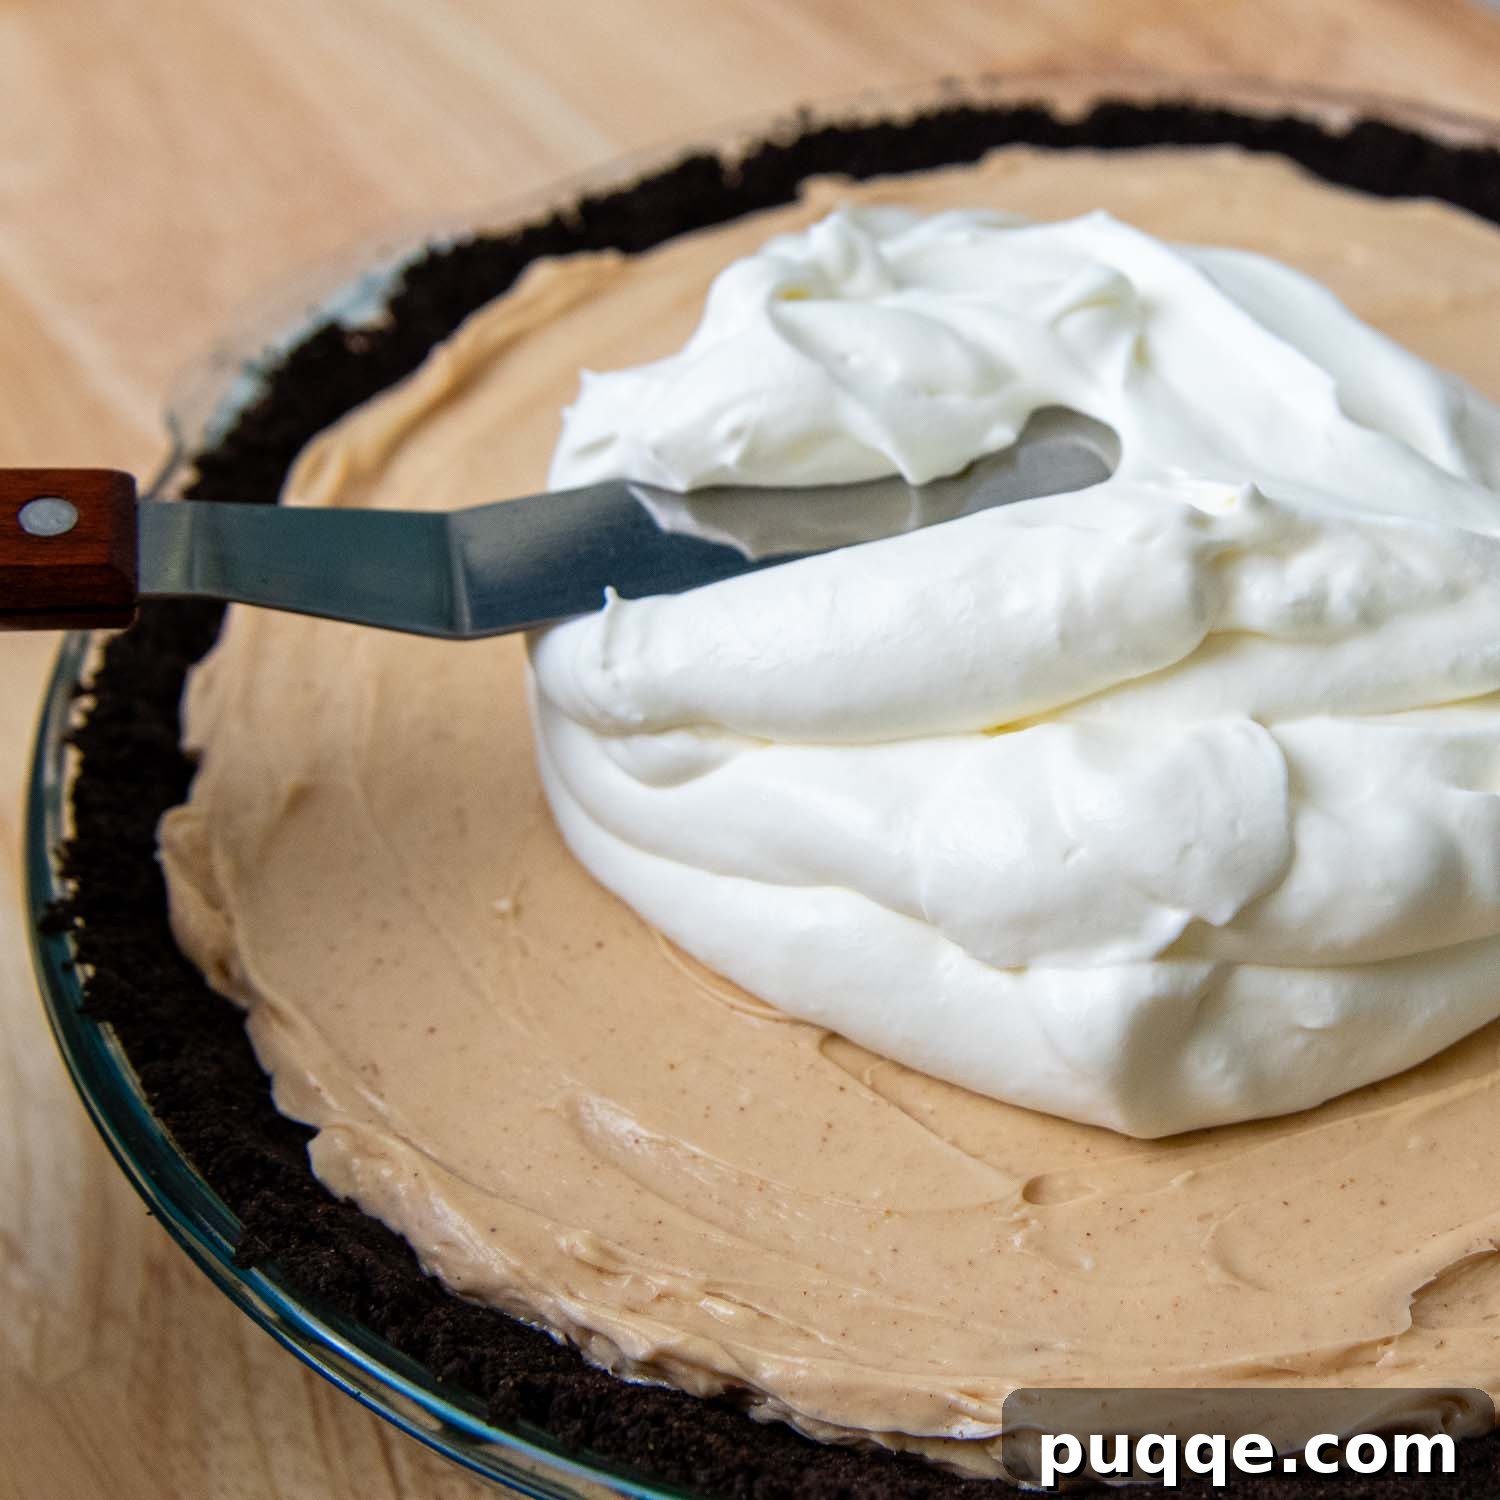
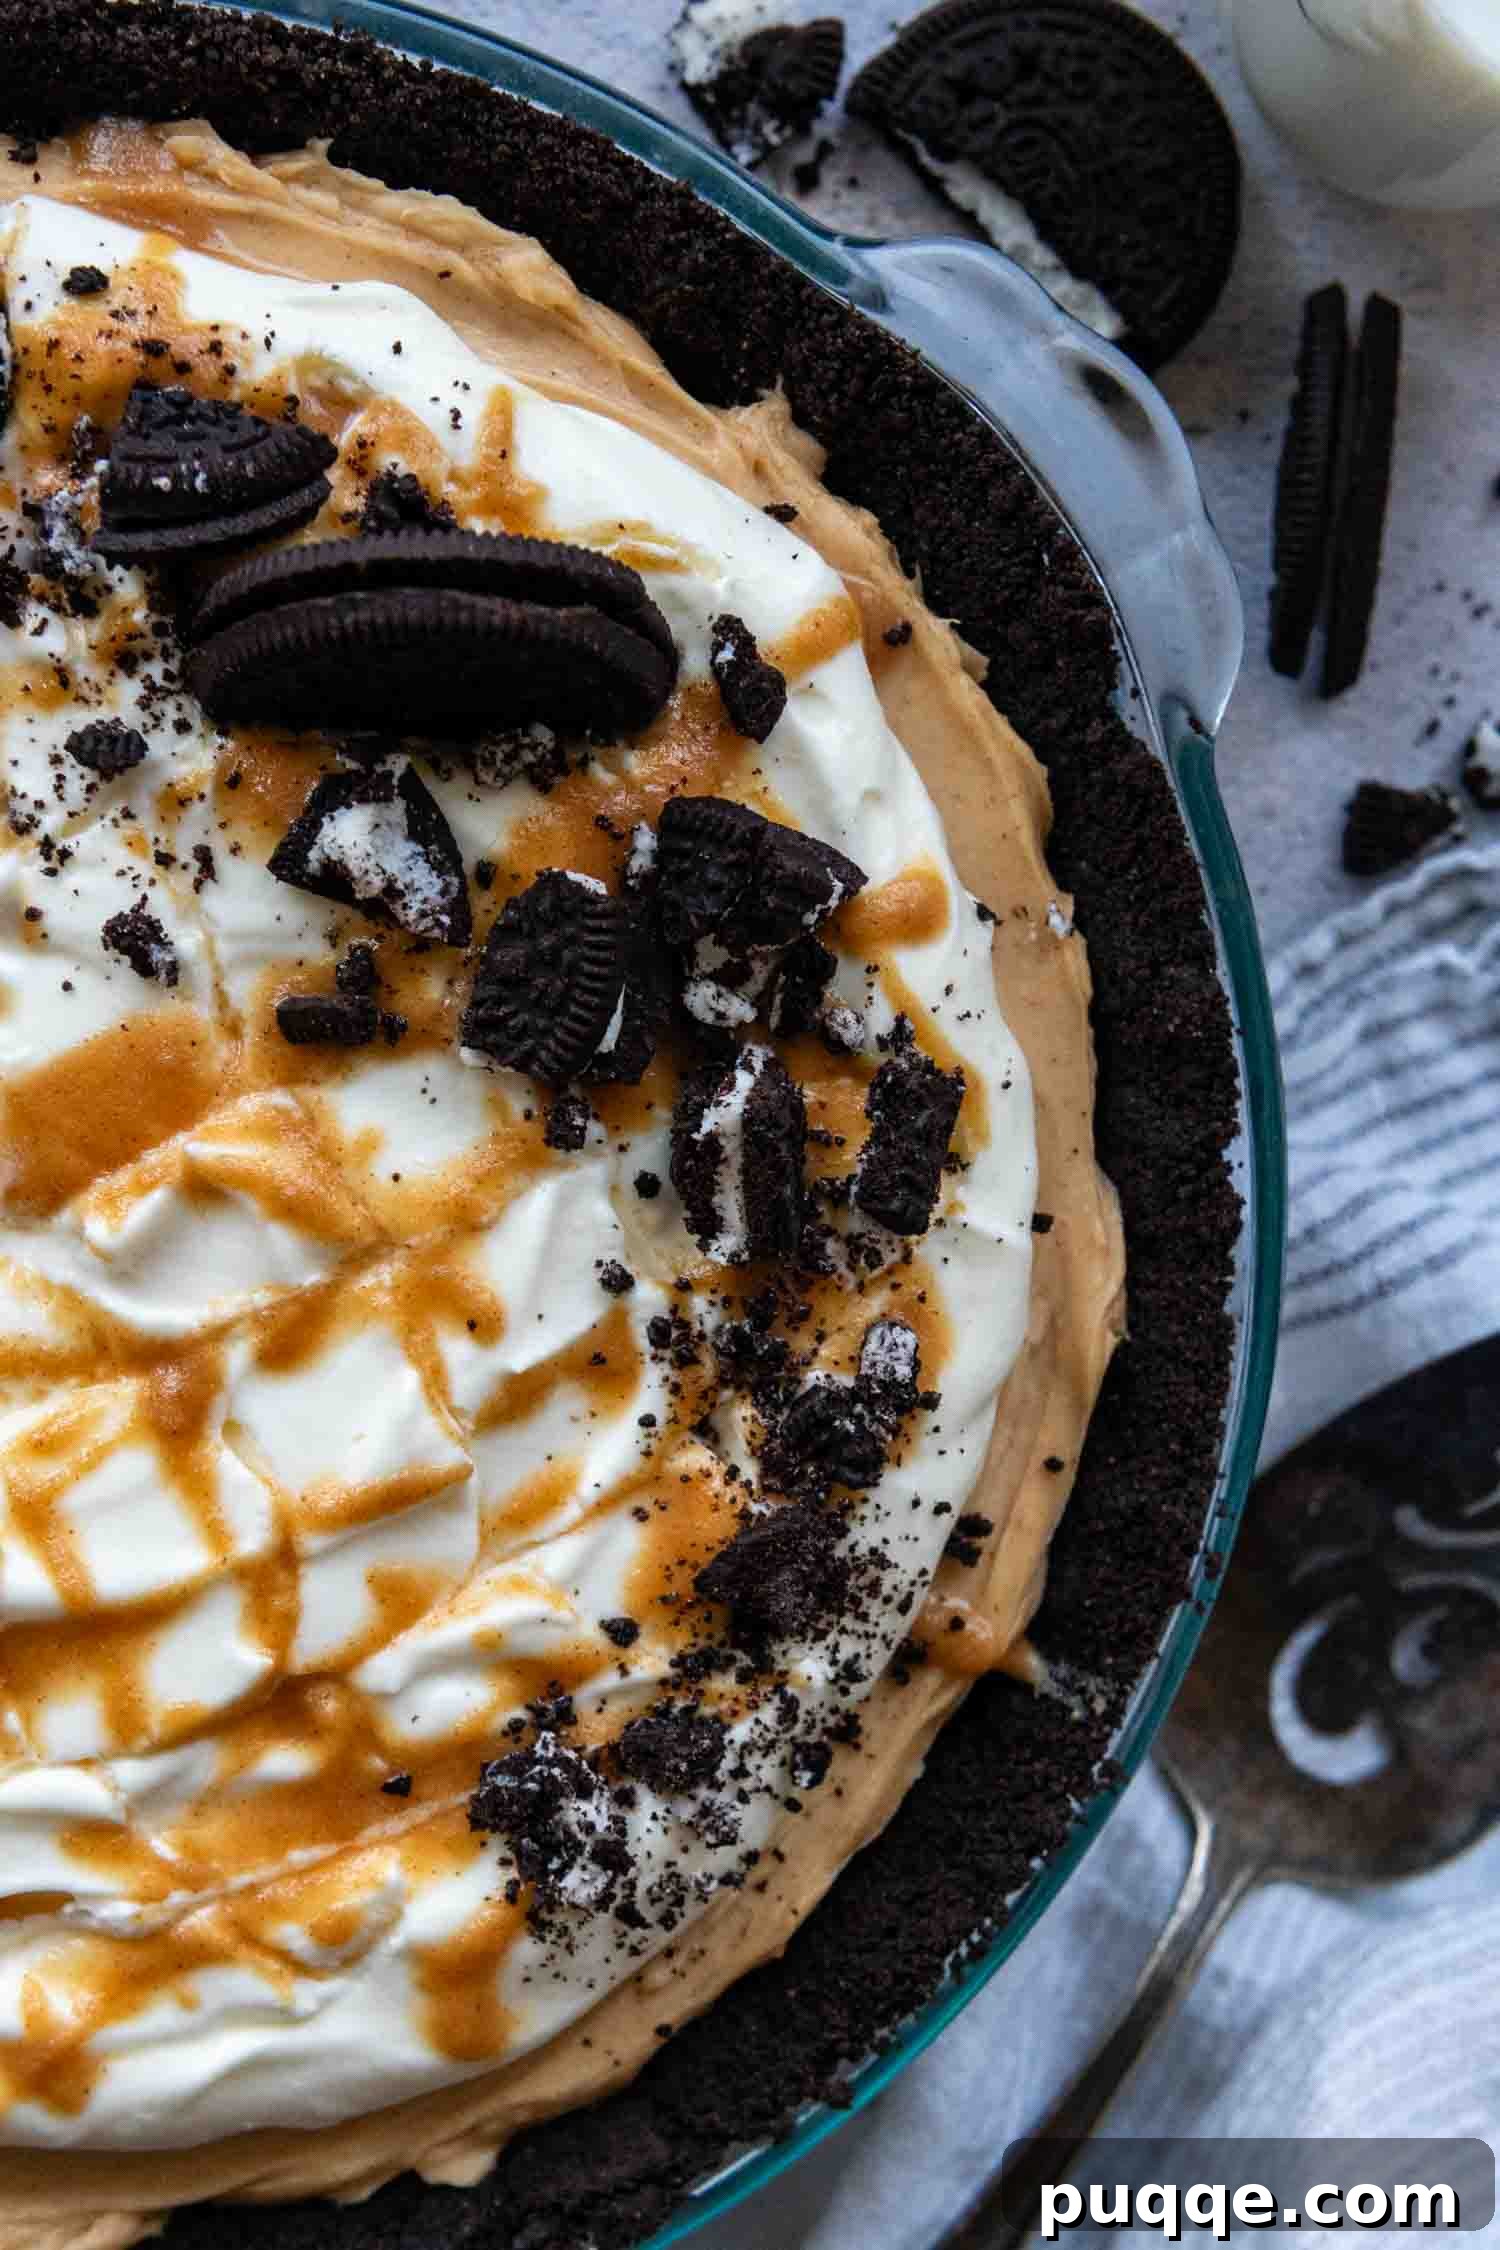
Now for the grand finale! Carefully spread the remaining whipped cream over the smooth peanut butter layer, creating a beautiful, airy cloud. To elevate this pie to another level of peanut butter heaven, prepare a simple drizzle. In a small bowl, whisk together 1 tablespoon of creamy peanut butter, 2 tablespoons of powdered sugar, and 1 tablespoon of milk until smooth and pourable. Drizzle this glorious peanut butter sauce artistically over the whipped cream. It’s so, so, so good!
Once fully assembled, place your masterpiece in the refrigerator to chill for at least 4 hours, or preferably overnight. This crucial chilling time allows all the layers to set perfectly, making for clean, firm slices and allowing the flavors to meld beautifully. The wait will be agonizing, but trust us, it’s absolutely worth every minute!
Next Level Topping Ideas
While a simple drizzle and a few reserved Oreo crumbs make for a stunning presentation, don’t hesitate to get creative with your toppings! The partial package of Oreos you used for the crust leaves some cookies for garnish, but here are even more irresistible ideas to take your pie to the next level:
- Reese’s Peanut Butter Cups: Chop them up and sprinkle generously over the whipped cream.
- Chocolate Shavings or Curls: Add an elegant touch and extra chocolatey goodness.
- Chopped Peanuts: For a delightful textural contrast and intensified peanut flavor.
- Pretzel Bits: A fantastic salty crunch that beautifully complements the sweet and creamy layers.
- Mini Chocolate Chips: A classic and always welcome addition.
- Chopped Snickers Bars or Reese’s Pieces: For a candy bar twist that’s undeniably delicious.
Want to Make This Gluten-Free? Absolutely!
Yes, you absolutely can make this incredible pie gluten-free, and it’s just as delicious! The only adjustment you’ll need to make is using gluten-free Oreo cookies for the crust. Follow our detailed recipe for a gluten-free Oreo crust, which includes specific tips for shaping and pressing the crust firmly to ensure it holds together perfectly. We promise, no one will even guess they’re enjoying a gluten-free dessert – it’s that good!
Can I Make This a Fully No-Bake Dessert?
You certainly can transform this into a completely no-bake pie, but there’s a small caveat! This option works best with traditional Oreo cookies, as gluten-free Oreos often benefit from a short bake to help the crust set. For a no-bake crust, combine 24 traditional Oreo cookies (finely crushed) with 4 tablespoons of melted butter. Press this mixture firmly into your pie plate and refrigerate for at least 30 minutes before adding the fillings. While delicious and convenient, be aware that no-bake crusts tend to be a little more crumbly when sliced compared to a lightly baked crust.
Storage and Make-Ahead Tips
This peanut butter Oreo pie is not only incredibly delicious but also a fantastic make-ahead dessert, perfect for reducing stress before a special event. Follow these tips to store your pie and prepare it in advance:
- Refrigeration: The entire pie can be assembled and refrigerated for up to 2 days before serving. We recommend adding the peanut butter drizzle and any cookie or candy garnishes closer to serving time. Oreo toppings, in particular, can soften slightly when refrigerated for extended periods.
- Freezing for Longer Storage: For even longer storage, this pie freezes beautifully! Prepare the entire pie as directed, but hold off on adding any garnishes. Once assembled, freeze the pie until it’s solid. Then, wrap it securely with several layers of plastic wrap, followed by a layer of aluminum foil to prevent freezer burn.
- Thawing Frozen Pie: When you’re ready to enjoy, simply transfer the frozen pie to the refrigerator and let it thaw overnight. Once thawed, sprinkle on your desired garnishes, slice, and serve. It will taste just as fresh and delicious as if you made it that day!
- Leftovers: Any leftover slices should be stored in an airtight container in the refrigerator for up to 3-4 days.
Frequently Asked Questions (FAQs)
- Can I use crunchy peanut butter instead of creamy?
- While creamy peanut butter is recommended for the smoothest filling and drizzle, you *could* use crunchy peanut butter in the main filling for added texture. However, we still suggest creamy for the drizzle to ensure it’s smooth enough to pour easily.
- How long does the pie need to chill?
- A minimum of 4 hours is necessary for the layers to properly set. For the best results and easiest slicing, we strongly recommend chilling the pie overnight.
- What if my pudding isn’t thickening enough?
- Ensure you are using *instant* pudding mix and not “cook and serve.” Also, double-check that you’ve used slightly less milk than the box calls for. Sometimes, the temperature of the milk can affect setting; very cold milk helps. If it’s still too thin, try chilling it longer or adding a tiny bit more pudding mix (unmixed) and whisking vigorously.
- Can I make individual peanut butter Oreo pies?
- Yes! This recipe can easily be adapted to make individual mini pies. Use mini pie crusts or press Oreo crumbs into muffin tins lined with paper liners. Adjust baking times accordingly if you opt for baked crusts, or chill thoroughly for no-bake versions.
Save this recipe to your Pinterest board!
Let’s be friends on Pinterest! I’m always sharing great recipes!
Did you make this recipe? We love hearing from you! Share your thoughts and photos with us.

Dreamy Creamy Oreo Peanut Butter Pie

By Melissa Erdelac
Yield: 8 servings |
Prep Time: 20 mins |
Cook Time: 10 mins |
Chill Time: 4 hrs |
Total Time: 4 hrs 30 mins
This incredibly luscious peanut butter Oreo pie is the ultimate dessert for PB and chocolate lovers. An Oreo crust can be made with traditional or gluten-free cookies and topped with a thick layer of chocolate pudding, fluffy peanut butter cream cheese filling, and whipped cream. If you are looking for a make-ahead, virtually no bake pie to celebrate you’ve found the magic recipe!
Ingredients
Oreo Crust
- 26 Oreos, gluten-free or traditional
- 5 tablespoons butter, melted
Peanut Butter Chocolate Pie
- 1 (3.9 oz) box instant chocolate pudding
- 1½ cups milk, (2% at least)
- 1½ cups heavy cream (or 8 oz thawed Cool Whip)
- ¾ cup powdered sugar, divided (¼ cup for whipped cream, ½ cup for filling)
- 8 ounces cream cheese, softened
- ½ cup creamy peanut butter
- 1 teaspoon vanilla extract
- ¼ teaspoon salt
Peanut Butter Drizzle
- 1 tablespoon creamy peanut butter
- 2 tablespoons powdered sugar
- 1 tablespoon milk
Equipment
- 9-inch pie plate
- Stand Mixer or electric beaters
- Food Processor (optional, for crushing Oreos)
- Offset Spatula
Instructions
Oreo Crust
- Crush the 26 Oreos into fine crumbs. Use a food processor for best results, or place cookies in a ziplock bag and crush with a rolling pin until extremely fine.
- Add the 5 tablespoons of melted butter to the crumbs and mix until well combined.
- Dump the mixture into a 9-inch pie plate (or 8/9-inch square baking pan). Use the bottom of a glass to firmly press the crumbs evenly along the bottom and sides of the pan. Press with your hand to ensure everything is compressed.
- Bake at 350°F (175°C) for 10 minutes. Allow to cool completely before filling.
Peanut Butter Pie Assembly
- While the crust cools, make the chocolate layer. Whisk together the 3.9 oz box of instant chocolate pudding and 1½ cups milk. It will be very thick. Cover and refrigerate until ready to use.
- In a separate large bowl, add the 1½ cups heavy cream and ¼ cup powdered sugar. Using a stand mixer with a whisk attachment or electric beaters, beat until very stiff peaks form. Transfer to another bowl, reserving about 1 cup for the peanut butter filling and the rest for topping.
- For the cream cheese layer, use the same bowl you used for the whipped cream (no need to clean). Beat together the 8 ounces cream cheese, ½ cup powdered sugar, ½ cup creamy peanut butter, 1 teaspoon vanilla extract, and ¼ teaspoon salt until smooth, scraping down the sides. Gently fold in 1 cup of the reserved whipped cream.
- To assemble: Spread the chilled pudding evenly on the bottom of the cooled crust. Dollop the peanut butter mixture on top and spread smoothly with an offset spatula. Top with the remaining whipped cream.
- Prepare the peanut butter drizzle by mixing together 1 tablespoon creamy peanut butter, 2 tablespoons powdered sugar, and 1 tablespoon milk until smooth. Drizzle over the whipped cream.
- Refrigerate for at least 4 hours, or preferably overnight, before serving. Garnish with chopped remaining Oreos or other desired toppings just before serving. Refrigerate any leftovers.
Notes
Using Cool Whip
Instead of beating together heavy cream with ¼ cup powdered sugar, an 8-ounce container of thawed whipped topping (like Cool Whip) may be used. Fold 1 cup into the peanut butter mixture and use the remaining to top the pie.
Make Ahead & Freezer Option
The entire pie can be prepped and refrigerated up to 2 days before serving. We recommend saving the peanut butter drizzle and garnish until closer to serving time. Especially if topping with Oreos, these can get a little soft upon refrigeration.
To freeze, prep the entire pie but leave off the garnish. Freeze until solid, then wrap securely with plastic wrap and a layer of foil. Thaw overnight in the refrigerator, sprinkle on garnish, and serve.
Nutrition Information (per serving)
- Calories: 810kcal
- Carbohydrates: 92g
- Protein: 12g
- Fat: 46g
- Saturated Fat: 22g
- Polyunsaturated Fat: 5g
- Monounsaturated Fat: 16g
- Trans Fat: 0.3g
- Cholesterol: 87mg
- Sodium: 1159mg
- Potassium: 493mg
- Fiber: 4g
- Sugar: 68g
- Vitamin A: 1122IU
- Vitamin C: 0.3mg
- Calcium: 155mg
- Iron: 6mg
*Nutrition values are approximate and may vary based on ingredients and preparation methods.