
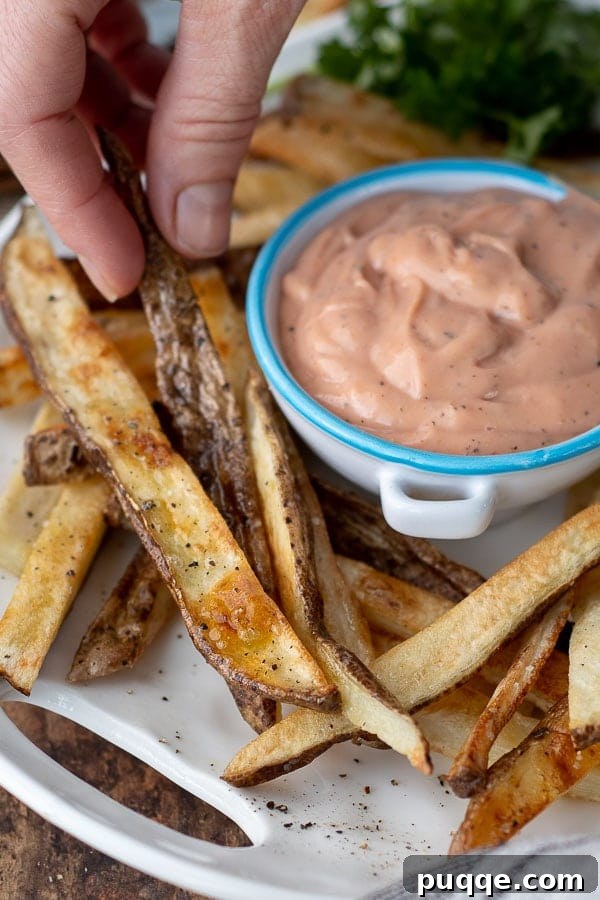
Are you on a quest for the ultimate homemade french fries – the kind that are unbelievably crisp on the outside and wonderfully fluffy on the inside, without the grease and fuss of deep-frying? Look no further! This comprehensive guide reveals all the secrets to crafting the best crispy baked oven fries right in your own kitchen. Forget soggy, limp potatoes; we’re talking about restaurant-quality crunch achieved through simple, yet essential, techniques. Not only will you master the art of baking perfectly golden fries, but you’ll also discover how to whip up an irresistible, creamy homemade fry sauce recipe that elevates every bite. Prepare to transform your potato game forever!
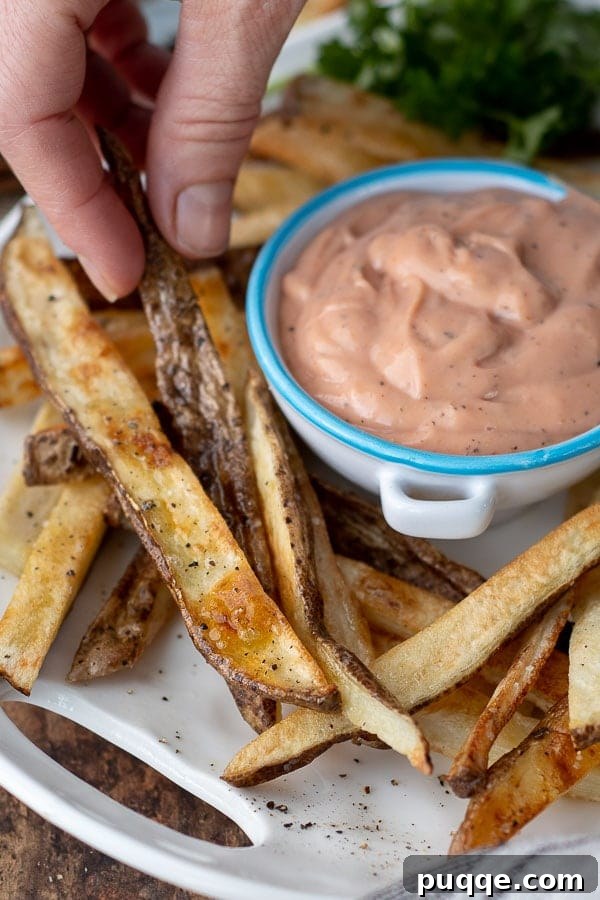
Mastering the Art of Crispy Oven Fries: Your Ultimate Guide
There’s a universal love for french fries, but a universal disappointment for soggy ones. The pursuit of the perfect crispy fry, especially when baked instead of deep-fried, can feel like a culinary challenge. I’ve spent countless hours experimenting, enduring many (delicious) “mistakes” to pinpoint the exact methods that guarantee an ultra-crispy finish every single time. The good news? It’s much simpler than you think! By understanding a few key principles and applying some easy tricks, you can achieve that golden-brown, satisfying crunch without resorting to a deep fryer. This healthier approach doesn’t compromise on flavor or texture; in fact, many find baked fries even more satisfying due to their lighter feel.
The Essential Secrets to Achieve Unbeatable Crispness
Creating truly crispy oven fries involves more than just tossing potatoes in oil and baking them. It’s about minimizing moisture and maximizing surface area for browning. Here are the foundational tricks that will take your homemade fries from good to absolutely extraordinary:
- The Critical Starch-Removal Soak: This is arguably the most crucial step. Soaking your freshly cut potatoes in cold water for several hours or even overnight draws out excess surface starch. Why is this key? Starch, when cooked, can create a gummy texture and prevent the exterior from crisping effectively. By removing it, you’re setting the stage for a beautifully golden and crackling crust, mimicking the results of deep-frying.
- Optimal Spacing is Non-Negotiable: Overcrowding your baking sheet is the enemy of crispiness. When fries are packed too closely, they release steam, which gets trapped and essentially steams the potatoes instead of baking them. This leads to soft, limp fries. Always use multiple baking sheets if necessary, ensuring each fry has ample room for hot air to circulate freely around its entire surface. This allows the moisture to escape and the potatoes to properly brown.
- Patience with the Flip: Resist the urge to flip your fries too soon! For the majority of the baking time, leave them undisturbed. This allows one side to develop a beautiful, deep golden crust and a firm sear, making them much easier to flip without tearing or breaking. Once they’ve achieved this initial crispness, they will naturally release from the pan, indicating they’re ready for the other side to crisp up.
- Strategic Seasoning Timing: While it might be tempting to season your fries before baking, hold off! Salt is a hygroscopic ingredient, meaning it draws out moisture. Adding salt too early can pull moisture to the surface of the potatoes, hindering their ability to crisp up properly. Instead, wait until your fries are fresh out of the oven, perfectly golden and crunchy, to sprinkle on your preferred seasonings. This ensures maximum crispness and optimal flavor adherence.
Choosing the Right Potato for Perfect Oven Fries
The type of potato you choose significantly impacts the final texture of your oven fries. To achieve that classic, fluffy interior and super crispy exterior, Russet potatoes (also known as Idaho potatoes) are your best bet. Here’s why:
- High Starch Content: Russet potatoes are notoriously high in starch and low in moisture. This composition is ideal for fries because the starch helps create a dry, crispy surface when baked at high temperatures, while the interior becomes wonderfully light and fluffy.
- Fluffy Texture: Their starchy nature means they break down easily during cooking, leading to that coveted fluffy core that contrasts beautifully with the crispy crust.
In contrast, waxy potatoes like red potatoes, new potatoes, or Yukon Golds have a higher moisture content and lower starch. While delicious for other applications like smashed potatoes, mashed potatoes, or grilled potatoes, they tend to steam rather than crisp when baked, resulting in a softer, less desirable texture for fries. Stick with Russets for an authentic crispy french fry experience.
The Step-by-Step Journey to Your Crispiest Oven Fries
Now that you understand the fundamental principles, let’s walk through the precise steps to make these perfect crispy oven fries. Each stage is designed to build towards that ultimate crunch.
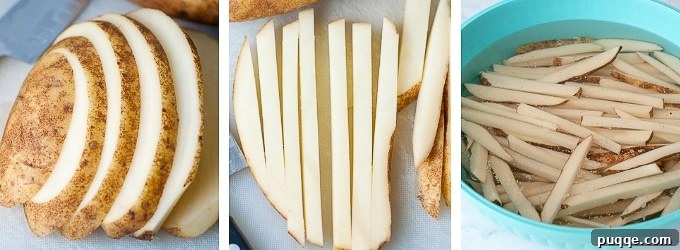
- Preparation: Cutting and Soaking: Begin by washing your Russet potatoes thoroughly. If you prefer, peel them, or leave the skins on for a rustic touch and added nutrients. First, slice the potatoes lengthwise into ¼-inch thick pieces. Lay these slices flat and then cut them again into ¼-inch matchsticks. Aim for uniformity in size, as this ensures even cooking. Immediately place the cut fries into a large bowl and cover them completely with cold water. Allow them to soak for at least 2 hours, or for best results, refrigerate and soak overnight. This process is vital for drawing out excess starch.
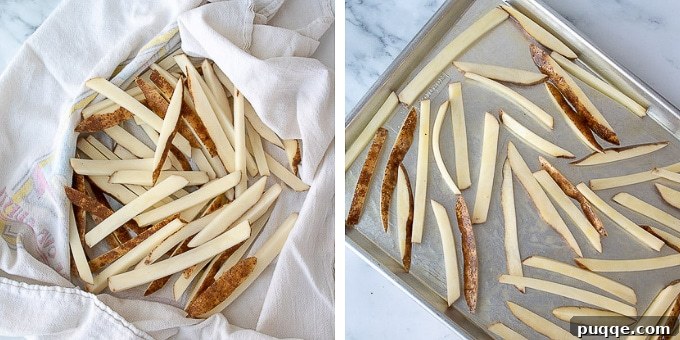
- Drying for Success: Once soaking is complete, drain the potatoes and rinse them thoroughly under cold running water. This helps remove any remaining surface starch. The next step is paramount: drying. Lay the rinsed fries in a single layer on highly absorbent, lint-free towels, such as flour sack towels. Press firmly with additional towels to blot them as dry as possible. Any residual moisture will prevent them from crisping.
- Preheating and Oiling the Pan: Preheat your oven to a high temperature of 450ºF (232ºC). While the oven preheats, lightly spray your baking sheets with cooking spray. This provides an excellent non-stick base. Divide the thoroughly dried fries evenly among two to three baking sheets. Remember, do not overcrowd them. Drizzle the olive oil over the potatoes and toss them gently but thoroughly to ensure every piece is lightly coated. Spread the fries back out into a single layer, making sure no pieces are touching.
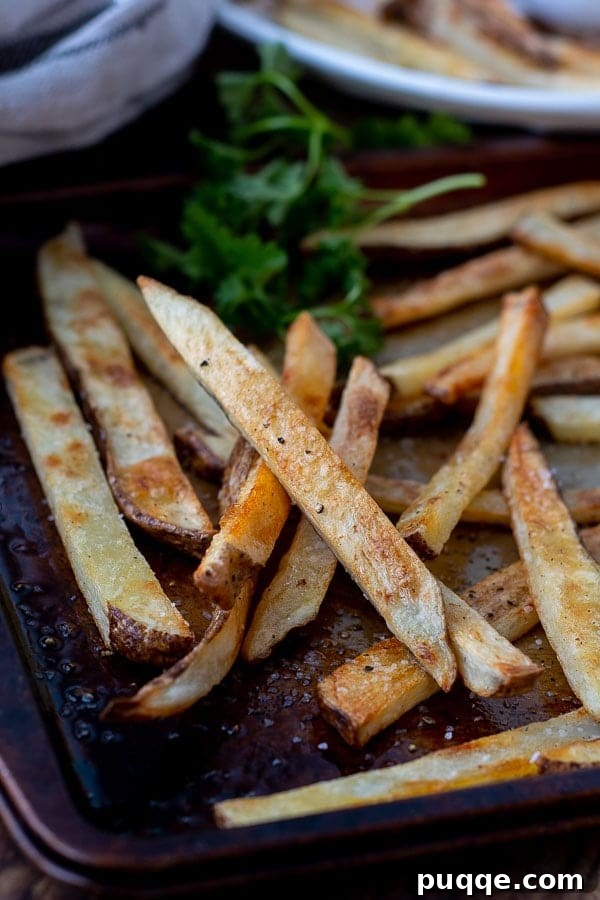
- Arrangement and Initial Bake: Place the baking sheets in the preheated oven. Bake for an initial 20-25 minutes. If using multiple pans, rotate their positions on the oven racks halfway through this period for uniform heating. During this phase, the fries will begin to cook through and start to develop a crispy crust on the bottom.
- The Crucial Flip and Final Bake: After 20-25 minutes, carefully remove the baking sheets from the oven. Using a thin, flexible steel spatula, try to flip the fries. If they stick to the pan and resist flipping, it means they haven’t developed a sufficient crust yet. Return them to the oven for a few more minutes until they release easily. Once flipped, return the pans to the oven and continue baking for another 5-10 minutes, or until the fries are golden brown, uniformly crispy, and cooked to perfection.
- Seasoning to Perfection: As soon as you remove the crispy fries from the oven, transfer them to a serving platter. Immediately sprinkle them generously with salt. This is also the perfect time to add any other preferred seasonings such as black pepper, garlic powder, paprika, chili powder, a dash of seasoned salt, fresh chopped herbs, or even grated Parmesan cheese for extra flavor dimensions.
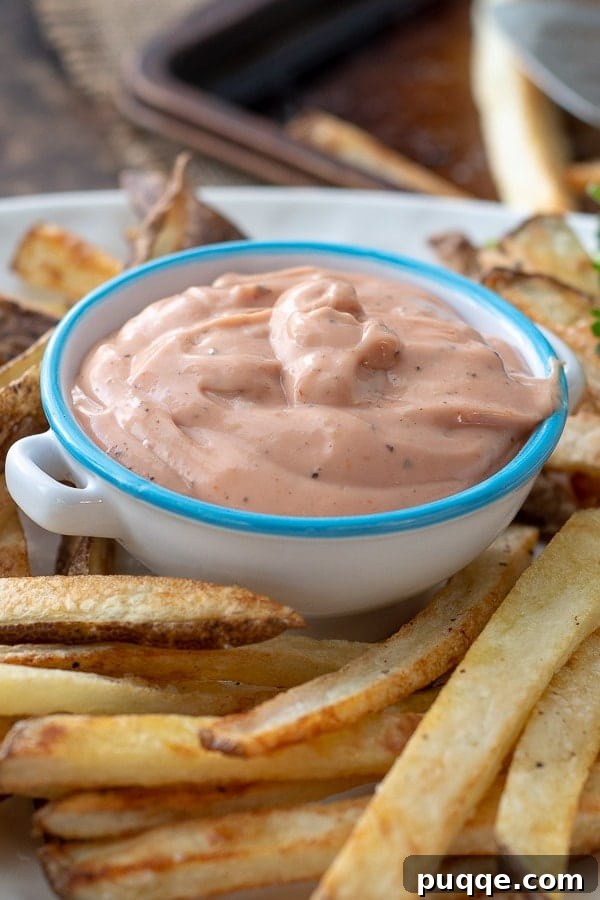
The Magic of Our Life-Changing Homemade Fry Sauce
For too long, I lived in blissful ignorance of fry sauce. Those were indeed dark times. If you’ve never experienced the simple joy of a perfectly balanced fry sauce, I understand your skepticism. You might look at the short list of humble ingredients and wonder what all the fuss is about. But trust me on this – it’s legitimate! Who would have thought that a mere five ingredients could combine to create such a profoundly delicious “soulmate” for french fries?
This creamy, tangy, and slightly savory sauce offers a delightful counterpoint to the crispiness of the fries. It’s incredibly easy to make, and chances are you already have all the ingredients in your pantry. A spoonful of this fry sauce transforms an ordinary plate of fries into an extraordinary culinary experience. It’s so good, you might find yourself looking for other things to dip into it!
Expert Tips for Flawless Oven Fries Every Time
Beyond the core steps, these additional expert tips will ensure your oven fries are consistently perfect, showcasing that extra level of culinary finesse:
- The Unrivaled Russet: As mentioned, Russet potatoes are supreme for this recipe. Their starchiness is your secret weapon for that ideal crisp-to-fluffy ratio. Feel free to peel them or leave the skins on; both options yield fantastic results.
- Uncompromising Dryness: Seriously, this cannot be overstressed. After soaking, lay your drained potatoes on clean, absorbent towels like flour sack towels. Press out every bit of surface moisture. Flour sack towels are particularly excellent because they are highly absorbent, lint-free, and large, making them perfect for drying everything from delicate greens to these potato matchsticks.
- The Pre-Spray Advantage: Always spray your baking sheets with cooking spray before adding oil. This isn’t redundant; cooking spray contains lecithin, which creates a thin, non-stick barrier between the pan, oil, and food, guaranteeing that your fries release effortlessly when it’s time to flip. If using parchment paper, confirm it’s rated for the 450ºF (232ºC) baking temperature.
- Preventing the Crowd: This is a cardinal rule for crispy anything. If your fries are too close together, they’ll steam instead of roast. I routinely use two to three baking sheets for a single batch to ensure adequate space. If you’re short on pans, consider cutting your potatoes into thicker wedges instead of matchsticks, which can tolerate slightly less space, though ample room is still best.
- Strategic Pan Rotation: To ensure even browning and crisping across all your fries, rotate the baking sheets between the oven racks halfway through the baking process. This compensates for any hot spots in your oven.
- The “Free Release” Rule for Flipping: Don’t force the flip. If your fries are sticking to the pan, they simply need more time to develop that crispy, golden crust. They will naturally release easily from the pan when they are ready to be turned. A thin, flexible steel spatula is the ideal tool for this delicate task.
- Post-Bake Flavor Burst: Seasoning after baking prevents moisture loss and ensures the salt and spices adhere beautifully to the hot, crispy surface. Experiment with different flavor profiles beyond just salt – consider garlic powder, onion powder, smoked paprika, cayenne pepper for a kick, Italian seasoning, or a sprinkle of grated Parmesan cheese for an umami boost.
How to Reheat Leftover Fries to Crispy Perfection
While leftover crispy oven fries are a rarity in my home, sometimes you might find yourself with a few to spare. Whatever you do, *please* avoid the microwave; it will only render them soggy and unappetizing. To bring them back to their former crispy glory, use one of these methods:
- In the Oven: This method is excellent for larger batches. Place a baking sheet in your oven and preheat it to 425ºF (218ºC). Once the oven and pan are hot, carefully remove the sheet, spread the fries in a single layer (again, avoid crowding!), and bake for 3-5 minutes, or until heated through and re-crisped.
- On the Stovetop: For a quick reheat, especially for smaller portions, a heavy skillet (cast iron works beautifully) is your friend. Heat the skillet over high heat until it’s very hot. Add a tiny splash of oil (if needed) and spread the fries in a single layer. Flip them every 30 seconds or so until they’re hot, golden, and crispy again.
- In an Air Fryer: The air fryer is fantastic for reheating fries. Preheat your air fryer to 350ºF (175ºC). Place the fries in the basket, ensuring it’s no more than halfway full to allow for proper air circulation. Cook for 3-4 minutes, shaking the basket halfway through to promote even crisping.
Frequently Asked Questions About Oven Fries
- Can I use sweet potatoes for this recipe?
- While you can bake sweet potatoes in a similar fashion, they have a different starch and sugar content, so they won’t achieve the same kind of crispness as Russet potatoes. They tend to caramelize more and will be softer. The soaking step is still beneficial.
- What’s the best oil to use for oven fries?
- Olive oil is a great choice for its flavor and relatively high smoke point. However, you can also use other neutral oils with high smoke points like avocado oil, grapeseed oil, or canola oil, especially if you prefer a milder flavor profile.
- Can I make these ahead of time?
- For the best crispness, it’s ideal to serve oven fries immediately after baking. However, you can complete the cutting and soaking steps up to a day in advance. Store the soaked potatoes in cold water in the refrigerator, then drain and dry thoroughly just before baking.
- How do I know if my fries are cooked through?
- Perfectly cooked fries will be tender on the inside and crispy on the outside. You can test by carefully biting into one (once it’s cooled slightly!) or by gently piercing with a fork. They should offer minimal resistance.
Save this recipe to your Pinterest board!
Let’s be friends on Pinterest! I’m always sharing great recipes!
Did you make this recipe? We love hearing from you! Leave a star rating and comment below the recipe card. Your feedback helps others discover amazing recipes in our community. We always appreciate hearing from you! -Melissa
Crispy Homemade Oven Fries (Not Soggy!)

Average Rating: 4.93 stars from 14 ratings
Author: Melissa Erdelac
Yield: 6 servings
Prep Time: 1 hour 15 minutes (includes soaking time)
Cook Time: 25 minutes
Total Time: 1 hour 40 minutes
This extra crispy baked oven fries recipe shows you how to make the best homemade baked french fries. Here you will find easy tips and tricks for making ultra crispy potatoes to dunk into the included homemade fry sauce recipe.
Ingredients
For the Crispy Oven Fries:
- 3 large russet potatoes, cut into 1/4″ matchsticks
- 3 tablespoons olive oil
- Salt, for seasoning (to taste, added after baking)
- Optional seasonings: black pepper, garlic powder, paprika, chili powder, seasoned salt, fresh herbs, or Parmesan cheese
For the Life-Changing Fry Sauce:
- ½ cup mayonnaise (light mayonnaise can be used for a lighter option)
- ¼ cup ketchup
- ½ teaspoon garlic salt
- ¼ teaspoon Worcestershire sauce
- ½ teaspoon black pepper
Equipment
- Baking Sheets (2-3 recommended for optimal crispness and air circulation)
- Flexible Steel Spatula
- Flour Sack Towels (or other highly absorbent lint-free towels)
Instructions for Crispy Homemade Oven Fries
- **Prepare and Soak Potatoes:** Place the cut potato matchsticks in a large bowl and cover them completely with cold water. Allow them to soak for a minimum of 2 hours, or for the crispiest results, refrigerate and soak overnight. This step is crucial for drawing out excess starch.
- **Preheat Oven & Dry Potatoes:** Preheat your oven to 450ºF (232ºC). Drain the soaked potatoes thoroughly, rinse them under cold water, and then lay them out in a single layer on highly absorbent, lint-free towels (such as flour sack towels). Blot them as dry as possible, pressing firmly to remove all surface moisture. The drier the potatoes, the crispier your fries will be.
- **Prepare Baking Sheets and Oil Fries:** Lightly spray your baking sheets with cooking spray. Divide the thoroughly dried potatoes evenly between 2-3 baking sheets, ensuring they are not overcrowded. Drizzle the olive oil over the potatoes and toss them well to ensure every fry is lightly coated. Spread them out again in a single layer, making sure there is plenty of space between each fry for hot air to circulate.
- **Initial Bake:** Place the baking sheets in the preheated oven. Bake for 20-25 minutes. If using multiple pans, rotate their positions on the oven racks halfway through for even browning.
- **Flip and Final Bake:** After the initial bake, remove the pans from the oven. Attempt to flip the fries with a flexible steel spatula. If they stick or resist flipping, return them to the oven for a few more minutes until the bottom side is crispy enough to release easily. Once flipped, continue baking for another 5-10 minutes, or until the fries are beautifully golden brown and irresistibly crisp on all sides.
- **Season and Serve:** Remove the crispy fries from the oven and immediately season generously with salt and any other desired seasonings. Serve hot with the homemade fry sauce.
Instructions for the Life-Changing Fry Sauce:
- **Combine Ingredients:** In a small bowl, whisk together the mayonnaise, ketchup, garlic salt, Worcestershire sauce, and pepper until thoroughly combined and smooth.
- **Serve and Store:** Serve immediately with your freshly baked crispy oven fries. Any leftover sauce can be stored in an airtight container in the refrigerator for up to a week.
Notes
Best Tips to Remember for Perfect Crispy Fries!
- **Potato Choice is Key:** Always opt for Russet potatoes for their high starch content, which yields the crispiest exterior and fluffy interior. You can peel them or leave the skins on.
- **Dryness is Paramount:** After soaking, rigorously dry the potato matchsticks with absorbent towels. This crucial step removes surface moisture, which is the enemy of crispiness.
- **Non-Stick Baking:** Spray your baking sheets with cooking spray before oiling the potatoes. The lecithin in the spray provides an extra layer of non-stick protection, ensuring fries release easily. If using parchment paper, confirm its temperature rating.
- **Avoid Overcrowding:** Give your fries room to breathe! Use multiple baking sheets to spread them in a single layer. This allows hot air to circulate, preventing steaming and promoting browning.
- **Even Heat Distribution:** Rotate your baking pans between oven racks during the cooking process to ensure all fries are exposed to consistent heat and brown evenly.
- **Patience for the Flip:** Don’t rush to flip the fries. Wait until they have formed a crispy crust on the bottom and release easily from the pan. Forcing them too early can tear them.
- **Season Post-Baking:** Season your fries immediately after they come out of the oven. Adding salt earlier can draw out moisture, compromising their crispness.
Nutrition Information (per serving)
Calories: 288kcal, Carbohydrates: 22g, Protein: 2g, Fat: 21g, Saturated Fat: 3g, Cholesterol: 7mg, Sodium: 375mg, Potassium: 475mg, Fiber: 1g, Sugar: 3g, Vitamin A: 65IU, Vitamin C: 6.5mg, Calcium: 16mg, Iron: 1.1mg