
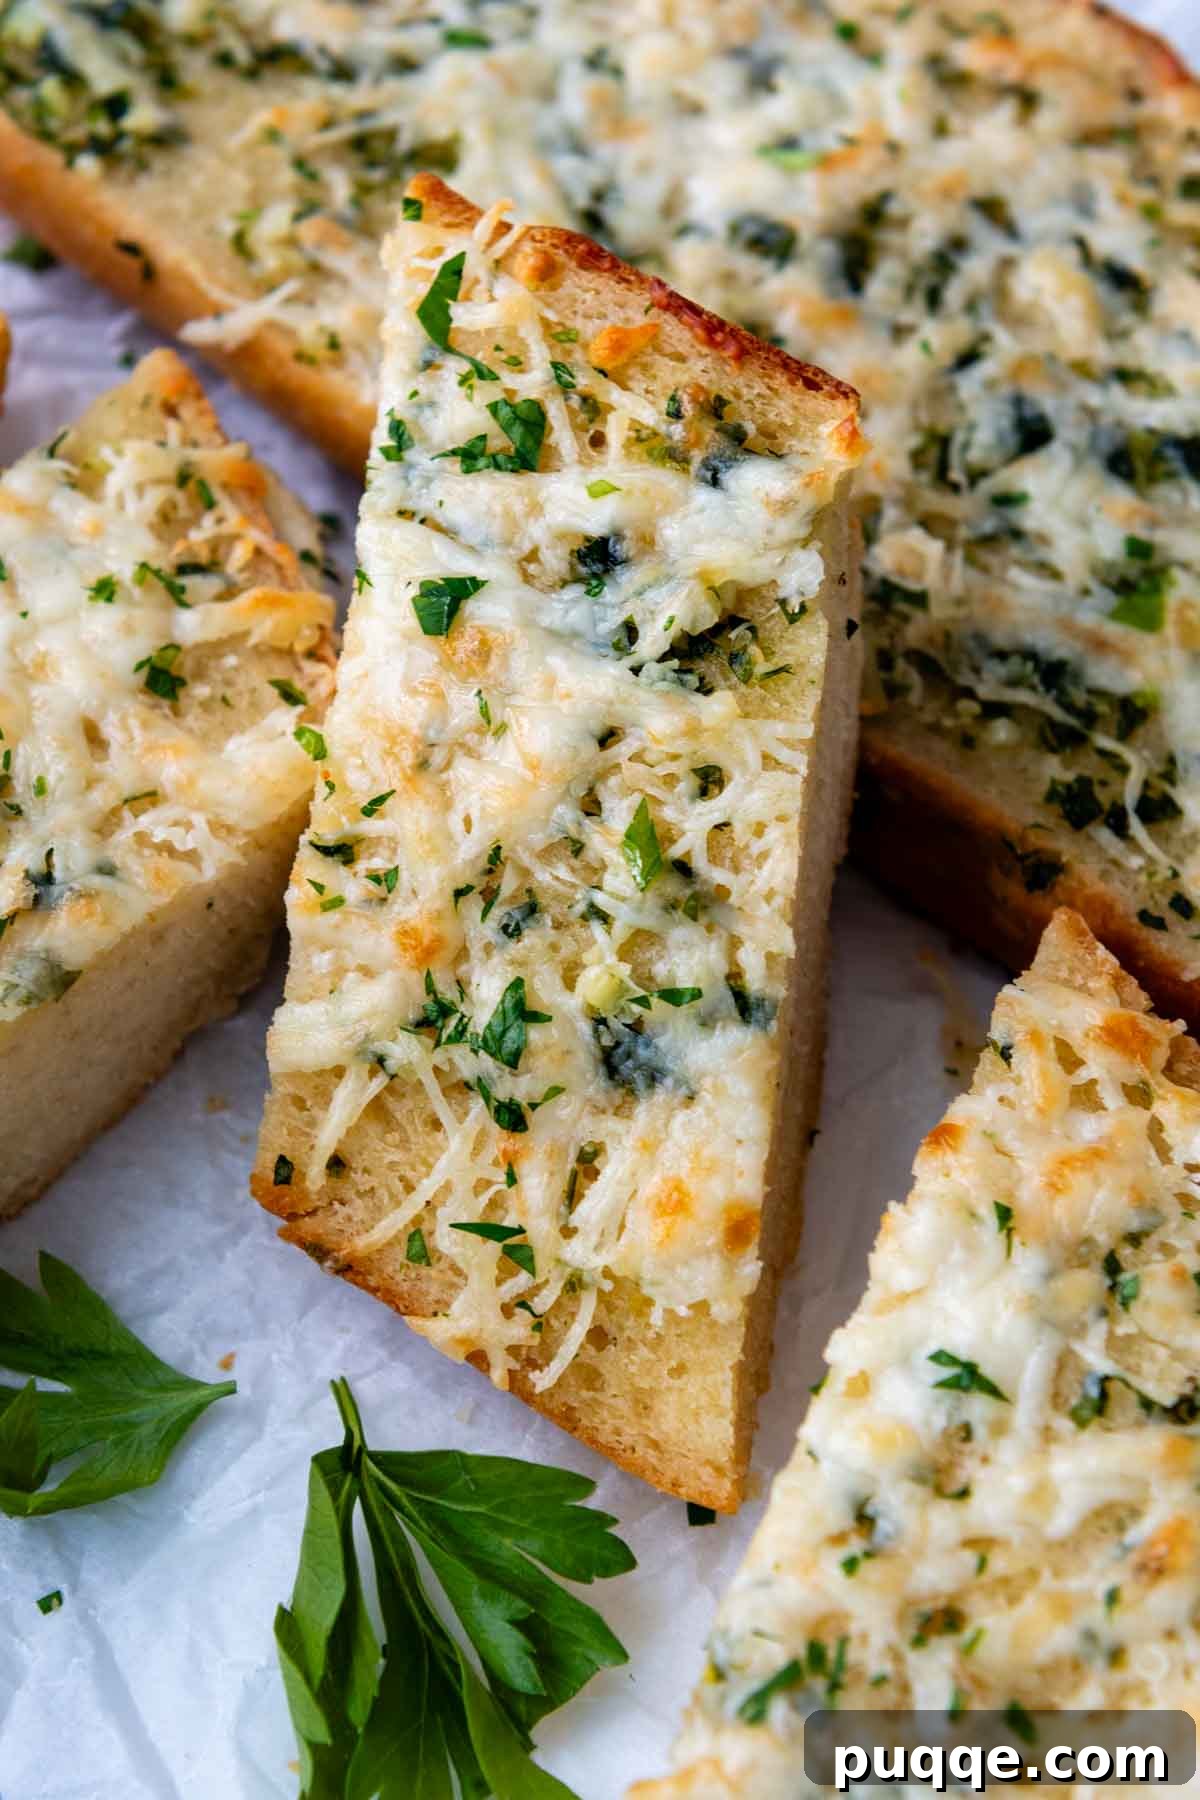
The Ultimate Gluten-Free Garlic Bread: Crispy, Cheesy, and Utterly Delicious
Craving that classic, warm, garlicky, buttery goodness but sticking to a gluten-free diet? The days of missing out are officially over! Get ready to master the **best gluten-free garlic bread** recipe, featuring perfectly crisp, golden edges, a delightfully soft and tender interior, and a unique, deeply flavorful combination of butter, olive oil, and fresh garlic. Plus, we’ll explore an optional cheesy topping that takes this side dish to new heights, making it a truly unforgettable addition to any meal.
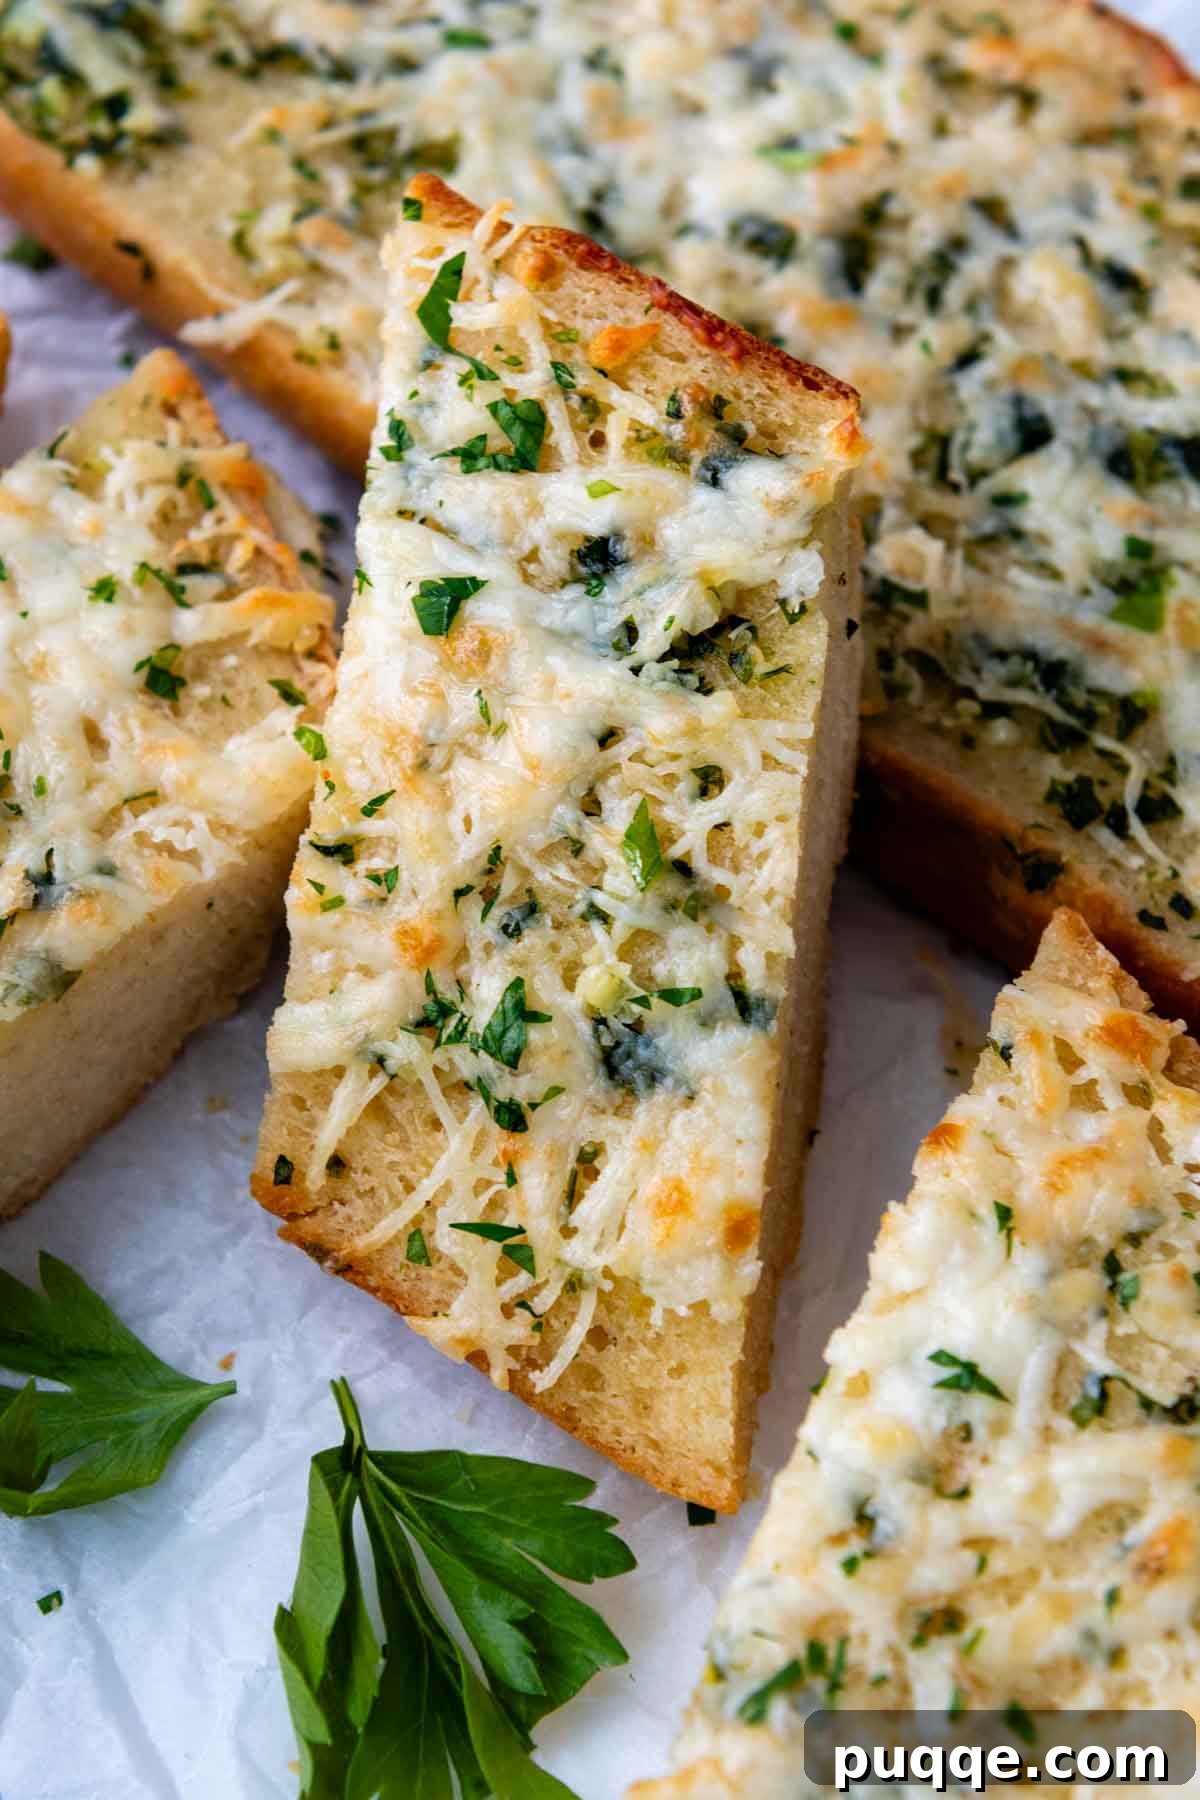
Why This Gluten-Free Garlic Bread Recipe Is a Game Changer
For those navigating a gluten-free lifestyle, the sight of a bread basket can often bring a pang of longing. Family dinners, cherished restaurant meals, and classic pasta dishes have long been enjoyed without that quintessential slice of buttery, crisp garlic bread. It’s a simple pleasure many gluten-free eaters have had to forego… until now.
After years of perfecting gluten-free baking, including popular recipes for gluten-free baguettes and soft gluten-free Italian bread, my mission became clear: to create a truly exceptional homemade gluten-free garlic bread. This recipe isn’t just a substitute; it’s a celebration of flavor and texture that rivals its gluten-containing counterparts, proving that a gluten-free diet doesn’t mean compromising on taste or experience.
The Secret to Unforgettable Flavor: The Power of Salt and Quality Ingredients
Don’t be deceived by the seemingly simple ingredients in garlic bread. The real magic lies in understanding how to maximize their potential. An often-overlooked yet utterly essential element in enhancing flavor is **salt**! Whether you prefer using salted butter or keep unsalted butter on hand, incorporating additional salt into your garlic butter mixture is key. It acts as a flavor unifier, drawing out and intensifying the rich garlic, butter, and olive oil notes, transforming average bread into something immensely flavorful and crave-worthy.
This emphasis on flavor maximization is particularly crucial when making garlic toast from gluten-free bread. Gluten-free flours and starch blends often have a slightly earthier, more subdued taste compared to traditional wheat-based breads. While classic French or Italian breads prioritize texture, structure, and crumb with a more neutral flavor profile, gluten-free versions require a little extra love in the flavoring department. This recipe ensures that the garlic butter mixture is robust enough to shine through, creating a truly memorable experience that will have everyone reaching for a second slice.
Beyond salt, another effortless way to elevate the taste profile is by adding freshly grated cheese. **Cheesy gluten-free garlic bread** isn’t just a side dish; it’s an event. It pairs perfectly with beloved family meals such as easy homemade gluten-free lasagna, hearty soups, a comforting saucy gluten-free spaghetti casserole, or a refreshing Italian chopped salad. Imagine dipping a warm, cheesy slice into a rich marinara – pure bliss!
This comprehensive guide provides all the expert tips you need, including how to transform leftover bread into delectable garlic toast, brilliant make-ahead and freezer instructions, recommended store-bought gluten-free bread options, and simple dairy-free modifications so everyone can enjoy this fantastic dish without hesitation.
Essential Ingredients for the Best Gluten-Free Garlic Bread
Crafting the perfect crisp, buttery garlic bread starts with high-quality ingredients. While the core components remain simple, there are numerous delightful ways to customize this recipe, whether you dream of extra-cheesy bread, infused with additional herbs, or tailored for a dairy-free diet. Here’s a closer look at what you’ll need to create this culinary masterpiece:
- Gluten-Free Bread: For a truly traditional experience, opt for a sturdy gluten-free Italian loaf or a classic French baguette. The dense yet tender structure of these breads holds up beautifully to the butter mixture and baking process, resulting in that ideal garlic bread chew. However, don’t feel limited! We’ll explore plenty of other GF bread options for garlic bread further down, ensuring you can use what’s readily available or what you prefer.
- Butter: You can use either salted or unsalted butter. If using unsalted, you’ll simply add a touch more salt to the mixture, which is easy to adjust. For those following a vegan diet, a high-quality vegan butter substitute works wonderfully, providing the same rich flavor and texture. A fantastic advantage of this recipe is that the butter is melted and used to sauté the fresh garlic, meaning there’s no need to remember to soften it beforehand – just toss it straight into the pan!
- Salt: As discussed, salt is a crucial flavor enhancer. If you’re using salted butter or a vegan butter that already contains salt, slightly reduce the amount of added salt – a scant ¼ teaspoon should be just right. Always taste your garlic butter mixture before spreading and adjust to your preference, aiming for balanced seasoning that truly makes the garlic pop.
- Fresh Garlic Cloves: For an unparalleled, vibrant garlic flavor, always use freshly minced garlic rather than garlic powder. The enzymatic reactions that occur when fresh garlic is crushed or minced release potent aromatic compounds that garlic powder simply cannot replicate. Aim for finely minced cloves to ensure even distribution and intense flavor throughout your bread.
- Olive Oil: The addition of olive oil alongside butter, a clever tip inspired by classic garlic bread recipes, serves multiple purposes. It helps achieve those coveted crispy edges by preventing the butter from burning too quickly and imparts a beautiful, subtle depth of flavor that perfectly complements the richness of the butter. A good quality extra virgin olive oil will make a noticeable difference.
- Fresh Parsley: Freshly minced parsley not only adds a bright, herbaceous note that cuts through the richness of the butter and garlic but also a pop of vibrant color, making your garlic bread visually appealing. While fresh is always preferred for its superior taste and aroma, you can substitute with 1 teaspoon of dried parsley if fresh isn’t available. Feel free to experiment with additional fresh or dried herbs like oregano, basil, or even a pinch of red pepper flakes for a subtle kick. When using a combination of herbs, ensure their total quantity equals the amount of parsley specified to maintain balance.
- Optional Cheese: For cheesy garlic bread, the choice is yours! Freshly grated Parmesan cheese offers a sharp, salty, umami flavor that crisps beautifully. Mozzarella cheese, on the other hand, provides a delightful stretch and mild creaminess when melted. A combination of both is often my preferred choice for the best balance of flavor and texture. The amount is entirely customizable: for a subtle flavor boost, a light sprinkle of Parmesan suffices; for truly decadent, very cheesy bread, use more mozzarella and pile it on generously, almost like a mini pizza!
Step-by-Step Guide: Crafting Your Perfect Gluten-Free Garlic Bread
Creating this delicious gluten-free garlic bread is remarkably straightforward and quick. Follow these simple steps, complete with visual cues, to achieve perfect results every time. (For precise ingredient measurements and the full printable recipe, please refer to the detailed recipe card at the bottom of this page.)
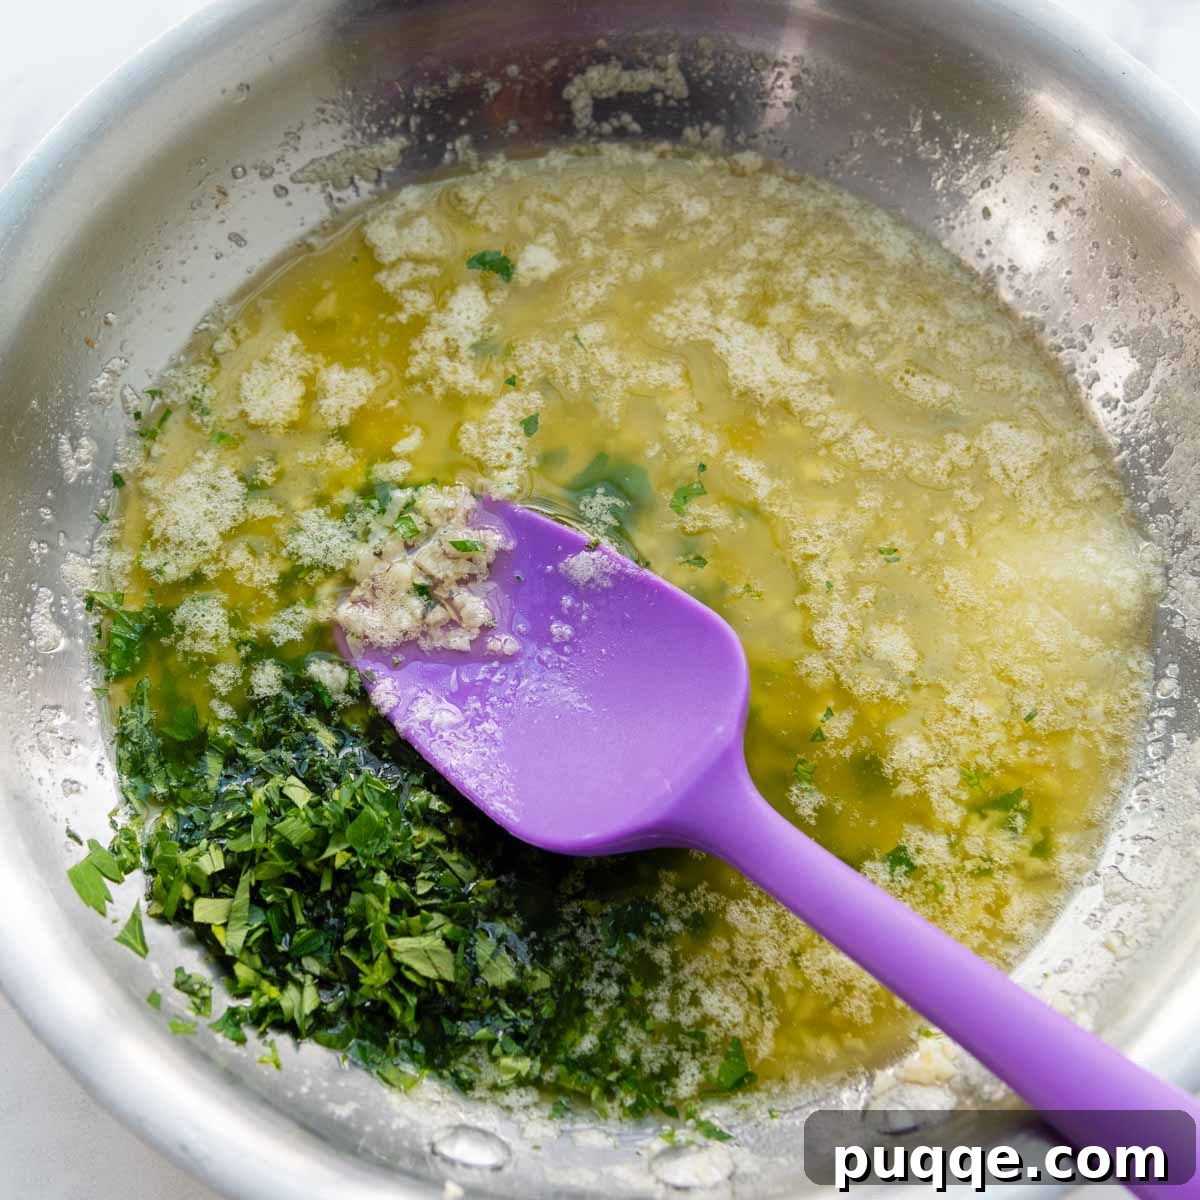
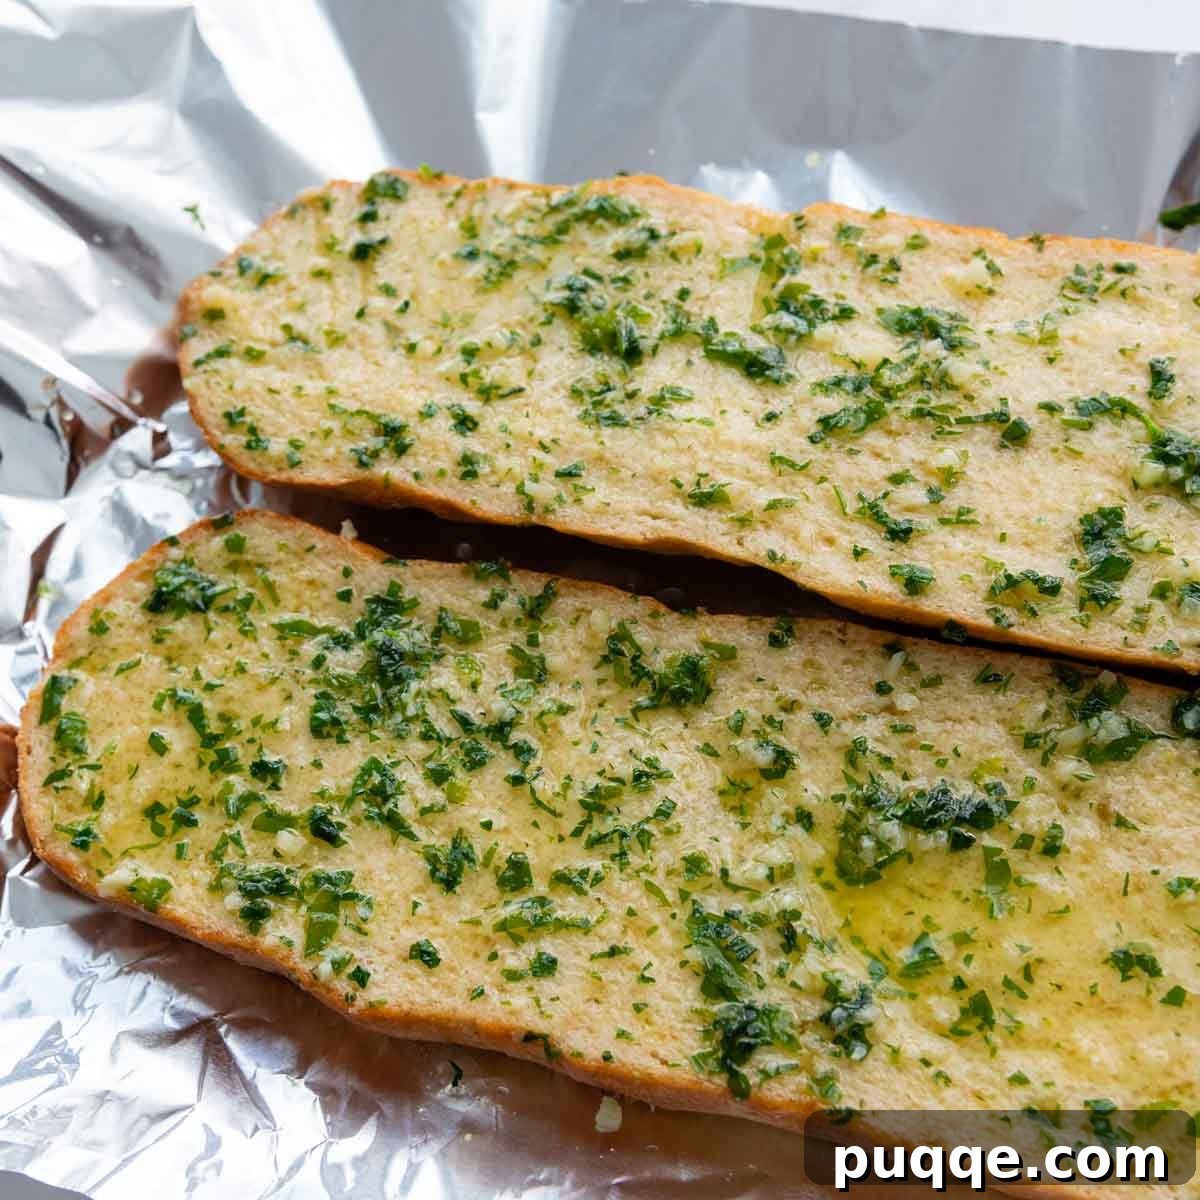
- Preheat Oven & Prepare Bread: Begin by preheating your oven to 400°F (200°C). Position an oven rack in the middle of the oven, which is ideal for even baking. Take your chosen loaf of gluten-free bread and carefully slice it in half horizontally, creating two long halves. This exposes the soft inner crumb, ready to absorb all that delicious garlic butter. Lay both halves, cut-side up, on a large sheet of aluminum foil.
- Prepare the Flavorful Garlic Butter: In a small skillet, melt the butter and olive oil together over low heat. It’s crucial to keep the heat low to prevent burning. Once the butter and oil are melted and shimmering, add the finely minced garlic. Stir and cook gently for approximately 1 minute. The goal here is to release the garlic’s fragrance without browning it, as burnt garlic can develop a bitter taste. Immediately remove the skillet from the heat and stir in the salt and your fresh or dried parsley.
- Brush & First Bake: Generously brush the warm, aromatic garlic butter mixture over the two exposed cut sides of the bread. Ensure every nook and cranny is coated for maximum flavor penetration. Once brushed, place the two halves back together, like closing the original loaf, and wrap it securely with the aluminum foil. This step is vital for locking in moisture and allowing the bread to warm through evenly. Place the foil-wrapped bread directly onto the middle oven rack and bake for 10 minutes.
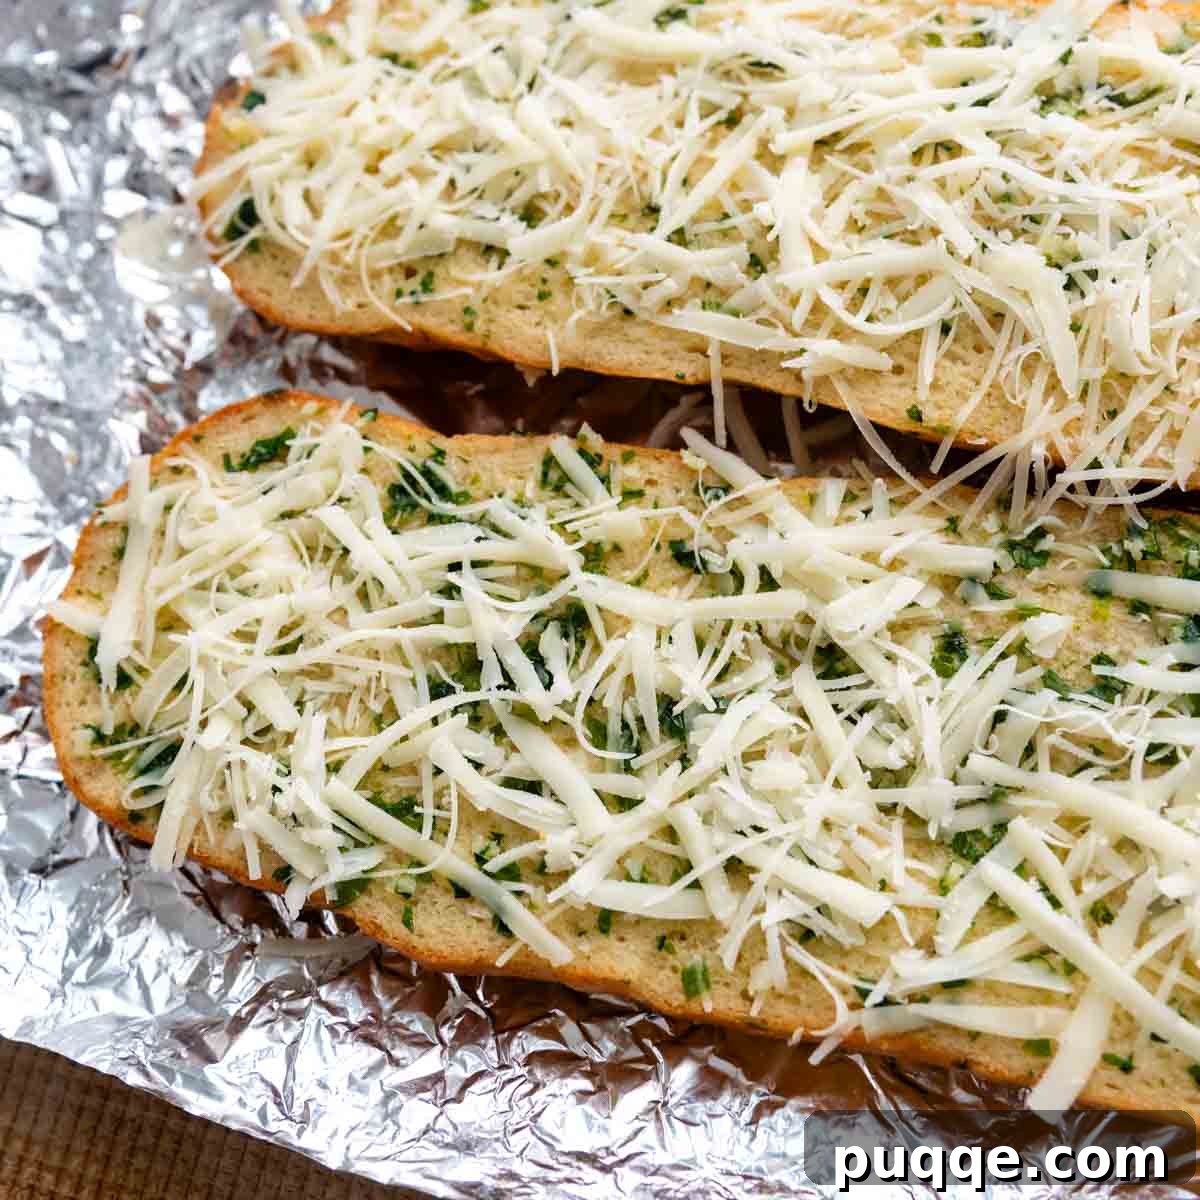
- Add Cheese & Final Bake (Optional): Carefully remove the foil-wrapped bread from the oven. Unwrap it, laying the two buttered halves face up on the foil. If you’re adding cheese, sprinkle your desired amount evenly over the exposed surfaces. Mozzarella and/or Parmesan work wonderfully here. Return the foil-lined bread (now open-faced) to the oven rack. Bake for an additional 8-10 minutes, or until the edges are golden, the bread is warmed through, and the cheese is melted and bubbly. For extra crispy bread or beautifully golden, slightly charred cheese, switch your oven to the broiler setting for 1-2 minutes. Keep a very close eye on it during this stage, as broiling can quickly go from perfect to burnt!
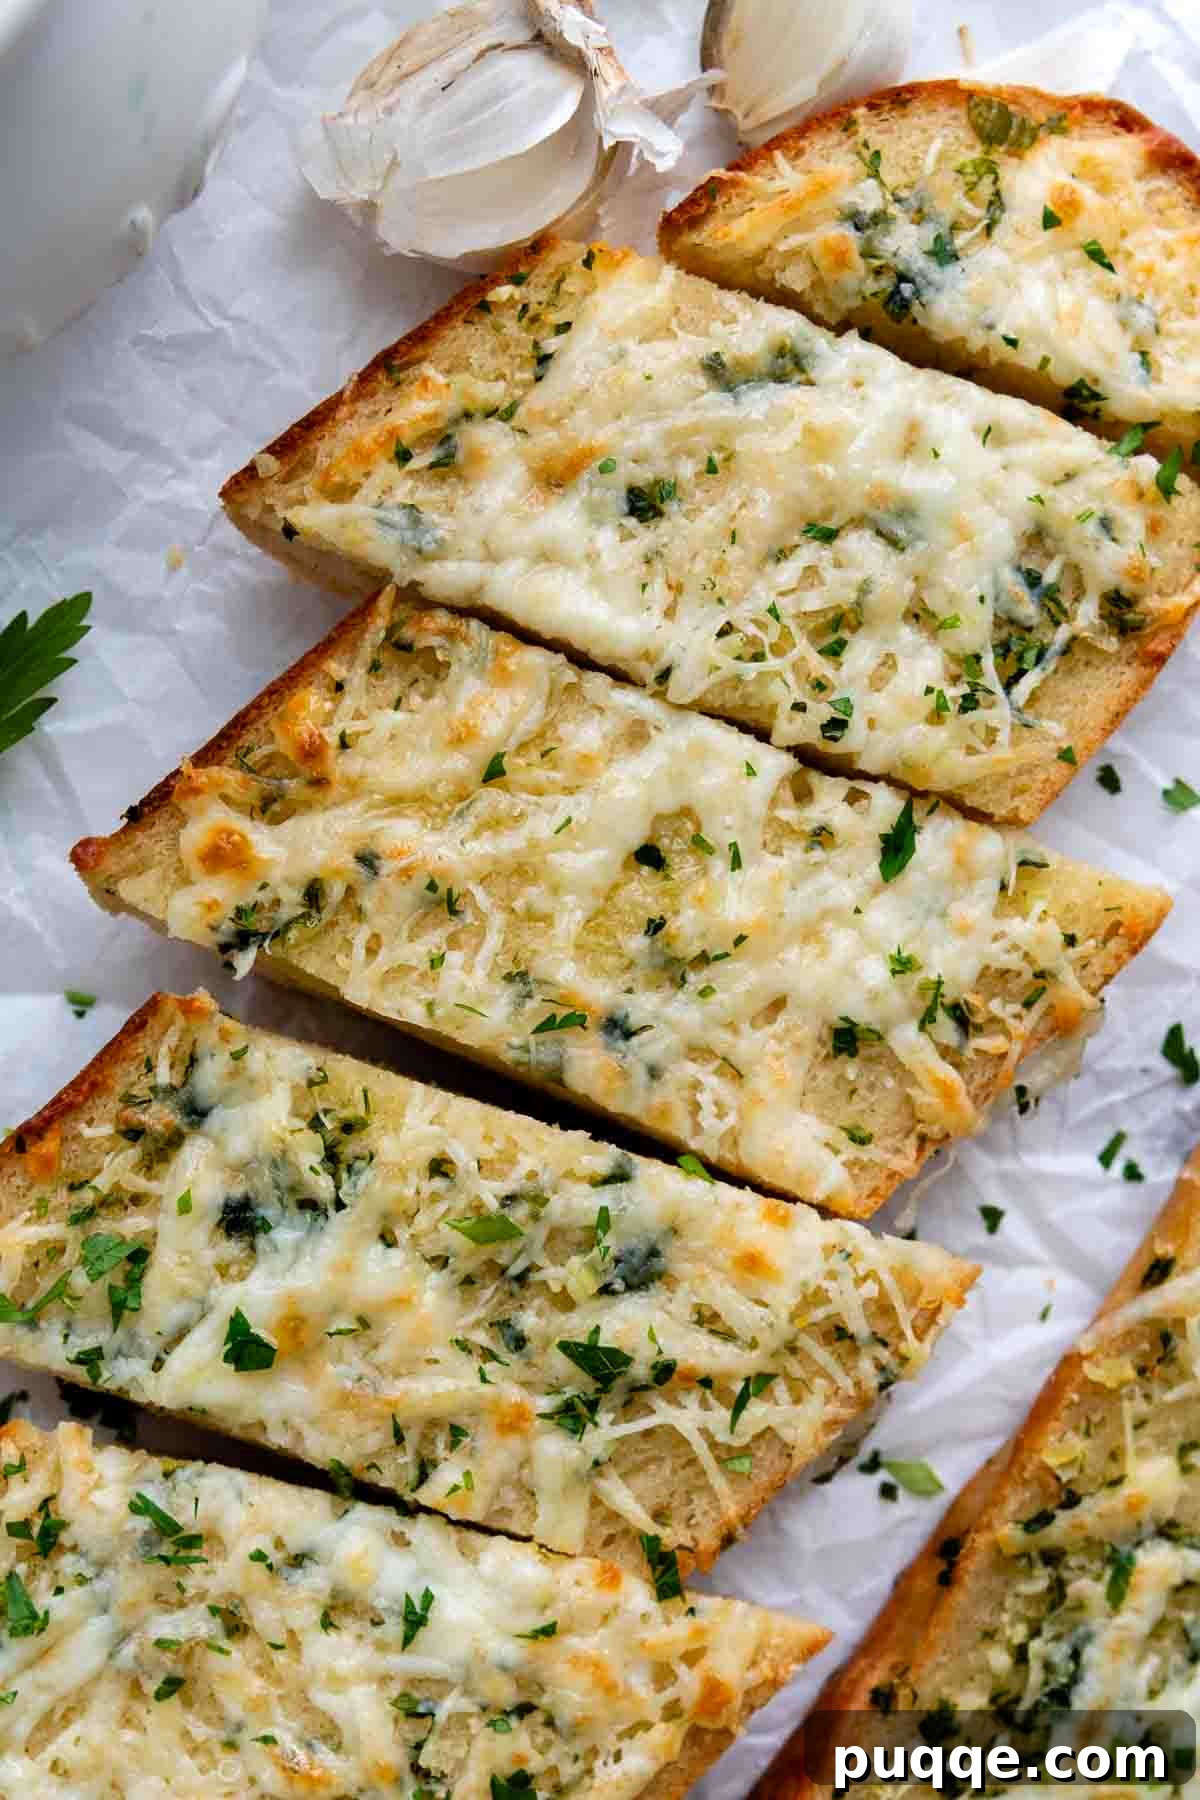
- Serve Warm: Once baked to your desired crispness and golden perfection, remove the garlic bread from the oven. Use a sharp serrated knife to slice it into individual portions, making sure to cut through the crust cleanly. Serve warm immediately as a perfect accompaniment to your meal or a delicious snack on its own. Enjoy every flavorful bite!
More Gluten-Free Bread Options for Garlic Bread
One of the best things about this recipe is its incredible versatility when it comes to the base bread. If baking a homemade loaf isn’t feasible, or if you simply want to use what you have on hand, there are plenty of excellent gluten-free bread options that work beautifully for garlic bread, ensuring you never have to skip this delicious side dish.
- Leftover Gluten-Free Breads: Don’t let those bread ends or slightly stale slices go to waste! Almost any leftover gluten-free bread can be transformed into delicious garlic toast. Think gluten-free hot dog buns, hamburger buns, bagels (sliced thinly for more surface area), or even regular sandwich bread. For multiple smaller slices or buns, simply arrange them on a baking sheet before brushing with garlic butter and baking. This is a fantastic way to minimize food waste!
- Store-Bought Gluten-Free Loaves: Many excellent brands now offer high-quality gluten-free breads that are perfect for garlic bread. My personal preference leans towards Schar brand, which produces fantastic baguettes, ciabatta rolls, and even hot dog and hamburger buns that make excellent garlic bread due to their good texture and neutral flavor. Always double-check labels to ensure they are certified gluten-free, as ingredients can vary.
- Gluten-Free Texas Toast Style: For a thicker, more substantial slice that can stand up to a hearty sauce, cut a loaf of your favorite gluten-free sandwich bread into thick slices (about ¾ to 1 inch). Brush generously with the prepared garlic butter mixture. Place these slices directly on the oven rack or in a convection toaster oven for maximum crispness. Bake at 400°F (200°C) for 5-8 minutes, or until they achieve a lovely crisp, golden finish. This method yields a perfectly toasted and satisfyingly thick garlic bread.
- Homemade Garlic Croutons: If you have extra bread ends, a slightly dry loaf, or a small hunk of GF French bread, cube it into 1-inch pieces. Place them in a large bowl, drizzle with the garlic butter, and toss gently to coat evenly. Spread the cubes in a single layer on a parchment-lined baking sheet and bake in a 375°F (190°C) oven for 15-20 minutes, stirring and flipping halfway through, until golden brown and delightfully crunchy. These homemade garlic croutons are perfect for sprinkling over salads, enriching soups, or simply snacking on!
Achieving Your Desired Texture: Soft or Perfectly Crusty Garlic Bread
Whether you prefer your garlic bread soft and pillowy or gloriously crisp with a golden crust, this recipe offers flexible techniques to achieve your ideal texture. The initial foil-wrapped baking step is key to locking in moisture and infusing flavor, while the subsequent unwrapped bake and optional broil allow for customization.
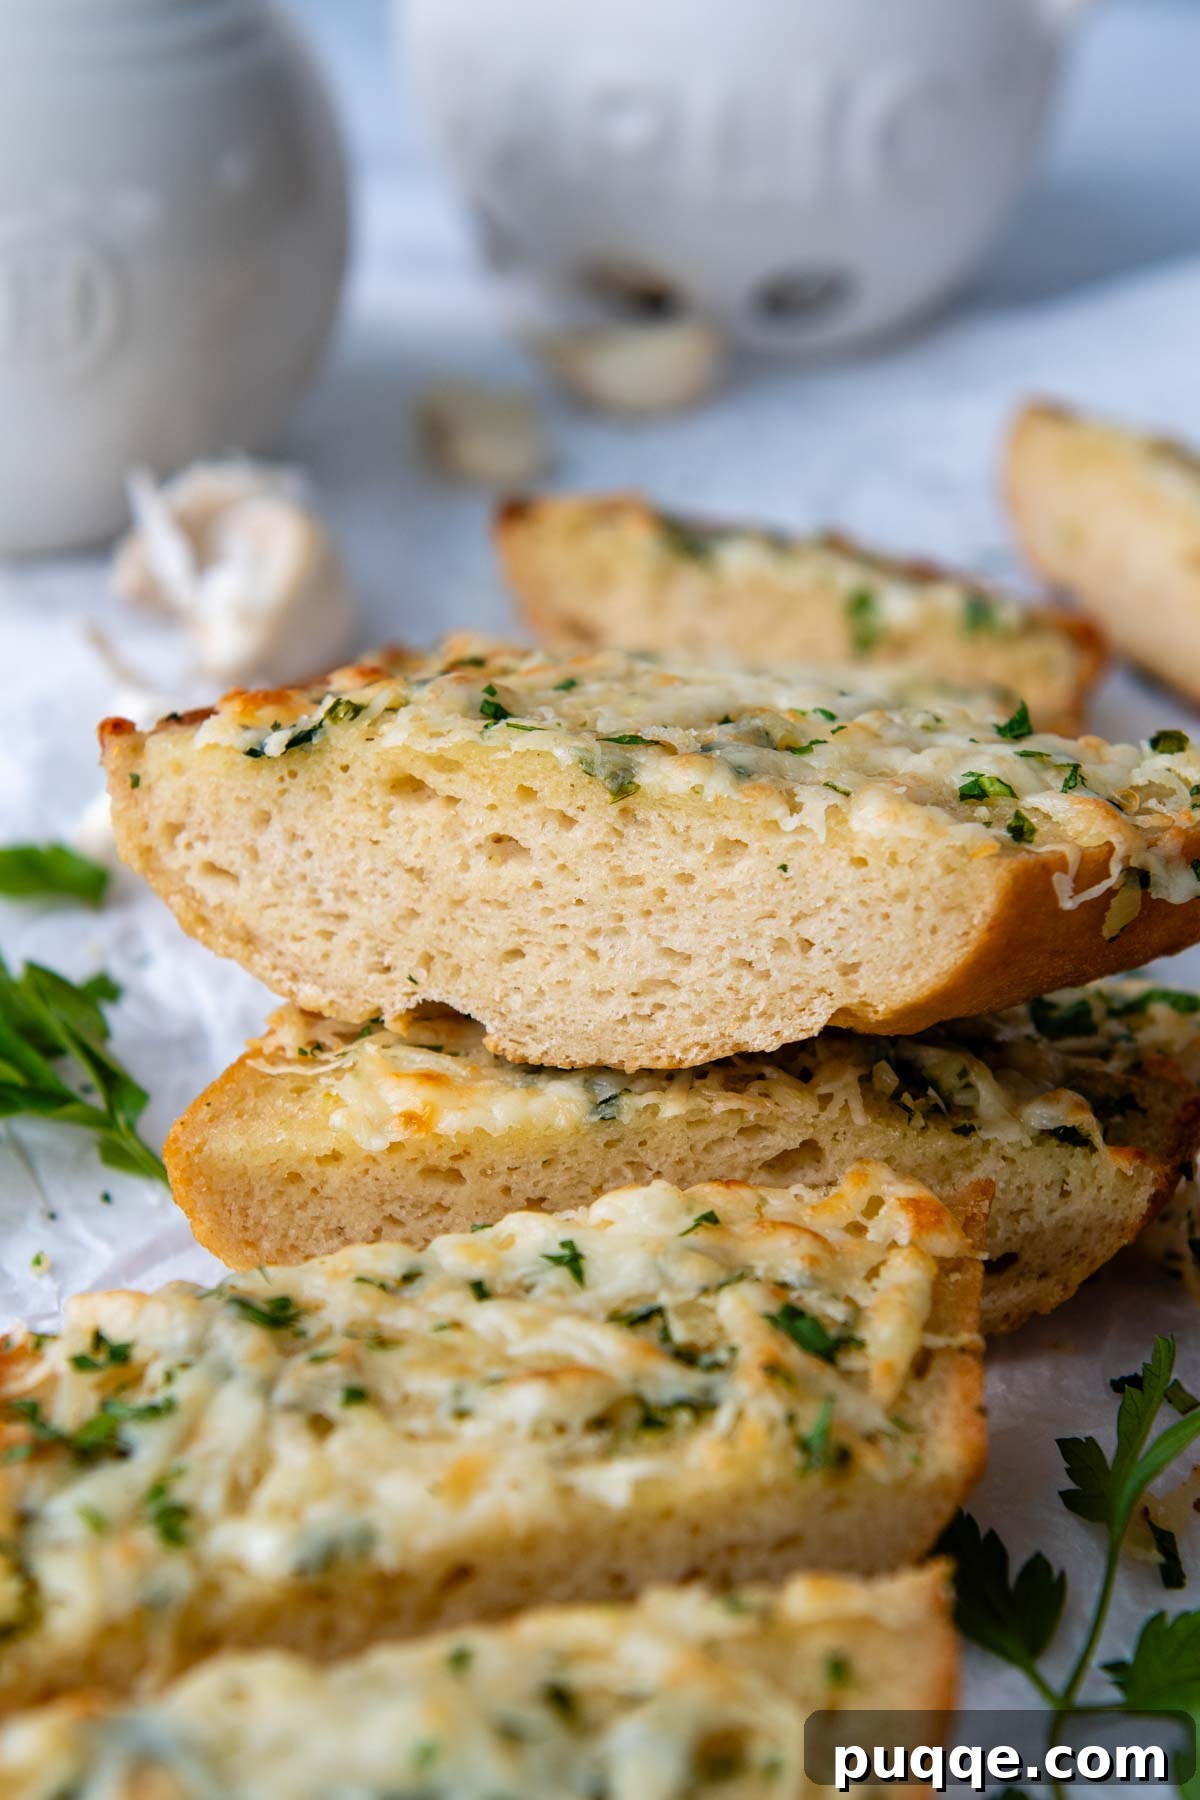
- For Super Soft Garlic Bread: If you desire a very soft, tender interior that yields easily to the bite, keep the garlic bread fully wrapped in aluminum foil throughout the entire baking process. Extend the initial warming time slightly, baking for a total of approximately 15 minutes. This method steams the bread within the foil, resulting in a wonderfully squishy texture where the butter and garlic permeate deeply, creating a melt-in-your-mouth experience.
- For Perfectly Crisp Garlic Toast: To achieve those coveted crispy edges and a beautifully golden exterior that offers a satisfying crunch, start by warming the bread in foil for 10 minutes as directed in the main recipe. This allows the bread to heat through without drying out. Then, carefully unwrap the bread from the foil and place the buttered halves directly onto the oven rack. From this point, you control the crispness!
- Crispness Levels: Bake for at least 5 minutes longer for slightly crisp edges and a warm interior, or up to 10 minutes more for a more pronounced crispness that extends throughout the slice. If you crave a deeply golden, extra-crusty finish reminiscent of classic Italian garlic toast, turn on your oven’s broiler for 1-2 minutes. Remember to stay by the oven and watch it very closely during this stage, as bread under a broiler can go from perfectly golden to burnt in a matter of seconds!
Storing, Make-Ahead & Freezing Tips for Gluten-Free Garlic Bread
While gluten-free garlic bread is undeniably best enjoyed fresh from the oven, you can absolutely prepare it in advance or save leftovers to savor later. Proper storage ensures you get to enjoy its deliciousness whenever the craving strikes, without compromising on quality.
- Storing Leftovers: If you happen to have any slices left (a rare occurrence in most households!), I highly recommend freezing them for optimal freshness, as gluten-free bread tends to dry out quicker than traditional wheat bread. Wrap individual slices tightly in plastic wrap, then transfer them to a freezer-safe ziplock bag. Properly stored, they can be kept in the freezer for up to 2 months.
- Reheating Leftovers: To reheat frozen garlic bread, there’s no need to thaw! Simply remove the desired slices from the freezer, wrap them in aluminum foil, and warm in a 350°F (175°C) oven for 5-10 minutes, or until heated through and soft again. For a quick microwave option, wrap a single slice in a paper towel and microwave on 50% power for about 30 seconds, though be aware the texture won’t be as good as oven reheating.
- Make-Ahead Instructions: To get a head start on entertaining or simply for convenience, you can prepare the garlic bread in advance. Prepare the garlic butter mixture and brush it onto the bread halves as directed in the recipe. Place the halves back together, wrap them securely in aluminum foil, and then add a double layer of plastic wrap to prevent freezer burn. You can freeze the prepared, unbaked bread for up to 2 months. This is perfect for busy weeknights!
- Baking From Frozen: When you’re ready to bake your make-ahead garlic bread, remove the plastic wrap but leave the bread wrapped in the aluminum foil. Bake from frozen in a 400°F (200°C) oven for about 15 minutes. This allows it to thaw and heat through. Then, carefully unwrap the foil, lay the bread face up, and continue baking for another 8-10 minutes (or broil for 1-2 minutes) until golden and crispy.
Customizing Your Gluten-Free Garlic Bread: Variations to Explore
This recipe provides a fantastic foundation for truly exceptional gluten-free garlic bread, but don’t hesitate to make it your own! The beauty of cooking lies in customization. Here are some exciting variations and enhancements to explore, catering to different tastes and dietary needs:
- Dairy-Free Garlic Bread: It’s incredibly easy to make this recipe completely dairy-free without sacrificing flavor. Simply substitute the butter with your favorite high-quality vegan butter. Ensure your chosen gluten-free bread is also dairy-free (most are, but always check labels). If you desire a cheesy element, skip the dairy cheese or opt for a dairy-free Parmesan alternative that melts well.
- Spicy Garlic Bread: For those who love a bit of heat, add a pinch or two (or more, to taste!) of red pepper flakes to the garlic butter mixture while it’s simmering. This will infuse a lovely, subtle warmth and a gentle kick into every bite, creating a dynamic flavor profile.
- Herb Lover’s Garlic Bread: Beyond the classic parsley, incorporate other finely minced fresh herbs into your garlic butter for a more complex and aromatic profile. Rosemary, thyme, oregano, basil, or chives all pair wonderfully with garlic. Dried herbs can also be used, but remember that dried herbs are more potent than fresh, so use about half the amount. A blend of Italian herbs works particularly well.
- Garlic Bread with a Zesty Twist: A squeeze of fresh lemon juice or a dash of lemon zest added to the butter mixture just before brushing can brighten the flavors beautifully. The acidity from the lemon provides a lovely contrast to the richness of the butter and garlic, adding a fresh, vibrant note.
- Roasted Garlic Bread: For a milder, sweeter garlic flavor, consider using roasted garlic instead of fresh minced garlic. Roast a head of garlic until soft, then mash the cloves and incorporate them into the butter and olive oil mixture. This will yield a wonderfully mellow and deeply aromatic garlic bread.
Frequently Asked Questions (FAQs) About Gluten-Free Garlic Bread
- Can I use pre-minced garlic from a jar?
- While fresh garlic cloves are highly recommended for the best, most vibrant flavor, you can certainly use pre-minced garlic from a jar in a pinch for convenience. However, be aware that its flavor might be less potent and slightly different, as jarred garlic often has preservatives. You might need to adjust the quantity to your preference to achieve the desired garlic intensity.
- My gluten-free bread often turns out dry. How can I avoid this?
- Gluten-free breads can indeed be prone to dryness due to the lack of gluten structure. The combination of butter and olive oil in this recipe is specifically designed to keep it moist and flavorful. The initial step of wrapping the bread in foil is crucial for steaming the bread and preventing it from drying out prematurely. Also, be mindful not to overbake, especially if you prefer a softer texture; stick to the recommended baking times.
- How do I get extra crispy edges without burning?
- The key to achieving those coveted crispy edges and a golden crust is the final unwrapped bake and the optional broiler step. Ensure your oven is fully preheated to the correct temperature. When using the broiler, it’s essential to stay by the oven and watch *constantly*. Broiling is a very fast cooking method, and usually, 1-2 minutes is all it takes to get that beautiful golden crisp without going from perfect to burnt in an instant.
- Can I make this recipe in an air fryer?
- Yes, you can absolutely make delicious gluten-free garlic bread in an air fryer! For air fryer garlic bread, brush the butter mixture generously onto individual slices or smaller halves of your chosen gluten-free bread. Place them in a single layer in the air fryer basket (you might need to work in batches, depending on the size of your air fryer). Air fry at 350°F (175°C) for 3-5 minutes, flipping halfway through, until golden brown and crispy. If you’re adding cheese, sprinkle it on for the last minute of cooking until melted and bubbly.
- Can I use frozen gluten-free bread directly?
- Yes, you can use a frozen gluten-free loaf directly, though it might need a slightly longer initial foil-wrapped baking time to thaw and warm through evenly. Add an extra 5-10 minutes to the initial foil-wrapped baking step before unwrapping and proceeding with the recipe instructions.
The Best Gluten-Free Garlic Bread Recipe
Yields: 12 servings
Prep time: 5 minutes
Cook time: 20 minutes
Total time: 25 minutes
Author: Melissa Erdelac
Rating: 5 out of 5 stars (Based on 1 rating)
Summary: There’s no reason to miss out on a classic anymore! Learn how to make the best gluten-free garlic bread, with crisp, golden edges, a soft, squishy interior, a unique combo of butter, olive oil, fresh garlic, and optional cheesy topping. This easy recipe includes plenty of tips and variations to fit any preference, from homemade bread options, store-bought substitutes, and how to create the perfect ratio of ingredients for spectacular flavor!
Ingredients
- 1 loaf gluten-free Italian bread (see notes for other options)
- 4 tablespoons unsalted butter (or vegan butter)
- 1 tablespoon olive oil (good quality recommended)
- 3 garlic cloves, minced (fresh is best!)
- ¼ teaspoon salt (adjust if using salted butter/vegan butter)
- 1 ½ tablespoons minced fresh parsley (or 1 teaspoon dried parsley)
- ¼-½ cup freshly grated Parmesan cheese (optional, see notes)
- ½-1 cup freshly grated mozzarella cheese (optional, see notes)
Equipment
- Pastry Brush
- Serrated Knife
- Santoku Knife (or chef’s knife for mincing garlic)
- Small skillet
- Aluminum foil
Instructions
- Preheat the oven to 400°F (200°C) and position the oven rack to the middle. Slice the gluten-free bread loaf in half horizontally. Lay the cut sides up on a large sheet of aluminum foil.
- In a small skillet over low heat, melt the butter and olive oil together. Once melted, stir in the minced garlic. Cook, stirring constantly, for 1 minute, being careful not to burn the garlic. Remove from heat and stir in the salt and fresh or dried parsley.
- Liberally brush the garlic butter mixture over both cut sides of the bread. Place the two halves back together and wrap securely in the aluminum foil. Place the foil-wrapped bread directly on the middle oven rack and bake for 10 minutes.
- Remove from the oven and carefully unwrap the foil. If adding cheese, lay the two buttered halves face up on the foil and sprinkle generously with your chosen cheese (Parmesan, mozzarella, or a mix). Transfer the foil, with the bread buttered side up, back to the oven rack. Bake for an additional 8-10 minutes. For crispier bread or golden, bubbly cheese, turn on the broiler for 1-2 minutes, watching closely to prevent burning. Slice and serve warm.
Recipe Notes and Tips
More Bread Options:
- Gluten-free French bread recipe: If using a homemade gluten-free French bread recipe, the garlic butter mixture will be enough for two baguettes.
- Garlic Texas Toast: Thickly slice a loaf of your favorite gluten-free sandwich bread and brush with the garlic butter. Place directly on the oven rack. Bake at 400°F (200°C) for 5-8 minutes, or until crisp and golden.
- Store-bought bread: Schar brand is recommended for its quality baguettes, ciabatta, hot dog, or hamburger buns, all of which work well.
Cheesy Garlic Bread:
For a perfect cheese combination, I recommend using ¼ cup Parmesan and ½-1 cup of mozzarella cheese. You can also use all Parmesan (up to ½ cup) or all mozzarella (up to 1 cup). For a truly pizzeria-style cheese bread, feel free to use up to 2 cups of mozzarella cheese, piled high!
Storing, Make-Ahead, and Freezing:
- Storing Leftovers: Leftover garlic bread is best frozen, as gluten-free bread can lose freshness quickly. Wrap individual slices tightly in plastic wrap and transfer to a freezer-safe ziplock bag for up to 2 months.
- Reheating: Rewarm frozen slices wrapped in foil in a 350°F (175°C) oven for 5-10 minutes. Alternatively, microwave a slice wrapped in a paper towel for 30 seconds at 50% power, though oven reheating yields better texture.
- Make-Ahead: Prepare the garlic butter and brush onto bread halves. Wrap securely in aluminum foil, then a double layer of plastic wrap, and freeze for up to 2 months.
- Baking From Frozen: Remove plastic wrap, leave in foil. Bake from frozen at 400°F (200°C) for 15 minutes, then unwrap and bake for 8-10 minutes longer (or broil 1-2 minutes) until golden and crispy.
Nutrition Information (per serving)
- Calories: 77kcal
- Carbohydrates: 1g
- Protein: 2g
- Fat: 7g
- Saturated Fat: 4g
- Polyunsaturated Fat: 0.4g
- Monounsaturated Fat: 2g
- Trans Fat: 0.2g
- Cholesterol: 17mg
- Sodium: 182mg
- Potassium: 18mg
- Fiber: 0.04g
- Sugar: 0.1g
- Vitamin A: 226IU
- Vitamin C: 1mg
- Calcium: 64mg
- Iron: 0.1mg
Did you make this recipe? We’d love to hear from you! Leave a star rating and comment below. Your feedback helps others discover delicious recipes!
Save This Delicious Recipe to Your Pinterest Board!
Pin Now, Bake Later!
Let’s be friends on Pinterest! I’m always sharing great recipes!