
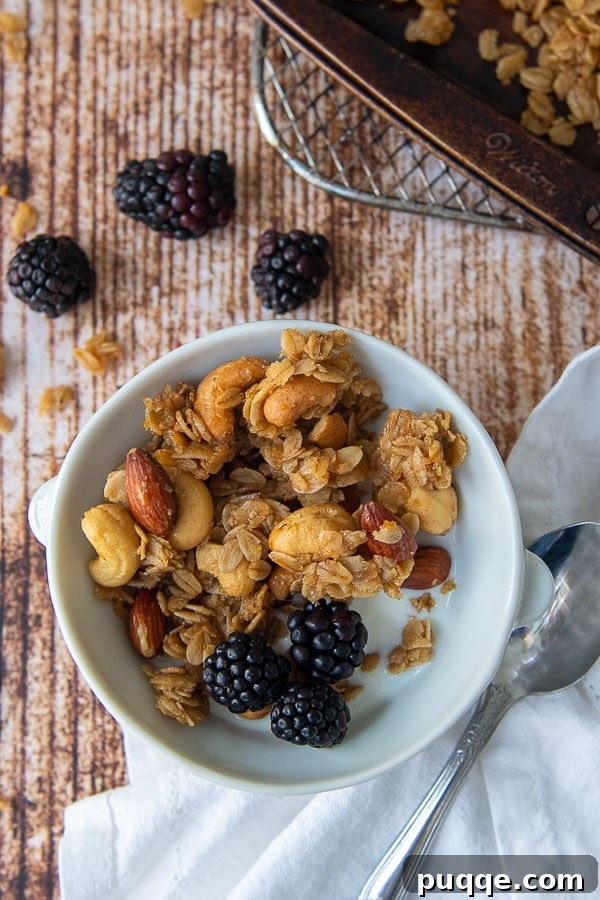
If you’re on a quest for the perfect breakfast or snack—something with an irresistible chew, satisfying crunch, and bursting with flavor—then look no further. This **Homemade Gluten-Free Granola recipe** is engineered to deliver exactly that: rich, chunky clusters that will make your taste buds sing. Infused with aromatic orange zest, a harmonious blend of warm spices, and naturally sweetened with pure maple syrup, this isn’t just a granola recipe; it’s a culinary revelation. Forget bland, crumbly versions; prepare yourself for a granola experience that is truly in a league of its own, crafted for ultimate flavor and texture.
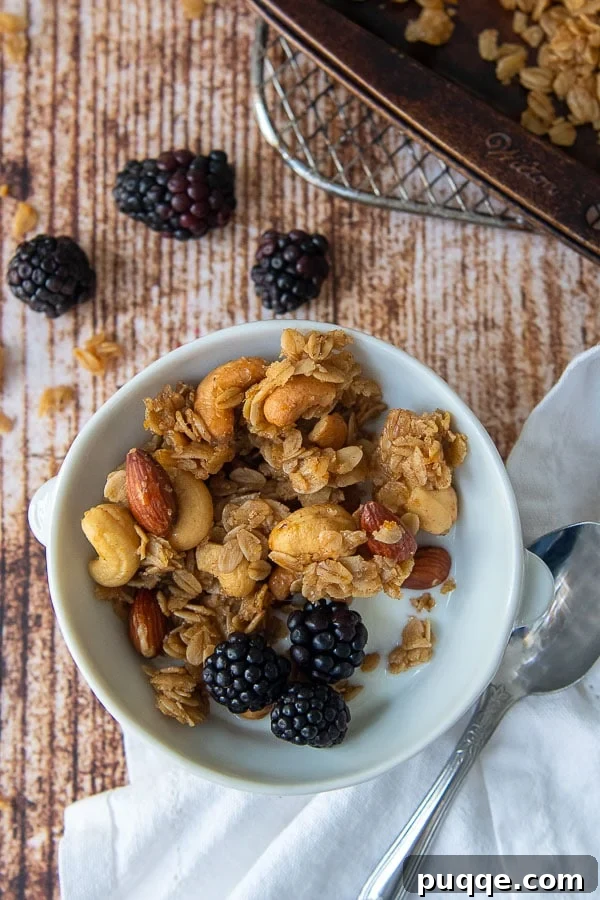
Crafting the Ultimate Chewy & Chunky Gluten-Free Granola
Achieving granola perfection isn’t just a dream; it’s a delicious reality with this unique recipe. Many have tried, but few have mastered the art of granola that strikes the ideal balance between golden crispiness and soft, chewy clusters. This recipe promises an unparalleled experience, setting a new standard for what homemade granola can be. It’s a symphony of textures and flavors, designed to captivate with every bite. Allow me to elaborate on the key elements that make this granola truly exceptional:
- Exquisite Spice Blend: The carefully curated spice mixture is nothing short of extraordinary. The bright, fragrant notes of orange zest intermingle beautifully with the comforting warmth of nutmeg and cinnamon. This particular combination evokes memories of Stollen, a beloved classic Christmas dessert, lending a sophisticated and uniquely festive flavor profile that makes this granola suitable for any season. It’s a departure from typical granola, offering a gourmet twist.
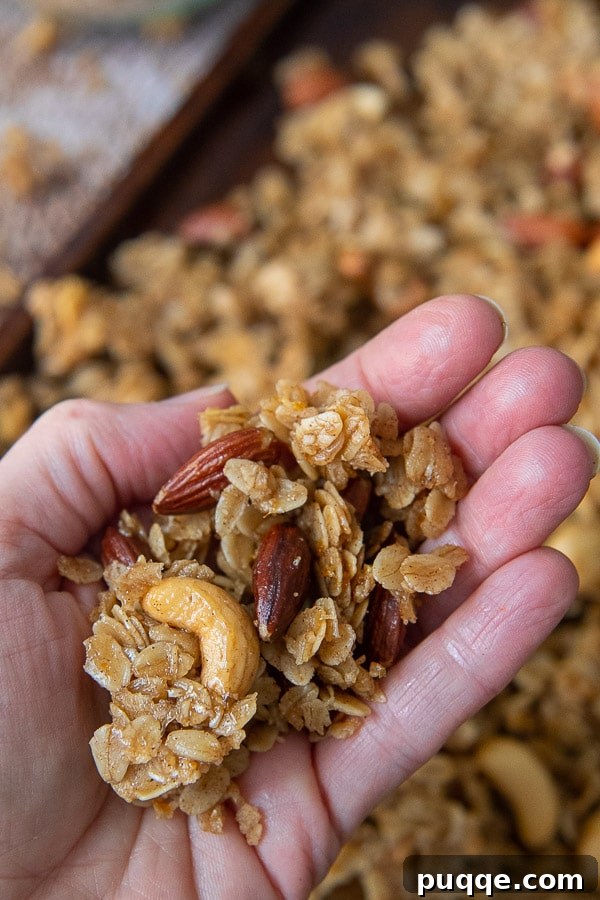
- Irresistible Chunky Clusters: We all love those substantial, snackable pieces of granola, and this recipe delivers them in spades. Generous clusters of wholesome rolled oats, perfectly toasted almonds, and creamy cashews come together to form large, satisfying chunks. These clusters are not only perfect for convenient snacking straight from the bag but also elevate a simple bowl of yogurt or your morning smoothie to an entirely new level of indulgence. Their robust nature means they won’t disintegrate the moment they hit liquid.
- Revolutionary Baking Method: The secret to this granola’s phenomenal texture lies in an unconventional baking technique, inspired by the innovative methods of Bojon Gourmet. By strategically baking the granola between two sheet pans, we create a controlled environment that ensures a magical transformation. The result is a delightful contrast: edges that are wonderfully crispy and golden brown, while the interior clusters remain delightfully soft and chewy. This method seals in moisture and encourages the formation of those coveted, substantial clusters without requiring constant stirring.
The Gluten-Free Granola Dilemma: What You Need to Know
For many, the journey to a gluten-free diet is a path to better health. Granola, a popular breakfast and snack choice, often comes with questions regarding its gluten content. While whole oats are naturally gluten-free, the journey from field to your pantry can introduce cross-contamination, making many oat-based products unsafe for those with celiac disease or gluten sensitivities. Understanding this distinction is crucial for preparing truly gluten-free granola.
Ensuring Your Granola is Truly Gluten-Free:
- Certified Gluten-Free Oats: This is the golden rule. To guarantee your homemade granola is genuinely gluten-free, it is imperative to use certified gluten-free rolled oats. These oats are specifically grown, harvested, and processed in dedicated gluten-free facilities, preventing any contact with gluten-containing grains like wheat, barley, or rye. Always check for a reputable gluten-free certification on the packaging.
- Vigilant Label Reading: When purchasing any additional ingredients for your granola, practice meticulous label reading. Even seemingly innocuous items like dried fruit, nuts, or spices can sometimes be processed on shared equipment or contain hidden gluten-containing additives. Opt for brands that clearly state “gluten-free” or have a certified stamp.
- Avoiding Cross-Contamination: Beyond the ingredients themselves, be mindful of your kitchen environment. Use clean utensils, cutting boards, and baking sheets that haven’t been in contact with gluten-containing foods. This attention to detail ensures that your homemade creation remains safe for all who enjoy it.
Generally, I advise against relying on commercially produced granola unless it is explicitly labeled as gluten-free. Mass-produced granolas are frequently manufactured on shared machinery, posing a significant risk of cross-contamination. Furthermore, some conventional granolas may include gluten-containing ingredients such as barley malt extract or wheat flour as binders or flavor enhancers, which are easily overlooked if one is not careful. Making your own empowers you with complete control.
Why Homemade Gluten-Free Granola Reigns Supreme
If you’re committed to a gluten-free lifestyle, crafting your own granola at home offers a multitude of benefits that extend far beyond simply being delicious. It’s an act of self-care and culinary empowerment, ensuring that every bite aligns with your dietary needs and preferences. Here’s why homemade is always the superior choice:
- Unmatched Customization: The beauty of homemade granola lies in its infinite adaptability. You are the master of your granola destiny! Add your favorite nuts (almonds, walnuts, pecans), seeds (sunflower, pumpkin, chia), dried fruits (raisins, cranberries, apricots), or alternative sweeteners. Want to go nut-free? Easy. Prefer a specific oil like coconut oil? No problem. This recipe serves as a perfect foundation for all your creative variations, allowing you to tailor it to your exact taste, texture, and dietary requirements.
- Guaranteed Gluten-Free Integrity: Unlike store-bought options where hidden ingredients or cross-contamination are constant concerns, making your own ensures 100% gluten-free certainty. By selecting certified gluten-free oats and carefully vetting every additional component, you eliminate all risks, providing peace of mind with every spoonful. This control is invaluable for individuals with celiac disease or severe gluten sensitivities.
- Economical & Budget-Friendly: A quick glance at the supermarket shelf will reveal that quality gluten-free granola often comes with a hefty price tag. Homemade granola, on the other hand, is surprisingly cost-effective. Buying ingredients in bulk, especially staples like certified gluten-free oats and nuts, significantly reduces the per-serving cost, allowing you to enjoy this wholesome treat more frequently without breaking the bank.
- Surprisingly Simple to Make: Don’t let the gourmet taste fool you; granola is remarkably forgiving and straightforward to prepare. It’s an ideal project for even novice bakers. The process generally involves mixing wet and dry ingredients, spreading them on a baking sheet, and letting the oven do the rest. It’s hard to go wrong, making it a rewarding experience for anyone looking to bake from scratch.
- Freshness and Fragrance: There’s nothing quite like the aroma of freshly baked granola wafting through your home. Unlike pre-packaged options that can sit on shelves for months, your homemade batch is made with fresh ingredients, offering superior flavor and a more vibrant, inviting scent. This freshness translates directly into a more enjoyable eating experience.
- Nutritional Control: By making your own, you have complete oversight of the nutritional content. You can manage sugar levels, choose healthier fats, and avoid artificial additives, preservatives, or highly processed ingredients often found in commercial products. This allows you to create a truly wholesome and nourishing food tailored to your health goals.
Elevate Your Granola: Creative Add-Ins & Flavor Variations
While this recipe shines with its simple yet powerful blend of oats and nuts, the true magic of homemade granola lies in its endless potential for customization. Consider this recipe a delicious canvas, ready for your personal touch. Feel free to experiment with any of these suggested additions to make your favorite granola recipe truly your own:
- Seeds for Extra Crunch & Nutrition: Beyond nuts, seeds are fantastic for adding texture and a boost of nutrients. Try sunflower seeds, pepitas (pumpkin seeds), chia seeds, or hemp hearts. Flax seeds, whole or ground, offer healthy omega-3s and help bind clusters.
- Dried Fruits for Sweetness & Chewiness: Add these after baking to prevent burning. Popular choices include raisins, dried cranberries, chopped apricots, dried cherries, or finely diced dates. For a tropical twist, consider dried mango or pineapple.
- Tropical & Coconut Infusions: Coconut, whether sweetened or unsweetened, shredded or flaked, adds a wonderful aroma and texture. Banana chips provide a delightful crunch and natural sweetness.
- Chocolate & Carob Delights: Stir in chocolate chips, chunks, or carob nibs after the granola has cooled slightly, so they melt just enough to coat but don’t burn. Dark chocolate complements the orange and spice notes beautifully.
- Nutty Enhancements: While almonds and cashews are featured, feel free to substitute or add other nuts. Walnuts, hazelnuts, pecans, or even pistachios can offer different flavor profiles and textures. Lightly toast them beforehand for even more depth.
- Additional Spices & Extracts: Expand on the warm spice blend with a pinch of cardamom, allspice, or ginger. A splash of vanilla extract or almond extract in the wet mixture can further enhance the aroma and taste.
Scaling Your Recipe: Perfect Batches for Every Occasion
One of the practical advantages of homemade granola is its flexibility when it comes to batch size. Whether you’re whipping up a small quantity for personal enjoyment throughout the week or preparing a grand batch for a special event or thoughtful gifts, this recipe is incredibly easy to scale up or down. This makes it an ideal candidate for meal prepping or as a heartfelt, edible present during the holidays, perfect for neighbors, teachers, and friends.
The standard recipe yields approximately 4 cups of delicious granola, which translates to about sixteen ¼-cup servings. If you need less, you can effortlessly halve or even quarter the recipe. Many recipe cards, including the one for this granola, offer convenient serving size adjustments. Simply slide the serving size indicator, and the ingredient quantities will automatically adjust for you, simplifying the math.
When you reduce the recipe, remember to monitor the baking time closely. Smaller batches will cook faster, so expect the baking duration to decrease by roughly 5-10 minutes. Conversely, if you decide to double the recipe, you might need to slightly increase the baking time or, preferably, use two separate baking sheets to ensure even cooking and optimal cluster formation. Always keep an eye on the granola towards the end of the baking cycle to prevent over-browning.
The Art of Chewy & Chunky: Mastering Granola Texture
My unwavering devotion to this particular granola recipe stems from its extraordinary texture—a quality that many other granola recipes simply fail to achieve. This isn’t just about crunch; it’s about a delightful interplay of chewiness and crispiness that makes each bite utterly satisfying. The texture is perfectly balanced, benefiting from the synergistic sweetness of both maple syrup and brown sugar.
The maple syrup contributes a subtle, natural stickiness that holds the clusters together beautifully, while the brown sugar adds depth of flavor and another layer of moisture retention. The combination ensures the granola is wonderfully chewy without being overly sticky or cloyingly sweet. It’s a nuanced sweetness that complements the warm spices and orange zest.
But there’s an even greater secret to unlocking that perfectly chunky, chewy texture: the unconventional baking method. Unlike traditional granola recipes that often call for stirring halfway through baking, this best-in-class homemade granola bakes undisturbed between two sheet pans. This ingenious technique achieves several critical goals:
- Trapping Moisture: By placing a second baking sheet directly on top of the granola-covered parchment, you create a kind of steamy, enclosed environment. This traps moisture, preventing the granola from drying out too quickly and encouraging the formation of those coveted soft, chewy centers within each cluster.
- Even Browning without Stirring: The weight and even heat distribution from the top pan ensure that the granola bakes evenly without the need for stirring. This undisturbed baking is paramount for allowing the ingredients to bind together naturally, forming larger, more coherent clusters.
- The “Granola Bar” Effect: When this granola emerges from the oven, it looks like one giant, gloriously chewy granola bar. This is precisely what you want! Instead of loose crumbs, you’ll have a cohesive slab that, once cooled, can be easily broken apart into perfectly bite-sized chunks or crumbled into smaller pieces, depending on your preference. This method guarantees maximum cluster satisfaction.
Unlock the Secret to Epic Granola Clusters
For those who dream of extra-large, gloriously chunky granola clusters—the kind you can truly sink your teeth into—there’s a simple yet highly effective hack that will revolutionize your granola-making game. This secret ingredient acts as a binding agent, helping the oats and nuts adhere together more firmly during baking:
Add a beaten egg white to your wet ingredients! This method is particularly effective when the granola is baked at a slightly lower temperature, such as 325ºF, as it allows the egg white to gently coagulate and set without burning.
Here’s how to implement this cluster-boosting technique for the best results:
- Prepare the Egg White: Before combining it with the other wet ingredients, make sure to beat one egg white until it becomes frothy and foamy. This aeration helps create a lighter, more effective binding agent.
- Combine with Wet Ingredients: Once frothy, gently fold the beaten egg white into your melted butter, maple syrup, brown sugar, and vanilla extract mixture. Ensure it’s well incorporated, but avoid overmixing.
- Low and Slow Baking: The lower baking temperature (325ºF) is key here. It allows the egg white to bind the ingredients slowly and thoroughly, strengthening the clusters without making them brittle.
- Cool Completely, Undisturbed: This step cannot be emphasized enough. After baking, remove the top baking sheet and parchment, but resist the urge to touch or stir the granola. It is absolutely crucial to let the granola cool completely, undisturbed, on the baking sheet. As it cools, the sugars and egg white will harden, solidifying those magnificent clusters. Once fully cool, you can break it apart into the large, satisfying chunks you desire.
Embrace these tips, and you’ll be enjoying the biggest, most satisfying granola clusters you’ve ever made!
Step-by-Step: Making Your Own Gluten-Free Granola
Ready to embark on a delightful culinary journey and create your own batch of irresistible gluten-free granola? Follow these simple steps, and you’ll soon be savoring the best homemade granola you’ve ever tasted.
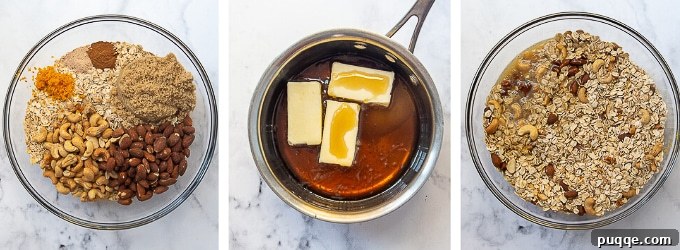
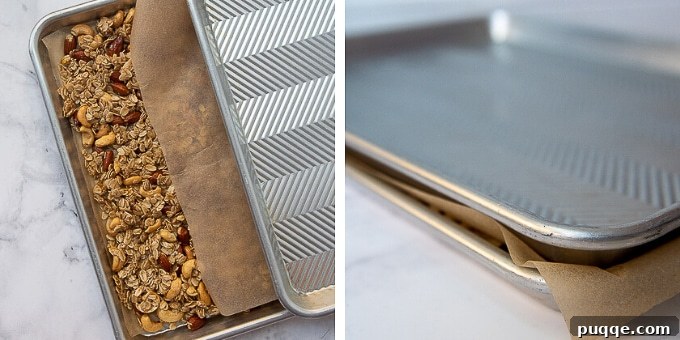
- Prepare Your Workspace: Begin by preheating your oven to 325ºF (160ºC). Line two standard baking sheets with parchment paper. This prevents sticking and makes cleanup a breeze. Set them aside while you prepare your ingredients.
- Combine Dry Ingredients: In a large mixing bowl, combine the 2 ½ cups of certified gluten-free rolled oats, ½ cup of cashews (whole or chopped), ½ cup of almonds (whole or chopped), ½ teaspoon of ground cinnamon, ½ teaspoon of ground nutmeg (freshly grated for best flavor), and the fragrant zest of 1 orange. Give these ingredients a good stir to ensure they are evenly distributed.
- Melt & Mix Wet Ingredients: In a small saucepan, gently melt together 6 tablespoons of unsalted butter, ⅓ cup of brown sugar, ¼ cup of pure maple syrup, and 1 teaspoon of salt over low heat. Stir continuously until the butter has completely melted and all the ingredients are well combined and smooth. Once ready, carefully pour this warm, sweet mixture over the dry ingredients in the large bowl. Stir thoroughly with a spatula or wooden spoon until every oat and nut piece is evenly coated, ensuring no dry spots remain.
- The Granola Sandwich Technique: Transfer the moist granola mixture onto one of your prepared lined baking sheets. Using the back of your spoon or your hands, spread it out into a single, even layer. Take the second piece of parchment paper and lay it directly on top of the granola. Then, gently place the second baking sheet (right-side up) on top of this parchment. You’ve now created a “granola sandwich,” which is crucial for achieving those irresistible chewy clusters.
- Bake to Golden Perfection: Place your granola sandwich into the preheated oven. Bake for an initial 20 minutes. After this time, carefully rotate the baking sheets (if using two) or simply rotate the single sheet 180 degrees. Continue baking for an additional 15-20 minutes, or until the edges of the granola appear beautifully golden brown, but the center still feels slightly soft and yielding. The granola will crisp up further as it cools.
- Cool & Break for Clusters: Once baked, carefully remove the top baking sheet and its parchment paper. Now comes the hardest part: resist the urge to stir or touch the granola! Allow it to cool completely, undisturbed, on the baking sheet. This cooling period is vital for the clusters to form and set properly. Once the granola is fully cooled and firm, you can break it apart into large, satisfying chunks or smaller pieces, depending on your preference.
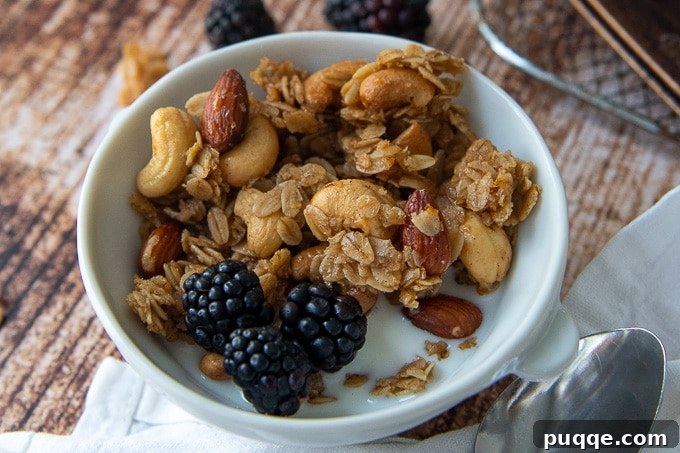
Serving Suggestions for Your Homemade Granola
Once your glorious homemade gluten-free granola is cooled and broken into perfect clusters, the possibilities for enjoyment are endless! Its rich flavor and satisfying texture make it incredibly versatile. Here are some of our favorite ways to enjoy this delightful creation:
- With Milk or Yogurt: The classic pairing! Serve a generous handful with your favorite dairy or non-dairy milk, allowing the granola to soften slightly while still maintaining its satisfying crunch. For a creamier treat, spoon it over a bowl of Greek yogurt, kefir, or dairy-free yogurt, perhaps with a drizzle of honey.
- Topping for Smoothies & Desserts: Add a fantastic textural contrast to your morning smoothie bowls or a healthy crunch to a fruit parfait. It’s also an excellent topping for baked apples, fruit crumbles, or even a scoop of ice cream for a healthier dessert option.
- On-the-Go Snack: Thanks to its chunky clusters, this granola is perfect for grabbing by the handful as a quick, energizing snack. Pack it in small bags for work, school, hiking, or any time you need a delicious and wholesome boost.
- Ingredient in Baking: Get creative! Use crushed granola as a crunchy topping for muffins, quick breads, or even as a pie crust base.
Storing Your Freshly Baked Granola
To maintain the crispness, chewiness, and delightful flavor of your homemade granola, proper storage is essential. While it’s tempting to devour the entire batch immediately, knowing how to store it correctly ensures you can enjoy it for weeks to come:
- Airtight Container: Once completely cooled, transfer your granola into an airtight container. Glass jars with tight-fitting lids, plastic food storage containers, or even heavy-duty resealable bags work wonderfully. Preventing air exposure is key to maintaining its texture.
- Cool, Dry Place: Store the container in a cool, dry pantry or cupboard, away from direct sunlight or heat sources. Humidity is the enemy of crispy granola, so avoid storing it in the refrigerator unless your kitchen is exceptionally warm and humid.
- Longevity: When stored correctly, your homemade gluten-free granola will stay fresh, crunchy, and delicious for up to 3-4 weeks. If you notice any signs of staleness or changes in texture, it’s likely time to bake a fresh batch!
Save this recipe to your Pinterest board!
Let’s be friends on Pinterest! I’m always sharing great recipes!
Did you make this recipe? I love hearing from you! Leave a star rating and comment below. It helps others when searching for recipes and I appreciate feedback from our community. You will always hear back from me! -Melissa
Homemade Gluten Free Granola Recipe

Melissa Erdelac
If you love chewy, chunky granola clusters, you will go crazy for Homemade Gluten Free Granola recipe! This is hands down the best granola flavored with orange zest, warm spices, and sweetened with pure maple syrup.
Pin Recipe
Rate This Recipe
Ingredients
- 2 ½ cups gluten free rolled oats
- ½ cup cashews, whole or chopped
- ½ cup almonds, whole or chopped
- ½ teaspoon cinnamon
- ½ teaspoon nutmeg, freshly grated preferred
- Zest of 1 orange
- 6 tablespoons unsalted butter
- ⅓ cup brown sugar
- ¼ cup pure maple syrup
- 1 teaspoon salt
Instructions
- Preheat oven to 325ºF. Line two baking sheets with parchment paper and set aside.
- In a large bowl, combine the rolled oats, cashews, almonds, cinnamon, nutmeg, and orange zest.
- In a small saucepan, gently melt together the butter, maple syrup, brown sugar, and salt. Once fully combined, pour this wet mixture over the dry ingredients in the large bowl. Stir thoroughly until all the oats and nuts are evenly coated.
-

Transfer the mixed granola onto one of the lined baking sheets, spreading it out into an even layer. Place the second piece of parchment paper directly on top of the granola, then gently place the second baking sheet (right-side up) on top of the parchment. This creates a “granola sandwich” that helps create the chewy clusters.
- Bake in the preheated oven for 20 minutes. Then, rotate the baking sheets and continue baking for another 15-20 minutes, or until the edges of the granola are golden brown but the center still feels slightly soft.
- Carefully remove the top baking sheet and parchment paper. Allow the granola to cool completely, undisturbed, on the baking sheet. Resist the urge to stir! Once fully cooled, break the granola into desired chunks and clusters.
Nutrition Facts (per 1/4 cup serving)
Calories: 165.08 kcal, Carbohydrates: 18.72g, Protein: 3.4g, Fat: 9.08g, Saturated Fat: 3.33g, Cholesterol: 11.29mg, Sodium: 185.87mg, Potassium: 121.34mg, Fiber: 1.99g, Sugar: 8.02g, Vitamin A: 131.2 IU, Calcium: 30.42mg, Iron: 1.01mg