
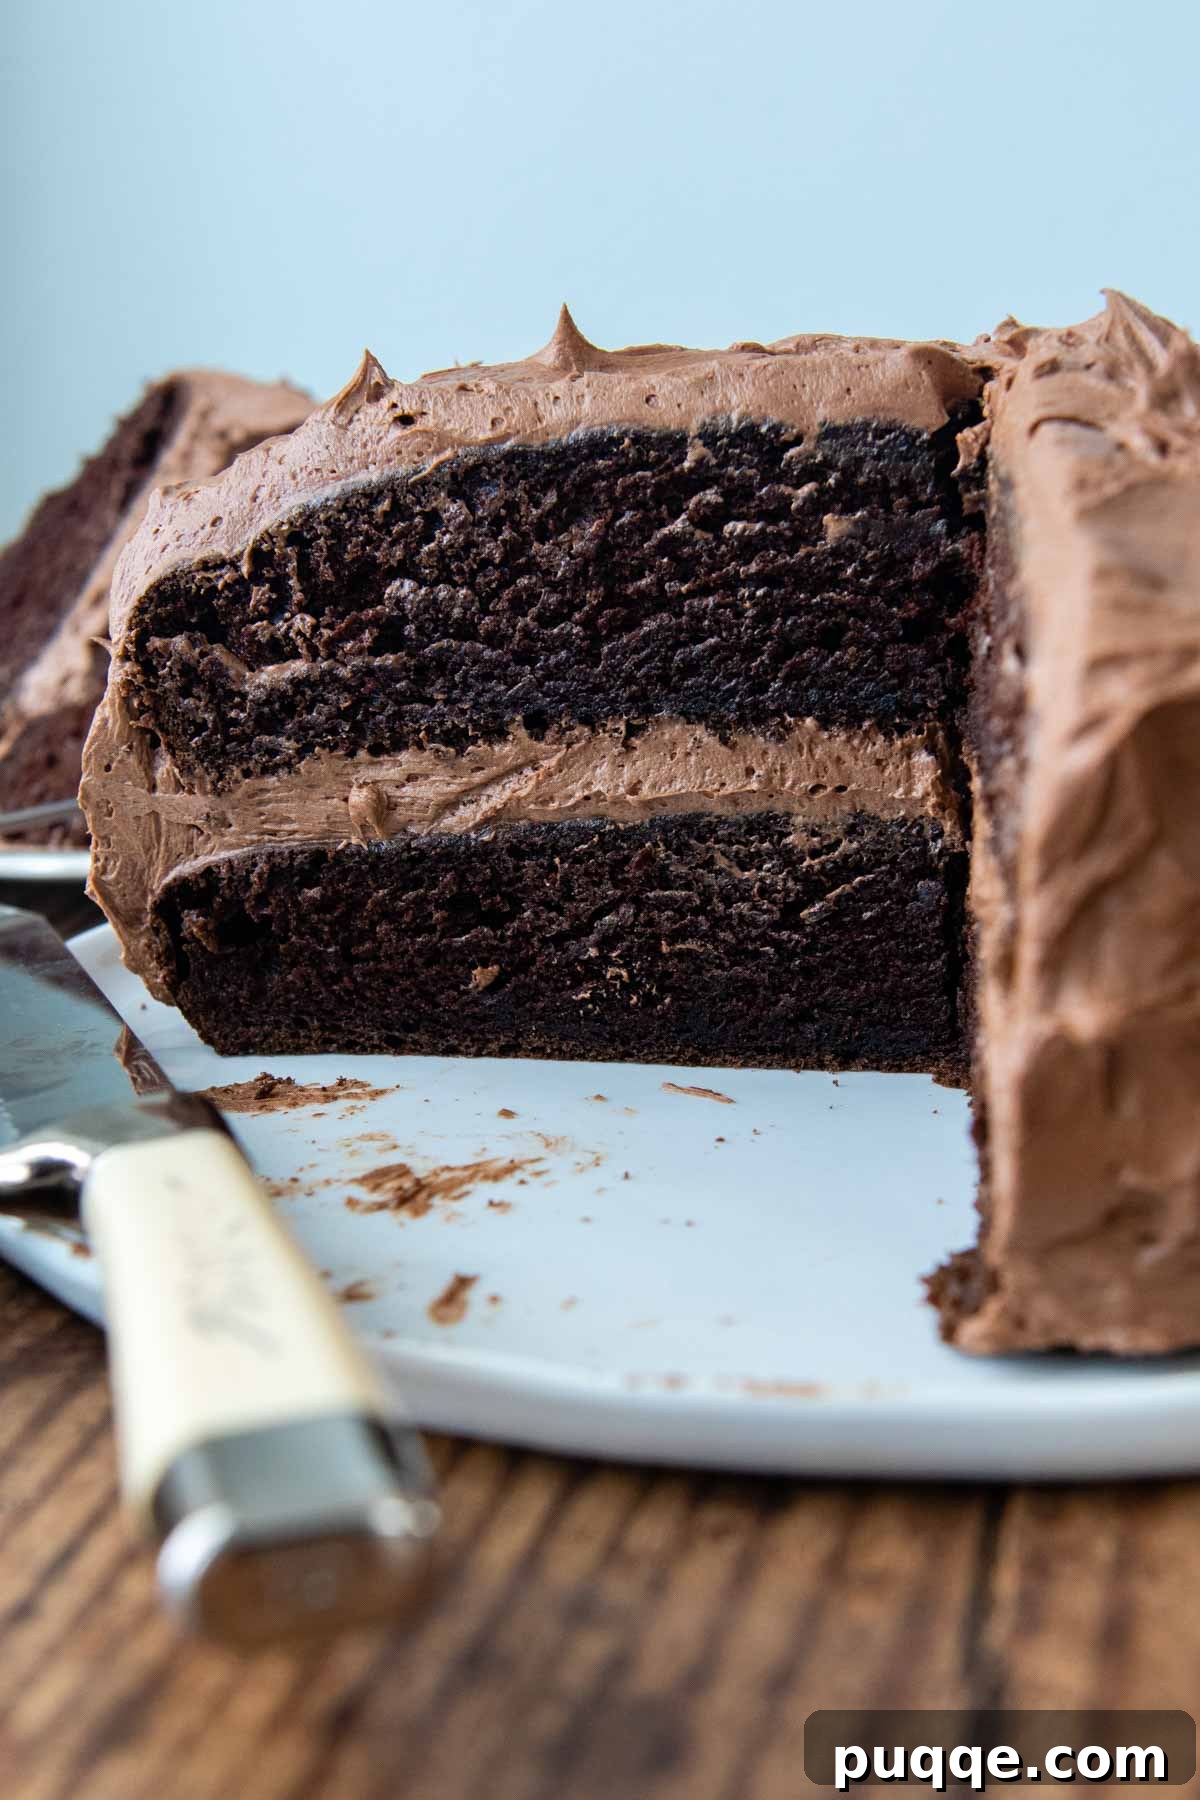
Unlock the secret to baking the most exceptional, melt-in-your-mouth gluten-free chocolate cake with this incredibly simple and foolproof recipe. What makes this cake so unbelievably moist and tender? The magic lies in adding boiling water to the batter. This crucial step expertly saturates the gluten-free starches, preventing any grittiness, while simultaneously aerating the batter to create a cake that is remarkably light, fluffy, and exquisitely moist. Experience for yourself why this gluten-free masterpiece has garnered hundreds of enthusiastic 5-star reviews from bakers and eaters alike!
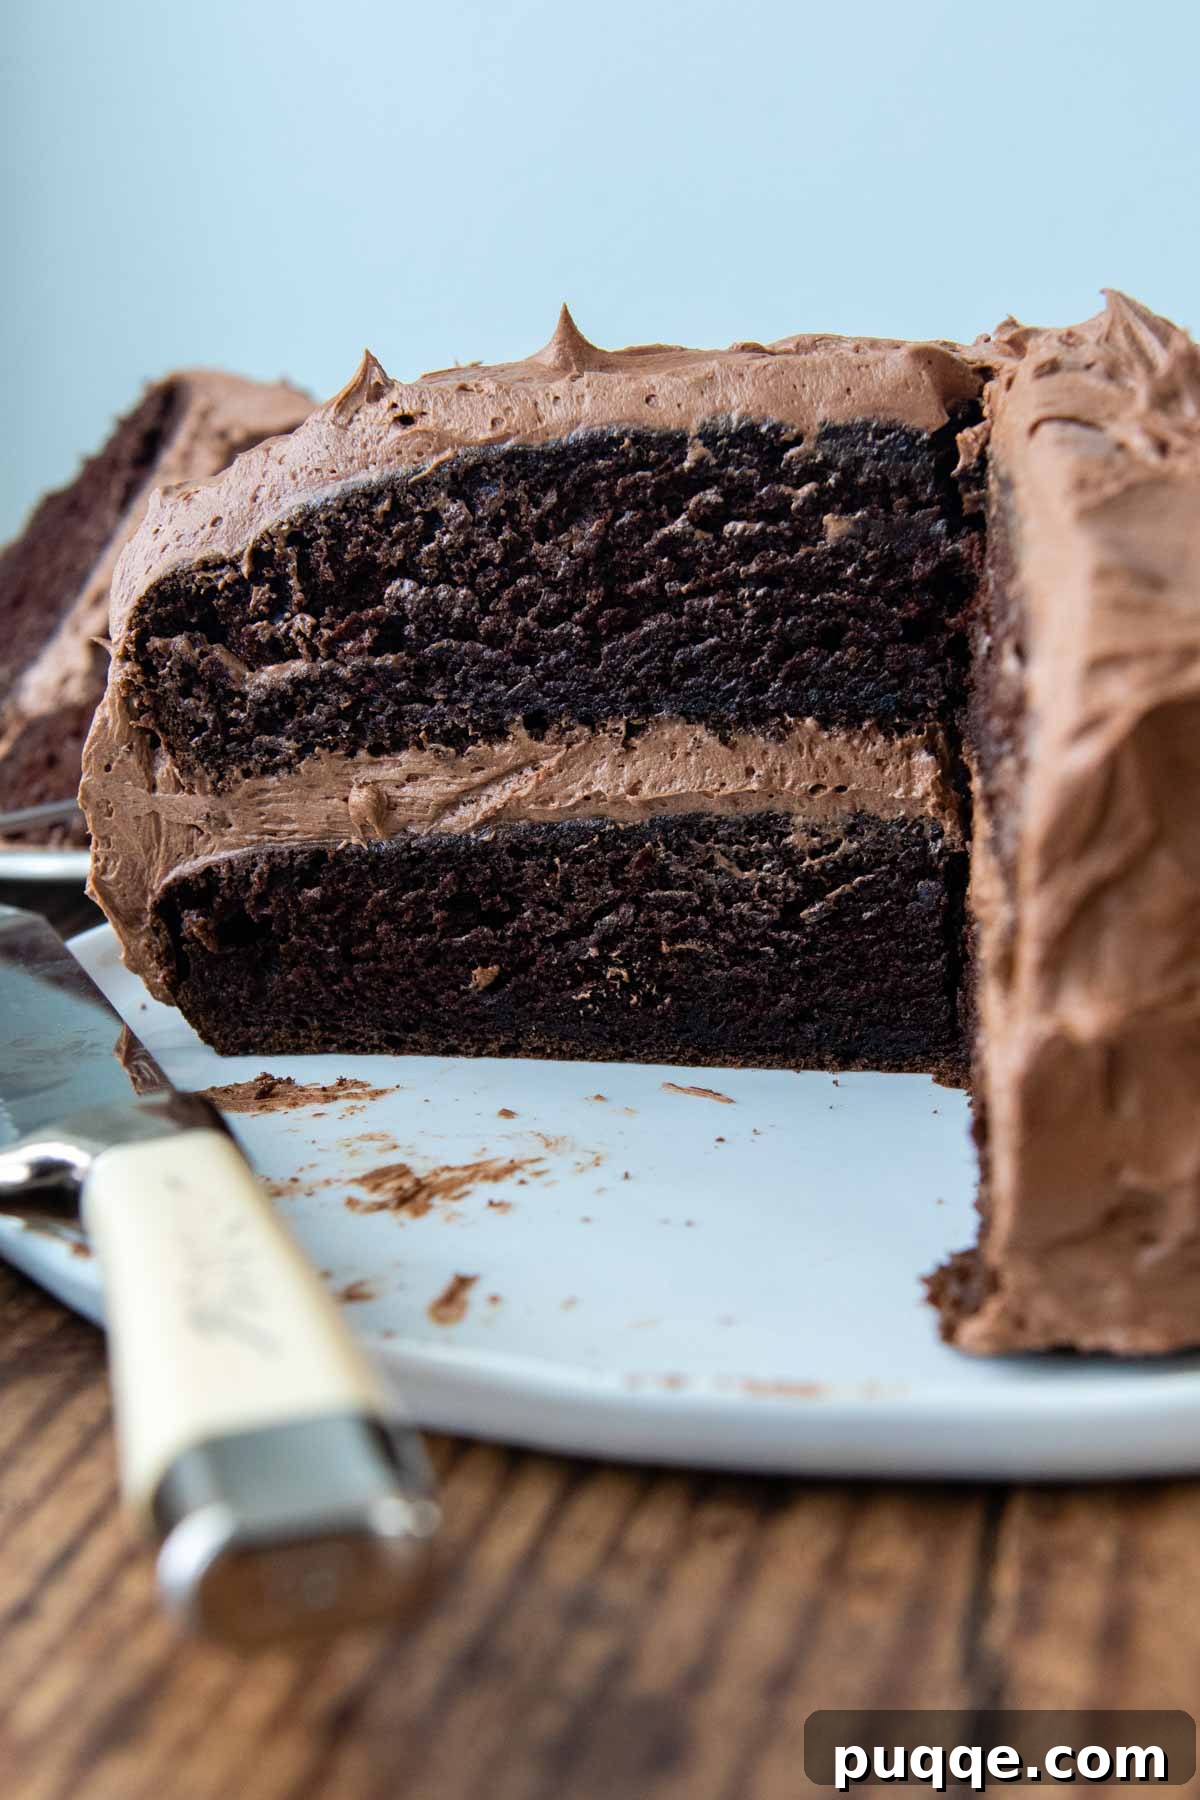
The Ultimate Gluten-Free Chocolate Cake You’ll Ever Bake
Whether you’re embarking on your first gluten-free baking adventure or you’re a seasoned pro, every baker deserves a reliable, homemade gluten-free chocolate cake recipe that can impress even the most discerning palates. This particular recipe consistently fools everyone; they always assume it’s a classic, old-fashioned, from-scratch cake, never suspecting it’s gluten-free.
I’ve personally relied on this recipe countless times, transforming it into a delightful gluten-free birthday cake, a showstopper for various celebrations, and even as a versatile base for other creative desserts within my extensive collection of gluten-free cakes. From a decadent Ding Dong cake to an epic cookies and cream gluten-free ice cream cake, its versatility knows no bounds.
It’s my most frequently requested and made dessert because it’s incredibly quick to assemble and consistently yields spectacular results. So, what’s the secret behind this cocoa powder-based chocolate cake that sets it apart from all the rest? Let’s delve into the details.
Why This Gluten-Free Chocolate Cake Recipe Stands Out
There are several key factors that contribute to the unparalleled success and rave reviews of this particular gluten-free chocolate cake:
- Readily Available Pantry Staples: Forget obscure ingredients! This recipe calls for common items you likely already have on hand, such as your favorite gluten-free all-purpose flour blend, unsweetened cocoa powder, eggs, milk (or a dairy-free alternative), and vanilla extract.
- Oil for Superior Moisture: Unlike many traditional recipes that rely on butter, this cake uses oil. This not only makes it effortlessly adaptable into a dairy-free gluten-free recipe but also ensures the cake’s crumb remains incredibly moist and tender for days, without drying out.
- Effortless Preparation: Preparing this cake is just as easy, if not easier, than using a boxed cake mix, yet the results are far superior. Simply combine all the ingredients in a bowl, mix, and bake. It’s designed to be virtually impossible to mess up, making it perfect for bakers of all skill levels.
- The “Magic” of Boiling Water: This recipe incorporates a truly special ingredient that delivers exceptional results: boiling water. Here’s how it works its magic:
- Saturates Gluten-Free Starches: Gluten-free flours can sometimes lead to a gritty texture. Boiling water helps to fully hydrate and saturate these starches, eliminating any unpleasant grittiness and ensuring a smooth, tender crumb.
- Activates Cocoa Flavor: The heat from the boiling water intensifies the cocoa powder, unlocking a richer, deeper, and more complex chocolate flavor profile that’s simply irresistible.
- Aerates the Batter: The hot water creates steam within the batter, which contributes to its aeration. This process, combined with the leavening agents, ensures a light and airy texture.
- Boosts Leavening Agents: The warmth of the boiling water gives a jumpstart to the baking powder and baking soda, creating an extra fluffy texture as the cake bakes.
While some chocolate cake recipes might call for sour cream to enhance moisture, when working with an all-purpose gluten-free flour blend, the secret to achieving that ultimate moistness is often as simple and effective as adding a cup of hot boiling water!
Continue reading to master the art of making this phenomenal from-scratch layer cake. We’ll cover invaluable baker’s tips, smart ingredient substitutions, and variations for transforming it into a sheet cake, cupcakes, or a dairy-free delight. All the information you need is right here! Once you’ve mastered this easy layer cake, you can even morph it into other show-stopping desserts, like my family’s highly requested gluten-free Black Forest cake.
I have the same praise as everyone does, it’s the best chocolate cake I’ve made period!
—Heather
We actually like this cake better than our favorite chocolate cake with regular flour. This GF cake is so moist and delicious! Thank you for this wonderful recipe!
—Rebecca
Essential Ingredient Breakdown
Understanding the role of each ingredient is key to successful gluten-free baking. Here’s a closer look at what you’ll need for this incredible chocolate cake:
- Gluten-Free Flour: I consistently achieve outstanding results with Cup4Cup gluten-free flour blend and highly recommend it. However, many readers have successfully used other gluten-free flour blends. Feel free to check the comments section below for various flour blend suggestions and their results.
- Unsweetened Cocoa Powder: You can use regular unsweetened cocoa powder, but for an intensely rich and deep chocolate flavor, I personally prefer and recommend Dutch-processed cocoa powder. It has a smoother, less acidic taste that truly elevates the cake.
- Milk: This recipe is incredibly versatile when it comes to milk. Feel free to use any kind you prefer, whether it’s regular dairy milk or a non-dairy alternative such as almond milk, soy milk, or oat milk.
- Vegetable Oil: The use of oil, instead of butter, is crucial for the cake’s exceptional moisture and tender crumb. You can use standard vegetable oil, or substitute it with coconut oil or any other neutral-flavored oil you prefer.
- Boiling Water: This is our secret weapon for a truly moist, light, and deceptively gluten-free cake! As discussed, it plays a vital role in saturating the gluten-free starches, preventing grittiness, and aerating the batter for a delightfully fluffy texture.
Let’s Bake This Deliciousness *Together*!
(Below you’ll find step-by-step photos and modified instructions to guide you. For the complete recipe, including precise ingredient amounts and baking times, please scroll down to the full recipe card.)
Making This Cake is Seriously Easy!
Achieving absolutely fabulous results with a homemade gluten-free cake doesn’t have to be complicated. Pinky promise!
To begin, combine all the dry ingredients – that’s the gluten-free flour, sugar, cocoa powder, baking powder, baking soda, and salt – in a large mixing bowl. Whisk them thoroughly to ensure they are well combined. Next, add the wet ingredients: the eggs, milk, oil, and vanilla extract. Stir everything together until just combined. You’re already almost there!
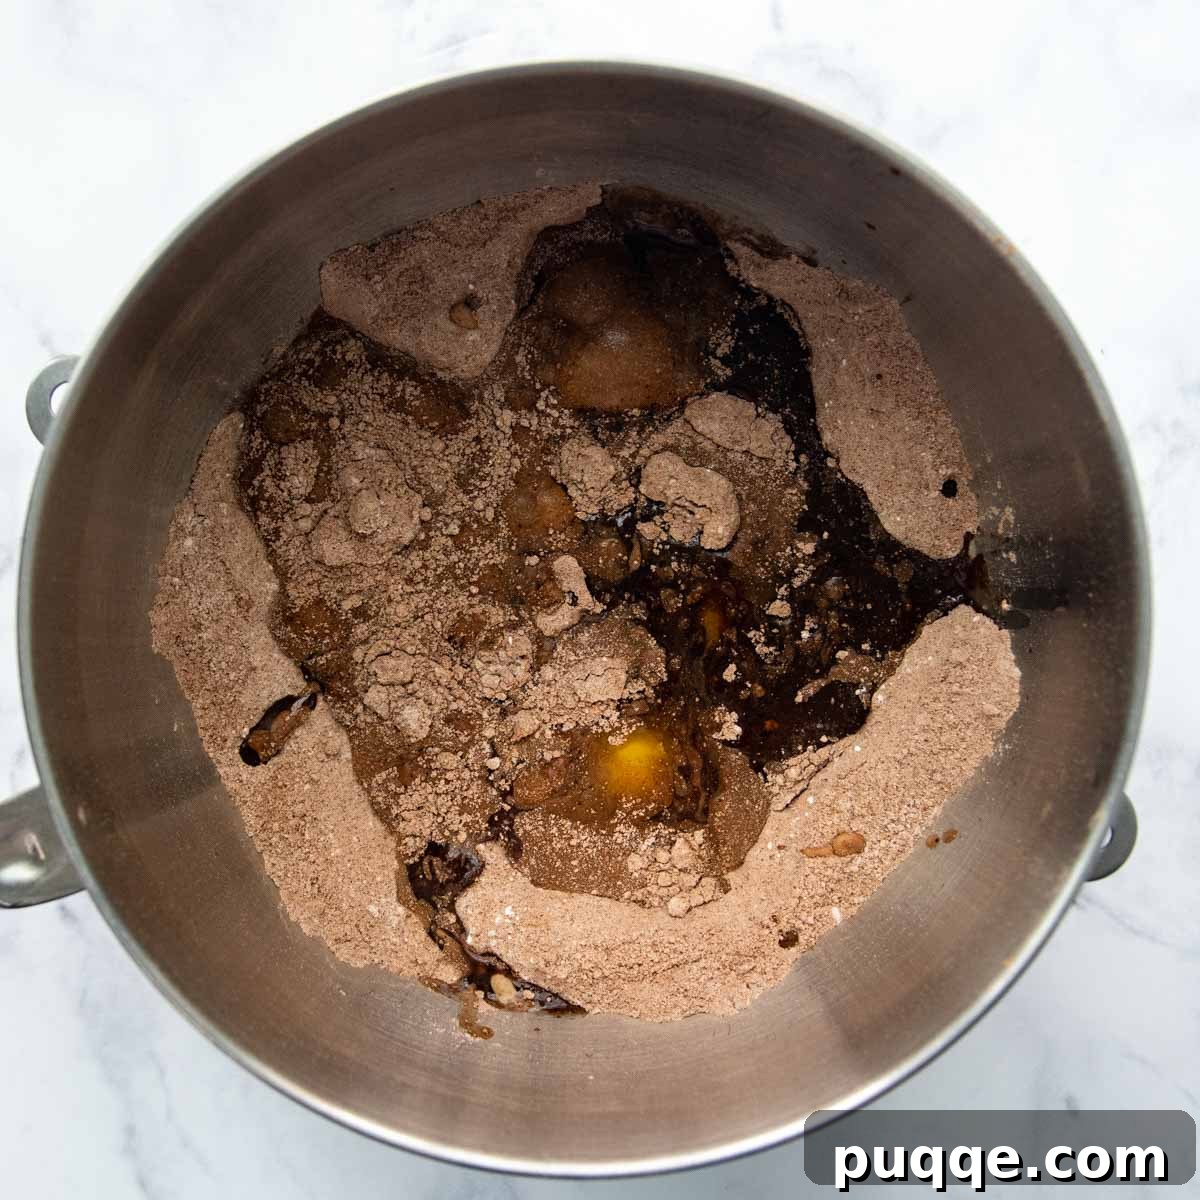
It’s “Magic” Ingredient Time!
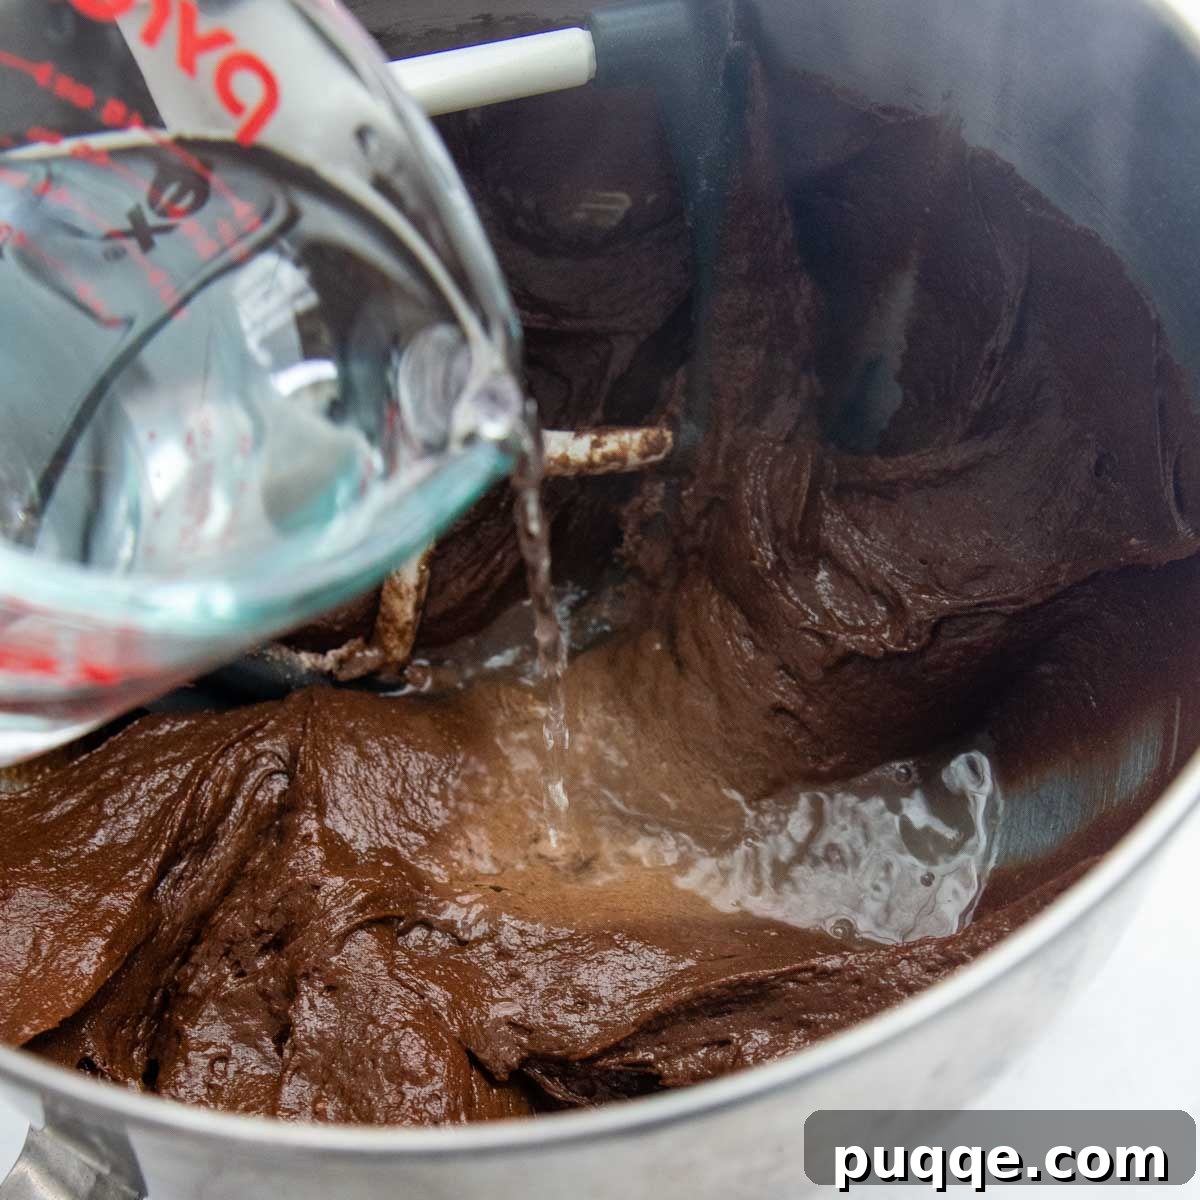
While your mixer is running on low speed, slowly and carefully pour in the boiling water. Once the boiling water is fully incorporated into the batter, increase the mixer speed to high and mix for exactly one minute. This “magic” step is critical: the hot water activates the cocoa for a much richer flavor, saturates the gluten-free starches so they are never gritty, and ultimately creates an incredibly moist crumb. See? It’s truly magic!
Bake, Cool, Frost, and Indulge (Immenseley)!
When baking gluten-free cakes, it’s often better to slightly overbake than underbake, as you want to ensure all excess moisture has evaporated. An underbaked gluten-free cake tends to sink in the middle as it cools. Make sure the tops of your cakes are fully set, especially in the very center. For precise testing, I recommend using a cake tester that grabs a good amount of crumb for an accurate reading.
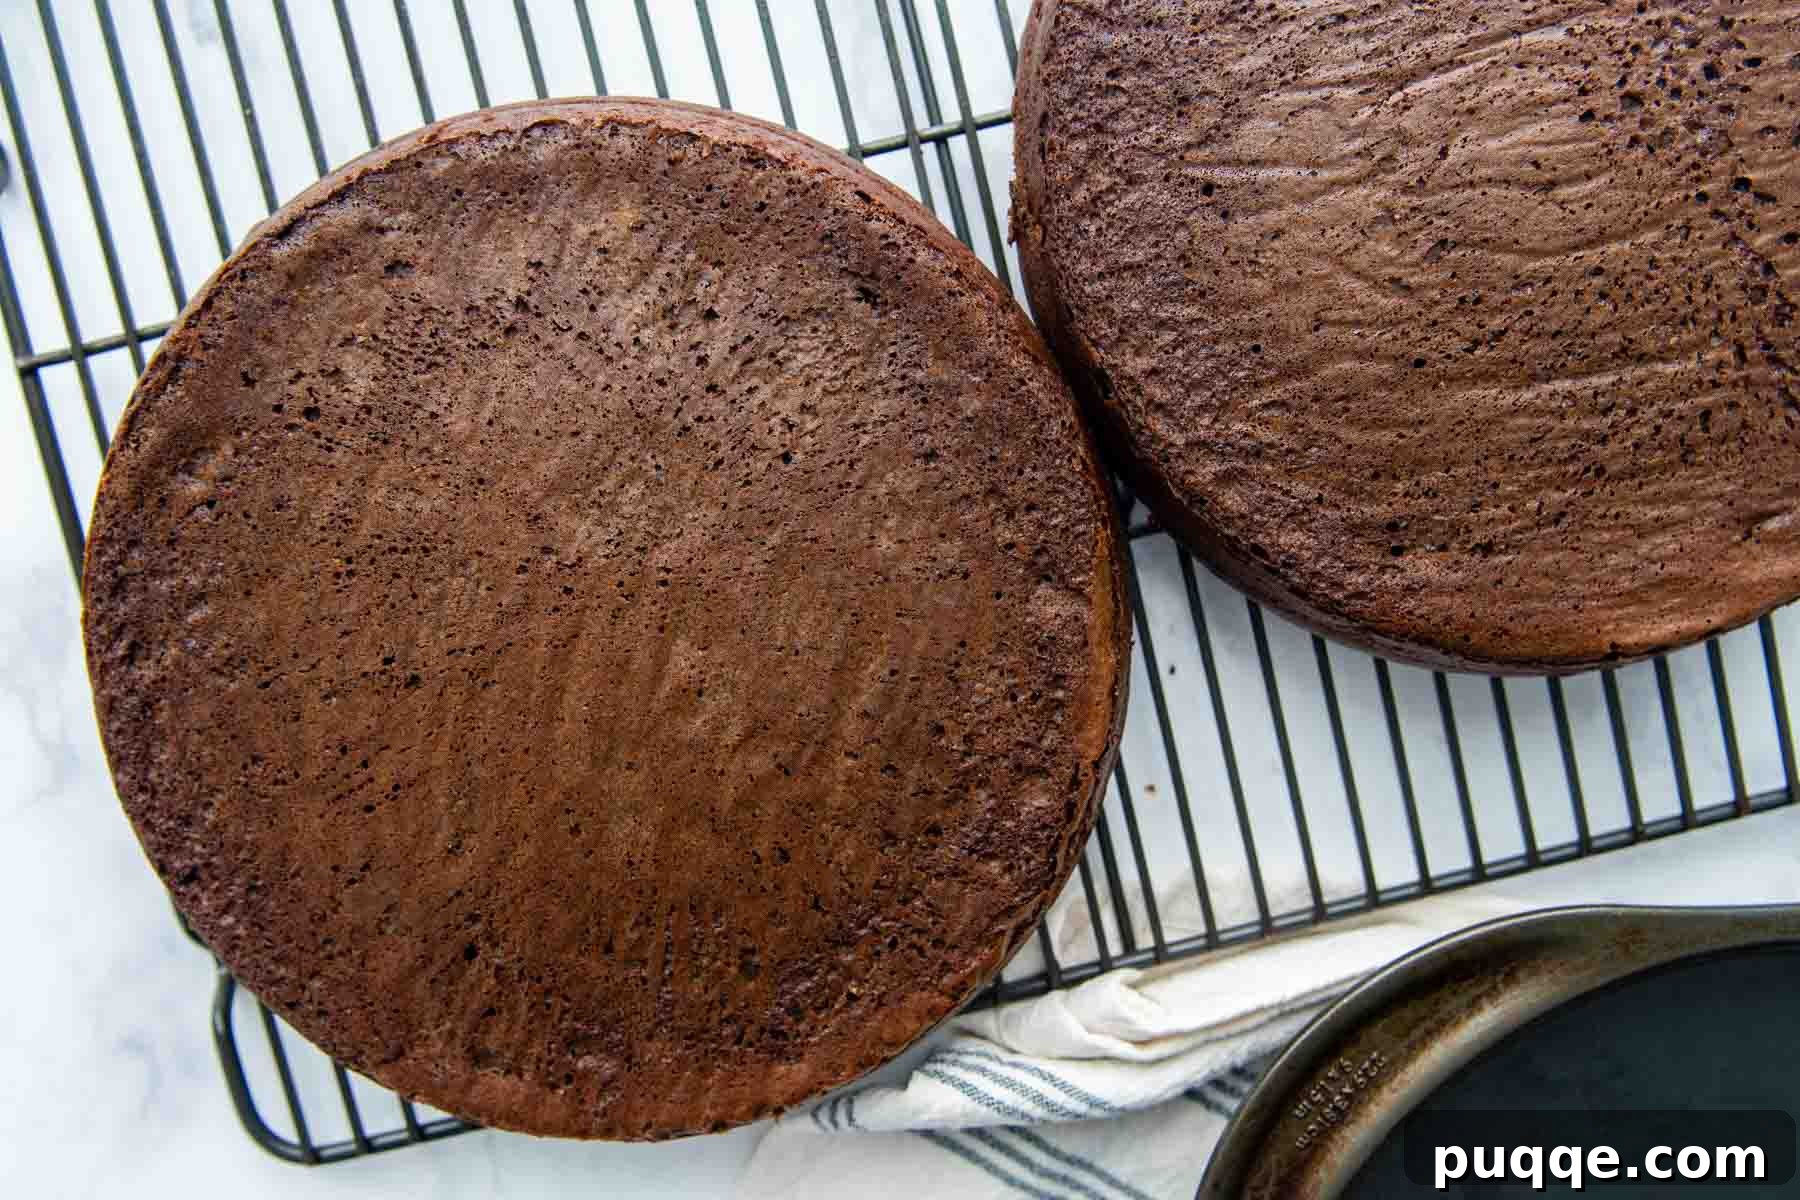
Once baked, allow the cakes to cool in their pans for about 5 minutes. Then, carefully invert them onto a wire rack to cool completely before you even think about frosting. Your kitchen will be filled with the most heavenly chocolate aroma. You’re welcome!
What’s a Cake Without Decadent Frosting?
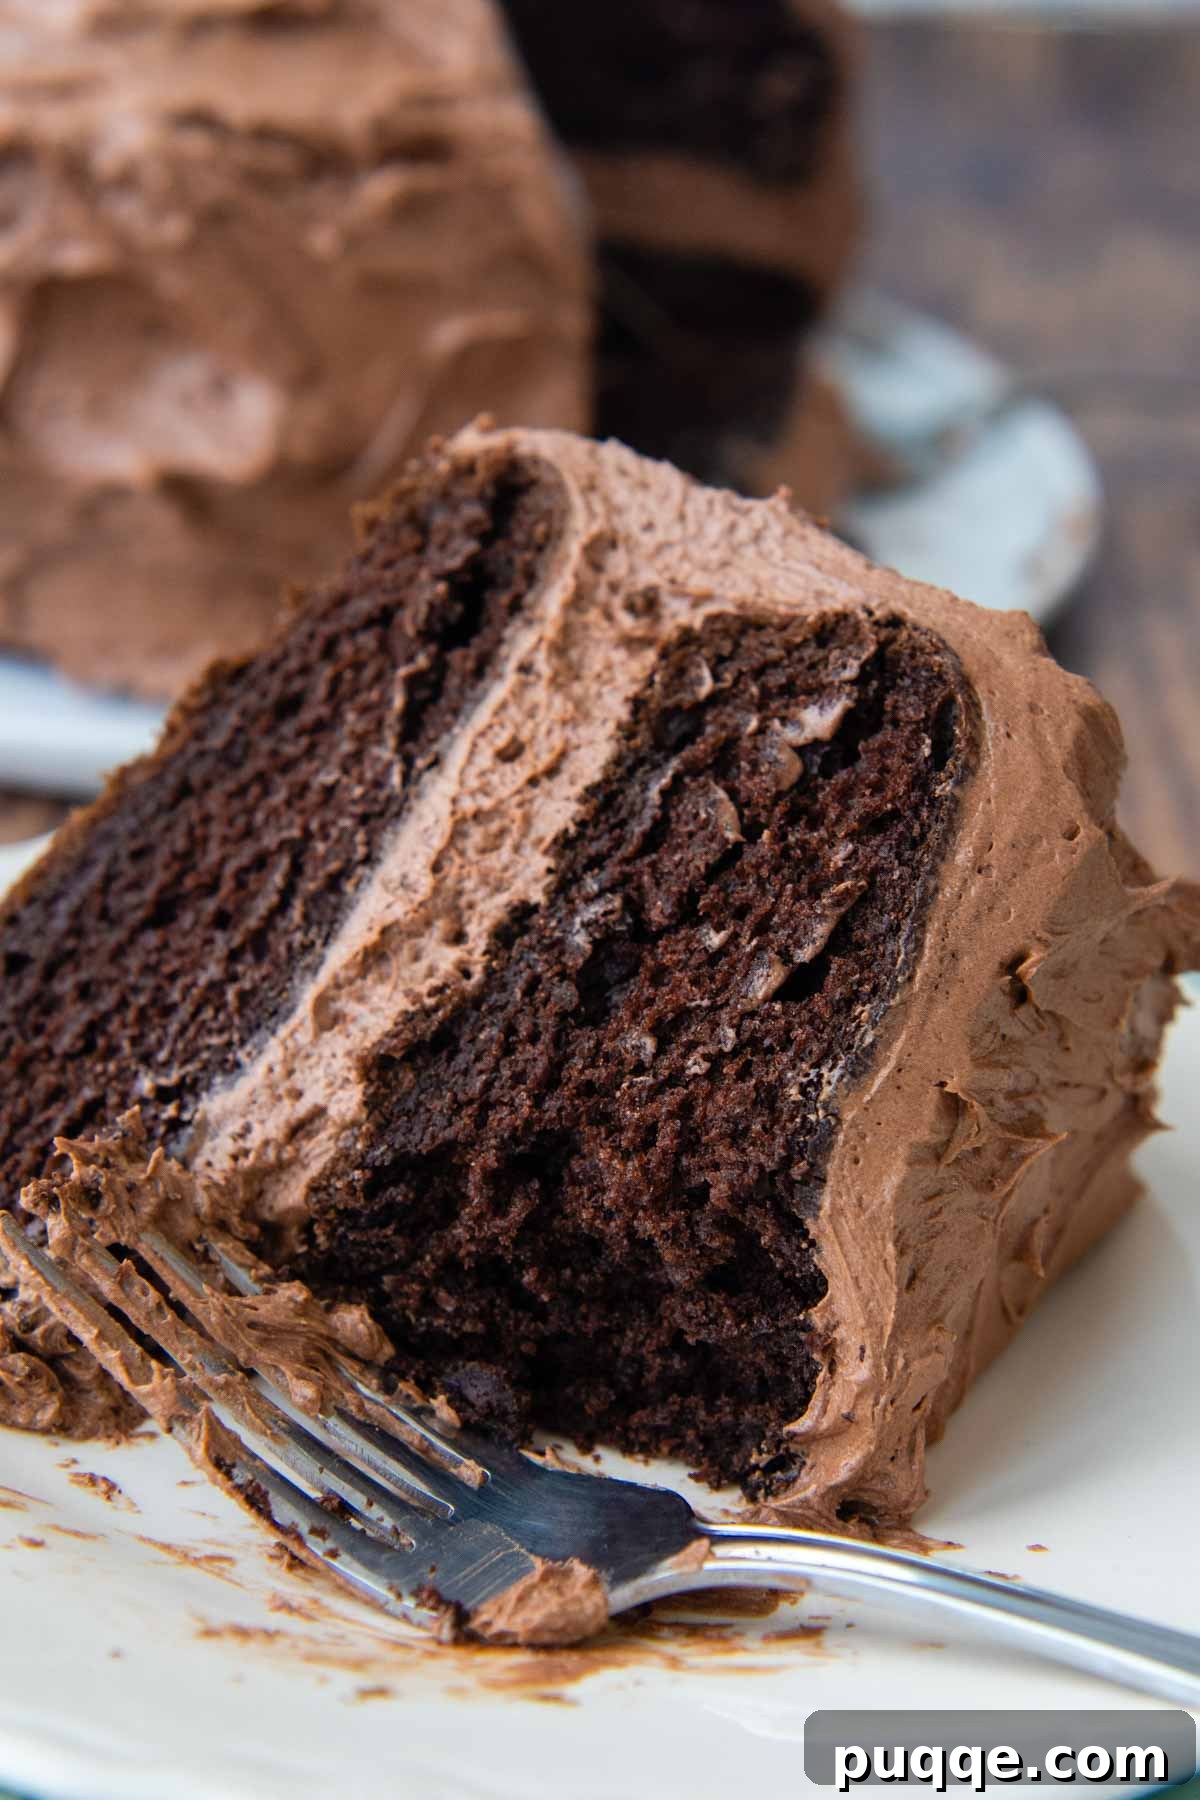
You’ve put in the effort to bake this magnificent cake, now it’s time to get serious about the next crucial step: choosing the perfect decadent frosting to smother over this beauty! Just a friendly reminder: ensure your cake layers are completely cool before applying any frosting, or you’ll face the dreaded sliding cake layers. No one wants that! 😳
If you’re a true chocolate aficionado craving an extra chocolatey experience, then my uber fluffy chocolate frosting, featuring an unexpected secret ingredient, is an absolute must-try. For those who adore the classic black-and-white combination, I highly recommend my go-to recipe for the world’s fluffiest vanilla buttercream frosting. Other delightful options include a rich chocolate ganache, a tangy cream cheese or sour cream frosting, a light and airy whipped cream, or this luscious silky peanut butter glaze. Choose your adventure and elevate your cake!
Expert Tips for the Moistest Gluten-Free Cake
- Utilize Cake Baking Strips: To ensure your cake remains wonderfully moist throughout baking and to prevent uneven layers (which can make frosting tricky), I highly recommend using cake baking strips. These clever tools help the cake bake more evenly, resulting in perfectly level and moist layers.
- Understand the Role of Sugar: Sugar isn’t just for sweetness; it also plays a vital role in moisture retention in cakes. Generally, the less sugar you use, the drier the cake will be. While you can certainly reduce the amount of sugar if preferred, be aware that it might result in a slightly less moist cake.
- Master Baking Time (and Don’t Overbake!): This particular gluten-free cake recipe is more forgiving when it comes to baking time than many others. However, the cardinal rule of baking still applies: avoid overbaking. Overbaking is the quickest way to a dry cake. To check for doneness, insert a toothpick into the very middle of the cake. It should come out with a few moist crumbs attached, but not be liquidy. If you’re ever unsure, turn off your oven and let the cake sit in the residual heat for an additional 1-2 minutes before removing it. This gentle finish can make all the difference.
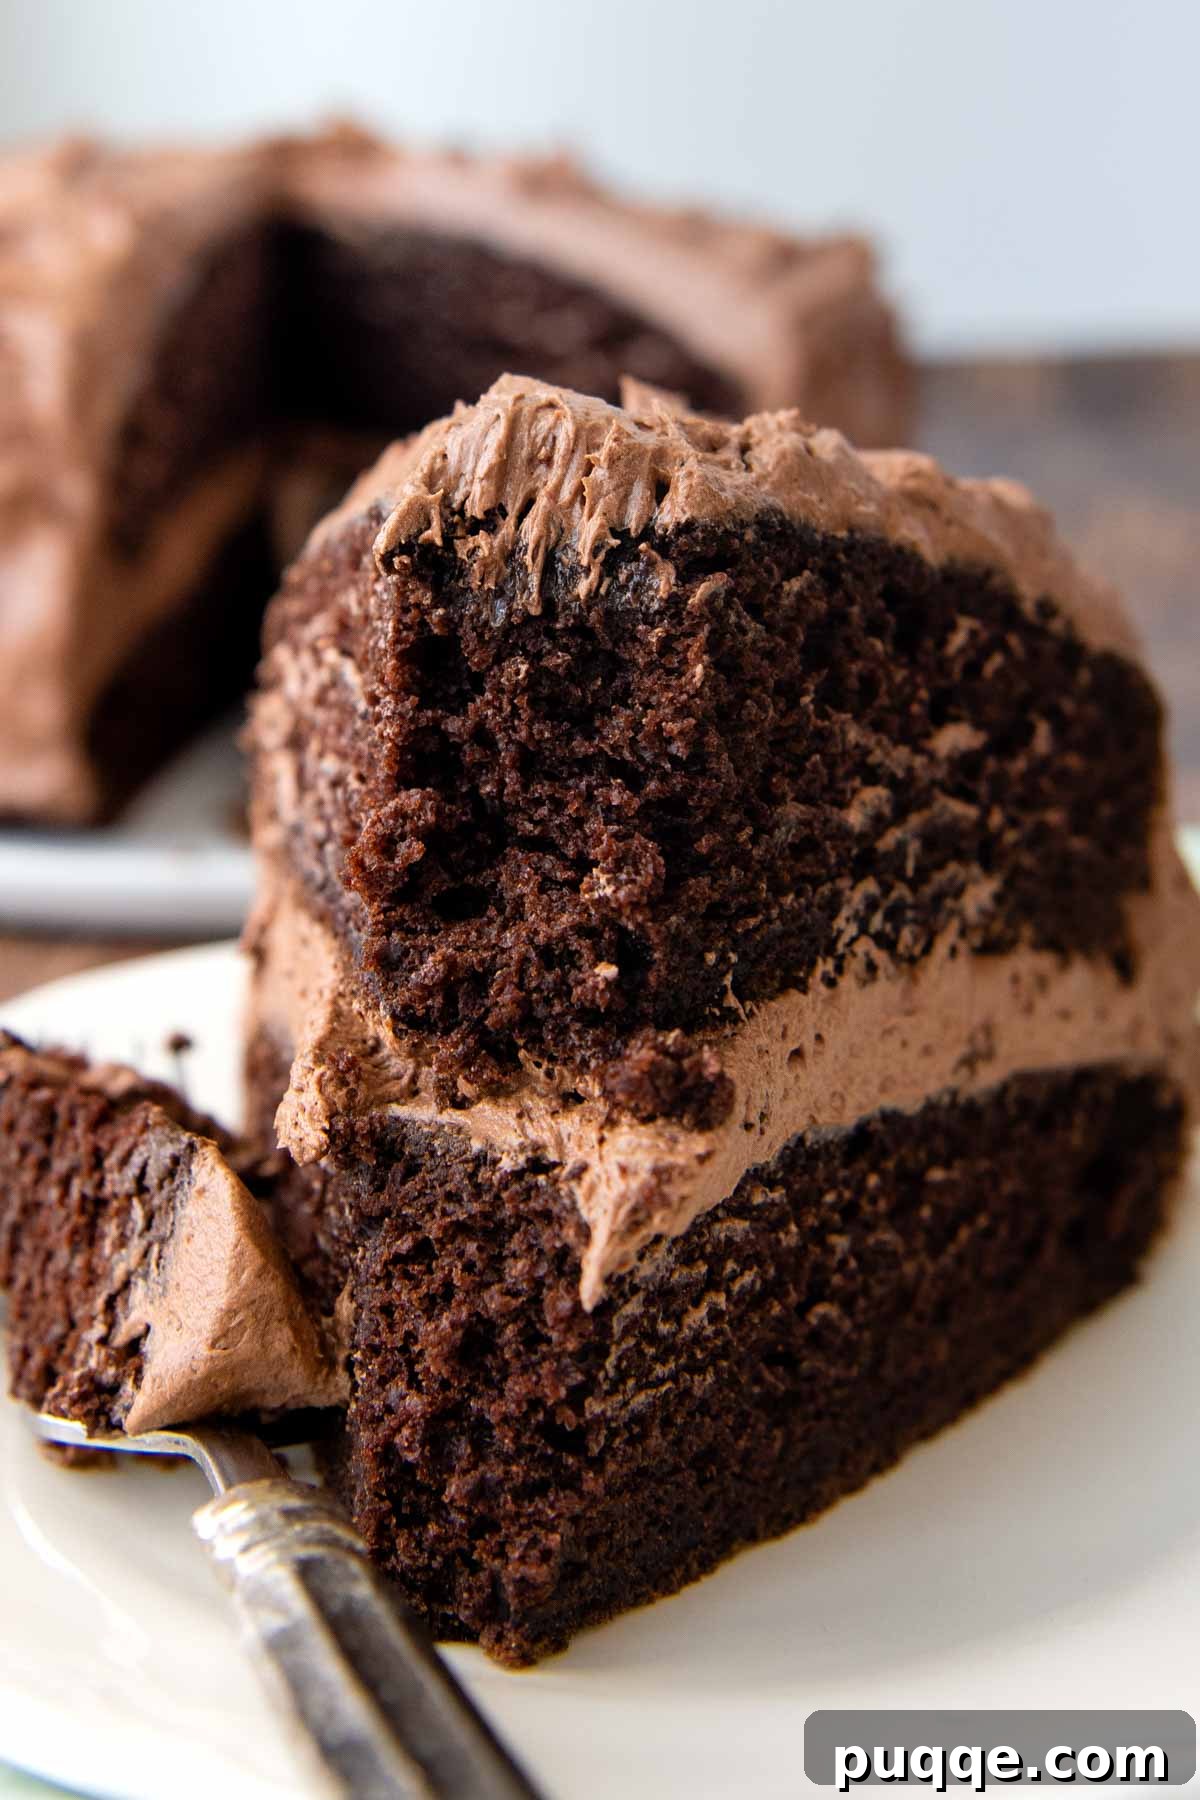
- Serve at Room Temperature: Although some frostings require refrigeration, I strongly advise allowing your cake to come to room temperature for several hours before serving. Gluten-free cakes, in particular, have a tendency to dry out more quickly in the refrigerator compared to their gluten-containing counterparts. Serving at room temperature ensures the best texture and flavor.
Can I Use a Different Baking Pan? Absolutely!
This versatile gluten-free chocolate cake recipe can easily be adapted for different pan sizes and types, offering flexibility for any occasion.
- For Cupcakes: If you’d prefer to make individual gluten-free chocolate cupcakes, simply follow the specific baking directions outlined in my easy gluten-free chocolate cupcakes recipe. It will guide you through the ideal baking times and temperatures for perfect portions.
- For a Sheet Cake: To transform this into a convenient sheet cake, simply pour all the prepared batter into a greased 9×13 inch baking pan. Bake for approximately 45-50 minutes, or until a toothpick inserted into the center comes out clean. Allow it to cool completely on a wire rack before frosting and serving. This is a fantastic option for potlucks, parties, or when you need a simpler serving solution.
Don’t Forget to Pin This Recipe for Later!
Let’s connect and be friends on Pinterest! I’m always sharing amazing gluten-free recipes and inspiration!
Did you bake this delightful recipe? I absolutely love hearing from you! Please leave a star rating and comment below the recipe card. Your feedback is incredibly valuable to our community and helps others discover fantastic recipes. Rest assured, you will always hear back from me! -Melissa
Rated 4.72 stars by 113 users.
Legit Moist & Easy Gluten-Free Chocolate Cake
By Melissa Erdelac
Yield: 12 servings
Prep Time: 5 mins
Cook Time: 35 mins
Total Time: 40 mins
Learn how to bake the best and most moist gluten-free chocolate cake with this easy-to-follow, no-fail recipe. What makes the cake so moist? Boiling water in the cake batter! It helps saturate the starches, aerates the batter, making the cake light, fluffy, and moist instead of gritty. Find out for yourself why this GF cake recipe has earned hundreds of 5-star reviews!
Print Recipe
Pin Recipe
Ingredients
- 2 cups (292 g) all purpose gluten-free flour (I highly recommend Cup4Cup gluten-free flour)
- 2 cups (400 g) granulated sugar
- ¾ cup (75 g) unsweetened baking cocoa, Dutch-processed preferred
- 2 teaspoons baking powder
- 1 ½ teaspoons baking soda
- 1 teaspoon salt
- 1 cup (245 g) milk or non-dairy milk
- ½ cup (107 g) oil, any preferred
- 2 large eggs
- 2 teaspoons vanilla extract
- 1 cup (240 g) boiling water
Equipment
- 9 inch Cake Pans (x2)
- Stand Mixer or large mixing bowl with hand mixer
- Cup 4 Cup Gluten Free Flour (as recommended ingredient)
Instructions
- Preheat your oven to 350º F (175º C). Prepare two 9-inch cake pans by lightly spraying them with cooking spray, then lining the bottoms with cut-to-size parchment paper, and finally spraying the parchment as well. Set the prepared pans aside.
- In a large mixing bowl, combine the dry ingredients: gluten-free flour, granulated sugar, unsweetened cocoa, baking powder, baking soda, and salt. Whisk them thoroughly to ensure they are well combined, or use the paddle attachment on your stand mixer and mix until combined.
- To the flour mixture, add the milk, oil, eggs, and vanilla extract. Mix on medium speed until all ingredients are just well combined. Reduce the mixer speed to low, and very slowly add the boiling water to the cake batter. Once the water is fully incorporated, increase the speed to high and mix for 1 minute to aerate the batter.
- Divide the cake batter evenly between the two prepared 9-inch cake pans. Bake for 30-35 minutes, or until a wooden toothpick inserted into the center of each cake comes out clean or with a few moist crumbs attached (no wet batter).
- Remove the cakes from the oven and let them cool in their pans for 10 minutes. After 10 minutes, carefully invert the cakes onto a wire rack to cool completely before frosting with your preferred frosting, such as fluffy vanilla buttercream or rich chocolate buttercream.
Recipe Notes
Dairy-Free Modification
Adapting this recipe to be dairy-free is incredibly simple. The only modification you’ll need to make is replacing regular dairy milk with a dairy-free milk alternative, such as almond milk, soy milk, or coconut milk. If you prefer to use coconut oil, it can also easily replace the vegetable oil for a subtle flavor variation.
Important Note: Always remember to check the ingredient labels of your gluten-free flour blend, as some blends may contain milk powder. Opt for a certified dairy-free blend if strict dairy avoidance is necessary.
Using Different Baking Pans
Gluten-Free Cupcakes
To bake this cake batter as cupcakes, please refer to my Incredible Gluten-Free Chocolate Cupcakes recipe for specific baking times and instructions tailored for cupcakes.
9×13 Inch Sheet Cake
If you prefer a single-layer sheet cake over a layer cake, prepare the batter exactly as written. Then, pour all the batter into a greased 9×13 inch baking pan. Bake at 350°F (175°C) for approximately 45-50 minutes, or until a toothpick inserted into the middle comes out clean. Allow the sheet cake to cool completely on a wire rack before frosting.
Freezing and Storing Tips
Gluten-free cakes generally do not retain their freshness as long as traditional cakes due to the absence of gluten. Therefore, if you don’t plan on freezing the cake, aim to make it no more than 24 hours before you intend to serve it.
Freezing Unfrosted Cake Layers:
Once each cake layer has completely cooled, wrap it securely in several layers of plastic wrap. Then, transfer the wrapped layer to a gallon-sized freezer bag or an airtight container. You can freeze unfrosted cake layers for up to 3 months.
When you’re ready to use them, remove the wrapped cake layers from the freezer bag and allow them to thaw at room temperature for about 1 hour before unwrapping and frosting.
Freezing Frosted Cake:
If you have an assembled cake with both filling and frosting, first place the entire cake in the freezer until the frosting is solid (this prevents smudging). Once frozen solid, wrap the cake securely with plastic wrap, followed by a layer of aluminum foil. Freeze for up to 3 months.
To thaw, transfer the wrapped cake to the refrigerator overnight. Carefully remove the plastic wrap and foil, then continue to thaw the cake at room temperature for 5-6 hours before serving to ensure the best texture and flavor.
Freezing Cake Slices:
For convenience, slice any leftover cake into individual serving portions. Wrap each piece tightly in plastic wrap and arrange them in a single layer on a baking sheet. Once the slices are frozen solid, transfer them to a gallon-sized freezer bag or an airtight container.
Thaw individual slices on the counter for about 1 hour, or defrost them in the microwave at 20% power, being careful to avoid overheating and melting the frosting.
Adapted from Add a Pinch
Nutrition Information
- Calories: 299 kcal
- Carbohydrates: 49 g
- Protein: 4 g
- Fat: 11 g
- Saturated Fat: 8 g
- Cholesterol: 29 mg
- Sodium: 352 mg
- Potassium: 104 mg
- Fiber: 2 g
- Sugar: 35 g
- Vitamin A: 73 IU
- Calcium: 69 mg
- Iron: 1 mg
Did you make this recipe? Please leave a star rating and review below. It helps others when searching for recipes and I LOVE feedback!