
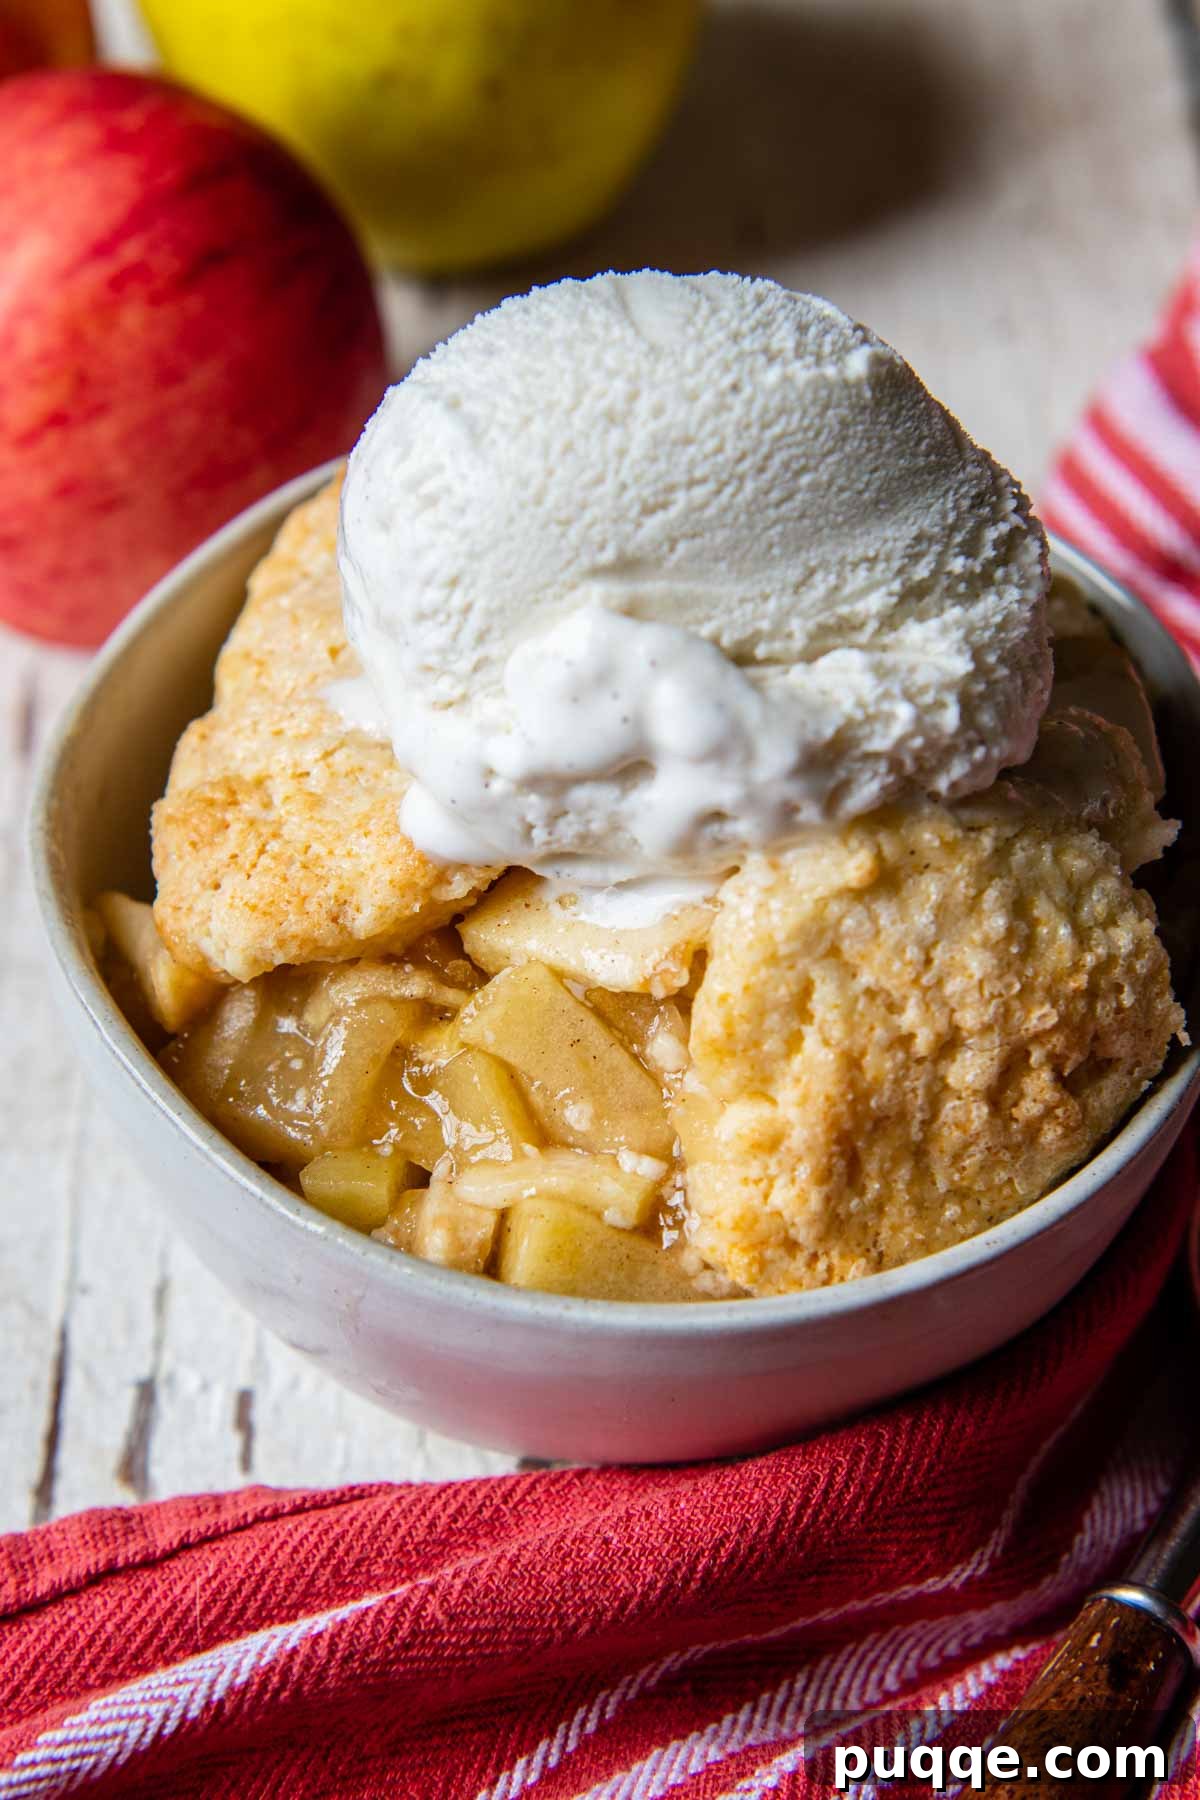
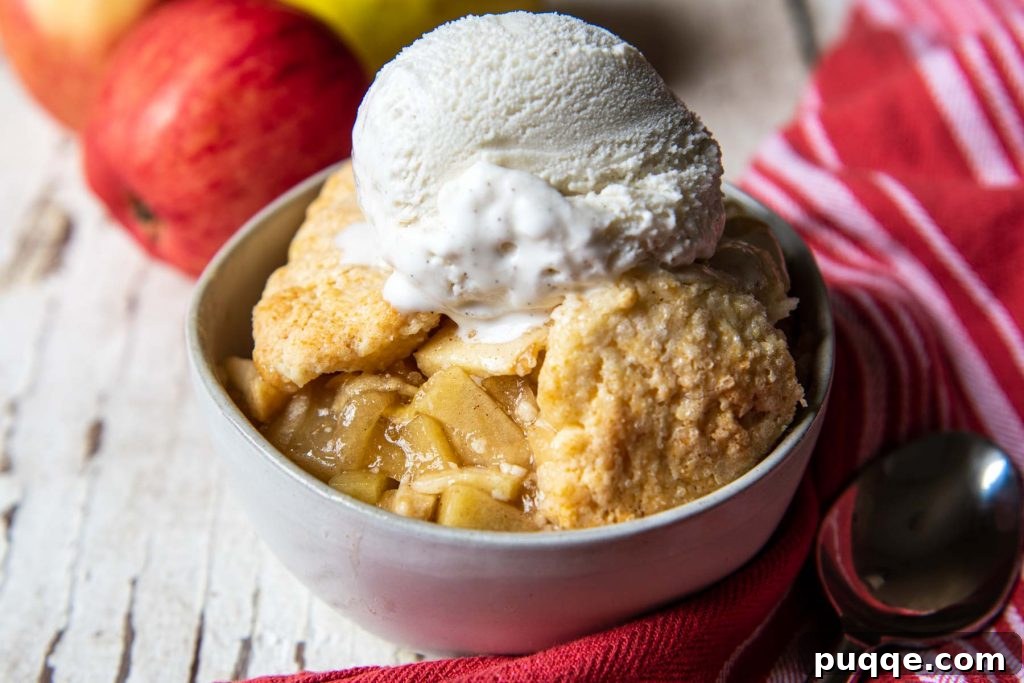
Unlock the secret to the most irresistible gluten-free apple cobbler with this timeless, old-fashioned recipe. Forget everything you thought you knew about gluten-free baking; this cobbler defies expectations, delivering a truly spectacular dessert experience. It features an exquisitely sweetened cinnamon apple filling that bakes up incredibly juicy, tender, and perfectly thickened, thanks to a clever, yet simple, technique of incorporating a grated apple. Crowned with a buttery, soft biscuit topping that’s surprisingly easy even for gluten-free baking newcomers, this recipe promises success. I’ll guide you through each step, ensuring a flawless result every time!
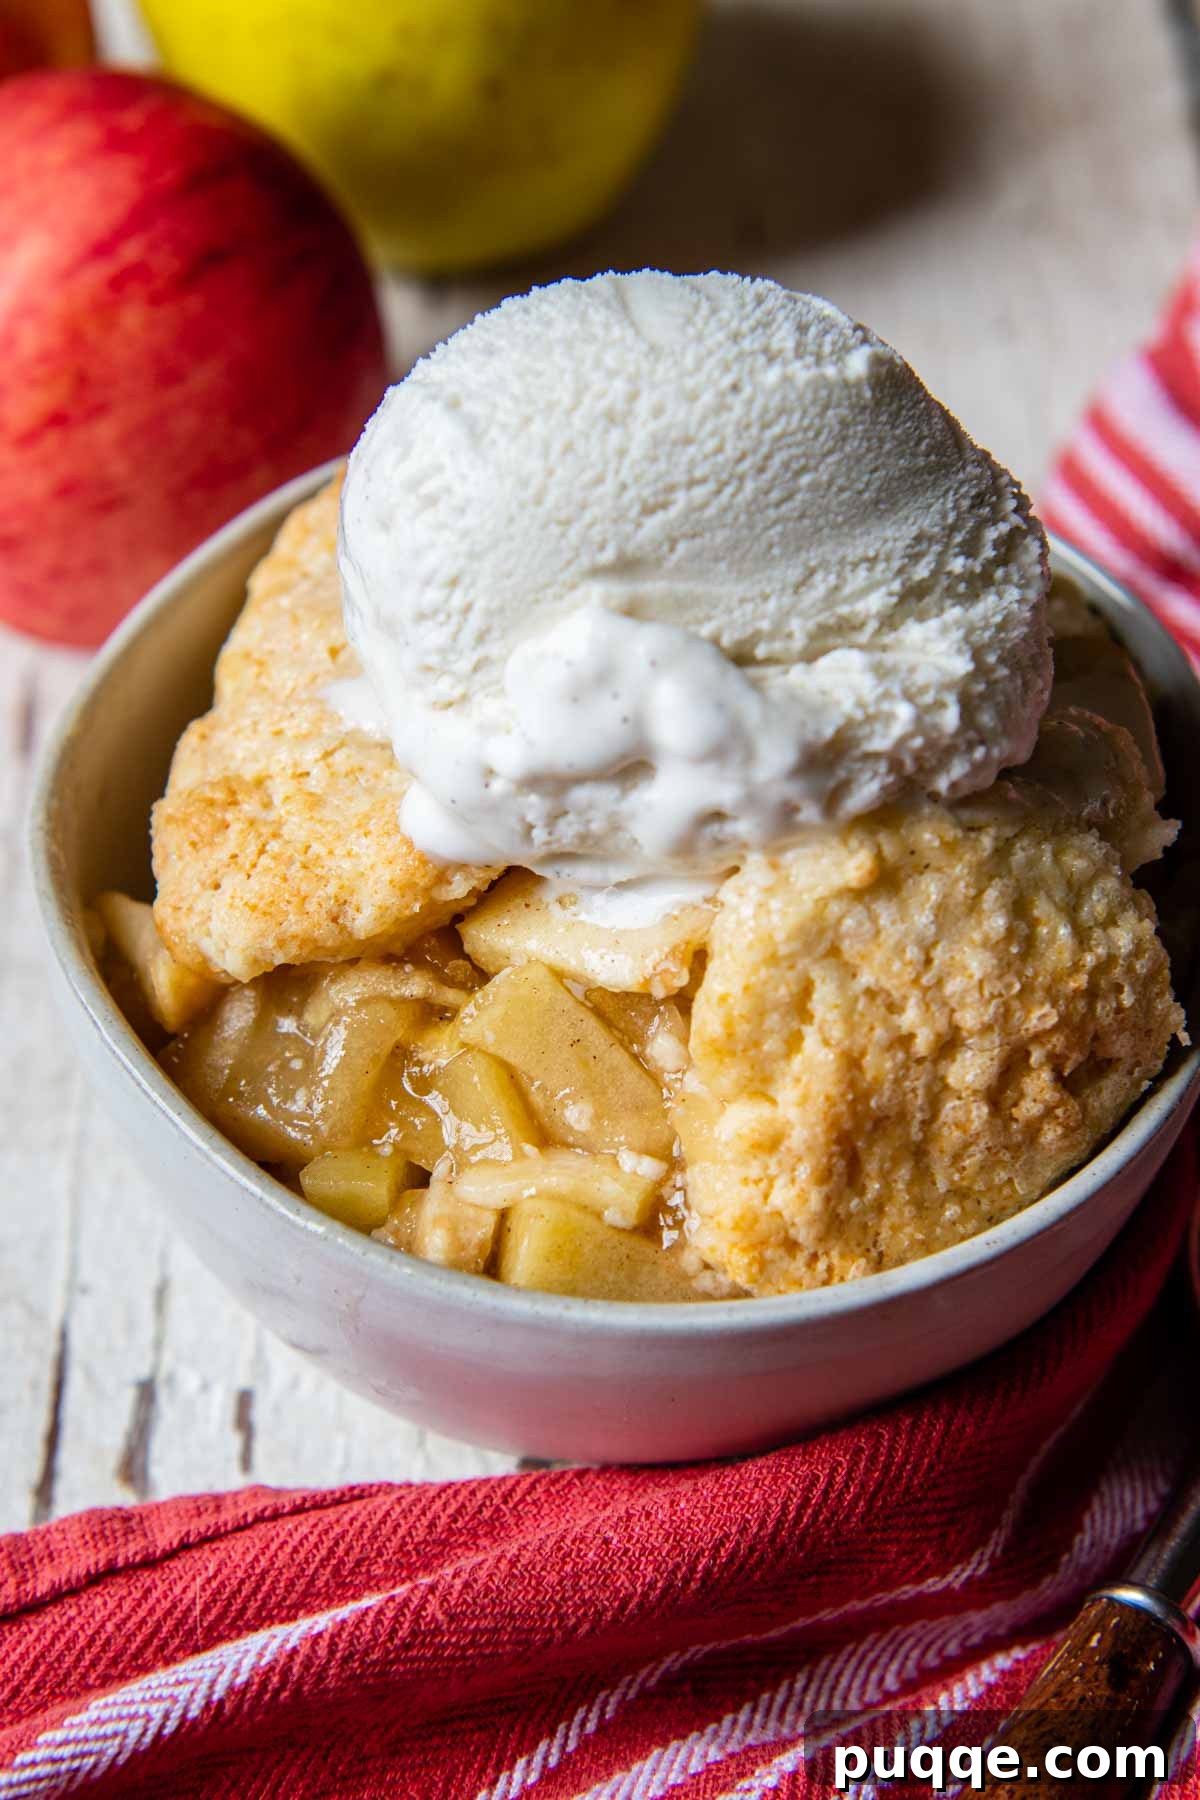
The Ultimate Easy Gluten-Free Apple Cobbler Recipe
The crisp autumn air signals the arrival of apple season, and for many of us, that means a glorious trip to a U-pick orchard. If you, like me, find yourself with an abundance of fresh, crisp apples and a slight case of sticker shock (it’s always worth it!), then it’s time to transform that harvest into something truly magical. This old-fashioned, homemade apple cobbler, reimagined as a gluten-free masterpiece, is your next essential recipe.
Far superior to anything you might remember (yes, even Gramma’s!), this gluten-free apple cobbler recipe is a close cousin to beloved fall desserts like homemade gluten-free apple crisp with an oat topping, but with its own unique charm. It’s a two-part symphony of flavors and textures that culminates in an epic dessert. First, we create a luscious apple filling, where fresh apples are expertly combined with just the right amount of sugar and a secret thickening agent. My easy hack for a perfectly thickened filling that’s neither too runny nor overly dense involves grating one of the apples. This ingenious trick allows the grated apple to break down during baking, naturally enriching and thickening the juices to an ideal consistency.
Next comes the star of the show: the easy gluten-free cobbler topping. If the phrase “gluten-free biscuit topping” sounds intimidating, banish those worries! This mix-and-drop biscuit topping boasts the same rich, buttery, and subtly sweet flavor profile as classic homemade gluten-free shortcake. Its pliable texture makes it incredibly simple to shape and gently pat over the fragrant apple filling, ensuring every bite is a delightful blend of fruit and tender, golden crust.
This cobbler brought back so many cherished memories! I haven’t enjoyed a cobbler since going gluten-free, and this recipe was incredibly simple and utterly delicious. Thank you so much for bringing this joy back!
—Grey
Essential Ingredients for Your Gluten-Free Apple Cobbler
Crafting the perfect gluten-free apple cobbler begins with understanding the role each ingredient plays. Here’s a detailed breakdown to help you select the best components and make informed substitutions.
For the Flavorful Apple Filling:
- Apples: The foundation of any great apple cobbler. I highly recommend using Golden Delicious apples. They are a baker’s dream because they soften beautifully while maintaining their shape, preventing a mushy texture. Their balanced flavor profile—not too sweet, not too tart—makes them versatile for other dishes too, such as a fluffy apple almond flour cake or savory recipes like maple mustard roasted apples and carrots. Feel free to experiment with other baking apple varieties for diverse flavor notes.
- Cornstarch: This acts as our primary thickening agent, ensuring the apple juices achieve a luscious, syrupy consistency without being watery. For those seeking alternatives, an equal amount of arrowroot powder or quick-cooking tapioca flour can be used effectively as gluten-free fruit thickeners.
- Butter: A small amount of melted butter in the filling adds a rich, creamy depth of flavor that truly elevates the cobbler. While optional, it imparts a wonderful indulgent quality. For dairy-free or vegan adaptations, simply substitute with a high-quality plant-based butter stick or omit it entirely if preferred.
- Sugars & Spices: A blend of granulated and brown sugar provides a balanced sweetness with hints of caramel. Cinnamon and nutmeg are classic companions to apple, enhancing their natural warmth, while a touch of lemon juice brightens the flavors and prevents browning.
For the Irresistible Cobbler Topping:
- Gluten-Free All-Purpose Flour: The key to a tender, flaky biscuit topping. I consistently achieve excellent results with Cup4Cup gluten-free flour blend. However, many excellent gluten-free flour blends are available. If you have a preferred brand, feel free to use it. Be sure to check the comments section below, as many readers share their successful adaptations with different flour blends.
- Butter: Cold, unsalted butter is crucial for creating that coveted flaky, tender biscuit texture. When cut into the flour, it creates pockets of steam during baking, leading to a light and airy topping. For dairy-free or vegan versions, use chilled plant-based butter sticks (like Earth Balance) cut into small pieces.
- Milk: Provides moisture to bring the biscuit dough together. Any type of dairy milk works beautifully. For a dairy-free or vegan recipe, unsweetened almond milk or any other plant-based milk will yield equally delicious results.
- Baking Powder & Salt: These leavening agents give the biscuits their characteristic rise and lightness, while salt balances the sweetness and enhances all the flavors.
Let’s Bake This Delicious Cobbler Together!
(Note: This step-by-step visual guide will walk you through the process with accompanying pictures. For precise ingredient measurements and detailed instructions, please refer to the comprehensive recipe card located at the bottom of this post.)
Step 1: Prepare the Apple Filling
Begin by preheating your oven to 400°F (200°C) and lightly greasing an 11×7 inch (or 2-quart) baking dish. In a large mixing bowl, combine the granulated sugar, brown sugar, water, vanilla extract, fresh lemon juice, cornstarch, ground cinnamon, nutmeg, and salt. Whisk these ingredients together until well combined. Then, add your chopped apples and the secret ingredient: the grated apple. Stir everything gently to ensure the apples are evenly coated with the fragrant spice and sugar mixture.
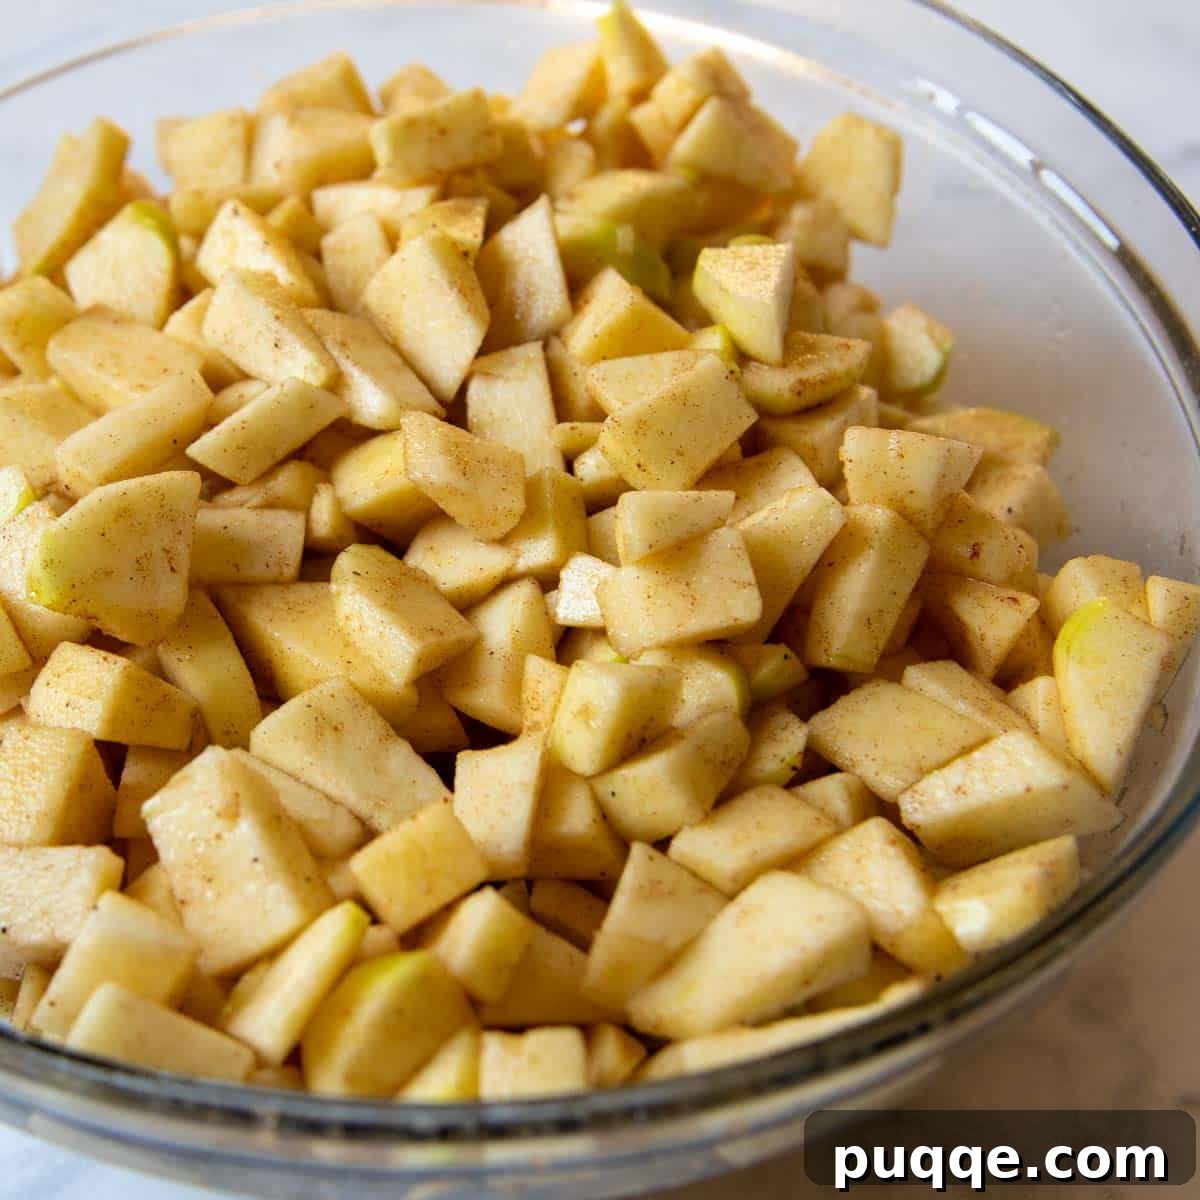
Step 2: Partially Bake the Filling
While many cobbler recipes call for baking the fruit and topping together from the start, I’ve found that pre-baking the apple filling significantly improves the final texture and consistency. This crucial step ensures the apples soften perfectly and the filling thickens without the topping becoming overcooked. Transfer the apple mixture to your prepared baking dish and pour the melted butter evenly over the top. Cover the dish tightly with aluminum foil to create a steaming environment, which helps quicken the apple’s cooking process. Bake for 20 minutes while you prepare the biscuit dough.
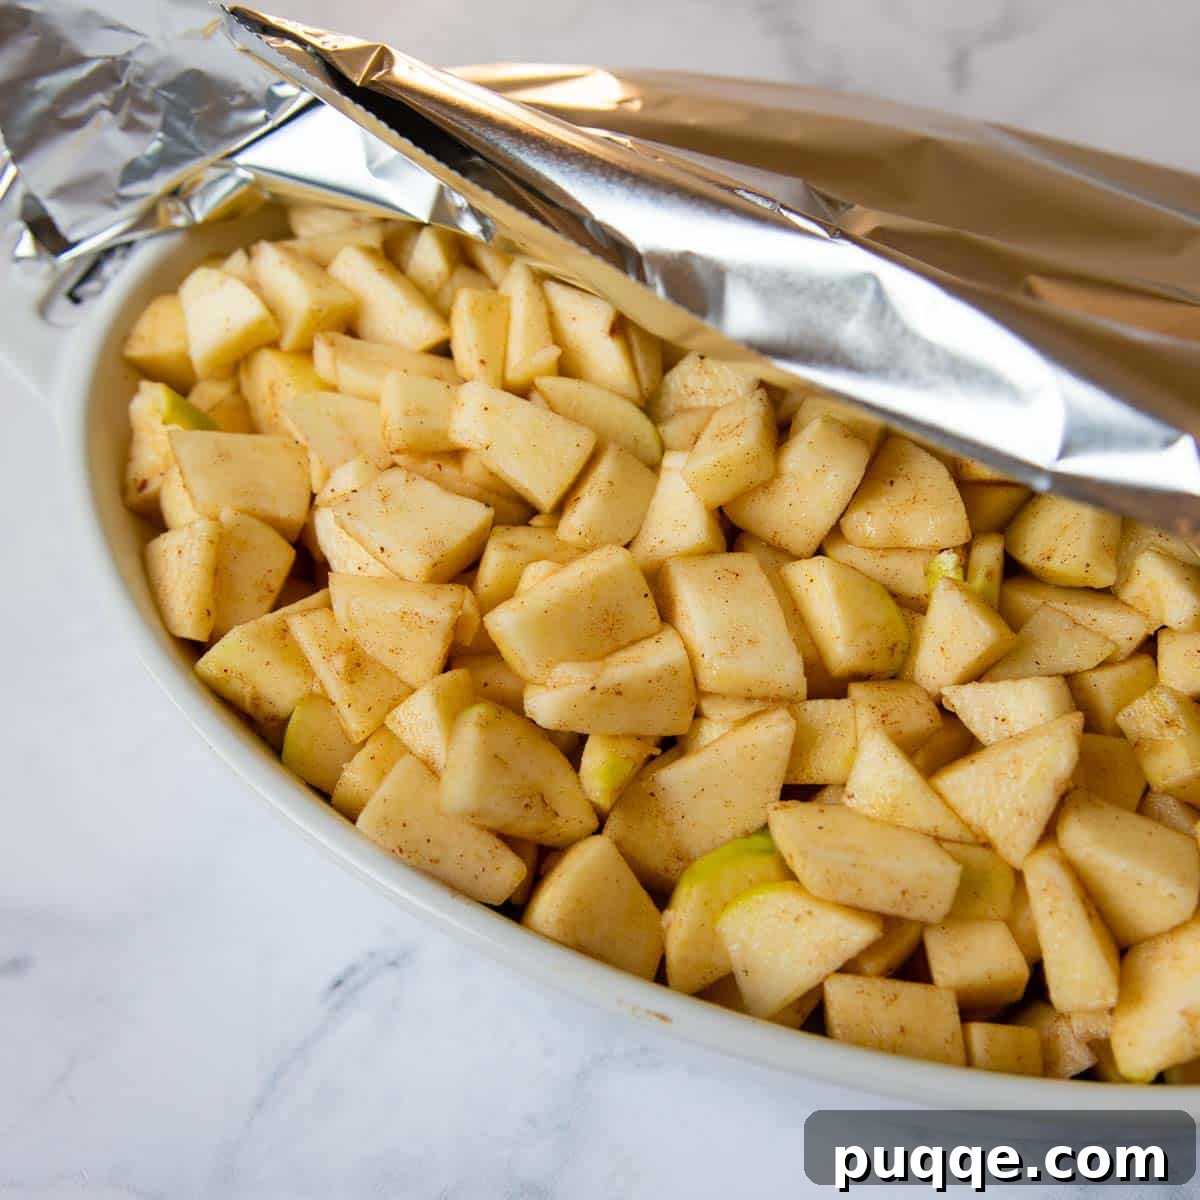
Step 3: Craft the Gluten-Free Cobbler Topping
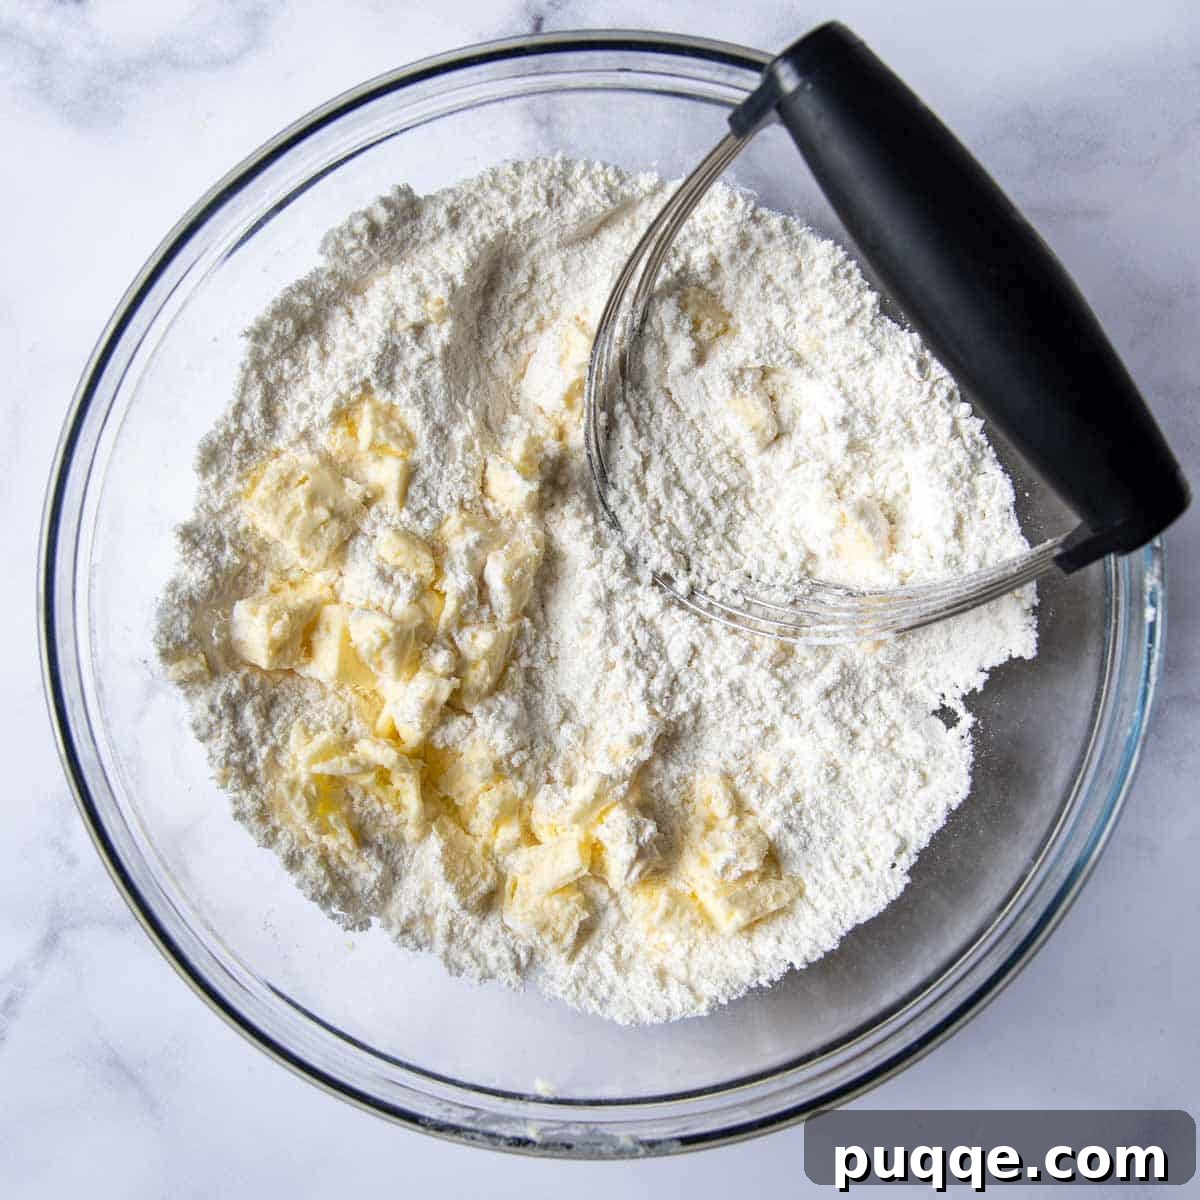
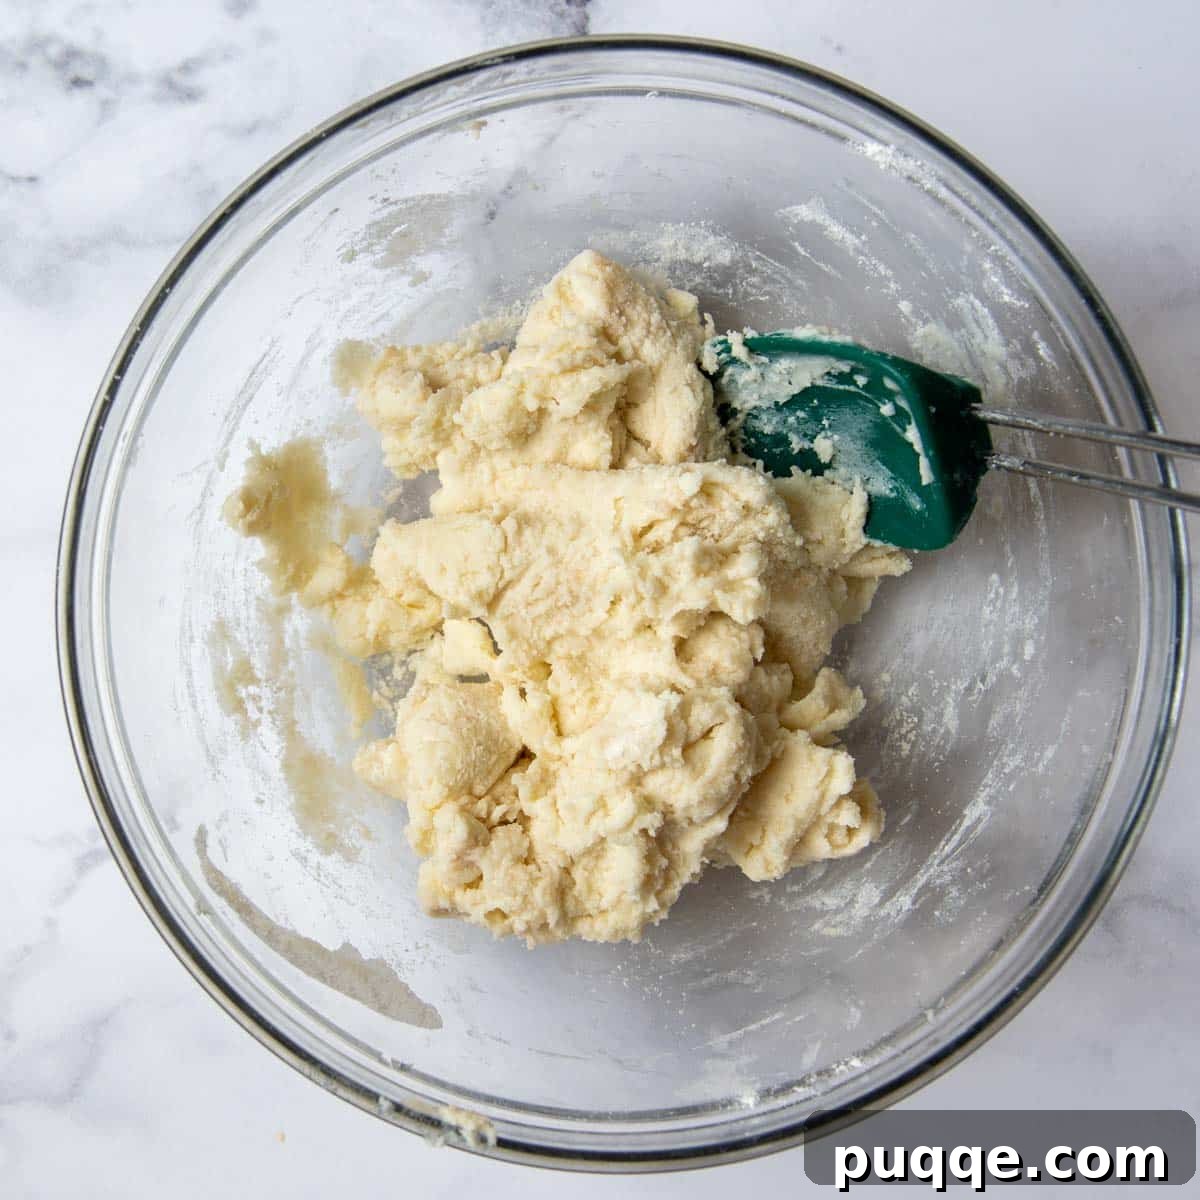
In a separate medium bowl, whisk together the gluten-free all-purpose flour, granulated sugar, baking powder, and salt. Add the cold, chopped butter pieces to the dry mixture. Using a pastry blender, a fork, or even your fingertips, cut the butter into the flour until the mixture resembles coarse crumbs with some pea-sized pieces of butter remaining. The goal is to avoid overworking the dough. Next, gently stir in the milk until just combined and no dry flour pockets are visible. You will achieve a dough that is stiff, yet soft and manageable. Avoid over-mixing to ensure a tender topping.
Step 4: Assemble and Bake to Golden Perfection
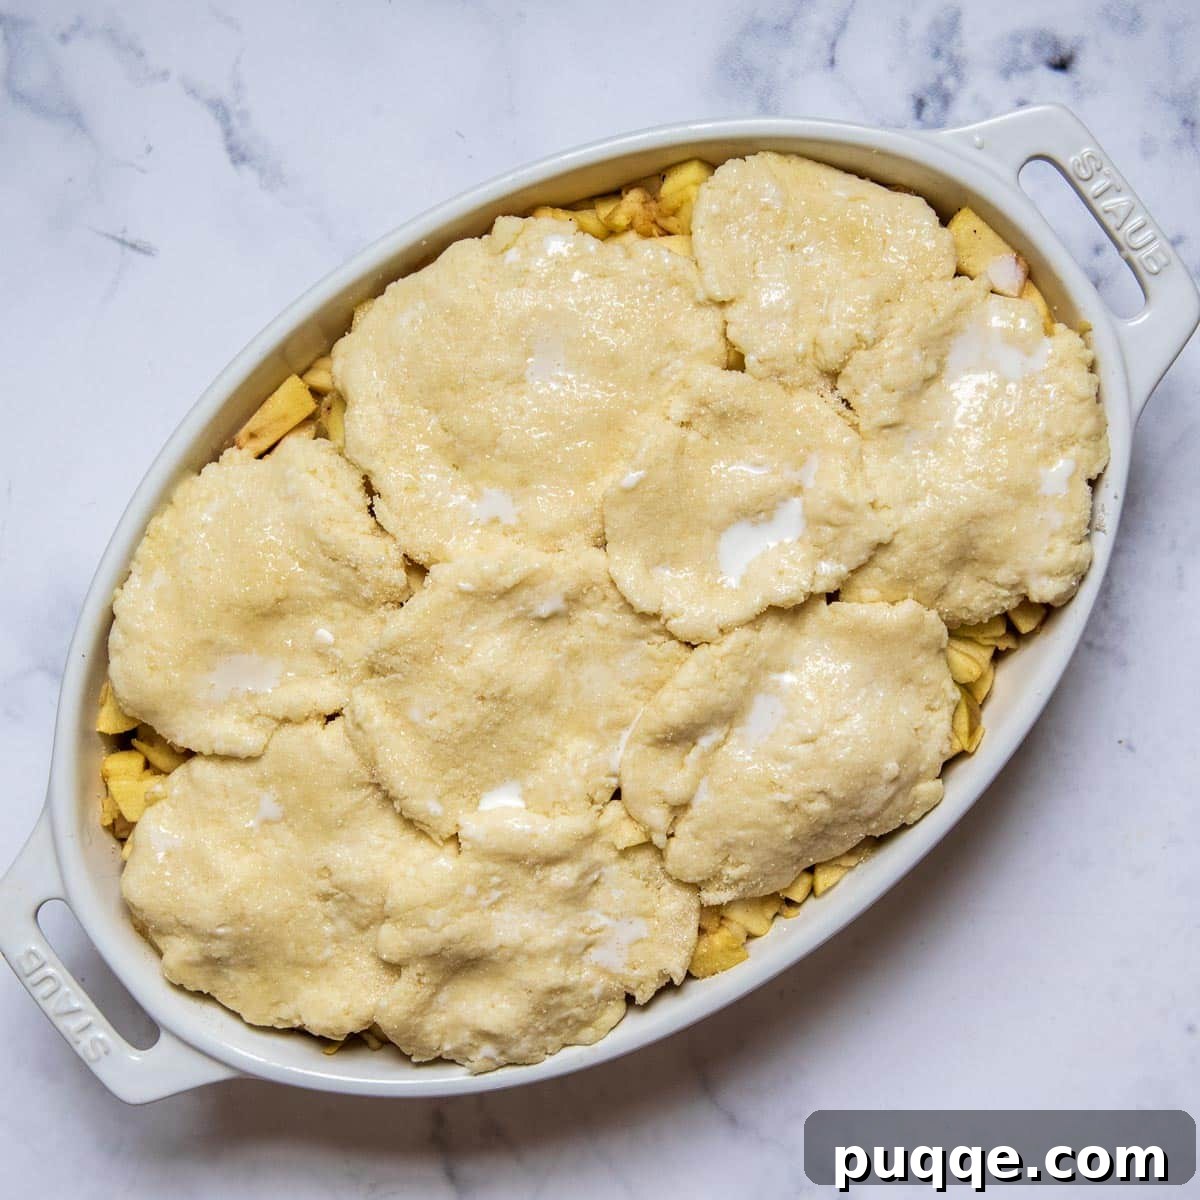
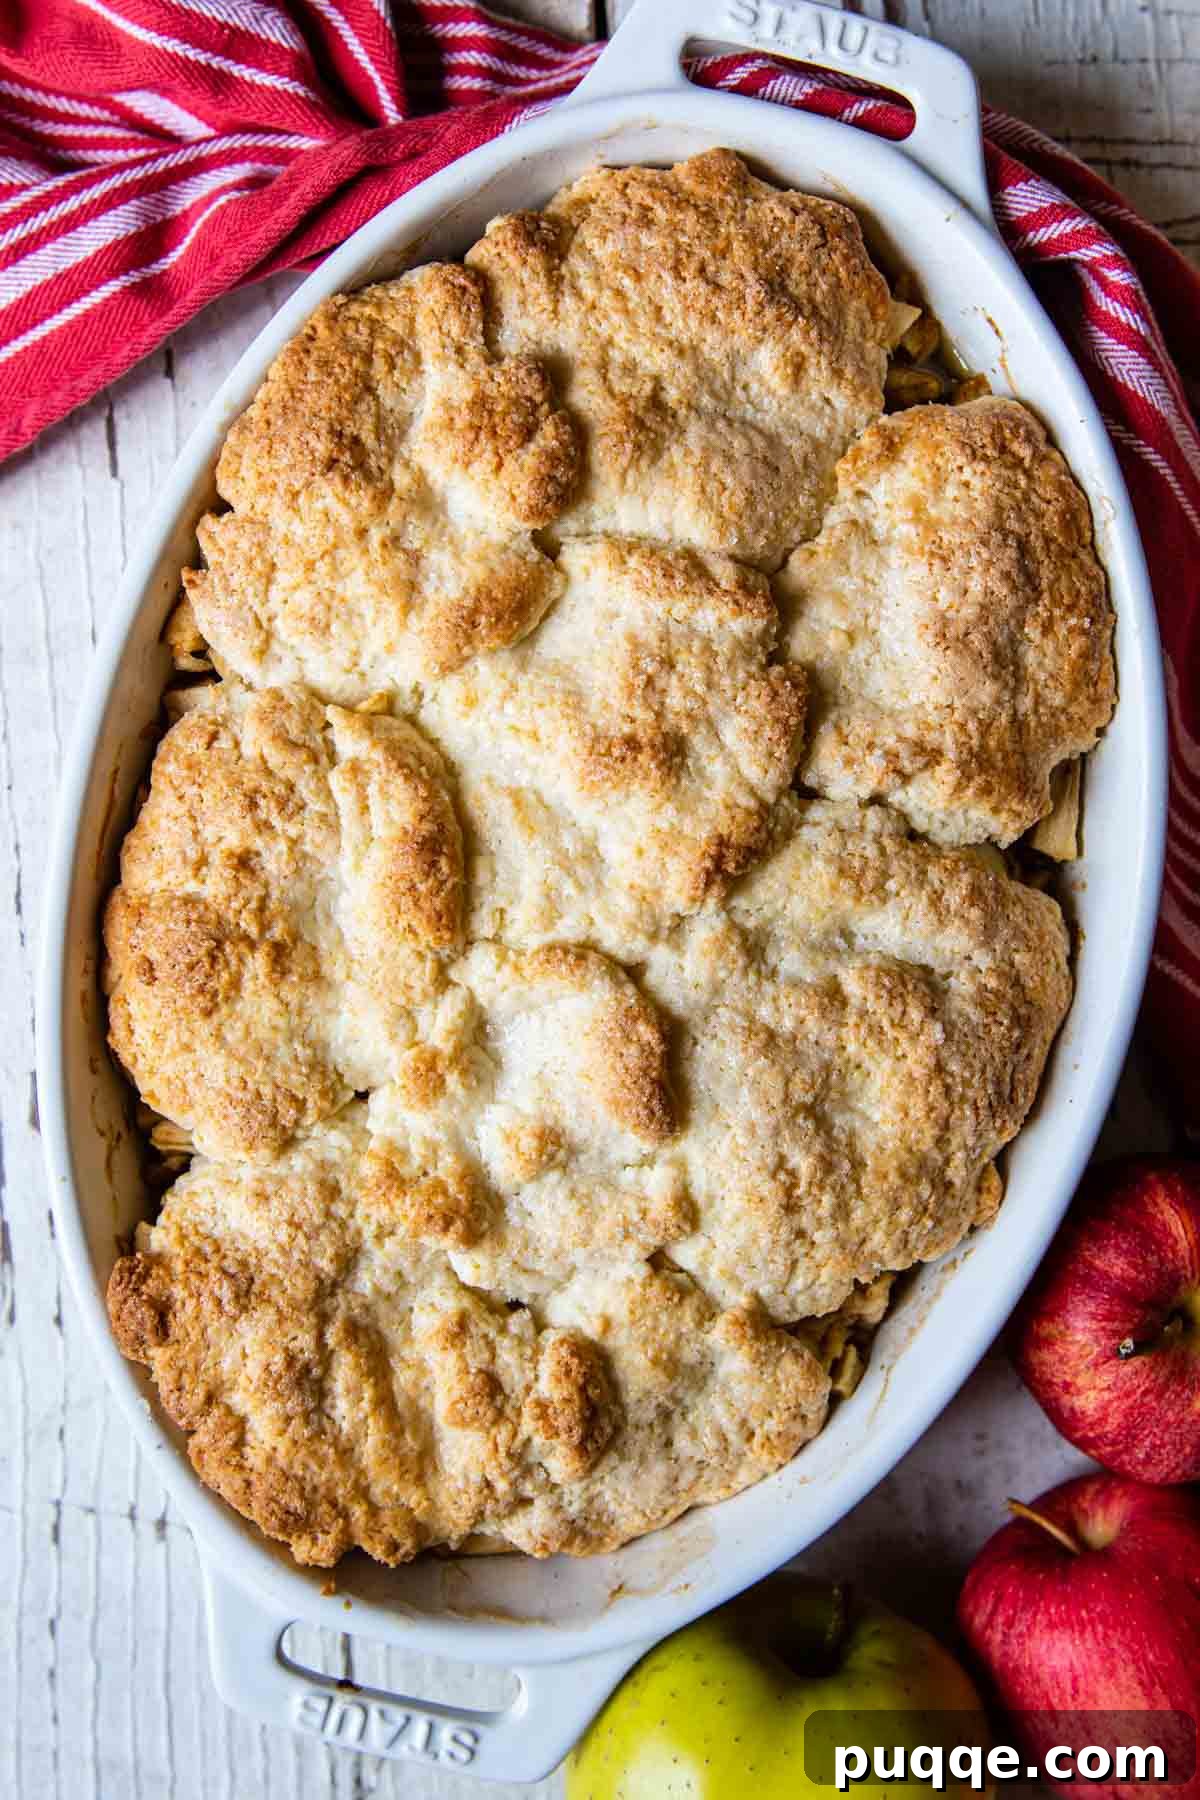
Carefully remove the partially baked apple filling from the oven. Evenly distribute the biscuit dough by gently patting it into small, flat rounds and placing them over the hot apple filling. It’s perfectly fine if some of the fruit peeks through the topping – this adds to the rustic charm of a cobbler. For an extra touch of flavor and a beautiful golden-brown finish, lightly brush the tops of the biscuit dough with a tablespoon of milk and sprinkle with coarse sugar (optional, but highly recommended!). Return the cobbler to the oven and bake for an additional 35-40 minutes, or until the biscuit topping turns a lovely golden brown and a toothpick inserted into the center of a biscuit comes out clean. Allow the cobbler to cool for 30-60 minutes before serving; this allows the filling to set and thicken beautifully. Serve warm with a generous scoop of vanilla ice cream or a dollop of fresh whipped cream.
Choosing the Best Apples for Baking Your Cobbler
Navigating the wide array of apple varieties at the grocery store or orchard can be daunting, especially when trying to pick the perfect ones for baking. For a truly exceptional gluten-free apple cobbler, selecting apples that can withstand the heat of the oven without turning into complete mush is crucial. You want apples that retain some of their texture and offer a balanced flavor profile.
The best apples for baking or roasting are those known for holding their shape and developing a tender-yet-firm consistency. My personal favorite, and the one I highly recommend for all gluten-free apple desserts, is the Golden Delicious. These apples strike a perfect balance between sweetness and a slight tartness, preventing the cobbler from becoming overly sugary. They also have an inherent ability to hold their structure wonderfully during baking, contributing to that desirable juicy, tender filling.
Here are some other excellent apple varieties that perform well in baked goods, ensuring your cobbler has the ideal texture and flavor:
- Honeycrisp: Known for its crisp texture and sweet-tart flavor, it holds up beautifully.
- Granny Smith: A classic baking apple, offering a tart kick that pairs wonderfully with sweeter fillings. Consider combining it with a sweeter apple like Honeycrisp for a more complex flavor.
- Jonagold: A cross between Jonathan and Golden Delicious, it provides a honeyed, slightly tart flavor and good structure.
- Braeburn: Sweet with a hint of tartness and a firm texture, making it great for baking.
- Pink Lady: Offers a delightful balance of sweet and tart, with a crisp texture that softens perfectly.
- Golden Delicious: (My personal favorite!) Sweet, mellow, and holds its shape exceptionally well.
The Genius Trick: Why Grate an Apple for the Filling
The secret weapon in achieving an optimally flavored and perfectly thickened apple filling lies in a simple, yet profoundly effective technique: grating one apple into the mixture along with the chopped apples. This ingenious method, championed by culinary experts like Cook’s Illustrated, makes all the difference.
During baking, the finely grated apple pieces break down more completely and quickly than the chopped apples. This releases additional pectin and natural apple juices, which act as a natural thickener, melding seamlessly with the cornstarch to create a rich, syrupy consistency. It ensures the filling isn’t too thin and watery, nor overly gelatinous. I’ve experimented with making this cobbler both ways (because, let’s be honest, grating an apple is an extra step), and I can confidently say that taking the small amount of time to grate one apple absolutely transforms the filling, making it SO much better and truly elevating the entire dessert.
Can You Use Canned Apple Filling?
While I always advocate for the unparalleled taste and texture of fresh apples in your cobbler, I understand that sometimes convenience is key. Yes, you can substitute canned apple pie filling for the fresh apple mixture, though the results will inevitably be different. If you opt for canned filling to save a step, you’ll need two 20-ounce cans to match the volume of apples. Be aware that canned fillings are typically much sweeter than homemade, so you may want to reduce the amount of granulated sugar in the cobbler topping to maintain a balanced flavor profile. For the best possible cobbler, however, fresh is always best!
Don’t Forget to Pin This Recipe!
Join our community on Pinterest! I’m always sharing delicious and inspiring recipes!
Have you made this incredible recipe? I absolutely love hearing from you! Please leave a star rating and comment below the recipe card. Your feedback is invaluable, helping others discover and enjoy this recipe, and I always make sure to respond! -Melissa
No-Fail Gluten-Free Apple Cobbler with Biscuit Topping
 Melissa Erdelac
Pin
Rate
Remove Ads
Ingredients
Apple Filling
- ⅓ cup (67 g) granulated sugar
- 2 tablespoons brown sugar
- 1 tablespoon (15 mL) water
- 1 tablespoon (15 mL) lemon juice
- 1 ½ tablespoons cornstarch
- 1 teaspoon vanilla extract
- ½ teaspoon ground cinnamon
- ⅛ teaspoon ground nutmeg
- ⅛ teaspoon salt
- 2 ¾ pounds (about 5 large – 1.25 kg) Golden Delicious apples,, peeled and cut into ½” cubes
- 1 Golden Delicious apple, peeled and grated
- 2 tablespoons (28 g) unsalted butter, melted
Cobbler Topping
- 1 ⅓ cup (192 g) all purpose gluten-free flour, (I recommend Cup4Cup gluten-free flour)
- ⅓ cup (67 g) granulated sugar
- 1 ½ teaspoons baking powder
- ¼ teaspoon salt
- ⅓ cup (76 g) unsalted butter, chopped
- ⅓ cup (80 mL) milk
- 1 tablespoon coarse sugar, optional for topping
- 1 tablespoon milk, optional for topping
- ice cream or whipped cream,, for serving
Equipment
-
11X7 Baking Dish
-
Large Mixing Bowl
-
Cup 4 Cup Gluten Free Flour
Instructions
Apple Filling:
-
Preheat oven to 400ºF (200°C). Grease a 11X7 or 2-quart baking dish.
-
In a large bowl, whisk together granulated sugar, brown sugar, water, vanilla extract, lemon juice, cornstarch, cinnamon, nutmeg, and salt. Add chopped apples and grated apple. Stir to combine thoroughly.⅓ cup (67 g) granulated sugar, 2 tablespoons brown sugar, 1 tablespoon (15 mL) water, 1 tablespoon (15 mL) lemon juice, 1 ½ tablespoons cornstarch, 1 teaspoon vanilla extract, ½ teaspoon ground cinnamon, ⅛ teaspoon ground nutmeg, ⅛ teaspoon salt, 2 ¾ pounds (about 5 large – 1.25 kg) Golden Delicious apples,, 1 Golden Delicious apple
-
Transfer the apple mixture to the prepared baking dish. Pour the melted butter evenly over the apple filling. Cover tightly with aluminum foil and bake for 20 minutes.2 tablespoons (28 g) unsalted butter
Cobbler Topping:
-
While the apples are baking, prepare the topping. In a medium bowl, whisk together the gluten-free flour, sugar, baking powder, and salt. Add the chilled, chopped butter pieces to the flour mixture. Using a pastry blender, fork, or your fingers, cut the butter into the flour until the mixture resembles coarse crumbs with some small, pea-sized pieces of butter remaining.1 ⅓ cup (192 g) all purpose gluten-free flour, ⅓ cup (67 g) granulated sugar, 1 ½ teaspoons baking powder, ¼ teaspoon salt, ⅓ cup (76 g) unsalted butter
-
Gently stir in the milk until just combined and no flour pockets remain. Be careful not to overmix. Pat the dough into flat, rustic rounds and carefully place them on top of the hot fruit filling. It is perfectly fine if the fruit shows through the topping.⅓ cup (80 mL) milk
-
If desired, use a pastry brush to lightly brush additional milk over the tops of the biscuits and sprinkle with coarse sugar for an appealing sparkle and crunch. Bake for 35-40 minutes, or until the biscuit topping is golden brown and a toothpick inserted into the center of a biscuit comes out clean. Serve warm with ice cream or whipped cream.1 tablespoon milk, 1 tablespoon coarse sugar
-
Allow the cobbler to cool for 30-60 minutes before serving. This cooling time is important as it allows the delicious apple filling to thicken to its optimal consistency. Serve slightly warm with a scoop of your favorite ice cream or a dollop of freshly whipped cream.
Notes & Pro Tips
Dairy-Free / Vegan Adaptations
Making this delightful apple cobbler dairy-free or vegan is simple! For the milk in the topping, substitute with your preferred dairy-free milk alternative, such as unsweetened almond milk, soy milk, or oat milk. For the butter in both the filling and the topping, use high-quality plant-based butter sticks (brands like Earth Balance or Miyoko’s Kitchen work wonderfully) or solid vegetable shortening for the topping. When serving, opt for store-bought coconut whipped cream (like CocoWhip) or prepare homemade coconut whipped cream. Most supermarkets also offer a fantastic selection of vegan and dairy-free ice cream options to complete your dessert.
How to Store and Reheat Your Cobbler
- Room Temperature Storage: Cover the fruit cobbler tightly with aluminum foil or plastic wrap and store it at room temperature for up to 3 days. Ensure your kitchen isn’t excessively warm.
- Refrigeration: For longer storage, refrigerate the covered cobbler for up to one week.
- Reheating Individual Servings: To quickly warm up a single portion, simply microwave it until heated through.
- Reheating in the Oven: For best results and to maintain the crispy texture of the biscuit topping, reheat the entire cobbler (or larger portions) in the oven. Allow it to come to room temperature first. Then, bake at 250ºF (120°C) for approximately 20 minutes, or until thoroughly warmed. You may want to loosely cover the cobbler with foil to prevent the biscuit topping from becoming overcooked or too browned.
- Freezing for Later: To freeze your cobbler, bake it completely and allow it to cool entirely to room temperature. Once cooled, wrap the cobbler tightly in several layers of plastic wrap, followed by a layer of aluminum foil. Label with the date and freeze for up to two months. Thaw in the refrigerator overnight before reheating.
 Did you make this recipe?Please leave a star rating and review below. It helps others when searching for recipes and I LOVE feedback!